D.I.Y. Installations/Modifications Do It Yourself guides and information for the G37. Stickies approved by Administrators and Moderators.

DIY: Grounding kits made simple, step by step guide to making your own!

Old Feb 23, 2018 | 05:04 PM
  #211  
Dan G37's Avatar
Dan G37
Registered Member
 
Joined: Jul 2017
Posts: 207
Likes: 4
Originally Posted by RMB5190
Yup! 16/17 Ft. was more than enough for me when I incorporated the throttle bodies. 13 ft. when I didn't.

Just make sure you get the correct gauged connectors with 5/16 IDs
awesome thank you! How does this compared to the stillen grounding kit? Or should it be about the same?
Reply
Old Feb 26, 2018 | 10:15 AM
  #212  
RMB5190's Avatar
RMB5190
Super Moderator
5 Year Member
Liked
Loved
Community Favorite
iTrader: (2)
 
Joined: Dec 2016
Posts: 3,105
Likes: 504
From: Maryland
Should be the same. Stillen kit is the same materials + $150 lol
Reply
Old Feb 26, 2018 | 12:14 PM
  #213  
Baadnewsburr's Avatar
Baadnewsburr
Super Moderator
iTrader: (3)
 
Joined: Oct 2014
Posts: 1,784
Likes: 320
From: Toronto
Originally Posted by RMB5190
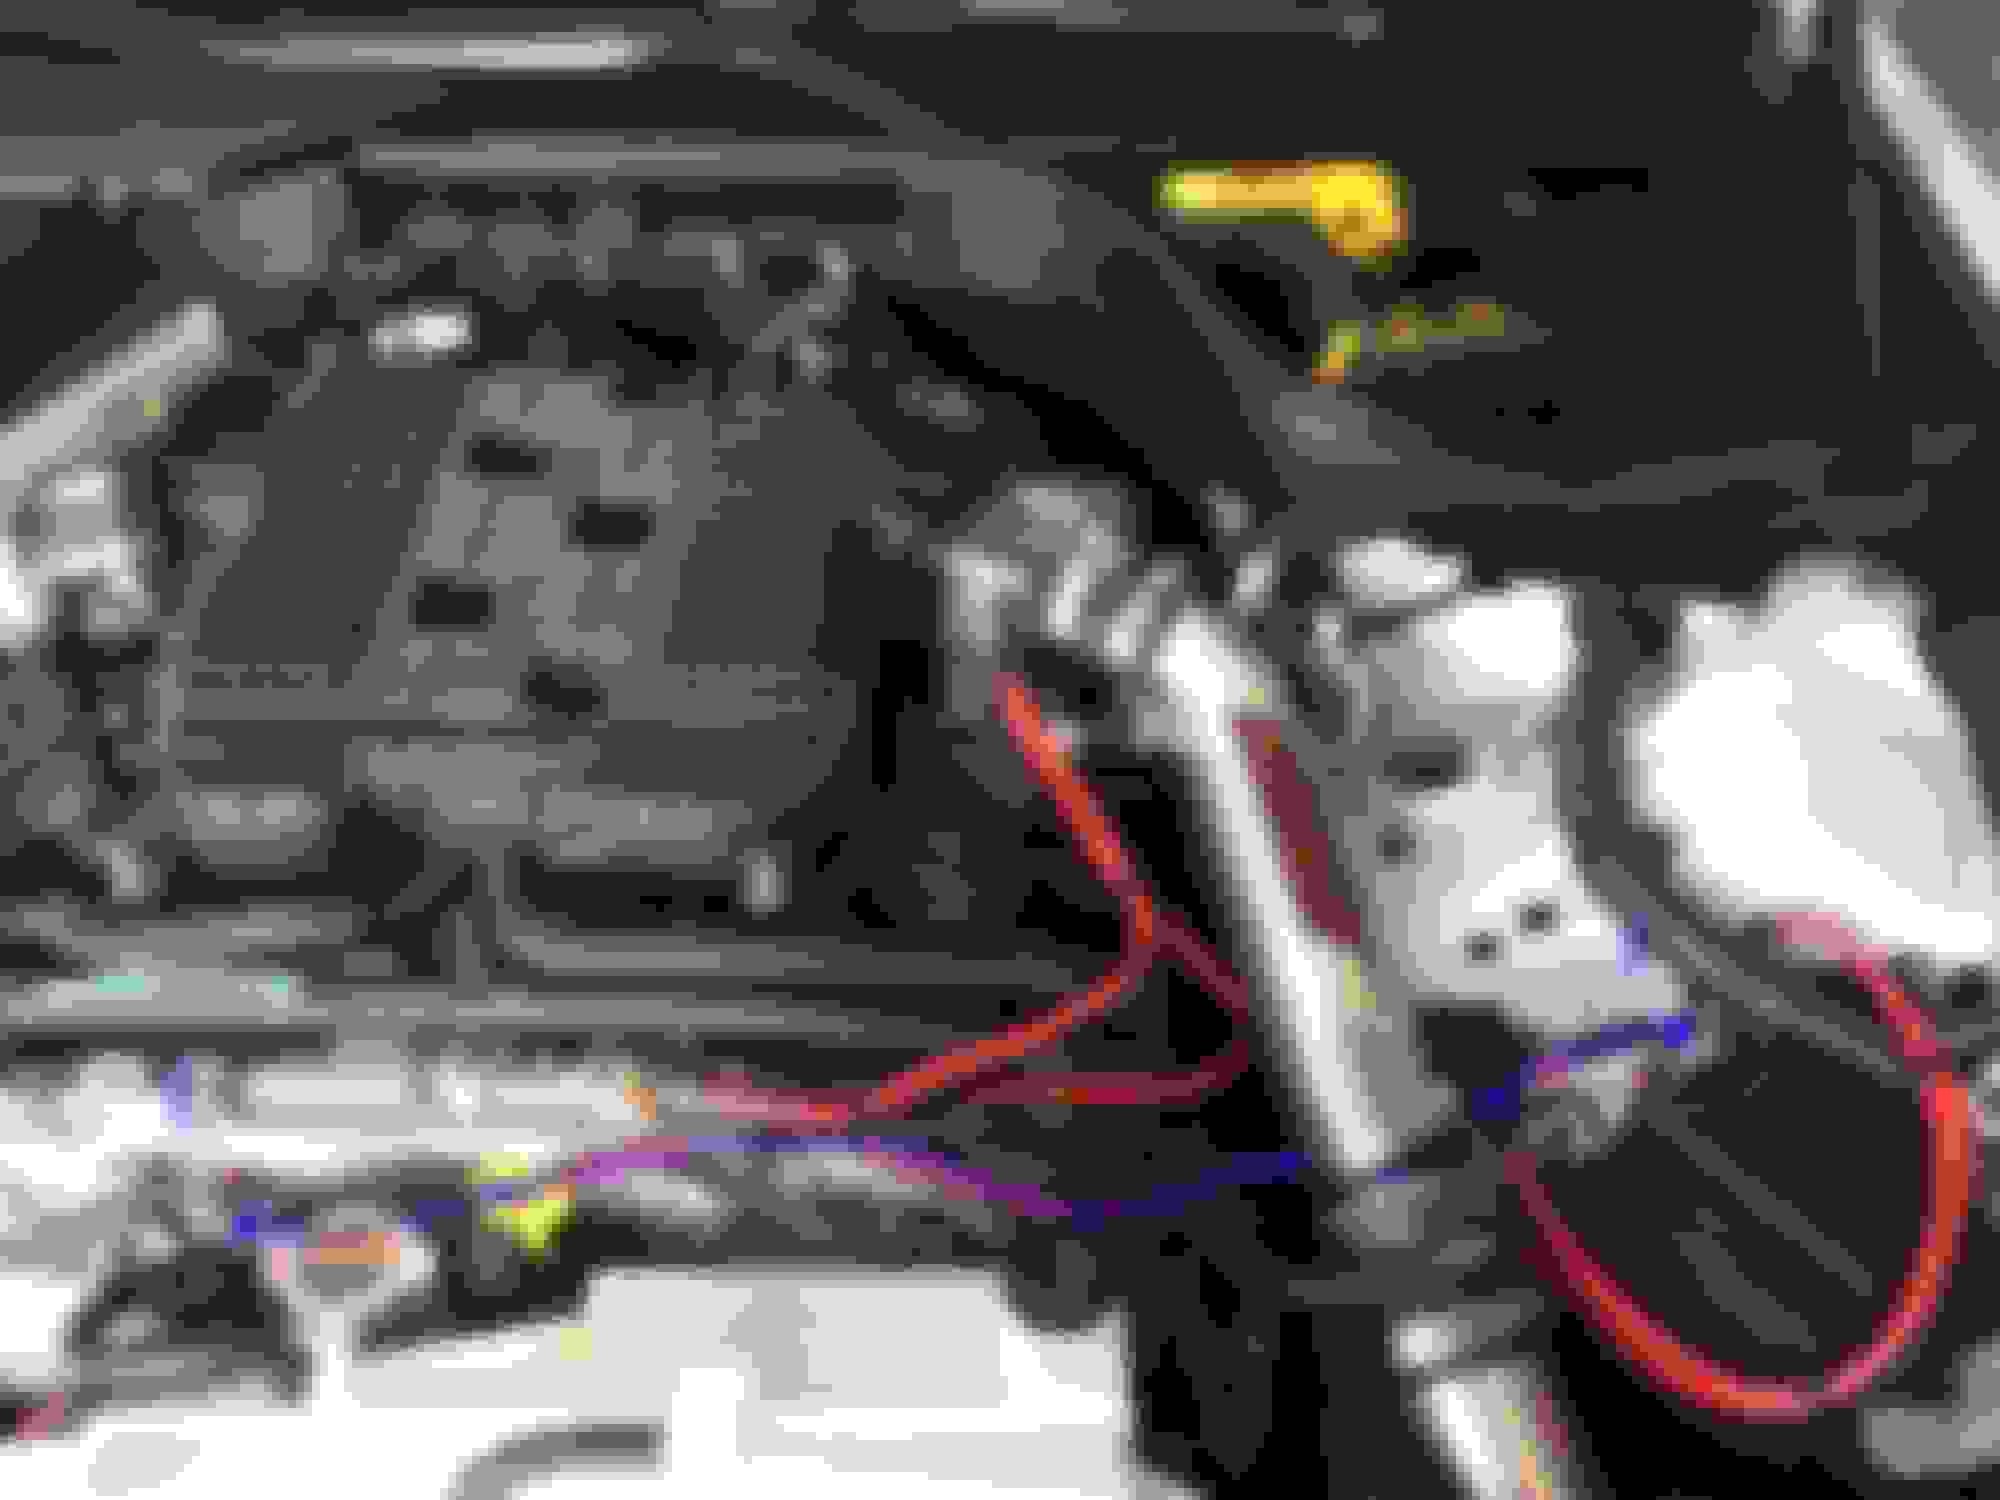
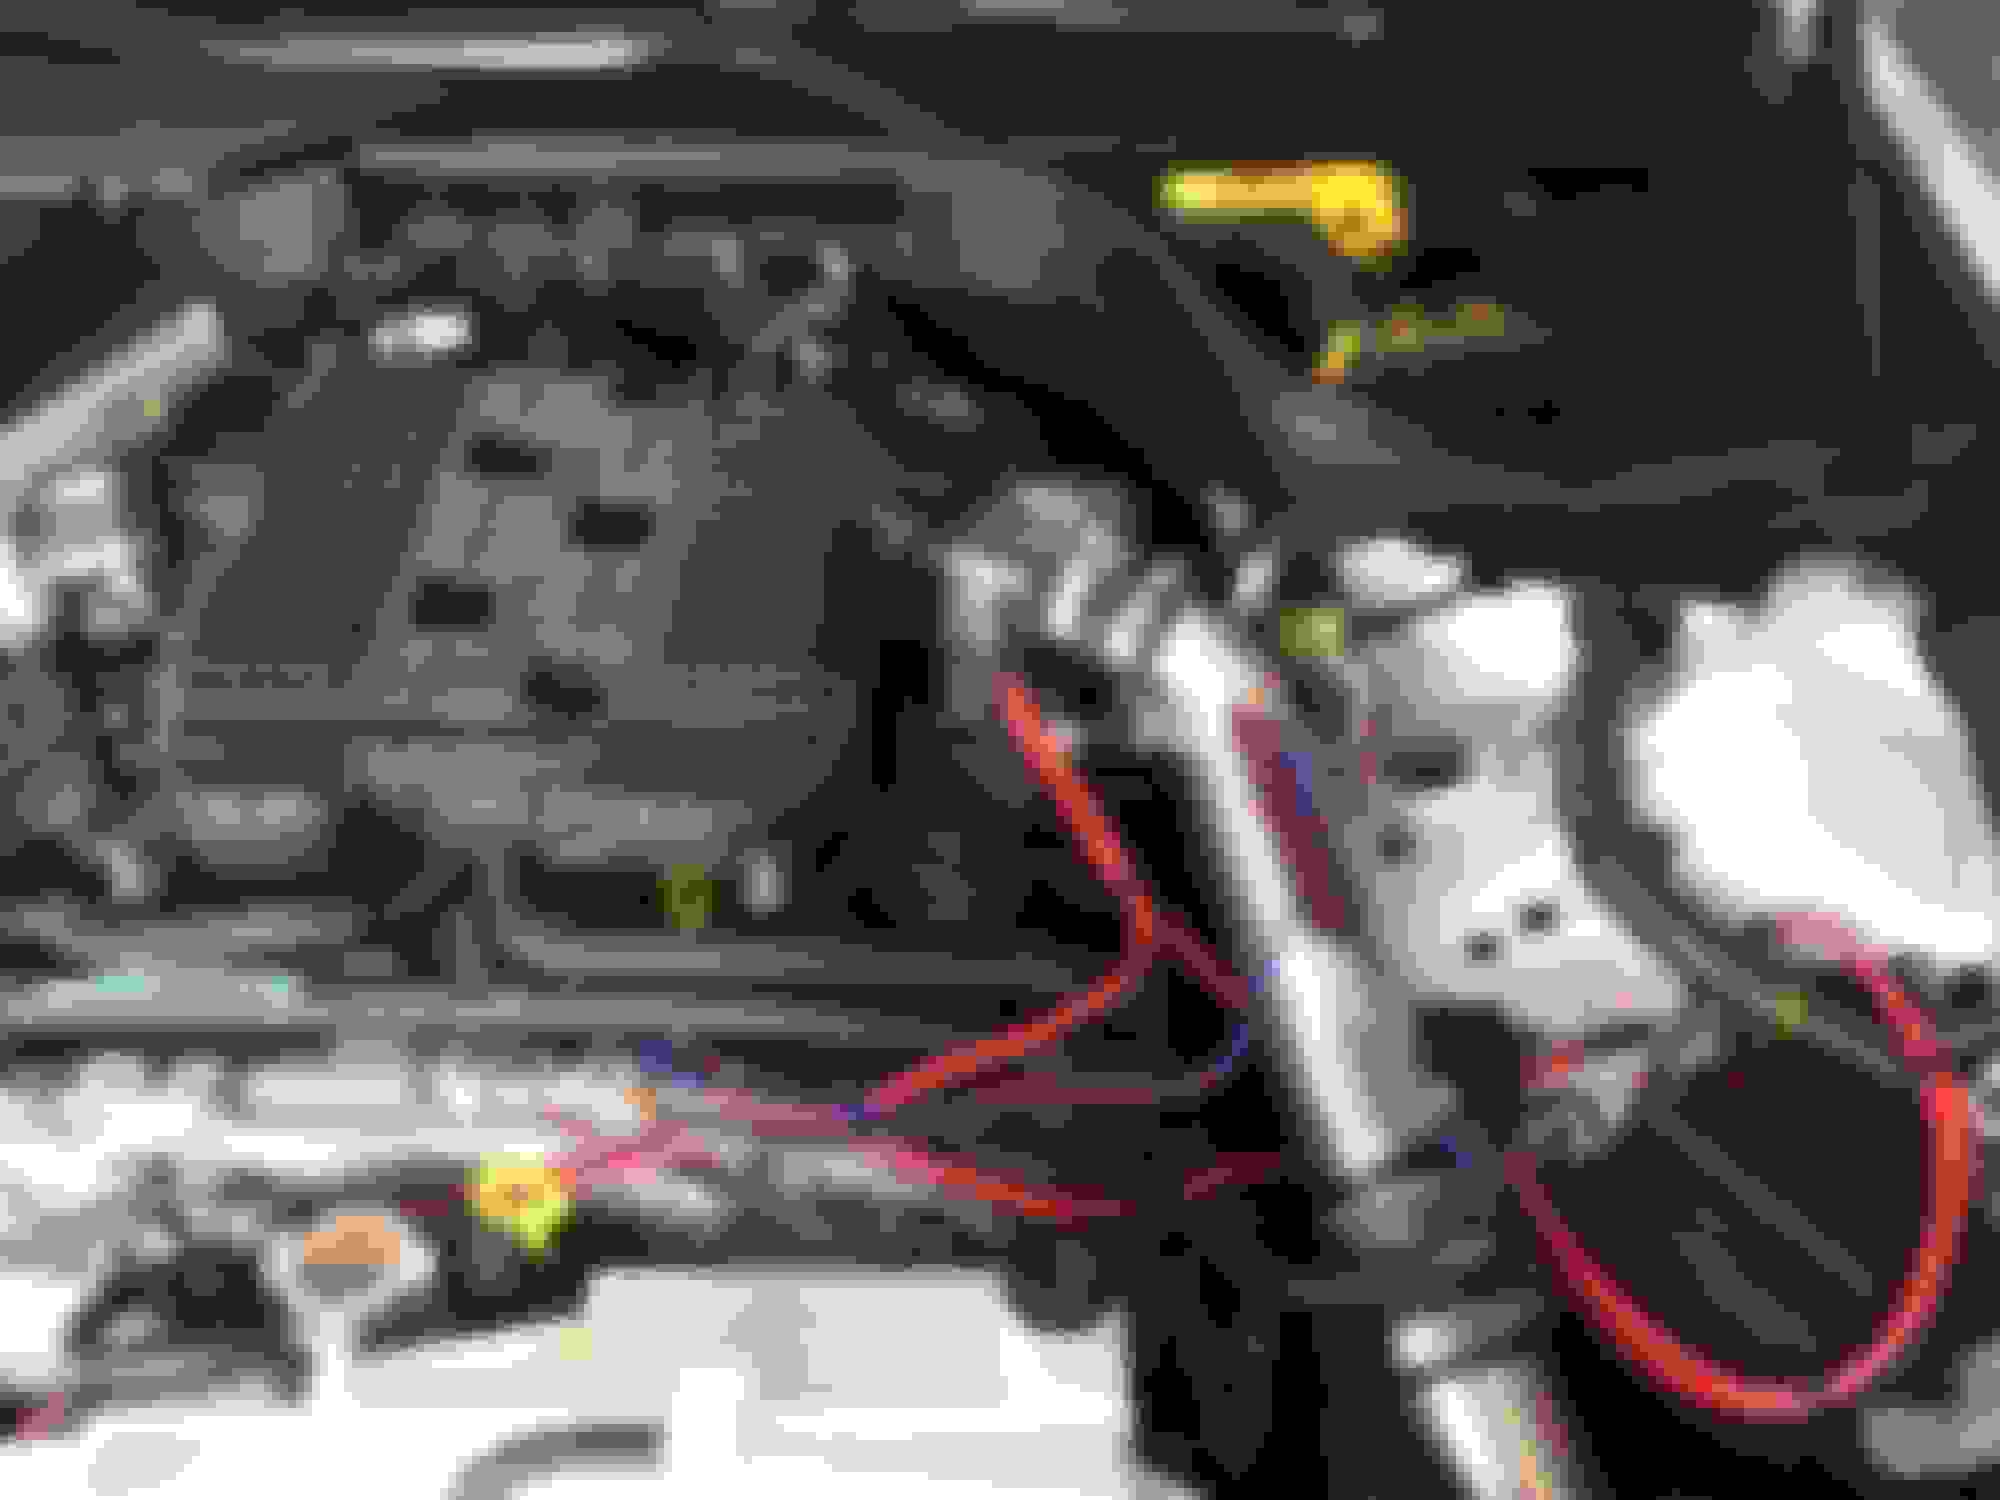
My apologies on getting this up everyone. Here is the way the kit is supposed to be set up. All points are circled and labeled. Blue 'mist' is there to show you how it is ran. I've added some additional connection to my TB and plan to re-do everything this winter in order to clean it up a bit. I'll make a new DIY if one hasn't been posted by then. If anyone has any questions in reference to the pics below - please don't hesitate to ask.

**Not a word on how dirty my bay is**


Connections A-B-C


Closer of pic of Connection C


Connection C leading to Connection D


Location of connection D


Singe wire. Connections E-F


Connections G-H-I


Closeup of Connection H
thanks for posting this with the arrows and highlights, I cant wait to see your DIY
Reply
Old Feb 26, 2018 | 01:55 PM
  #214  
RMB5190's Avatar
RMB5190
Super Moderator
5 Year Member
Liked
Loved
Community Favorite
iTrader: (2)
 
Joined: Dec 2016
Posts: 3,105
Likes: 504
From: Maryland
Still tweaking some stuff so I can keep it simple yet hit the main(?) spots
Reply
Old Feb 28, 2018 | 05:50 PM
  #215  
bloodbruise's Avatar
bloodbruise
Registered User
 
Joined: Feb 2018
Posts: 45
Likes: 1
From: California
Originally Posted by Flakman
I ran multiple cables to the block, but for cosmetic reasons more than anything.

I am also a car audio nut and agree with the big three. However, from what I understand, on the G, running a cable from Battery pos to Alternator output bypasses the car's charging sensor. It senses load and adjusts alternator output accordingly (apparently to save fuel). Therefore, bypassing this by connecting alternator output straight to the battery will keep the system thinking that it only needs to charge at a lower voltage and the battery will not get charged properly under load.

Someone can chime in to correct me if I'm wrong.
Just to throw it out there. I would agree. I wired mine up this way, and let my radio play for about 20-30 min just sitting in the car without the engine running, and my battery died.
Reply
Old Mar 5, 2018 | 05:30 PM
  #216  
Dan G37's Avatar
Dan G37
Registered Member
 
Joined: Jul 2017
Posts: 207
Likes: 4
Originally Posted by RMB5190
Yup! 16/17 Ft. was more than enough for me when I incorporated the throttle bodies. 13 ft. when I didn't.

Just make sure you get the correct gauged connectors with 5/16 IDs
For the Guaged connectors what would I need for the 4 AWG terminal guage. Don't I need to add 2 wires into 1 guage connector like the first thread on this DIY?
Reply
Old Mar 7, 2018 | 01:10 PM
  #217  
RMB5190's Avatar
RMB5190
Super Moderator
5 Year Member
Liked
Loved
Community Favorite
iTrader: (2)
 
Joined: Dec 2016
Posts: 3,105
Likes: 504
From: Maryland
Originally Posted by Dan G37
For the Guaged connectors what would I need for the 4 AWG terminal guage. Don't I need to add 2 wires into 1 guage connector like the first thread on this DIY?
Sorry should've been more clear - Yes 4AWG for where two wires join but the actual opening (where the screw threads through) should be 5/16.

Example: 8AWG
https://www.genuinedealz.com/catalog...BVCLP-8-516%09

4AWG:
https://www.genuinedealz.com/catalog...6%2FBCLP-4-516

Different gauge size, same hole opening size. Hope that clears it up.
Reply
Old Mar 7, 2018 | 01:15 PM
  #218  
Dan G37's Avatar
Dan G37
Registered Member
 
Joined: Jul 2017
Posts: 207
Likes: 4
Originally Posted by RMB5190
Sorry should've been more clear - Yes 4AWG for where two wires join but the actual opening (where the screw threads through) should be 5/16.

Example: 8AWG
https://www.genuinedealz.com/catalog...BVCLP-8-516%09

4AWG:
https://www.genuinedealz.com/catalog...6%2FBCLP-4-516

Different gauge size, same hole opening size. Hope that clears it up.
Haha its all good, I figured it out and knew I was an idiot. How much of the wire did you strip off to connect the guage to the wire?
Reply
Old Mar 7, 2018 | 01:30 PM
  #219  
RMB5190's Avatar
RMB5190
Super Moderator
5 Year Member
Liked
Loved
Community Favorite
iTrader: (2)
 
Joined: Dec 2016
Posts: 3,105
Likes: 504
From: Maryland
¯\_(ツ)_/¯

Not sure, maybe .5 - 1 ''?

Just cut your shrink wrap long enough to cover any exposed wire and still cover the connector's krimp area.
Reply
Old Mar 7, 2018 | 01:55 PM
  #220  
Dan G37's Avatar
Dan G37
Registered Member
 
Joined: Jul 2017
Posts: 207
Likes: 4
Originally Posted by RMB5190
¯\_(ツ)_/¯

Not sure, maybe .5 - 1 ''?

Just cut your shrink wrap long enough to cover any exposed wire and still cover the connector's krimp area.
Sounds good thank you
Reply
Old Mar 8, 2018 | 11:55 PM
  #221  
Dillons VQ37's Avatar
Dillons VQ37
Registered Member
 
Joined: Aug 2017
Posts: 33
Likes: 0
Originally Posted by AZg37
No problem guys!
I'm just now starting to do this type of stuff to my car as I just bought it about 3 months ago. I know this is thread is about 6 years old but great write up man! This helps!
Reply
Old Mar 9, 2018 | 08:21 AM
  #222  
RMB5190's Avatar
RMB5190
Super Moderator
5 Year Member
Liked
Loved
Community Favorite
iTrader: (2)
 
Joined: Dec 2016
Posts: 3,105
Likes: 504
From: Maryland
Now that the DIY is fixed (photobucket block) & I've added my photos, a new, separate DIY is hardly necessary given how well this one was done.
Reply
Old Mar 12, 2018 | 05:47 PM
  #223  
Dan G37's Avatar
Dan G37
Registered Member
 
Joined: Jul 2017
Posts: 207
Likes: 4
Originally Posted by RMB5190
Now that the DIY is fixed (photobucket block) & I've added my photos, a new, separate DIY is hardly necessary given how well this one was done.
Do you twist the two 8 guage wires together where they meet for the 4 guage connector?
Reply
Old Mar 13, 2018 | 03:04 PM
  #224  
RMB5190's Avatar
RMB5190
Super Moderator
5 Year Member
Liked
Loved
Community Favorite
iTrader: (2)
 
Joined: Dec 2016
Posts: 3,105
Likes: 504
From: Maryland
I would so that the connection stays solid. I twisted, stuck in, crimped, heat wrapped, electrical taped all my connections; in that order.
Reply
Old Mar 14, 2018 | 02:11 PM
  #225  
Dan G37's Avatar
Dan G37
Registered Member
 
Joined: Jul 2017
Posts: 207
Likes: 4
Originally Posted by RMB5190
I would so that the connection stays solid. I twisted, stuck in, crimped, heat wrapped, electrical taped all my connections; in that order.
Is electrical tape needed? Or would heatshrink just be enough?

Reply

Thread Tools
Search this Thread

All times are GMT -4. The time now is 09:58 PM.