
DYI Parking Light Replacement ('13 Coupe)


Thread Starter
Registered Member
iTrader: (2)
Joined: Oct 2015
Posts: 969
Likes: 278
From: Westchester
DYI Parking Light Replacement ('13 Coupe)
I was searching for a DYI to change the parking lights but only found one for an earlier Sedan.
I'm sure I missed the thread on a later model but anyway, mine is a '13 Coup and does not have fog-lights in the assembly. Just HIDs, Parking and side lamps.
Edit: Oops, I forgot about SuperJoey's excellent DYI
There is no need to remove a wheel, or go through the wheelwell. It can be done in ~10 mins by simply removing the air filter box (and the washer filler tube. Even with big hands it's quite easy.
You MUST begin with a clean engine compartment.
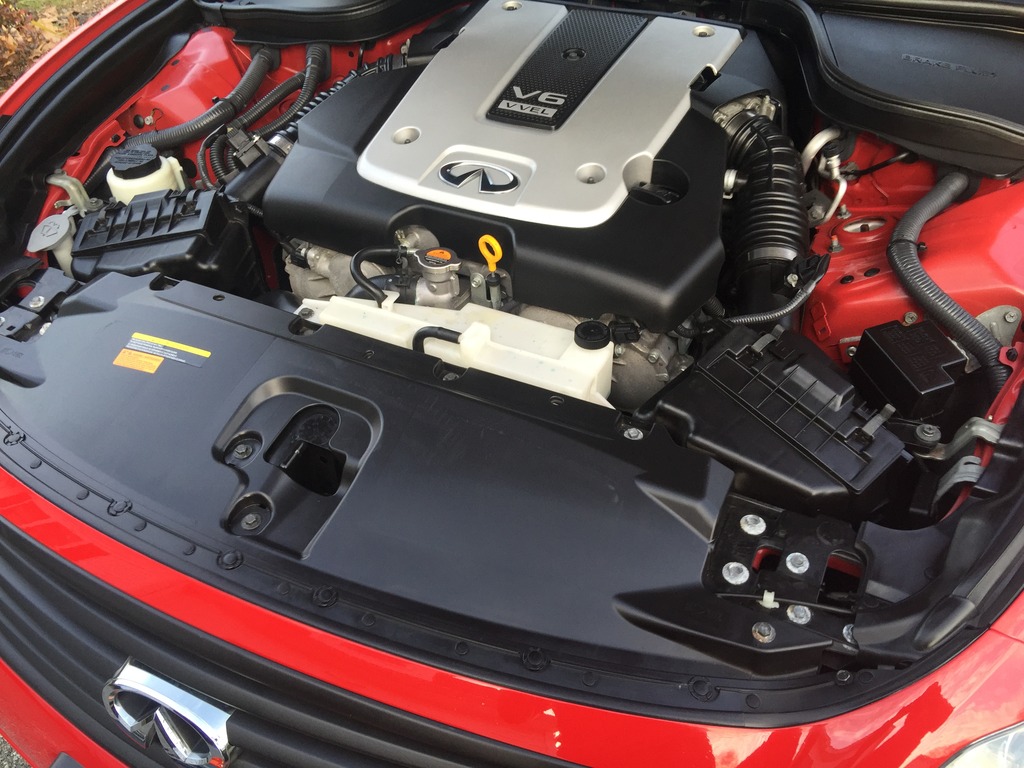
Okay I actually cleaned up after I finished. Sue me.
I changed the passenger's side parking light first. It's only slightly more difficult, and once you are done here, you'll breeeeeeeze through the driver's side.
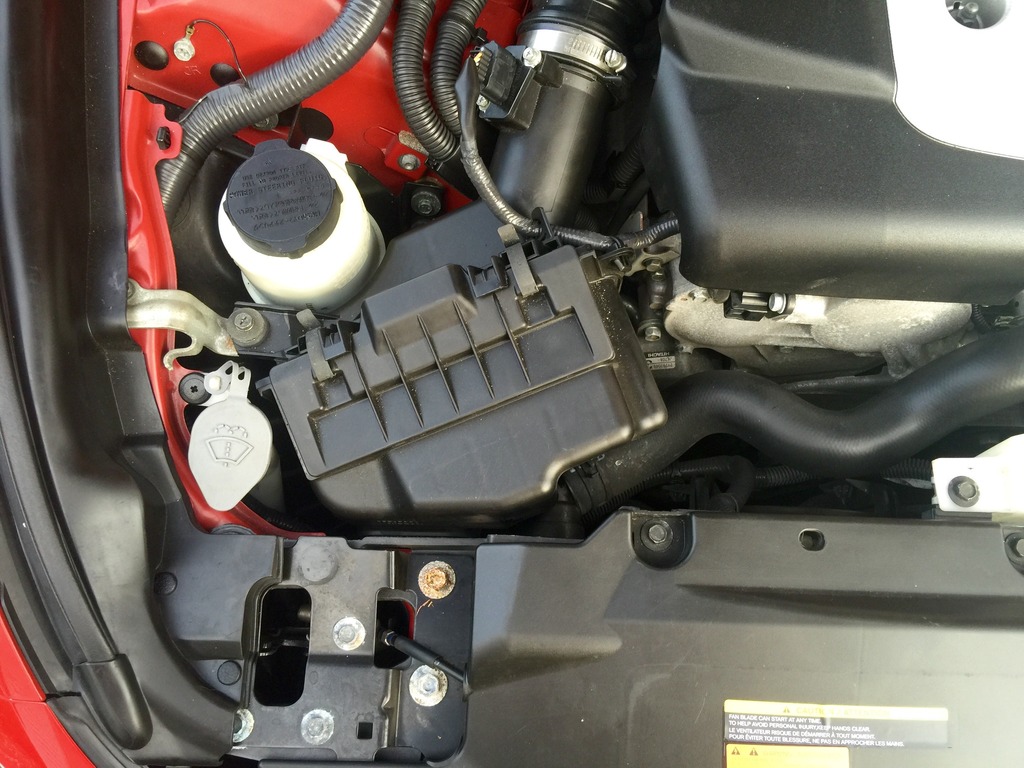
Remove the mounting bolt on the air box, unclip the MAF sensor connector. (No need to unscrew the actual MAF). use a pair of pliers to disconnect the cable hoder and swing the MAF wire out of the way.
Then loosen the hose clamp on the airbox tube. Pull the air box out of the rubber feed hose and yank it straight up to pull the plastic mounting pins out of the rubber holders underneath.
Gently twist the plastic pop-clip on the mount for the washer fluid tube. Pull the clip out and wiggle and pull the feed tube straight up and out. (Provided its not over-filled)
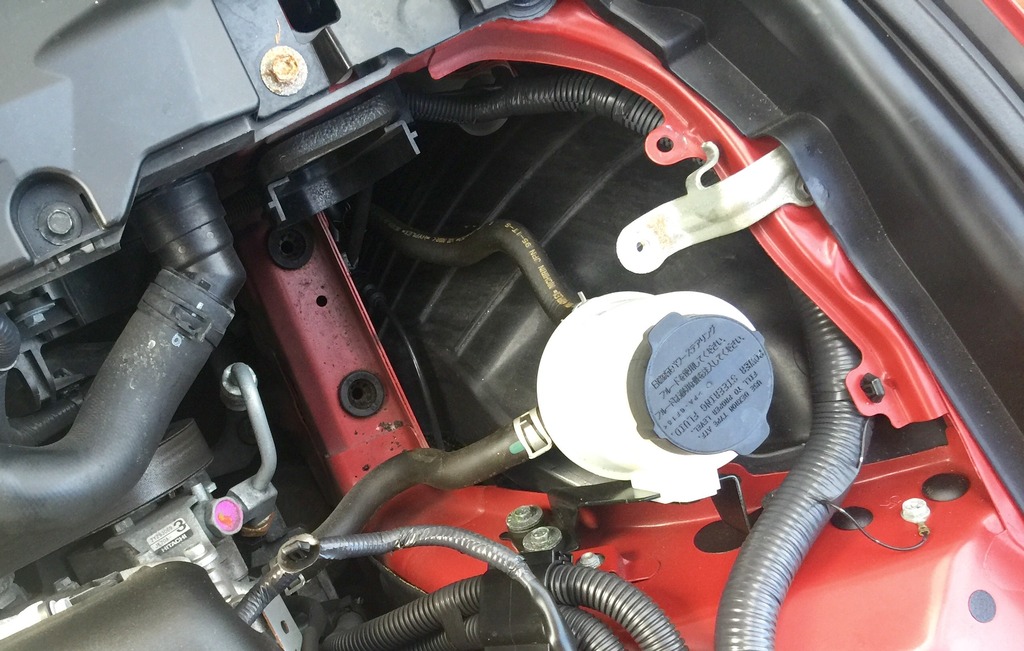
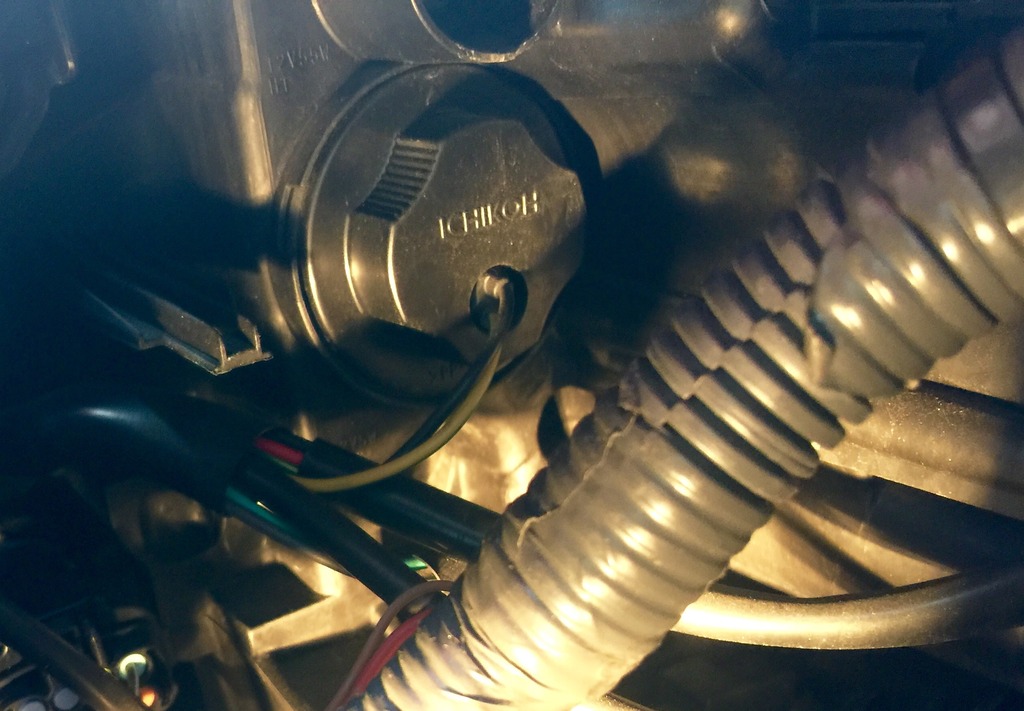
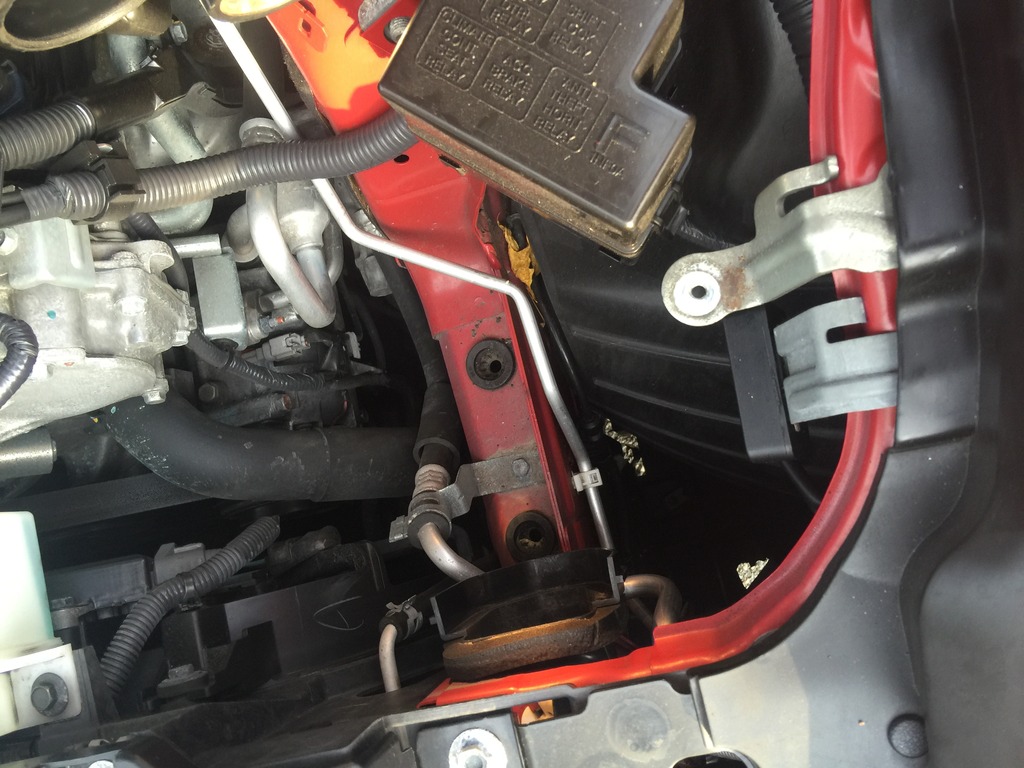
The city light access cap is just above and in front of the washer fill tube. It has two wires leading into it (Yellow & Black)
*Props to Infiniti for making the actual air filter access so easy. On my 07FX it is a royal PITA to change the AF. Here it's two clips and it slides straight out. No matter because I'll be swapping in a Short CAI anyway.
On the passenger's side,
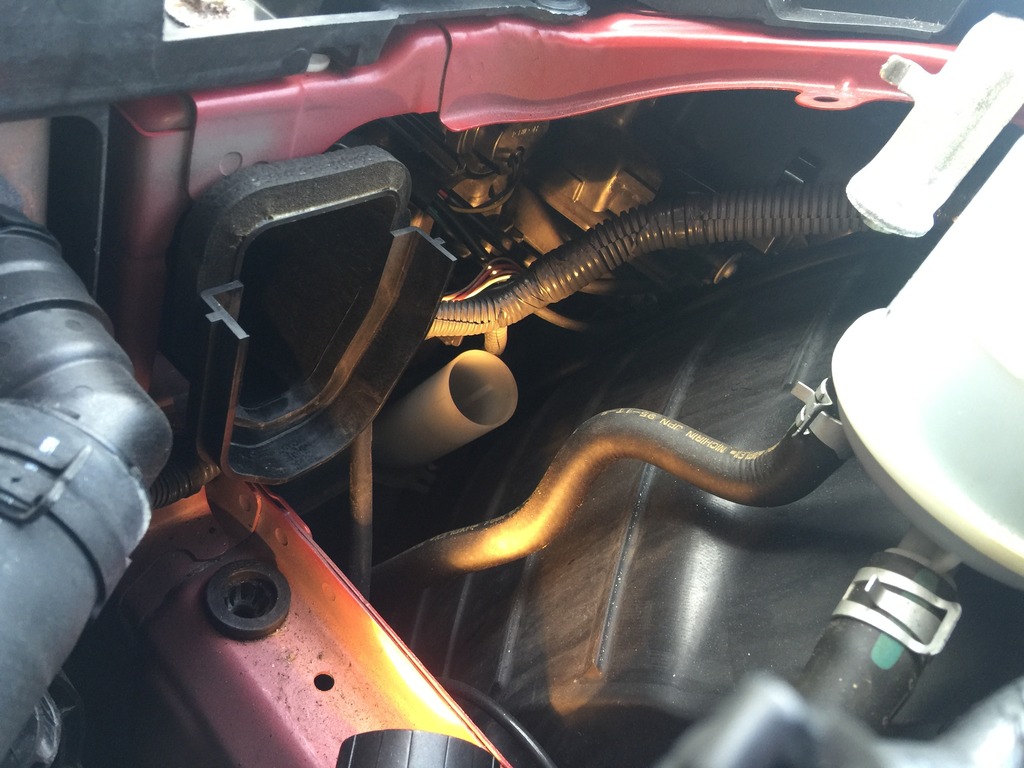
just to the right of the airbox intake, you will see the twist cap for the parking/city light. *NOTE it's orientation*, then turn it CCW to open.
**NOTE**
Play close attention to the orientation of the access cap. It is a ROYAL PITA to line up by feel alone. Once you have it oriented correctly it goes right in and closes right up. But if you try to do it by feel alone you can waste a lot of time fiddling around. Get it right first and you can do the whole procedure in less than 10 minutes on each side. Even with big hands like I have.
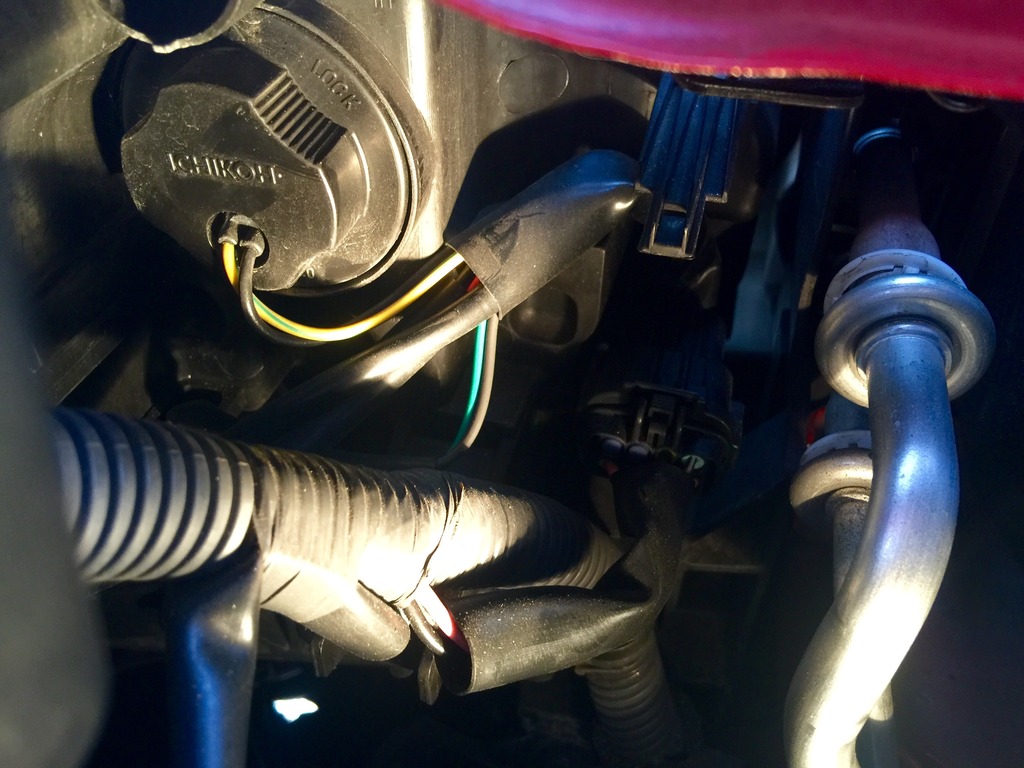
Once open you will be able to see daylight through the access port, and the two wires leading to a plug inside.
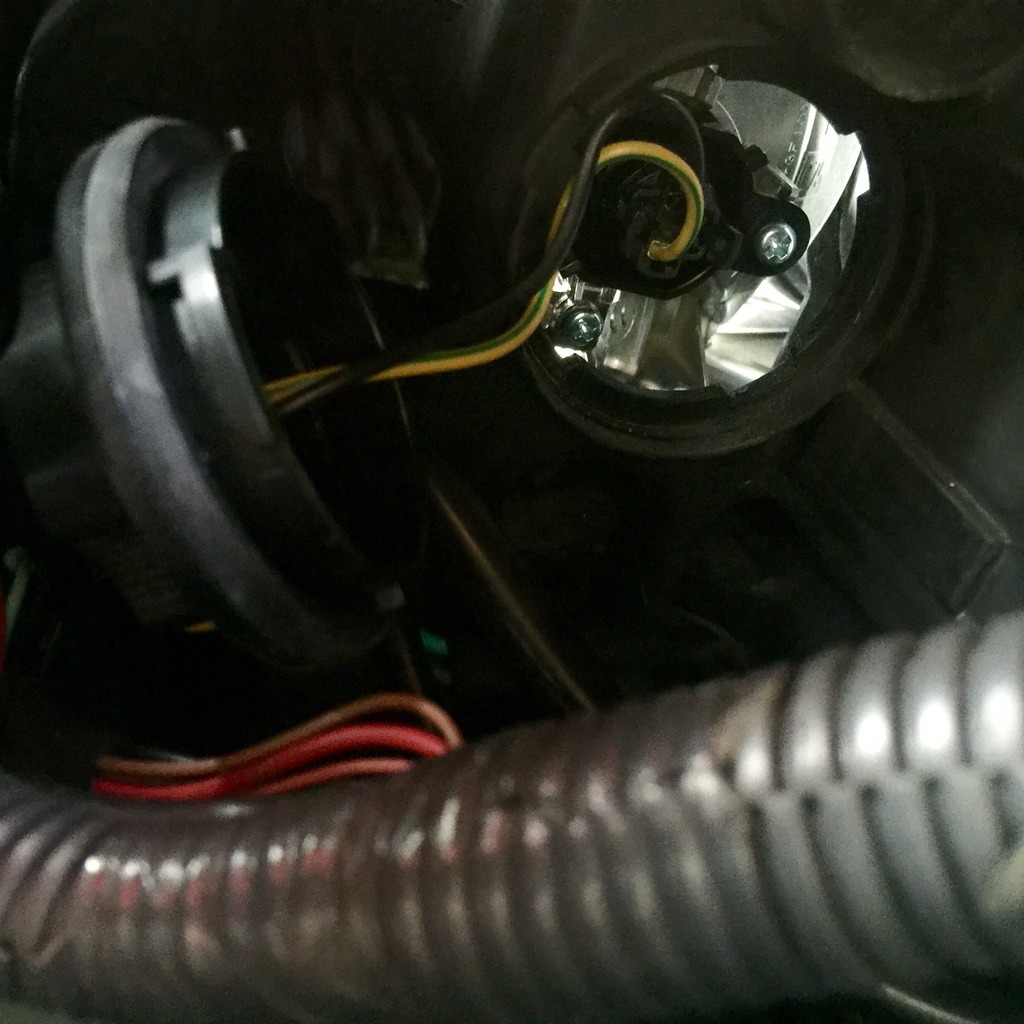
The plug is held in place by two plastic squeeze prongs one on each side. Just gently squeeze them in with two fingers and it will pop right out. No need to use any tool.
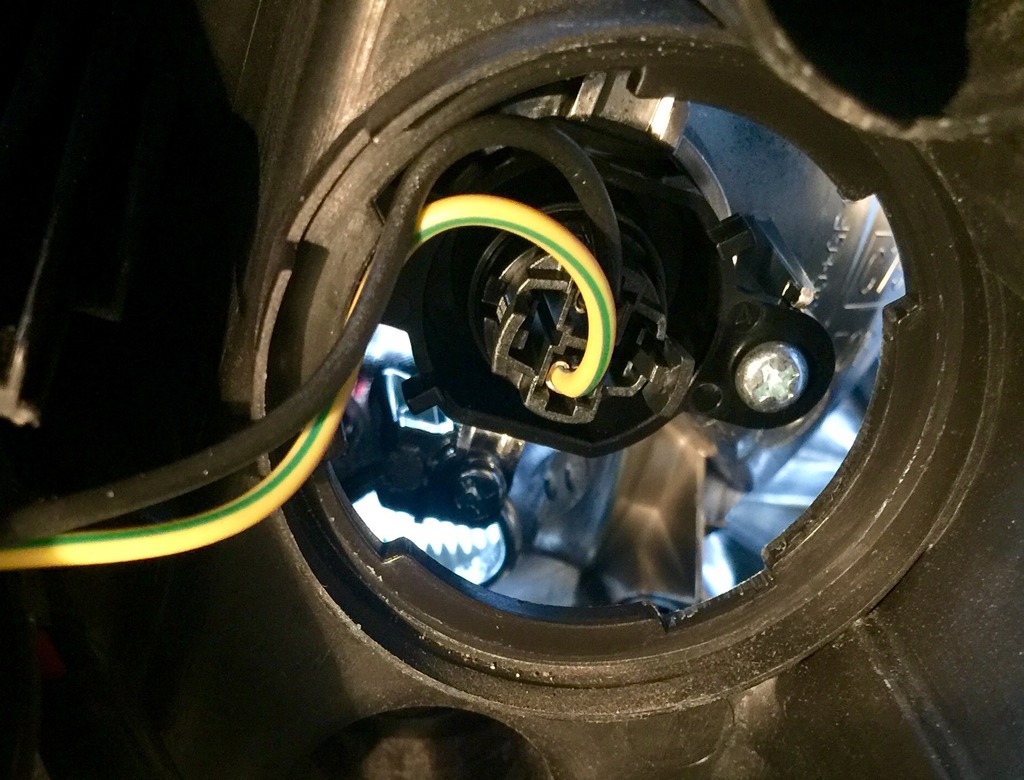
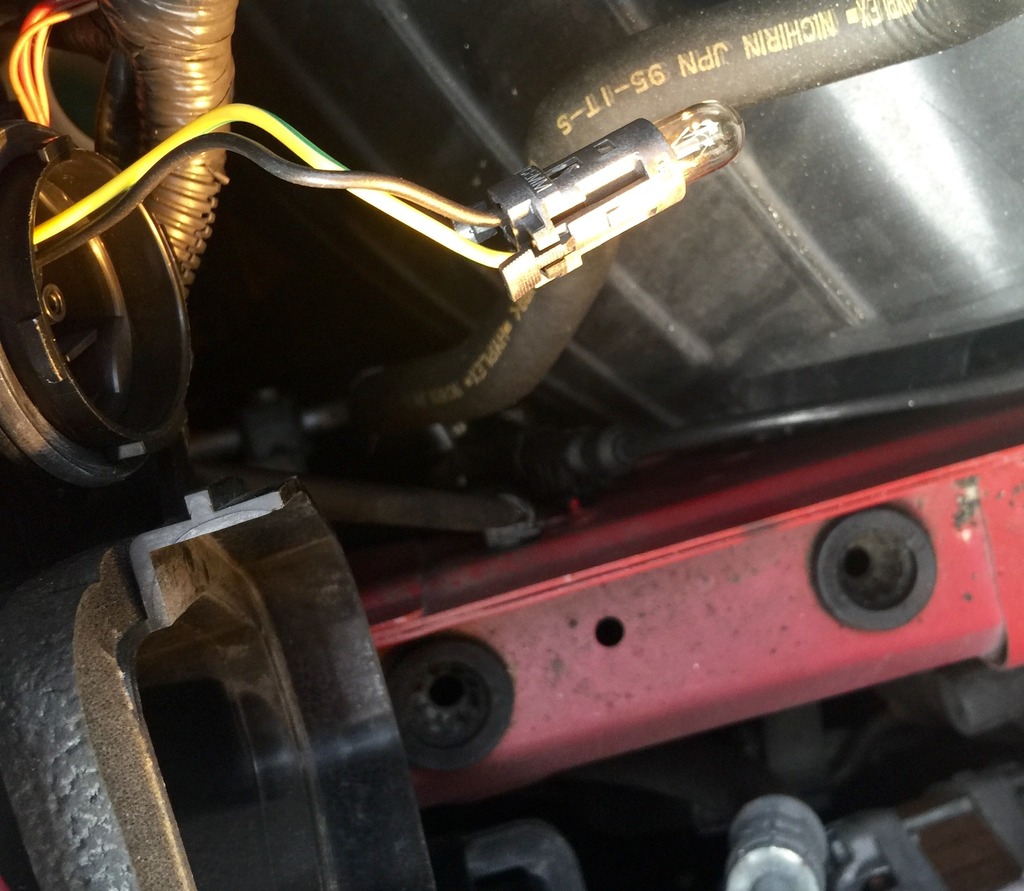
The light bulb pulls right out of the socket, and then just push the LED bulb in it's place. It wouldn't hurt to test it before putting things back together.
The driver's side is very similar and easier since you don't have to bother with the washer fill tube (which was super easy to remove amd replace anyway)
On the driver's side the parking/city light access cap is just above and in front of the wire bundle. Again with a single pair of wires (Black and Yellow) leading in. Twist the **** CCW to open.
squeeze the plastic clips on the socket holder, remove the bulb, replace it and reassemble.
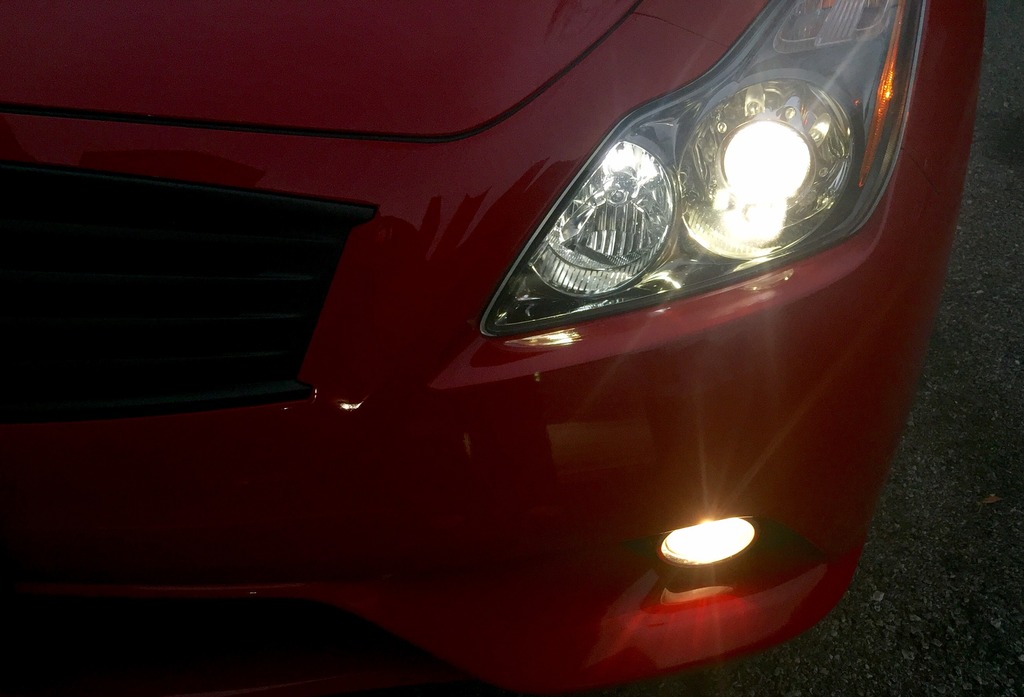
When all finished I found the DD 6000k LEDs are a bit whiter or less yellow than the stock HIDs.

I'm sure I missed the thread on a later model but anyway, mine is a '13 Coup and does not have fog-lights in the assembly. Just HIDs, Parking and side lamps.
Edit: Oops, I forgot about SuperJoey's excellent DYI
There is no need to remove a wheel, or go through the wheelwell. It can be done in ~10 mins by simply removing the air filter box (and the washer filler tube. Even with big hands it's quite easy.
You MUST begin with a clean engine compartment.
Okay I actually cleaned up after I finished. Sue me.
I changed the passenger's side parking light first. It's only slightly more difficult, and once you are done here, you'll breeeeeeeze through the driver's side.
Remove the mounting bolt on the air box, unclip the MAF sensor connector. (No need to unscrew the actual MAF). use a pair of pliers to disconnect the cable hoder and swing the MAF wire out of the way.
Then loosen the hose clamp on the airbox tube. Pull the air box out of the rubber feed hose and yank it straight up to pull the plastic mounting pins out of the rubber holders underneath.
Gently twist the plastic pop-clip on the mount for the washer fluid tube. Pull the clip out and wiggle and pull the feed tube straight up and out. (Provided its not over-filled)
The city light access cap is just above and in front of the washer fill tube. It has two wires leading into it (Yellow & Black)
*Props to Infiniti for making the actual air filter access so easy. On my 07FX it is a royal PITA to change the AF. Here it's two clips and it slides straight out. No matter because I'll be swapping in a Short CAI anyway.
On the passenger's side,
just to the right of the airbox intake, you will see the twist cap for the parking/city light. *NOTE it's orientation*, then turn it CCW to open.
**NOTE**
Play close attention to the orientation of the access cap. It is a ROYAL PITA to line up by feel alone. Once you have it oriented correctly it goes right in and closes right up. But if you try to do it by feel alone you can waste a lot of time fiddling around. Get it right first and you can do the whole procedure in less than 10 minutes on each side. Even with big hands like I have.
Once open you will be able to see daylight through the access port, and the two wires leading to a plug inside.
The plug is held in place by two plastic squeeze prongs one on each side. Just gently squeeze them in with two fingers and it will pop right out. No need to use any tool.
The light bulb pulls right out of the socket, and then just push the LED bulb in it's place. It wouldn't hurt to test it before putting things back together.
The driver's side is very similar and easier since you don't have to bother with the washer fill tube (which was super easy to remove amd replace anyway)
On the driver's side the parking/city light access cap is just above and in front of the wire bundle. Again with a single pair of wires (Black and Yellow) leading in. Twist the **** CCW to open.
squeeze the plastic clips on the socket holder, remove the bulb, replace it and reassemble.
When all finished I found the DD 6000k LEDs are a bit whiter or less yellow than the stock HIDs.
Last edited by bikezilla; Dec 13, 2015 at 06:41 PM.


Thread Starter
Registered Member
iTrader: (2)
Joined: Oct 2015
Posts: 969
Likes: 278
From: Westchester
Originally Posted by G37xS-Life
Thank you and great guide.
How sensitive are the MAF Sensors in our cars? I am thinking about going after the city lights via your method, but I am concern about damaging the MAF Sensor.
Any idea?
How sensitive are the MAF Sensors in our cars? I am thinking about going after the city lights via your method, but I am concern about damaging the MAF Sensor.
Any idea?
Get a spray can of MAF cleaner.
Disconnect the MAF wire.
Have a sip of cold beer.
Unscrew the two bolts that secure the MAF sensor to the intake mid pipe.
Have a sip of cold beer.
Don't not drop or loose the bolts.
Have a sip of cold beer.
Spray the MAF with cleaner.
Make sure you get the sensor.
Have a sip of cold beer.
Spray it again
Have a sip of cold beer.
Spray it again
Have a sip of cold beer.
Set it down on a microfiber towel to dry.
Have a sip of cold beer.
Clean the other while the first drys.
Have a sip of cold beer.
Replace the first while the second drys.
Have a sip of cold beer.
Replace the second one.
Have a sip of cold beer.
Note:
Some of the sips of beer are entirely optional.

Registered Member
Joined: Aug 2015
Posts: 1,386
Likes: 188
i took one of the MAF sensors out for cleaning when i cleaned my throttle body @ 30k, and it looked like new, so i didn't bother cleaning them.
Thread Starter
Registered Member
iTrader: (2)
Joined: Oct 2015
Posts: 969
Likes: 278
From: Westchester
Originally Posted by Landshark
you don't even touch the MAF sensor when replacing the bulbs.
i took one of the MAF sensors out for cleaning when i cleaned my throttle body @ 30k, and it looked like new, so i didn't bother cleaning them.
i took one of the MAF sensors out for cleaning when i cleaned my throttle body @ 30k, and it looked like new, so i didn't bother cleaning them.
Yes there is zero risk in damaging the MAF sensors, you are only removing the air boxes, not the mid pipes. Even then you don't have to mess with the sensors.
As for cleaning them, mine looked clean at 33kmi as well.
But the sensors are so tiny it'd be hard to tell.
Takes five mins to clean each one, so I figured wtf, why not.
I also reset the ECU for a clean slate.
Totally optional.


Thread
Thread Starter
Forum
Replies
Last Post
Deuuuce
Car Care & Detailing
3
Jan 28, 2011 10:56 AM