
DIY: Dball/dball2 installation diy

Dball/dball2 installation diy
DBALL/DBALL2 INSTALLATION DIY
DBALL/DBALL2 is a door lock bypass/security system. The main reason most of us install this module is to enable a remote start feature from the factory keyfob. Once can simply install this module, press the lock buttom on the OEM Keyfob 3 times, and the vehicle will start. Great feature for warming up the vehicle before leaving a location. One can also attach a viper system to this module through a single connection. This will allow you to use an external remote (Viper or comparable system) and start your vehicle from a distance greater than what the OEM remote can reach. This module does have a few additional features as well. Visit xpresskit.com for more information.
Got some time to make a write-up and get pictures while installing a DBALL in a member�s car. Thanks to Alex for lending the donor vehicle and lending a hand during install.
What you'll need for this install:
Tools needed for this install:
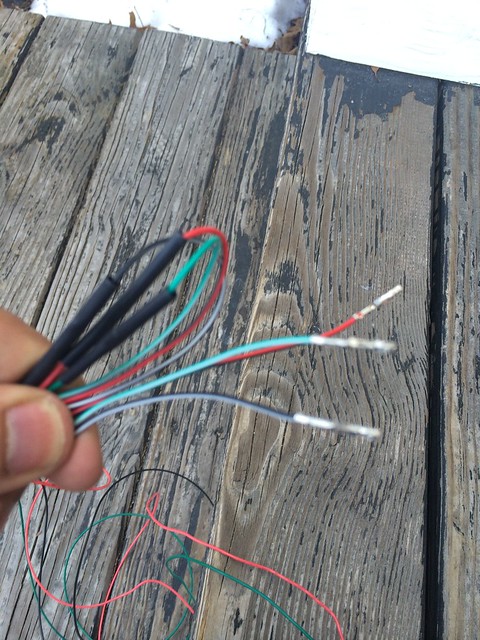
Begin by extending the necessary wires on the THNISS3 harness. When extending my harness, I cut directly in the center of the three wires that you need to extend:
� Lock Output (Green/White)
� Unlock Output (Black/White)
� Driver Door Pin (Red/Black)
Add in ~5 feet of wire (red, black, green), solder each new wire length to the wire cut wire on the harness end, then solder the other half of the wire ends that were cut off, to the ends of the added wire length. You should be splicing in 5 feet of wire to each run. Cover each soldered connection with heat shrink, then wrap exposed wires with wire loom or OE fabric wire wrap.

DISASSEMBLING THE DRIVER SIDE
DISASSEMBLING THE PASSENGER SIDE
CONNECT HARNESS ON PASSENGER SIDE
Plug all harness connection plug taps to the corresponding port, sensor, bracket, etc.

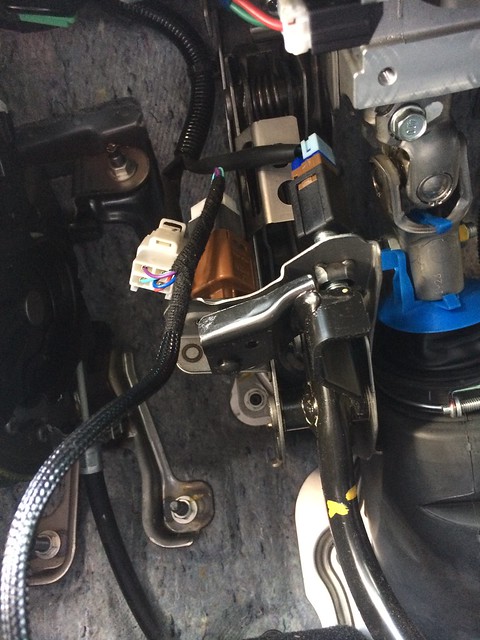
CONNECT HARNESS WIRES TO GREEN BCM PLUG
Remove the GREEN BCM PLUG from the module. You�ll need a pick to pry open the locking tab on the GREEN PLUG. This NEEDS to be opened for the pins to be inserted and locked down. Refer to the picture below.


Lock Output (GREEN/WHITE) > Insert pin to BCM pin #37 on BCM plug
Unlock Output (BLACK/WHITE) > Insert pin to BCM pin #15 on BCM plug
Driver Door PIN (RED/BLACK) > Cut pin and splice to gray wire pin #39 on BCM plug

CONNECT HARNESS TO PTS BUTTON
PTS Wire (GREEN/BLACK) > Splice wire to brown wire pin #4 on PTS button connector
(Refer to DIY below on how to remove the PTS button)
PTS Installation DIY Link
Verify you have connected everything:
Program the DBALL before reassembling the vehicle. Ensure everything is working properly and the remote start feature works.
Once confirmed, neatly tie your wires up and secure down wires to mounting points. I used zipties and attached wire runs to unmoving parts. I mounted the DBALL to the metal frame that surrounds the steering column under the dash. Two long zipties connected together will wrap around and hold it in place. I mounted the wires directly below the DBALL. I can get pictures of how these are mounted if they are really needed � we forgot to take pictures of this portion of the install.
Reinstall all panels carefully. Ensure everything lines up 100% before you press it in place.
If anyone has completed this and noticed that I missed something, please PM me and I will make edits.
DBALL/DBALL2 is a door lock bypass/security system. The main reason most of us install this module is to enable a remote start feature from the factory keyfob. Once can simply install this module, press the lock buttom on the OEM Keyfob 3 times, and the vehicle will start. Great feature for warming up the vehicle before leaving a location. One can also attach a viper system to this module through a single connection. This will allow you to use an external remote (Viper or comparable system) and start your vehicle from a distance greater than what the OEM remote can reach. This module does have a few additional features as well. Visit xpresskit.com for more information.
Got some time to make a write-up and get pictures while installing a DBALL in a member�s car. Thanks to Alex for lending the donor vehicle and lending a hand during install.
What you'll need for this install:
- DBALL/DBALL2 Module
- THNISS3 T-Harness for DBALL/DBALL2
- ~15' Wire for extending harness
- Wire taps
Tools needed for this install:
- Soldering Iron with Solder
- Zip ties
- A few different phillips screwdrivers
- Small channel locks
- Needle Nose Pliers
- Thin pick (to open green BCM plug wire lock)
- Fish wire (to route wires behind center of dash)
Begin by extending the necessary wires on the THNISS3 harness. When extending my harness, I cut directly in the center of the three wires that you need to extend:
� Lock Output (Green/White)
� Unlock Output (Black/White)
� Driver Door Pin (Red/Black)
Add in ~5 feet of wire (red, black, green), solder each new wire length to the wire cut wire on the harness end, then solder the other half of the wire ends that were cut off, to the ends of the added wire length. You should be splicing in 5 feet of wire to each run. Cover each soldered connection with heat shrink, then wrap exposed wires with wire loom or OE fabric wire wrap.
DISASSEMBLING THE DRIVER SIDE
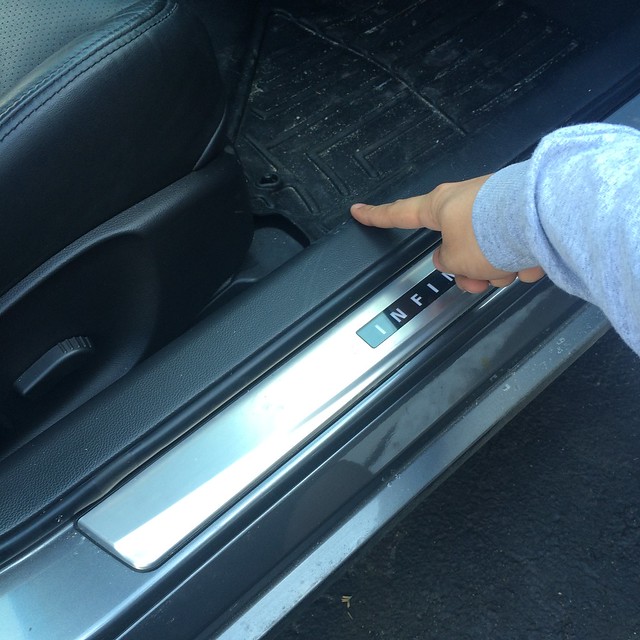
- Remove the piece of trim (that looks like the letter �B�) on the side of the dash that touches the door when closed. Use a plastic flat blade to pry the �B� shaped trim away from the dash.

- Remove 4 screws. Two screws for the OBD2 port, and the other two screws for the hood release handle. Slide the OBD2 and hood latch down and away from the dash. Set all screws aside in a safe place.
- Pull the dash from the bottom towards the driver seat and down at the same time.
- Disconnect 2 or 3 connectors closest to you on the removed lower dash panel and pull to the left. From left to right, these connections are TRUNK, VSC, PARKING SENSORS.

- Next disconnect the single white connector for the KEY FOB PORT.

- On the other side of the removed lower dash piece, remove whatever this connection by unscrewing the single screw that is on the left side of the plug.

- Next unmount the Brake sensor by unscrewing counterclockwise it from the brake stop post. 1-2 turns will remove it from the stop post. Disconnect the connector from the brake sensor and set on the floor.

- Remove the OBD2 port from metal bracket. Set bracket on floor.

DISASSEMBLING THE PASSENGER SIDE
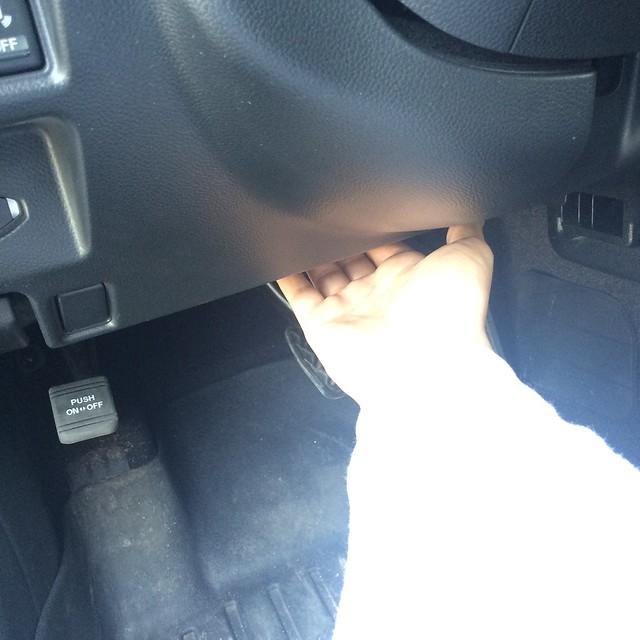
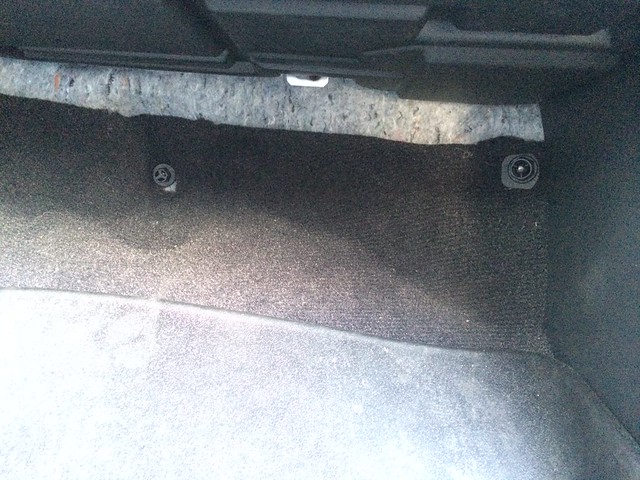
- Remove the floor trim piece that is right behind the kick plate. Get your fingers underneath the backside and pull up and out.
- Remove two plastic screws holding the carpet and trim piece. Set aside in a safe place.
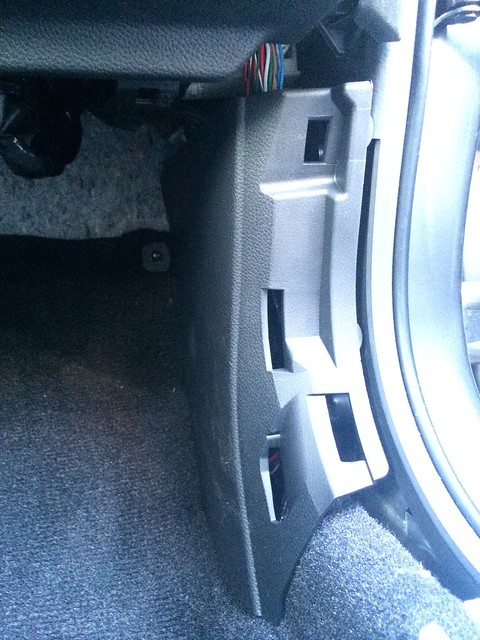
- Remove the trim piece below the glove box by pulling down then towards the passenger seat. Set aside.

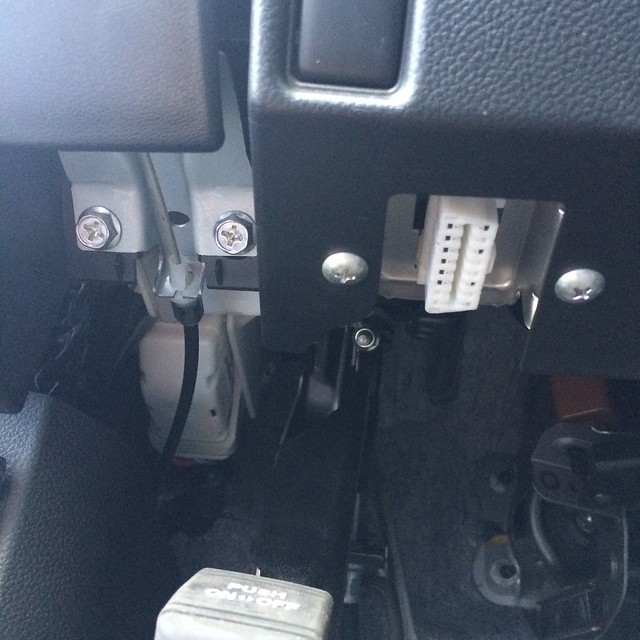
- Remove the trim piece that was held down by the plastic screw. You will need to pull towards the center console. There will be two white plastic screws that hold this to the right side of the vehicle. They will most likely stay attached to the vehicle so you�ll need a thin flat head or a pair of needle nose to get those out. Attach to trim piece and set aside. GREEN BCM PLUG should now be revealed.

CONNECT HARNESS ON PASSENGER SIDE
- Connect BRAKE SENSOR TO HARNESS
- Connect OBD2 PLUG TO HARNESS (install new OBD2 plug to metal bracket)
- Connect KEY PORT TO HARNESS
Plug all harness connection plug taps to the corresponding port, sensor, bracket, etc.
CONNECT HARNESS WIRES TO GREEN BCM PLUG
Remove the GREEN BCM PLUG from the module. You�ll need a pick to pry open the locking tab on the GREEN PLUG. This NEEDS to be opened for the pins to be inserted and locked down. Refer to the picture below.
Lock Output (GREEN/WHITE) > Insert pin to BCM pin #37 on BCM plug
Unlock Output (BLACK/WHITE) > Insert pin to BCM pin #15 on BCM plug
Driver Door PIN (RED/BLACK) > Cut pin and splice to gray wire pin #39 on BCM plug
CONNECT HARNESS TO PTS BUTTON
PTS Wire (GREEN/BLACK) > Splice wire to brown wire pin #4 on PTS button connector
(Refer to DIY below on how to remove the PTS button)
PTS Installation DIY Link
Verify you have connected everything:
- T-HARNESS to BCM
- T-HARNESS to PTS button
- T-HARNESS to Brake Switch
- T-HARNESS to Key Port
- T-HARNESS to OBD2
Program the DBALL before reassembling the vehicle. Ensure everything is working properly and the remote start feature works.
Once confirmed, neatly tie your wires up and secure down wires to mounting points. I used zipties and attached wire runs to unmoving parts. I mounted the DBALL to the metal frame that surrounds the steering column under the dash. Two long zipties connected together will wrap around and hold it in place. I mounted the wires directly below the DBALL. I can get pictures of how these are mounted if they are really needed � we forgot to take pictures of this portion of the install.
Reinstall all panels carefully. Ensure everything lines up 100% before you press it in place.
If anyone has completed this and noticed that I missed something, please PM me and I will make edits.
Last edited by connoisseurr; Mar 19, 2014 at 11:37 AM.


Here's an Ebay listing that lists its' functions, basically a door lock bypass/security system
Xpresskit Dball: Car Alarms & Security | eBay
I guess I completely missed that part, huh? GO ME!!
DBALL/DBALL2 is a door lock bypass/security system like Brad had mentioned. The main reason most of us install this module is to enable a remote start feature from the factory remote. Once can simply install this module, press the lock buttom on the OEM Keyfob 3 times, and the vehicle will start. Great feature for warming up the vehicle before leaving a location.
DBALL/DBALL2 is a door lock bypass/security system like Brad had mentioned. The main reason most of us install this module is to enable a remote start feature from the factory remote. Once can simply install this module, press the lock buttom on the OEM Keyfob 3 times, and the vehicle will start. Great feature for warming up the vehicle before leaving a location.
Trending Topics
I guess I completely missed that part, huh? GO ME!!
DBALL/DBALL2 is a door lock bypass/security system like Brad had mentioned. The main reason most of us install this module is to enable a remote start feature from the factory remote. Once can simply install this module, press the lock buttom on the OEM Keyfob 3 times, and the vehicle will start. Great feature for warming up the vehicle before leaving a location.
DBALL/DBALL2 is a door lock bypass/security system like Brad had mentioned. The main reason most of us install this module is to enable a remote start feature from the factory remote. Once can simply install this module, press the lock buttom on the OEM Keyfob 3 times, and the vehicle will start. Great feature for warming up the vehicle before leaving a location.

Registered User
Joined: Mar 2014
Posts: 2
Likes: 0
I have an 09 G37 that I am trying to hook up the dball with a t-harness, Everything is hooked the same way, but the dball will not program to the key. I power the unit, it gives me a red ligh, I hit the unlock button on the factory fob and nothing happens. I've tried it with the key on and off, tried to do a reset (does not do a reset). To this point, I have never seen an orange light. I have gotten a green light, but nothing happens when I hit the unlock and it does not seem that I can reset or program the dball.

Registered User
Joined: Oct 2006
Posts: 138
Likes: 4
I have an 09 G37 that I am trying to hook up the dball with a t-harness, Everything is hooked the same way, but the dball will not program to the key. I power the unit, it gives me a red ligh, I hit the unlock button on the factory fob and nothing happens. I've tried it with the key on and off, tried to do a reset (does not do a reset). To this point, I have never seen an orange light. I have gotten a green light, but nothing happens when I hit the unlock and it does not seem that I can reset or program the dball.
and this seems like a good deal
http://www.ebay.com/itm/Plug-N-Play-Nissan-Infinity-RSR-Remote-Start-Kit-DBALL2-THNISS3-T-Harness-/291110721766?pt=US_Car_Keys_Transponders&hash=item43c78d18e6


Registered Member
Joined: Jun 2013
Posts: 272
Likes: 33
From: Edmonton, Alberta, Canada
did you buy it programmed with the Infiniti firmware?
and this seems like a good deal
Plug N Play Nissan Infinity RSR Remote Start Kit DBALL2 THNISS3 T Harness | eBay
and this seems like a good deal
Plug N Play Nissan Infinity RSR Remote Start Kit DBALL2 THNISS3 T Harness | eBay
