
DIY: OEM Aluminum Sport Pedal Installation

Thread Starter
The Steering Wheel Guy
iTrader: (12)
Joined: Nov 2013
Posts: 3,111
Likes: 561
From: Frankfort, IL
OEM Aluminum Sport Pedal Installation
The first, and most important, step to swapping to aluminum pedals, is "Thanking" this post! 
UPDATE!: I have posted part numbers for the 6MT footrest and replacement clips to secure the footrest (they can be reused but can break during removal).
I have been looking into installing the aluminum sport pedals for a while and have not seen a DIY put together, or even a good "one stop shop" list of part numbers. With this being said, I decided to make a little contribution and put together my findings.
Aluminum Sport Pedal Part Numbers / Prices:
Accelerator pedal:18002-1NCOC
$178 (NEW) / $35-$65 (eBay)
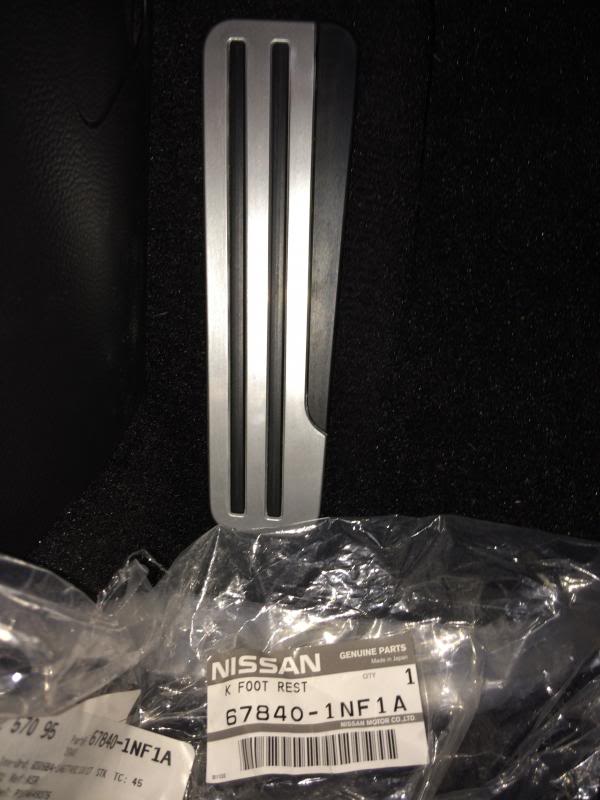
Dead pedal (Confirmed for Automatic Coupe, likely for Automatic Sedan): 67840-1NF1A
Dead pedal (6MT Coupe and Sedan, per parts database website): 67840-1NF3A
$32 (NEW)
Dead pedal clips: 74985-1NF0A (6 clips are needed (original clips can be reused), these clips or pressure washers to keep foot rest in place)
$7 (NEW)
Brake pedal: 46531-JK00C
$32 (NEW)

__________________________________________________ _________________
I will start with the accelerator pedal. Remove the bolt cover with something thin, I used a utility knife and it worked pretty well. Please excuse the mess, I vacuumed and cleaned as I went.
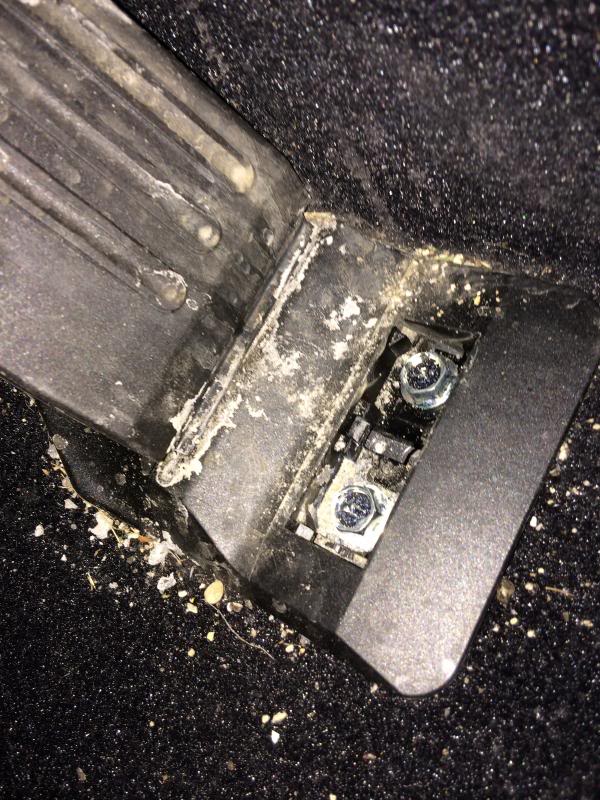
Remove the (2) bolts and then push out the tab holding the wire harness to the pedal (pictured below).
Unclip the wiring harness to the pedal and push the pedal upward to unseat it from the bracket.
Repeat steps in reverse order to install the new pedal.
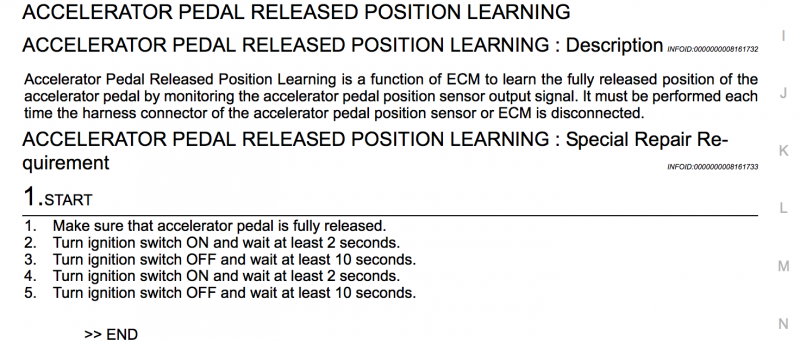
Below is Infiniti's pedal relearning procedure:
__________________________________________________ _________________
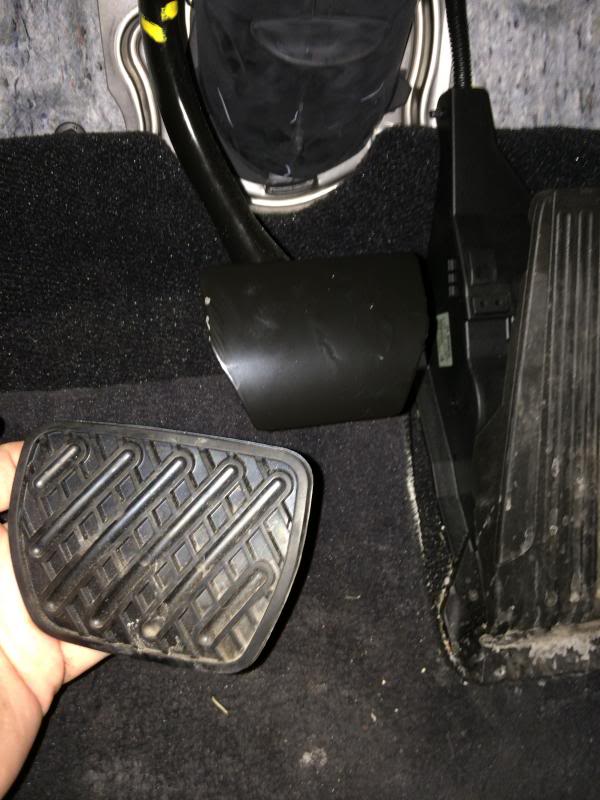
The brake pedal is rather simple. Pull off the black rubber cover, and push the new aluminum piece into place.
Tip: Put the bottom of the brake cover on first and then press the top into place.
__________________________________________________ _________________
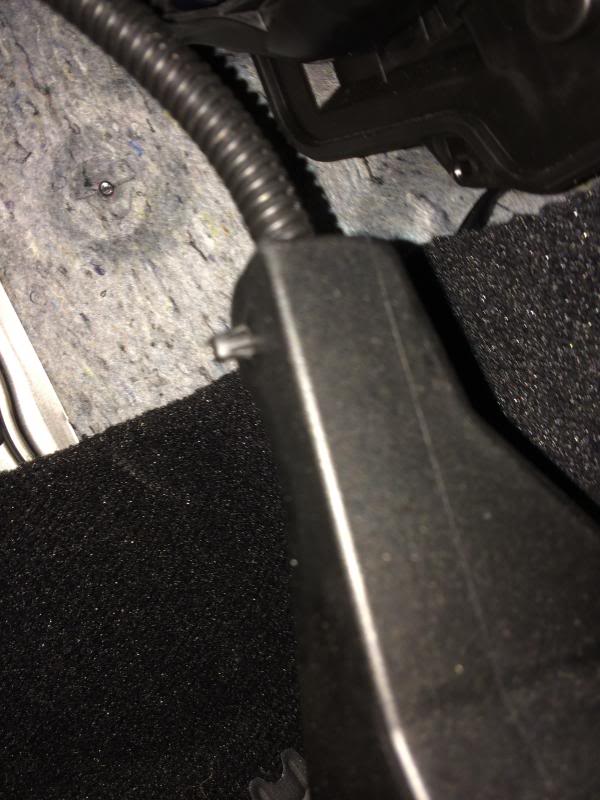
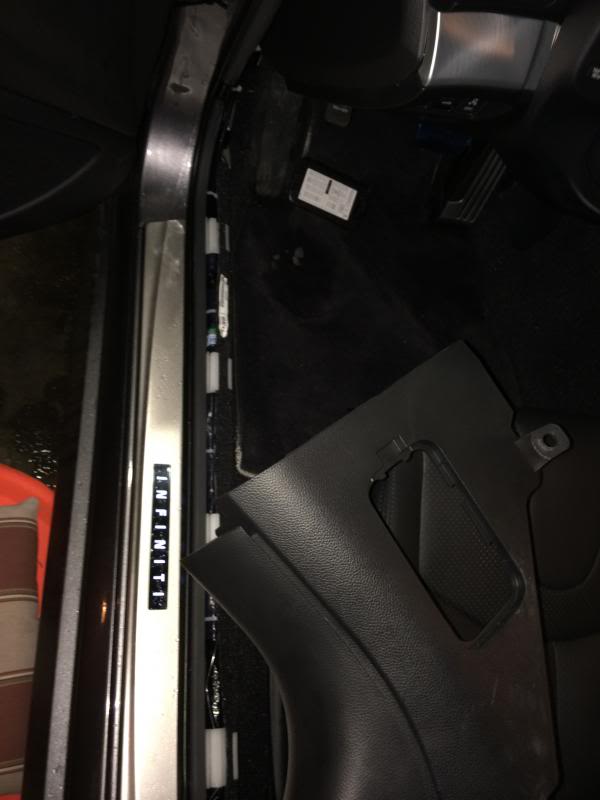
The dead pedal takes a bit of work, but is definitely manageable. Start by removing the interior door trim by pulling up, it will unclip, and there will be one nut by the fuse panel that can be removed by hand (the bolt hole location can be seen on the trim in the picture below).
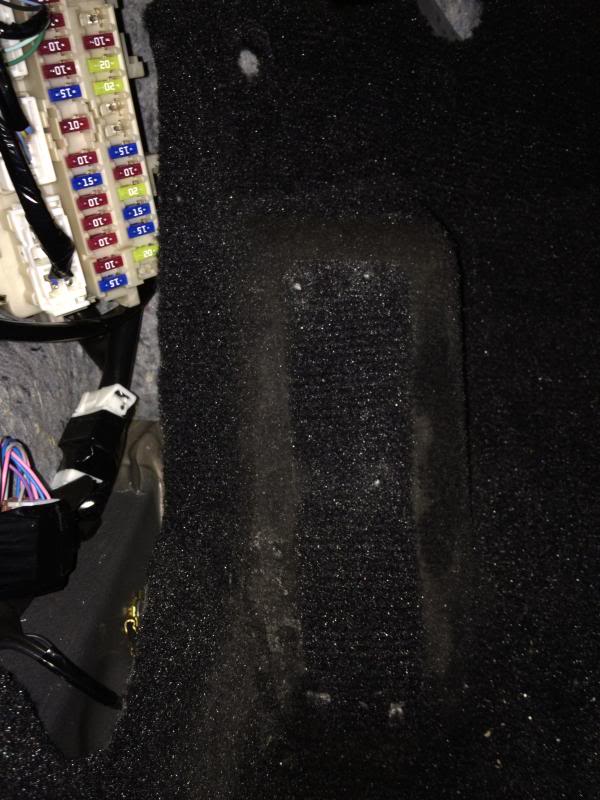
This will allow you to pull back the carpet to see (6) pins held in place by metal clips. Using a combination of a flathead scerwdriver and pliers I was able to remove these with a little elbow grease. I decided to clean the carpet with carpet cleaner in the area while I had the chance.
Put the new dead pedal in place and press the metal clips back into place, put your interior trim back in and your all set!
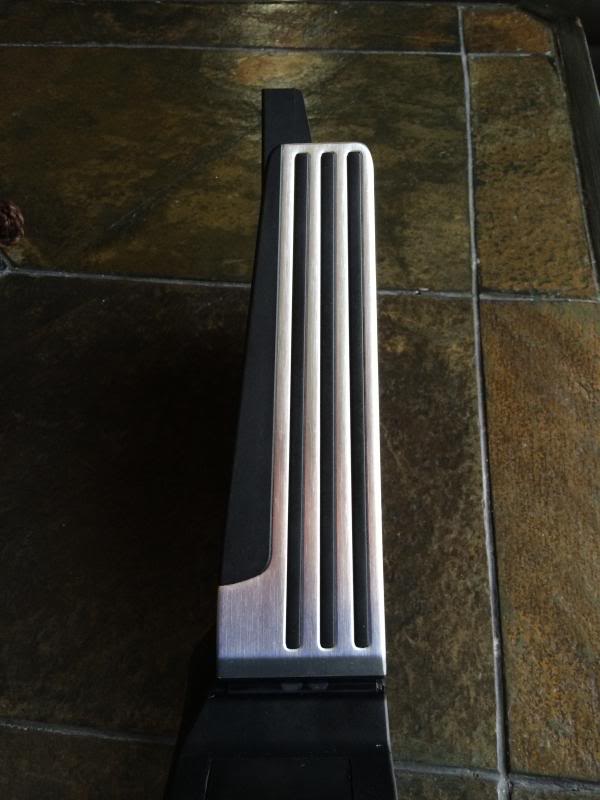
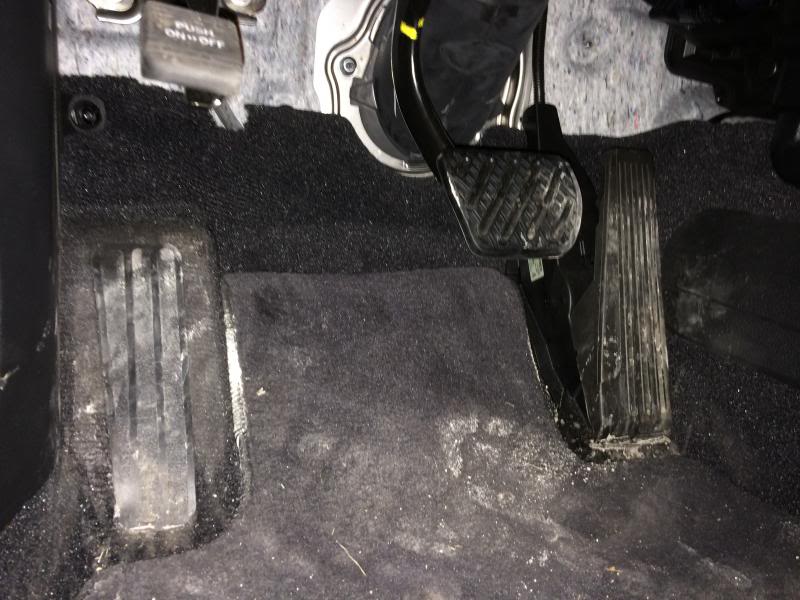
Before:
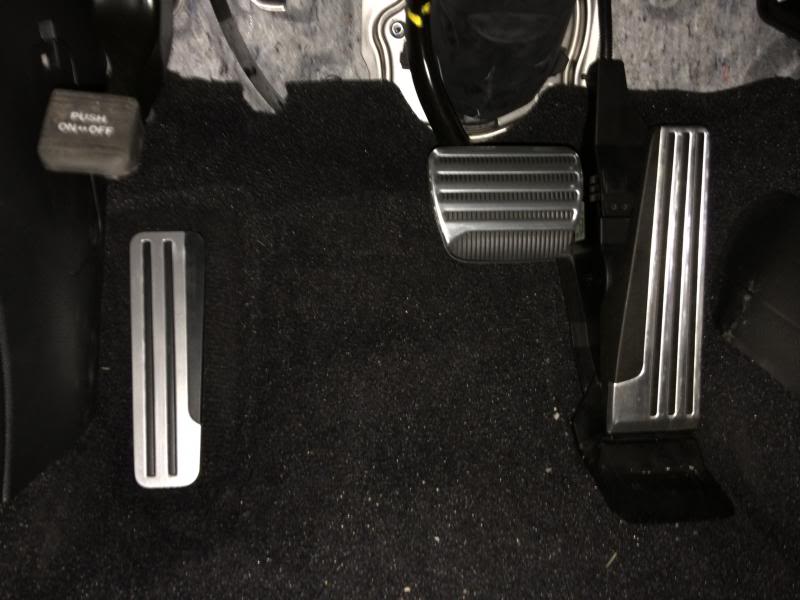
After:
This whole process only took me about an hour of time and $115. I think it is a great upgrade and well worth the money and effort. There is obviously some risk as you will be connecting/disconnecting electronics so please size up the job before you start as this is for your info only, I'm not liable for your work.
UPDATE!: I have posted part numbers for the 6MT footrest and replacement clips to secure the footrest (they can be reused but can break during removal).
I have been looking into installing the aluminum sport pedals for a while and have not seen a DIY put together, or even a good "one stop shop" list of part numbers. With this being said, I decided to make a little contribution and put together my findings.
Aluminum Sport Pedal Part Numbers / Prices:
Accelerator pedal:18002-1NCOC
$178 (NEW) / $35-$65 (eBay)

Dead pedal (Confirmed for Automatic Coupe, likely for Automatic Sedan): 67840-1NF1A
Dead pedal (6MT Coupe and Sedan, per parts database website): 67840-1NF3A
$32 (NEW)
Dead pedal clips: 74985-1NF0A (6 clips are needed (original clips can be reused), these clips or pressure washers to keep foot rest in place)
$7 (NEW)

Brake pedal: 46531-JK00C
$32 (NEW)

__________________________________________________ _________________
I will start with the accelerator pedal. Remove the bolt cover with something thin, I used a utility knife and it worked pretty well. Please excuse the mess, I vacuumed and cleaned as I went.

Remove the (2) bolts and then push out the tab holding the wire harness to the pedal (pictured below).

Unclip the wiring harness to the pedal and push the pedal upward to unseat it from the bracket.
Repeat steps in reverse order to install the new pedal.
Below is Infiniti's pedal relearning procedure:

__________________________________________________ _________________
The brake pedal is rather simple. Pull off the black rubber cover, and push the new aluminum piece into place.
Tip: Put the bottom of the brake cover on first and then press the top into place.

__________________________________________________ _________________
The dead pedal takes a bit of work, but is definitely manageable. Start by removing the interior door trim by pulling up, it will unclip, and there will be one nut by the fuse panel that can be removed by hand (the bolt hole location can be seen on the trim in the picture below).

This will allow you to pull back the carpet to see (6) pins held in place by metal clips. Using a combination of a flathead scerwdriver and pliers I was able to remove these with a little elbow grease. I decided to clean the carpet with carpet cleaner in the area while I had the chance.

Put the new dead pedal in place and press the metal clips back into place, put your interior trim back in and your all set!
Before:

After:

This whole process only took me about an hour of time and $115. I think it is a great upgrade and well worth the money and effort. There is obviously some risk as you will be connecting/disconnecting electronics so please size up the job before you start as this is for your info only, I'm not liable for your work.
Last edited by Ryne; Apr 7, 2016 at 10:17 AM.

Thread Starter
The Steering Wheel Guy
iTrader: (12)
Joined: Nov 2013
Posts: 3,111
Likes: 561
From: Frankfort, IL

Nice job man! I'm looking for the parts now as well. Great DIY!
Hey found my pedal ebay! Just had to remove the tac and there were like 5!
DOMO
Hey found my pedal ebay! Just had to remove the tac and there were like 5!
DOMO
Last edited by Deelow; Jan 9, 2014 at 10:03 PM. Reason: Info
Thread Starter
The Steering Wheel Guy
iTrader: (12)
Joined: Nov 2013
Posts: 3,111
Likes: 561
From: Frankfort, IL
Thanks! I found a lot of mixed opinions on whether you could buy these parts separate. More specifically, I saw a few forum posts stating that you can only get the aluminum dead pedal if you buy the entire carpet.
I am interested in hearing about anyone who does this DIY, how it worked out/what it cost to put the set together!
I am interested in hearing about anyone who does this DIY, how it worked out/what it cost to put the set together!
Thread Starter
The Steering Wheel Guy
iTrader: (12)
Joined: Nov 2013
Posts: 3,111
Likes: 561
From: Frankfort, IL
__________________________________________________ __________________________________________________
UPDATE!!!:
It has been almost 2 weeks with the aluminum pedals and I feel inclined to make an update. I have not noticed any negative effects of the swap, I state this due to the accelerator pedal being electronic. One very noticeable difference for me personally is the pedal feel. It may be an exaggeration to justify paying for the switch, but the pedals feel much better (more solid). The dead pedal is the most significant improvement. The plastic on the non sport trim is very flimsy and thin, while the aluminum sport dead pedal is significantly more substantial (thicker/more rigid). You can feel the difference while you are driving and it adds to the luxury feel of the car. I would definitely consider this a noticeable improvement.
Last edited by Ryne; Jan 13, 2014 at 12:05 AM.
Trending Topics
Thread Starter
The Steering Wheel Guy
iTrader: (12)
Joined: Nov 2013
Posts: 3,111
Likes: 561
From: Frankfort, IL
Thread Starter
The Steering Wheel Guy
iTrader: (12)
Joined: Nov 2013
Posts: 3,111
Likes: 561
From: Frankfort, IL
You're welcome! What was your method for getting the brake pedal cover installed? It is a little rough, more explanation from someone who just did it might help people. Thanks!


Registered User
Joined: Feb 2014
Posts: 6
Likes: 0
I slid the top part of the cover in place while stretching the bottom left and right with my fingers then kind of just forced it in. Took a few tries but it worked.
Thread Starter
The Steering Wheel Guy
iTrader: (12)
Joined: Nov 2013
Posts: 3,111
Likes: 561
From: Frankfort, IL