
DIY: StillGen3 Intake/Plasti Dip Rims Grill Calipers


Thread Starter
Registered Member
iTrader: (1)
Joined: Mar 2012
Posts: 12
Likes: 3
From: Vancouver BC
Been a while since I've posted anything, being winter and all. Not much to do, but get started on working on the car while its in storage. Just something I did this past week.
Got my Resonated HFC. On a scale of 1 to 10. I would set this at 5. I did break 2 bolts un-installing the old catalysts. Both of which you have to get at from the top of the engine. I did not remove the steering thing(IN order to remove 1 of the 3 bolts from the Driver side) The instructions that came with the HFC should be enough to get you through the project. Depending on how old your G is, and how much rust is on the bolts. It can be a toughy. I recommend some PB Blast for this one.
Now for some pictures! Feel free to message me if you have any troubles. I would do this with a friend, will make it easier.
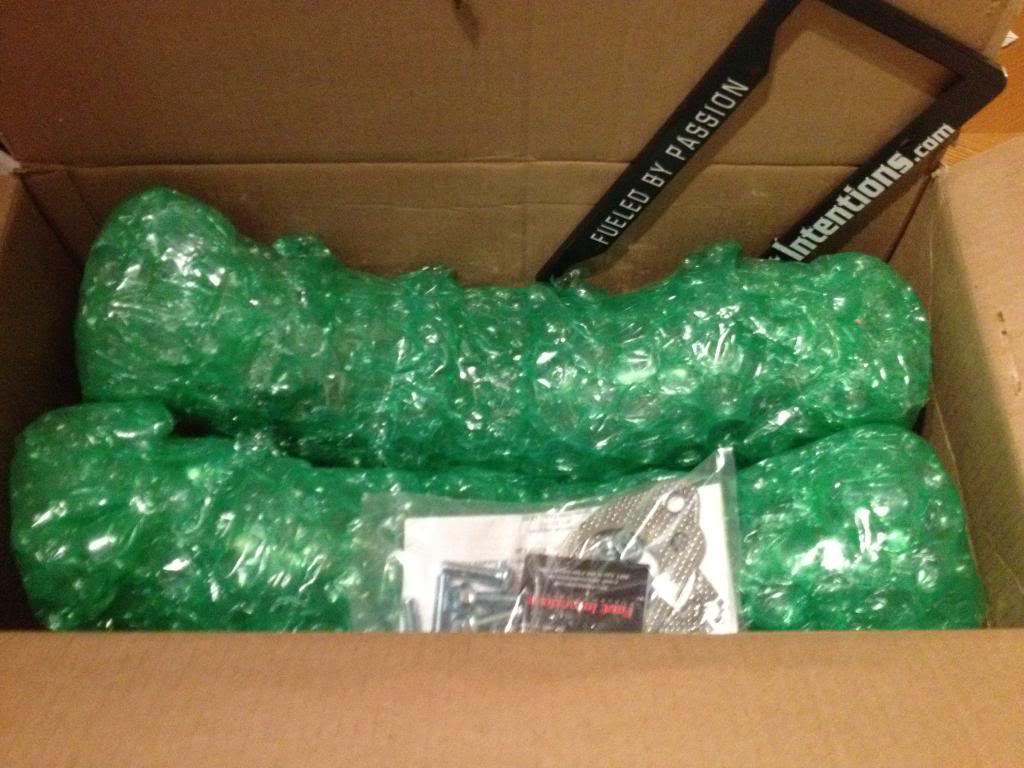
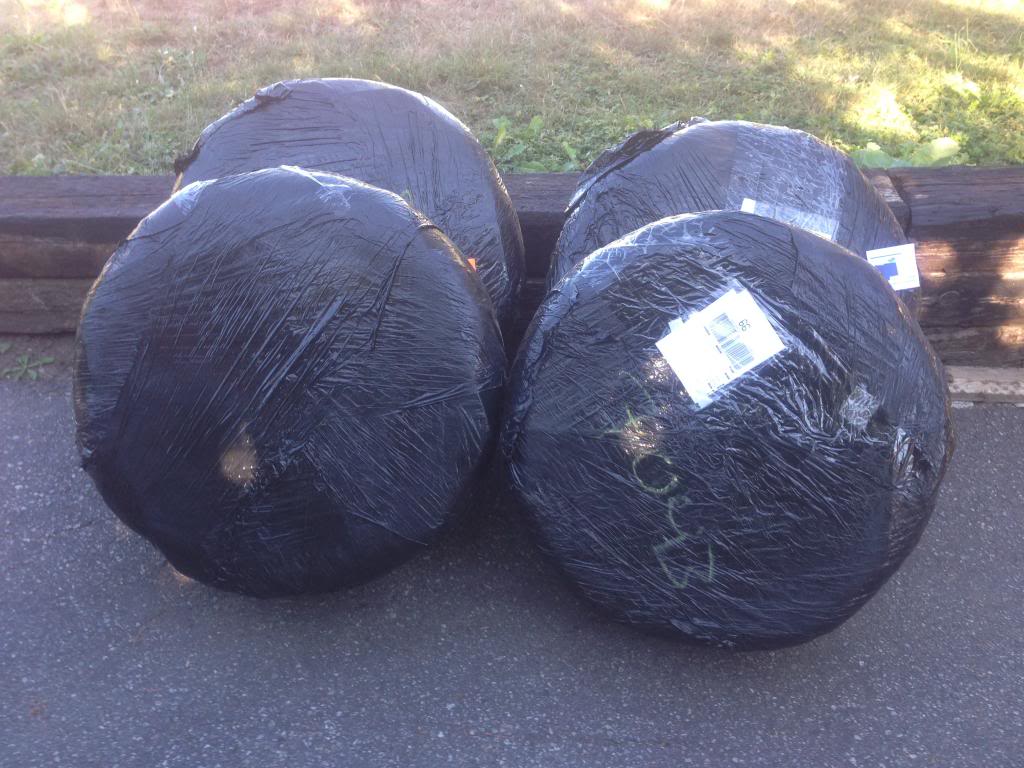
Yay! Packages.
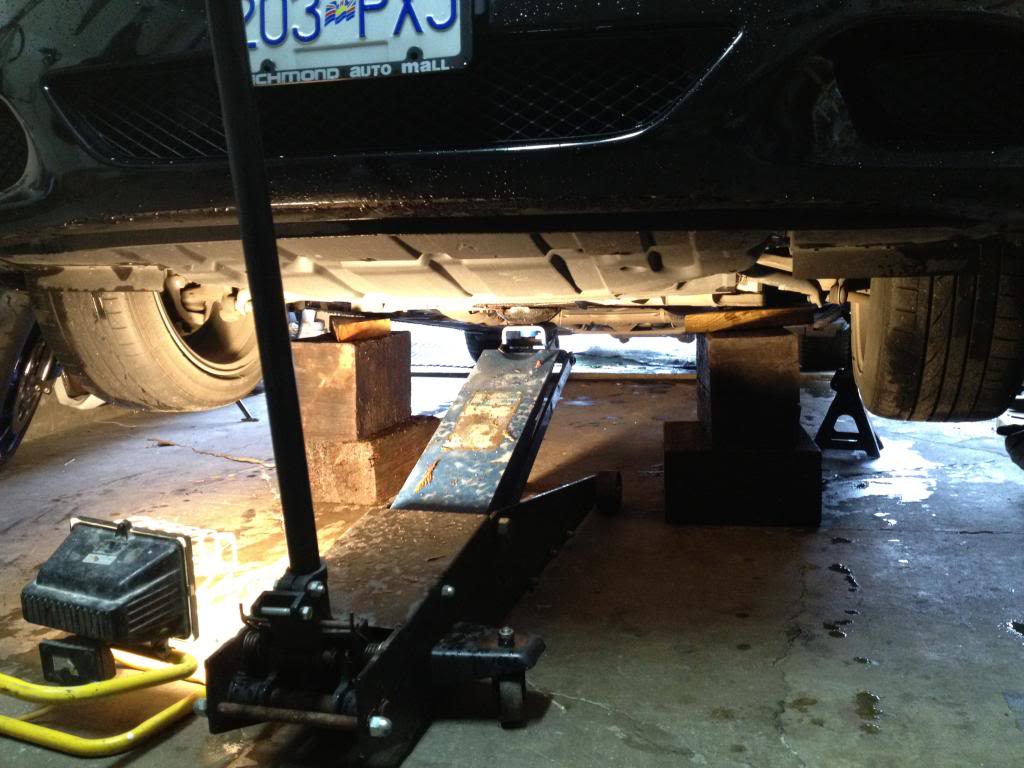
Thats right; Jack stands, Blocks, and jack... Never can be too safe. lol
This actually took me 3 hours; to take them off since the 2 of the 10 bolts were so rusted and broke. ;(

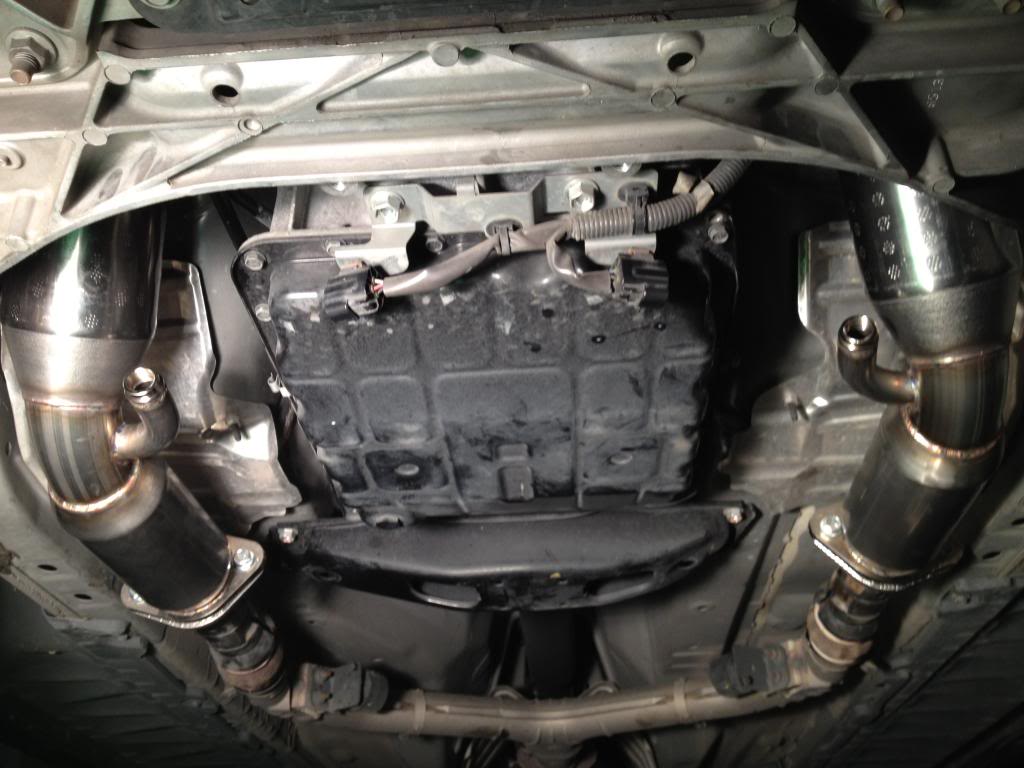
After getting the stocks ones off, the new Fast Intentions RHFC, took under 1 hour to install! Really easy install, wasn't sure if I should or not put the stock V plate back on that supported the old ones. Left it off, anyone put it back on?
Also here is a sound clip. This is right before/after finishing the install. Stationary.
Hope this helps! ^^ I also got some new LED, but nothing special or interesting to post there. Next this on my list is getting some Rotors/Brakes. I'll do a DIY if possible! Until then, Drive safe!
Got my Resonated HFC. On a scale of 1 to 10. I would set this at 5. I did break 2 bolts un-installing the old catalysts. Both of which you have to get at from the top of the engine. I did not remove the steering thing(IN order to remove 1 of the 3 bolts from the Driver side) The instructions that came with the HFC should be enough to get you through the project. Depending on how old your G is, and how much rust is on the bolts. It can be a toughy. I recommend some PB Blast for this one.
Now for some pictures! Feel free to message me if you have any troubles. I would do this with a friend, will make it easier.
Yay! Packages.
Thats right; Jack stands, Blocks, and jack... Never can be too safe. lol
This actually took me 3 hours; to take them off since the 2 of the 10 bolts were so rusted and broke. ;(
After getting the stocks ones off, the new Fast Intentions RHFC, took under 1 hour to install! Really easy install, wasn't sure if I should or not put the stock V plate back on that supported the old ones. Left it off, anyone put it back on?
Also here is a sound clip. This is right before/after finishing the install. Stationary.
Hope this helps! ^^ I also got some new LED, but nothing special or interesting to post there. Next this on my list is getting some Rotors/Brakes. I'll do a DIY if possible! Until then, Drive safe!
Thread Starter
Registered Member
iTrader: (1)
Joined: Mar 2012
Posts: 12
Likes: 3
From: Vancouver BC
Just an update
I have been busy over the last year with work and personal life so I haven't had as much time to work on my car and tinker around with the odd ins and outs. But thought I would just post an update of some of the work I got done. 
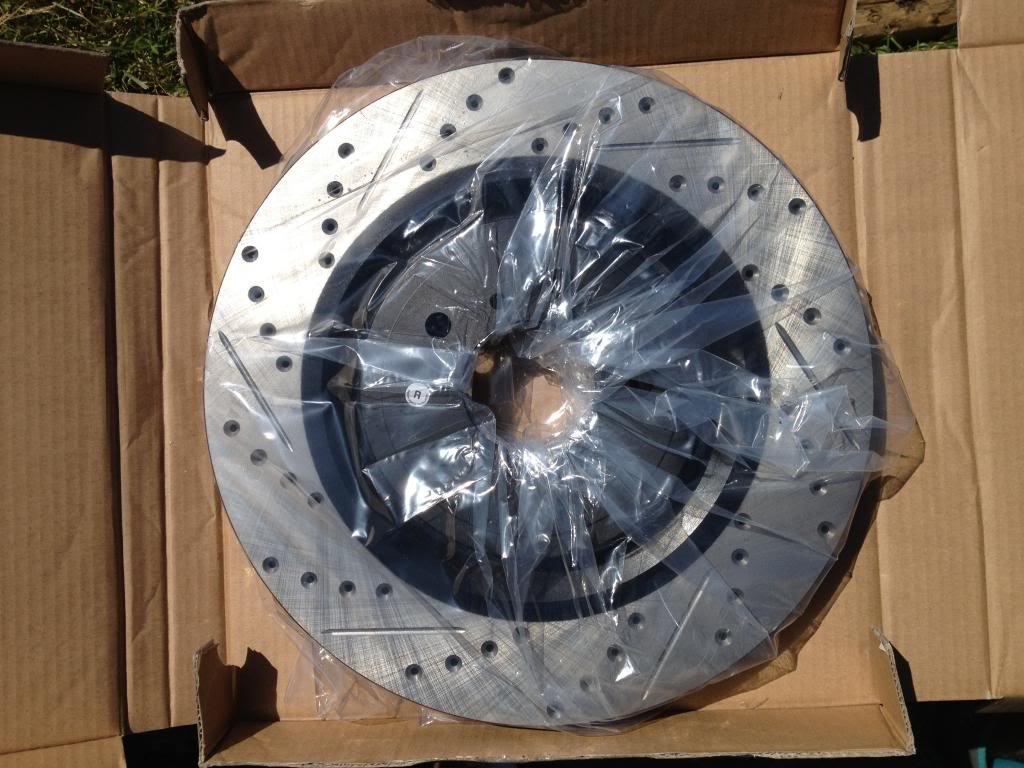
My rotors and brake pads I picked up from Napco*
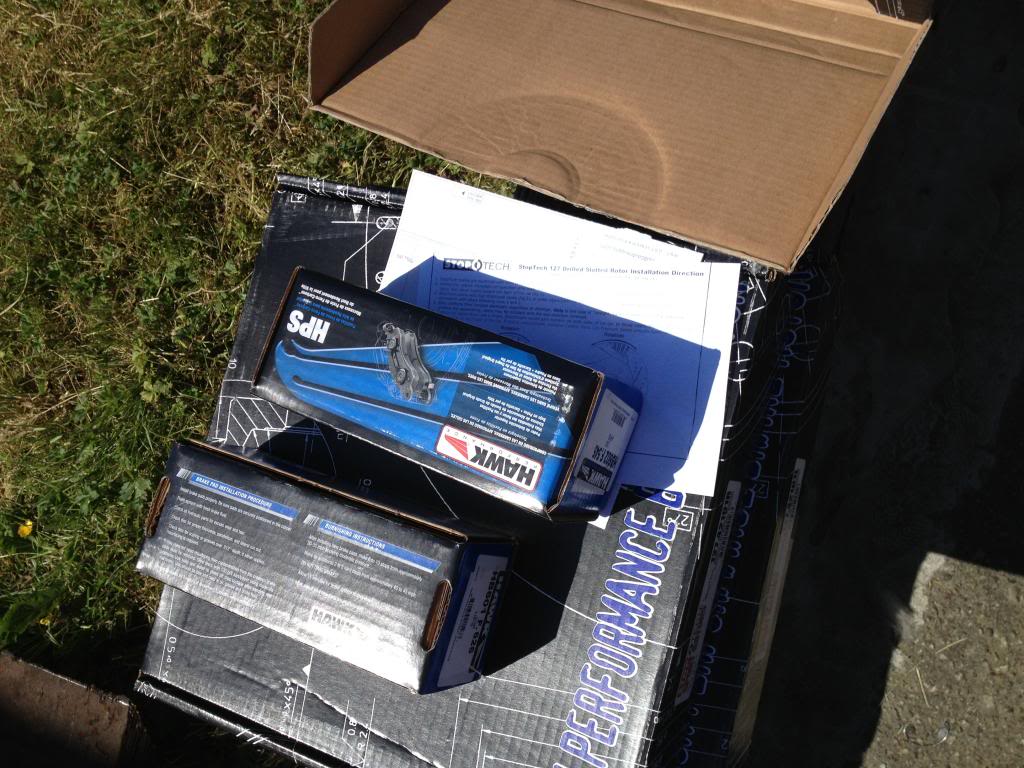
Better picture of the rotors from Stoptech
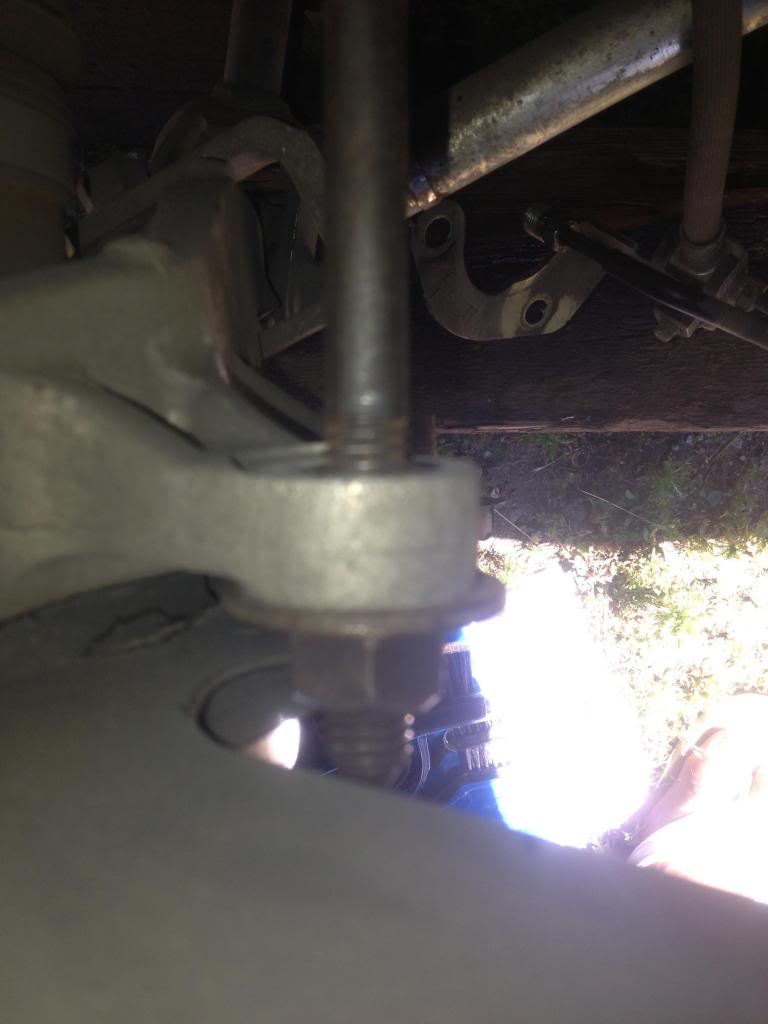
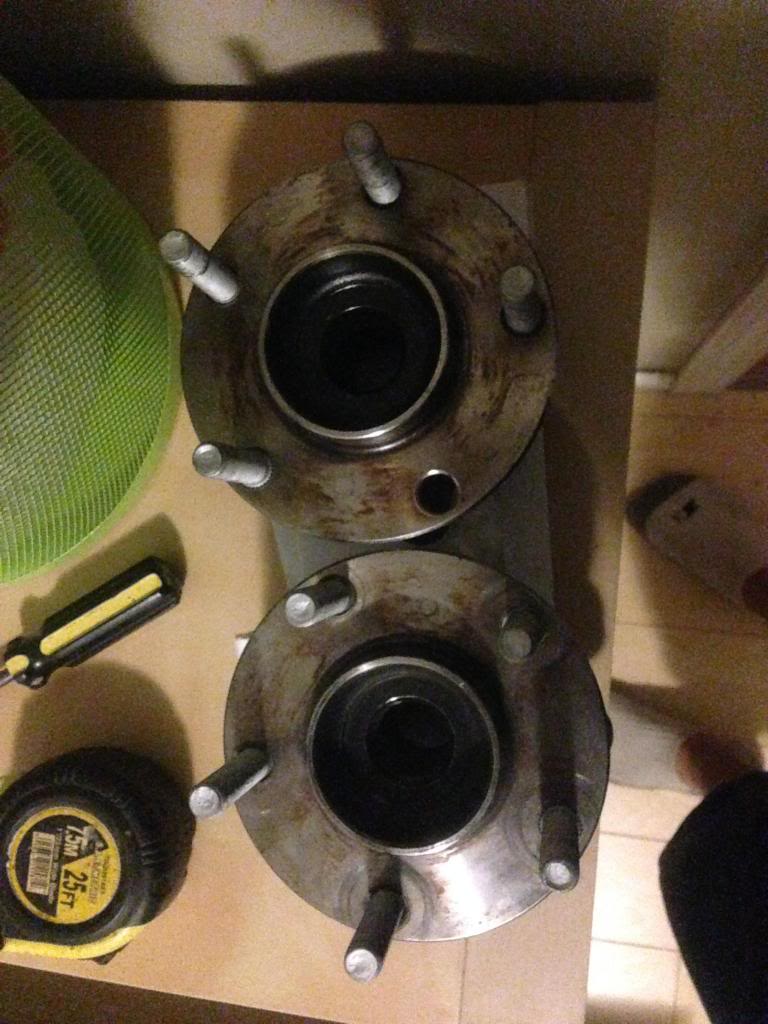
I'm not going to bother posting myself removing the wheels and caliper as I didn't take any pictures during the process and it was generally straight forward. Although I had an issue with was removing the rotors from the hub assembly. I had to use a bolt, nut, and flat washer and some wrenches to create enough tension between the rotor and caliper mounting location for it to pop off. Its hard to explain but I hope this picture gives you a better idea.
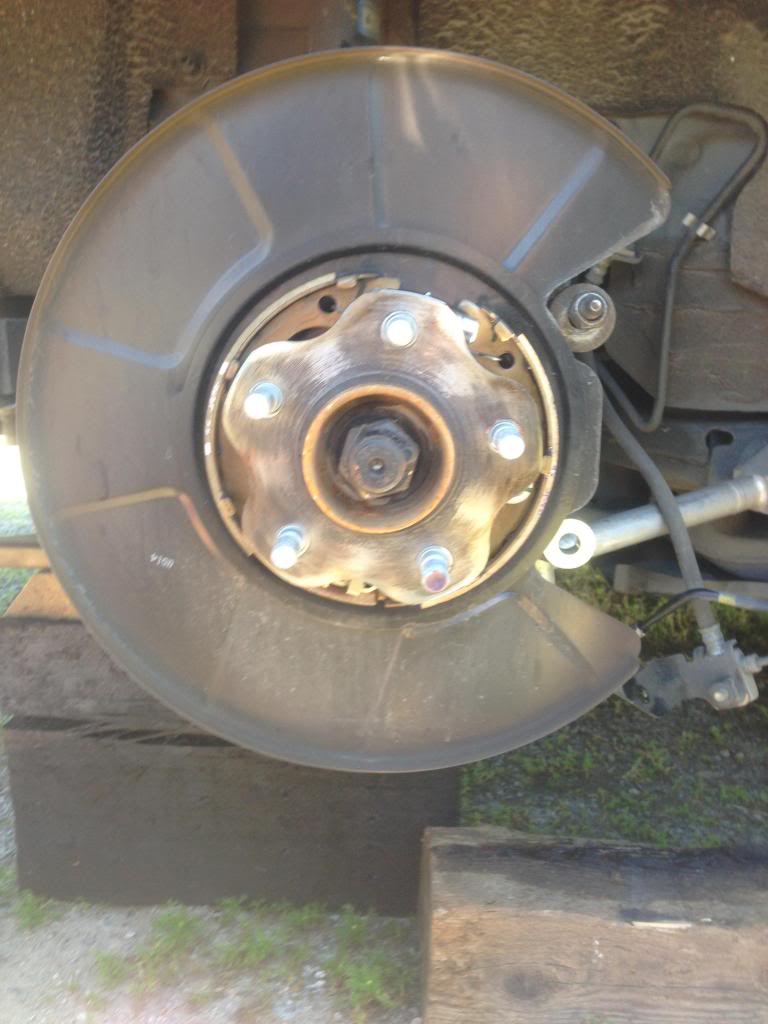
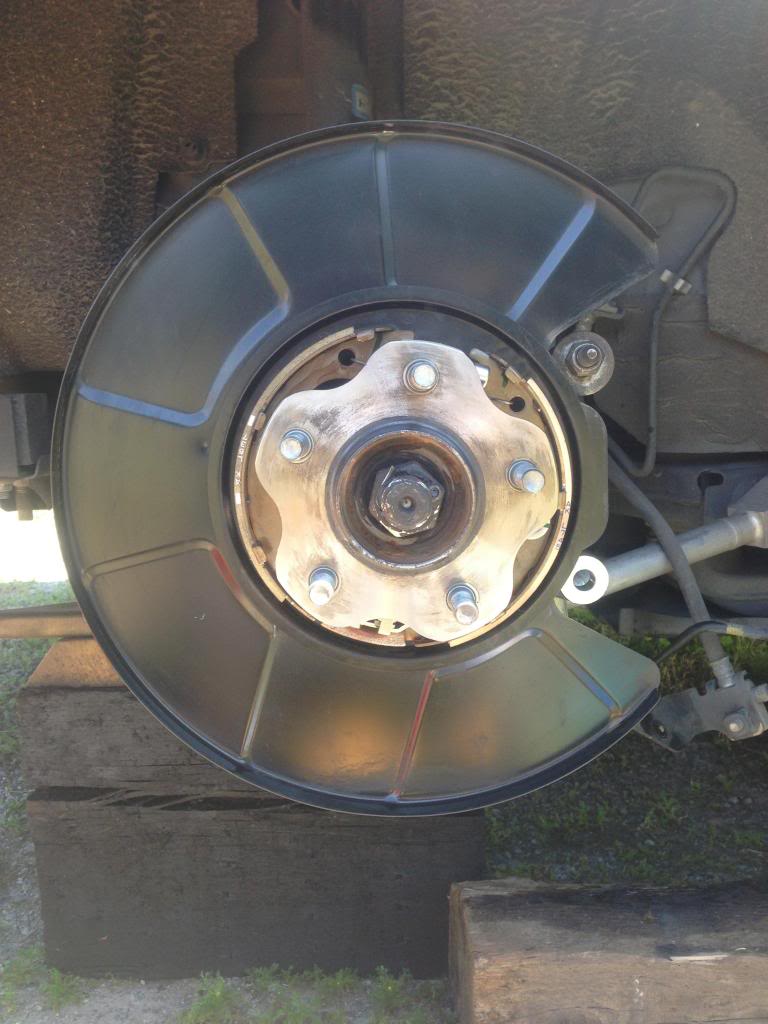
Once everything is off do some cleaning
Before
After some wire brushing
Throw your rotors on!
I had a special tool to check the radius of the rotors? Its been so long I actually forget what the piece of equipment was called but its to ensure there is no wobble on the rotor when turning. I'm sure someone can phrase that better but just thinking off the top of my head at the moment.
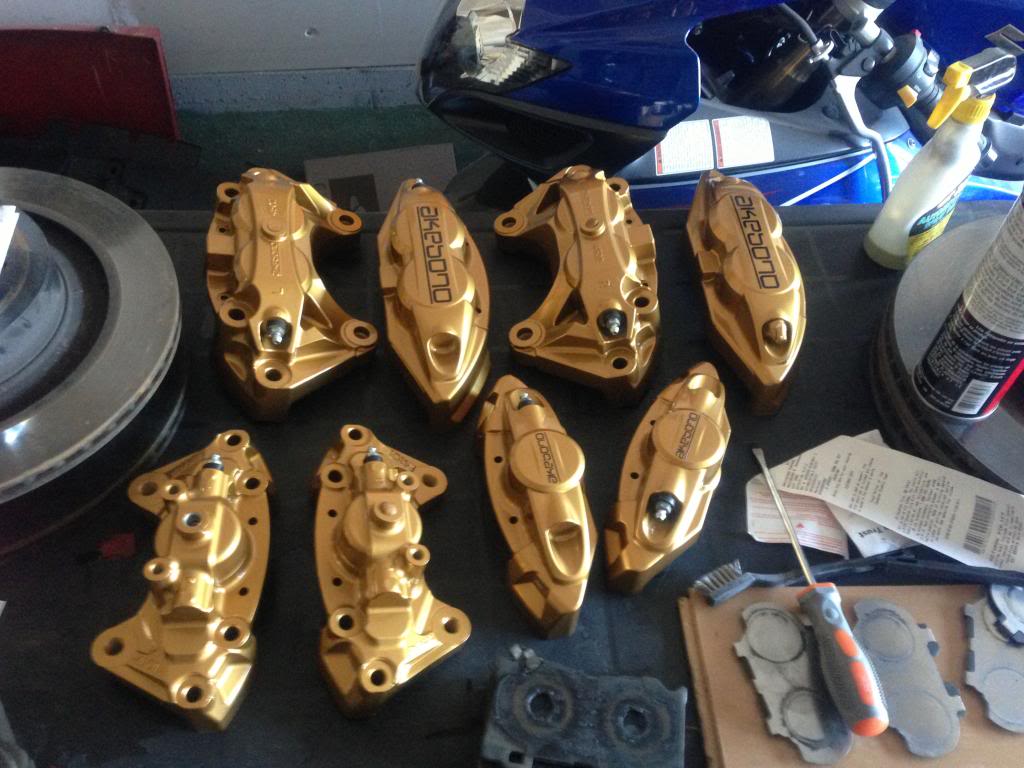
Onto the breaks; these things took forever to do because I lost my O ring for the calipers and it stopped me dead in my tracks for a month or so. Until a user helped me locate the niche ring I needed. Ill drop a link to that post:https://www.myg37.com/forums/g37-cou...er-o-ring.html .Anyways I painted the calipers and swapped the pads.
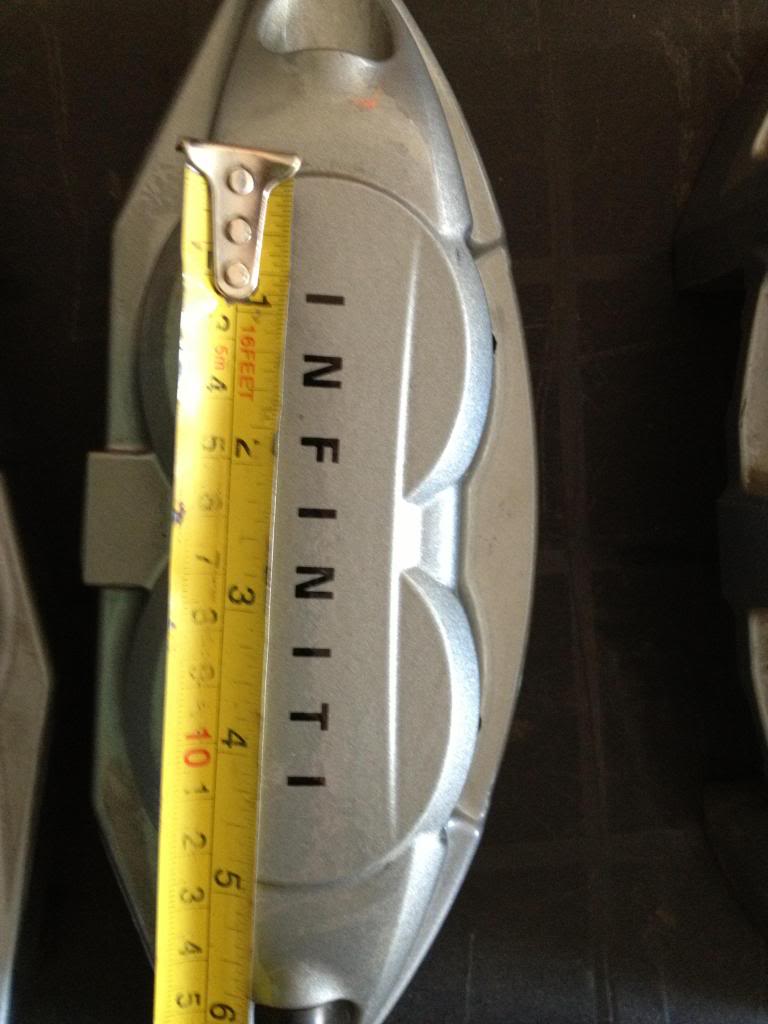
Old Calipers: platidip was starting to look stale
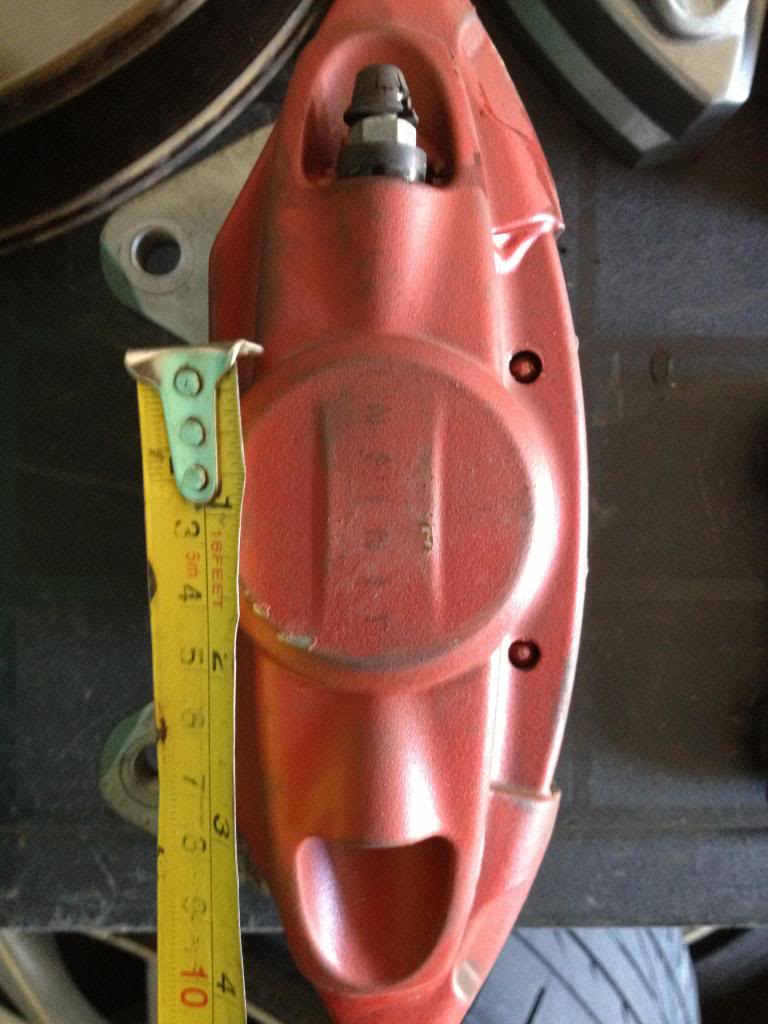
Back to OEM: was getting the measurements for some decals
Painted and ready to go:
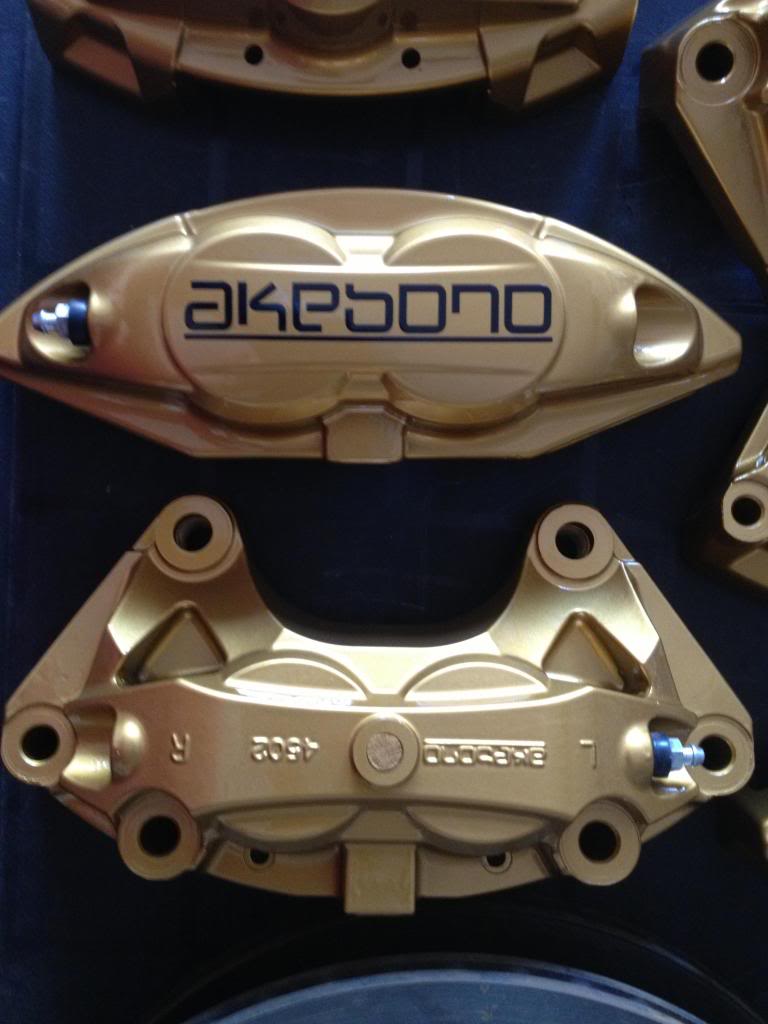
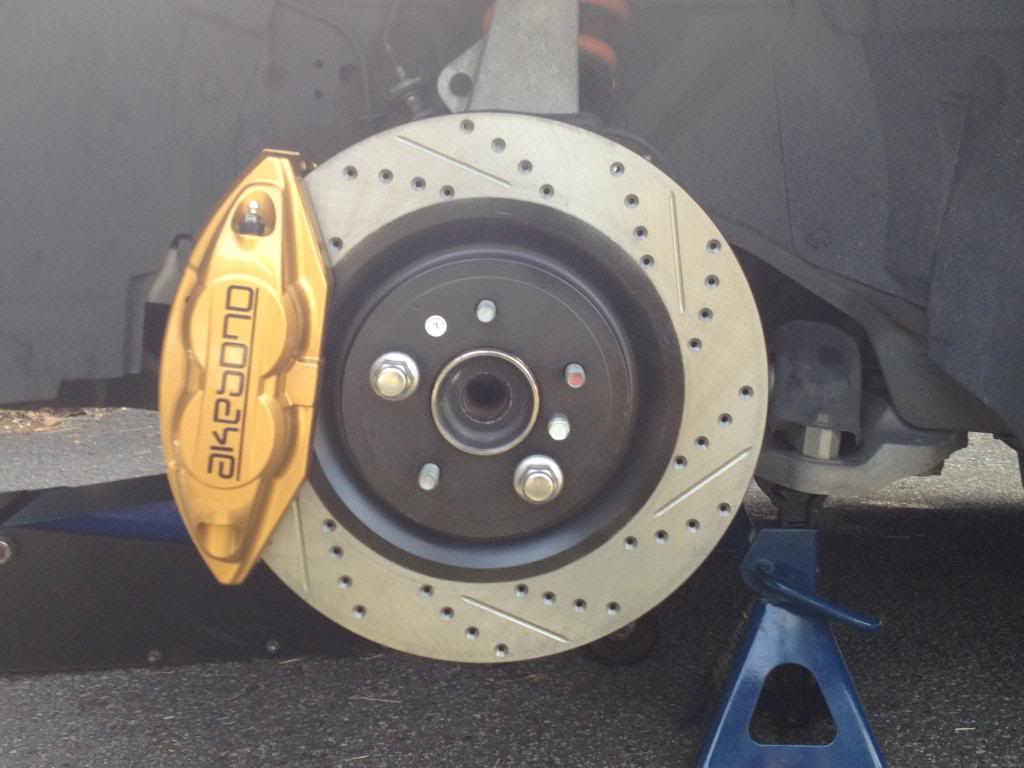
Hawk pads installed and on the car they go:
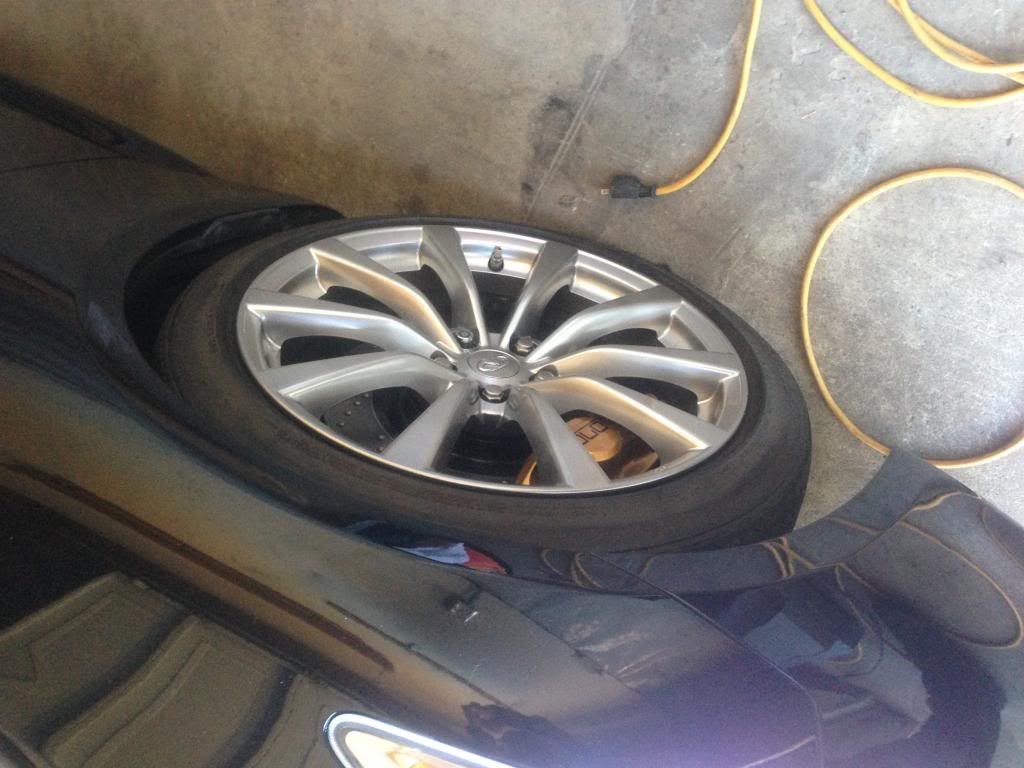
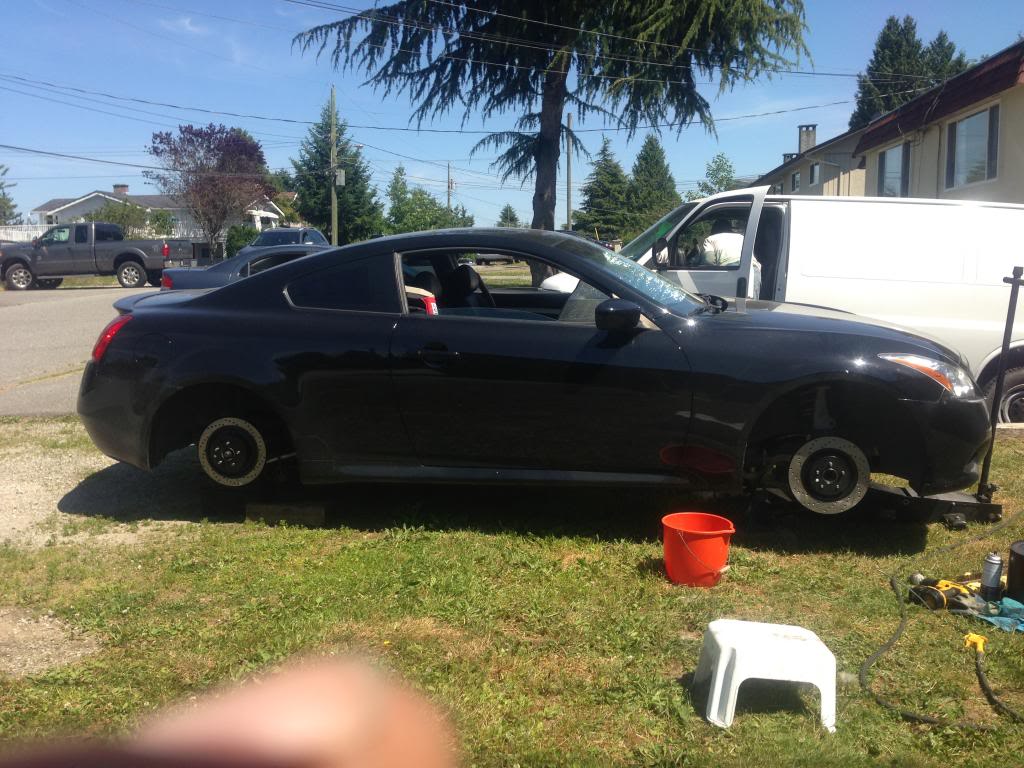
After that was all done I decided it was time to replace my wheels with something new.
Just a heads up however I picked up the wrong offset on my front wheels so I had to get spacers to clear the Akebono brakes. I believe +40mm would have been just right but I have mine set to 45mm currently.
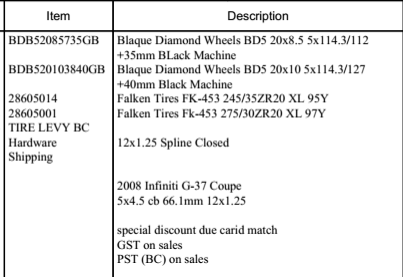
New wheels arrive!
Opted to get slighting longer studs for wheel assembly and a spacer over the alternative option.
Back set on:
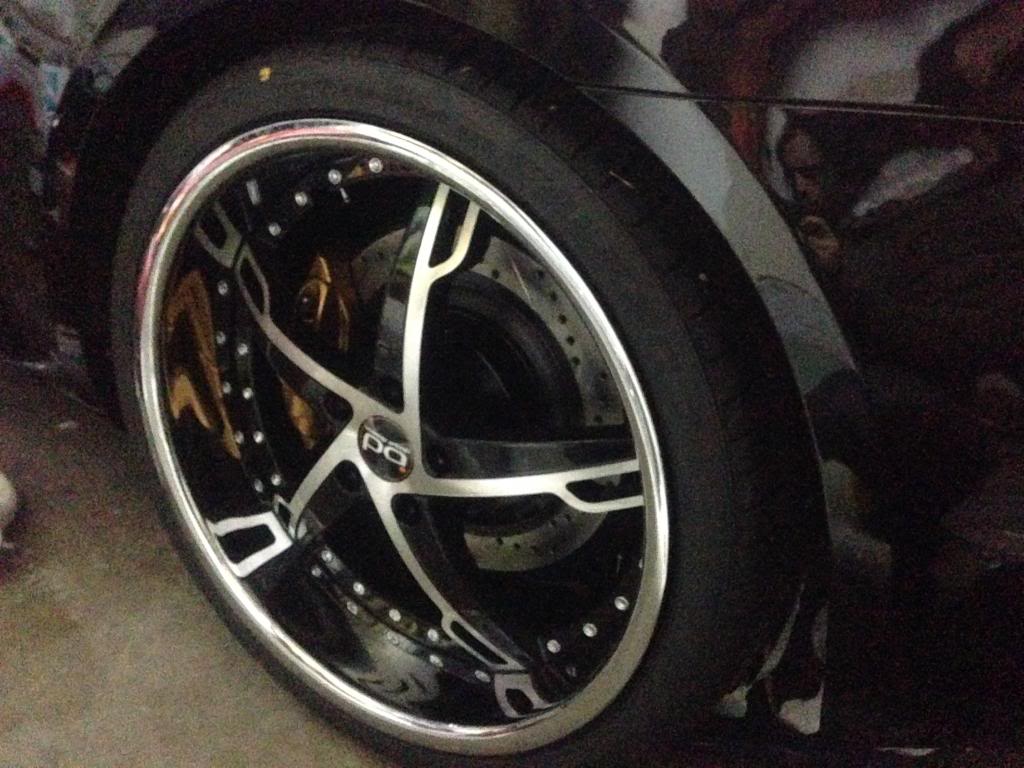
Everything put back together:

Just dropped it off at mechanics shop to make sure everything was sound and got the alignment done.
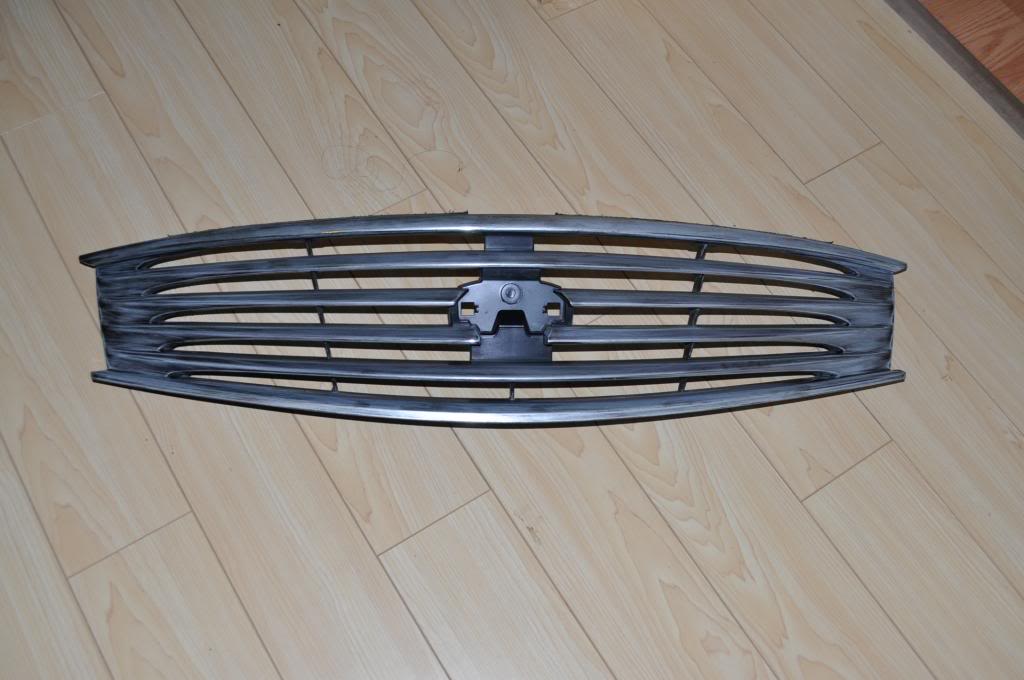
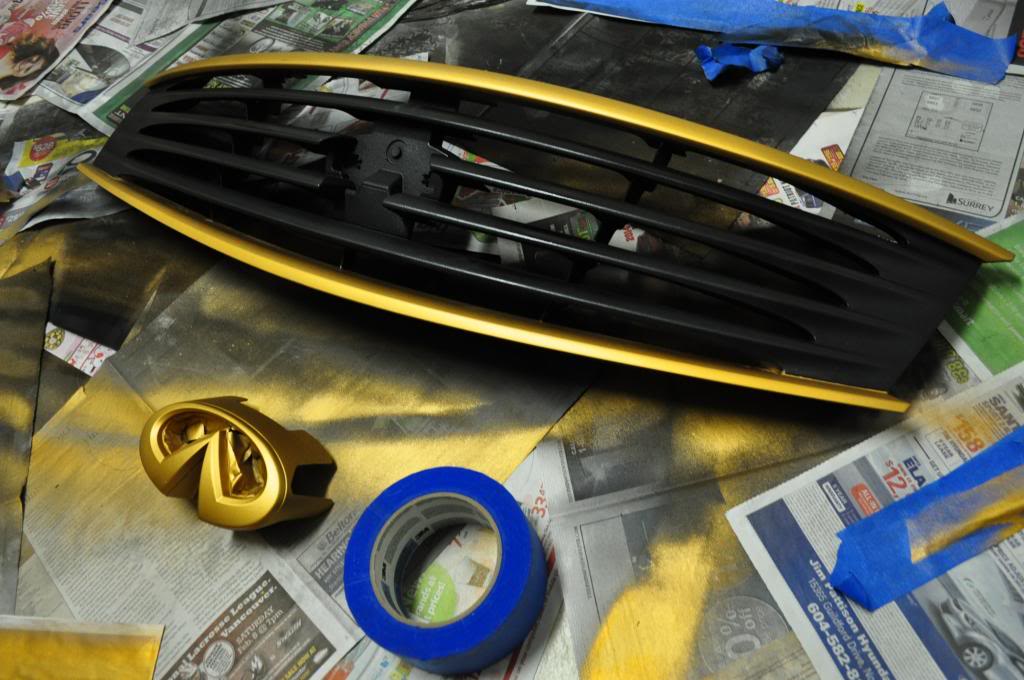
Then I decided to paint my own grill after looking and some awesome DIY's and here's the process!
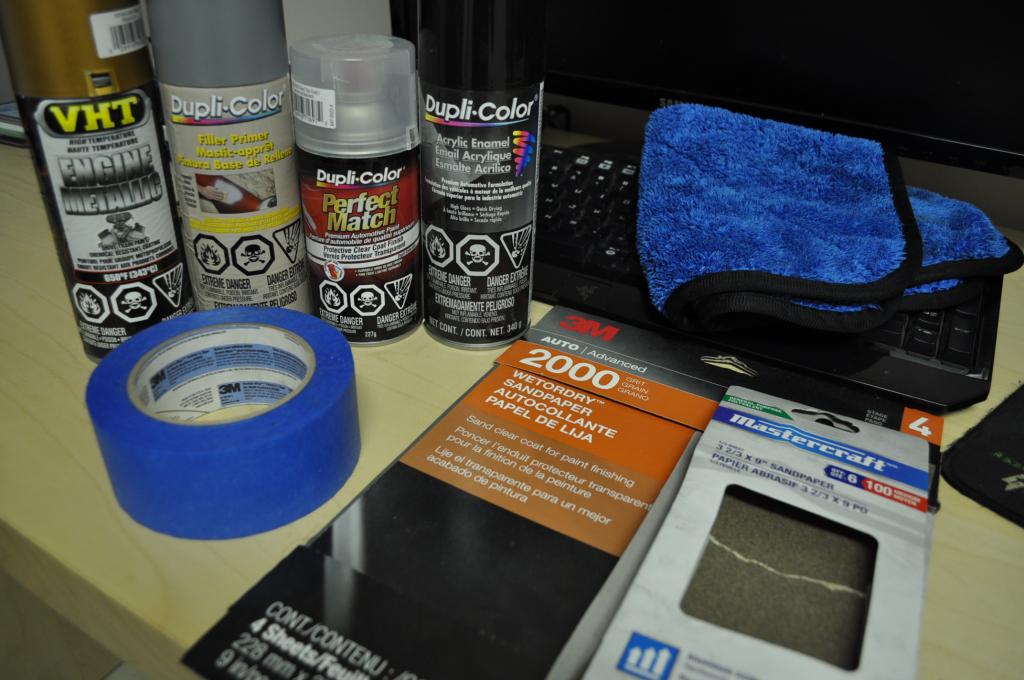
Everything I used:
Sanded it down:
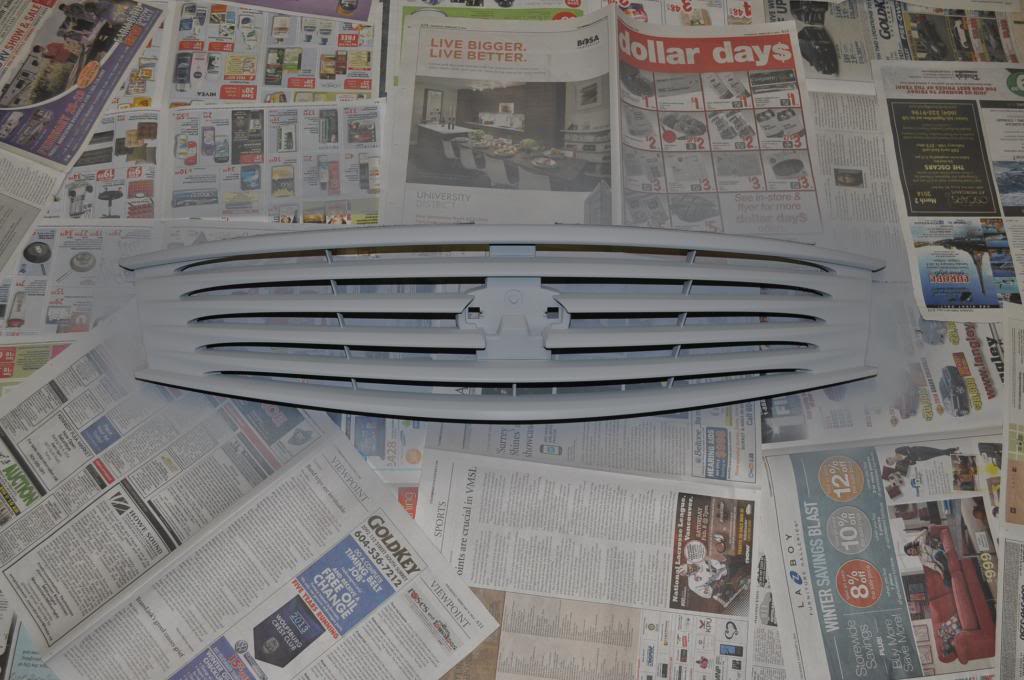
Primed:
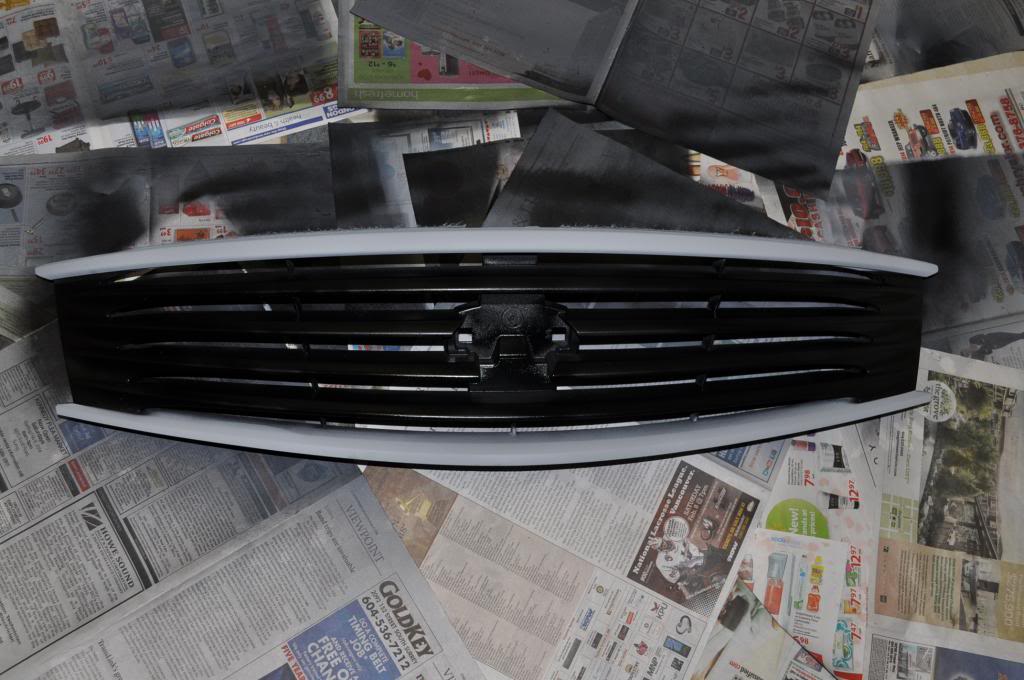
here it is all painted. I did a couple coats on both colours:

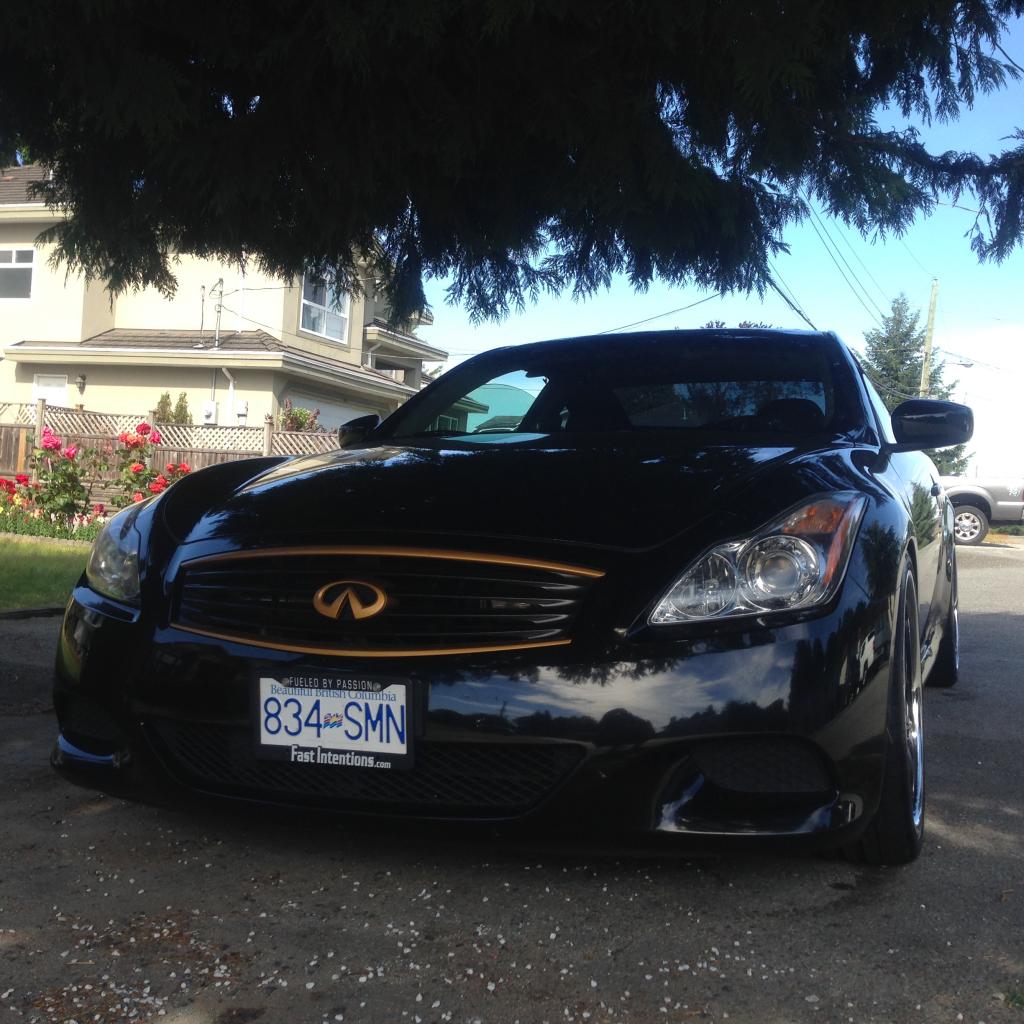
And back on the car after some clear coats and light sanding
Running late for work posting this but I hope I added everything, if ya have any questions feel free to message me!
My rotors and brake pads I picked up from Napco*

Better picture of the rotors from Stoptech

I'm not going to bother posting myself removing the wheels and caliper as I didn't take any pictures during the process and it was generally straight forward. Although I had an issue with was removing the rotors from the hub assembly. I had to use a bolt, nut, and flat washer and some wrenches to create enough tension between the rotor and caliper mounting location for it to pop off. Its hard to explain but I hope this picture gives you a better idea.

Once everything is off do some cleaning
Before

After some wire brushing

Throw your rotors on!

I had a special tool to check the radius of the rotors? Its been so long I actually forget what the piece of equipment was called but its to ensure there is no wobble on the rotor when turning. I'm sure someone can phrase that better but just thinking off the top of my head at the moment.
Onto the breaks; these things took forever to do because I lost my O ring for the calipers and it stopped me dead in my tracks for a month or so. Until a user helped me locate the niche ring I needed. Ill drop a link to that post:https://www.myg37.com/forums/g37-cou...er-o-ring.html .Anyways I painted the calipers and swapped the pads.
Old Calipers: platidip was starting to look stale

Back to OEM: was getting the measurements for some decals

Painted and ready to go:


Hawk pads installed and on the car they go:


After that was all done I decided it was time to replace my wheels with something new.
Just a heads up however I picked up the wrong offset on my front wheels so I had to get spacers to clear the Akebono brakes. I believe +40mm would have been just right but I have mine set to 45mm currently.

New wheels arrive!

Opted to get slighting longer studs for wheel assembly and a spacer over the alternative option.

Back set on:

Everything put back together:

Just dropped it off at mechanics shop to make sure everything was sound and got the alignment done.
Then I decided to paint my own grill after looking and some awesome DIY's and here's the process!
Everything I used:

Sanded it down:

Primed:

here it is all painted. I did a couple coats on both colours:


And back on the car after some clear coats and light sanding

Running late for work posting this but I hope I added everything, if ya have any questions feel free to message me!


Banned
Joined: Jul 2015
Posts: 30
Likes: 3
From: https://t.me/pump_upp
Rim's are sorta personal and as long the OP likes them they are great.
Man can you see the breaks through those rims to, and they look just awesome behind them. +1
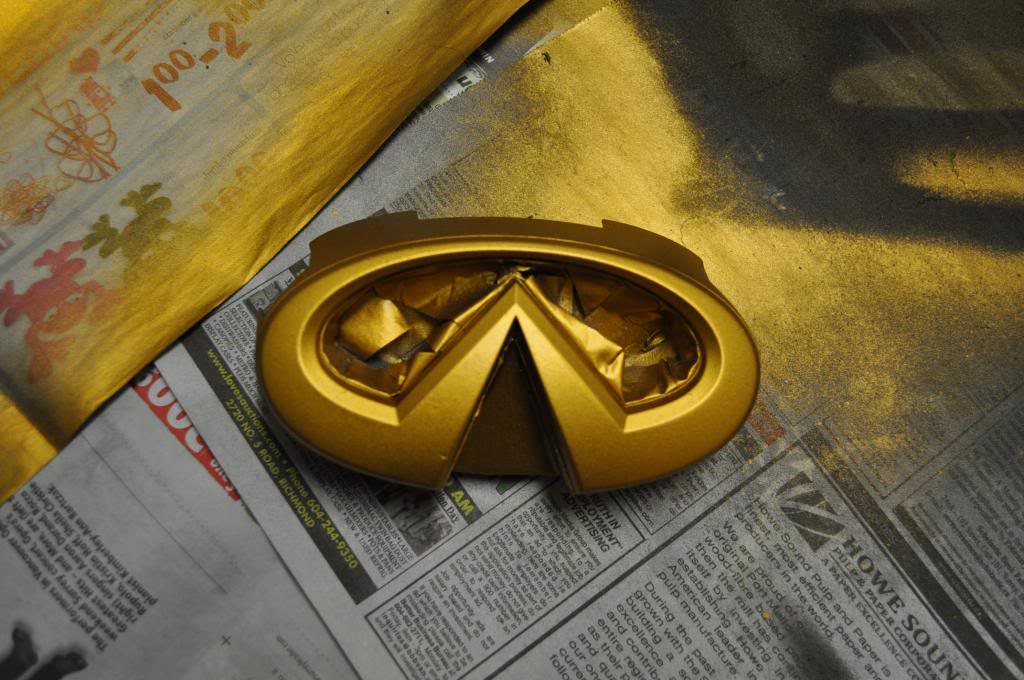
I was scrolling though you the pics and saw the gold on the grill and wasn't sure about it, but the finished product looks sweet on the car. I was thinking about may doing this with mine, just living the outers chrome and blacking out the inner grill. haven't decided between that and after market one yet.
Thanks for all the excellent write ups I'll probably be referring to them all in the next year or so.
Man can you see the breaks through those rims to, and they look just awesome behind them. +1
I was scrolling though you the pics and saw the gold on the grill and wasn't sure about it, but the finished product looks sweet on the car. I was thinking about may doing this with mine, just living the outers chrome and blacking out the inner grill. haven't decided between that and after market one yet.
Thanks for all the excellent write ups I'll probably be referring to them all in the next year or so.


Thread
Thread Starter
Forum
Replies
Last Post