
DIY: StillGen3 Intake/Plasti Dip Rims Grill Calipers


Thread Starter
Registered Member
iTrader: (1)
Joined: Mar 2012
Posts: 12
Likes: 3
From: Vancouver BC
StillGen3 Intake/Plasti Dip Rims Grill Calipers/Lowering Springs
Hey everyone, long time lurker & first time poster. 
I've had my car for a while, never really knew what mods I wanted to do, let alone where to start on top of being afraid to void my warranty.
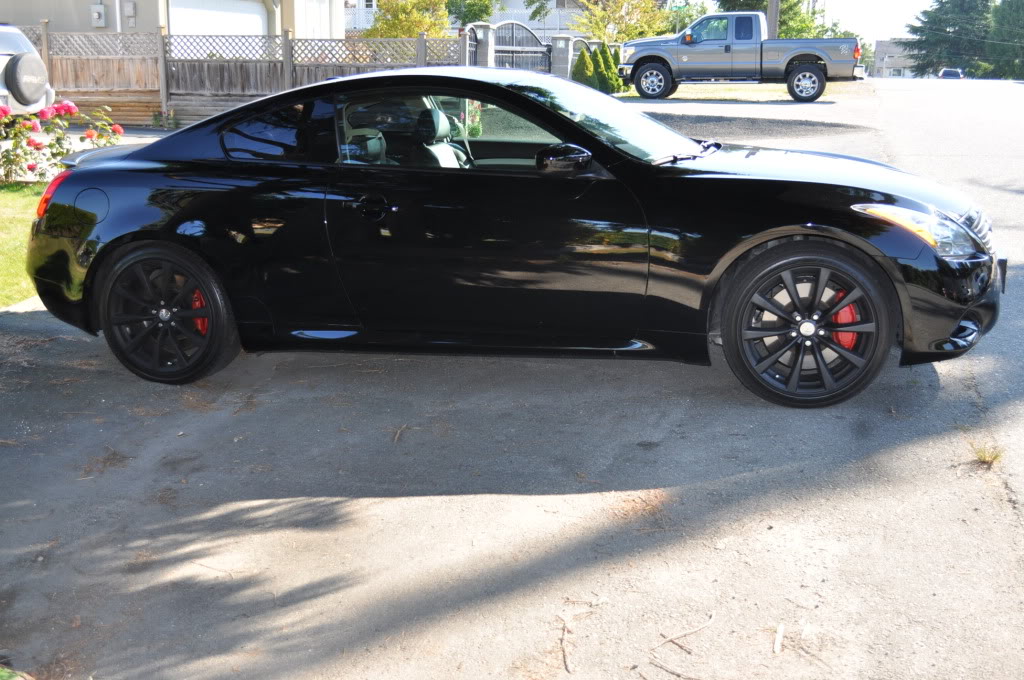
But, I started small with the little things! I decided to do some plastic dip on the rims, brake calipers, & grill. I also took off the infiniti writing off back ( still can't get that glue off, have tried everything in the book, aside from a professional.)
I'll split this post into 2 sections. Plasti Dip & Intake DIY.
What you'll need:
Car jack ( something to lift the car up with )
Desired Plasti dip colours (This is how we spell color in Canada)
Blocks
Tire Iron
Newspaper
Paint tape
Cards (any type)
Utility knife
10mm socket
Flat head screwdriver
Ratchet
Plasti Dip is pretty simple to use & cheaper then new rims! cost me about 100$ for 4 black cans & 2 reds. Depending on where you buy it. It will probably take about 1 day since you have to wait for the coat to dry, and will take multiple applications for a nice finish.
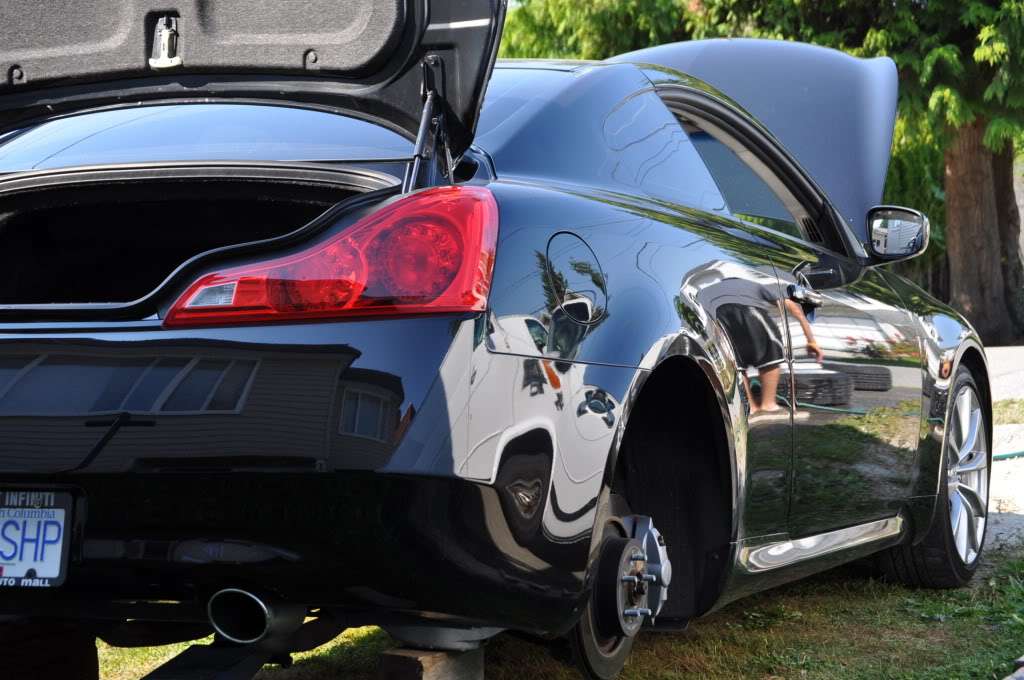
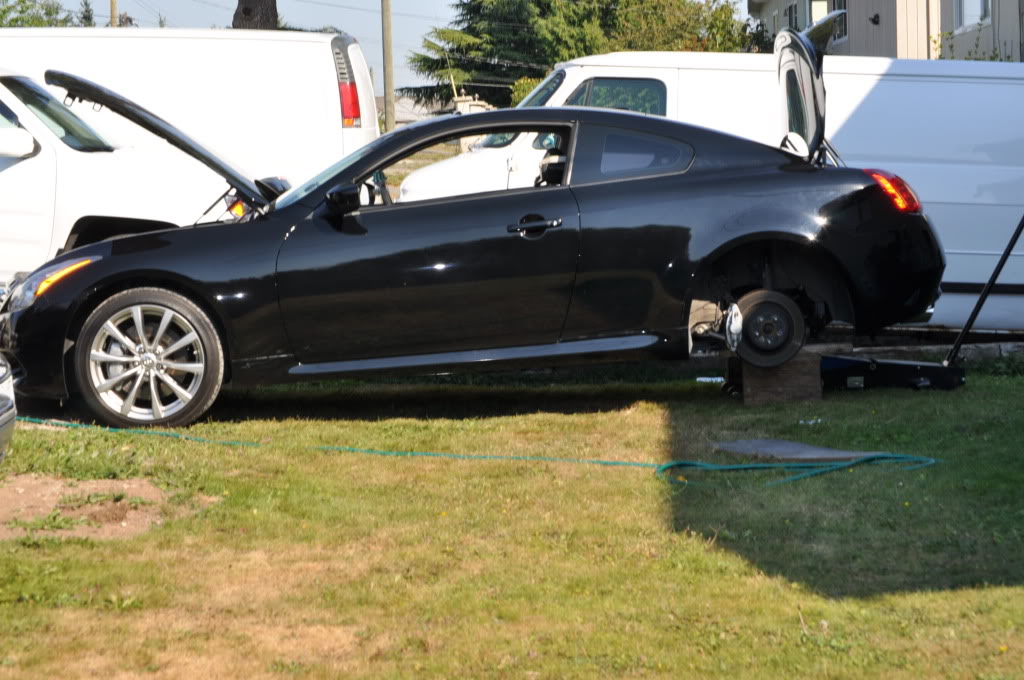
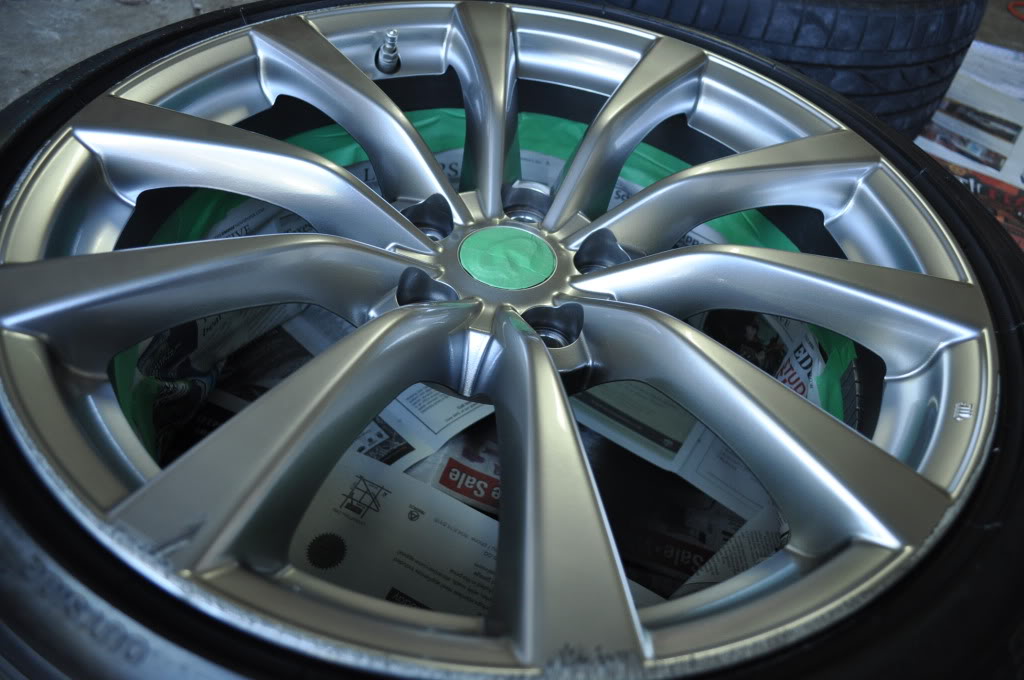
First thing you should do is jack up the car, and remove tires. Once off just give them a nice clean.
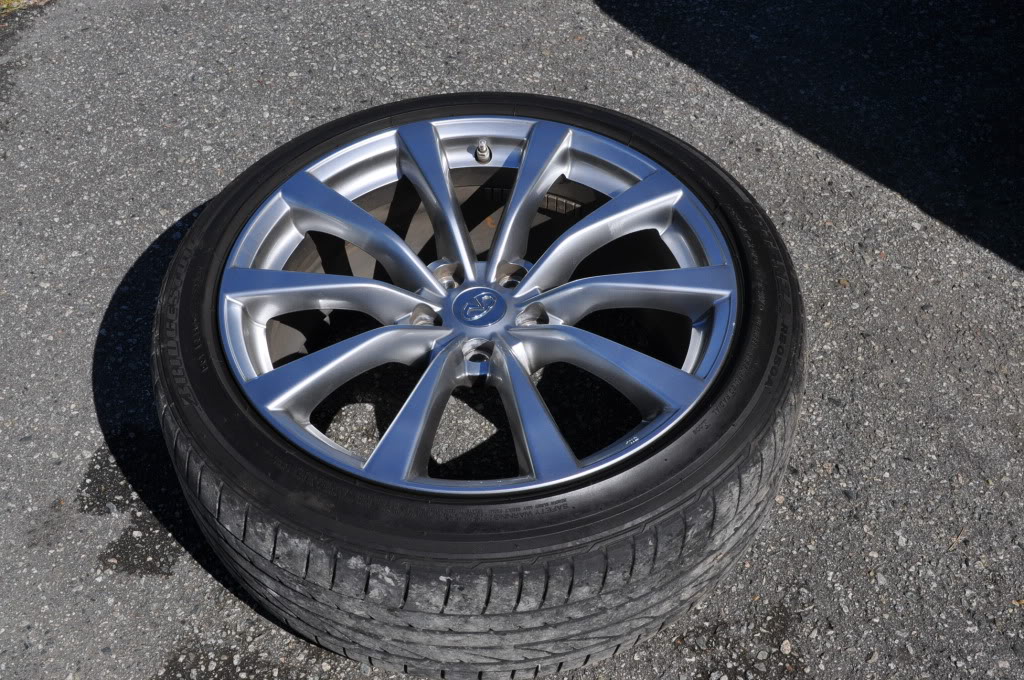
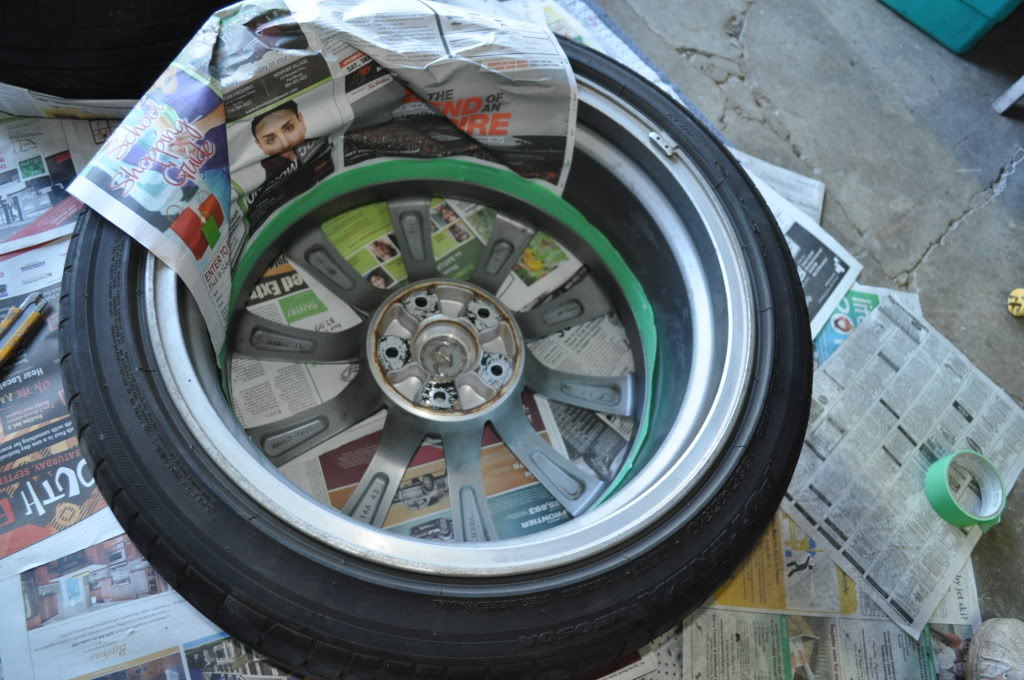
Once you've cleaned it and dried it off, go ahead and start taping/covering any area you don't want to get spray on.
PS don't let your mothers drive you car. Or it'll definitely get rimmed.

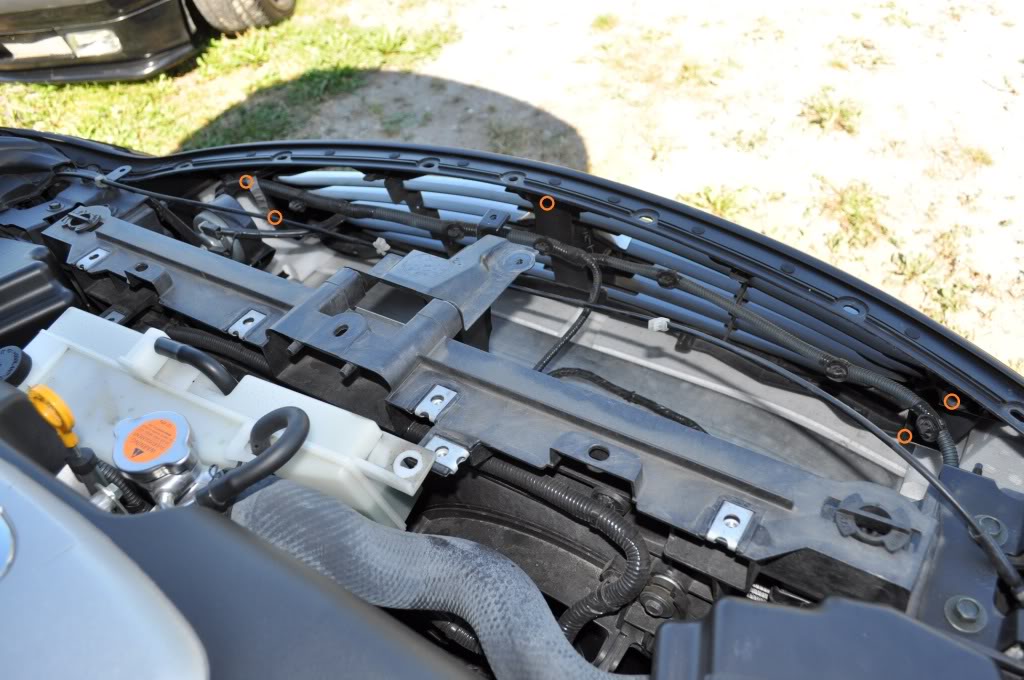
You'll also want to remove the grill if you to paint that as well. The top is easy to get off, you'll need to take of several clips, and a few bolts. I recommend taking off the coolant to make it easier to pull the top cover off the 2 "hooks"


After you take off the 5 bolts, there will be a few clips holding the grill on, just push them down and pull off. Once they're off you can go ahead and tape up your emblem or take it off by squeezing the clips on the back.
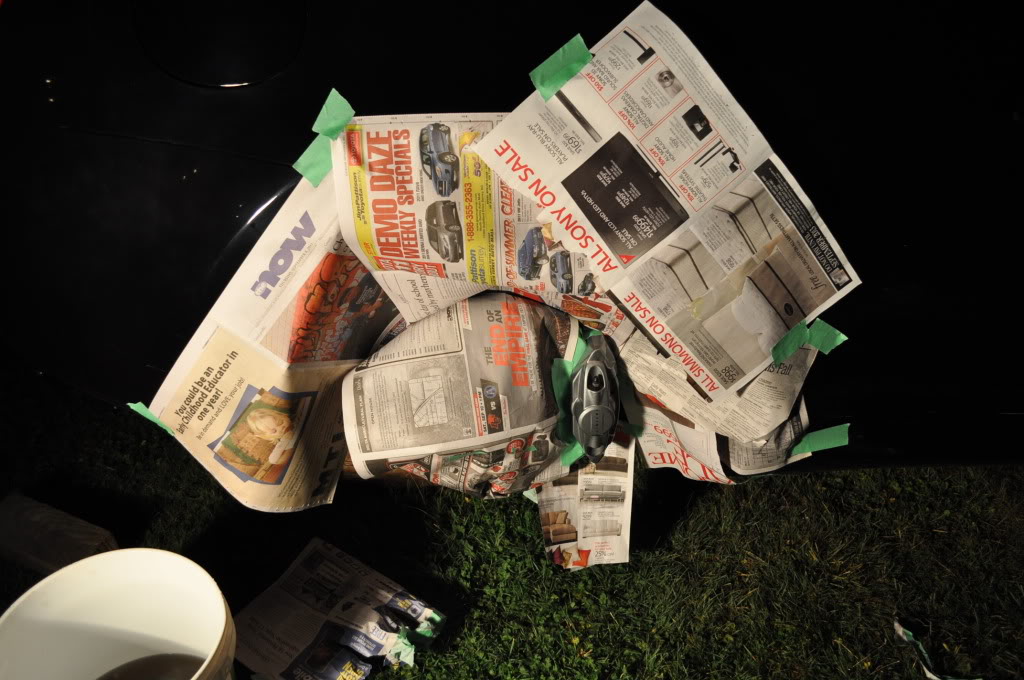
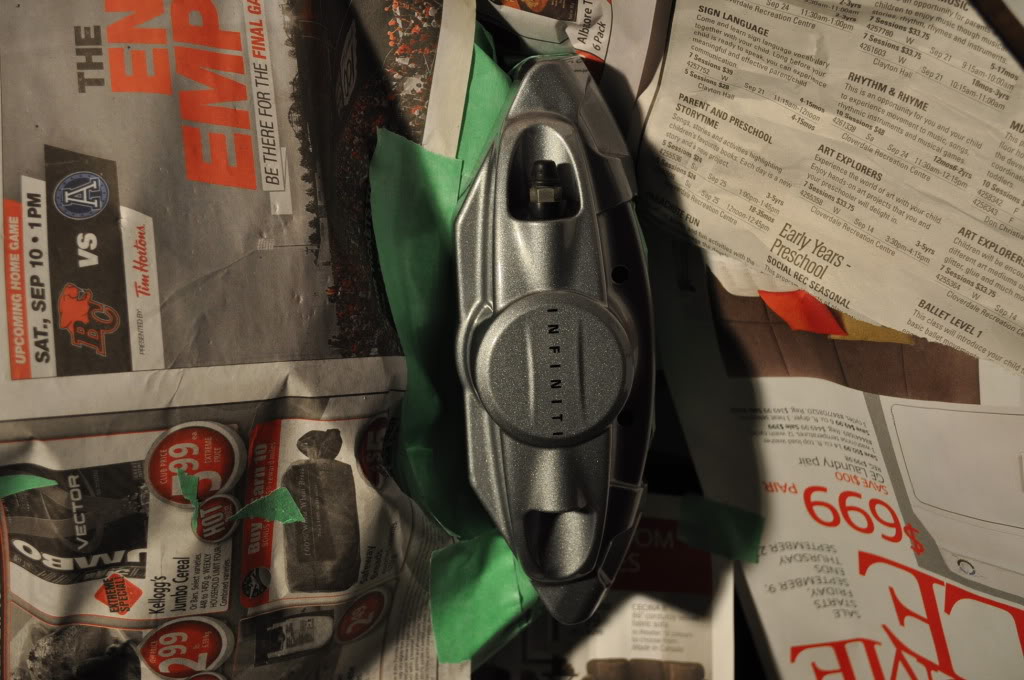
Then... if you also want to paint your brake calipers just tape around it and use newspaper to cover the tire well. You could take off the Calipers, but it isn't necessary. Don't forget to tape the black bolt sticking up at the top there. ^_^ Forgot to take a pic.
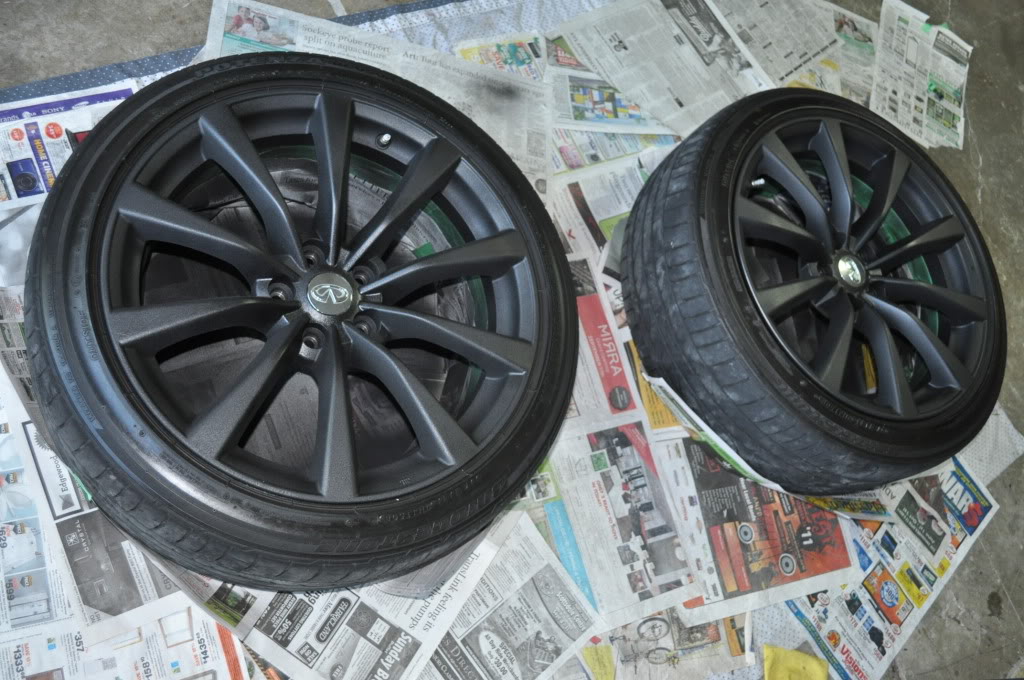
Now that you're ready for painting, you can do as many coats you feel necessary to achieve the look you are going for. I personally went with 3~4 coats. Just remember when spraying to apply evenly and don't concentrate on one area, as well as spray from a distance to get a nice even layer.
- Rims
- Grill

- Brake Calipers
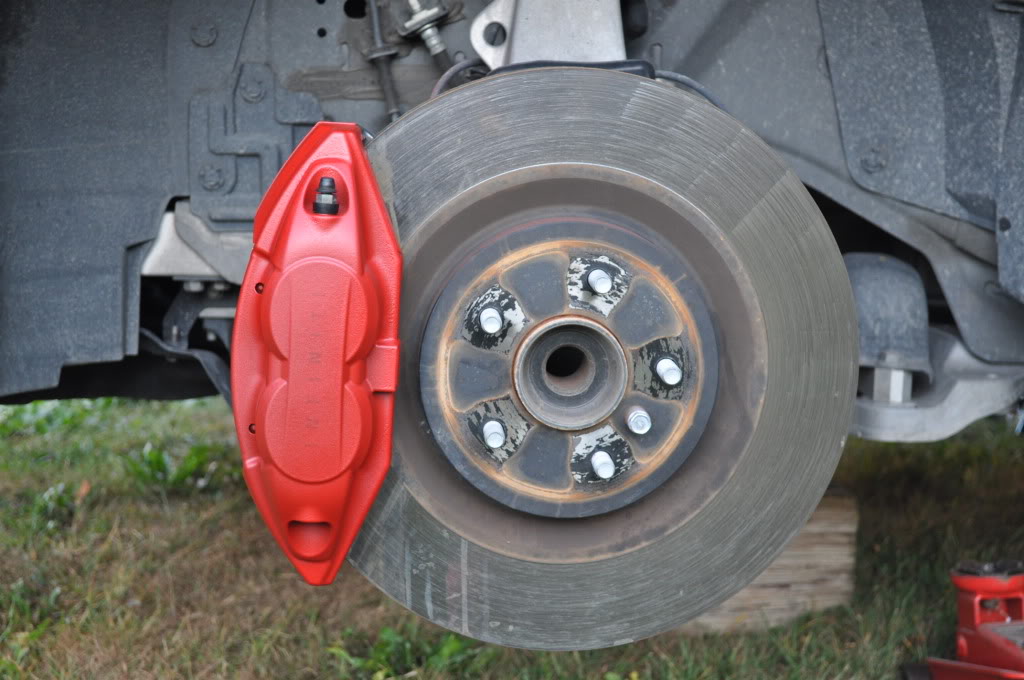
Final step after the paint has dried, just put it back together, be careful when removing the newspaper and tape, you may need to use your knife to keep the paint from peeling off with the tape.
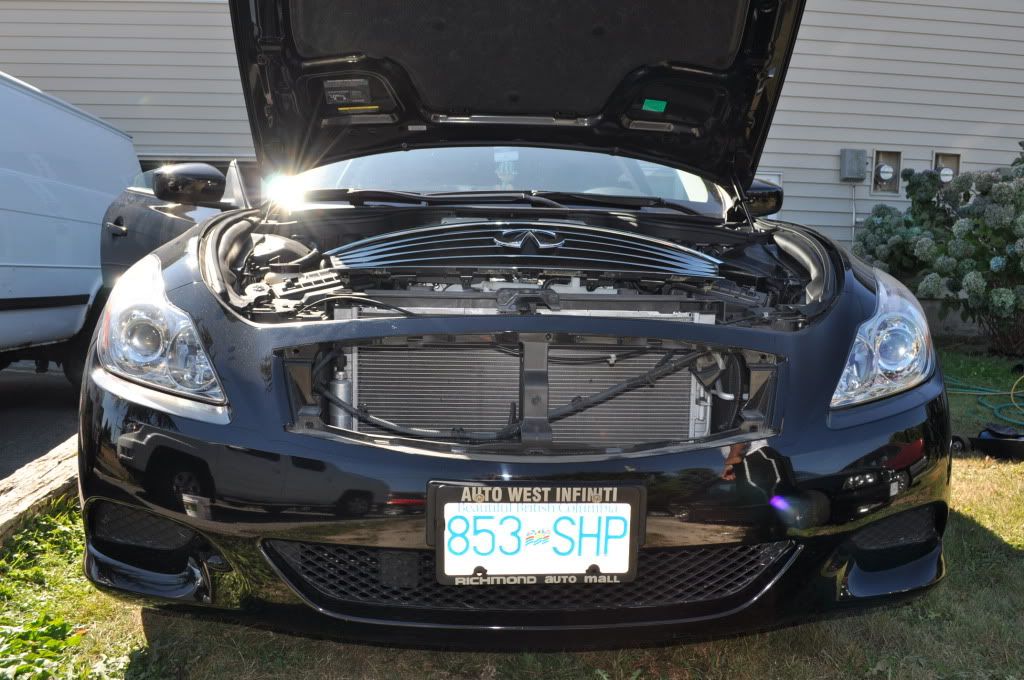
This is what you'll end up with!
BEFORE


AFTER


I've had my car for a while, never really knew what mods I wanted to do, let alone where to start on top of being afraid to void my warranty.
But, I started small with the little things! I decided to do some plastic dip on the rims, brake calipers, & grill. I also took off the infiniti writing off back ( still can't get that glue off, have tried everything in the book, aside from a professional.)
I'll split this post into 2 sections. Plasti Dip & Intake DIY.
What you'll need:
Car jack ( something to lift the car up with )
Desired Plasti dip colours (This is how we spell color in Canada)
Blocks
Tire Iron
Newspaper
Paint tape
Cards (any type)
Utility knife
10mm socket
Flat head screwdriver
Ratchet
Plasti Dip is pretty simple to use & cheaper then new rims! cost me about 100$ for 4 black cans & 2 reds. Depending on where you buy it. It will probably take about 1 day since you have to wait for the coat to dry, and will take multiple applications for a nice finish.
First thing you should do is jack up the car, and remove tires. Once off just give them a nice clean.
Once you've cleaned it and dried it off, go ahead and start taping/covering any area you don't want to get spray on.
PS don't let your mothers drive you car. Or it'll definitely get rimmed.
You'll also want to remove the grill if you to paint that as well. The top is easy to get off, you'll need to take of several clips, and a few bolts. I recommend taking off the coolant to make it easier to pull the top cover off the 2 "hooks"
After you take off the 5 bolts, there will be a few clips holding the grill on, just push them down and pull off. Once they're off you can go ahead and tape up your emblem or take it off by squeezing the clips on the back.
Then... if you also want to paint your brake calipers just tape around it and use newspaper to cover the tire well. You could take off the Calipers, but it isn't necessary. Don't forget to tape the black bolt sticking up at the top there. ^_^ Forgot to take a pic.
Now that you're ready for painting, you can do as many coats you feel necessary to achieve the look you are going for. I personally went with 3~4 coats. Just remember when spraying to apply evenly and don't concentrate on one area, as well as spray from a distance to get a nice even layer.
- Rims
- Grill
- Brake Calipers
Final step after the paint has dried, just put it back together, be careful when removing the newspaper and tape, you may need to use your knife to keep the paint from peeling off with the tape.
This is what you'll end up with!
BEFORE
AFTER
Last edited by Repsol13; Apr 14, 2012 at 04:47 AM. Reason: Change title
Thread Starter
Registered Member
iTrader: (1)
Joined: Mar 2012
Posts: 12
Likes: 3
From: Vancouver BC
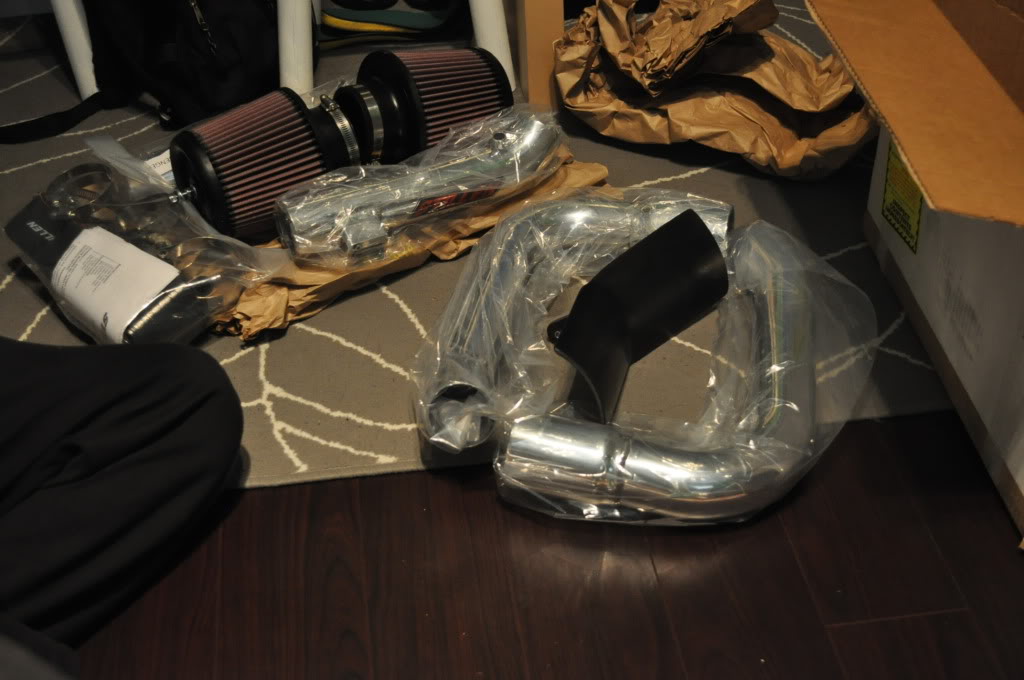
Stillen Gen 3 intake system
This will take a while depending on how much you know about your car, and if you want to take off the bumper. I definitely recommend you take it off. This was my first time, and it was frustrating at times, but it makes it 10x easier to work on the car, and you'll less likely scratch you pipes when sliding them in through grill. I suggest you do this with a friend, it'll be easier and you're going to need the help for taking off the bumper. The intake system comes with notes, you can reference those as well as some awesome guides on the forums for more details on getting the bumper off, or as the paper calls it the "Fascia"
I used this as a guide:
2008-2010 Infiniti G Coupe Front Bumper Removal Procedure | Infinitihelp.com
Here's what you'll need!
10mm & 11mm socket + wrenches & 14mm wrench I think
flat head screwdriver
pliers
patience
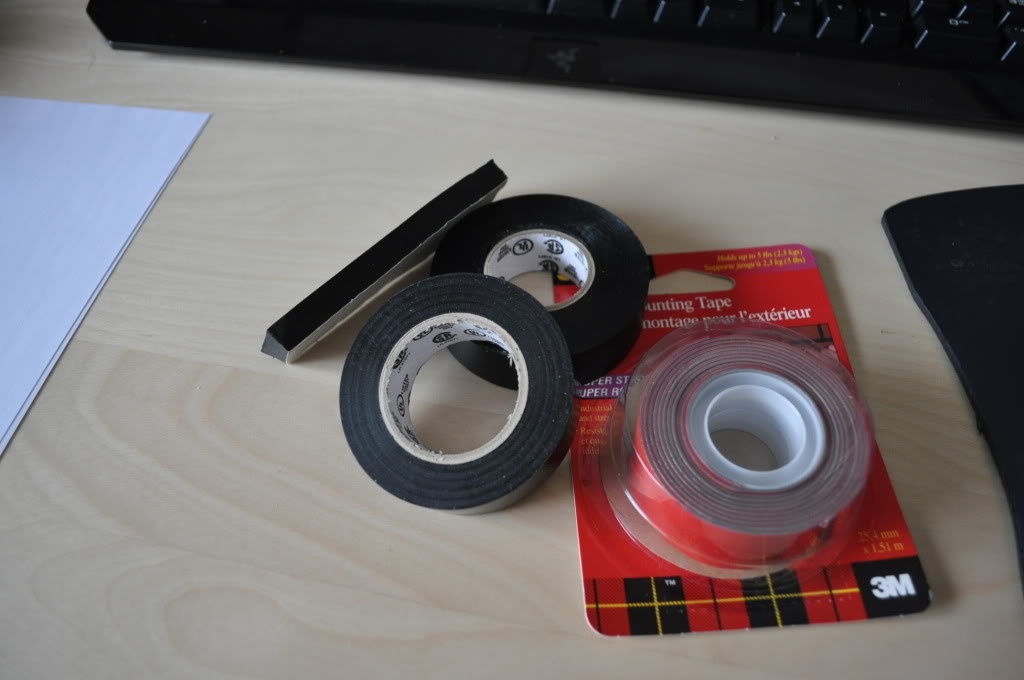
padding ( I used 1 sided tape that came with foam on other side, found at work) That plumbing padding works too.
Optional: mounting tape, electrical tape, and vinyl tape
rotary saw
sandpaper
ability to roll under the front like a boss
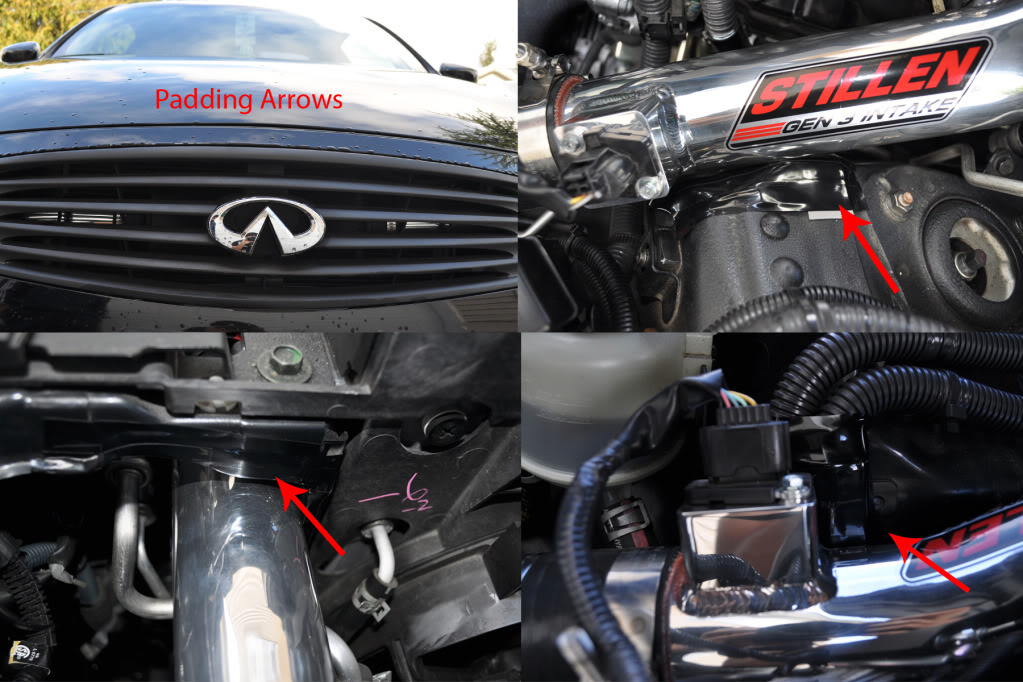
What I used for padding.
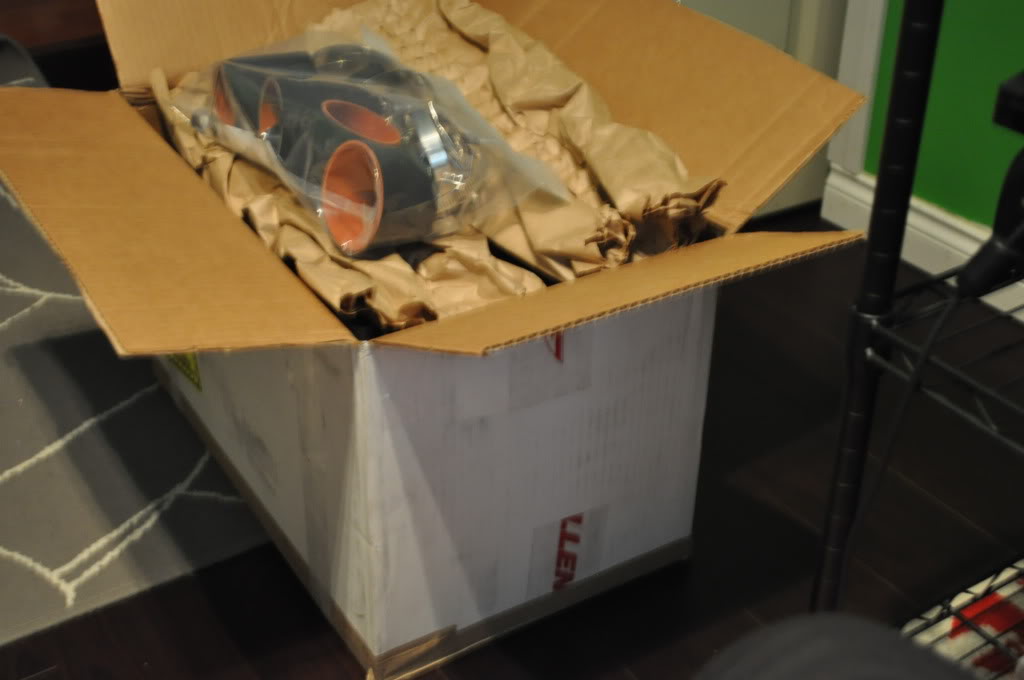
First thing you'll want to do is open the box, make sure you got everything, smile and get some coffee(I prefer cappuccino and play roll up the rim and cross fingers you win a Toyota to sell, so you can buy more parts for G37DOMO)

Now then, you'll want to start you car and turn your tires to one side so you can access the clips inside the tire wells. Afterwards turn off you car and disconnect the negative on the battery.

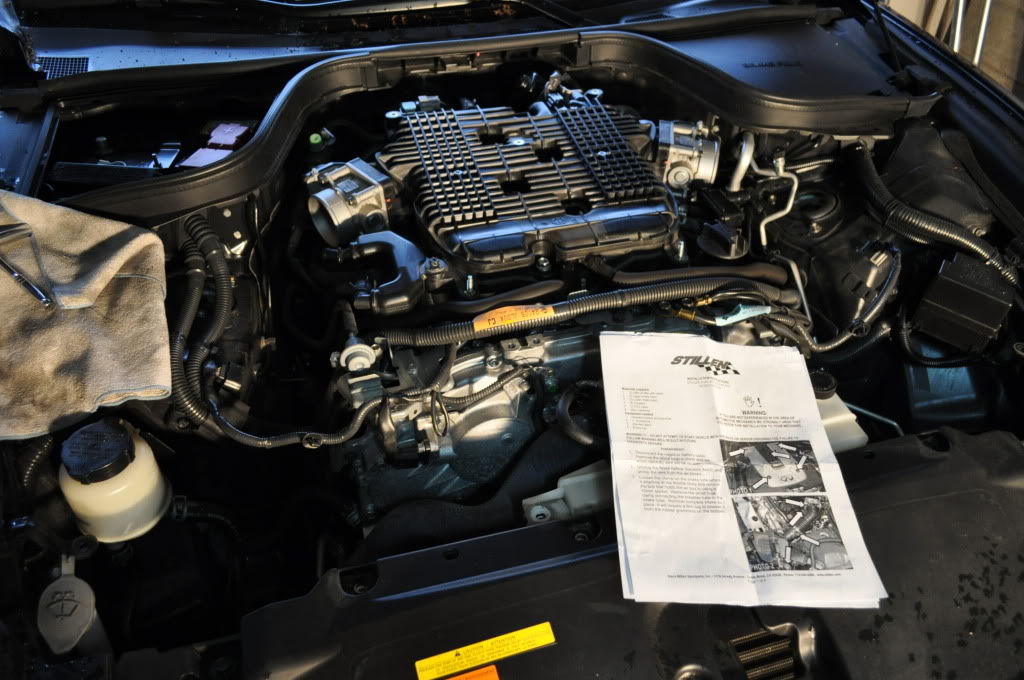
First thing you'll want to do is remove the engine cover, 5 bolts with the 10mm ratchet.
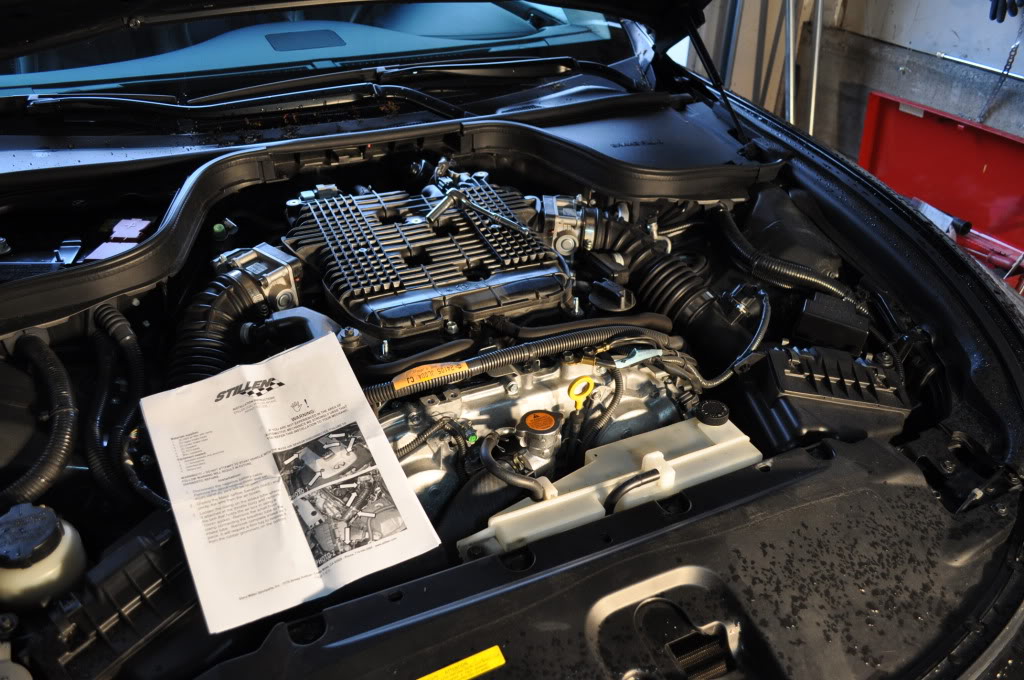
Then go ahead and unplug the intake sensors, take off the old intake; the bolts will come off really easy, you may to have use a little elbow grease for those darn hose clamps. Just be careful with the sensors inside the old intake, leave them in there until you've finished installing the new Stillen intake.
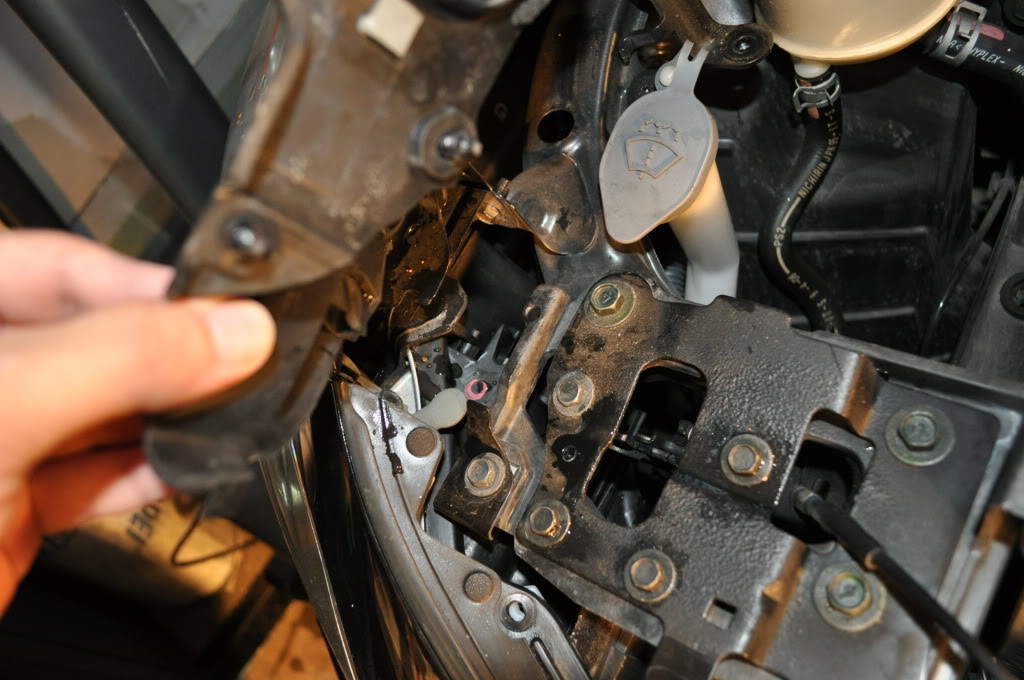
Afterwards you're going to need to take off the top cover. Be really careful here, you don't want to crack this, and it'll fight you to come off. just pop off clips, take out bolts. I recommend taking off the coolant bolts also so its easier to push it backwards and off. Once you have it off the hooks, disconnect the cables clipped on.
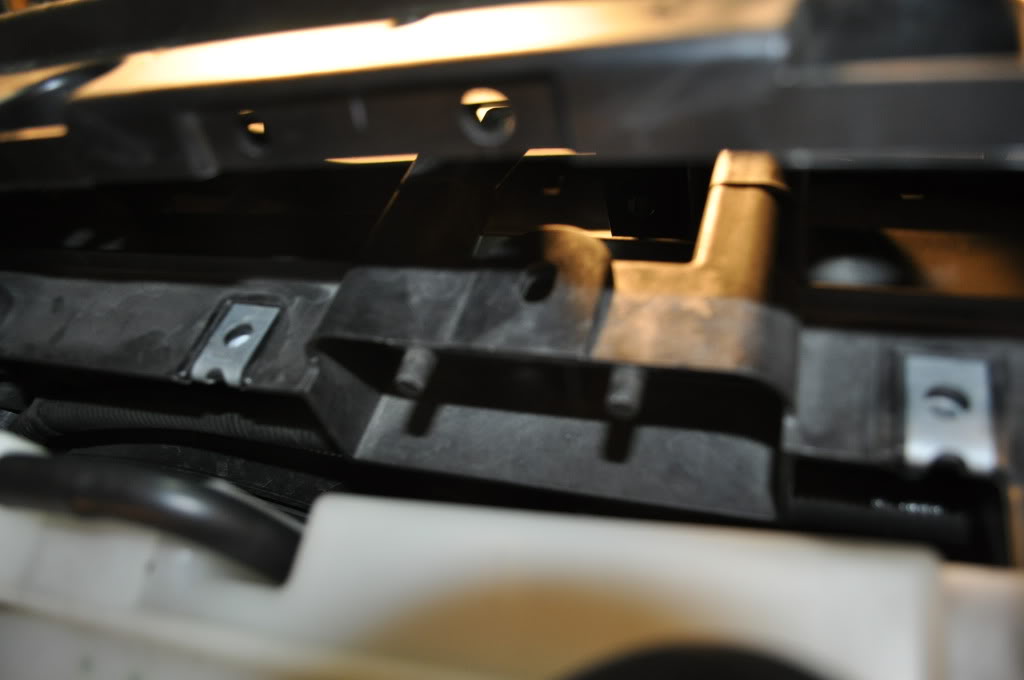
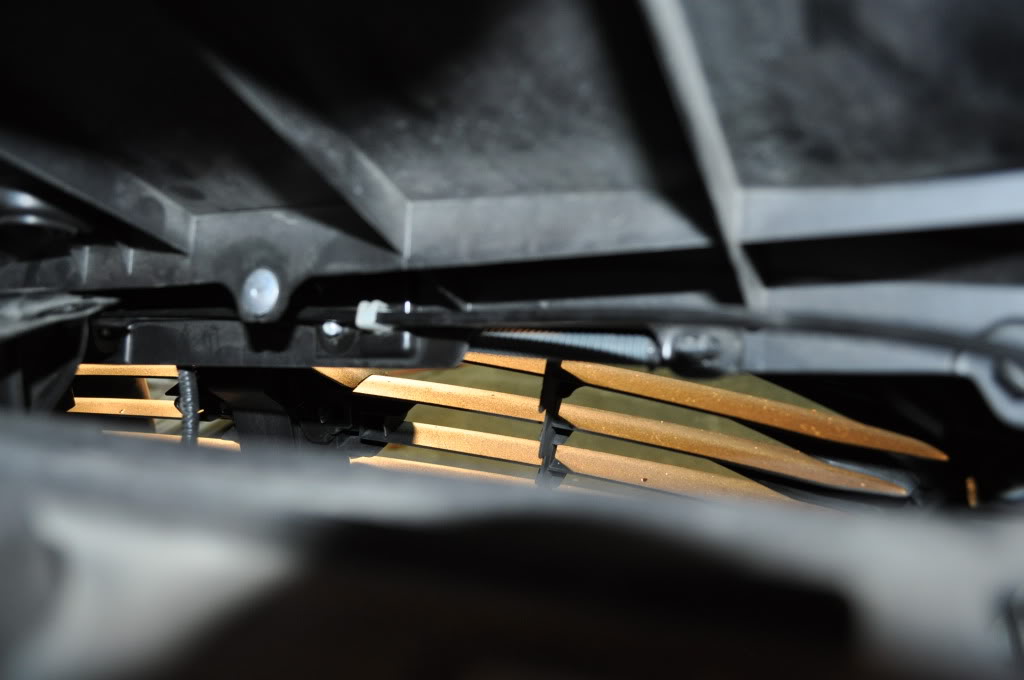
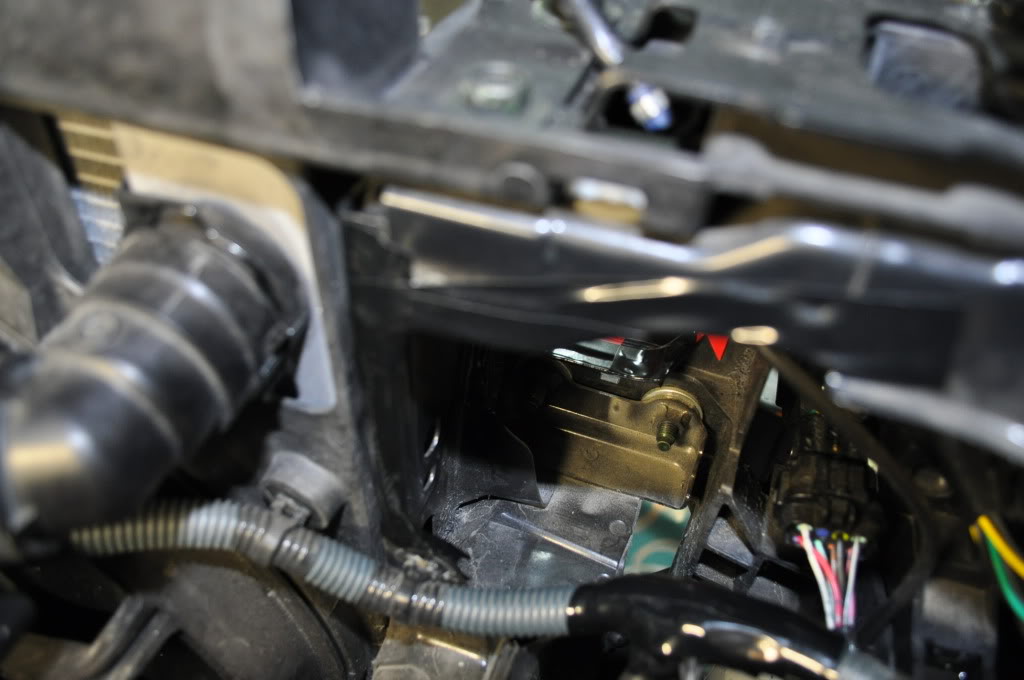
Now you'll want to pop off the 2 clips holding the rubber "thingy" in place to reveal a bolt holding on the bumper. Do this for both sides.
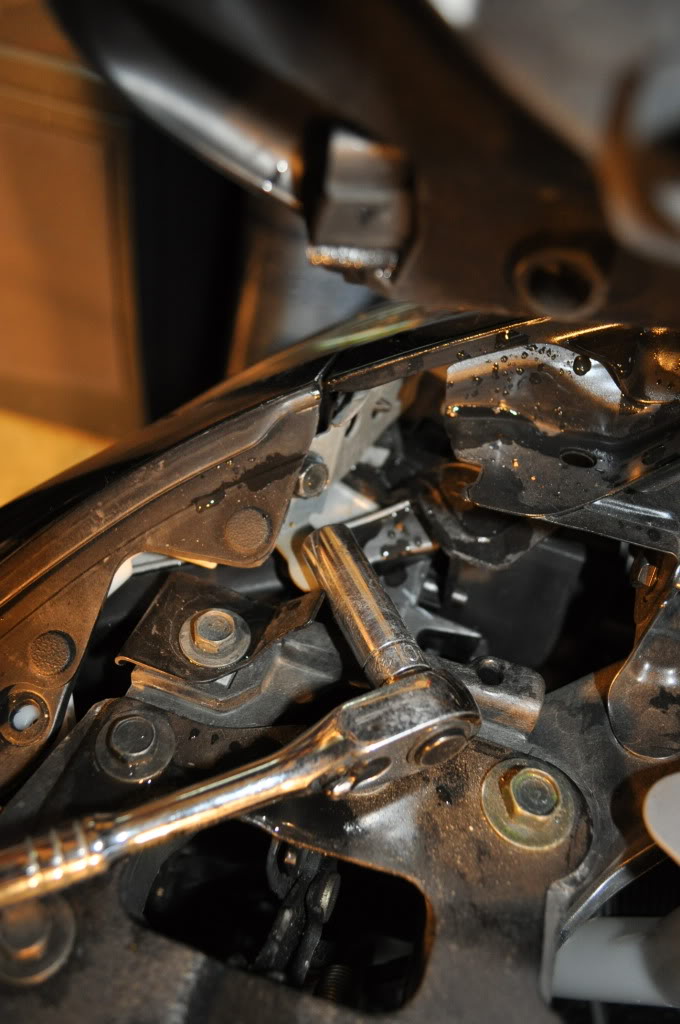
Then you'll need to roll under the car like a boss, and take off the 10 bolts near the front of the bumper, from left to right.

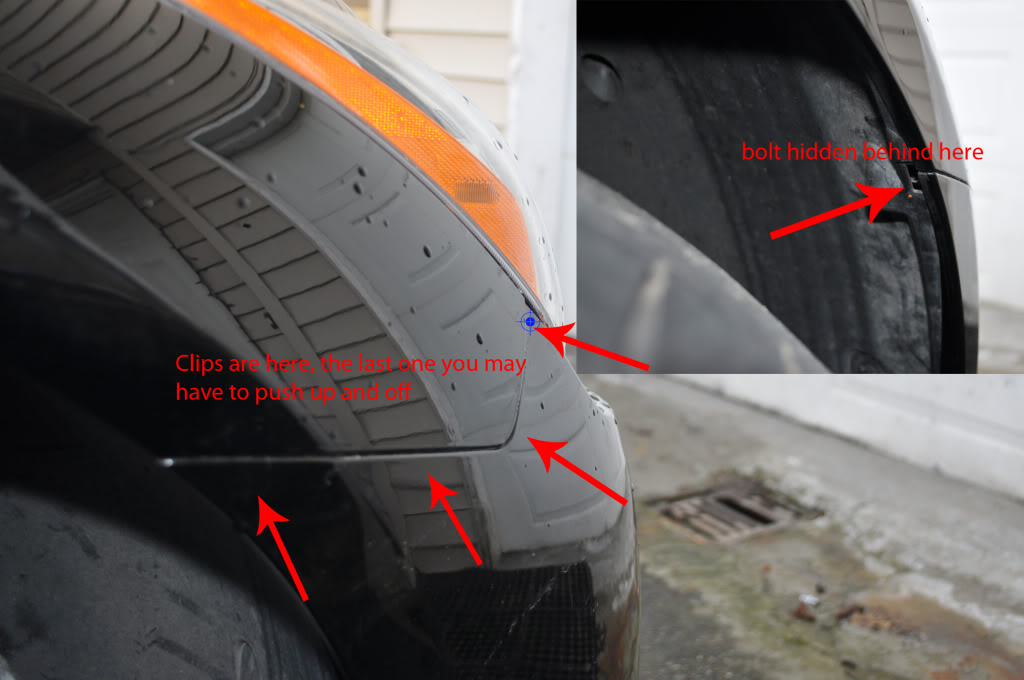
Next you're going to need to go into the tire wells and remove the clips holding the plastic piece on 4 minimum to remove, in order to access the 1 bolt for the bumper. I removed them all, I found it easier. Do this on both sides, hence the turning of the tire beforehand. This DIY has a nice explanation. https://www.myg37.com/forums/d-i-y-i...l-install.html
Once its off you'll see the clips hold the upper corner of the bumper on, with a friend you'll want to pull down and out, towards you and away from the car. The last clip on that row is a pain, i stuck my finger in from behind to push it up. Its pretty tough so it won't break, but definitely be CAREFUL!
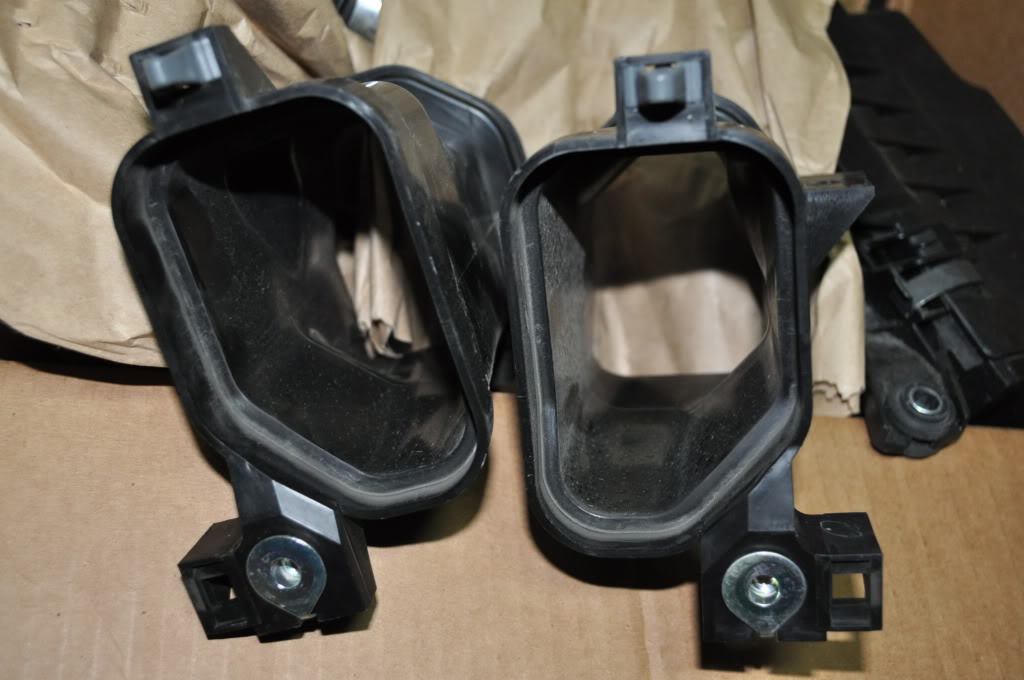
You'll need to remove the rest of the Stock intake. Its one plastic piece on either side, held on by 1 bolt and 1 clip.
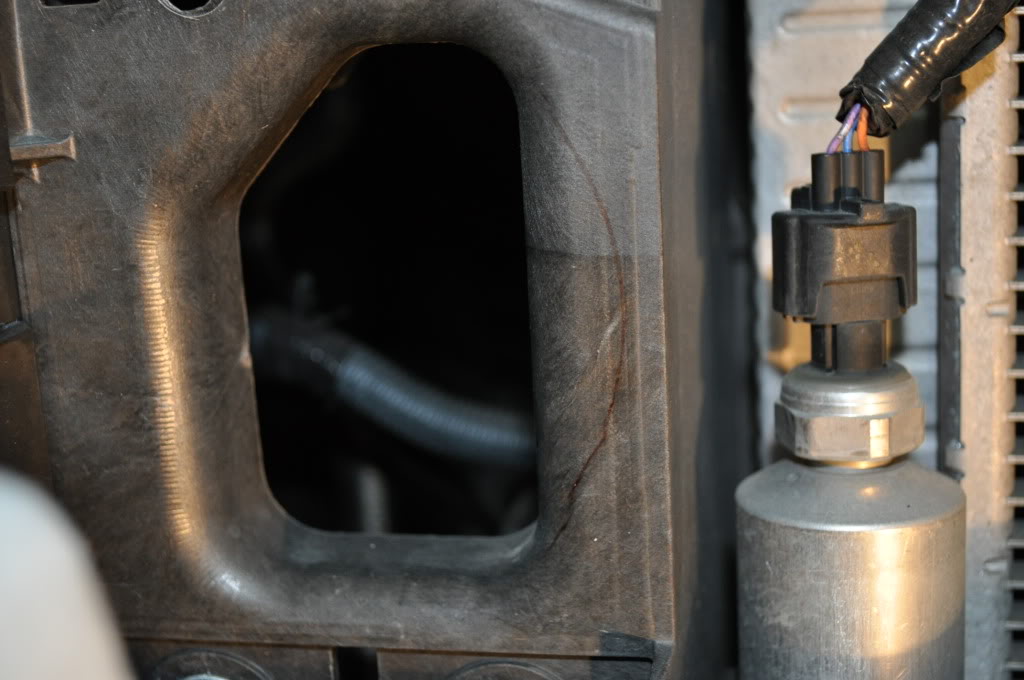
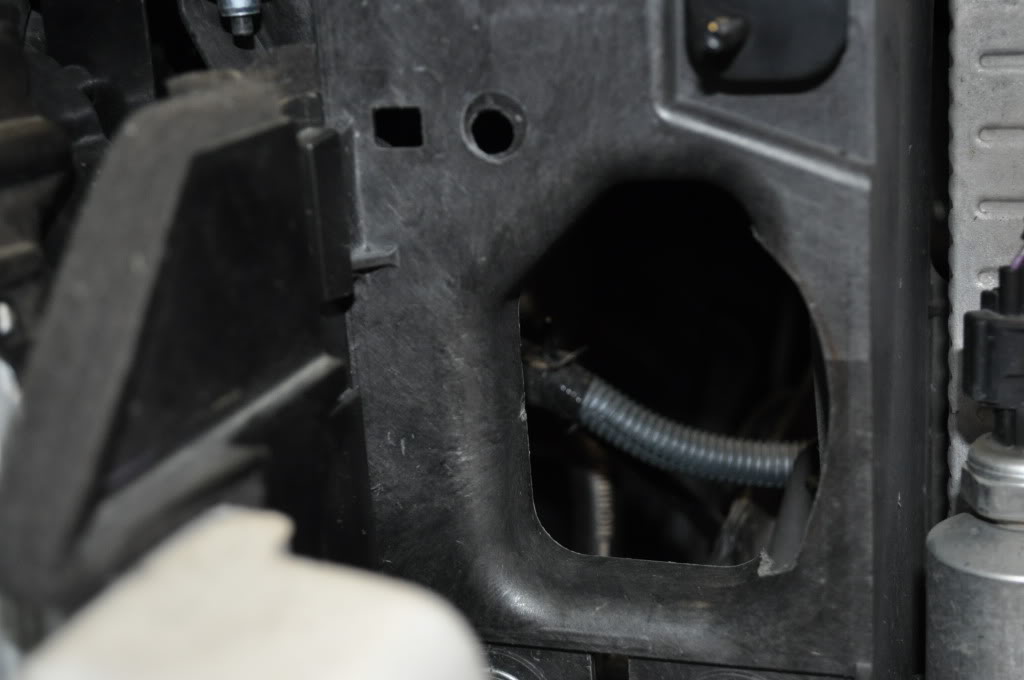
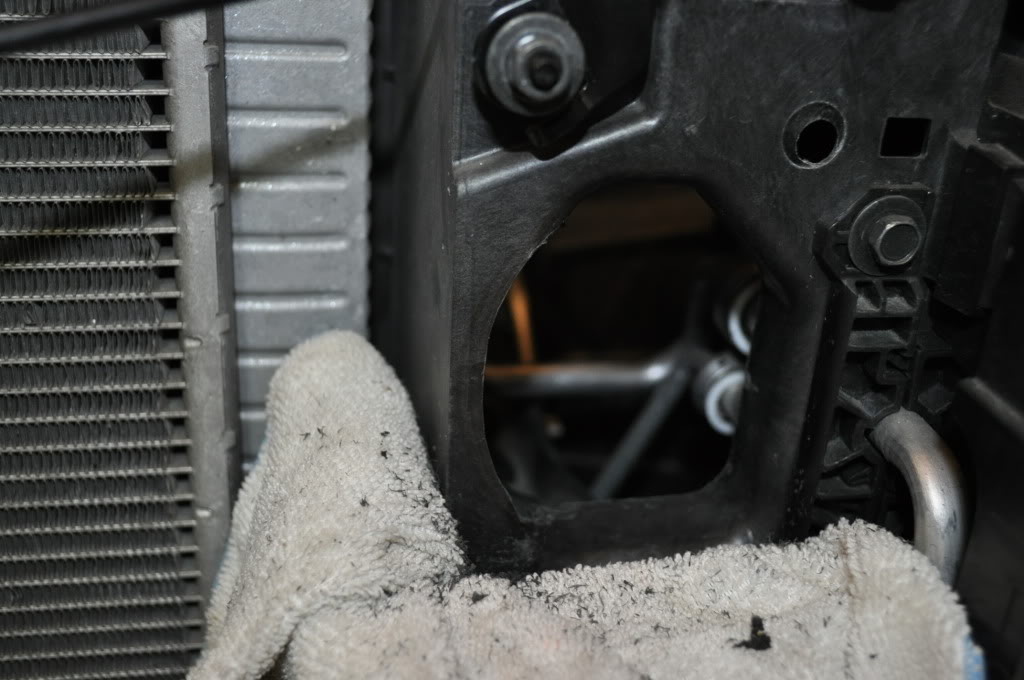
Now for the hard part, I hope you have steady hands. I used my geometry kit from grade school to make a guideline for my saw. Just be careful on the driver side because the AC pipes are there. You don't want to hit those!! The size of the hole doesn't really matter, you can always use padding to get a snug fit, or clamps. Just do what you're most comfortable with. I just made mine small, and slowly bigger until I got the pipe to slide in nice and snug. You can sand it, doesn't really matter, but I did to help the tape stick better.
You can start fitting the top 2 tubes on either side, don't forget to add padding where I did, it's most likely the area where the tube will rub/sit against. I thew on some double sided cushioning tape, and then wrapped that in vinyl tape so it would look more discreet or some electrical tape.

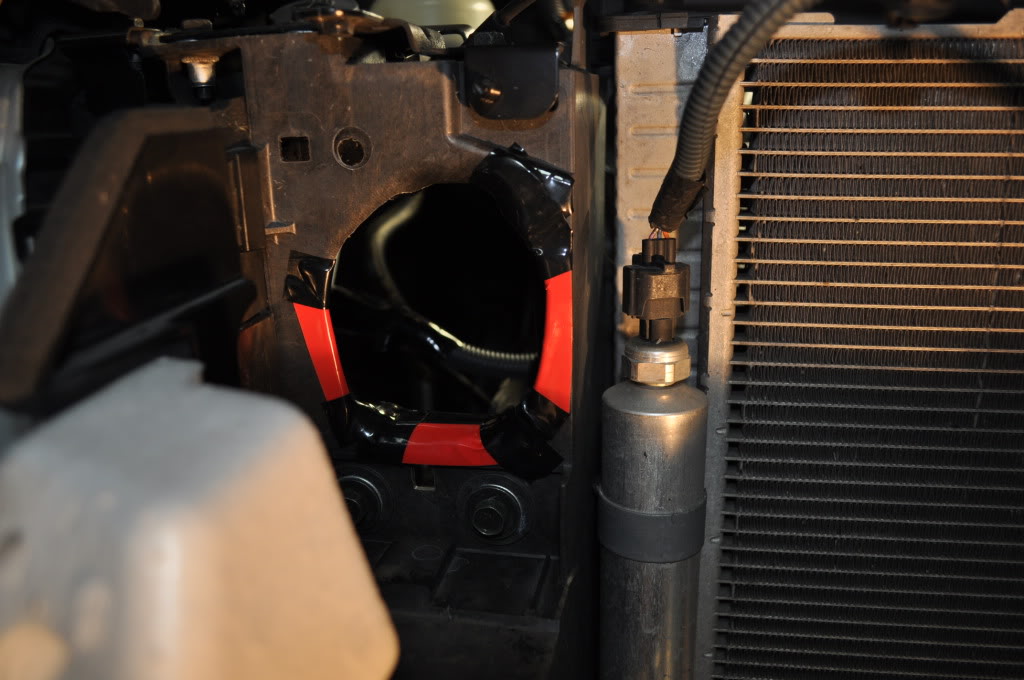
For the bottom 2 tubes, the holes you just cut will need some wrapping as well. Since there was 3 walls it passed by I went ahead and just wrapped them all. First I put on some padding, then mounting tape (since its "cushioney") and finished it off with a black vinyl
Afterwards put everything together loosely until you have it where you want it. Once you like the position & have everything taped up where you feel comfortable start to tighten all the bolts and clamps.
I'm sure if you have a 2008 G37s Coupe you may have this problem as well. Since I didn't see it in the video with the Sedan. When I lined up by 2 filters, the bracket was way too low and far back. I couldn't get the rain guard on and I lost half the bolt thread from the angel.
Plan A. Drill a hole on both the black stand & bracket and move higher?
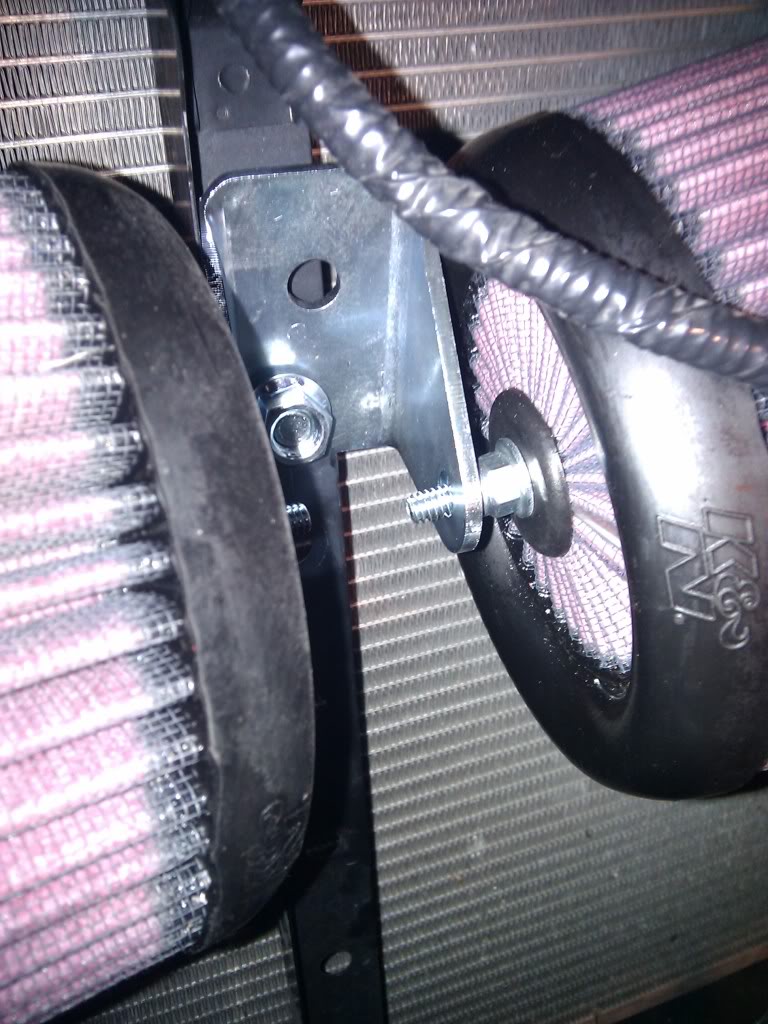

Results: FAILURE - good thing no one will know.
Plan B. Went to Home Depot and bought 2 sets of bolts, washers, nuts, and long metal plate with pre-drilled holes & made the following!
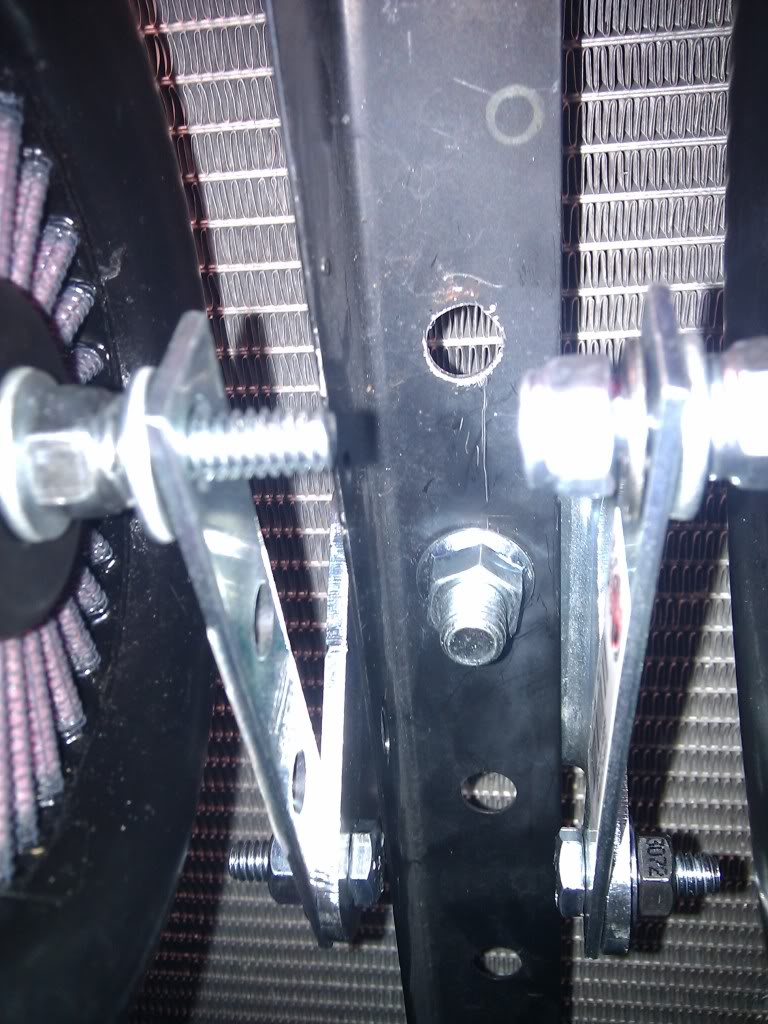
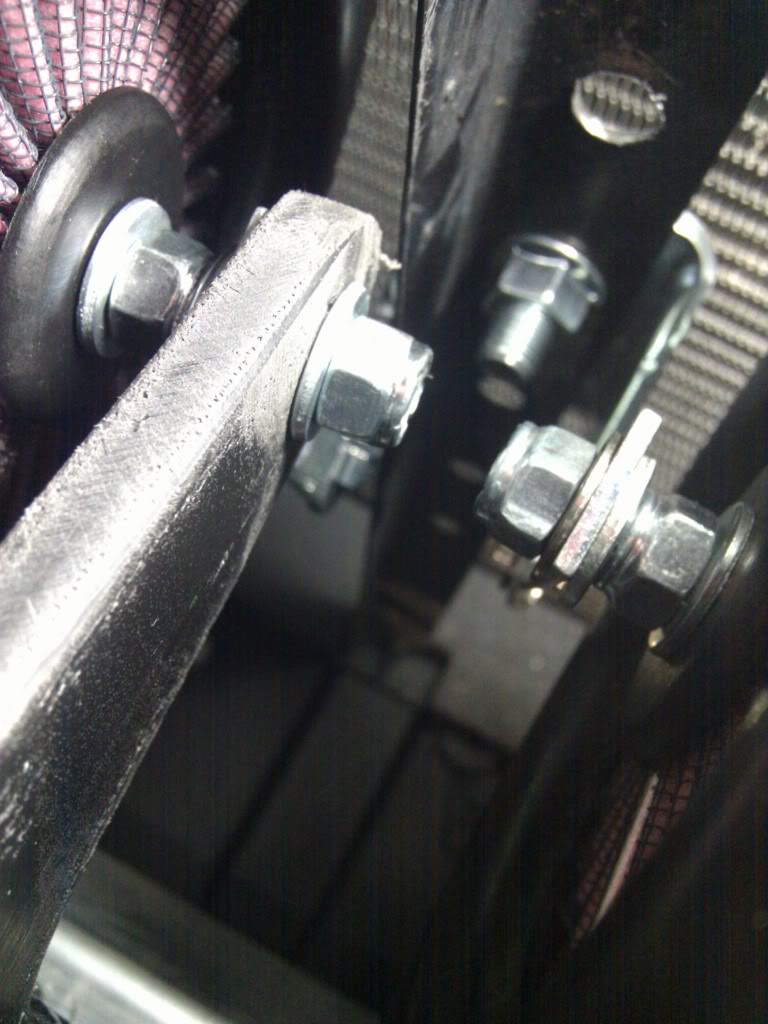
Results: SUCCESS!!
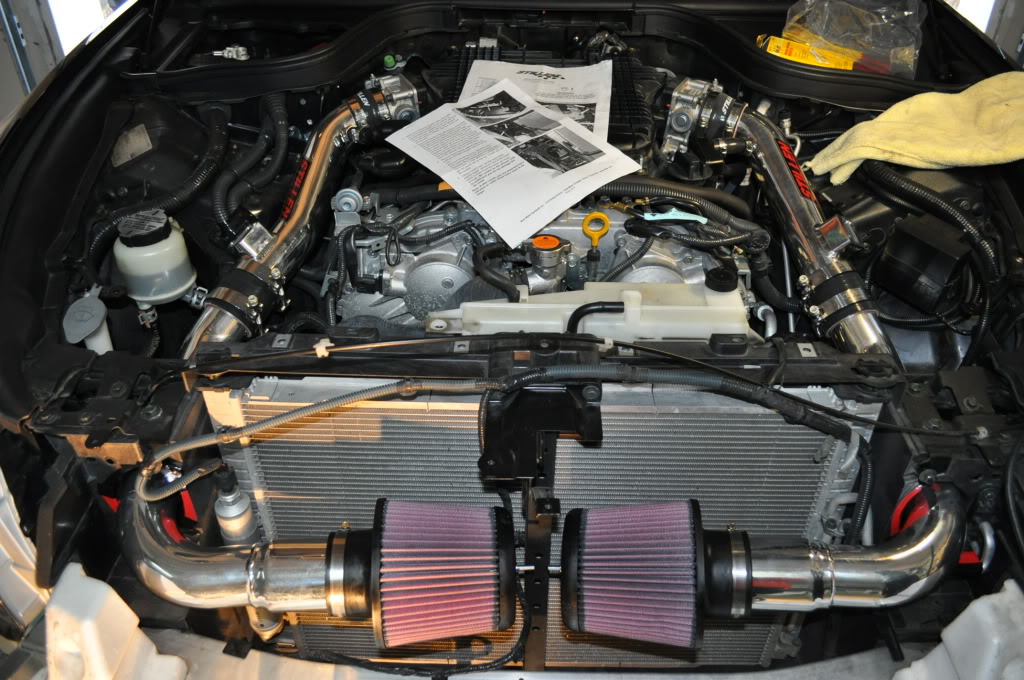
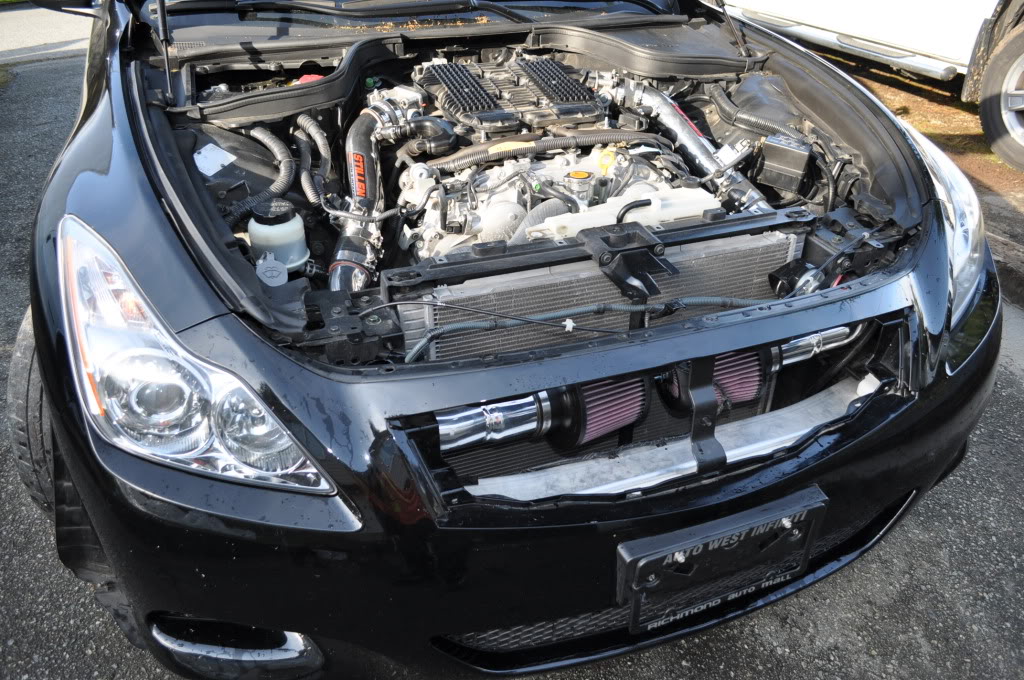
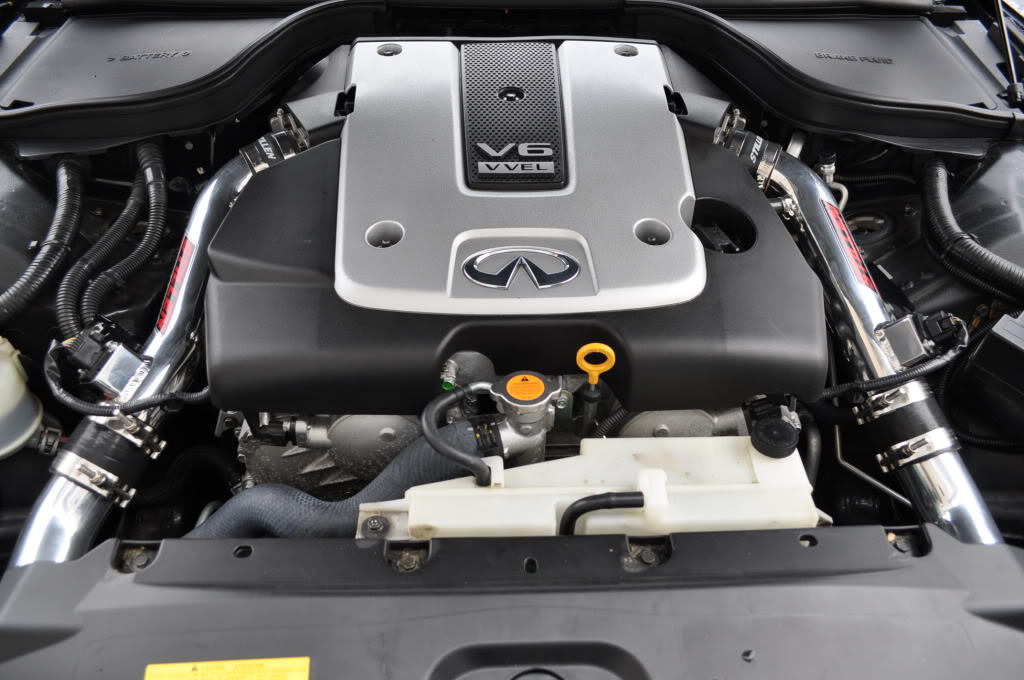
Finally all done! Do everything in reverse and just put everything back together.
This will take a while depending on how much you know about your car, and if you want to take off the bumper. I definitely recommend you take it off. This was my first time, and it was frustrating at times, but it makes it 10x easier to work on the car, and you'll less likely scratch you pipes when sliding them in through grill. I suggest you do this with a friend, it'll be easier and you're going to need the help for taking off the bumper. The intake system comes with notes, you can reference those as well as some awesome guides on the forums for more details on getting the bumper off, or as the paper calls it the "Fascia"
I used this as a guide:
2008-2010 Infiniti G Coupe Front Bumper Removal Procedure | Infinitihelp.com
Here's what you'll need!
10mm & 11mm socket + wrenches & 14mm wrench I think
flat head screwdriver
pliers
patience
padding ( I used 1 sided tape that came with foam on other side, found at work) That plumbing padding works too.
Optional: mounting tape, electrical tape, and vinyl tape
rotary saw
sandpaper
ability to roll under the front like a boss
What I used for padding.
First thing you'll want to do is open the box, make sure you got everything, smile and get some coffee(I prefer cappuccino and play roll up the rim and cross fingers you win a Toyota to sell, so you can buy more parts for G37DOMO)
Now then, you'll want to start you car and turn your tires to one side so you can access the clips inside the tire wells. Afterwards turn off you car and disconnect the negative on the battery.
First thing you'll want to do is remove the engine cover, 5 bolts with the 10mm ratchet.
Then go ahead and unplug the intake sensors, take off the old intake; the bolts will come off really easy, you may to have use a little elbow grease for those darn hose clamps. Just be careful with the sensors inside the old intake, leave them in there until you've finished installing the new Stillen intake.
Afterwards you're going to need to take off the top cover. Be really careful here, you don't want to crack this, and it'll fight you to come off. just pop off clips, take out bolts. I recommend taking off the coolant bolts also so its easier to push it backwards and off. Once you have it off the hooks, disconnect the cables clipped on.
Now you'll want to pop off the 2 clips holding the rubber "thingy" in place to reveal a bolt holding on the bumper. Do this for both sides.
Then you'll need to roll under the car like a boss, and take off the 10 bolts near the front of the bumper, from left to right.
Next you're going to need to go into the tire wells and remove the clips holding the plastic piece on 4 minimum to remove, in order to access the 1 bolt for the bumper. I removed them all, I found it easier. Do this on both sides, hence the turning of the tire beforehand. This DIY has a nice explanation. https://www.myg37.com/forums/d-i-y-i...l-install.html
Once its off you'll see the clips hold the upper corner of the bumper on, with a friend you'll want to pull down and out, towards you and away from the car. The last clip on that row is a pain, i stuck my finger in from behind to push it up. Its pretty tough so it won't break, but definitely be CAREFUL!
You'll need to remove the rest of the Stock intake. Its one plastic piece on either side, held on by 1 bolt and 1 clip.
Now for the hard part, I hope you have steady hands. I used my geometry kit from grade school to make a guideline for my saw. Just be careful on the driver side because the AC pipes are there. You don't want to hit those!! The size of the hole doesn't really matter, you can always use padding to get a snug fit, or clamps. Just do what you're most comfortable with. I just made mine small, and slowly bigger until I got the pipe to slide in nice and snug. You can sand it, doesn't really matter, but I did to help the tape stick better.
You can start fitting the top 2 tubes on either side, don't forget to add padding where I did, it's most likely the area where the tube will rub/sit against. I thew on some double sided cushioning tape, and then wrapped that in vinyl tape so it would look more discreet or some electrical tape.
For the bottom 2 tubes, the holes you just cut will need some wrapping as well. Since there was 3 walls it passed by I went ahead and just wrapped them all. First I put on some padding, then mounting tape (since its "cushioney") and finished it off with a black vinyl
Afterwards put everything together loosely until you have it where you want it. Once you like the position & have everything taped up where you feel comfortable start to tighten all the bolts and clamps.
I'm sure if you have a 2008 G37s Coupe you may have this problem as well. Since I didn't see it in the video with the Sedan. When I lined up by 2 filters, the bracket was way too low and far back. I couldn't get the rain guard on and I lost half the bolt thread from the angel.
Plan A. Drill a hole on both the black stand & bracket and move higher?
Results: FAILURE - good thing no one will know.
Plan B. Went to Home Depot and bought 2 sets of bolts, washers, nuts, and long metal plate with pre-drilled holes & made the following!
Results: SUCCESS!!
Finally all done! Do everything in reverse and just put everything back together.
Last edited by Repsol13; Mar 16, 2012 at 04:49 PM. Reason: Forgot info


 great write up though

Trending Topics

Thread Starter
Registered Member
iTrader: (1)
Joined: Mar 2012
Posts: 12
Likes: 3
From: Vancouver BC
Last about 6~7 months of driving.Nope, just washed and cleaned it thoroughly since I am using only plasti-dip.
And thanks to everyone for all the feedback!

Thread Starter
Registered Member
iTrader: (1)
Joined: Mar 2012
Posts: 12
Likes: 3
From: Vancouver BC
Ark Performance Lowering Springs
Ark Performance Lowering Springs Install:
This project will take you approx a few hours depending on the tools available to you. This is definitely one of those projects that would benefit you from having some assistance. The Rear is rather simple and straightforward to install. It might be a little tricky trying to line up the bolt hole on re assembly but you shouldn’t have much of an issue thereafter. I would recommend taking the time while you have you wheels off to do some tire well cleaning. Without any further delay let’s get started shall we.
DIY Video: My attempt at making video with shoddy camera work: http://www.youtube.com/watch?v=FUmGDd1K7Kg
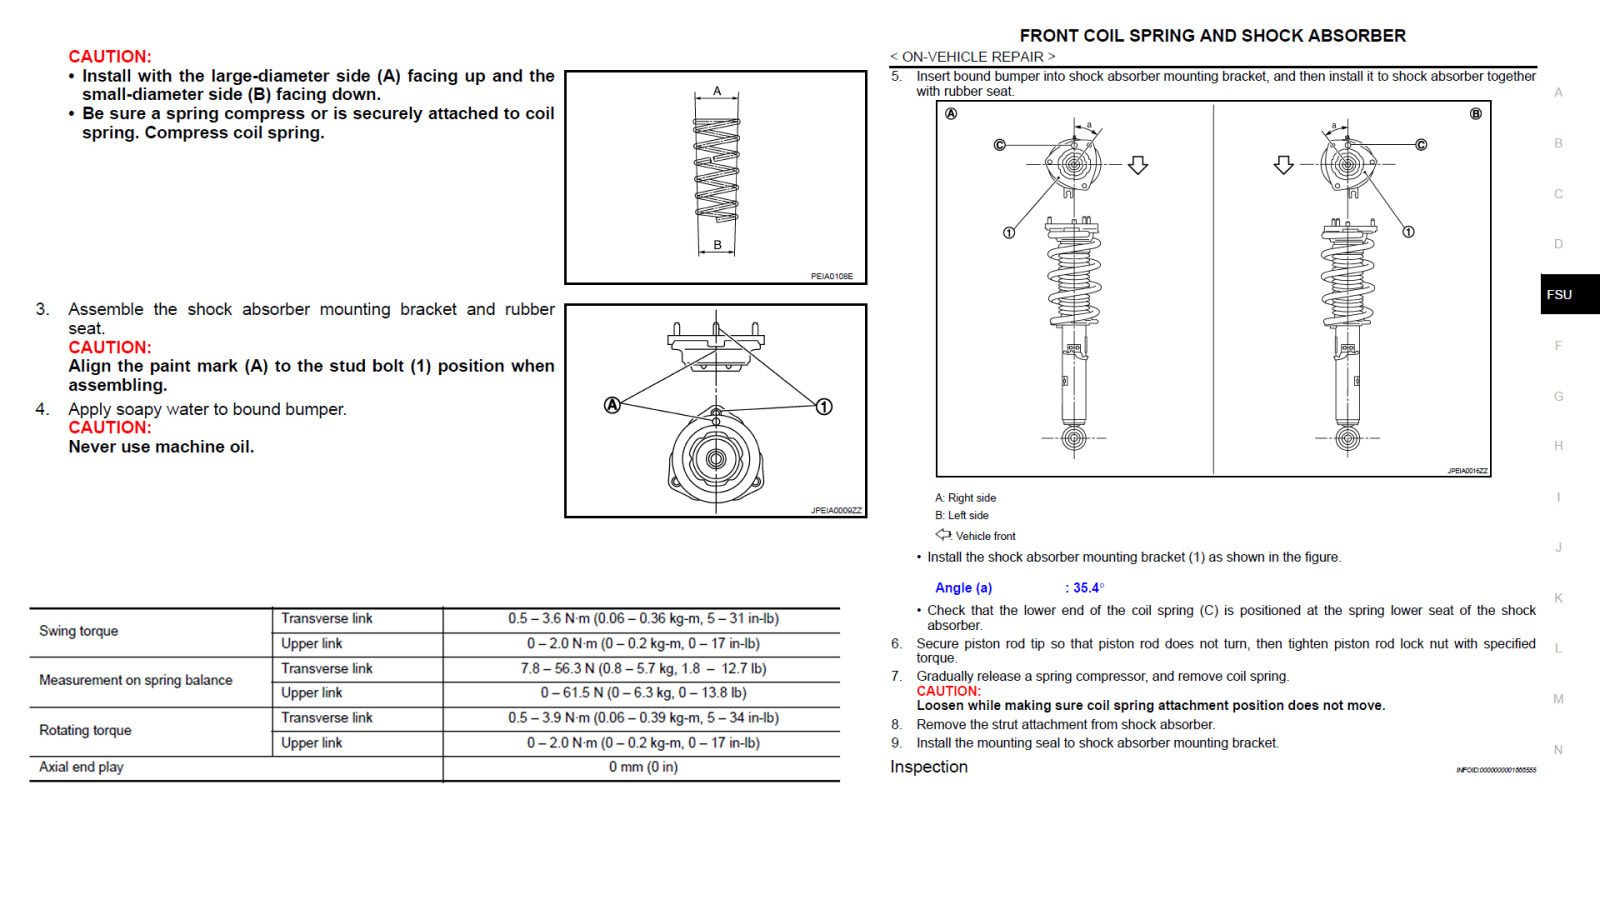
Please download the Factory Service manual: Category:Service - The Infiniti G37 Information Resource
After extracting the files you can look in the folder for FSU & RSU files where you will find information on the back and front suspension.
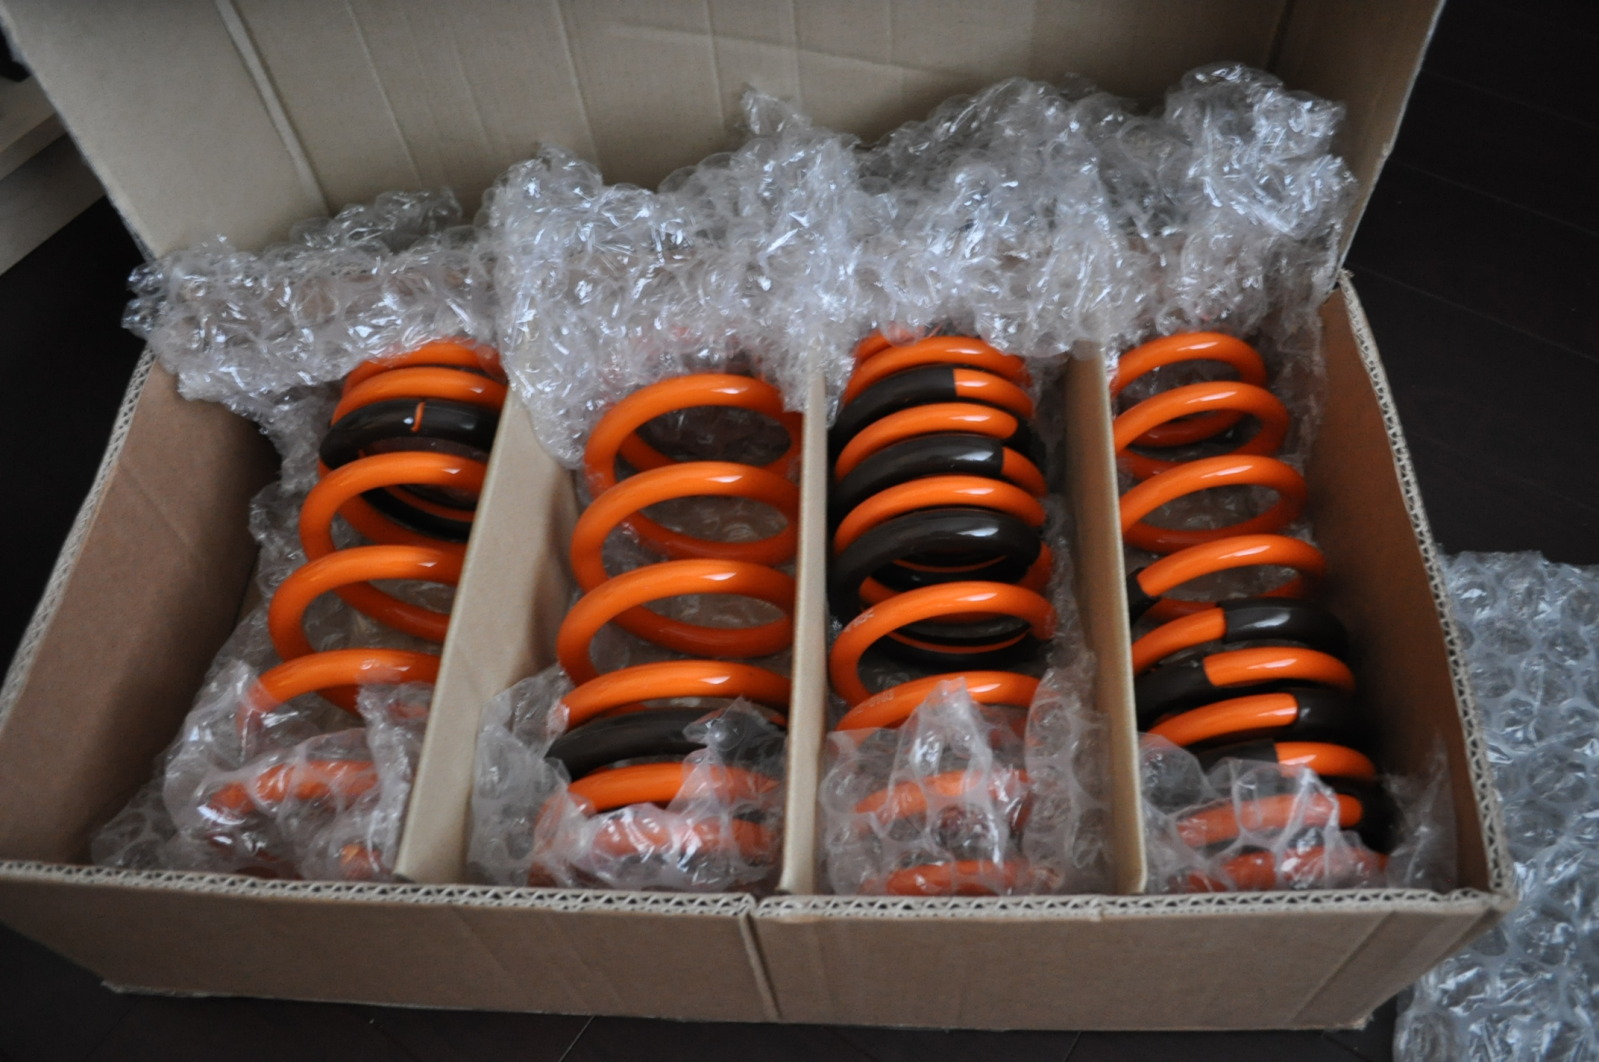
Ark Springs:
Equipment you will need:
Impact Wrench (air or electric works fine, I personally used a combination of both)
PB blast
White lithium grease
Ratchet with the following sockets; 12mm 14mm 17mm 19mm 21mm
Wrench 11/16
Jack Stands
Car jack
Tire iron
Optional: 5 Tonne Jack
Optional: general purpose cleaning equipment. Ex. Brush, cloth etc.
**Prior to starting the following break the seals on lug nuts securing your wheels in place. This will keep you from shaking the car about when removing nuts after lifting it onto jack stands. I know it personally took me a bit of elbow grease to break the seals on some of them.
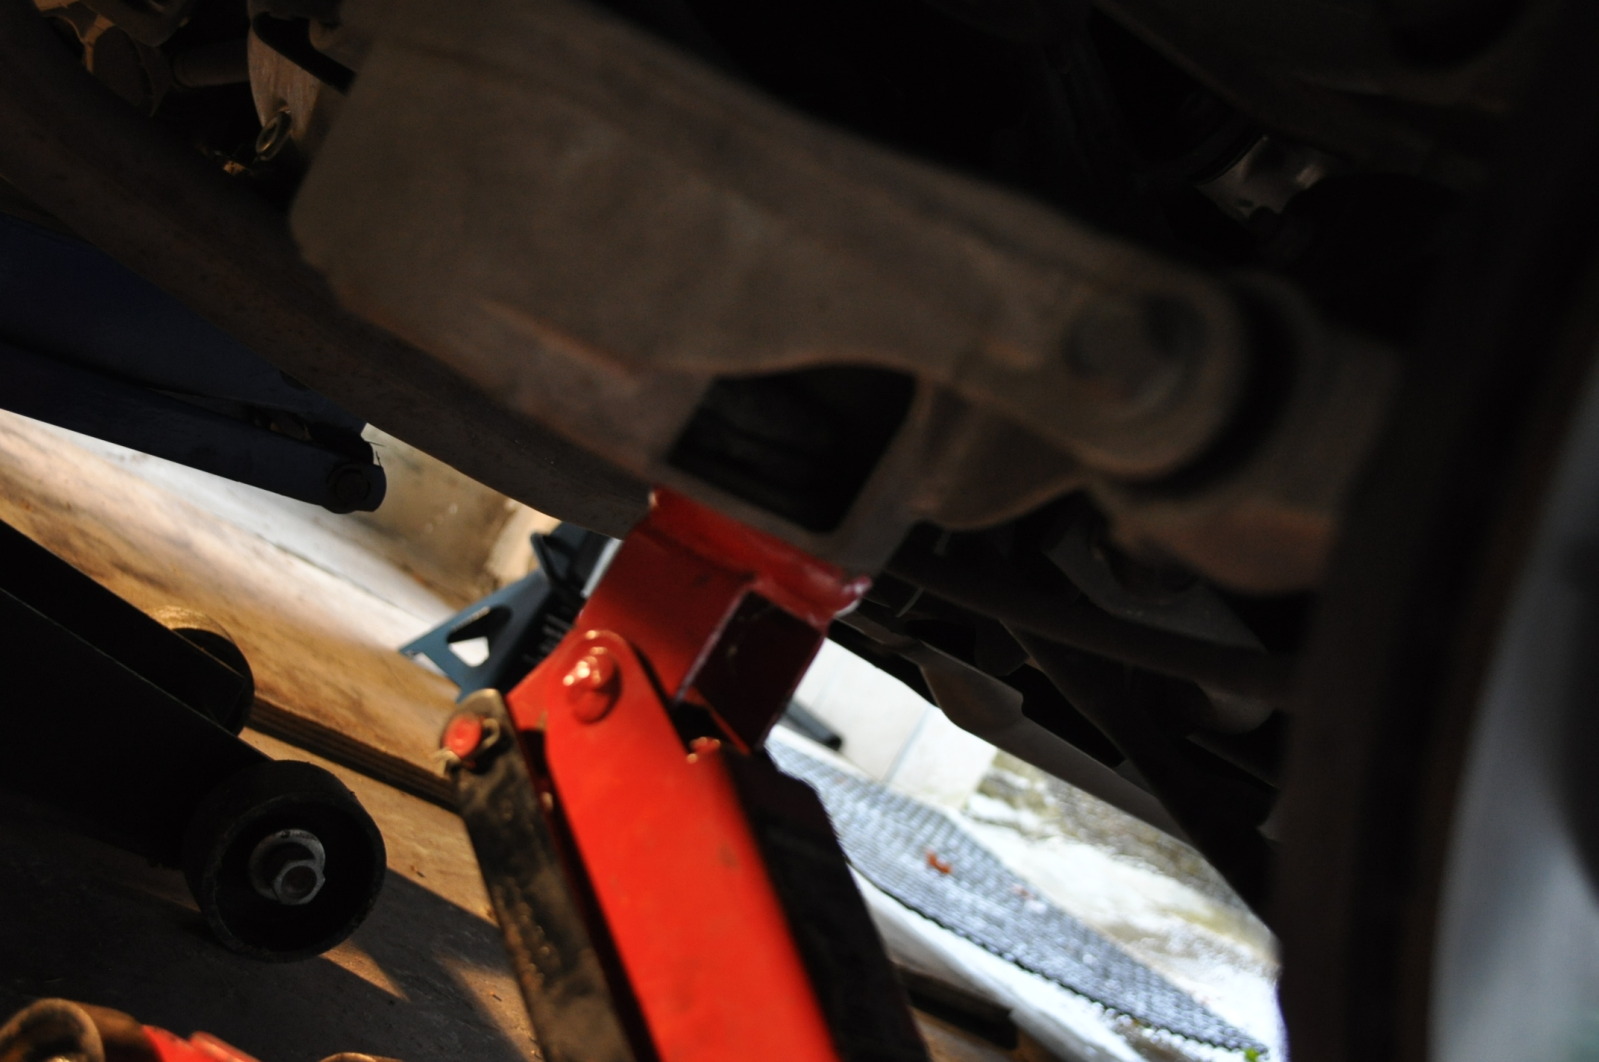
First things first you will need to jack up your car and place it onto, either jack stands like shown below or something similar to keep your wheels elevated. I recommend placing some wooden blocks on the opposite end of the side you are lifting for added security.
Once your car is jacked up and secured you can go ahead and remove the lug nuts holding your wheels in place(21mm socket). Feel free to use your air wrench to speed up the process!

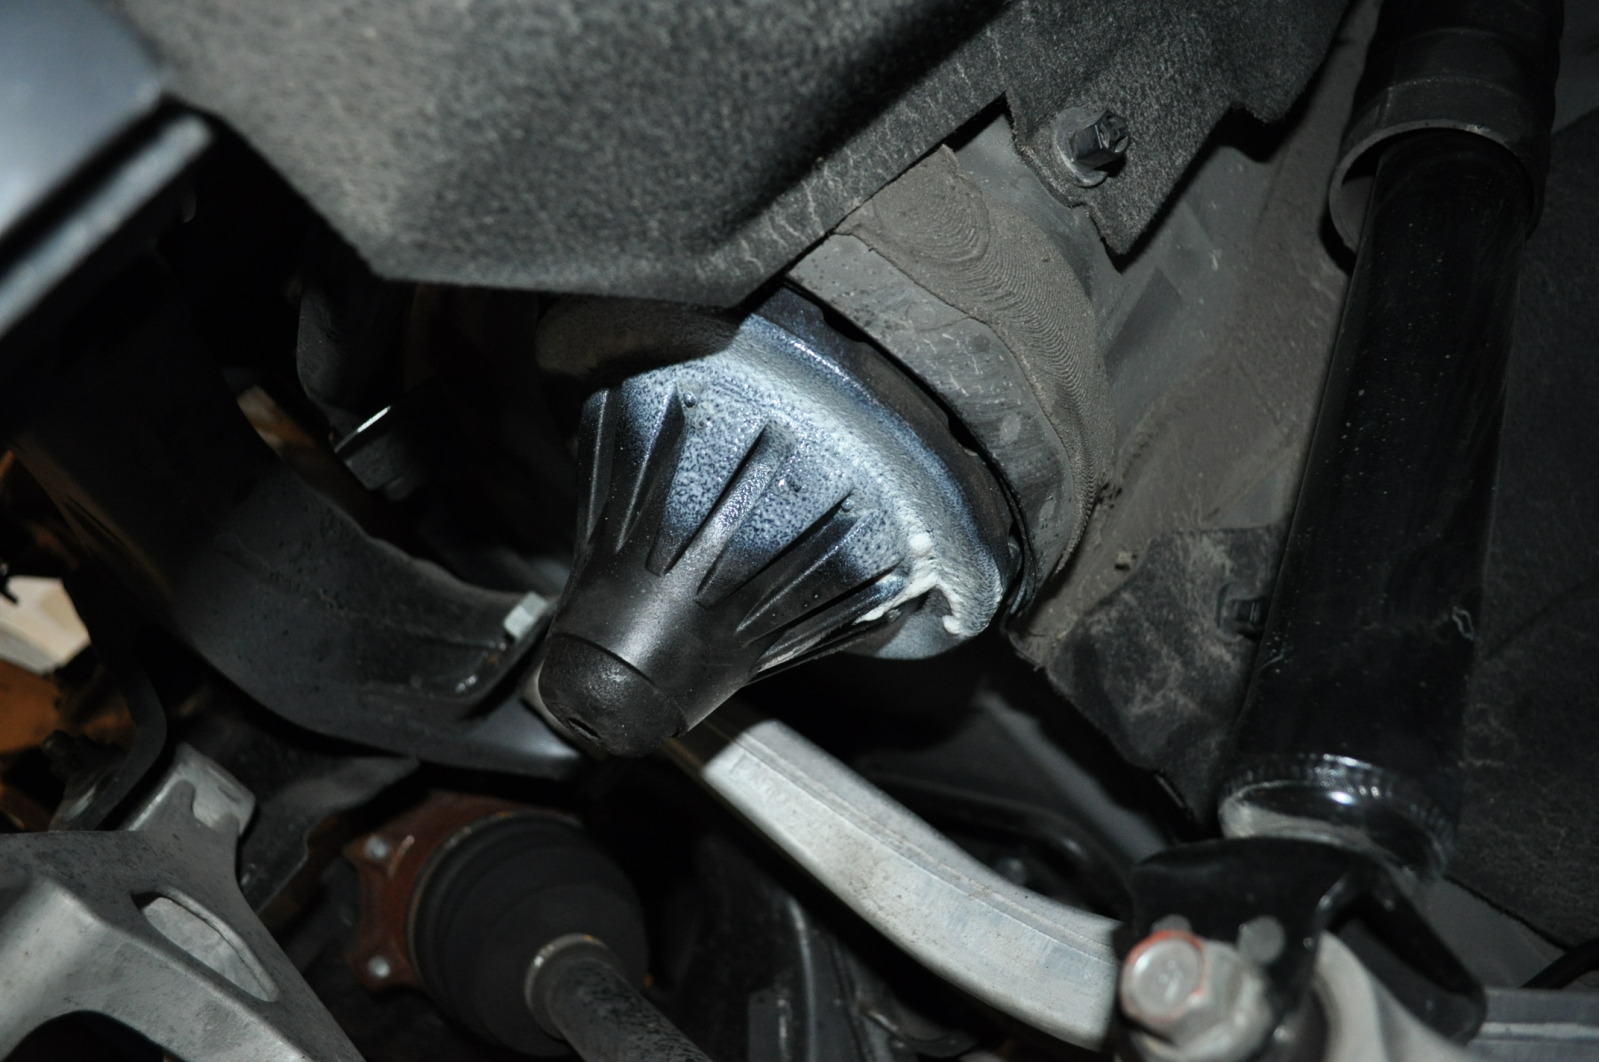
Now what you will want to do is position your car jack underneath the back spring plate. Once in position go ahead and jack it up till it compresses to a point in which there is little to none tension remaining on the “spring plate bolt”.
Follow this up by removing the “spring plate bolt” located behind the tire axle. In order to remove this bolt you will need a 11/16 wrench and a 17mm socket for either your impact wrench or ratchet.
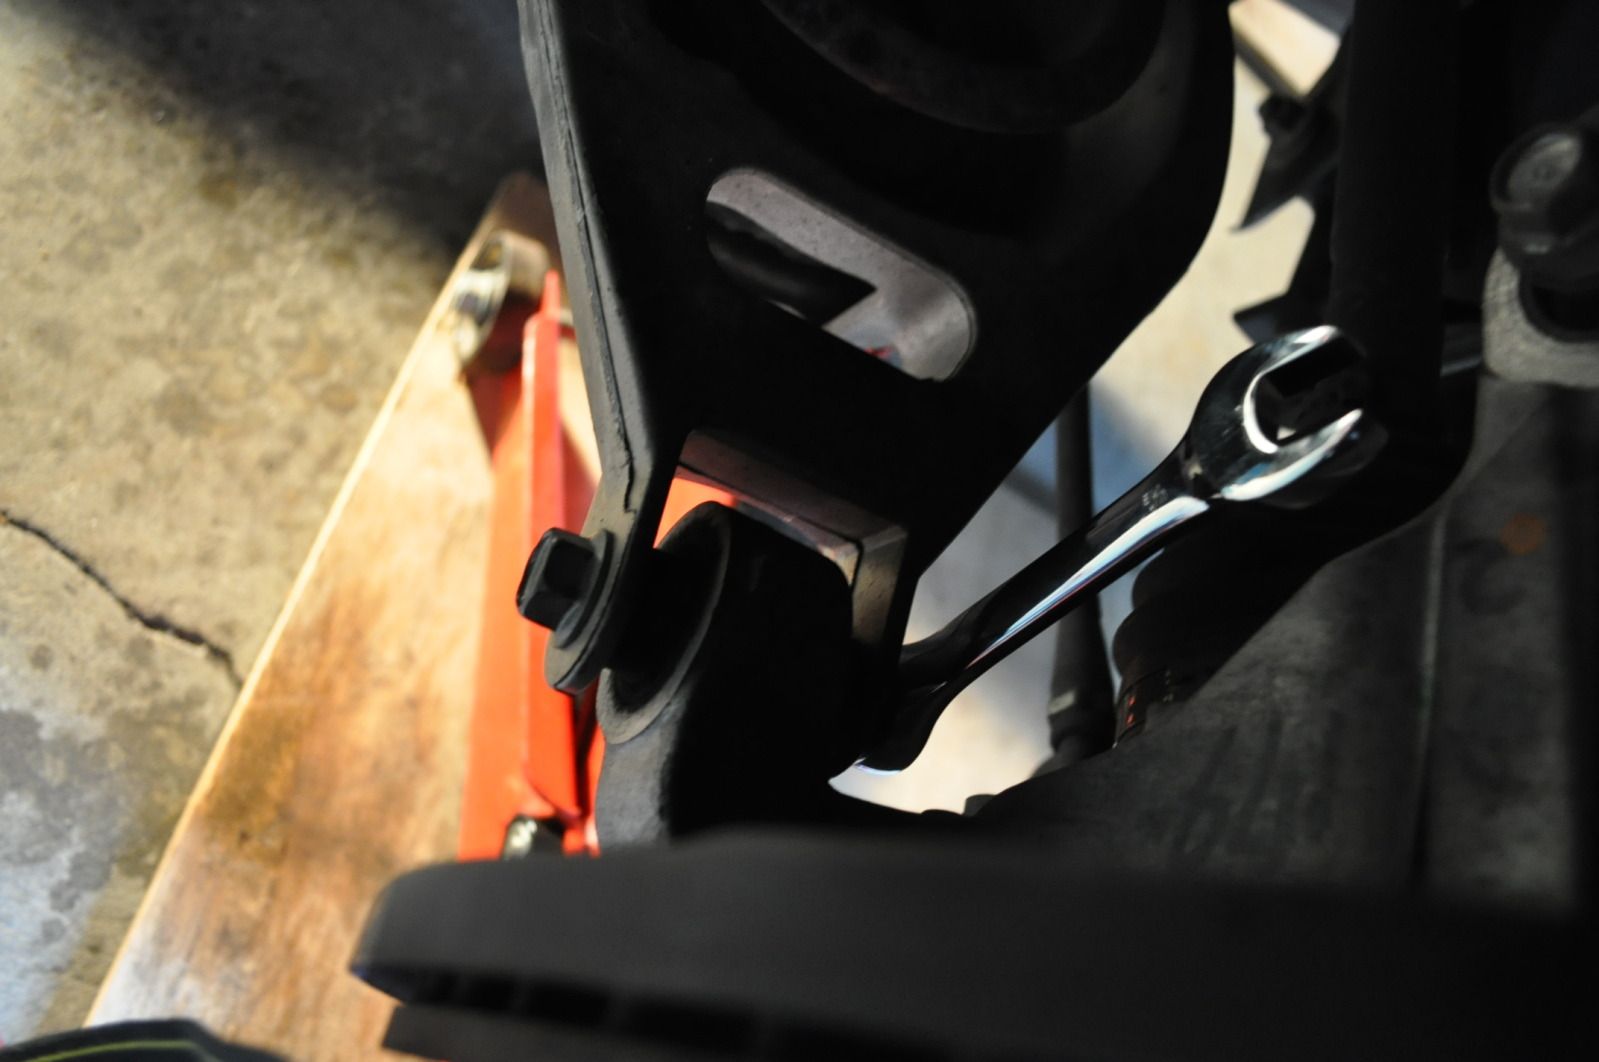
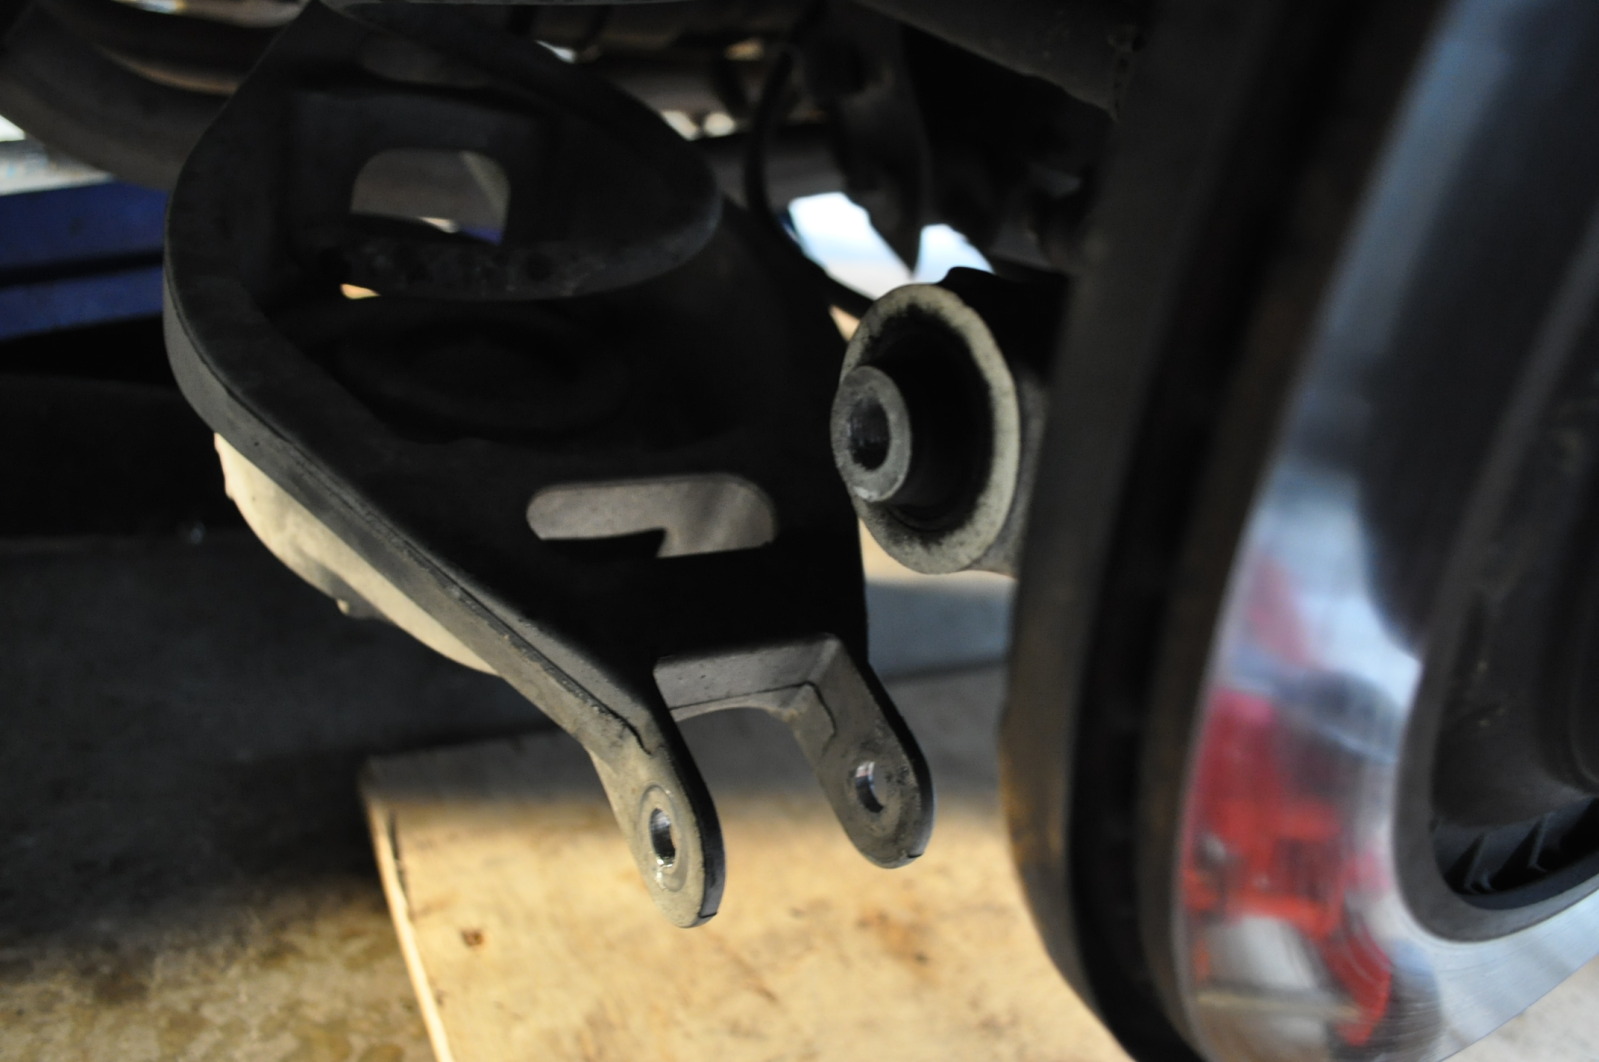
Once you have removed the “spring plate bolt” lower the jack slowly and remove the spring. However in order to remove the spring you will need to push down on the side you removed the bolt from the previous step. Then it’s just a matter of yanking it out as there will be nothing holding it in place.
Optional Step: Take this time to do some cleaning where you see fit. First time I have cleaned tire wells since I purchased my car in 08.
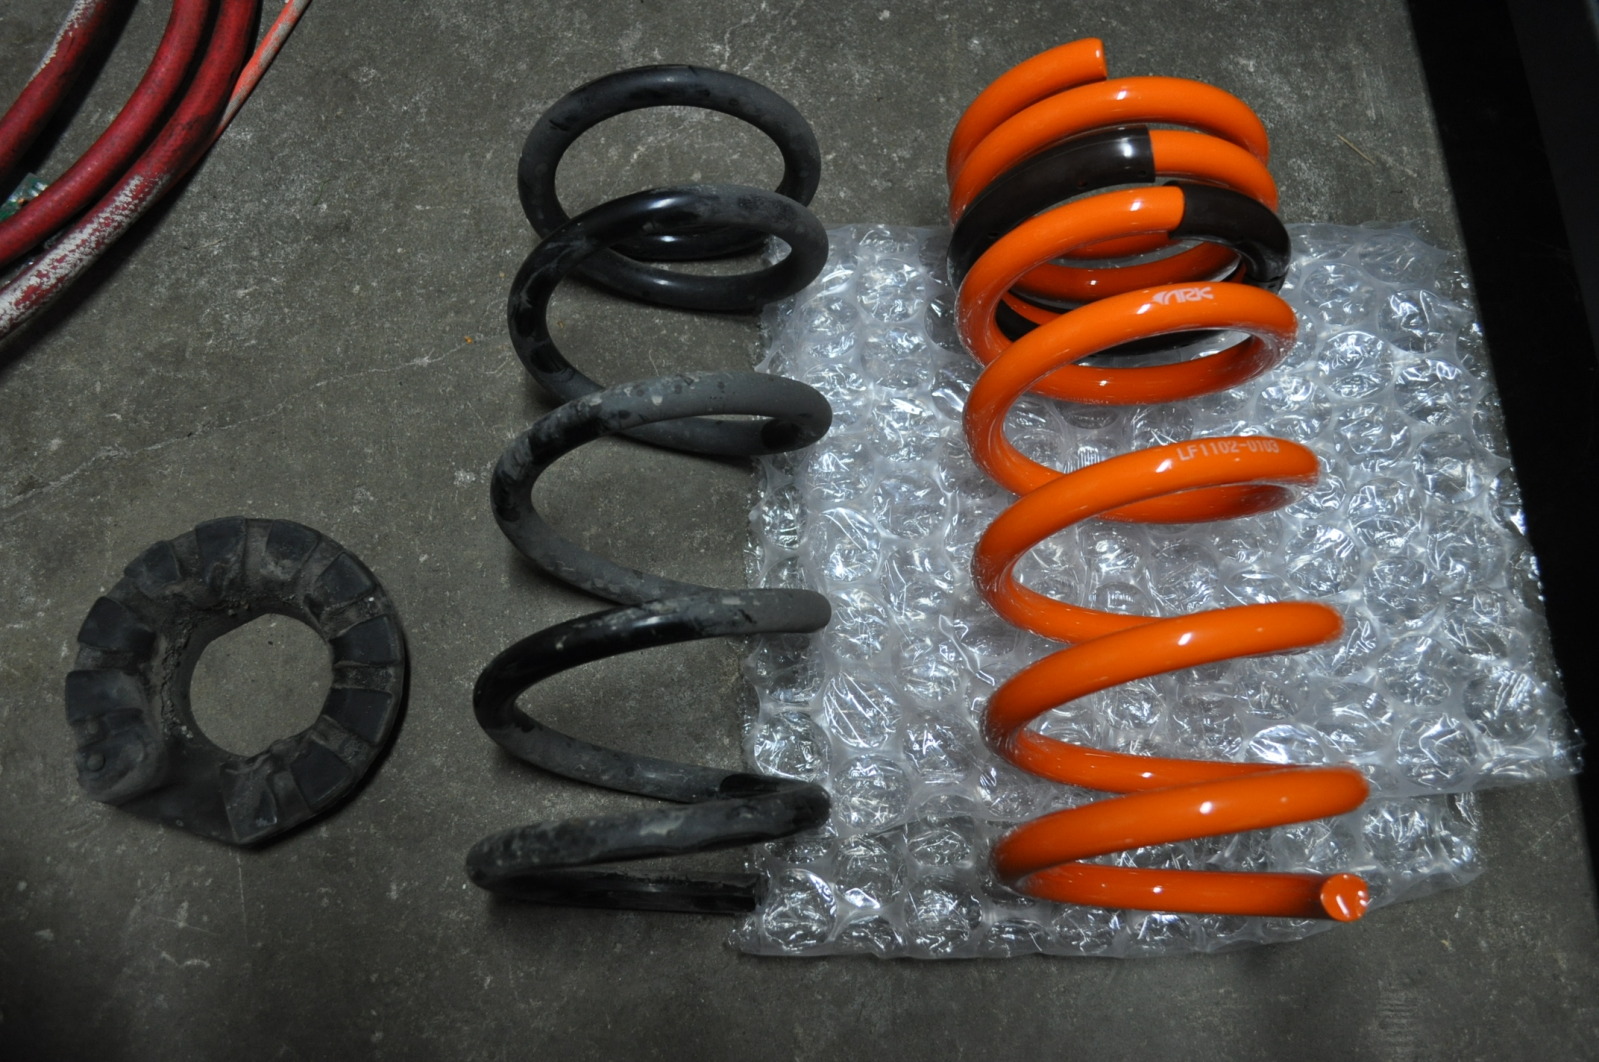
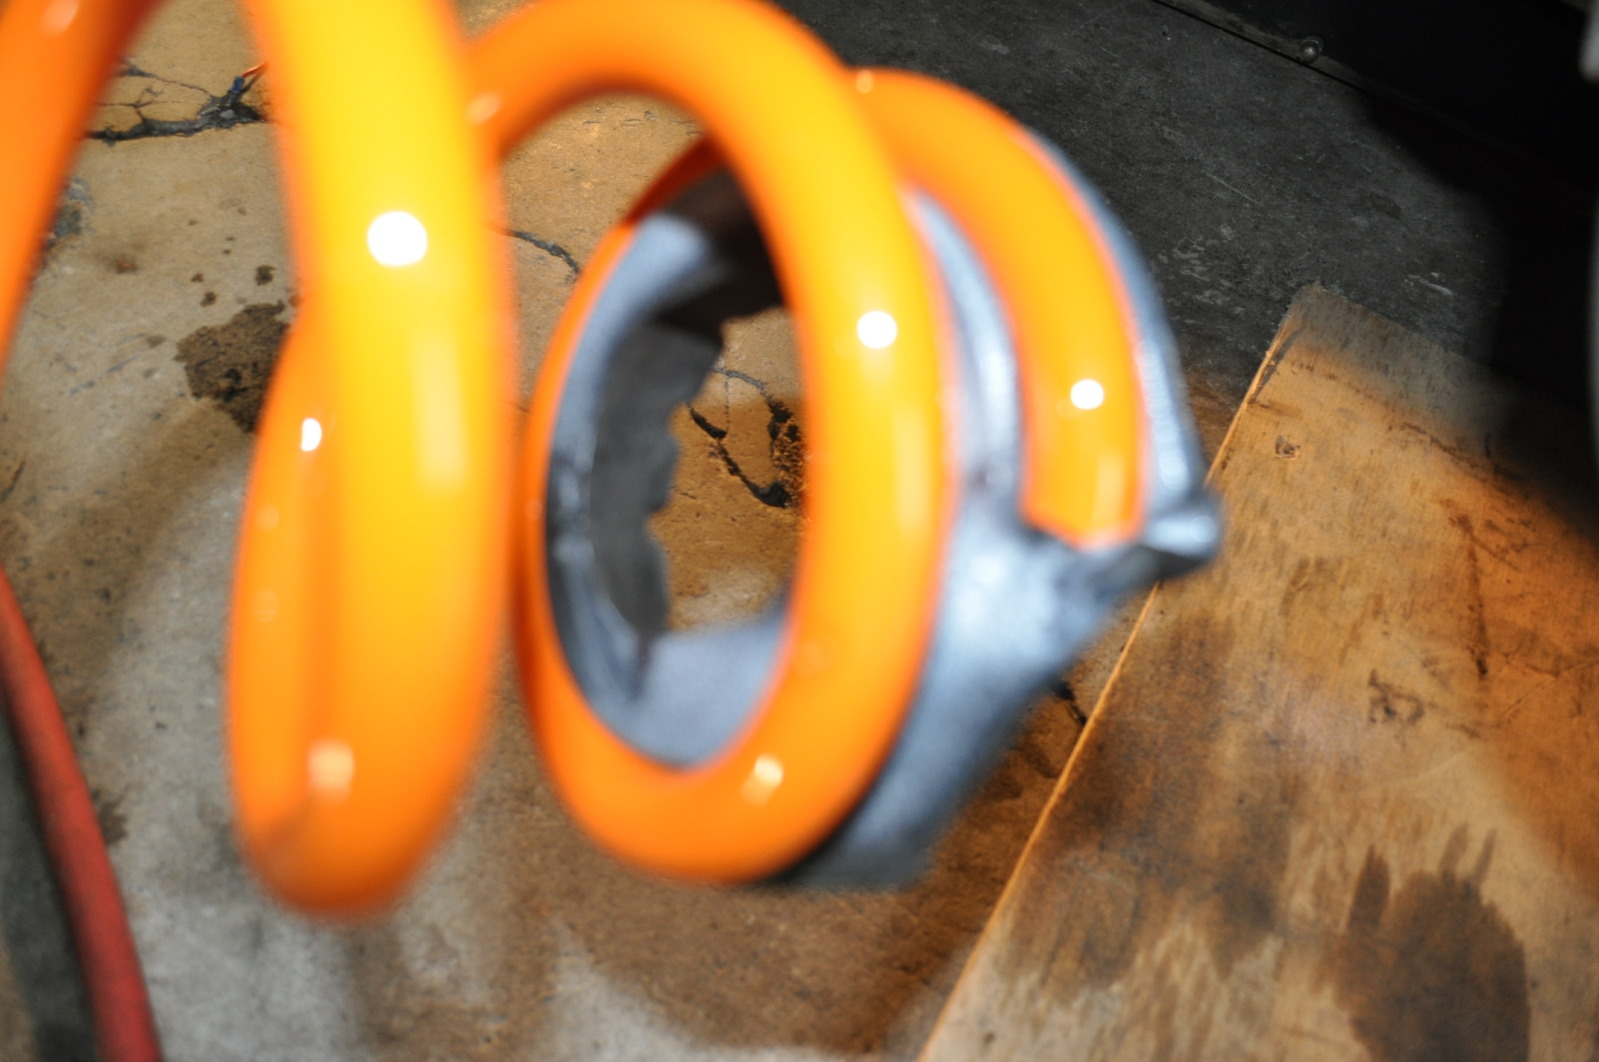
Spring Comparison
I recommend you clean the rubber ring, cone, and plate where the lowering spring will sit. Once they are clean you can apply some white lithium grease to each component.
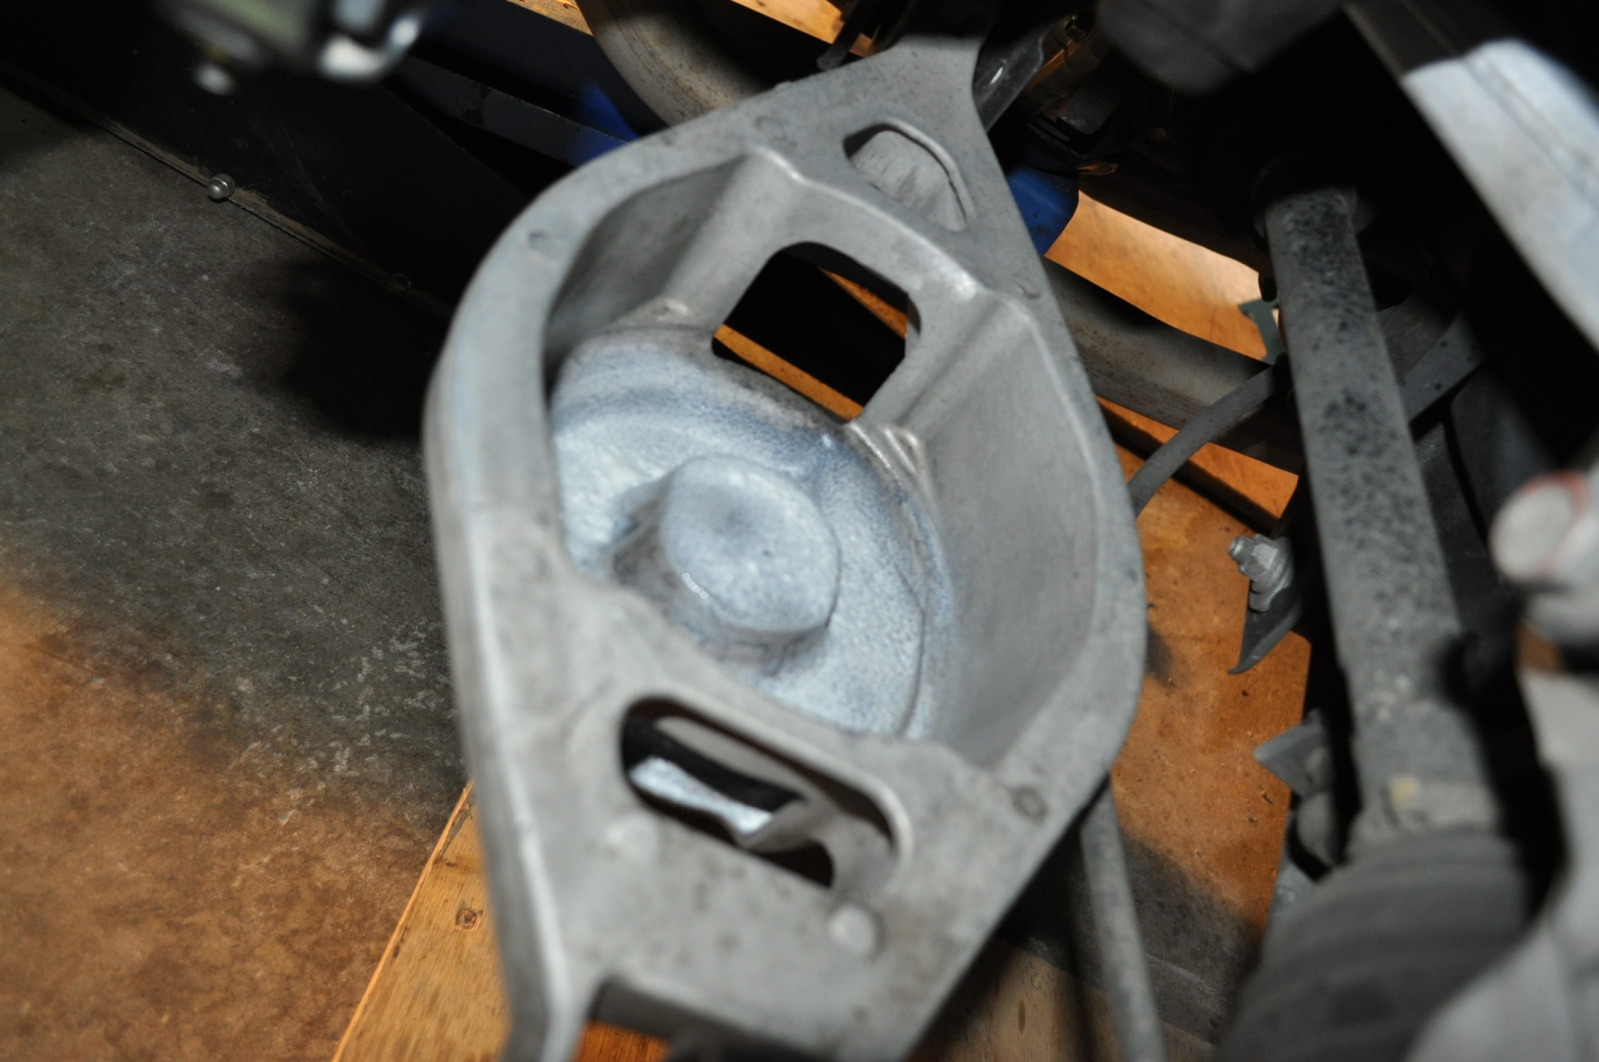
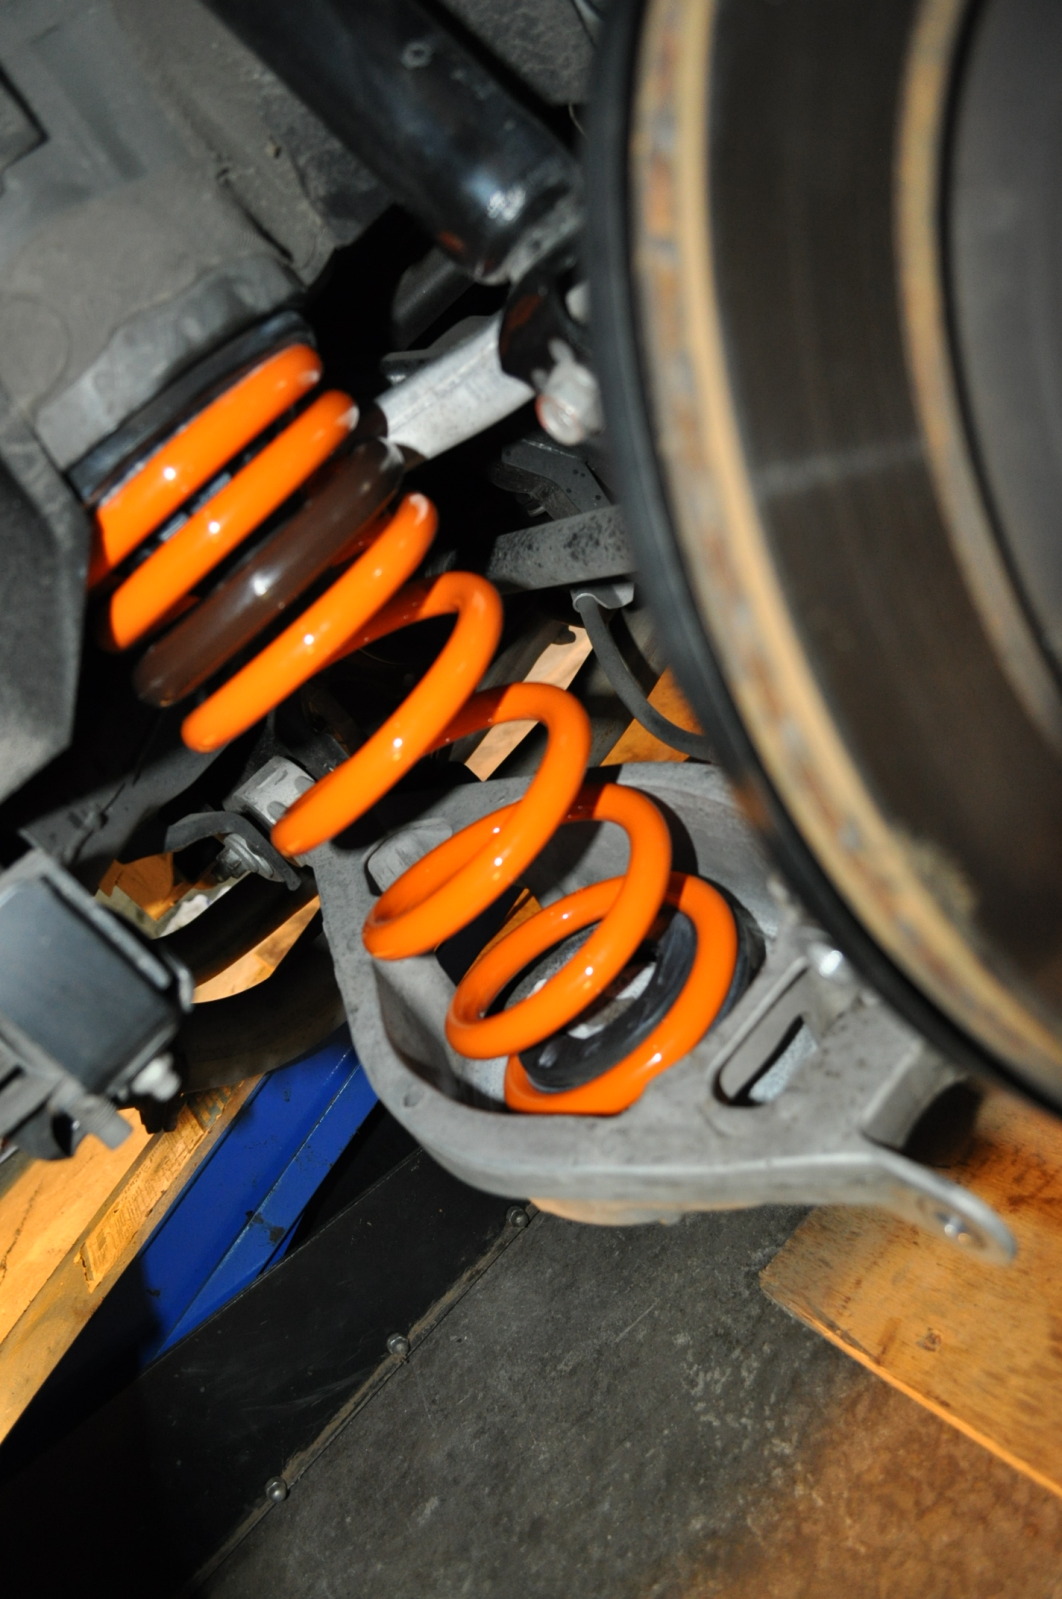
Now go ahead and insert your new spring onto the spring plate with the rubber ring attached to the bottom of it. Do it in the following order; Insert the top of the spring first into the rubber cone followed by the bottom of the spring with ring attached to the spring plate. (*note: the rubber ring at the bottom of your spring may need to be turned in order to fit the pattern in the bottom spring plate.)
Jack up spring with car jack and align it with tire axle so you are able to fit bolt through. This may take a couple of tries to get the positioning correct.
Now simply insert bolt and tighten it up. Once its fastened into place go ahead and drop the jack holding the spring plate up.
(Use your imagination Picture > drop jack )
)
Go ahead and re assemble now; Throw tire back on axle, fasten it down with lug nuts, jack up car to remove jack stands, remove car jack, and drive back into garage front first.
This project will take you approx a few hours depending on the tools available to you. This is definitely one of those projects that would benefit you from having some assistance. The Rear is rather simple and straightforward to install. It might be a little tricky trying to line up the bolt hole on re assembly but you shouldn’t have much of an issue thereafter. I would recommend taking the time while you have you wheels off to do some tire well cleaning. Without any further delay let’s get started shall we.
DIY Video: My attempt at making video with shoddy camera work: http://www.youtube.com/watch?v=FUmGDd1K7Kg
Please download the Factory Service manual: Category:Service - The Infiniti G37 Information Resource
After extracting the files you can look in the folder for FSU & RSU files where you will find information on the back and front suspension.
Ark Springs:
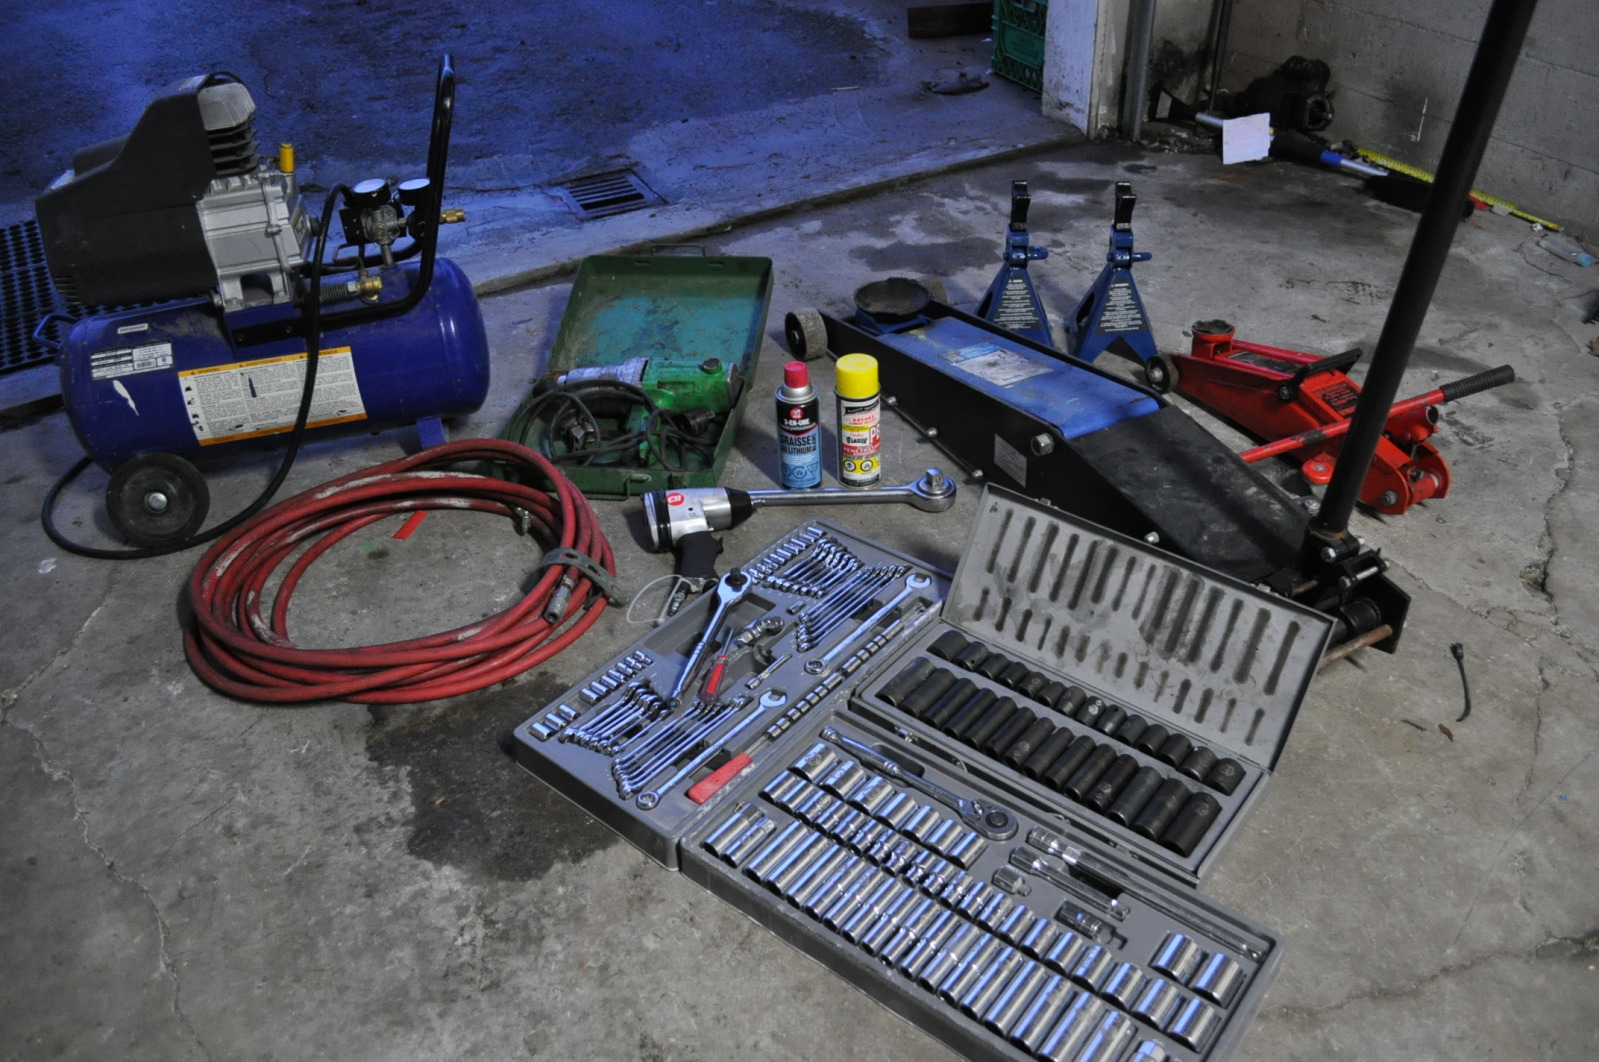
Equipment you will need:
Impact Wrench (air or electric works fine, I personally used a combination of both)
PB blast
White lithium grease
Ratchet with the following sockets; 12mm 14mm 17mm 19mm 21mm
Wrench 11/16
Jack Stands
Car jack
Tire iron
Optional: 5 Tonne Jack
Optional: general purpose cleaning equipment. Ex. Brush, cloth etc.
**Prior to starting the following break the seals on lug nuts securing your wheels in place. This will keep you from shaking the car about when removing nuts after lifting it onto jack stands. I know it personally took me a bit of elbow grease to break the seals on some of them.
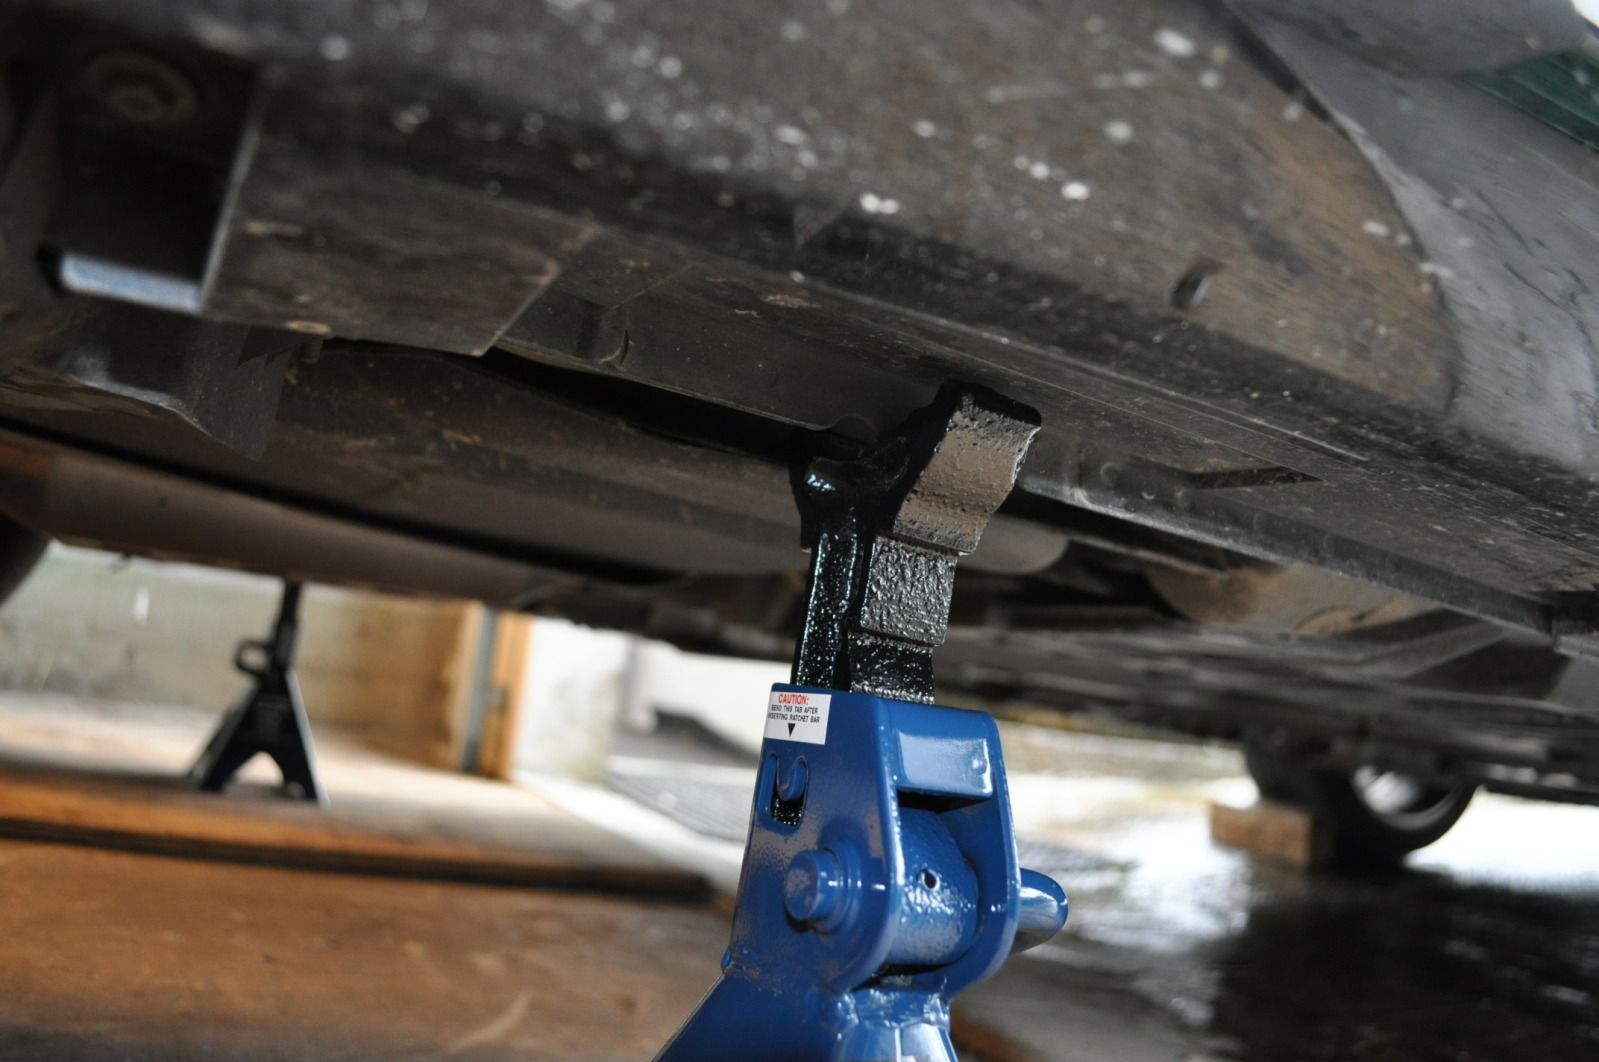
First things first you will need to jack up your car and place it onto, either jack stands like shown below or something similar to keep your wheels elevated. I recommend placing some wooden blocks on the opposite end of the side you are lifting for added security.
Once your car is jacked up and secured you can go ahead and remove the lug nuts holding your wheels in place(21mm socket). Feel free to use your air wrench to speed up the process!
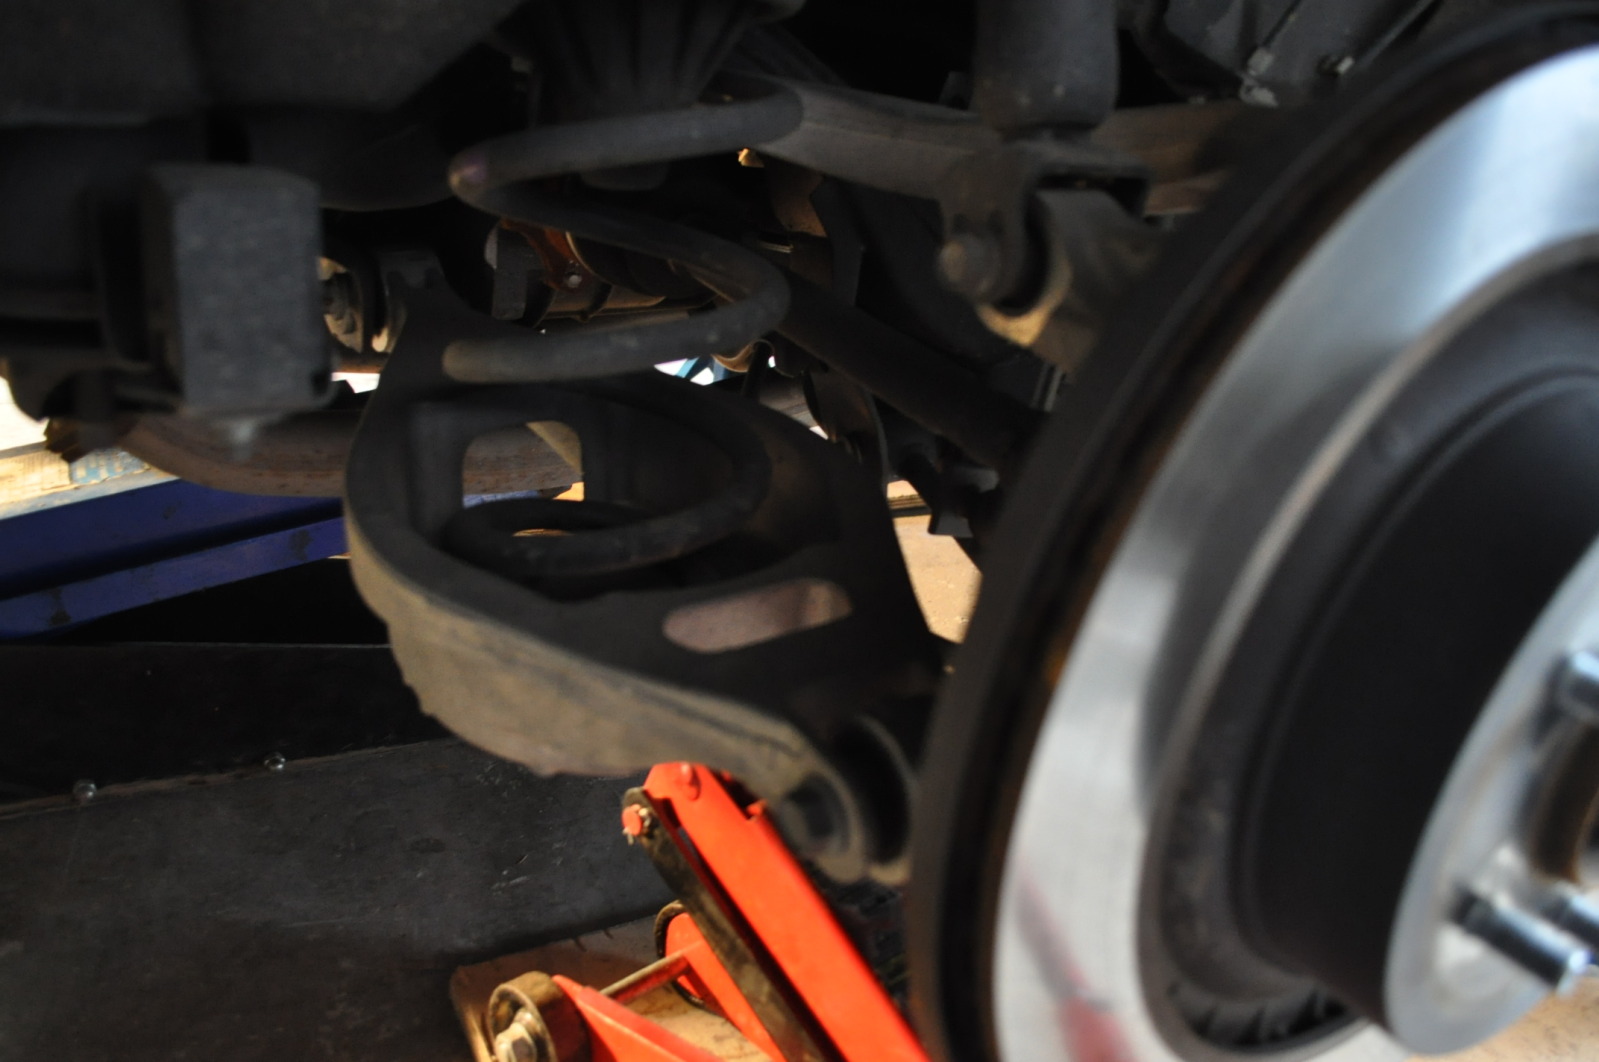
Now what you will want to do is position your car jack underneath the back spring plate. Once in position go ahead and jack it up till it compresses to a point in which there is little to none tension remaining on the “spring plate bolt”.
Follow this up by removing the “spring plate bolt” located behind the tire axle. In order to remove this bolt you will need a 11/16 wrench and a 17mm socket for either your impact wrench or ratchet.
Once you have removed the “spring plate bolt” lower the jack slowly and remove the spring. However in order to remove the spring you will need to push down on the side you removed the bolt from the previous step. Then it’s just a matter of yanking it out as there will be nothing holding it in place.
Optional Step: Take this time to do some cleaning where you see fit. First time I have cleaned tire wells since I purchased my car in 08.
Spring Comparison
I recommend you clean the rubber ring, cone, and plate where the lowering spring will sit. Once they are clean you can apply some white lithium grease to each component.
Now go ahead and insert your new spring onto the spring plate with the rubber ring attached to the bottom of it. Do it in the following order; Insert the top of the spring first into the rubber cone followed by the bottom of the spring with ring attached to the spring plate. (*note: the rubber ring at the bottom of your spring may need to be turned in order to fit the pattern in the bottom spring plate.)
Jack up spring with car jack and align it with tire axle so you are able to fit bolt through. This may take a couple of tries to get the positioning correct.
Now simply insert bolt and tighten it up. Once its fastened into place go ahead and drop the jack holding the spring plate up.
(Use your imagination Picture > drop jack
)Go ahead and re assemble now; Throw tire back on axle, fasten it down with lug nuts, jack up car to remove jack stands, remove car jack, and drive back into garage front first.
Last edited by Repsol13; Apr 14, 2012 at 11:48 AM. Reason: mooore pictuuurews
Thread Starter
Registered Member
iTrader: (1)
Joined: Mar 2012
Posts: 12
Likes: 3
From: Vancouver BC
Ark Performance Lowering Springs
*Still editing Video
I lost my, rather misplaced my camera halfway through putting front springs on, so I am missing pictures and videos. Sorry!DOMO
Now we move onto the more difficult part of the installation, the front springs. These personally were a headache for me due to the shape of the spring in particular. I didn�t have quite the right spring compressor so I ended up having a shop install them onto the front struts for me.
As mentioned before go ahead and raise your car onto your jack stands or something similar. I personally used my 5 tonne jack again, however I was unable to get this underneath the car without raising one of its sides with a car jack due to ride height. Place jack stands between indicated markers(refer to car manual) and as a added safety precaution feel free to place wooden blocks at opposite end.
(See Video)
*Remove your tire with 21mm socket and don�t forget to break seal prior to lifting vehicle. Take said tire and roll it down a hill� moving on..
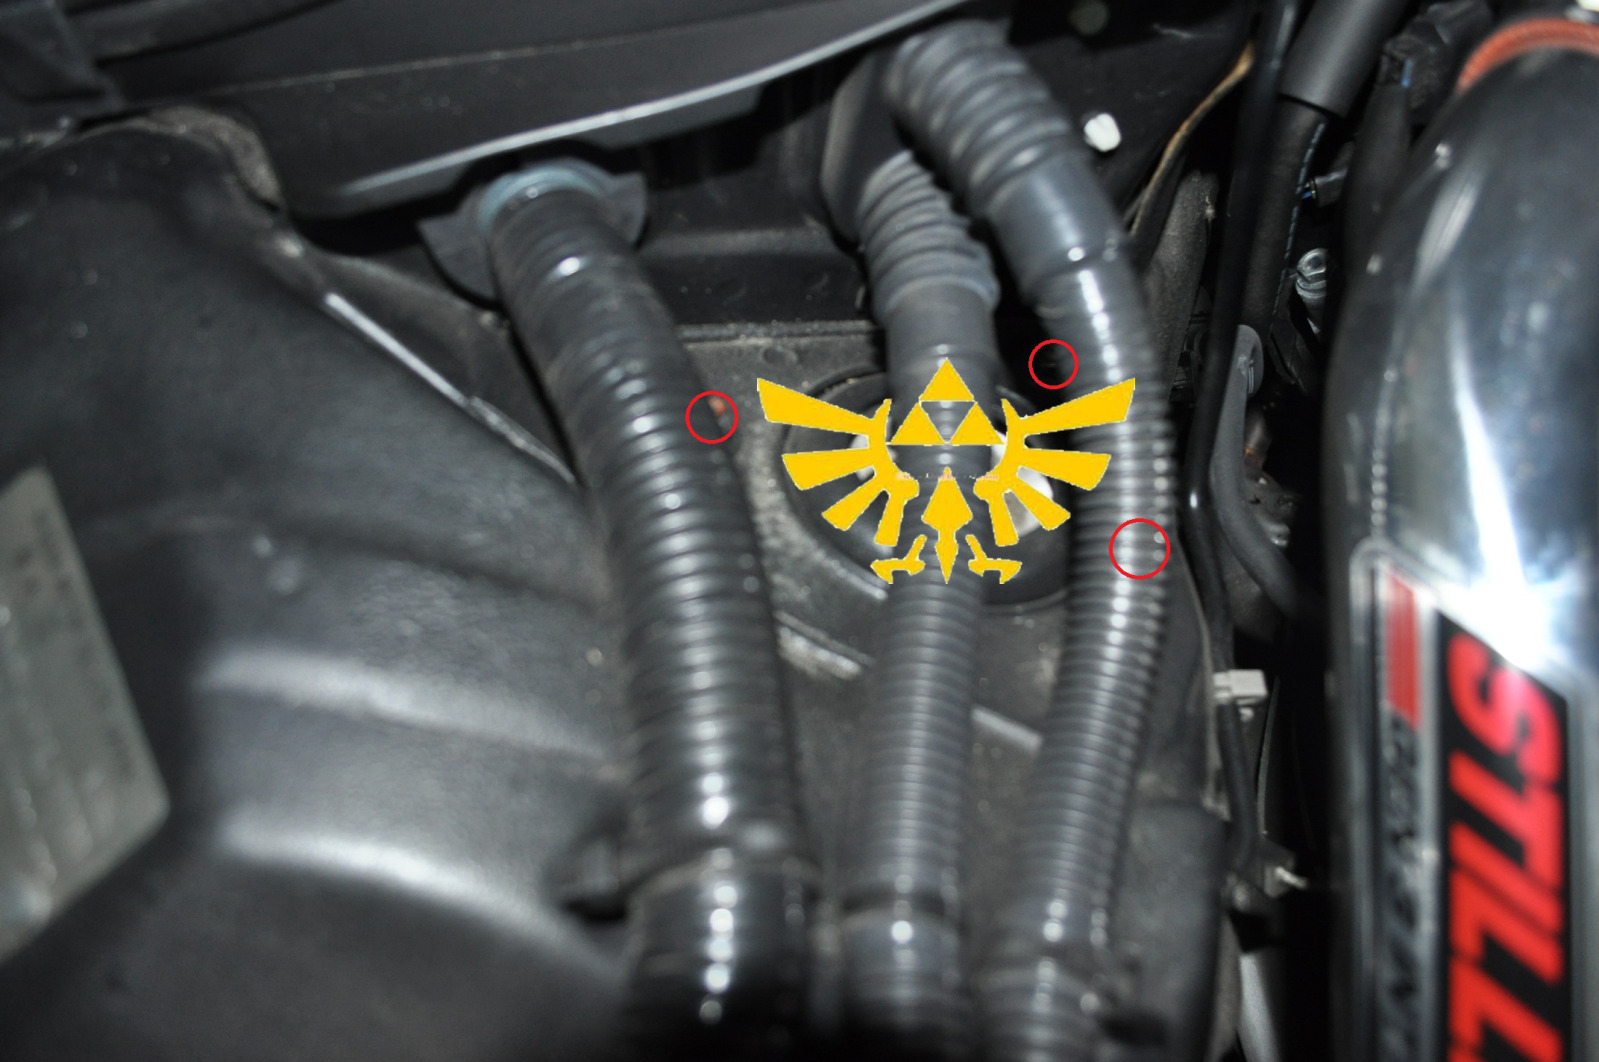
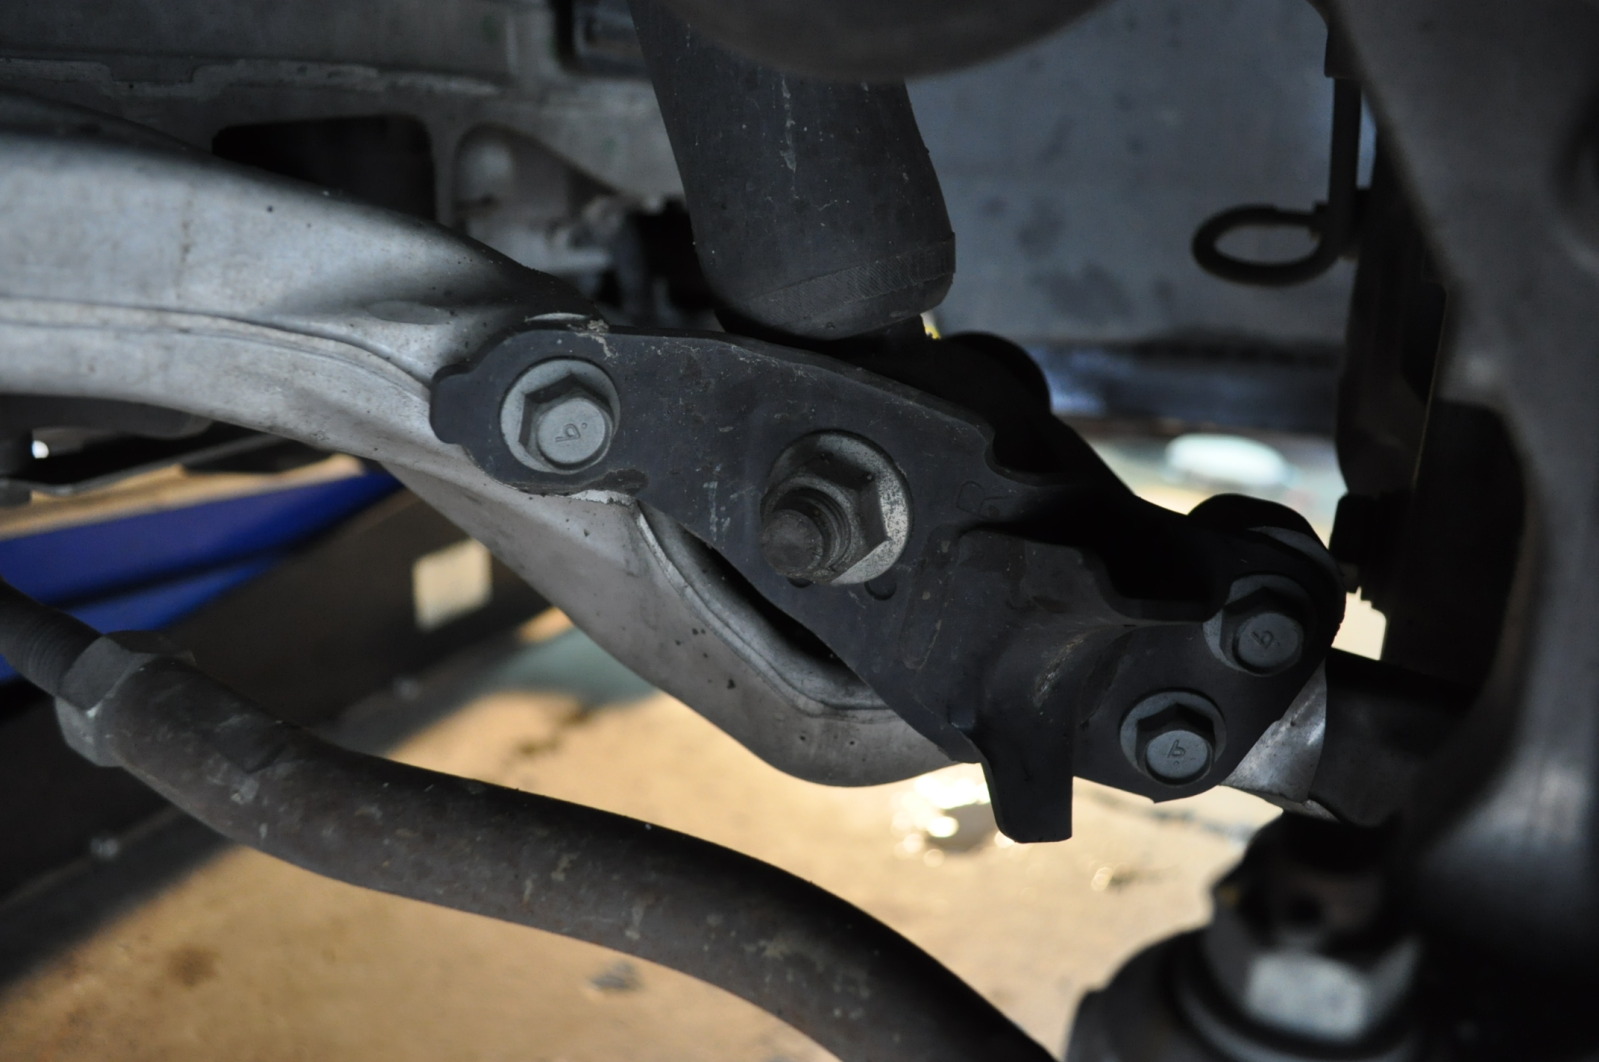
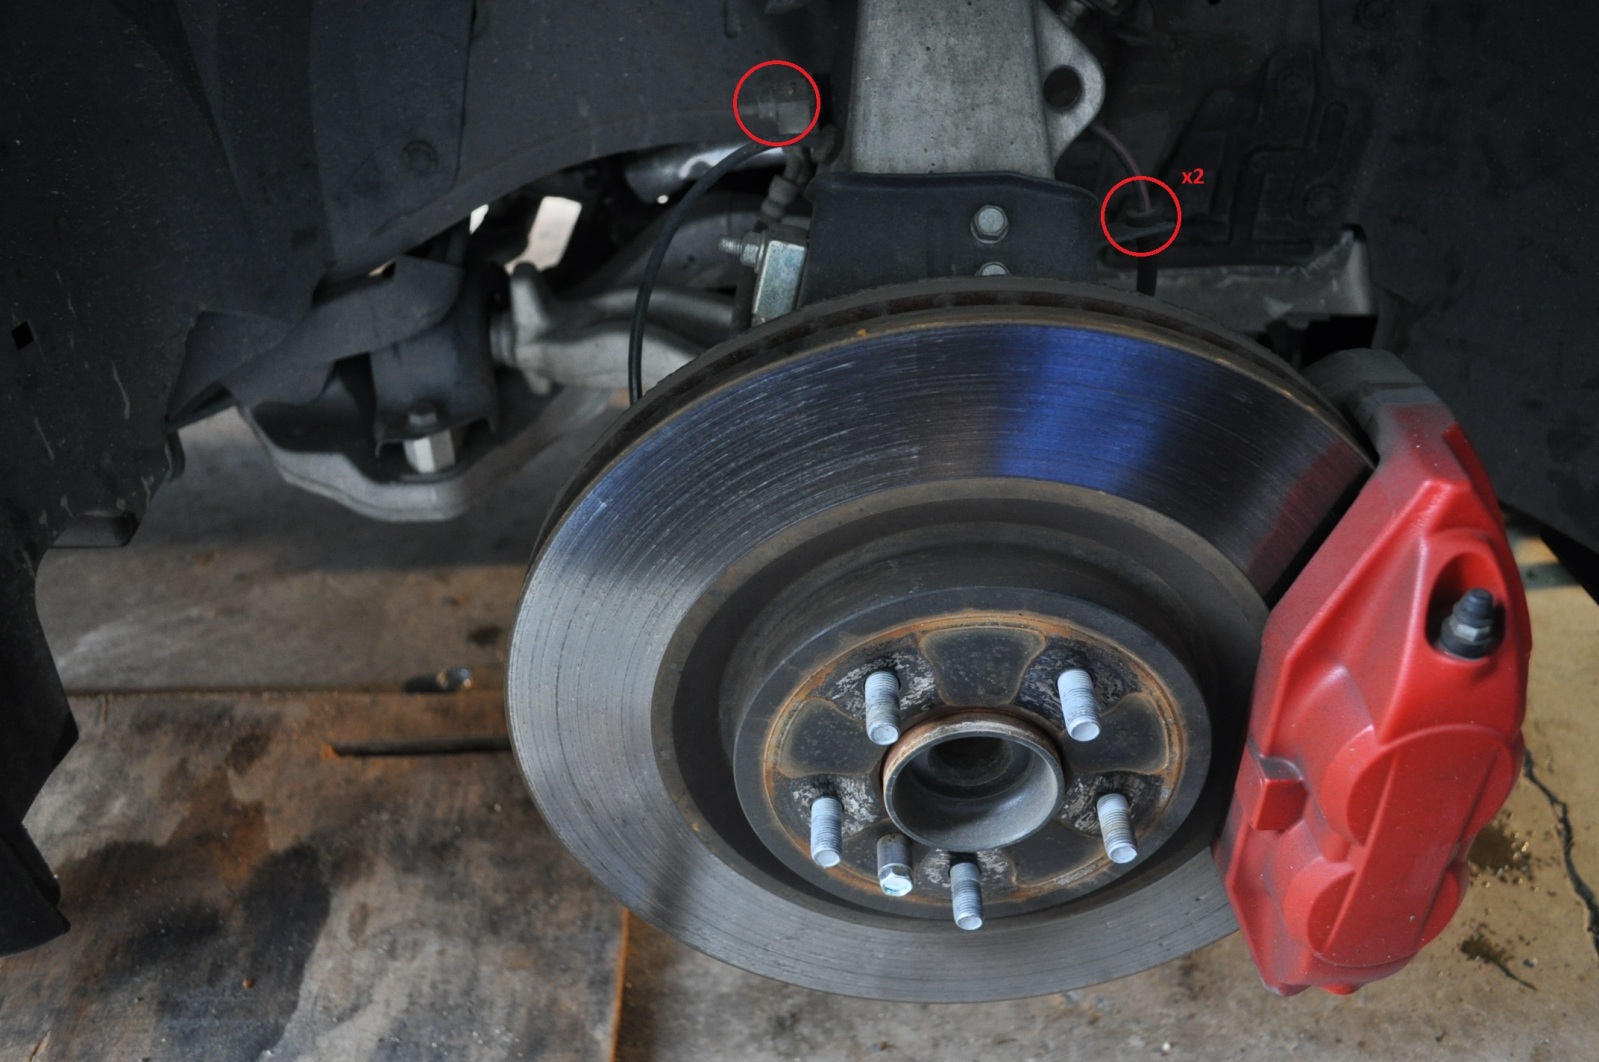
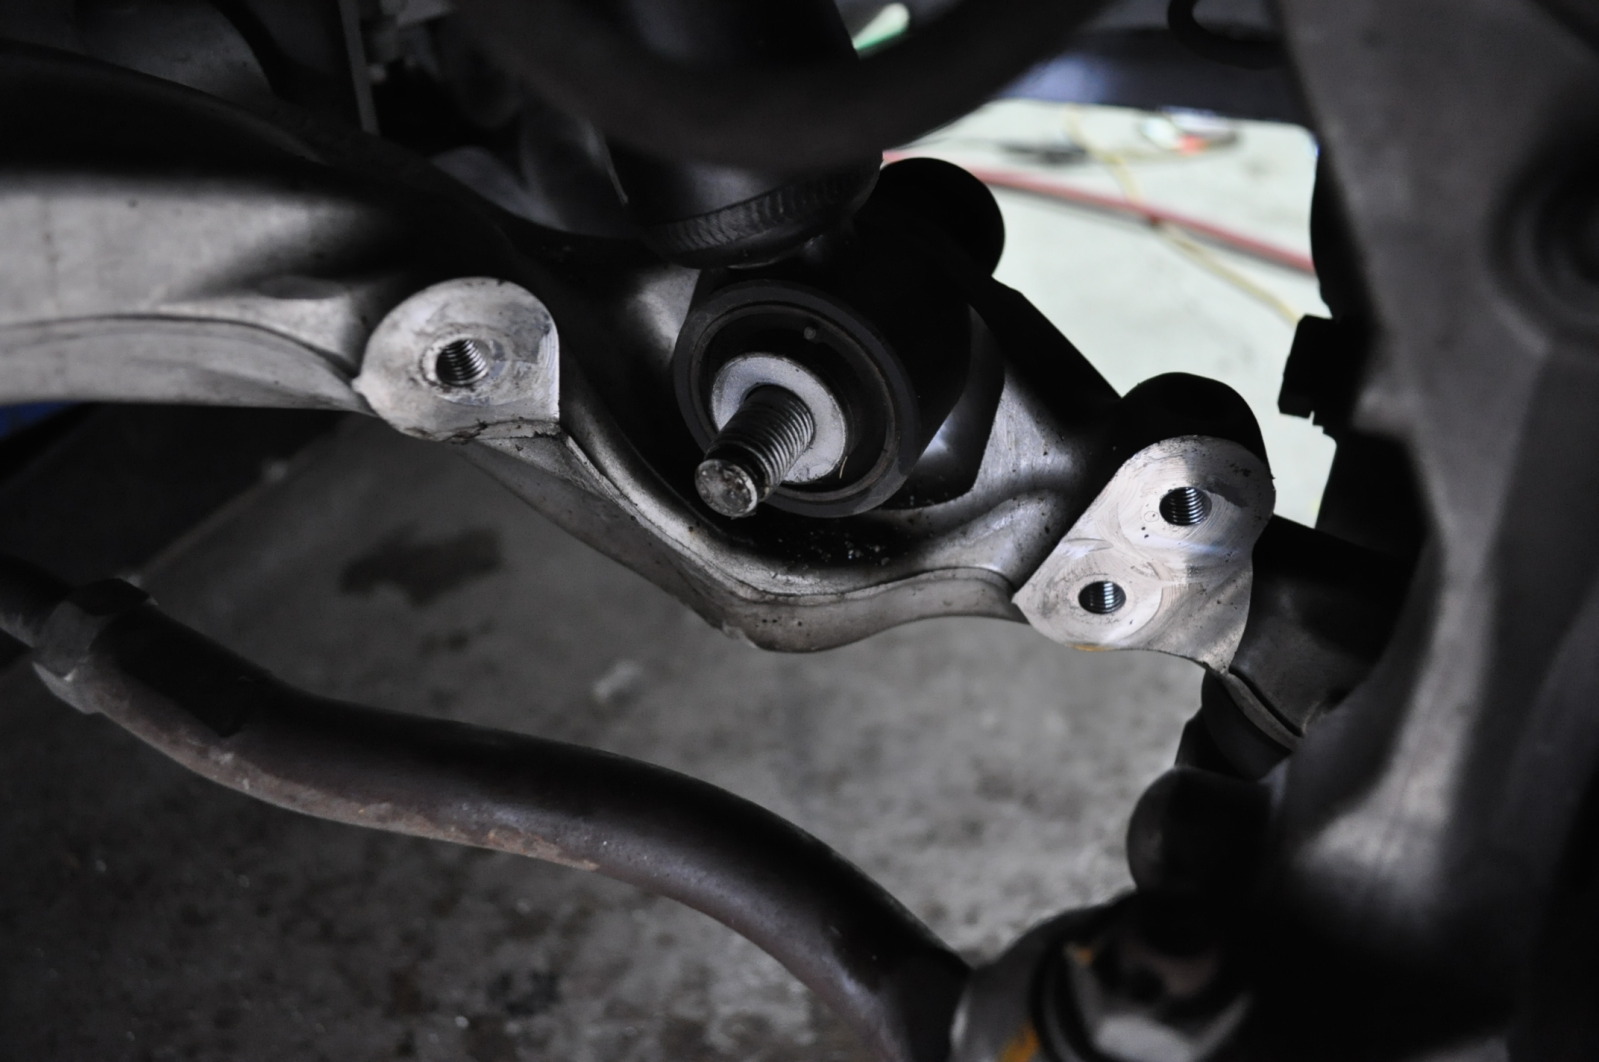
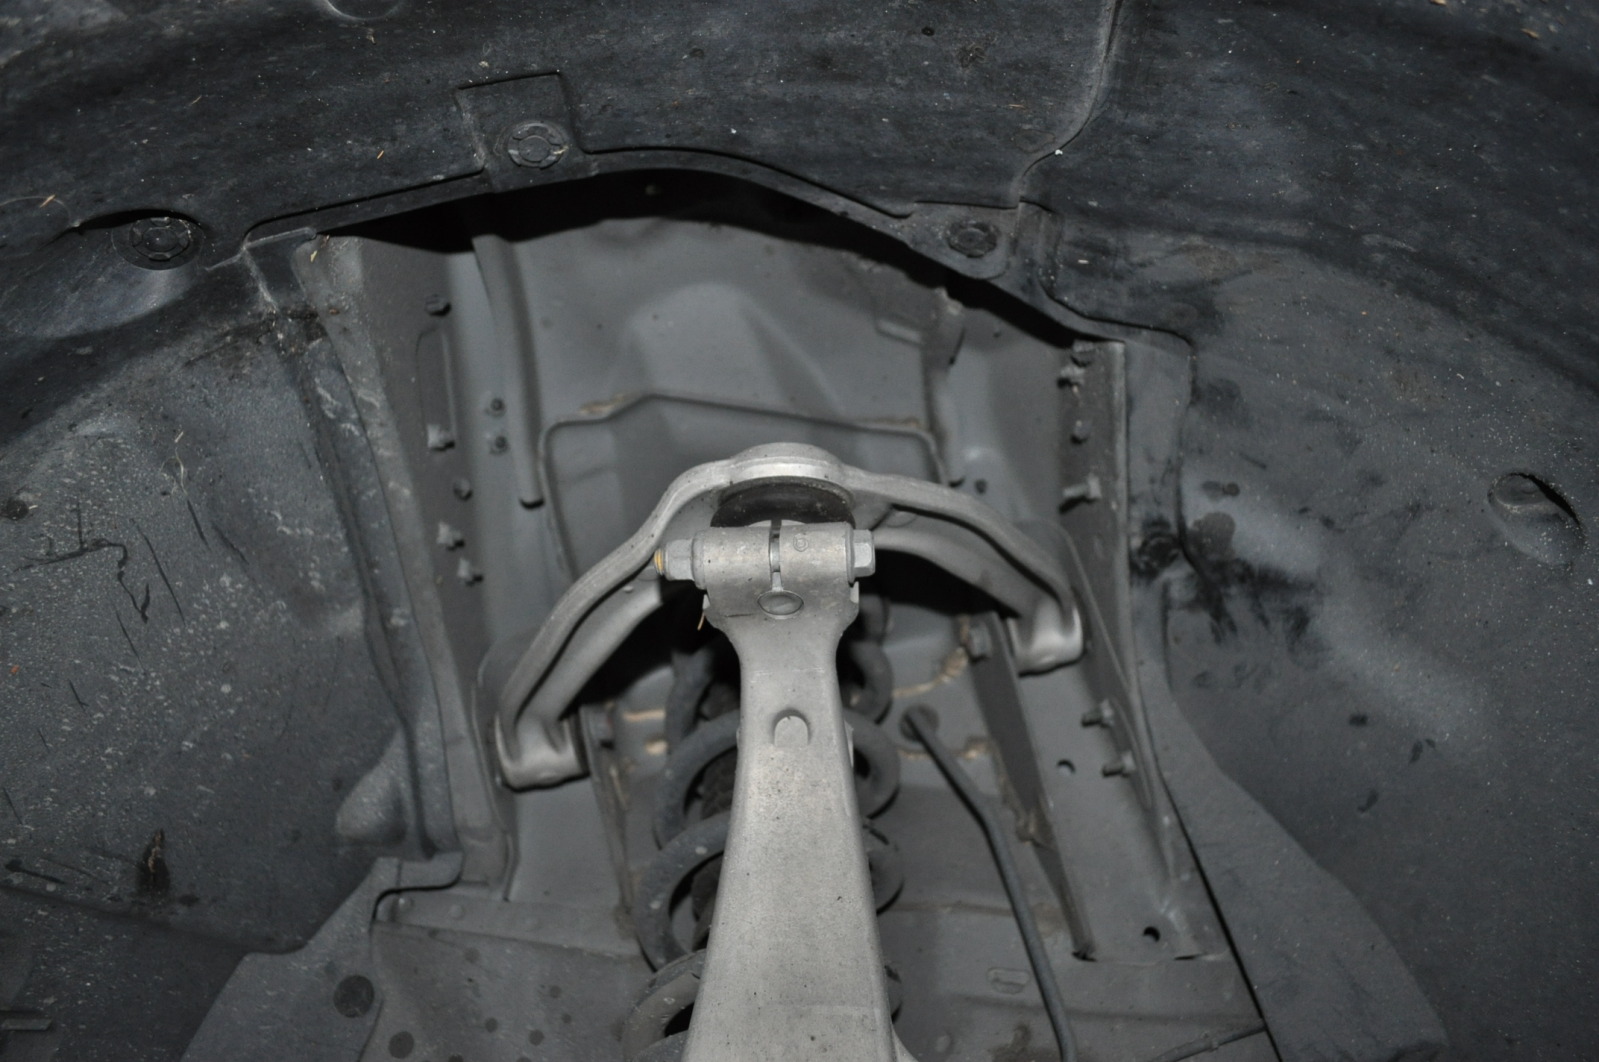
In order to remove the front springs, which are attached to the front struts, you will need to remove the following bolts; There are Three(3) 12mm nuts located underneath the hood, keeping the upper end of the front struts in place. One (1) 12mm bolt holding the brake line on the strut, and 2 cables looping onto the side, which can be pulled off. Finally there is a black bracket with Three(3) 14mm bolts, and the infamous 19mm nut keeping the lower half of the strut in place. There will be an orange gasket attached to top, make sure not to lose this piece. Pretty flimsy may fall off.
(insert picture; Bolts on top, black bracket, brake line, and 2 rubber cables.)
Top Nuts 12mmx3
Black Bracket (3) 14mm and (1) 19mm
2 rubber cables & 1 brake line nut 12mm
Once the previously mentioned bolts & nuts have been removed you are going to want to remove the front strut by winding it down in a spiral motion so it doesn�t get caught on anything. It�s much easier than it sounds.
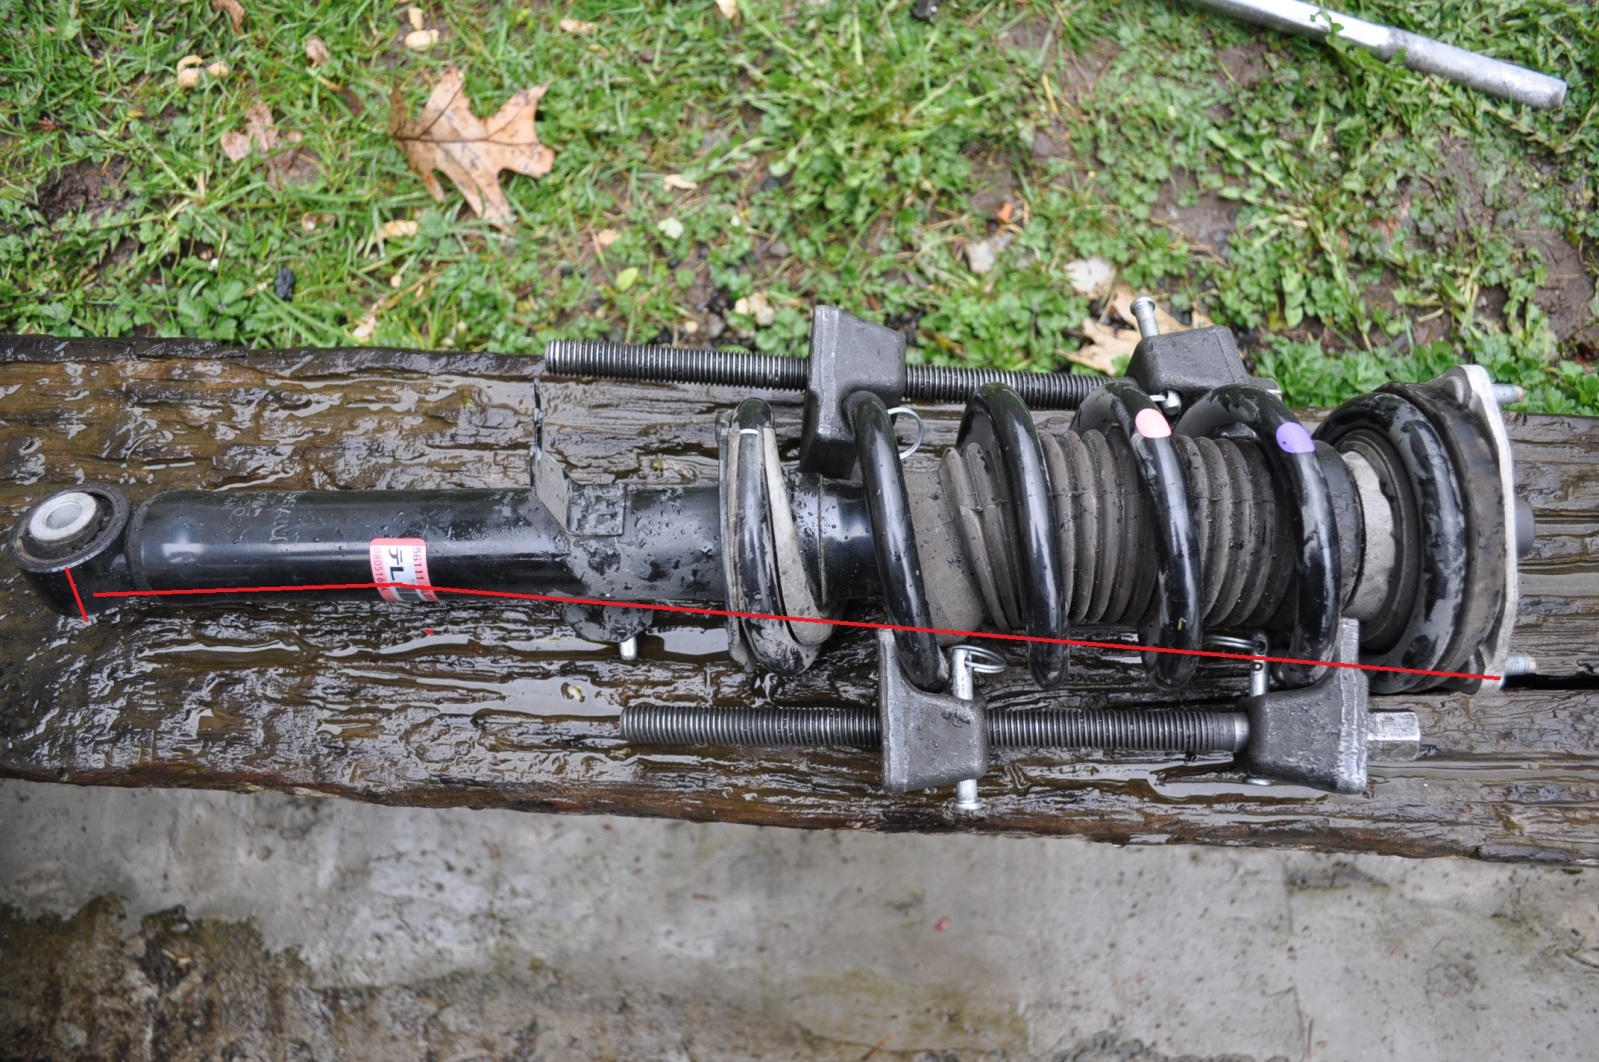
If you have a spring compressor kit, you can now go ahead and compress the spring, and remove it once there is no longer any tension on the strut. 17mm Socket for the inner nut holding the spring on the strut. Depending on what kind of after-market springs you�re placing on, you can either put them back on with the same kit, or in my case I took it to a shop and got them installed, and aligned for 40$ at friends shop. (*note if you do not align the springs properly onto the strut upon reassembly it will not fit back into your car) It is simple, just read what the strut is labelled L or R for the side, and make sure the Triangle shaped top, is parallel to the stickers. See picture below.
Spring compressor
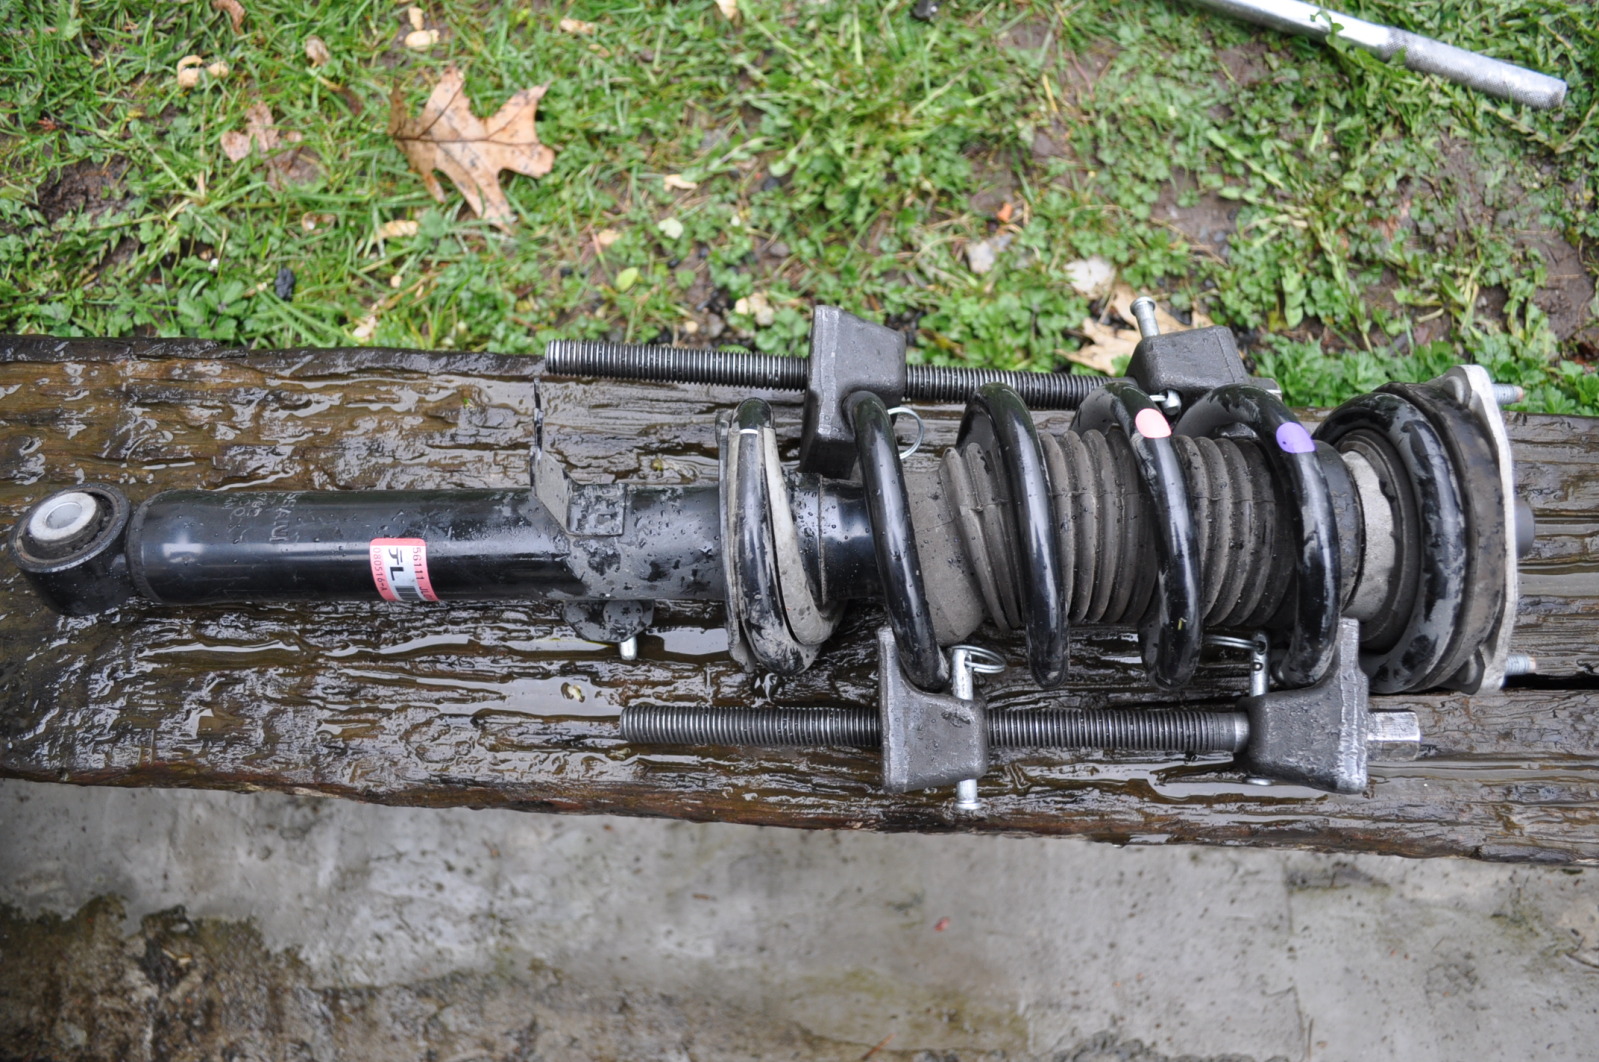 Alignment
Once you got your new after-market lowering springs on the struts go ahead and begin re-assembling the Struts back onto your car. Put your black bracket, brake line, 2 rubber cables, and 3 nuts at top back on. Place tire back on, lower car, and you�re basically finished.
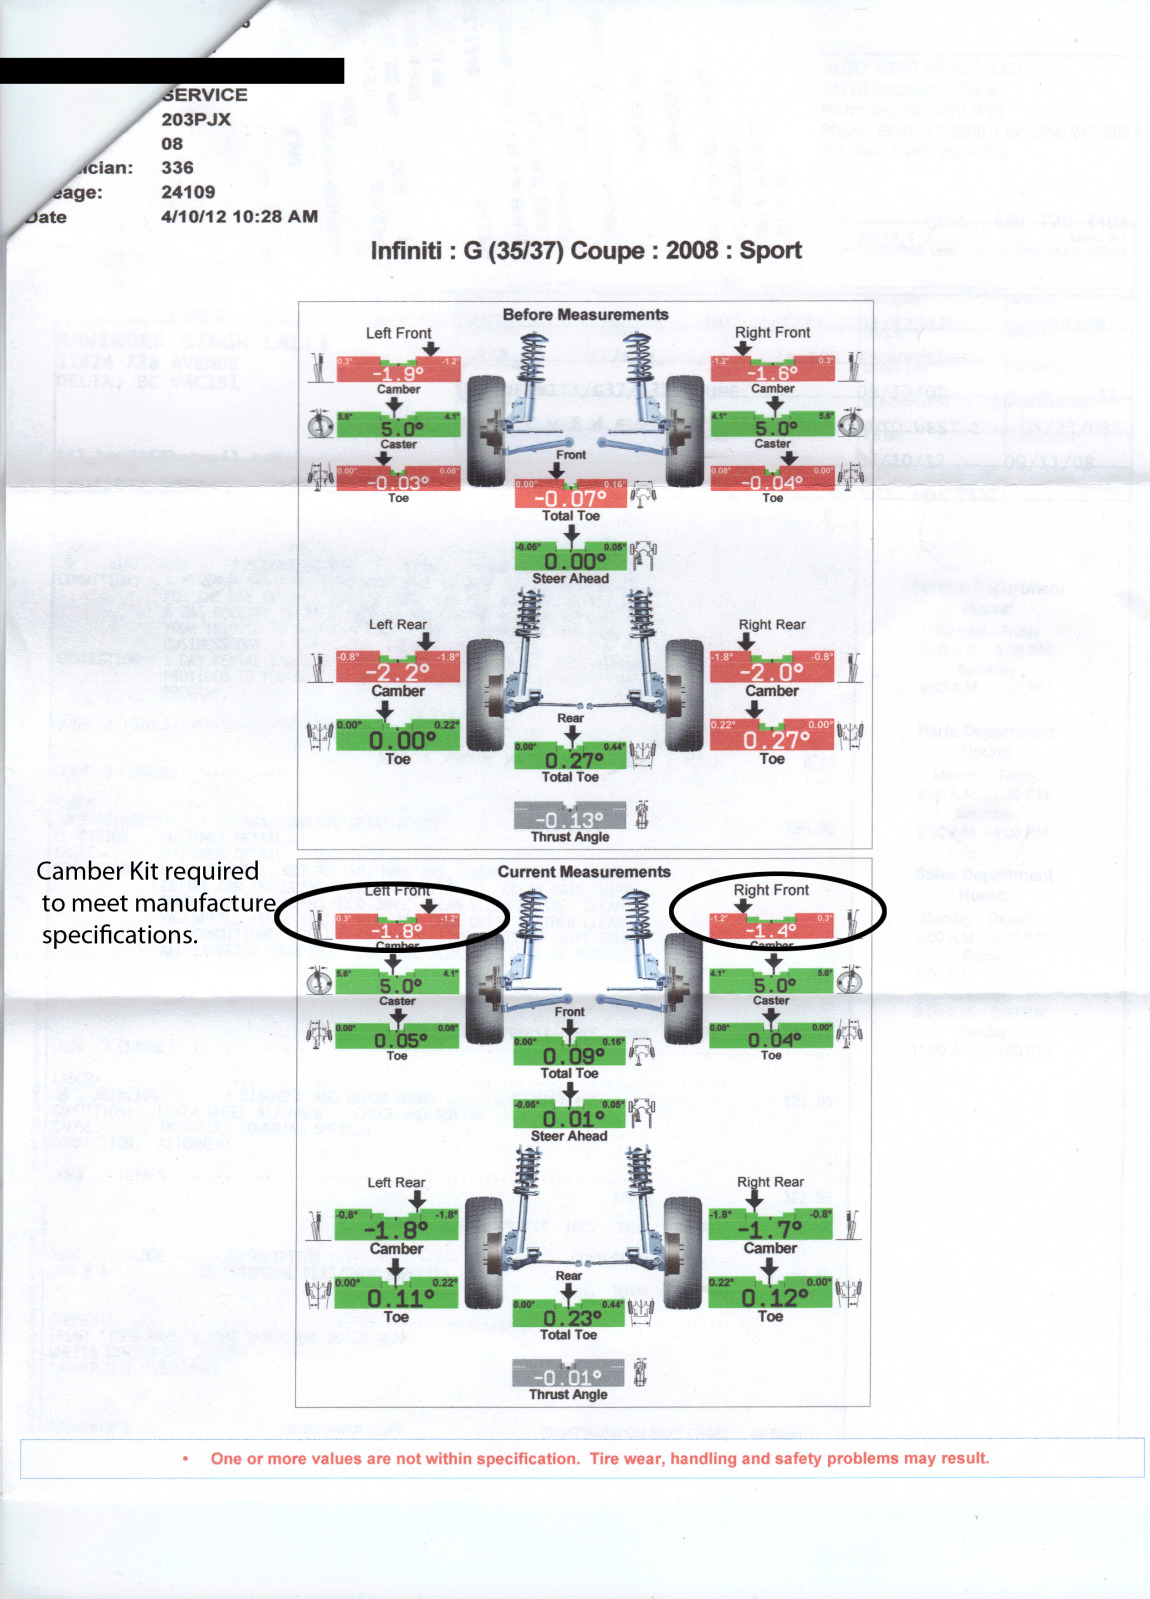
*After 2 weeks make sure to get your car re-aligned.
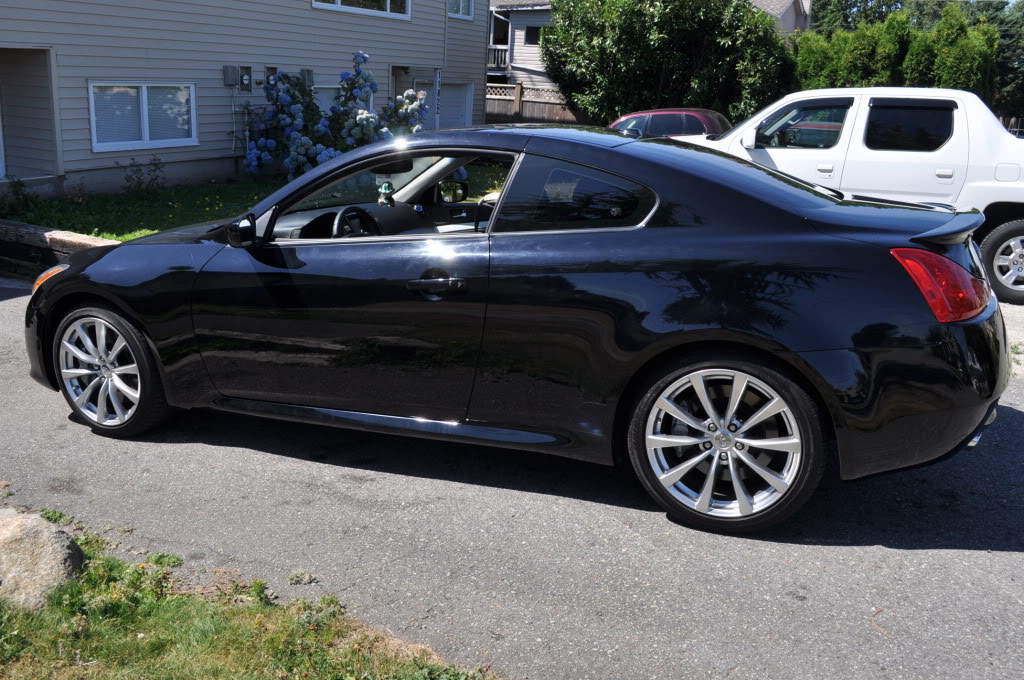
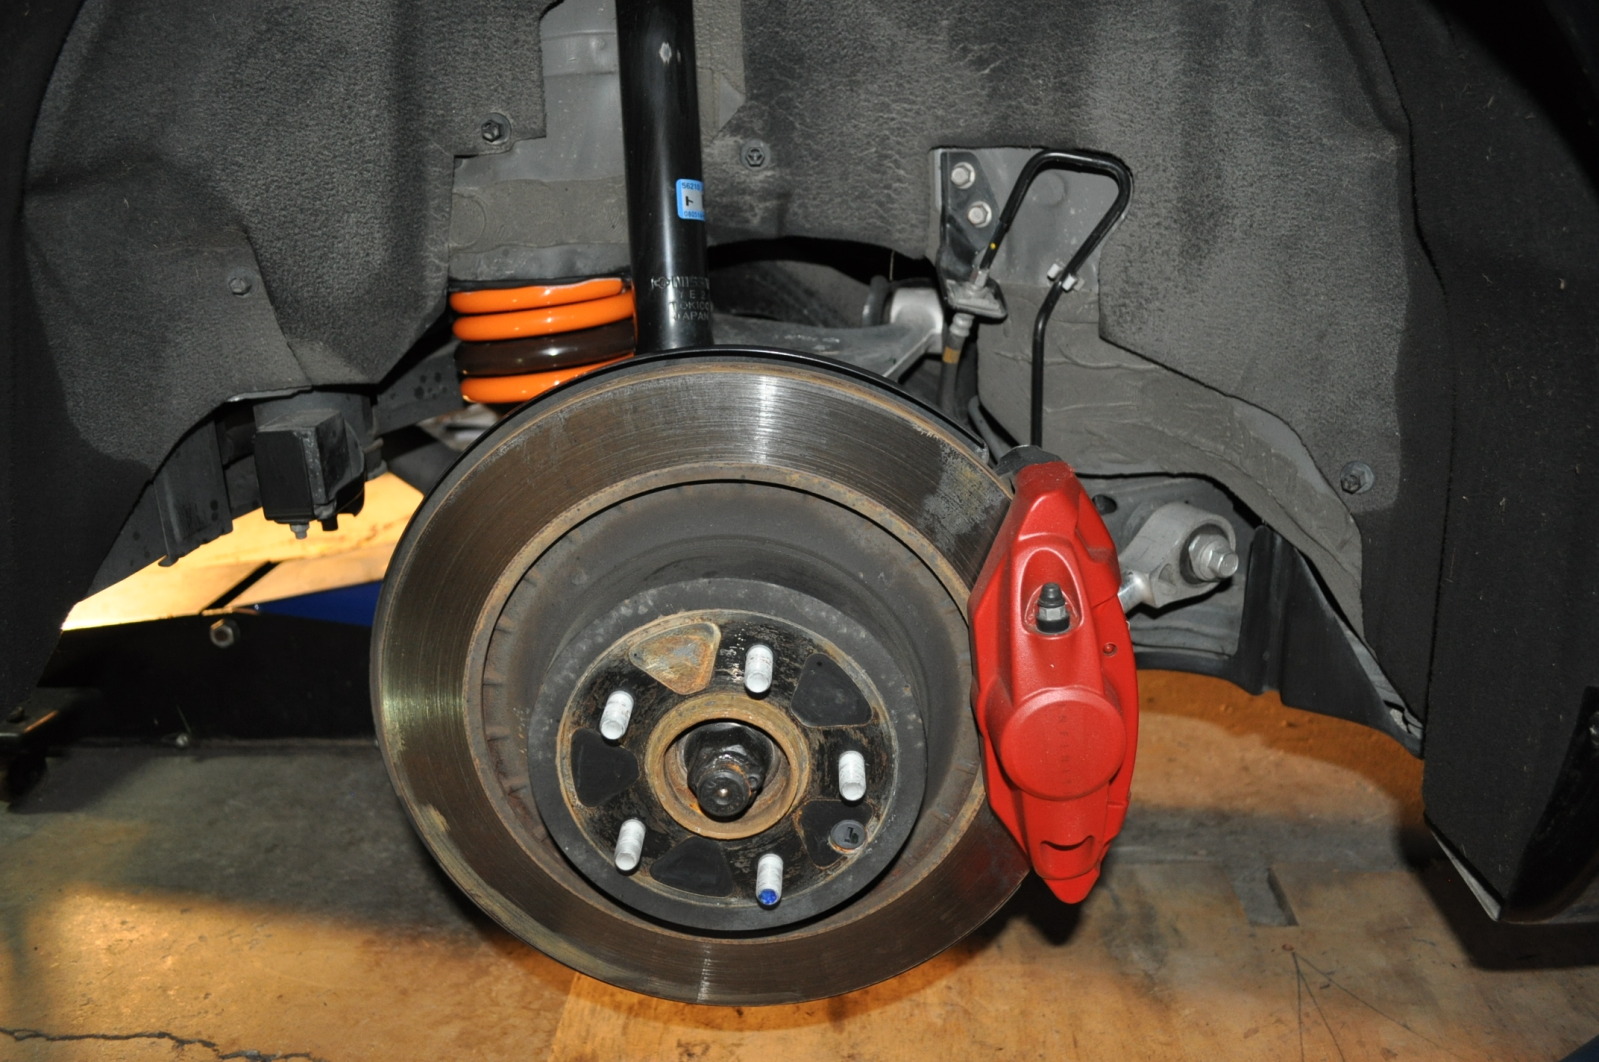
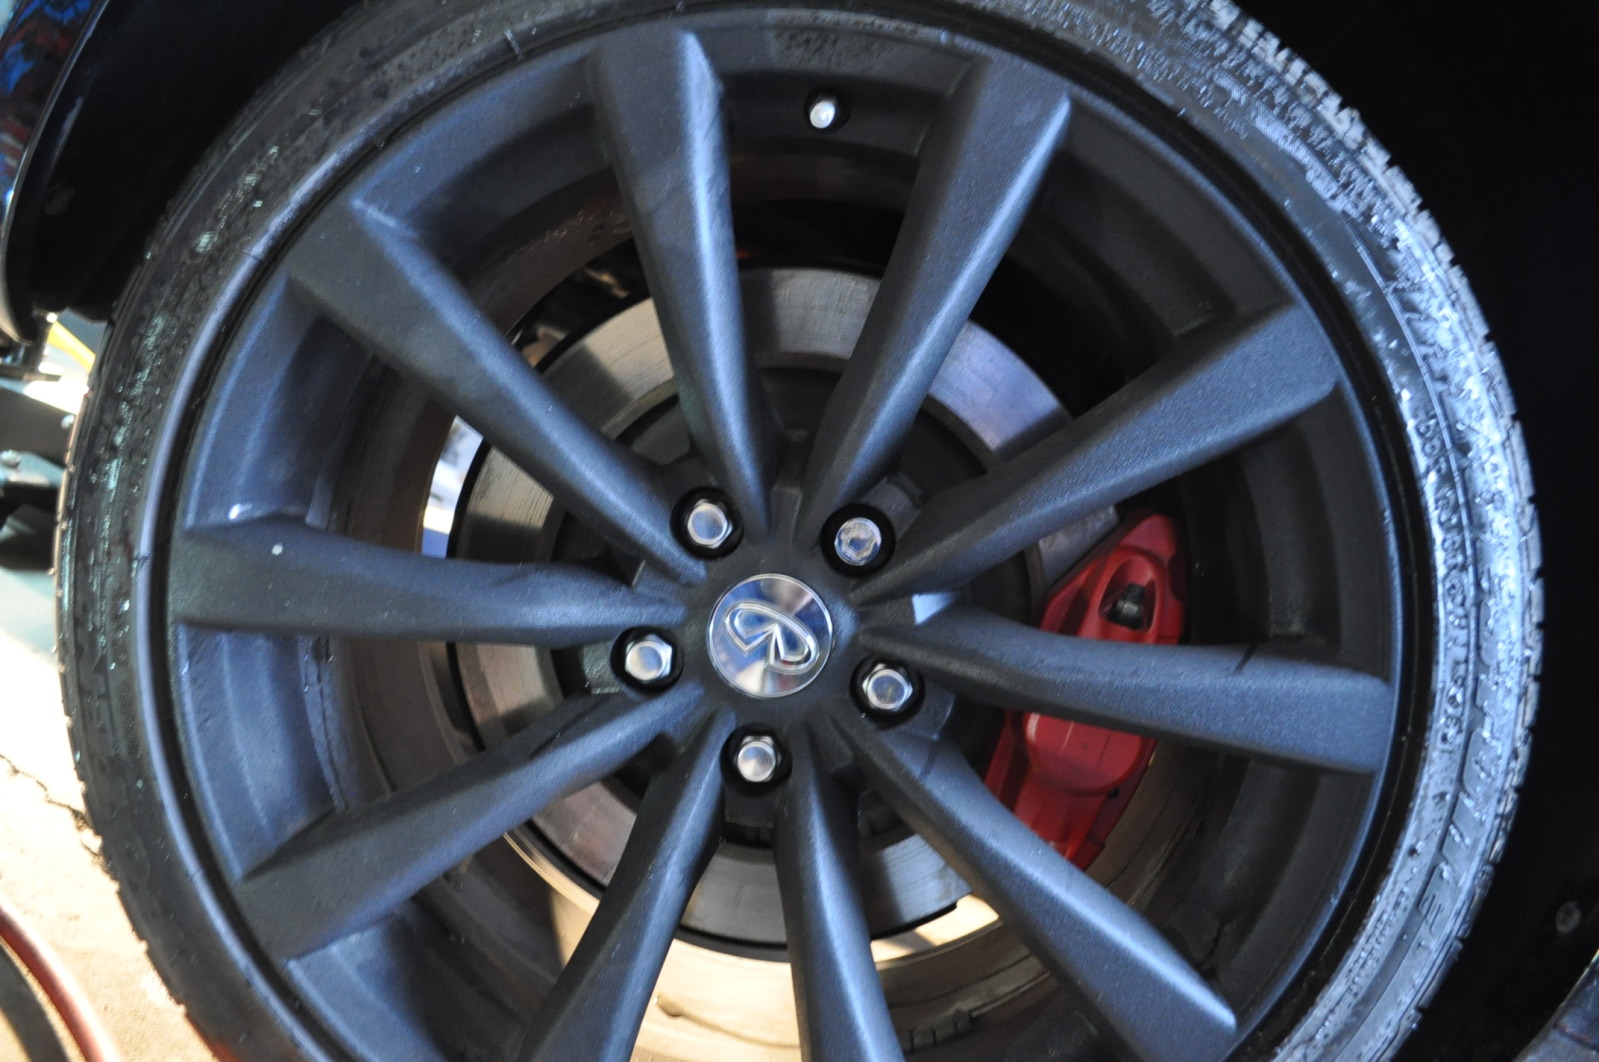
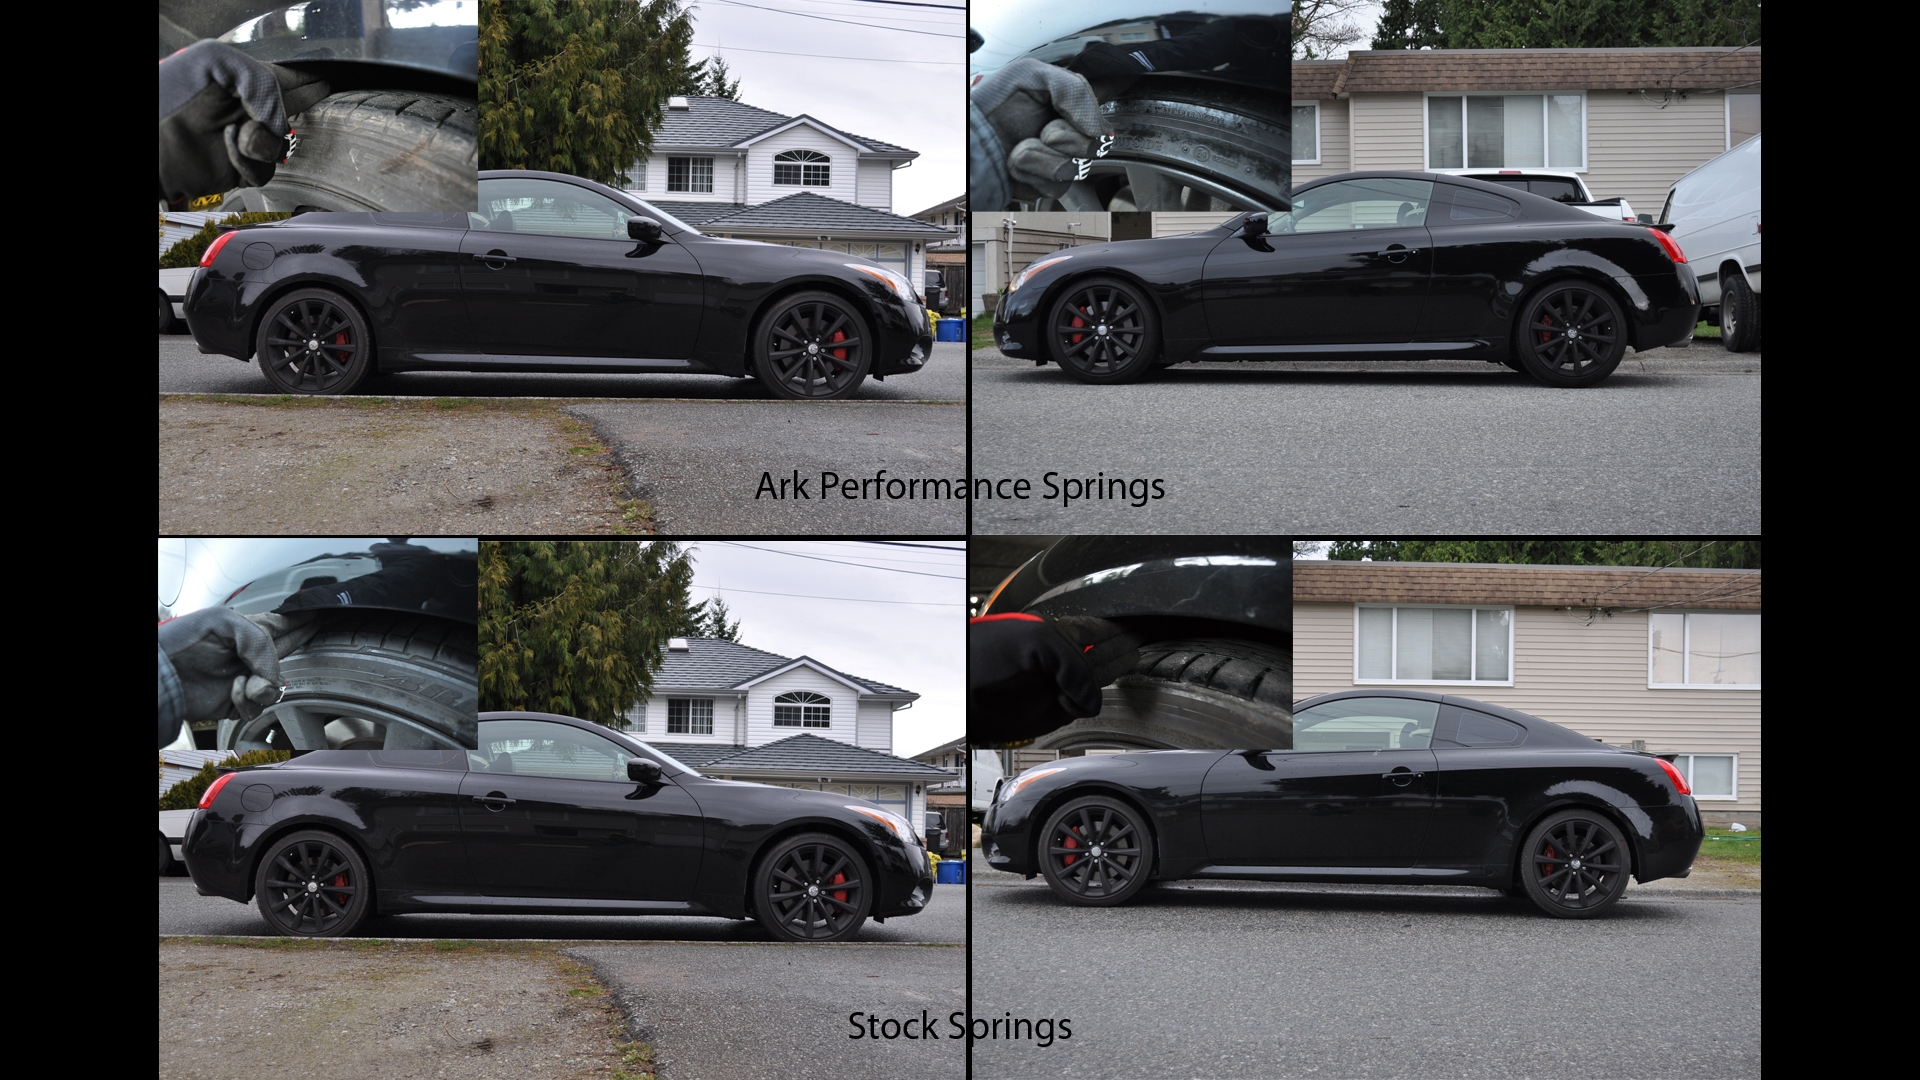
Here is how my car looks now. Depending on what springs you use, it�ll be a little different, but this is something worth doing as soon as possible.
[... 3 weeks later]
I took these the other day after getting my car fully detailed, so the springs have settled in these pictures.


I lost my, rather misplaced my camera halfway through putting front springs on, so I am missing pictures and videos. Sorry!DOMO
Now we move onto the more difficult part of the installation, the front springs. These personally were a headache for me due to the shape of the spring in particular. I didn�t have quite the right spring compressor so I ended up having a shop install them onto the front struts for me.
As mentioned before go ahead and raise your car onto your jack stands or something similar. I personally used my 5 tonne jack again, however I was unable to get this underneath the car without raising one of its sides with a car jack due to ride height. Place jack stands between indicated markers(refer to car manual) and as a added safety precaution feel free to place wooden blocks at opposite end.
(See Video)
*Remove your tire with 21mm socket and don�t forget to break seal prior to lifting vehicle. Take said tire and roll it down a hill� moving on..
In order to remove the front springs, which are attached to the front struts, you will need to remove the following bolts; There are Three(3) 12mm nuts located underneath the hood, keeping the upper end of the front struts in place. One (1) 12mm bolt holding the brake line on the strut, and 2 cables looping onto the side, which can be pulled off. Finally there is a black bracket with Three(3) 14mm bolts, and the infamous 19mm nut keeping the lower half of the strut in place. There will be an orange gasket attached to top, make sure not to lose this piece. Pretty flimsy may fall off.
(insert picture; Bolts on top, black bracket, brake line, and 2 rubber cables.)
Top Nuts 12mmx3
Black Bracket (3) 14mm and (1) 19mm
2 rubber cables & 1 brake line nut 12mm
Once the previously mentioned bolts & nuts have been removed you are going to want to remove the front strut by winding it down in a spiral motion so it doesn�t get caught on anything. It�s much easier than it sounds.
If you have a spring compressor kit, you can now go ahead and compress the spring, and remove it once there is no longer any tension on the strut. 17mm Socket for the inner nut holding the spring on the strut. Depending on what kind of after-market springs you�re placing on, you can either put them back on with the same kit, or in my case I took it to a shop and got them installed, and aligned for 40$ at friends shop. (*note if you do not align the springs properly onto the strut upon reassembly it will not fit back into your car) It is simple, just read what the strut is labelled L or R for the side, and make sure the Triangle shaped top, is parallel to the stickers. See picture below.
Spring compressor
Alignment Once you got your new after-market lowering springs on the struts go ahead and begin re-assembling the Struts back onto your car. Put your black bracket, brake line, 2 rubber cables, and 3 nuts at top back on. Place tire back on, lower car, and you�re basically finished.
*After 2 weeks make sure to get your car re-aligned.
Here is how my car looks now. Depending on what springs you use, it�ll be a little different, but this is something worth doing as soon as possible.
[... 3 weeks later]
I took these the other day after getting my car fully detailed, so the springs have settled in these pictures.


