
DIY: Removing Front Grille


Registered User
Joined: Oct 2010
Posts: 139
Likes: 2
From: NJ
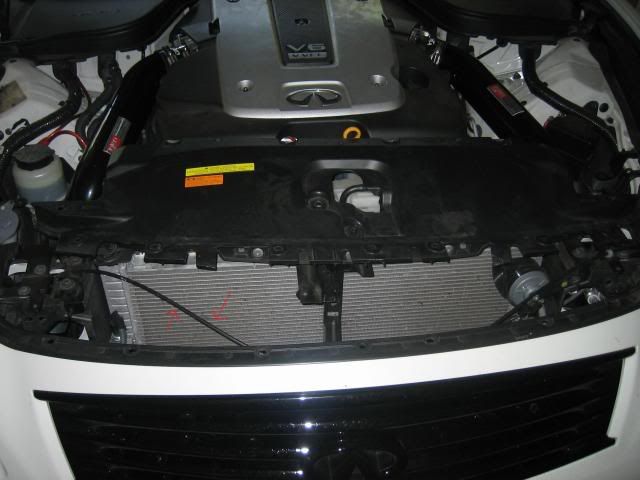
I managed to remove my radiator cover without cracking it. I removed all the bolts (cover and reservoir) and clips (cracked one), also removed the plastic pins on the weather striping over the headlights (broke all 4), and unscrewed the bolt above the headlight. By doing that the bumper was able to flex a lot. My problem is how do you disconnect the wiring harness under the cover without damaging anything? I didn't want to damage anything so I put it all back. Any help guys? The arrows in the attachment below point to some of the wiring harness clips.

For the white clips, just yank it out with a bit of force. That's what I did and there was no damage at all to the clips. For the black ones, use some pliers to squeeze the "hooks" and then gently push it out of the hole.
Registered User
Joined: Oct 2010
Posts: 139
Likes: 2
From: NJ
Thanks...I ended up breaking a bunch of clips on the radiator and bumper so I was afraid I'd do the same with the wire harness. By the way those little pins for the weather striping costs over $4 ea.
Anyone else with suggestions?

Registered User
Joined: Aug 2011
Posts: 35
Likes: 0
I just did this last night.
Time: 3 hours
I didn't have the right socket, so i spent almost an hour fiddling around and after my friend brought the socket, BOOM! The bolts came off super easy.
MAKE SURE to remove bolts from the white tank and move it back. Also declip the thick wires under the cover, it will make your job 10 times easier.
I also de-cliped the thick wire from its plug on the bottom left side.
There are 5 bolts to remove after you take the cover off to remove the grill.
When you put it all together, you need to clip back the thick wire first, then make sure you have a little patience and LOTS OF LIGHT. put it back exactly how you removed the cover and pop everything in place.
Overall this was a medium difficulty to a noob like me.
Time if I did it again: 10 minutes


I fear doing this since 3/4 of everyone that did cracked their radiator cover. Geez, I'm unsure if I wanna toggle with this over the weekend now. Is the cover that tough to remove without cracking??


If I had known there were two metal rods that stick through those two holes holding the cover in place...... I would have never cracked it! But you really cant see back there and you assume you can just pull up until you hear the CRACK.
Alright guys, I couldn't stand watching my midnight grill in my living room so I decided to bite the bullet and install. I couldn't wait so I started at 6 p.m. at night. I took my sweet time to avoid the famous "cracking" of the radiator cover. Well I completed the install in 2 hours without cracking the radiator cover. I removed the wash tank to clear room for those annoying two middle bolts. After some wiggling and pulling, I got a clean removal.
Only minor issue I had was while removing the actual grill the pointy freaking screw on the top of the grill got jammed and then chipped a very small piece of my front bumper as I yanked it out. It's not noticable, but it ruined my "perfect install." I also was left with 1 extra screw when I swear every hole had a screw...lol have no clue how I was left with 1. You guys can avoid cracking the cover if you take your time, that's my only recommendation.
Only minor issue I had was while removing the actual grill the pointy freaking screw on the top of the grill got jammed and then chipped a very small piece of my front bumper as I yanked it out. It's not noticable, but it ruined my "perfect install." I also was left with 1 extra screw when I swear every hole had a screw...lol have no clue how I was left with 1. You guys can avoid cracking the cover if you take your time, that's my only recommendation.

