
DIY: Removing Front Grille

Thread Starter
Former Prez of LA G'Z
iTrader: (9)
Joined: Feb 2008
Posts: 7,845
Likes: 24
From: ~So.Cal~
Removing Front Grille
Many of you have requested a DIY for removing the grille, so here it is..
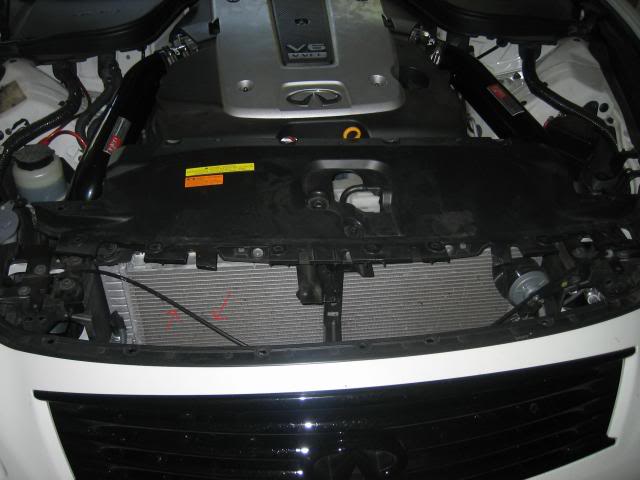
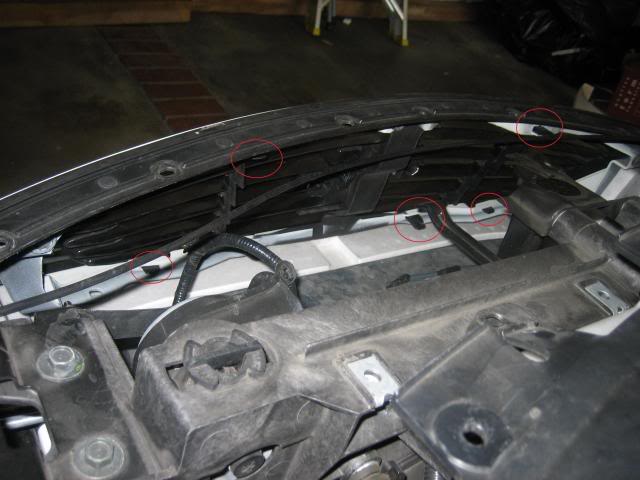
Remove the clips and bolts as shown in the picture with red circles. Use a 10mm socket and a flat head.
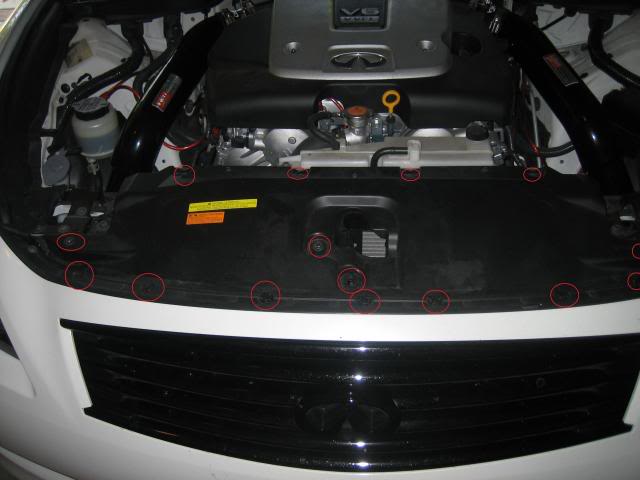
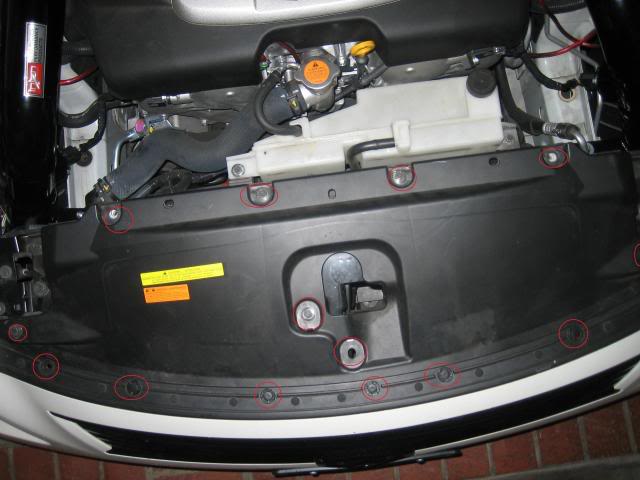
Use the flathead to insert it underneath the top of the clip and push down so the head of the flathead goes up as shown in the picture.
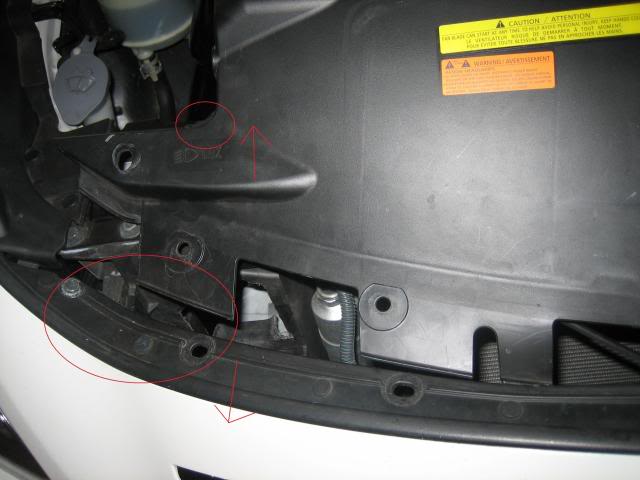
This is where it gets tricky, now put a finger or two in the indicated top red circle to get a grip on the cover, and use the other hand to pull the top of bumper towards you (the bottom red circle), and also pull the radiator cover (where the red circle is) up and away from you.
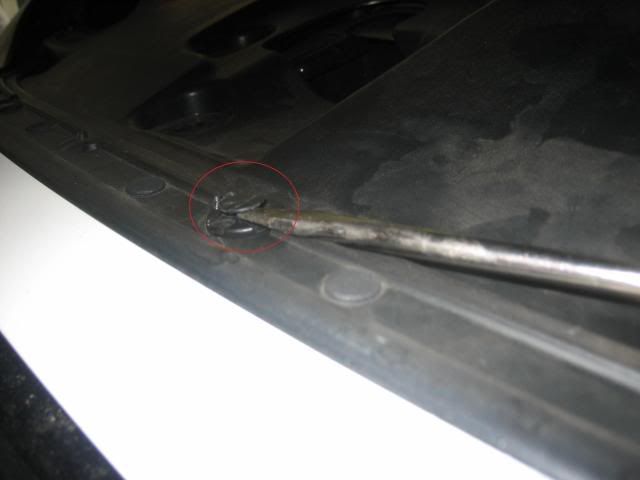
Once the radiator cover is removed, there is going to be some wires connected underneath the radiator cover, if you wish to have more room, declip them from the radiator cover. The wire is shown by the arrows pointing to it.
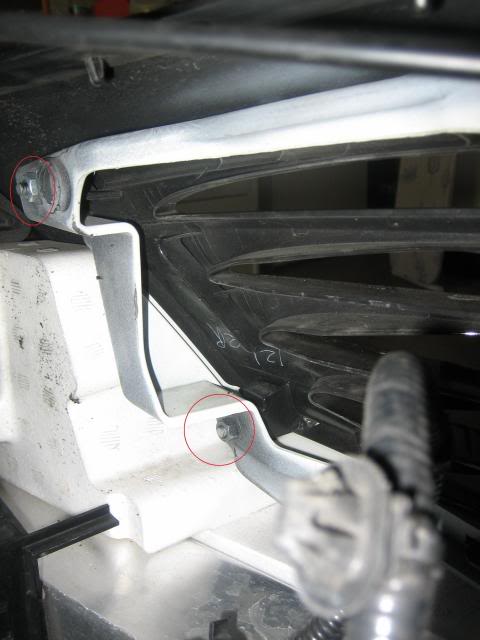
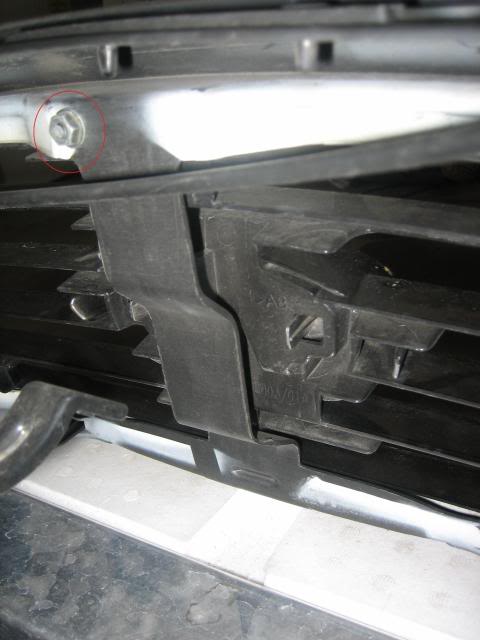
Once the radiator cover is out of the way, there is TWO screws on each side of inner-grille as well as one screw in the middle. Use a 10mm socket to remove it.
*Optional*
This is for you who want to remove the emblem ONLY.
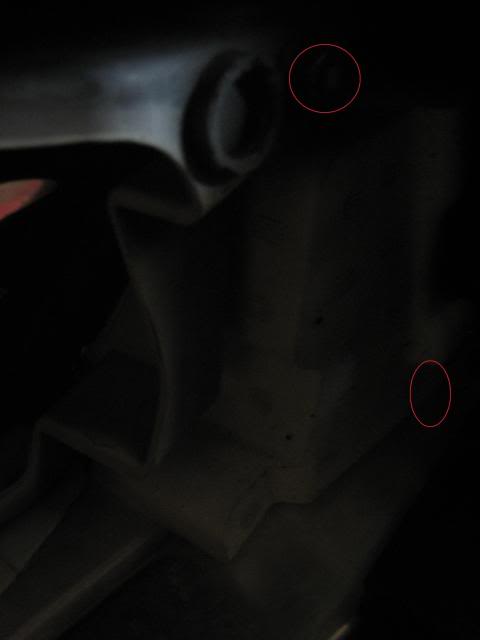
Just simply squeeze the indicated red clips inward and the emblem should pop out.
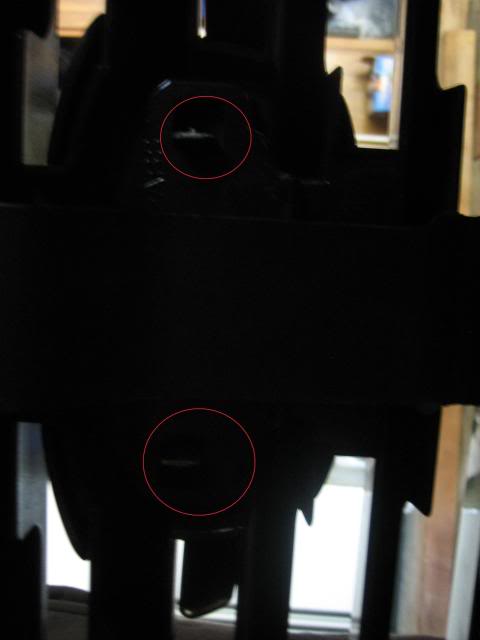
Finally, squeeze the top clips (circled in red) downwards, and squeze the bottom clips (circled in red), upwards, so the grille becomes loose.
To put it back together, just follow this in reverse. Hope this helps everyone! PM me with any additional questions!
Remove the clips and bolts as shown in the picture with red circles. Use a 10mm socket and a flat head.
Use the flathead to insert it underneath the top of the clip and push down so the head of the flathead goes up as shown in the picture.
This is where it gets tricky, now put a finger or two in the indicated top red circle to get a grip on the cover, and use the other hand to pull the top of bumper towards you (the bottom red circle), and also pull the radiator cover (where the red circle is) up and away from you.
Once the radiator cover is removed, there is going to be some wires connected underneath the radiator cover, if you wish to have more room, declip them from the radiator cover. The wire is shown by the arrows pointing to it.
Once the radiator cover is out of the way, there is TWO screws on each side of inner-grille as well as one screw in the middle. Use a 10mm socket to remove it.
*Optional*
This is for you who want to remove the emblem ONLY.
Just simply squeeze the indicated red clips inward and the emblem should pop out.
Finally, squeeze the top clips (circled in red) downwards, and squeze the bottom clips (circled in red), upwards, so the grille becomes loose.
To put it back together, just follow this in reverse. Hope this helps everyone! PM me with any additional questions!
Last edited by KAHBOOM; Jun 5, 2012 at 12:09 AM.


wth kind DIY is this. The dark picture look like you stop to have some Brokebackmoutain time with your friend.
hahaha jk man Good post. Should have made one back then when i bought your emblem not a year after HAHA
hahaha jk man Good post. Should have made one back then when i bought your emblem not a year after HAHA

 JK this should help out a lot of people out.

Trending Topics

Registered User
iTrader: (1)
Joined: Oct 2008
Posts: 2,324
Likes: 0
From: Moorpark, So Cal LAG'z Co-VP
you've been the grille king for a while now and you just now post this?! this could've helped me a lot in the past...thanks a$$hole...
haha jk bro...great DIY, thanks for posting!!
haha jk bro...great DIY, thanks for posting!!


Thread Starter
Former Prez of LA G'Z
iTrader: (9)
Joined: Feb 2008
Posts: 7,845
Likes: 24
From: ~So.Cal~
Easier way? This took me all but 10 minutes. Sorry for dirty engine bay, I was gonna wait till tomorrow so I can wash the G.
As for the paint, PM me on that, it was done by a local shop.
As for the paint, PM me on that, it was done by a local shop.