
Deelow's G37 Sedan Build Thread


Thread Starter
Registered Member
iTrader: (2)
Joined: Dec 2013
Posts: 292
Likes: 25
From: Clayton, NC
Deelow's G37 Sedan Build Thread
2/11/14:
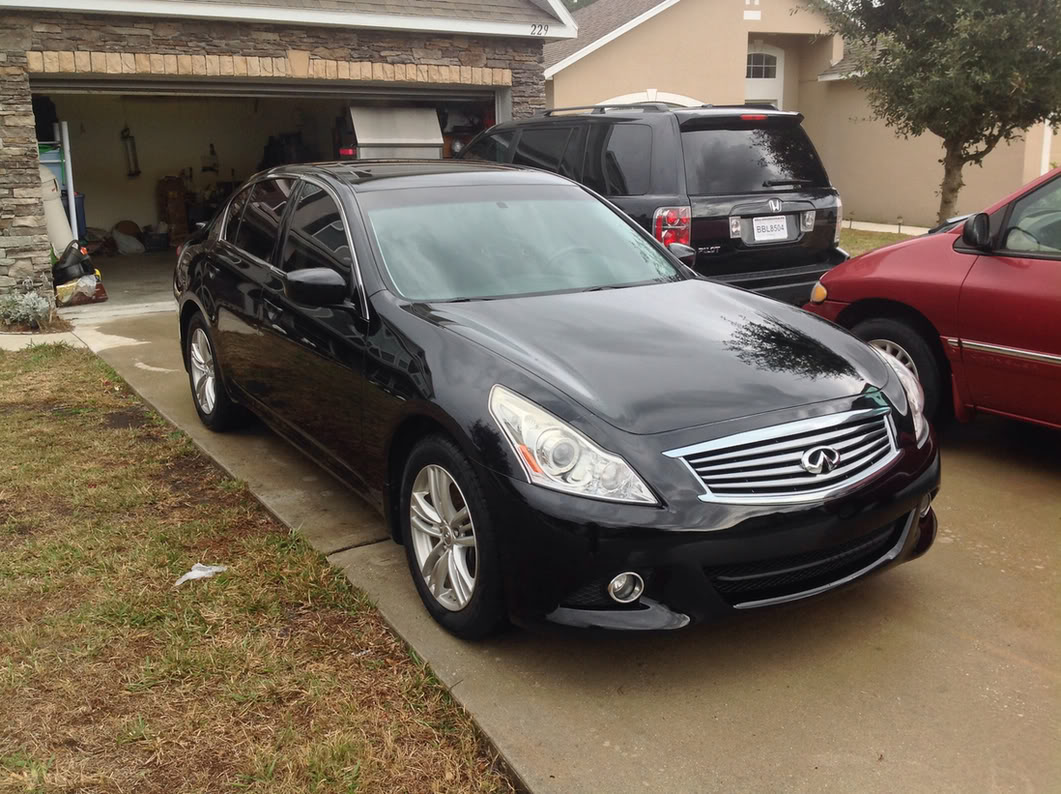
Starting my build thread! I bought my 2010 Infiniti G37x Sedan with black interior on black exterior from Carmax in December of 2013. So far I've spent a lot of time trying to figure out how I want it to look and sound, especially when it comes to the wheels.
I want to thank anyone who has helped me on my journey so far! I started lurking on these forums around a month before I bought my car and decided on a bunch of light modding to start. As you'll see in the following posts this is my modding journey.
Completed Mods: OEM Spoiler, OEM Sport pedals, Carsmo *****, 3M Crystalline window tint (32%), GT-R Push-to-start button with LED guts swapped from OEM button, Beat-Sonic TVK-56 DVD and NAVI Control Bypass Module (not included in modifications below due to forum rules)
Incoming Mods: Swift lowering springs, SPC Front and Rear camber kits, Stoptech brake pads, OEM 19" sport coupe wheels in GT-R gunmetal powdercoat UPDATE: Wheels Dropped off today, should have them back next week!, 245/40/19 tires and 285/35/19 tires (275 if company I choose doesn't stock the 285) in either Michelin/Toyo/
Future Mods: Cusco front strut brace, Hotchkis sway bars, R2C Intake system, ARK GRIP exhaust/Tanabe Medallion Exhaust, Hydro dipped interior pieces, Rear window spoiler.
Last edited by Deelow; Feb 13, 2014 at 05:29 PM.
Thread Starter
Registered Member
iTrader: (2)
Joined: Dec 2013
Posts: 292
Likes: 25
From: Clayton, NC
Spoiler posts.
Spoiler mod: Completed around the January 11, 2014
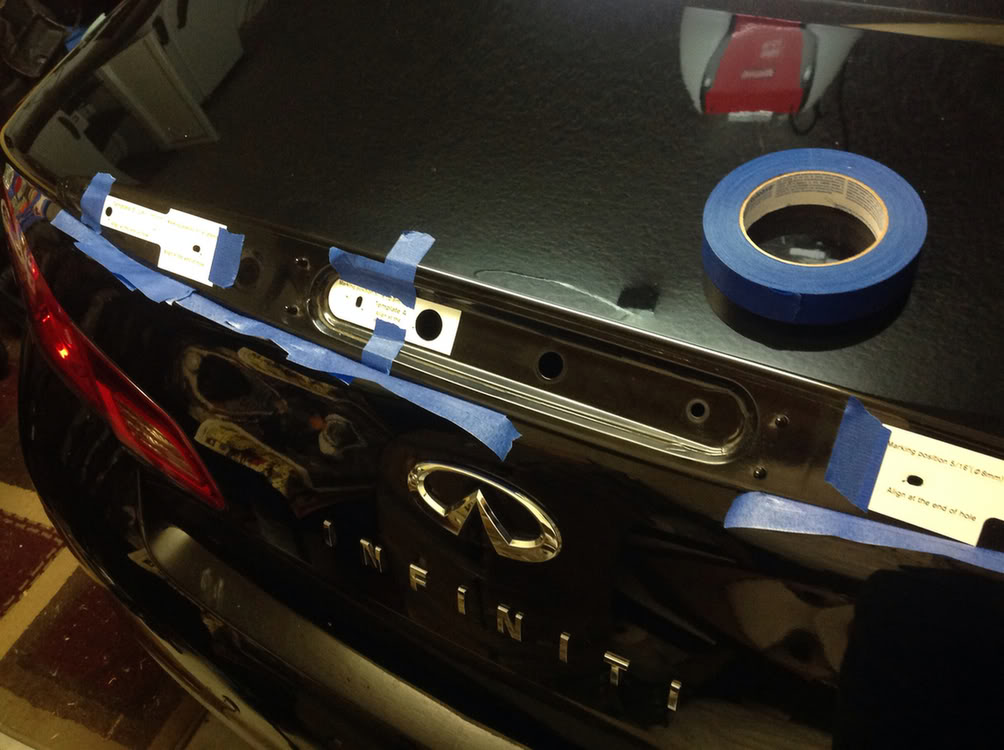
So here is where I started. I put the template on and used a sharp wood screw and hammer to mark the drill points.
Next I drilled the holes and disassembled the bracket with the camera and button, reinstalling them in the included new bracket. Mine was wrapped up within the spoiler.
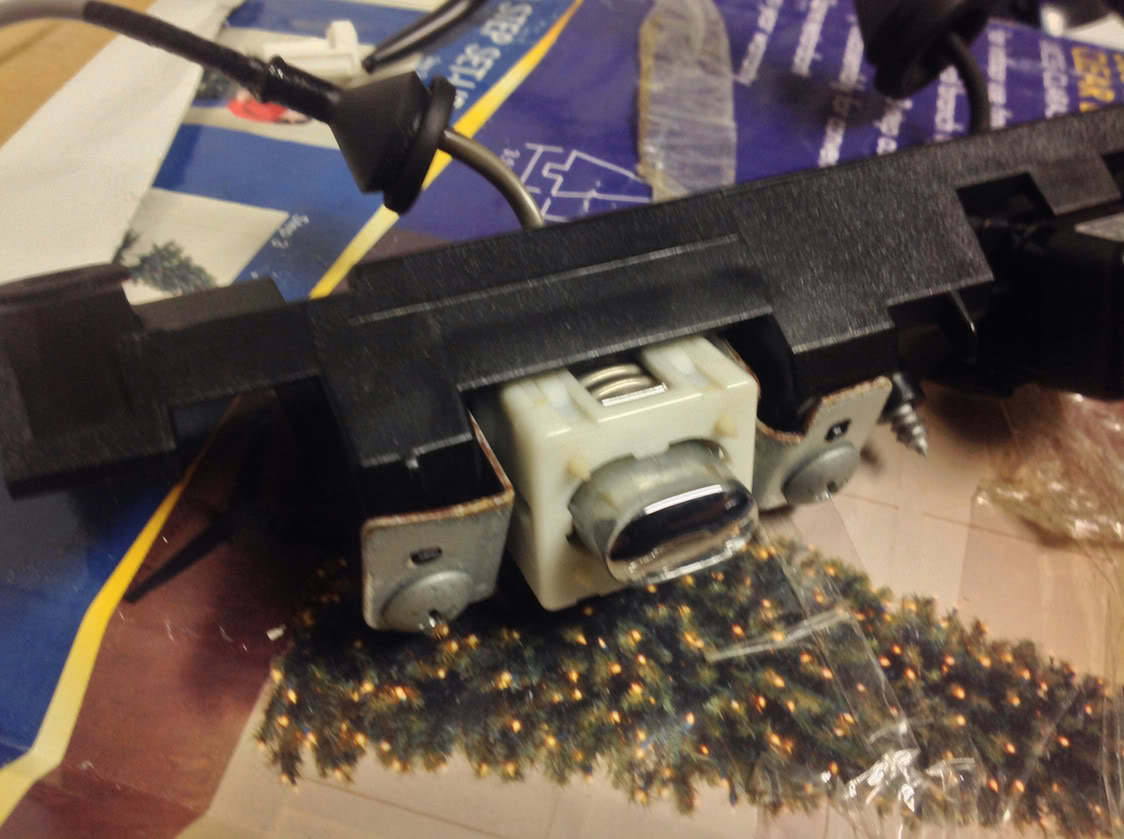
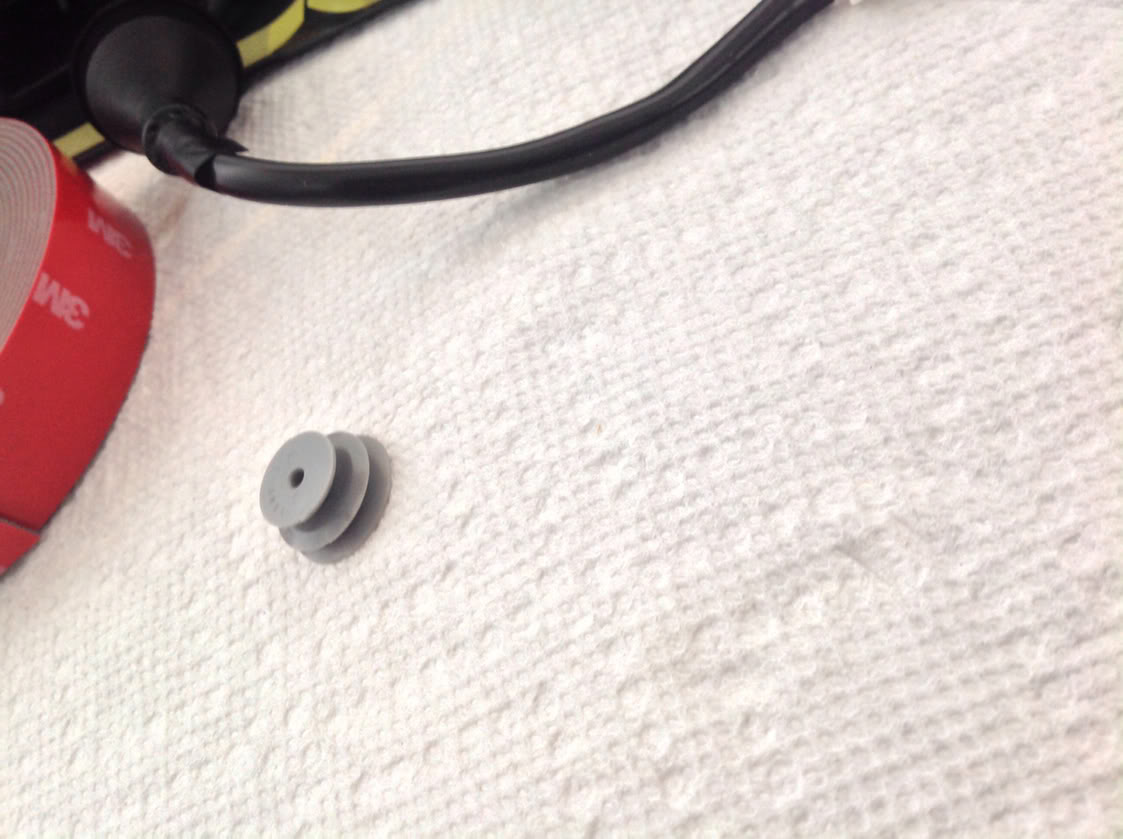
Here is the reinstalled camera and button. I added a washer to the button to make the button poke out a tad more like the chrome piece. I also had to bend the corners of the metal bracket for the button to keep it from impinging on the spoiler once screwed down.
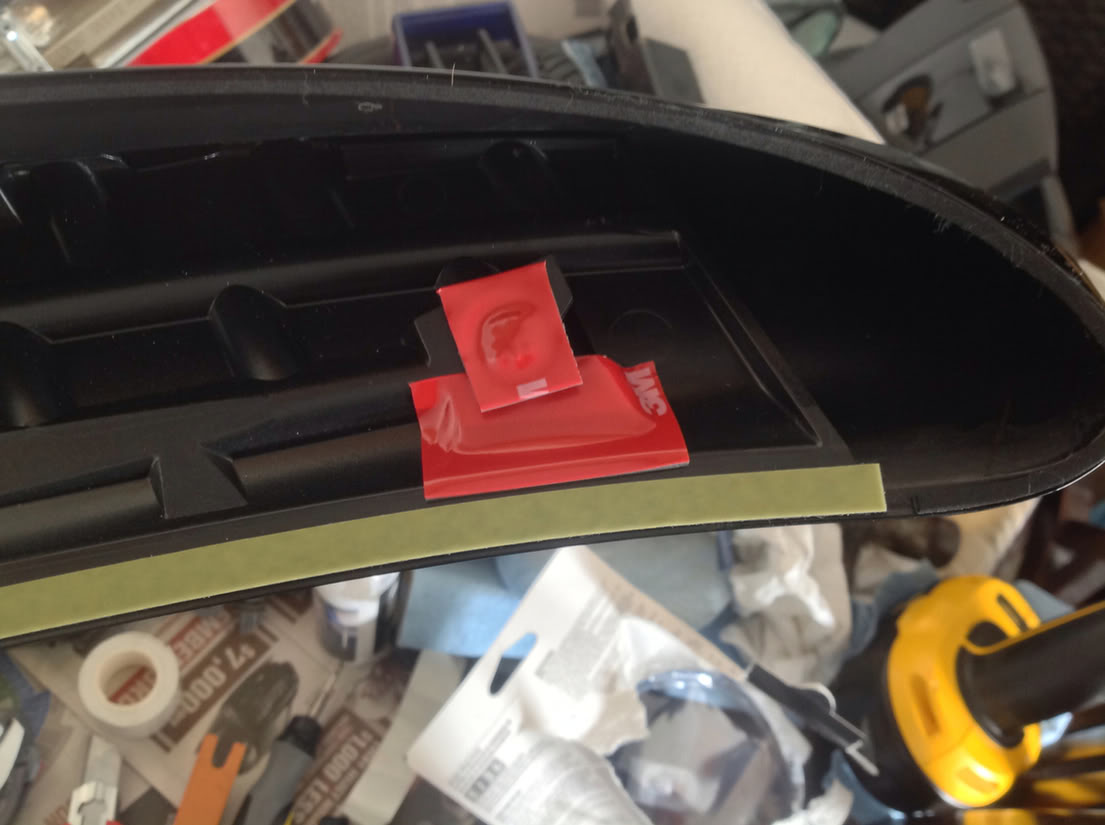
I've seen the drilling part of this and while I could have done it, 3M trim tape super sticky works as good. There were a few 1 inch places where the spoiler didn't have 2-sided tape, so I cut and placed tape there to seal the edges. Then instead of drilling I cut the clips and used 3M tape to stick it to the trunk.
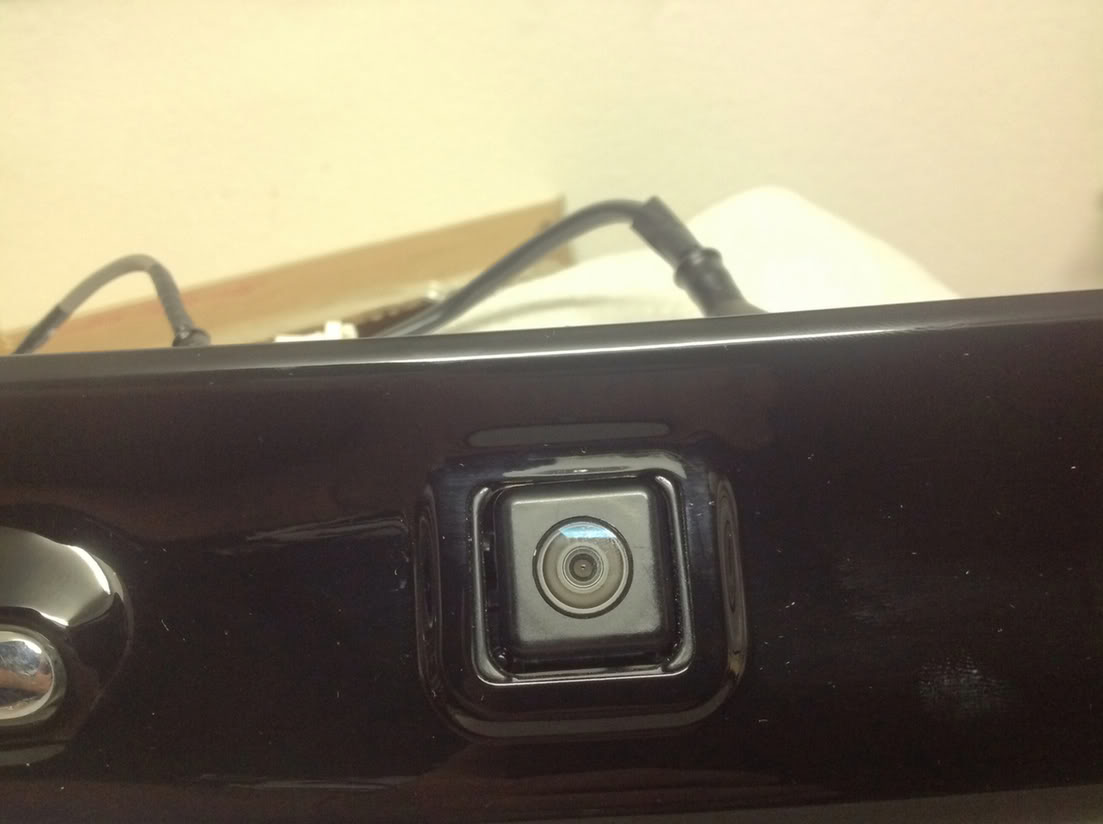
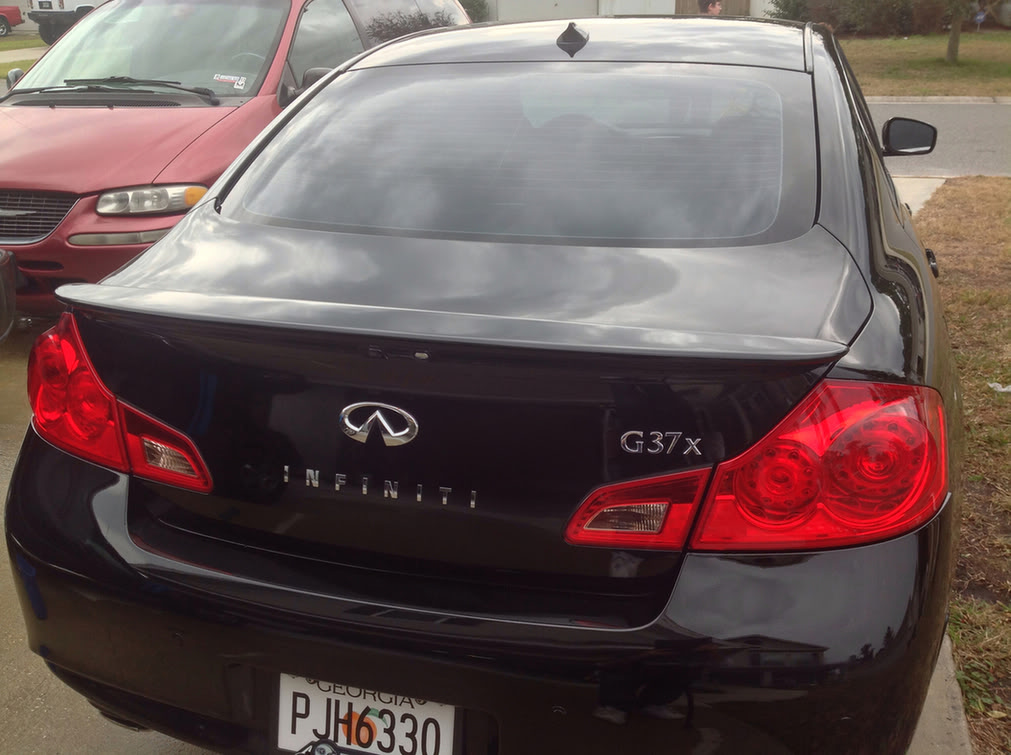
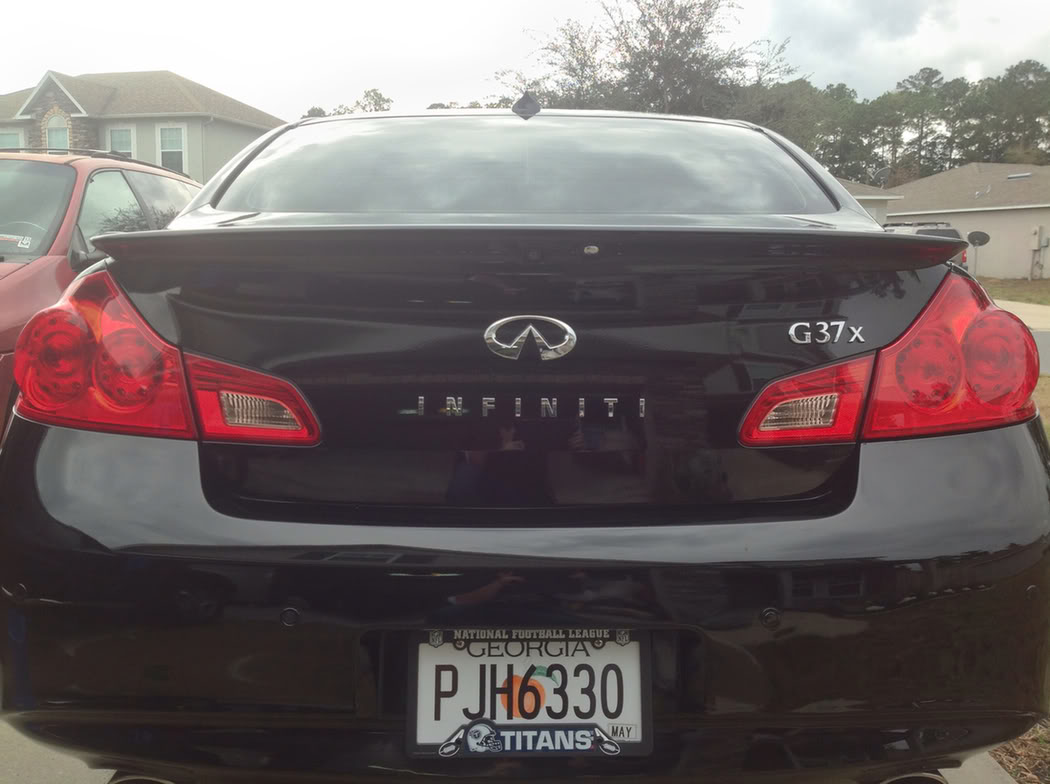
And the finished product!

So here is where I started. I put the template on and used a sharp wood screw and hammer to mark the drill points.
Next I drilled the holes and disassembled the bracket with the camera and button, reinstalling them in the included new bracket. Mine was wrapped up within the spoiler.
Here is the reinstalled camera and button. I added a washer to the button to make the button poke out a tad more like the chrome piece. I also had to bend the corners of the metal bracket for the button to keep it from impinging on the spoiler once screwed down.
I've seen the drilling part of this and while I could have done it, 3M trim tape super sticky works as good. There were a few 1 inch places where the spoiler didn't have 2-sided tape, so I cut and placed tape there to seal the edges. Then instead of drilling I cut the clips and used 3M tape to stick it to the trunk.
And the finished product!
Last edited by Deelow; Feb 11, 2014 at 05:23 PM.
Thread Starter
Registered Member
iTrader: (2)
Joined: Dec 2013
Posts: 292
Likes: 25
From: Clayton, NC
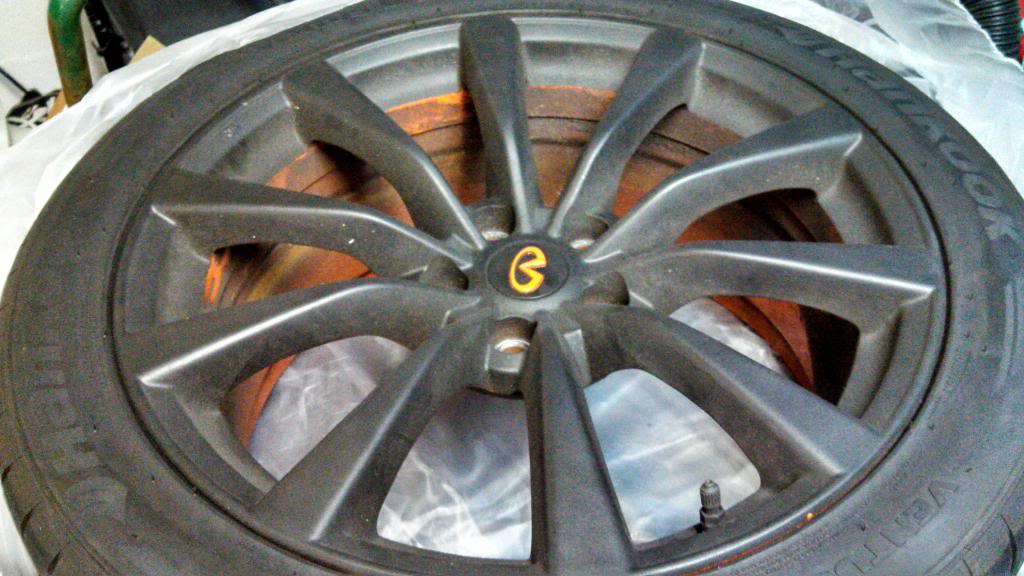
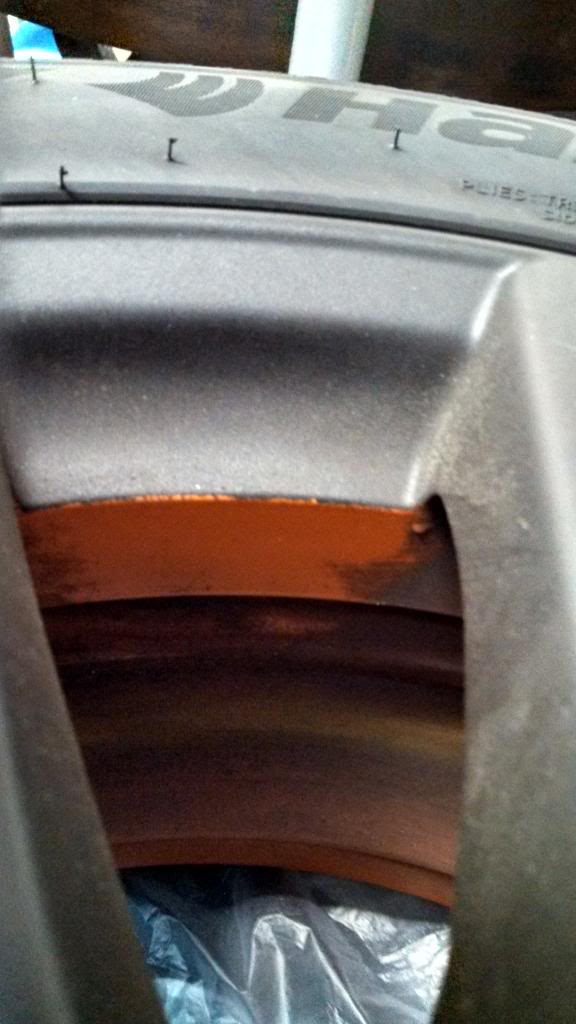
Finally got some OEM sport wheels. They are painted orange underneath. The outer rim is Plastidiped Black with orange painted logo. I've decided to go with Swift Springs but I'm currently taking my time with tire choice to vet all options before buying I have decided to go for a 245/40/19 front and 285/35/19 rear (might have to sacrifice to a 275/35/19.)


Last edited by Deelow; Feb 11, 2014 at 05:30 PM.


Thread Starter
Registered Member
iTrader: (2)
Joined: Dec 2013
Posts: 292
Likes: 25
From: Clayton, NC
LED Install was easy with the exception of the vanity mirrors. The thread below made it so much easier.
https://www.myg37.com/forums/d-i-y-i...ight-leds.html
https://www.myg37.com/forums/d-i-y-i...ight-leds.html
Thread Starter
Registered Member
iTrader: (2)
Joined: Dec 2013
Posts: 292
Likes: 25
From: Clayton, NC
The sport pedal install was very straightforward. This thread has the part number for each pedal and a great guide on how to do it. Hardest part for me was the removal of the gas pedal as the cover for the bolts was tough to pry up. I used a very small flathead screwdriver and finally got it off.
https://www.myg37.com/forums/d-i-y-i...tallation.html
https://www.myg37.com/forums/d-i-y-i...tallation.html
Trending Topics
Thread Starter
Registered Member
iTrader: (2)
Joined: Dec 2013
Posts: 292
Likes: 25
From: Clayton, NC
Thanks Brad. My wheel guy just called me and discussed my wheels, told me to drop by this afternoon with the wheels and he'd get started tonight! It's gonna cost me $400 for the paint strip/refinish but he says he can get me the exact color I asked for so I'm excited. Rochester has inspired me with his engine bay upgrades, which I have added to my mental list. I like how he listed his mod schedule too. Sounds like an idea I should take on lol!


Thread Starter
Registered Member
iTrader: (2)
Joined: Dec 2013
Posts: 292
Likes: 25
From: Clayton, NC
