When you click on links to various merchants on this site and make a purchase, this can result in this site earning a commission. Affiliate programs and affiliations include, but are not limited to, the eBay Partner Network.
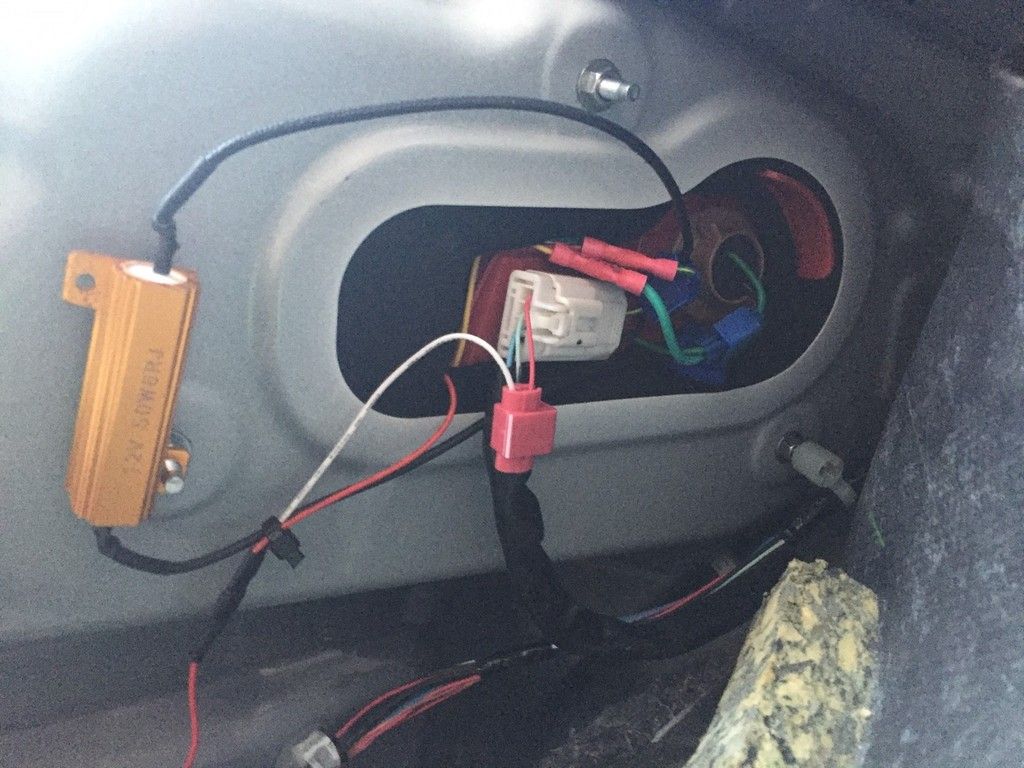
I mounted mine directly to the inner most mounting stud for the tail light housing. This keeps the resistor mounted to metal but also basically keeps it "floating" in open air space.
Thanks I ended up just mounting it under the tail light assembly with some sheet metal screws. Didn't even think about using the bolts already there...
I Noticed that my front and rear turn signals flash in sync until I hit the brake and then they flash out of sync. Once I release the brake they start flashing synchronously again. Is this normal or did I maybe get some wires crossed?
I heard about this as an issue, which was keeping me from pulling the trigger on the DIY module. Could anyone else with the kit advise if they are experiencing the same, or maybe Nick from DD can help shed some light?
The tail as turn modules are designed so brake lighting takes precedence over the turn signal. It's safer to have the brake lighting illuminate first vs. the turn signals.
Feel free to give us a call if you would like more information about the kit: (314) 205-3033
I heard about this as an issue, which was keeping me from pulling the trigger on the DIY module. Could anyone else with the kit advise if they are experiencing the same, or maybe Nick from DD can help shed some light?
I swapped my city lights to the LED switchbacks and they all blink together in harmony.....
I swapped my city lights to the LED switchbacks and they all blink together in harmony.....
Did you put switchbacks in the factory city light location (at the far top corner of the headlight) or the turn signal location? If you put them in place of the city lights then I'd be interested in seeing pics. I've got the V3 Tritons switchbacks in place of my turn signals and also kept the rear turn signals in the loop and replaced those with VLED LED bulbs and all flash in sync as well.
Did you put switchbacks in the factory city light location (at the far top corner of the headlight) or the turn signal location? If you put them in place of the city lights then I'd be interested in seeing pics. I've got the V3 Tritons switchbacks in place of my turn signals and also kept the rear turn signals in the loop and replaced those with VLED LED bulbs and all flash in sync as well.
I just installed the T-A-T kit + resistor kit over the weekend (Thank you to DD for a great kit!). It took longer than expected but I did solder and applied heat shrink over the connections to ensure good connections. Yes, i was being a bit ****. Of course, to do this I had to remove the tail light housing but that was pretty simple. 3 nuts removed per side and it came out easier than I thought.
It turned out just as good as all the youtube videos and testimonials from the forum members, so i won't add to the collection. However, what helped me tremendously was to sketch out a crude schematic of the T-A-T and resistor with respect to the tail light wiring. I have attached it to the post and hopefully, this helps some of the sedan owners awaiting for the PNP kit from DD.
Just reading through this thread. It's been a while since someone has asked about the Sedan Plug and Play Version. Any update? Or is the DIY version the only way?
Just reading through this thread. It's been a while since someone has asked about the Sedan Plug and Play Version. Any update? Or is the DIY version the only way?
I'm glad it's been a while since someone has asked as DD has told us multiple times they're waiting on a connector and will let us know as soon as they get it in and start manufacturing.
But per a FB comment of one of the DD guys, they're thinking it might be here in June. So you can wait a month for something that may not materialize or you can buy the comparably dirt-cheap DIY now.
Just finished the install in my 2008 sedan with the DIY + resistors kit. Took me a little longer than I would have hoped. The awkward angle for one of the tap connectors just didn't work in my favor, 2 of them pulled loose immediately after clamping them shut and I didn't have any spares. 1 quick run to the hardware store and it's all done. Looks great, thanks again DD!
Every product that the guys at Diode Dynamics offer are truly top notch quality lights. I have switched out almost all my lights to their LEDs and I couldn't be happier. And for a final touch I ordered and am waiting to receive my hid headlight and foglight LEDs! Keep up the amazing work guys and thanks again for everything you've done for us all on this forum.
Hey Nick,
It's been 6+ months since the last update. Still no plug and play version for sedans?
this guy ^^^^^^ your funny. 6 months later and they still have 0...chances are their never getting them again or the handful they did went in the blink of eye. just settle for the general kit