DIY: Cabin Air Filter Replacement Video
#61
Registered Member
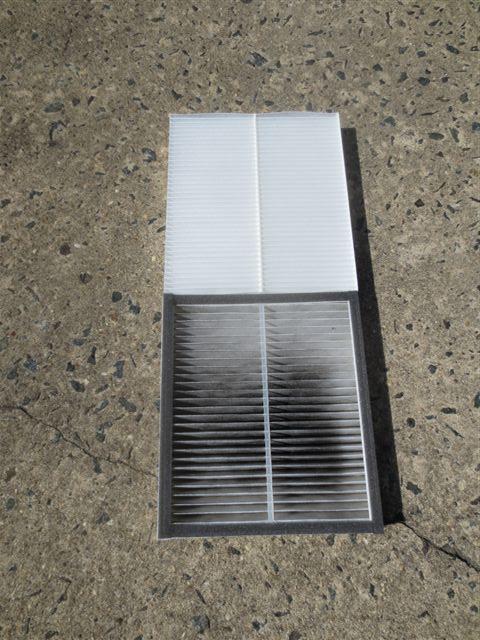
I just changed my 2010, with 30,000 miles, cabin filter.
It wasn't that dirty.
I probably could have gone to 50,000 miles.
The majority of my miles are long highway trips, so it didn't take but about a 1/3 of the hours to put the 30,000 miles on then someone who does most of their driving in town.
I used a Purolator, Breath Easy, C25870. It is electrostatically charged and has activated charcoal. The price was $21.99 before taxes at Advanced auto parts, in SW Florida.
It was helpful having a magnetic Phillips head screwdriver.
It would have been more helpful if the screwdriver was at least 10" long.
I removed the 7 screws, the right side plastic cover and the bottom cover.
The glove box pulled loose fairly easily.
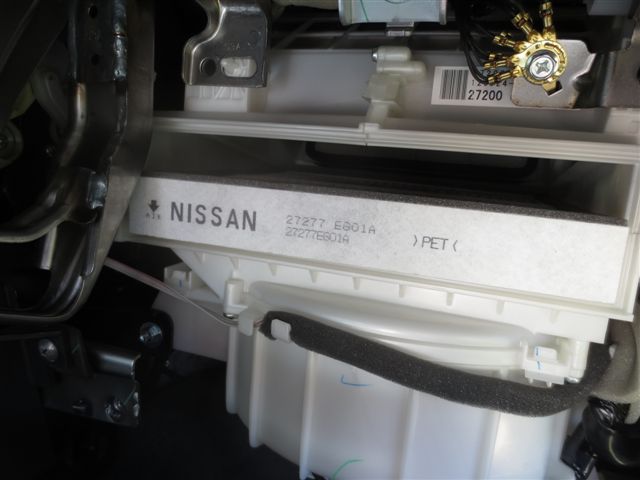
When you unsnap the right end of the white cover, in front of the filter, pull the cover to the right to remove it.
The new filter should have a directional arrow that needs to be facing down.
It wasn't obvious to me how the glove compartment should snap back into place.
I knew that the tabs on the right side had to properly line up to the slots, but didn't know what had to align on the left side.
I pushed the glove box back into it's space, but it didn't align that good on the left side, so I tapped it with the palm of my hand, on the left side, and it popped into place.
Tom
I only use OEM filters as I had a problem on my old 06 G35 using a purolator filter.


Telcoman
#62
Premier Member

iTrader: (13)
Why oh why did I click on this video. I didn't even know about the cabin filter so it's never been replaced in 60k miles. Now I won't be able to stop thinking about all the dirty air I'm breathing in and how black mine must be.  Oh well thanks for the video now time to change mine.
#64
I don't know if this video has been posted before, but it's a nice visual of how to replace the cabin air filter in the G.
<iframe title="YouTube video player" class="youtube-player" type="text/html" src="http://www.youtube.com/embed/3I5RL0VbYe8" allowfullscreen="" width="480" frameborder="0" height="390"></iframe>
<iframe title="YouTube video player" class="youtube-player" type="text/html" src="http://www.youtube.com/embed/3I5RL0VbYe8" allowfullscreen="" width="480" frameborder="0" height="390"></iframe>
#67
Registered User
Thanks OP for the link to the instructional video. Helped make everything go smooth. I had the magnetic philips head already just didn't have that extension. Probably would have been done in 10-15 minutes versus 20-25 minutes trying to squeeze my hand lol and just a heads up, when I was looking for the cabin filter I noticed that the same Fram Fresh Breeze Cabin filter AutoZone and Oreilly's is charged damn near $50 for was only $19 at walmart.
Fram FreshBreeze/Cabin Air Filter CF10743 at AutoZone.com
FRAM Fresh Breeze Cabin Air Filter, CF10743 - Walmart.com
Fram FreshBreeze/Cabin Air Filter CF10743 at AutoZone.com
FRAM Fresh Breeze Cabin Air Filter, CF10743 - Walmart.com
#68
Pyroclastic Flow

iTrader: (12)
I don't know if this video has been posted before, but it's a nice visual of how to replace the cabin air filter in the G.
<iframe title="YouTube video player" class="youtube-player" type="text/html" src="http://www.youtube.com/embed/3I5RL0VbYe8" allowfullscreen="" width="480" frameborder="0" height="390"></iframe>
<iframe title="YouTube video player" class="youtube-player" type="text/html" src="http://www.youtube.com/embed/3I5RL0VbYe8" allowfullscreen="" width="480" frameborder="0" height="390"></iframe>
Sean
#69
Registered Member
iTrader: (1)
If you remove the door from the glove box first, it's much easier to access all the screws. Open the door, disconnect the cable, and pull the door straight toward you. It snaps back on and you reconnect the cable, the whole job took me 15 minutes and I didn't lose any screws.
The following users liked this post:
heftylefty58 (04-21-2016)
#70
Pyroclastic Flow

iTrader: (12)
Started mine tonight.
Everything went back together fine....except I cannot get the left hand screw at the bottom of the door to line up.
I think I really need the long screw driver because when I push up on the bottom of the unit the door shuts slightly and pushes on the screw driver handle off the screw.
I'll have to finish tomorrow because I am getting tired and frustrated.
UPDATE: Done and all set. It did mine at 9K. Glad I did, mine looked like telcoman's. Plus there was a dead winged insect in it...don't know what it was...not an entomologist.
Sean
Last edited by VIVID; 07-16-2015 at 11:03 AM. Reason: Update
#71
Registered User
I need to get the longer screwdriver, too. I keep thinking the 12" will work, and I have lost two screws in my two replacements, one each time - the one in the middle falls into the abyss.... You would think I'd learn!
#72
Registered User
If you remove the door from the glove box first, it's much easier to access all the screws. Open the door, disconnect the cable, and pull the door straight toward you. It snaps back on and you reconnect the cable, the whole job took me 15 minutes and I didn't lose any screws.
Frankly, I can't believe anyone would attempt to remove their glove box without removing the door first. (I didn't bother disconnecting the door's cable and I was still able to access the 3 screws very easily.)
Just as I was about to upload some pictures showing how easy it is to remove the glove box door, I noticed there's another sticky that already covers this: https://www.myg37.com/forums/d-i-y-i...-box-bulb.html
Thanks again.


