
DIY: Reversing the shift direction for 5AT


Thread Starter
Registered User
Joined: Mar 2008
Posts: 77
Likes: 1
From: GUAM
Reversing the shift direction for 5AT
I did this to my g37 a while ago and it works out really well. I love how that you can upshift when slamming down on the shifter.
here is pictures on how to do it on your vehicle.
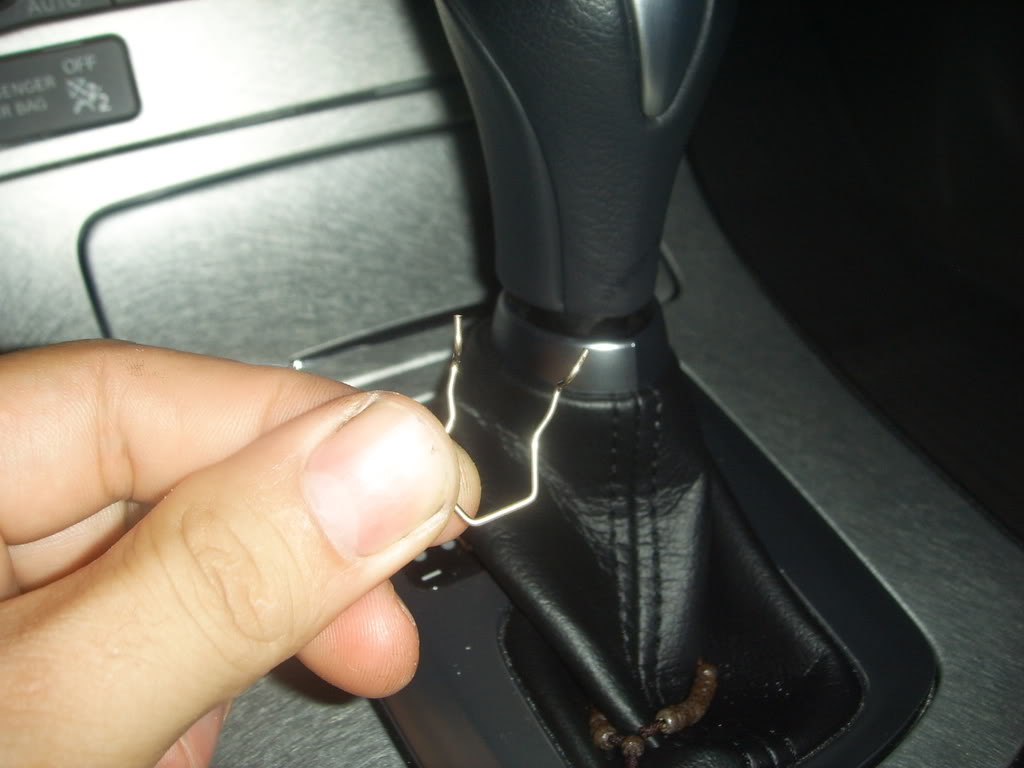
first you would have to pull down the shifter boot to view the locking tab on the ****
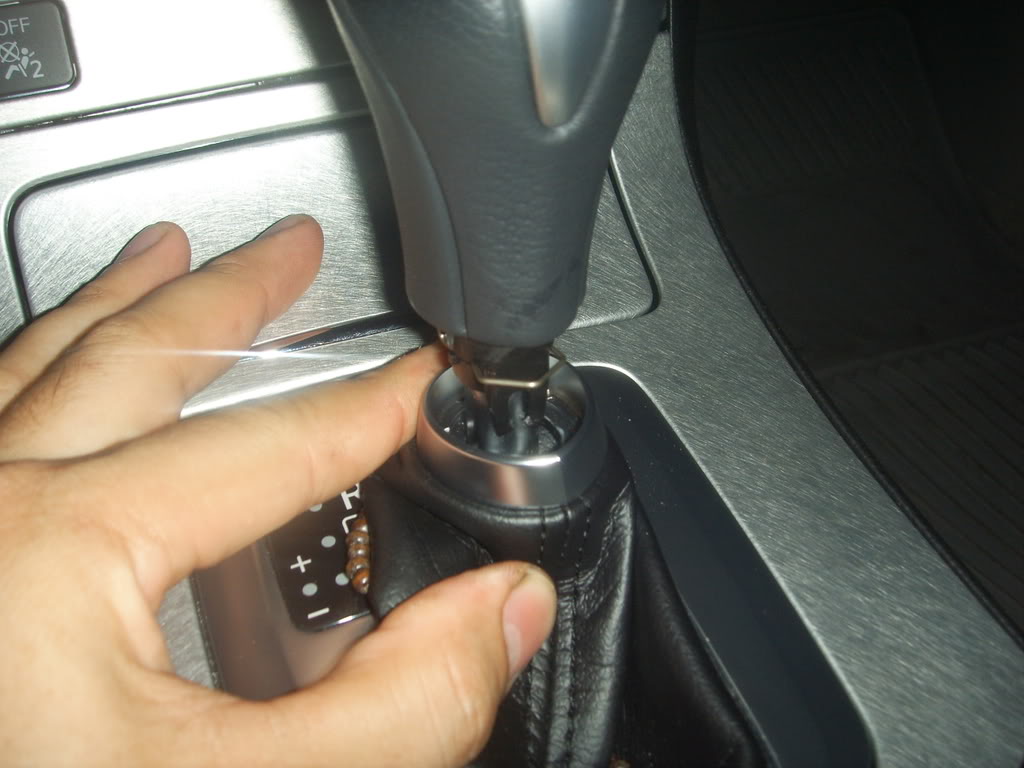
Now you would have to remove the locking tab by pulling it towards you and lifting up the shifter ****.
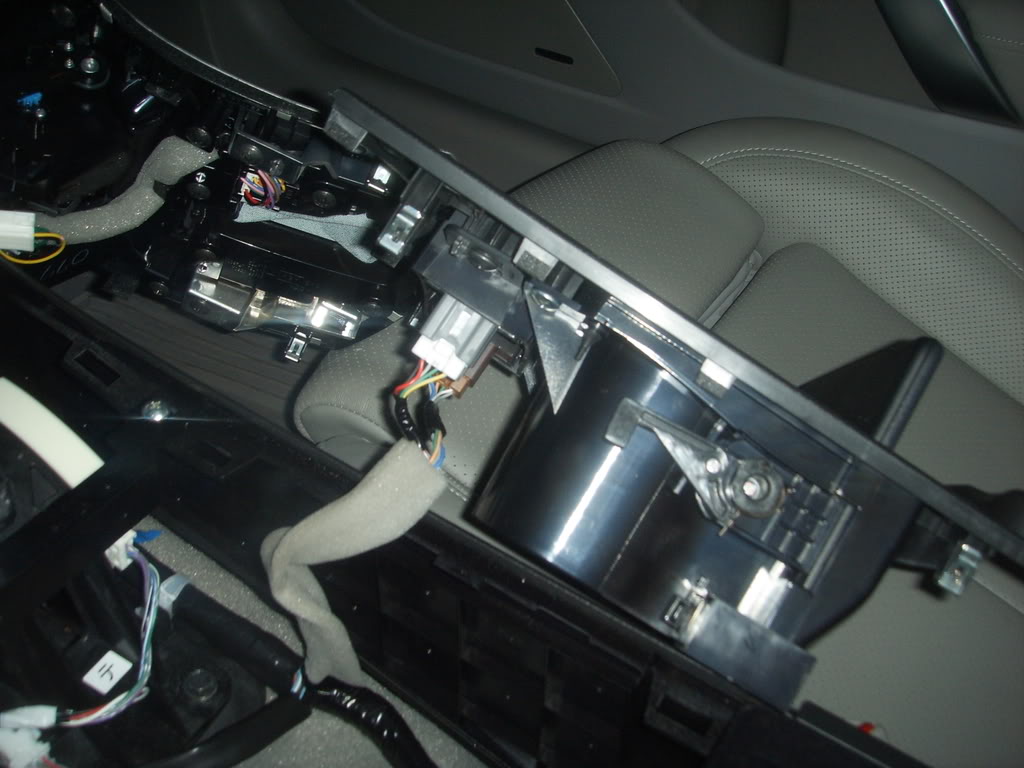
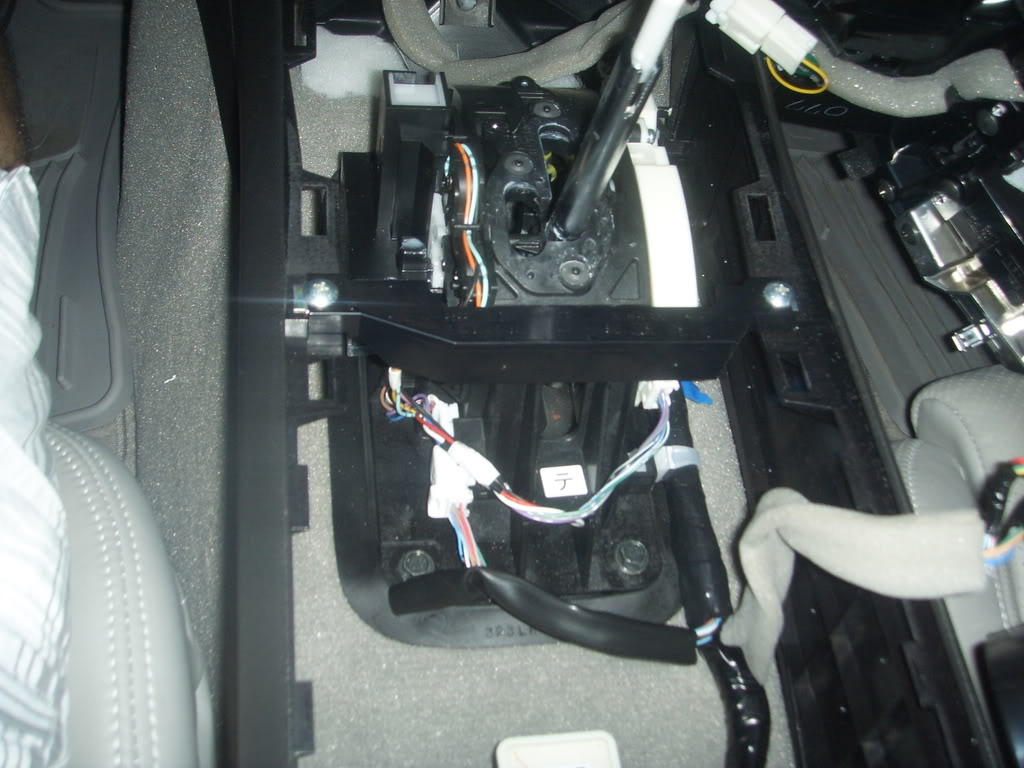
While you have the **** out now you can remove the shifter finisher by putting the shifter into
gear so you will have room when removing the finisher by pulling it from the back end then pulling
it out.
Now pull out the cup holder by pulling it from the front side and pulling towards the front.
be sure to leave the key in the off position so no MIL appears.
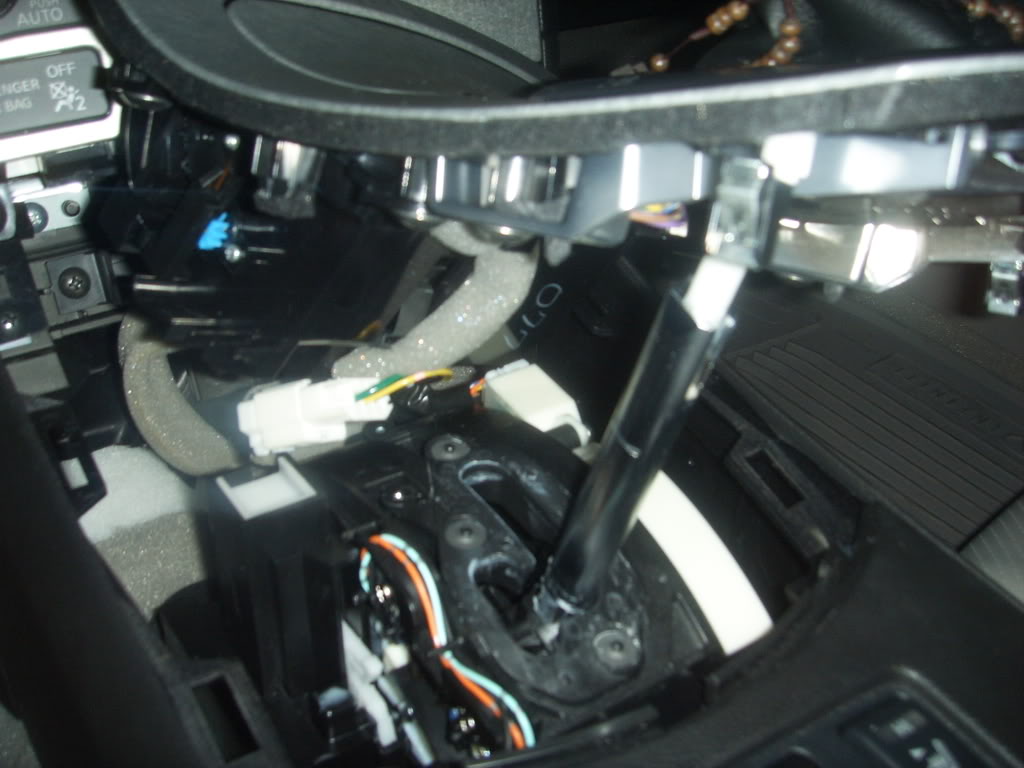
Now you can see the connector which is located at the rear of the shifter assy. on the left side.
pull out the connector and remove the front locking tab on the front of the connector so the terminal pins
can be seen.

Now look at the harness side of the connector and find the blue and purple wire which are located
at the top of the connector from left to right would be the second and third (locking connector at the top).
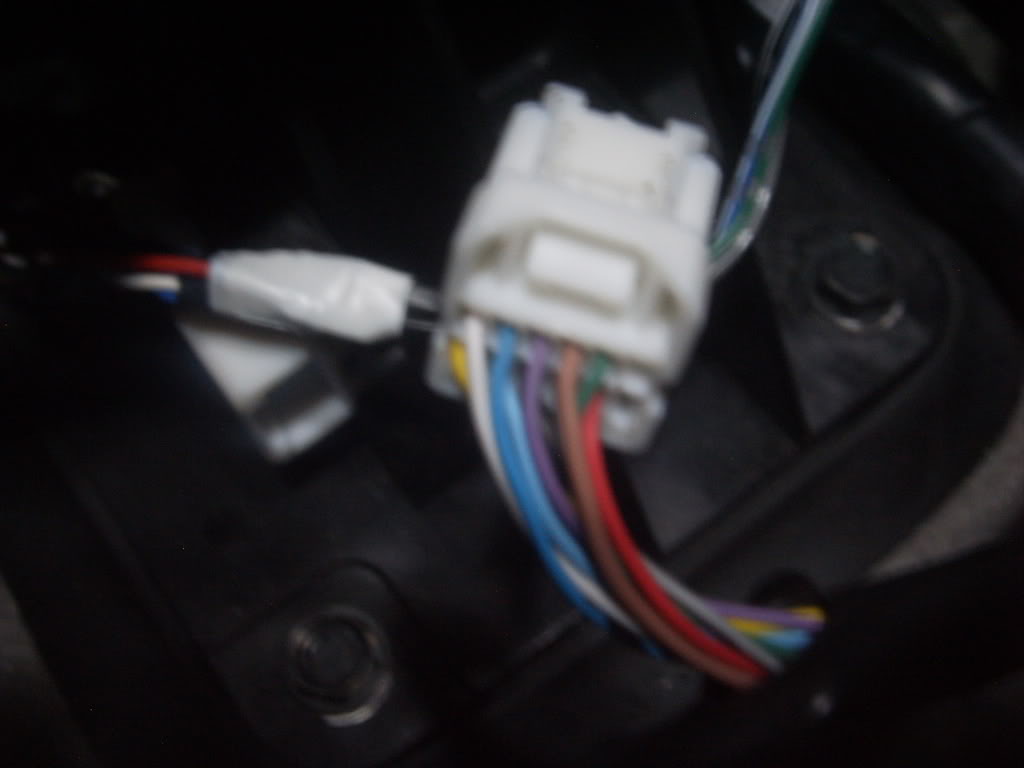
Be sure to use a terminal pin removal tool or a small pick and lift the tab on the front of the connector and
pull the terminals out from the back of the connector. The locking tab for the terminals is just right on top of each termianl.
Be sure not to damage the terminals lock tab which might not lock the terminal back in the connector.
When both wires are out, now switch them and be sure that you hear a click when inserting the terminals or pull
on the wire gently to be sure there locked in
Install in the revers order. enjoy.....the.....ride.....
here is pictures on how to do it on your vehicle.
first you would have to pull down the shifter boot to view the locking tab on the ****
Now you would have to remove the locking tab by pulling it towards you and lifting up the shifter ****.
While you have the **** out now you can remove the shifter finisher by putting the shifter into
gear so you will have room when removing the finisher by pulling it from the back end then pulling
it out.
Now pull out the cup holder by pulling it from the front side and pulling towards the front.
be sure to leave the key in the off position so no MIL appears.
Now you can see the connector which is located at the rear of the shifter assy. on the left side.
pull out the connector and remove the front locking tab on the front of the connector so the terminal pins
can be seen.
Now look at the harness side of the connector and find the blue and purple wire which are located
at the top of the connector from left to right would be the second and third (locking connector at the top).
Be sure to use a terminal pin removal tool or a small pick and lift the tab on the front of the connector and
pull the terminals out from the back of the connector. The locking tab for the terminals is just right on top of each termianl.
Be sure not to damage the terminals lock tab which might not lock the terminal back in the connector.
When both wires are out, now switch them and be sure that you hear a click when inserting the terminals or pull
on the wire gently to be sure there locked in
Install in the revers order. enjoy.....the.....ride.....
Last edited by DiamondGCoupe; Mar 4, 2009 at 03:06 PM.

Thread Starter
Registered User
Joined: Mar 2008
Posts: 77
Likes: 1
From: GUAM
If your talking about taking out the shifter finisher then all you have to do is pull up the finisher from the back end with a panel popper. If you dont have a panel popper then pull it from the back end of the boot then slide it out towards you.

Trending Topics


Registered User
Joined: Apr 2008
Posts: 330
Likes: 1
From: Jersey Shore