
35Sport's G35S build, rebuild and upgrades thread


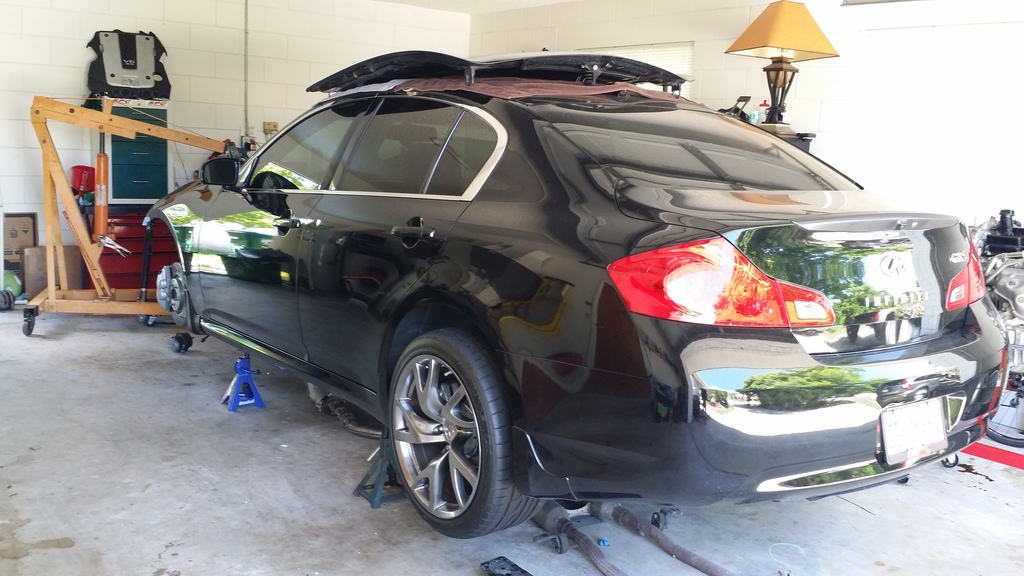
 Plenty of room to work and get every nook and cranny.
I love this thread as well. Thanks for the engine pricing. $2K seems like you got a steal....but I've never bought an engine before so.
I really like those slotted rotors! I'm sure you like the silver akebono's on tyat black sedan with the chrome window liners. But now would be a great time to paint the calipers if you ever planned on doing so. Like I said the silver color looks good against your black car tho.
Loving the pics keep them up plz

Thread Starter
Registered User
Joined: Nov 2013
Posts: 378
Likes: 59
From: Central Florida
I love this thread as well. Thanks for the engine pricing. $2K seems like you got a steal....but I've never bought an engine before so.
I really like those slotted rotors! I'm sure you like the silver akebono's on tyat black sedan with the chrome window liners. But now would be a great time to paint the calipers if you ever planned on doing so. Like I said the silver color looks good against your black car tho.
Loving the pics keep them up plz
I really like those slotted rotors! I'm sure you like the silver akebono's on tyat black sedan with the chrome window liners. But now would be a great time to paint the calipers if you ever planned on doing so. Like I said the silver color looks good against your black car tho.
Loving the pics keep them up plz

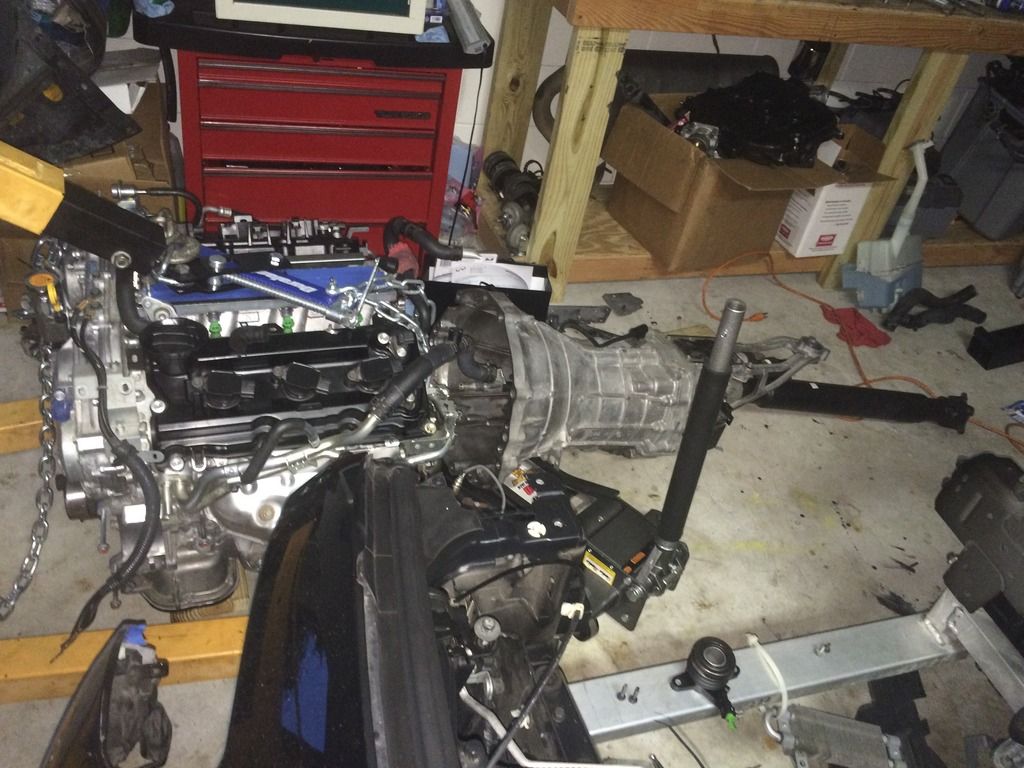
I made some more progress, but I'm on hold until I get the clutch alignment tool in.
I separated the trans by manually sliding the transmission off the motor. Came out fairly easy, just had to muscle it off a bit.

Removed the Automatic wiring harness off the 350z motor, cleaned it.
I needed to swap the motor mounts since they are different. I will also be reusing my exhaust manifolds.
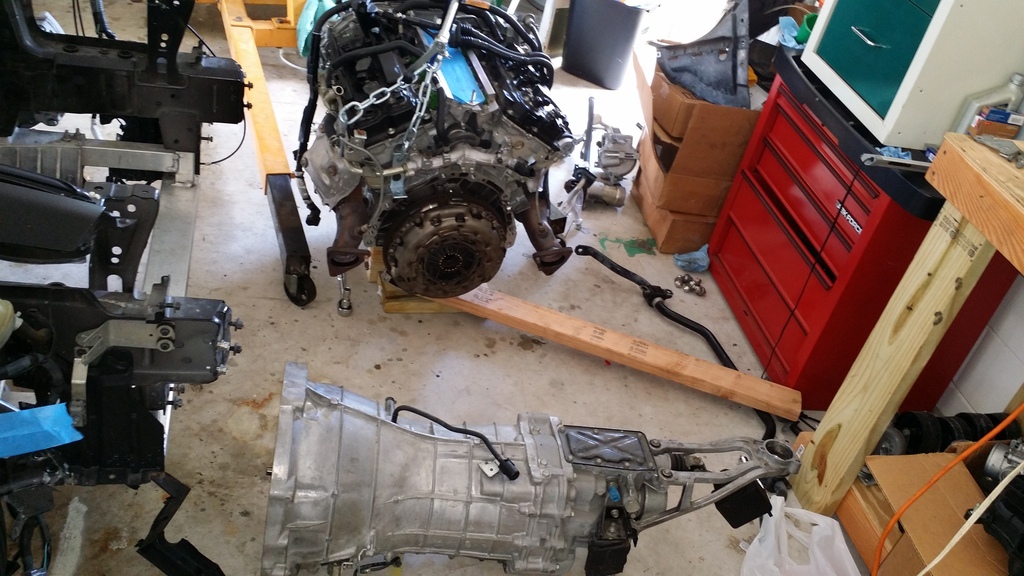
Last pic shows the 350Z manifolds on my old motor. Still need to remove the clutch and flywheel.
Thread Starter
Registered User
Joined: Nov 2013
Posts: 378
Likes: 59
From: Central Florida
Couple more updates.
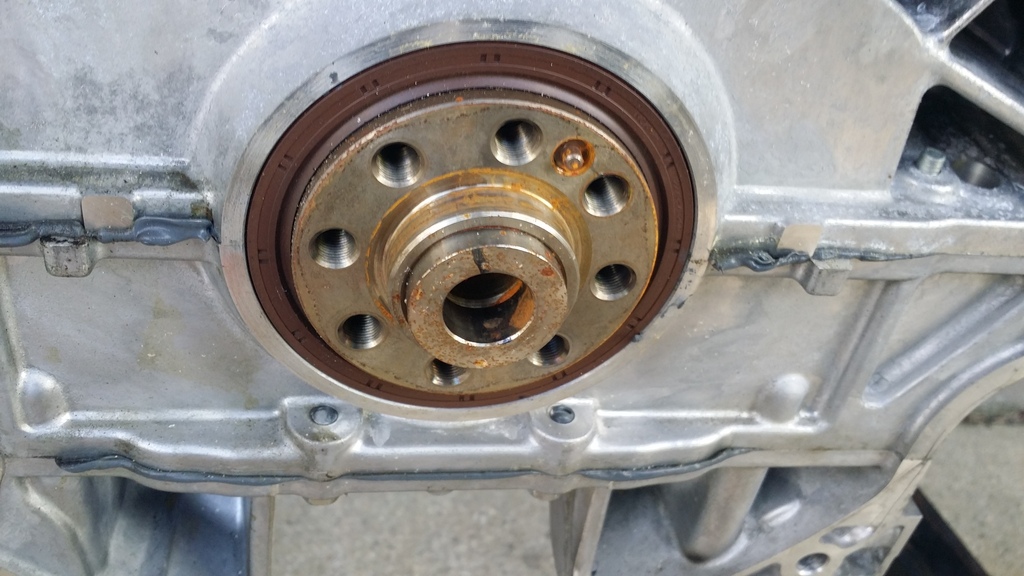
I got the old motor stripped of parts the new motor ended up needing. I found damage on the oil pan of the new motor. I needed to swap the lower section of the oil pan onto my new motor. This involved unbolting in sequence the bolts holding it. There is a special Nissan seal cutting tool that is recommended to use, however you can't really find it very easily. I ended up using an old method of using a block of wood and a hammer to knock the seal loose. I found LOTS of metal in the pan...definitely spun a bearing. I cleaned the pan thoroughly several times to rid it of metal. I used gray RTV sealant after cleaning both mating surfaces extensively to promote adhesion. I torqued all bolts in sequence after mating the pan withing 5 minutes of applying the sealant.
I then found there was damage on the coolant filler neck. I ended up removing the entire tube that runs through the lower manifold area by unbolting the 4 screws and pulling on the tube to remove it. There's an o-ring on the end of the tube that seals it to the rear section going into the rear of the heads. Simply push in the new tube and neck combo and reinstall the bolts.
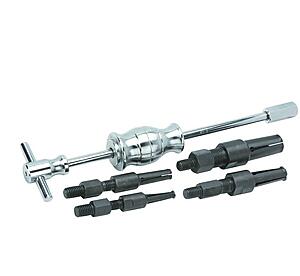
Since this motor was mated to an automatic transmission in its former body, it had a pilot converter installed that needed to be removed. There is a special type of puller you'll want to use, if you ever run into the same scenario. I found the kit for $50 at Harbor Freight.
Blind Hole Bearing Puller - Needle Bearing Puller
Next I finished torquing the motor mounts, header studs and nuts.
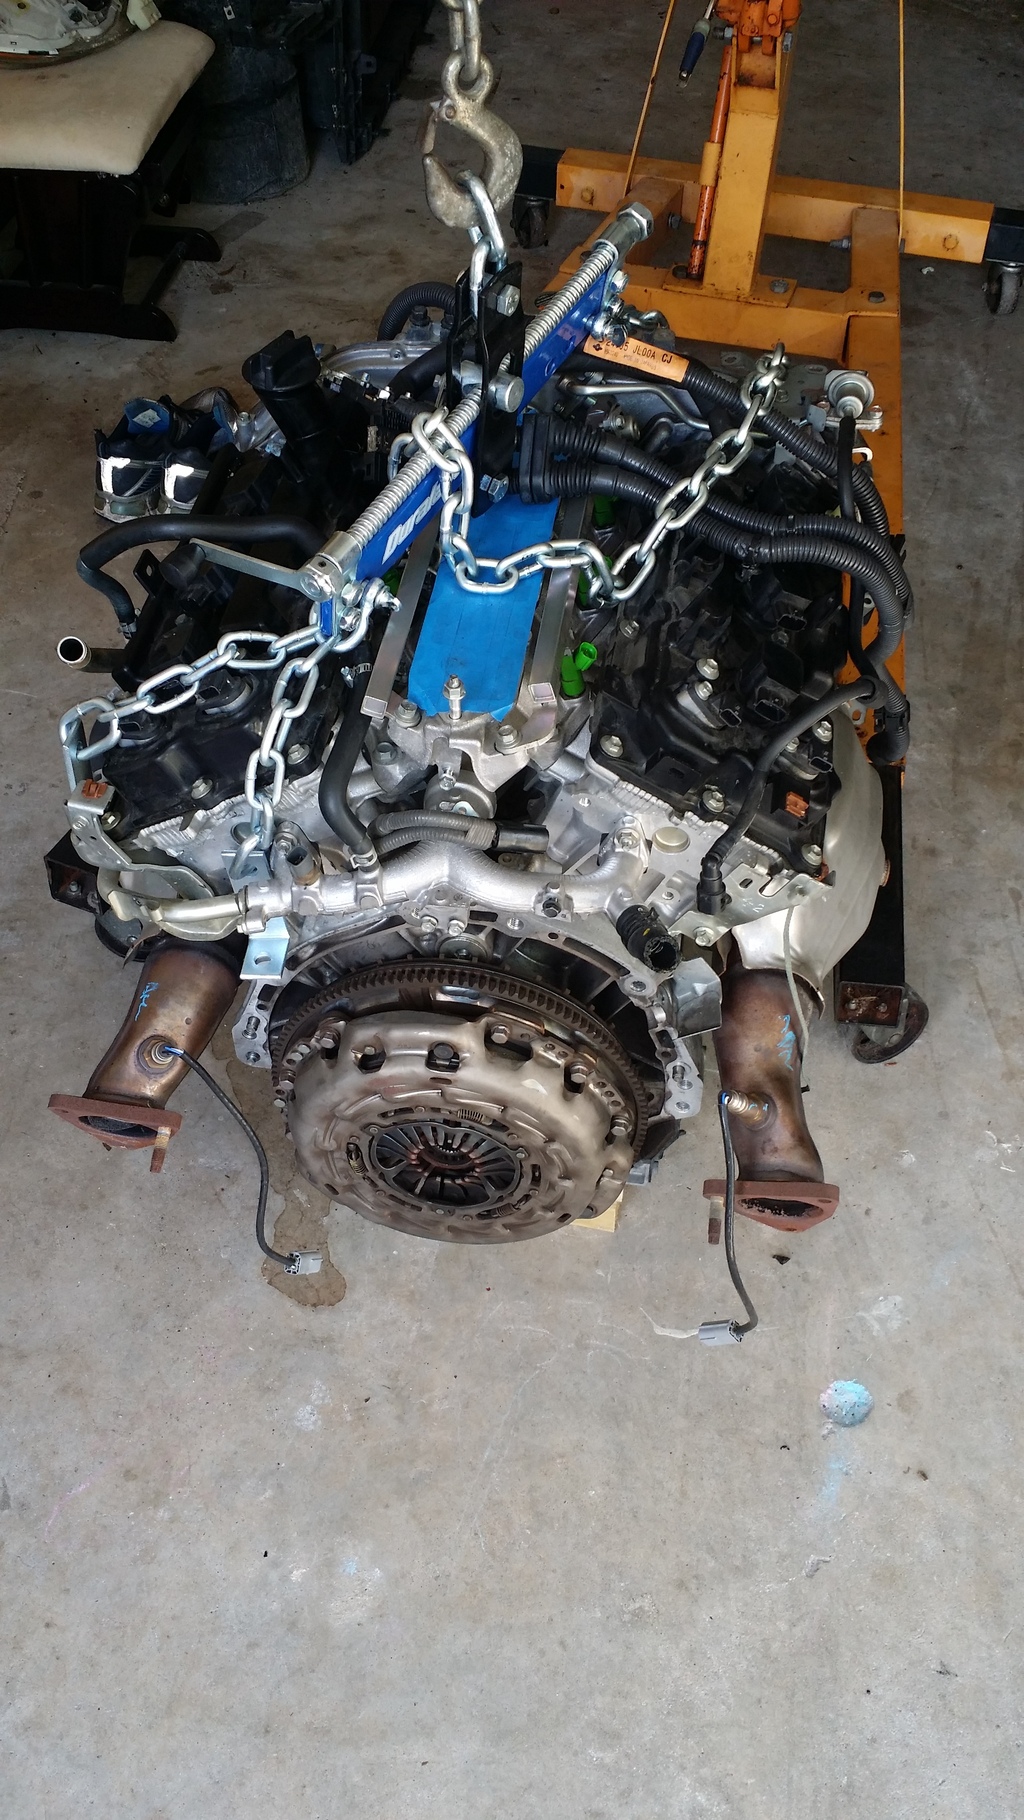
I then proceeded to install the new pilot bearing using a socket to tap it into the crank.
Once done, I mounted the flywheel making sure to line up the dowel pin with the hole between two bolt holes on the flywheel. If you don't do this, you will receive a check engine light right away.
Next I cleaned the mating surfaces of the flywheel and pressure plate using brake parts cleaner. I dusted off the clutch disc and greased the inner splines of the clutch disc. I used the clutch alignment tool I bought online made by ACT. AT01 is the model number that fits our spline count. I then aligned the pressure plate with the dowel pins on the flywheel and started hand tightening bolts in a diagonal pattern. Per the FSM you first tighten to 11 ft lbs in sequence and finally 29 ft lbs to finish.
I bought a new CSC from Infiniti parts for $115. While I was there I picked up 3 quarts of GL4 transmission fluid to refill what spilled from the transmission when removing it. I cleaned the input shaft and transmission housing. I then greased the input shaft and spines lightly with white lithium grease. I have to install the CSC and mate the transmission to the engine. For this I will need a transmission jack to carefully align them. I will then bolt them to spec and reinstall into the car. From there I will start the reassembly process.
I'm close
I got the old motor stripped of parts the new motor ended up needing. I found damage on the oil pan of the new motor. I needed to swap the lower section of the oil pan onto my new motor. This involved unbolting in sequence the bolts holding it. There is a special Nissan seal cutting tool that is recommended to use, however you can't really find it very easily. I ended up using an old method of using a block of wood and a hammer to knock the seal loose. I found LOTS of metal in the pan...definitely spun a bearing. I cleaned the pan thoroughly several times to rid it of metal. I used gray RTV sealant after cleaning both mating surfaces extensively to promote adhesion. I torqued all bolts in sequence after mating the pan withing 5 minutes of applying the sealant.
I then found there was damage on the coolant filler neck. I ended up removing the entire tube that runs through the lower manifold area by unbolting the 4 screws and pulling on the tube to remove it. There's an o-ring on the end of the tube that seals it to the rear section going into the rear of the heads. Simply push in the new tube and neck combo and reinstall the bolts.
Since this motor was mated to an automatic transmission in its former body, it had a pilot converter installed that needed to be removed. There is a special type of puller you'll want to use, if you ever run into the same scenario. I found the kit for $50 at Harbor Freight.
Blind Hole Bearing Puller - Needle Bearing Puller

Next I finished torquing the motor mounts, header studs and nuts.
I then proceeded to install the new pilot bearing using a socket to tap it into the crank.
Once done, I mounted the flywheel making sure to line up the dowel pin with the hole between two bolt holes on the flywheel. If you don't do this, you will receive a check engine light right away.
Next I cleaned the mating surfaces of the flywheel and pressure plate using brake parts cleaner. I dusted off the clutch disc and greased the inner splines of the clutch disc. I used the clutch alignment tool I bought online made by ACT. AT01 is the model number that fits our spline count. I then aligned the pressure plate with the dowel pins on the flywheel and started hand tightening bolts in a diagonal pattern. Per the FSM you first tighten to 11 ft lbs in sequence and finally 29 ft lbs to finish.
I bought a new CSC from Infiniti parts for $115. While I was there I picked up 3 quarts of GL4 transmission fluid to refill what spilled from the transmission when removing it. I cleaned the input shaft and transmission housing. I then greased the input shaft and spines lightly with white lithium grease. I have to install the CSC and mate the transmission to the engine. For this I will need a transmission jack to carefully align them. I will then bolt them to spec and reinstall into the car. From there I will start the reassembly process.
I'm close
Thread Starter
Registered User
Joined: Nov 2013
Posts: 378
Likes: 59
From: Central Florida
Some more updates...
I installed the new CSC slave cylinder and remounted the tubing. I then greased the input shaft sparingly.
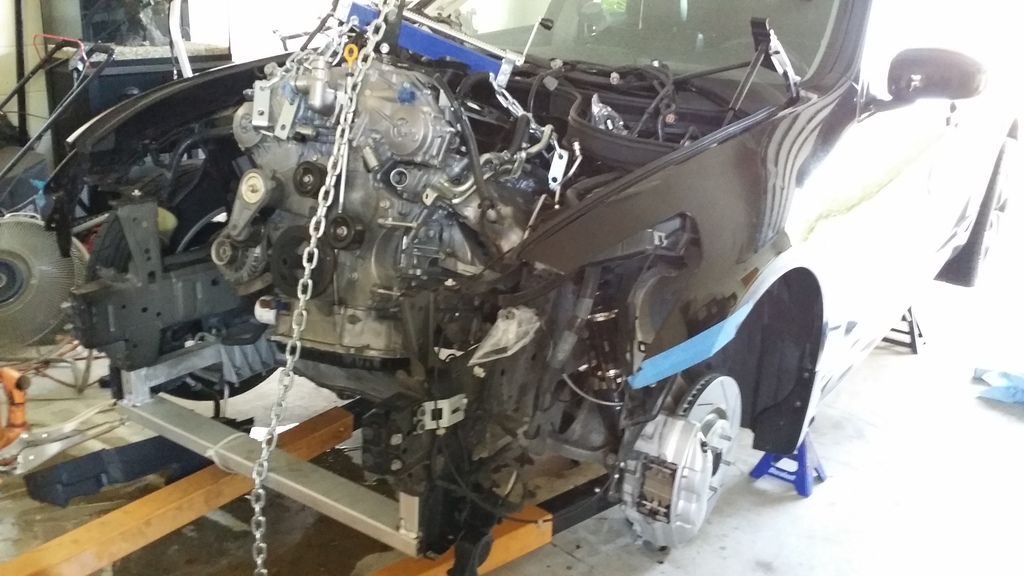
Next I mated the new couple for the first time.
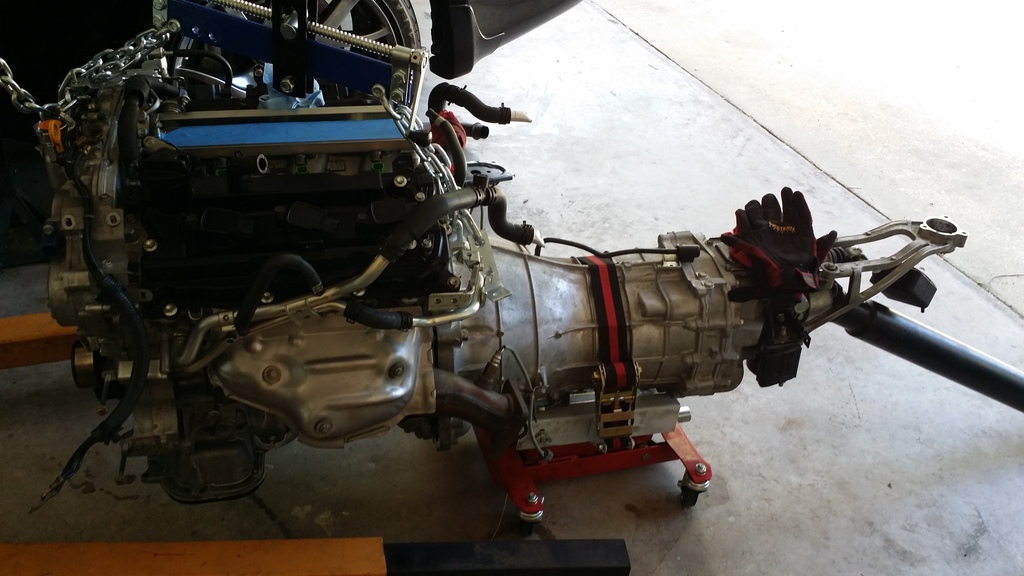
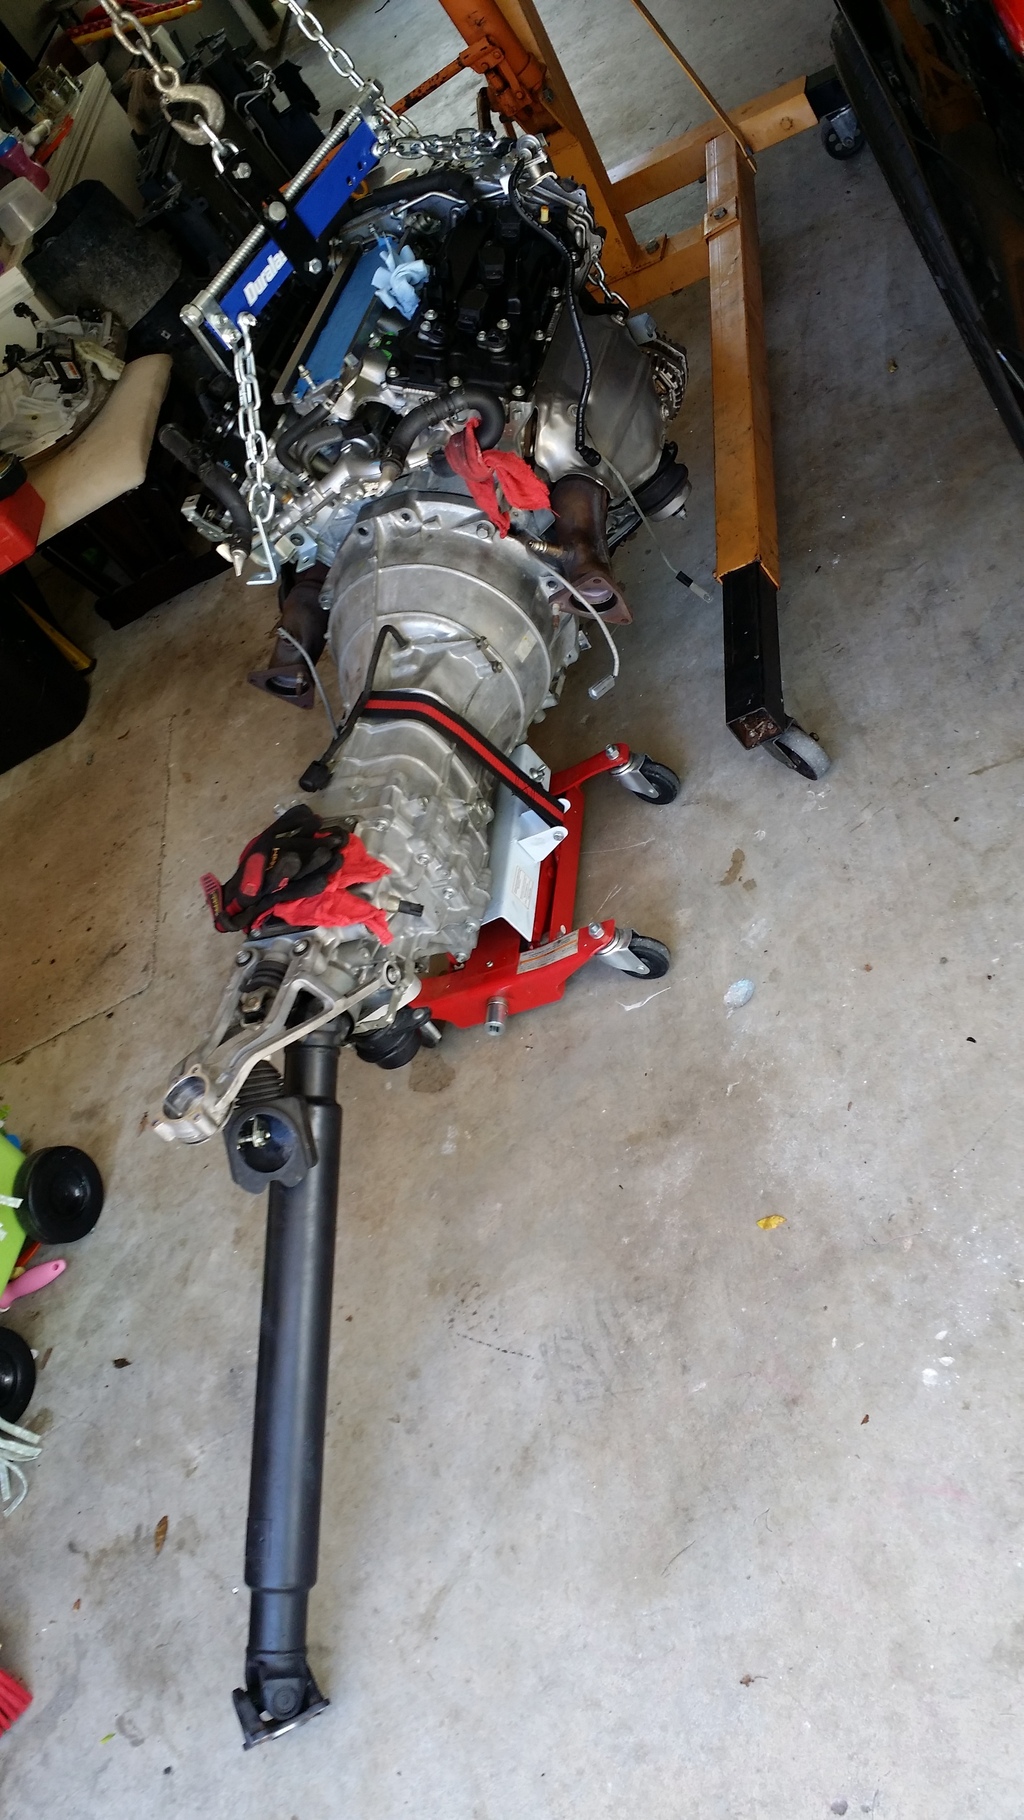
Time for a beer and admiration of the sexy beast that she is.
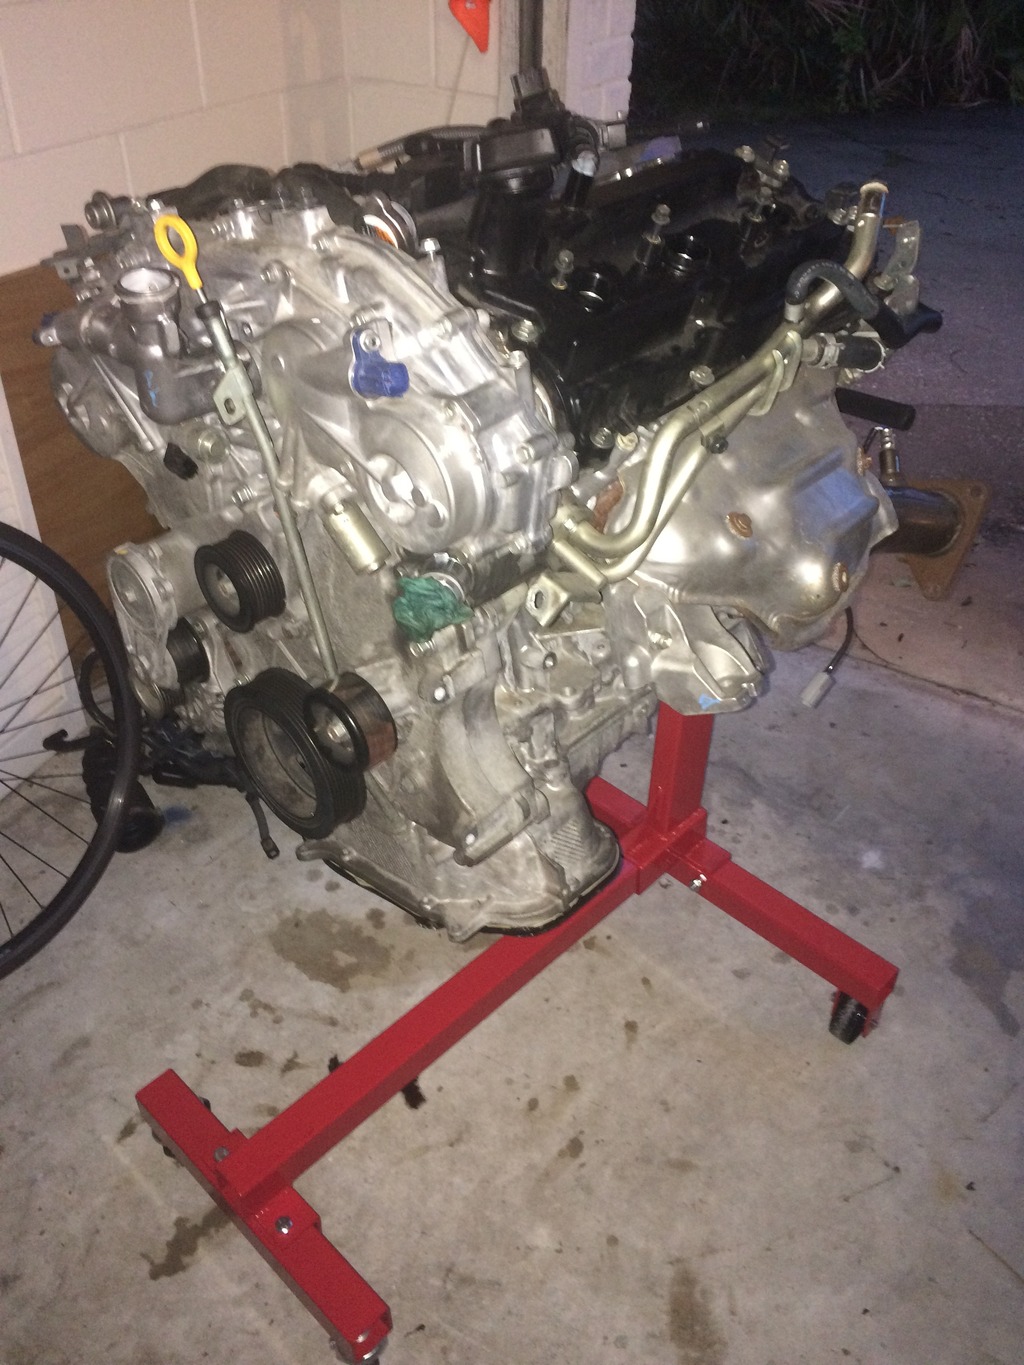
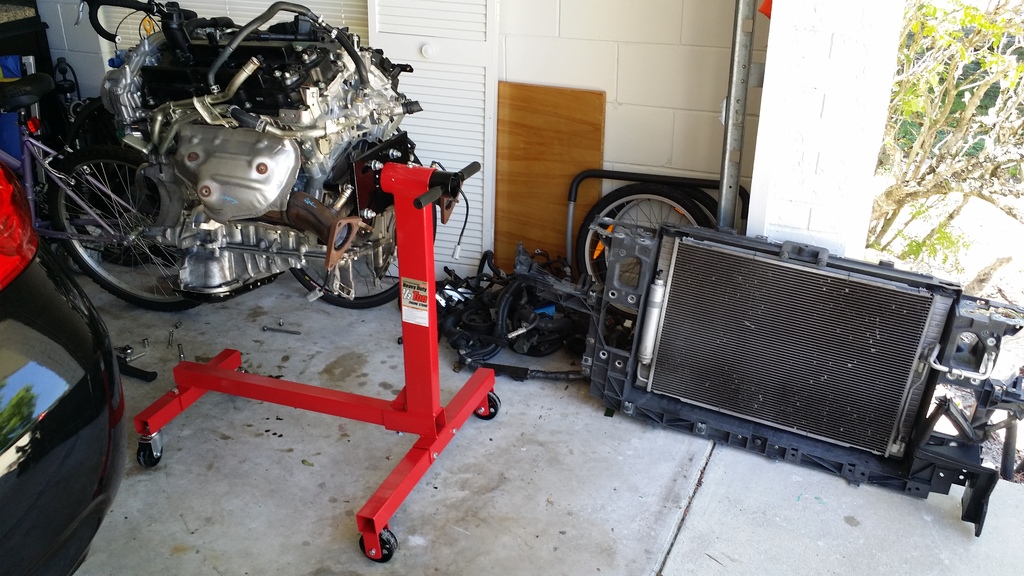
The old motor which I'm undecided what to do with yet...
 [/URL]
Ok enough with the break...time to install.
 [/URL]
In its new home, safe and sound.
I installed the new CSC slave cylinder and remounted the tubing. I then greased the input shaft sparingly.
Next I mated the new couple for the first time.
Time for a beer and admiration of the sexy beast that she is.
The old motor which I'm undecided what to do with yet...
[/URL]Ok enough with the break...time to install.
[/URL]In its new home, safe and sound.
Thread Starter
Registered User
Joined: Nov 2013
Posts: 378
Likes: 59
From: Central Florida

I'm hung up on the power steering pump tonight, so I called it quits. I'll resume in the morning. I'm going to save it for the end. I don't want to have something like that hold me up.
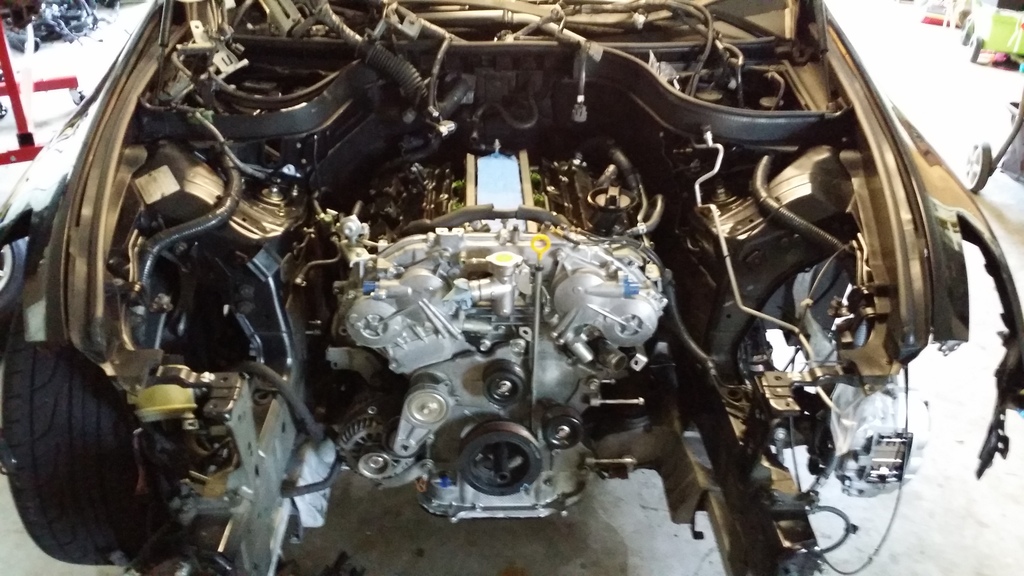
I have the engine and transmission fully bolted in, drive shaft reinstalled, fuel line, ground wire and rear coolant hoses.
Tomorrow I'll reconnect the engine harness, reinstall the exhaust and bolt on the front end. Then it should be filling it with fluids, charging the ac system and removal of the front automatic crank pulley. I'm going to use the starter method to break the bolt lose. Jam a large pry bar against the frame. You press the gas pedal to the floor so it stops the fuel pump and crank the engine.
Once it's off I can swap pulleys. Getting close...I'm hoping to be running this weekend.

Yeah your car is really coming together..and fast! Thanks for posting all the pics too. It's great to be able to see all the parts and upgrades your doing while reading about then. Keep up the good work!

Awesome work dude. I know you got a lot of flak for not checking your oil originally but I'm super impressed by this whole thread. I don't know how you resisted the urge to throw some turbos on it while the engine was out. If this happened to me I'd be bankrupt haha.
Thread Starter
Registered User
Joined: Nov 2013
Posts: 378
Likes: 59
From: Central Florida
****NEW UPDATE****
IT RUNS!
https://www.youtube.com/watch?v=A9qh...ature=youtu.be
I have the headlights and crash bar all back together. Need to bleed the clutch system which proved almost impossible by hand. I'm going to have to get a power bleeder top for the clutch reservoir.
Everything else is done except the hood, front bumper and the interior shift **** area.
Soon I'll have a video with a test drive