Review Wheel Refurbishing: iForged Challenges

Thread Tools
 
Search this Thread
 
Old May 28, 2014 | 12:49 PM
  #1  
Scoobykim's Avatar
Scoobykim
Thread Starter
Registered User
iTrader: (3)
 
Joined: Oct 2012
Posts: 338
Likes: 18
From: Queens, NY
Wheel Refurbishing: iForged Challenges

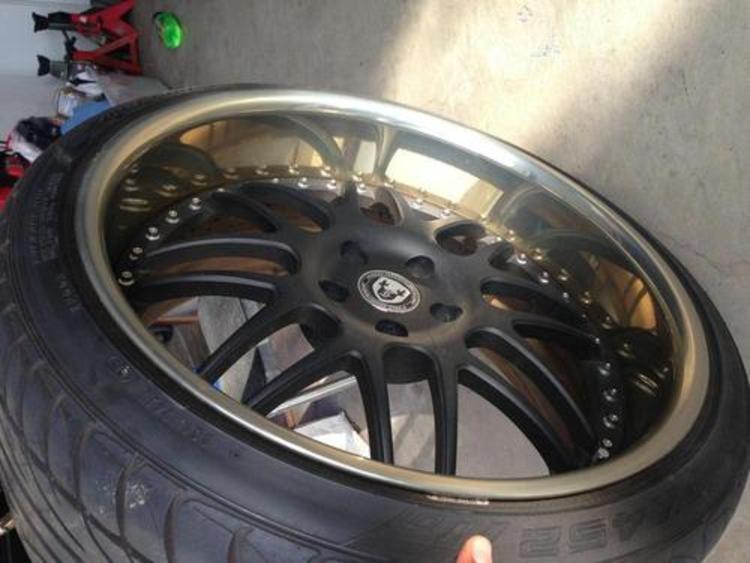
So I had a set of iForged Challenges that had a black powdercoated face and gold powdercoated lips. I didn't like the black face and the gold was fading in the rears and looked awkward with the mismatch shade from front to rear in the sun. Here are the before:
Name:  3JYgVxu.jpg
Views: 292
Size:  49.0 KB

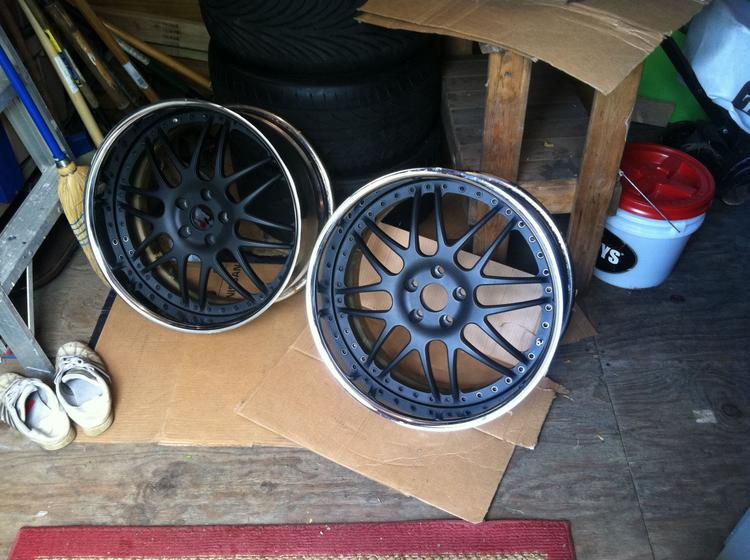
At first, I wanted to just remove the gold lips to remove the awkward shades of gold. A local shop was asking about 500 to sandblast lips and polish, but as a DIY, i did some research and bought necessary supplies. Here is the product after removing the faded gold:
Name:  okmPWRM.jpg
Views: 268
Size:  73.1 KB

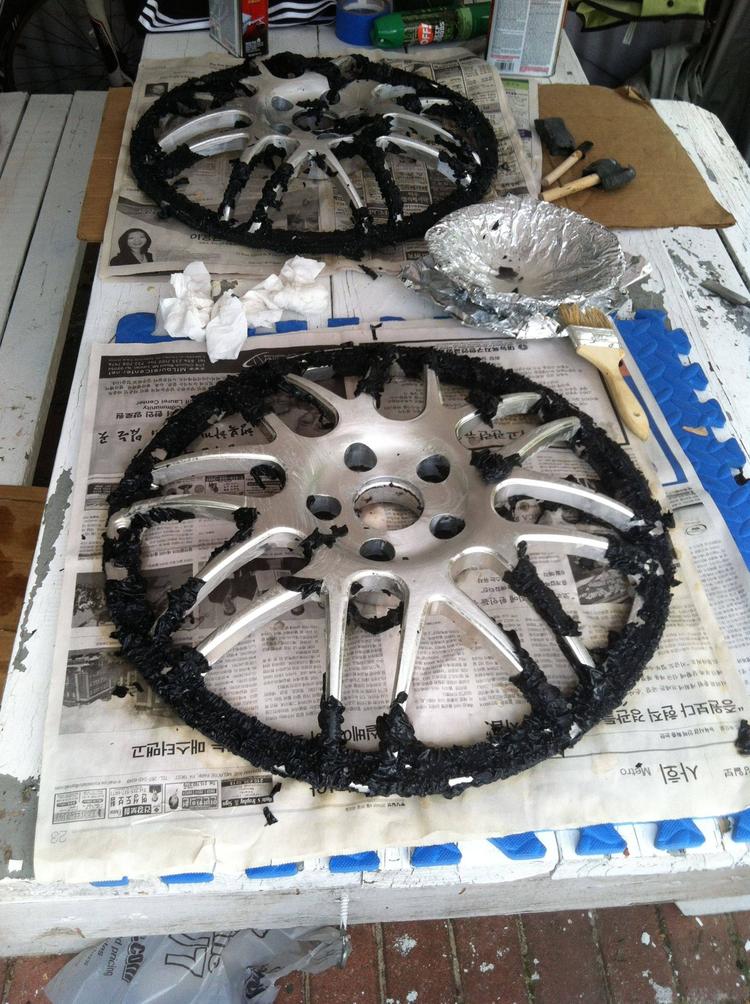
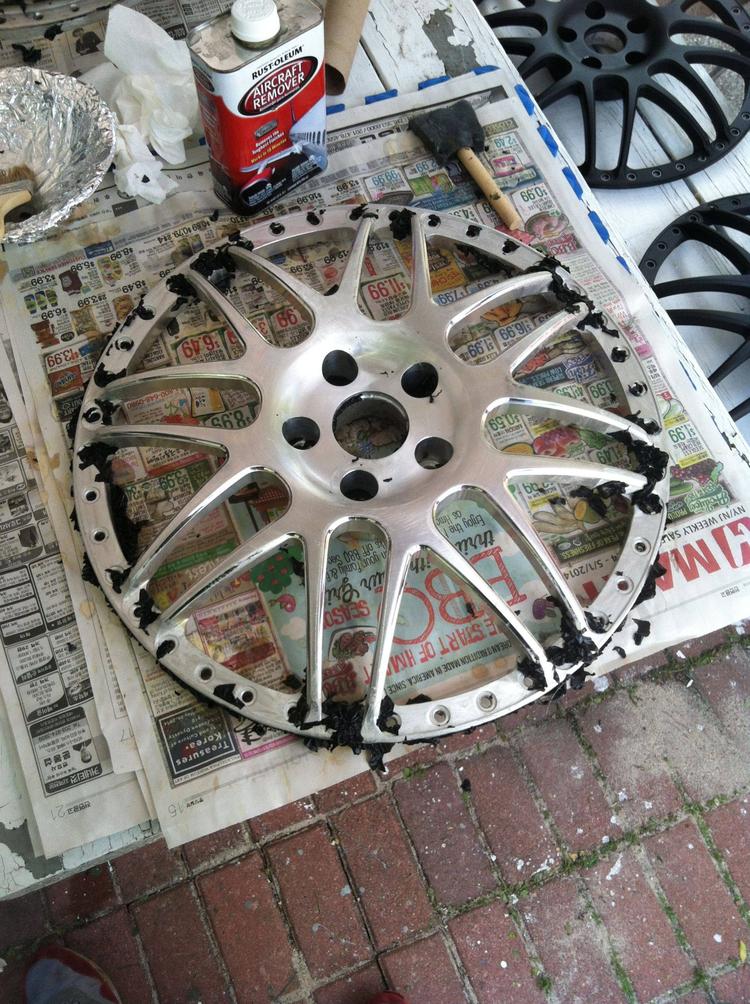
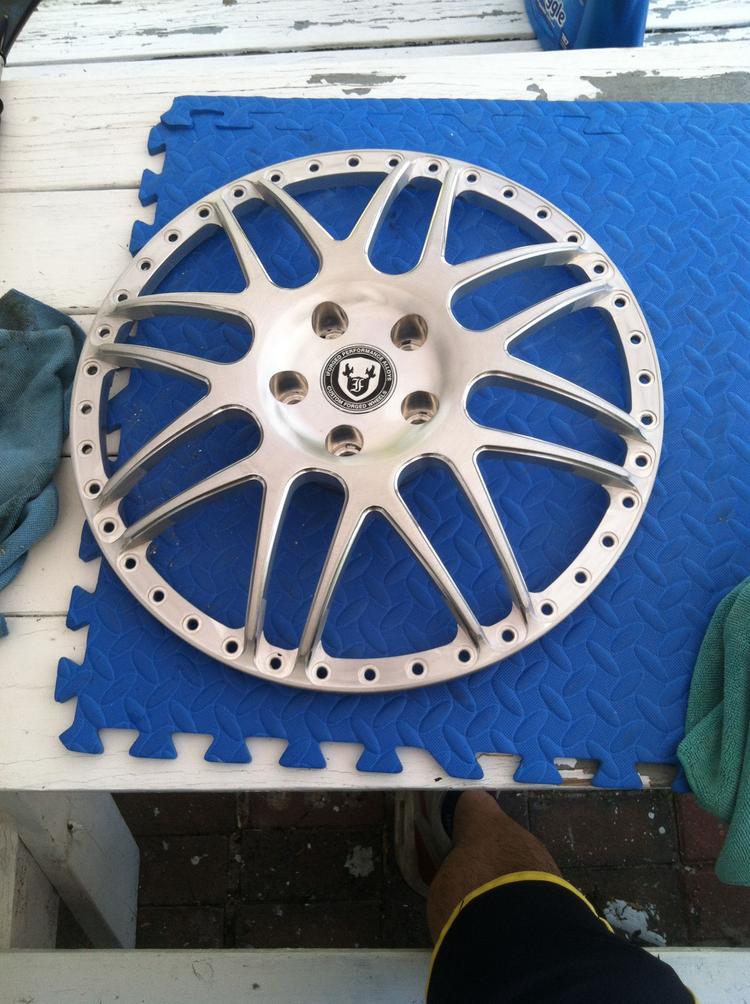
After doing all 4 barrels, I saw a member on an Audi forum page who did the same exact DIY with the iForged with similar color scheme. And he went from a black face to the bare aluminum of his wheels and influenced me to remove the black face as well. Here's the process:
Name:  Ze6cQa0.jpg
Views: 195
Size:  145.8 KB
Name:  IVVctFM.jpg
Views: 171
Size:  167.0 KB
Name:  gGmyYj3.jpg
Views: 200
Size:  110.6 KB

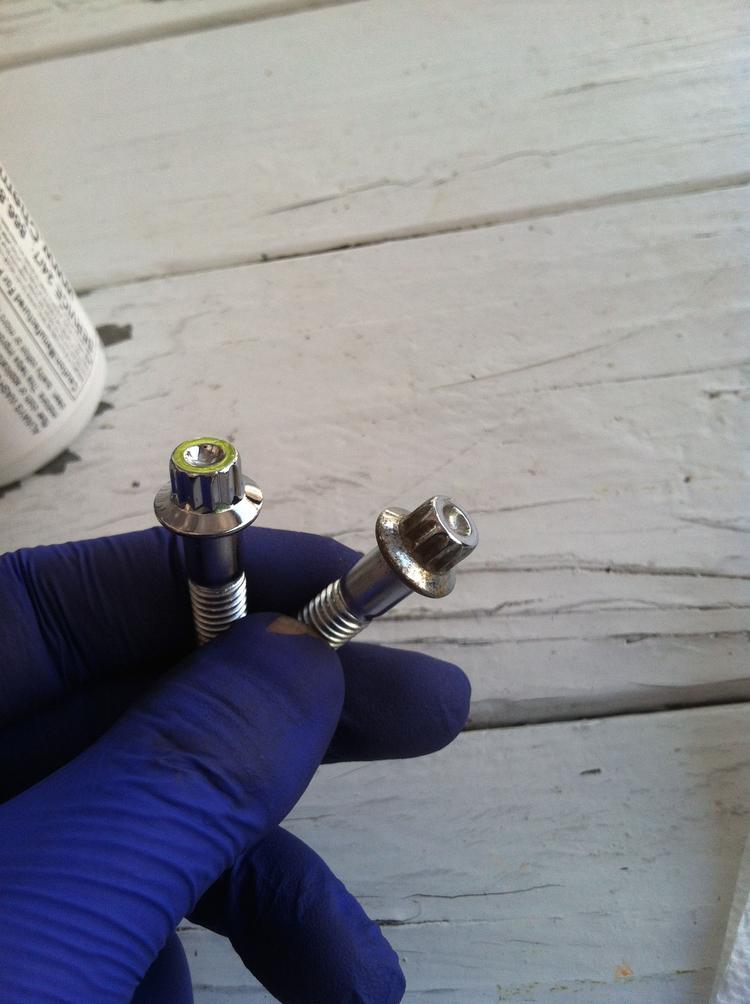
Polished the wheel bolts while they were off the car as well. Here's a picture comparing the two:

Name:  n9YhrWc.jpg
Views: 154
Size:  60.2 KB

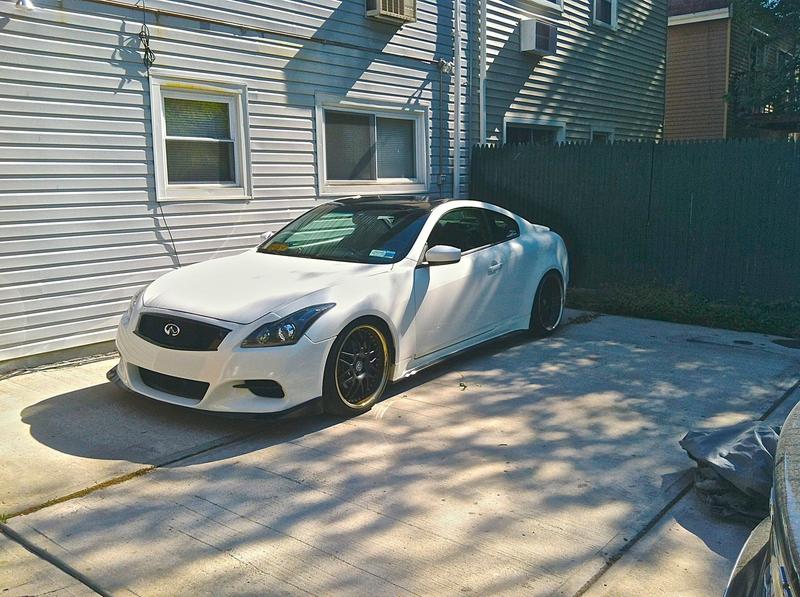
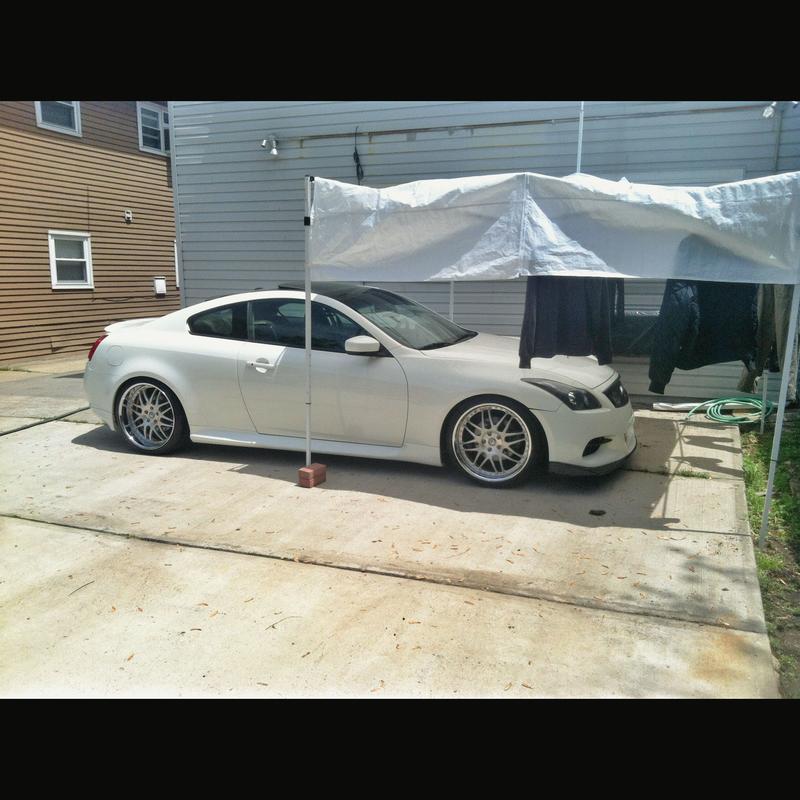
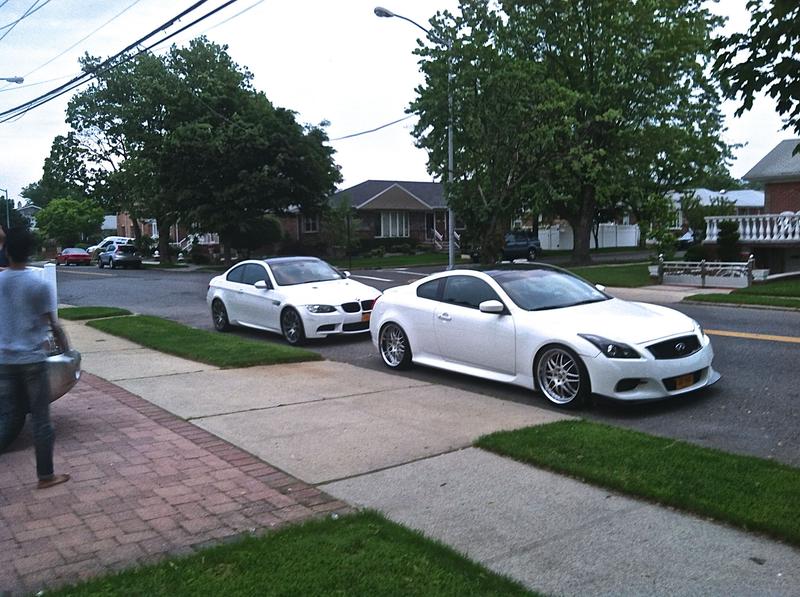
Total time I spent was about 25 hours, which is an estimate. In reality, I spent quite a few afternoons 3-4 hours at a time to get these to where they are now. Here are some shots of before and after on the car!


Before
Name:  HG1a3Vy.jpg
Views: 190
Size:  95.4 KB

After
Name:  WSGagg9.jpg
Views: 191
Size:  78.5 KB
Name:  UFORBZe.jpg
Views: 151
Size:  95.9 KB
Reply
Old May 28, 2014 | 04:24 PM
  #2  
blnewt's Avatar
blnewt
Movin On!
iTrader: (13)
 
Joined: Nov 2009
Posts: 24,876
Likes: 4,949
Wow, what a great job, and nice DIY details. I saw your rims in the FS section and nice to see they stayed in a good home! Those are some high quality wheels and deserved some TLC
Reply
Old May 29, 2014 | 12:53 PM
  #3  
Scoobykim's Avatar
Scoobykim
Thread Starter
Registered User
iTrader: (3)
 
Joined: Oct 2012
Posts: 338
Likes: 18
From: Queens, NY
Originally Posted by blnewt
Wow, what a great job, and nice DIY details. I saw your rims in the FS section and nice to see they stayed in a good home! Those are some high quality wheels and deserved some TLC
Thanks! They were previously for sale, but due to financial reasons as a student I decided to fix these up and keep them for the summer
Reply
Old May 29, 2014 | 01:46 PM
  #4  
Mattimus's Avatar
Mattimus
Registered Member
 
Joined: Jul 2013
Posts: 132
Likes: 14
From: Austin, Tx
Looks much better IMHO. What method did you use to polish the bolts? I'm in the process of refurbishing some 3 piece wheels as well but have been putting off the bolts because there are so many.
Reply
Old May 29, 2014 | 02:08 PM
  #5  
Scoobykim's Avatar
Scoobykim
Thread Starter
Registered User
iTrader: (3)
 
Joined: Oct 2012
Posts: 338
Likes: 18
From: Queens, NY
Originally Posted by Mattimus
Looks much better IMHO. What method did you use to polish the bolts? I'm in the process of refurbishing some 3 piece wheels as well but have been putting off the bolts because there are so many.
I left them in apple cider vinegar for about 24 hours along with the nuts to rid of rust, then sprayed them with WD40 after they were dried.

Then I applied Chemical Guys Metal Polisher on the bolts and buffed off. For all 160 bolts, it only took me about an hour or so.
Reply
Old May 29, 2014 | 04:09 PM
  #6  
Presto's Avatar
Presto
Registered User
 
Joined: Sep 2009
Posts: 1,112
Likes: 73
Much better than the black n gold combo. Looks great. Good job on the polishing
Reply
Old May 30, 2014 | 05:04 PM
  #7  
GetYourWheels's Avatar
GetYourWheels
Former Sponsor
iTrader: (5)
 
Joined: Aug 2011
Posts: 2,724
Likes: 104
From: Southern California
I know the previous owner of these wheels! They looked great on his G, but the fading lips definitely had to go.

Great job on the refinish! Look great now!
Reply
Old May 30, 2014 | 05:36 PM
  #8  
rAiN's Avatar
rAiN
Registered Member
15 Year Member
Liked
iTrader: (5)
 
Joined: Jan 2006
Posts: 1,620
Likes: 24
Can you link the thread to diy? I plan on doing that for my volks
Reply
Old May 30, 2014 | 08:09 PM
  #9  
Scoobykim's Avatar
Scoobykim
Thread Starter
Registered User
iTrader: (3)
 
Joined: Oct 2012
Posts: 338
Likes: 18
From: Queens, NY
Originally Posted by rAiN
Can you link the thread to diy? I plan on doing that for my volks

I followed this video:
and a few DIY on other forums. But after i stripped the powdercoat off the lips, I found out that the lips were already polished so I didn't have to do any sanding. I only applied compound + polisher and protective wax to make it shine more.
Reply
Old Jun 5, 2014 | 09:36 PM
  #10  
Italia311's Avatar
Italia311
Registered User
 
Joined: Jul 2011
Posts: 392
Likes: 2
about to do the same thing with a set of iForged emotions!
Reply
Related Topics
Thread
Thread Starter
Forum
Replies
Last Post
Amrit.bhathal
Wheels & Tires
18
Sep 11, 2015 07:36 PM
xpcgamer
Wheels & Tires
1
Sep 7, 2015 07:10 PM
Sylo
Private Classifieds
0
Sep 3, 2015 04:44 PM


All times are GMT -4. The time now is 01:01 PM.