Group Buy - Clutch Pedal Assist Spring for 6MT


Registered User
Joined: Dec 2011
Posts: 58
Likes: 3
From: Georgetown Ontario Canada
Pics and tips for this DIY Mod.
Finally had a chance to get this modification done. I've had my G37S 6MT for just about 5 weeks - and I'm STILL shifting gears like a newbie. The lurch and guessing game of clutch engagement has driven me nutso. I've driven manual cars for years - and my sport bike keeps me smooth.
So - I gathered up a bunch of tools, cable ties, flashlights, along with some grease and silicone lube - and got to it.
A lot of this has been covered - but I wanted to highlight some things that I found, that prior to doing the spring swap had me asking questions.
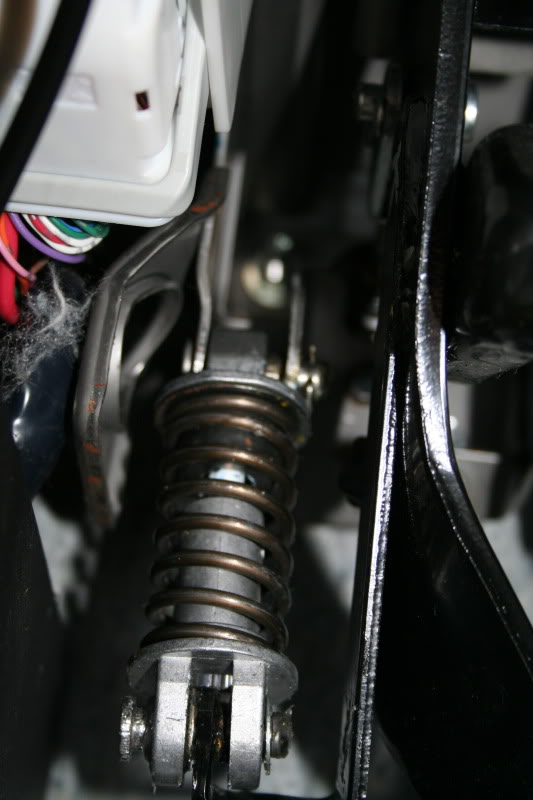
Here is the unaltered spring and assembly:
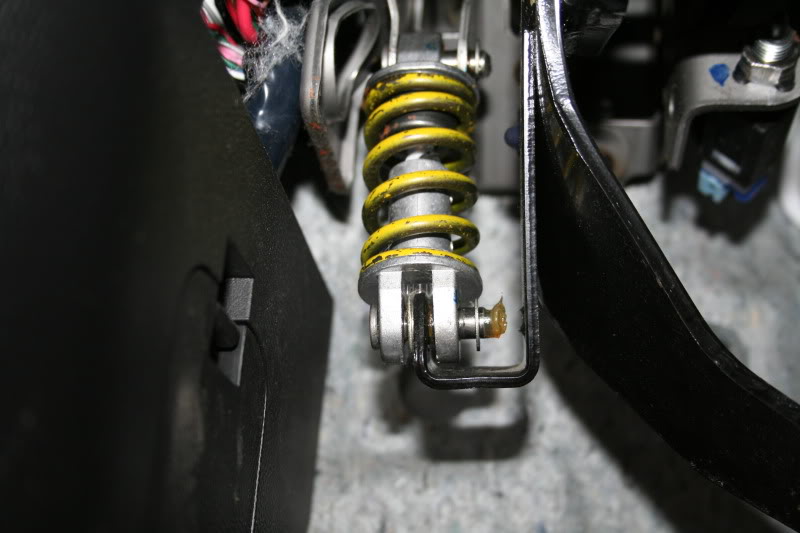
First thing I did was to get a cable tie around the top of the assembly, and the bottom - and cinch it up tight. Then - i added one more cable tie around the assembly - and the first cable tie - to keep the "top to bottom" cable tie in place and not slipping off the touch points.

Next thing I did was to carefully pry off the bottom "C" clip - the "C"clip actually has room for a mall flat screwdriver to slip in - then kind of twist up and around - and the clip comes off. I know others mentioned using two flat screwdrivers to push it off - but I was nervous about the clip flying in behind the firewall as someone had said happened to them. My way worked - so I went with it and did the same on the top clip.
Because the assembly was cable tied, I was able to remove the bottom pin, and then the assembly (with some moving of the clutch pedal back and forth - and side to side) was swinging free from the top pin.
I carefully removed the bottom pin, and then moved the top pin over to the left as far as I needed to without removing it completely - to free the top part of the assembly and out it came. I left the top pin in place on the car portion.
To "explode" the assembly which allows for spring swappinjg - I put the assembly into a towel - and cut the cable tie - but first I took a measurement of the compressed length of the assembly (62mm). The measuring points were the top and bottom flat pieces on the assembly heads.
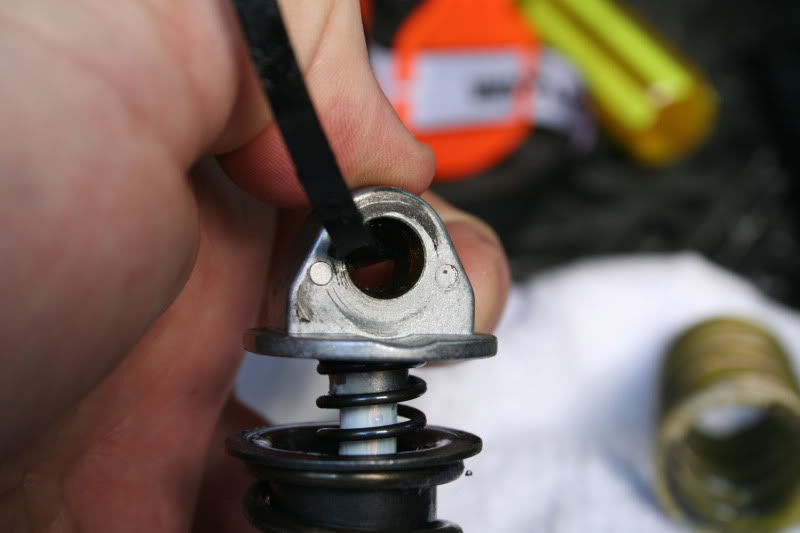
Here is what the assembly looks like un-compressed and without cable ties, and with the new spring in photo:

Now - simply pay careful attention to the items in the assembly, slip the bottom part off - remove old yellow spring - put new spring in place and get some more cable ties. I also slipped a cable tie into the top eyelet to indicate top and bottom. I attached a new cable tie to the assembly - it was a little fidgity to do - but I got it compressed and got it close to the 62 mm mark of the removed assembly. Again - I put an additional cable tie around the assembly to keep the top to bottom tie in place and keep it from slipping off the touch points.
In hind-site I wish I'd replaced the "new" assembly starting with the bottom pin - but I didn't - I did the top pin first. Reason I say this - is that the bottom pin seems to be more restrictive and has less play.
As I mentioned - I kept the top pin already on the car portion of the mount - and gently slid it to the left as far as I could without it dropping out:
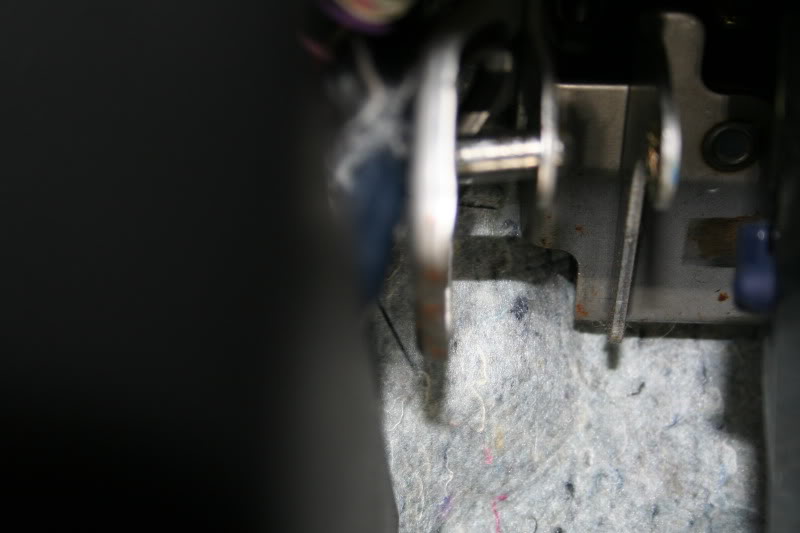
Then I put the assembly back in place and slipped the pin through the mount holes. As was mentioned elsewhere - there are two little 1/8 indent impressions in the assembly - on the top and bottom - here is what I mean:
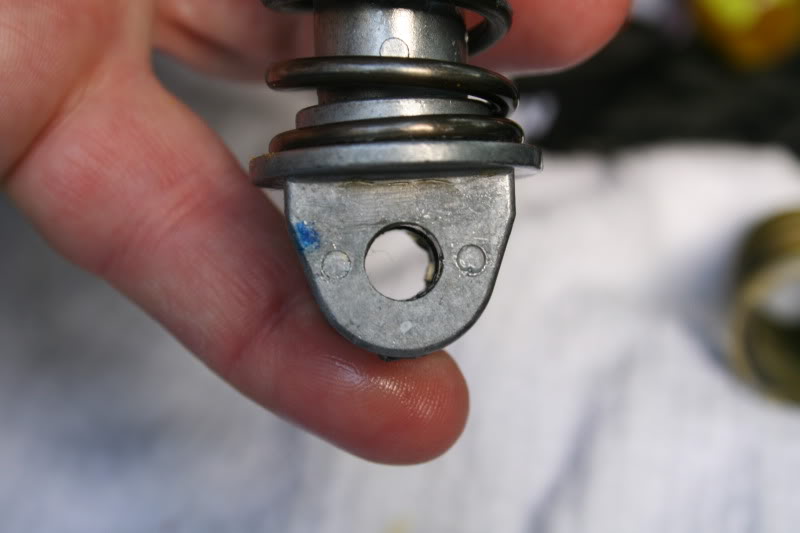
These two little impressions need to go on the right side (closest to the clutch pedal) for re-installation. I didn't know what they were when I read about them - so I'm showing them here.
Before you reinstall the bottom pin - lube the pin up with your favorite snake oil...
The bottom pin is a bugger to get started in the hole - as there is not much room on the left side to simply insert the pin into the car side of the mount. It fits - but just. the clutch pedal has some side to side play - you'll need to gently give it a little push to the right to get the pin started.
Once the pin is started through the first two holes, do yourself a favor and get a pair of channel lock pliers. Use the channel locks to compress the bottom pin into the hole. I tried for a half hour with needle nose pliers - but it was a waste of time. Got the channel locks out - and bam - the pin was in.
Take a pair of needle nose locking pliers and lock in the "C" clip - then you can simply push the clips back on.
DONE!!
Clean up - and go for a ride.
First impressions are very good - I feel like I know how to shift again!!!
Hope this long winded write up helps someone out - the stuff I gleaned from this forum has helped me a lot - time to give back.
Cheers.
Ken
So - I gathered up a bunch of tools, cable ties, flashlights, along with some grease and silicone lube - and got to it.
A lot of this has been covered - but I wanted to highlight some things that I found, that prior to doing the spring swap had me asking questions.
Here is the unaltered spring and assembly:
First thing I did was to get a cable tie around the top of the assembly, and the bottom - and cinch it up tight. Then - i added one more cable tie around the assembly - and the first cable tie - to keep the "top to bottom" cable tie in place and not slipping off the touch points.
Next thing I did was to carefully pry off the bottom "C" clip - the "C"clip actually has room for a mall flat screwdriver to slip in - then kind of twist up and around - and the clip comes off. I know others mentioned using two flat screwdrivers to push it off - but I was nervous about the clip flying in behind the firewall as someone had said happened to them. My way worked - so I went with it and did the same on the top clip.
Because the assembly was cable tied, I was able to remove the bottom pin, and then the assembly (with some moving of the clutch pedal back and forth - and side to side) was swinging free from the top pin.
I carefully removed the bottom pin, and then moved the top pin over to the left as far as I needed to without removing it completely - to free the top part of the assembly and out it came. I left the top pin in place on the car portion.
To "explode" the assembly which allows for spring swappinjg - I put the assembly into a towel - and cut the cable tie - but first I took a measurement of the compressed length of the assembly (62mm). The measuring points were the top and bottom flat pieces on the assembly heads.
Here is what the assembly looks like un-compressed and without cable ties, and with the new spring in photo:
Now - simply pay careful attention to the items in the assembly, slip the bottom part off - remove old yellow spring - put new spring in place and get some more cable ties. I also slipped a cable tie into the top eyelet to indicate top and bottom. I attached a new cable tie to the assembly - it was a little fidgity to do - but I got it compressed and got it close to the 62 mm mark of the removed assembly. Again - I put an additional cable tie around the assembly to keep the top to bottom tie in place and keep it from slipping off the touch points.
In hind-site I wish I'd replaced the "new" assembly starting with the bottom pin - but I didn't - I did the top pin first. Reason I say this - is that the bottom pin seems to be more restrictive and has less play.
As I mentioned - I kept the top pin already on the car portion of the mount - and gently slid it to the left as far as I could without it dropping out:
Then I put the assembly back in place and slipped the pin through the mount holes. As was mentioned elsewhere - there are two little 1/8 indent impressions in the assembly - on the top and bottom - here is what I mean:
These two little impressions need to go on the right side (closest to the clutch pedal) for re-installation. I didn't know what they were when I read about them - so I'm showing them here.
Before you reinstall the bottom pin - lube the pin up with your favorite snake oil...
The bottom pin is a bugger to get started in the hole - as there is not much room on the left side to simply insert the pin into the car side of the mount. It fits - but just. the clutch pedal has some side to side play - you'll need to gently give it a little push to the right to get the pin started.
Once the pin is started through the first two holes, do yourself a favor and get a pair of channel lock pliers. Use the channel locks to compress the bottom pin into the hole. I tried for a half hour with needle nose pliers - but it was a waste of time. Got the channel locks out - and bam - the pin was in.
Take a pair of needle nose locking pliers and lock in the "C" clip - then you can simply push the clips back on.
DONE!!
Clean up - and go for a ride.
First impressions are very good - I feel like I know how to shift again!!!
Hope this long winded write up helps someone out - the stuff I gleaned from this forum has helped me a lot - time to give back.
Cheers.
Ken
Thread Starter
Joined: Oct 2011
Posts: 6,103
Likes: 593
From: People's Republic of IL
^^Wow! That's a great write up, with perfect pictures. It should go in the DYI section 
With regard to those 2 little dimples; I think that side of the clevis is a few thousands smaller than the other side. With it oriented to the right, subsequent pin removal was easy. Facing to the left, removal was more difficult.
PS. To those doing this, don't lose the top pin behind the fuse box... You'll waste the next 3 hours fishing it out. Don't ask how I know this.


Registered User
Joined: Dec 2011
Posts: 58
Likes: 3
From: Georgetown Ontario Canada
Awesome - hope the write up I did benefited others. That was my goal.
I will be tackling the drivers seat thigh bolster mod soon - and plan to do a similar write up. Theres some great stuff already posted on that mod - but again - I"m going to try to answer some of my own questions - and help out others that might have the same queries.
Cheers.
Ken
I will be tackling the drivers seat thigh bolster mod soon - and plan to do a similar write up. Theres some great stuff already posted on that mod - but again - I"m going to try to answer some of my own questions - and help out others that might have the same queries.
Cheers.
Ken

Registered Member
Joined: Apr 2011
Posts: 331
Likes: 2
finally got mine done.
first off thanks to Jsolo...
i drove my car for couple of days without the spring just to get the feeling without it. i actually like it but just a little heavy for me. would this be same feel when performance clutch & flywheel be like?
and now with the softer spring. its pretty much feels in between the stock & without spring. i like it, seems like i'm shifting smoother.
i inserted the top pin from the right side in mine. call it lazy call it smart but it was cold & dark when i put it in at work.
Registered Member
Joined: Apr 2011
Posts: 331
Likes: 2
no magnet stick?
^^Wow! That's a great write up, with perfect pictures. It should go in the DYI section
With regard to those 2 little dimples; I think that side of the clevis is a few thousands smaller than the other side. With it oriented to the right, subsequent pin removal was easy. Facing to the left, removal was more difficult.
PS. To those doing this, don't lose the top pin behind the fuse box... You'll waste the next 3 hours fishing it out. Don't ask how I know this.
Registered Member
Joined: Apr 2011
Posts: 331
Likes: 2