
DIY: Front Bumper Removal/install

Thread Starter
NextLevel Performance
iTrader: (53)
Joined: Oct 2009
Posts: 8,659
Likes: 211
From: St Paul, MN
Front Bumper Removal/install
I went off of jarborn1's DIY, but I thought I would do an actual photo step by step thread.
1. Open the Hood.
2. Remove clips on top of bumper. They simply pop straight up with a flat head screw driver(the center of them comes out a bit, and then the "housing" of them comes out as a whole). You DO NOT need to remove the radiator cover.
(A in the photo from the Infiniti Site)

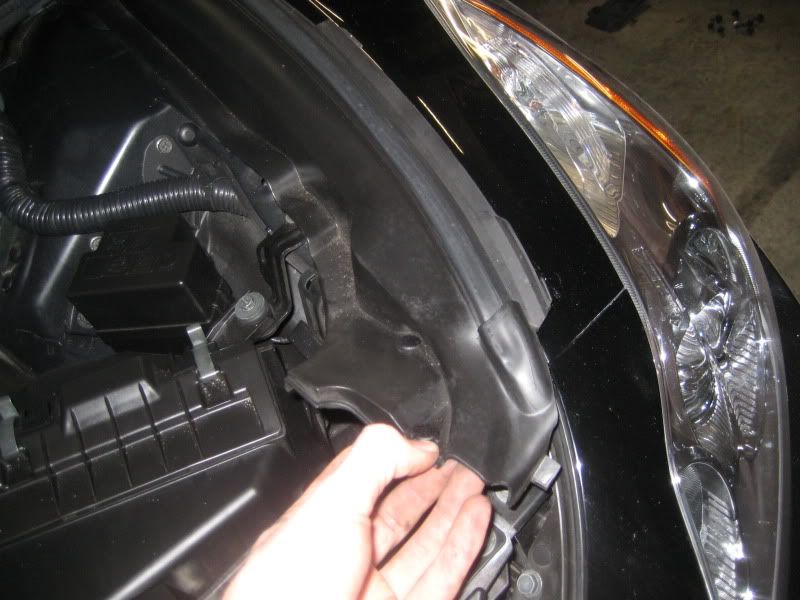
3. Then remove the first 3 or 4 pegs holding the seal around the outter edge of the engine bay. There are rubber pegs that simply come out w/ a flathead or a tool. This allows access to the bumper bracket.
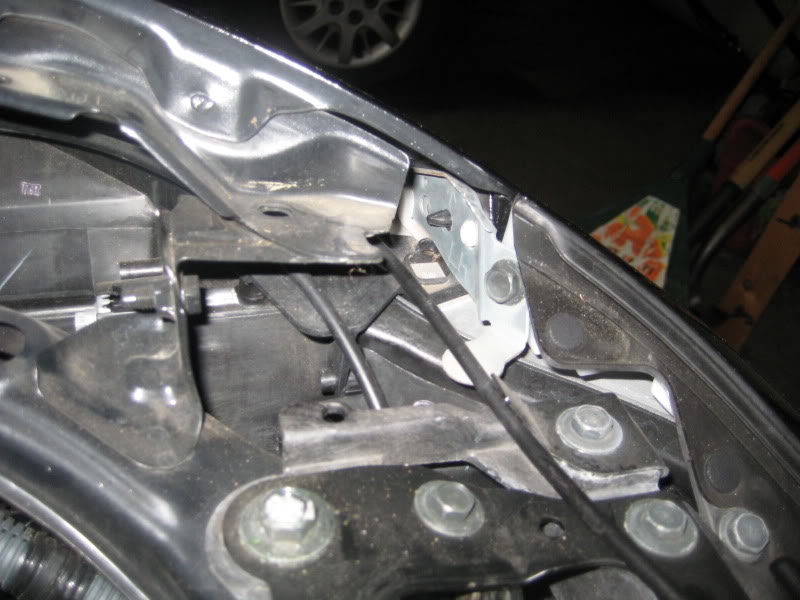
4. Next remove the screw from the bumper bracket (10mm). You'll see that all that is holding it in place is a piece of plastic. The bracket itself slides right out.(black screw on silver plate in photo)
(NOTE FOR REINSTALLATION: be careful with reassembling the bumper bracket, it screws into plastic, and it will break if overtightened)
5. That's it for under the hood. Next remove all of the screws underneath the car just as you did on the top of the bumper(under the hood). There are bolts(10mm) all along the edge of the bumper holding it to the under engine cover. (A in the photo below from the Infiniti Site)

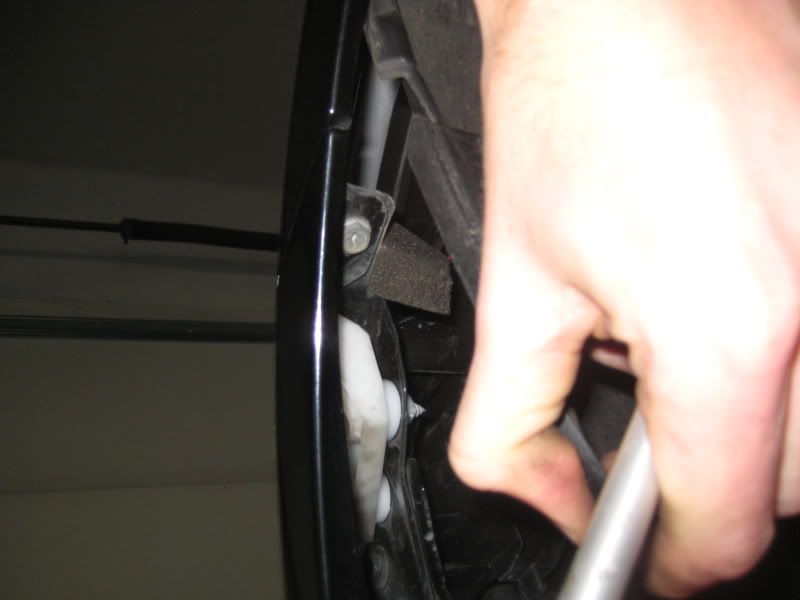
6. There is one more screw holding the bumper on, and this is the hardest one to access. Simply stick a flat head screw driver in to pry the plastic liner toward the tire. This will give you access to the one screw(again 10mm) on each side. Once removed all of the hardware has been removed on the driver side, proceed to do steps 6&7 to remove the passanger side. (the screw goes VERTICAL as in the photo)
8. Once the passanger side is also done, the rest of the bumper simply pops off. go from one side to the other slowly pulling the bumper away from the car and it will be released from the car.
Now go get a sick bumper and do the reverse steps and mount it up!

1. Open the Hood.
2. Remove clips on top of bumper. They simply pop straight up with a flat head screw driver(the center of them comes out a bit, and then the "housing" of them comes out as a whole). You DO NOT need to remove the radiator cover.
(A in the photo from the Infiniti Site)
3. Then remove the first 3 or 4 pegs holding the seal around the outter edge of the engine bay. There are rubber pegs that simply come out w/ a flathead or a tool. This allows access to the bumper bracket.
4. Next remove the screw from the bumper bracket (10mm). You'll see that all that is holding it in place is a piece of plastic. The bracket itself slides right out.(black screw on silver plate in photo)
(NOTE FOR REINSTALLATION: be careful with reassembling the bumper bracket, it screws into plastic, and it will break if overtightened)
5. That's it for under the hood. Next remove all of the screws underneath the car just as you did on the top of the bumper(under the hood). There are bolts(10mm) all along the edge of the bumper holding it to the under engine cover. (A in the photo below from the Infiniti Site)
6. There is one more screw holding the bumper on, and this is the hardest one to access. Simply stick a flat head screw driver in to pry the plastic liner toward the tire. This will give you access to the one screw(again 10mm) on each side. Once removed all of the hardware has been removed on the driver side, proceed to do steps 6&7 to remove the passanger side. (the screw goes VERTICAL as in the photo)
8. Once the passanger side is also done, the rest of the bumper simply pops off. go from one side to the other slowly pulling the bumper away from the car and it will be released from the car.
Now go get a sick bumper and do the reverse steps and mount it up!
Last edited by 1cleanG; Oct 14, 2012 at 04:04 PM.


you can actually also do it without jacking up or removing the tires. To access the bolts on either side of the bumper, just turn the wheels until they lock, another easy and quicker way to do it.


Thread Starter
NextLevel Performance
iTrader: (53)
Joined: Oct 2009
Posts: 8,659
Likes: 211
From: St Paul, MN
LMAO!!!!! Yes. I'm only installing it so I can see if i can get down my driveway tomorrow. My wheels will not be in for another month so I'm borrowing a buddies. The bumper is actually for sale in the FS thread.
yes indeedy. Its currently for sale in the FS threads too!
Trending Topics


Thread Starter
NextLevel Performance
iTrader: (53)
Joined: Oct 2009
Posts: 8,659
Likes: 211
From: St Paul, MN

 haha, JK bro, ya know i got love for ya

Thanks for your help. The most trouble I had was putting the small push-pins back into the fender liner for some stupid reason  . I definitely recommend using towels to protect your paint when putting the bumper back in place.
. I definitely recommend using towels to protect your paint when putting the bumper back in place.