
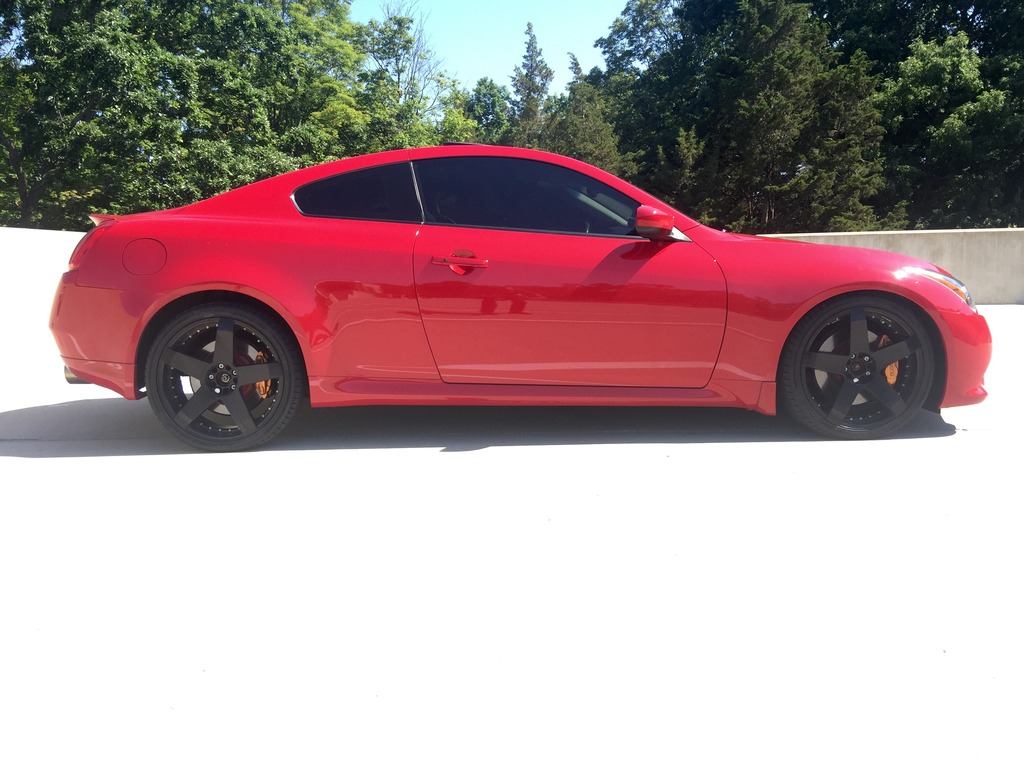
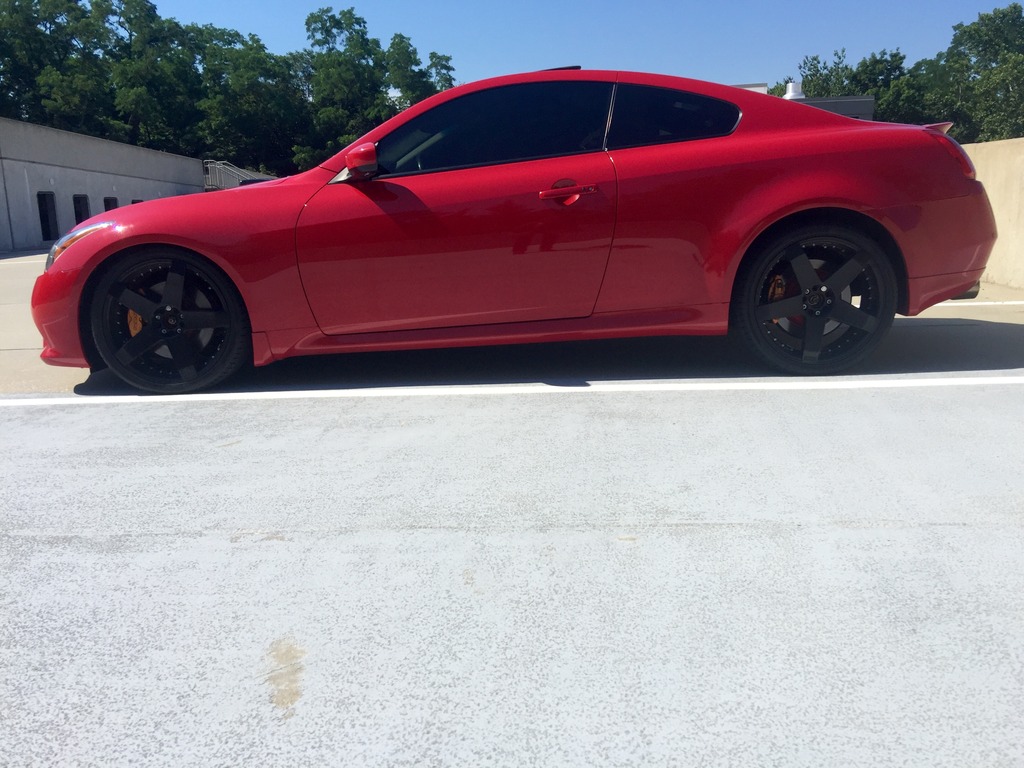
Well, here goes nothing... Buh-bye OEM


Thread Starter
Registered Member
iTrader: (2)
Joined: Oct 2015
Posts: 969
Likes: 278
From: Westchester

BTW, Zilla, I think it was a smart move getting the extensions for the rears and poking them through the trunk. In for a penny, in for a pound... and all that. I'm kind of jealous how my Teins don't support damping adjustment, even though I tell myself it's something I would dial in to a preference and never touch again.
It's the mountain biker in me. Hours upon hours of shock tweaking. It's in my blood...sadly I didn't learn much more than the difference between CW and CCW.

Thread Starter
Registered Member
iTrader: (2)
Joined: Oct 2015
Posts: 969
Likes: 278
From: Westchester
No, if you remove the sway bar to lower control arm it will droop enough.
https://www.myg37.com/forums/d-i-y-i...l-on-an-x.html
https://www.myg37.com/forums/d-i-y-i...l-on-an-x.html


Registered User
Joined: Mar 2015
Posts: 156
Likes: 18
Come to Portland and we can go to the best bike shop ever with a dozen taps!
Velo Cult ? Brick by brick since 2006
PS I'm a bike nut also.
Velo Cult ? Brick by brick since 2006
PS I'm a bike nut also.
Thread Starter
Registered Member
iTrader: (2)
Joined: Oct 2015
Posts: 969
Likes: 278
From: Westchester


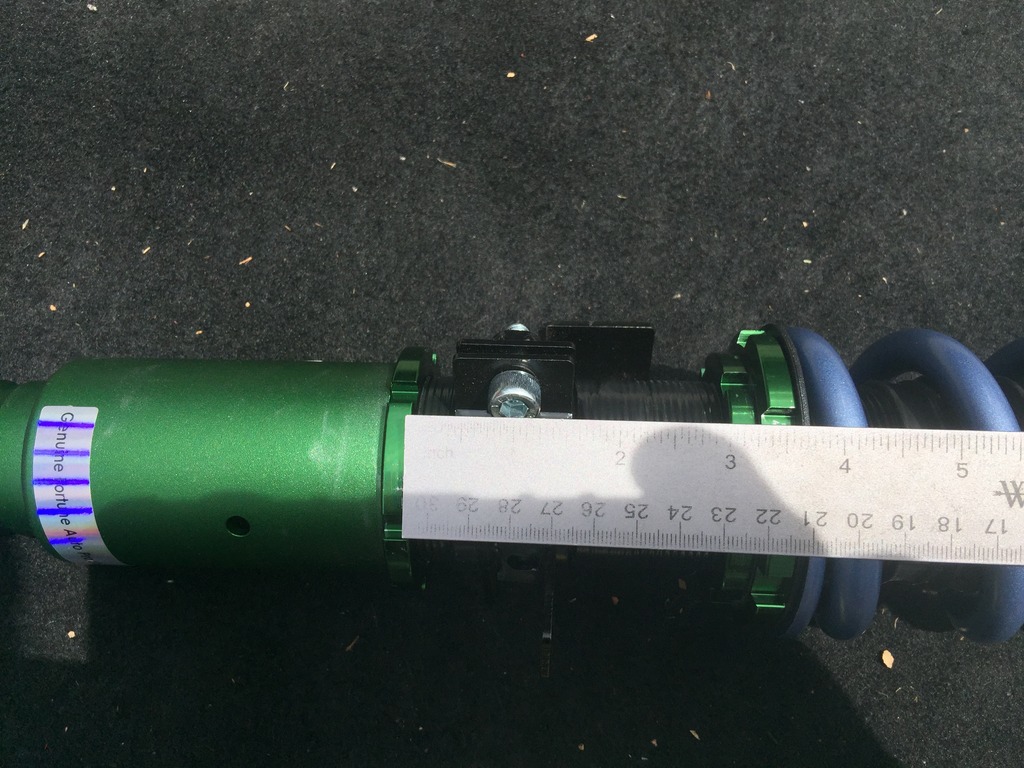
I estimated the shock height setting based on what my arch height was and where I wanted it. (-2") so I took 2" off the OEM shock length. Funny it looks like that came out to almost exactly what you have your front shocks set for.

As you can see, the drop is a bit more dramatic.
But I haven't dropped the rear yet so it may level-off a bit. I figure I'll still have to raise the front almost an inch.
Also worth noting, the new upper A-arms from SPC don't clear the sheet-metal mounts in the front wheel wells. I had to trim both mounts to make sure the a-arms had a full vertical range of motion.
More on all this when I'm done.

Thread Starter
Registered Member
iTrader: (2)
Joined: Oct 2015
Posts: 969
Likes: 278
From: Westchester
Thanks, yeah, I'll raise it up and build in some settleing height.
I put 1/4" preload on them.
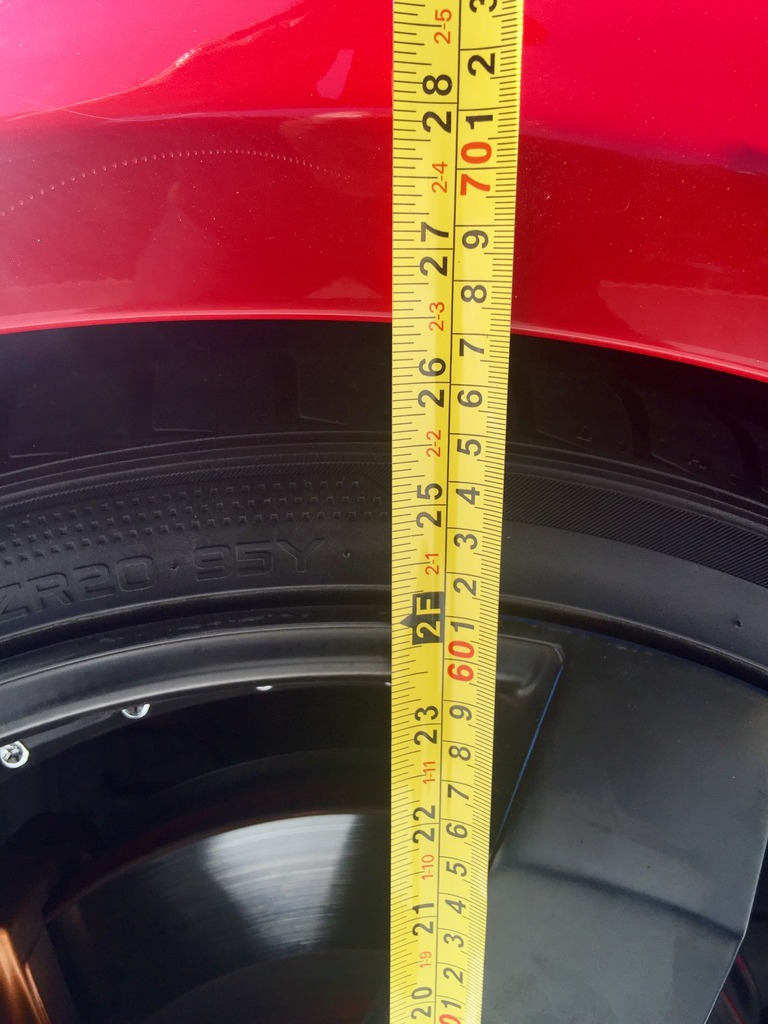
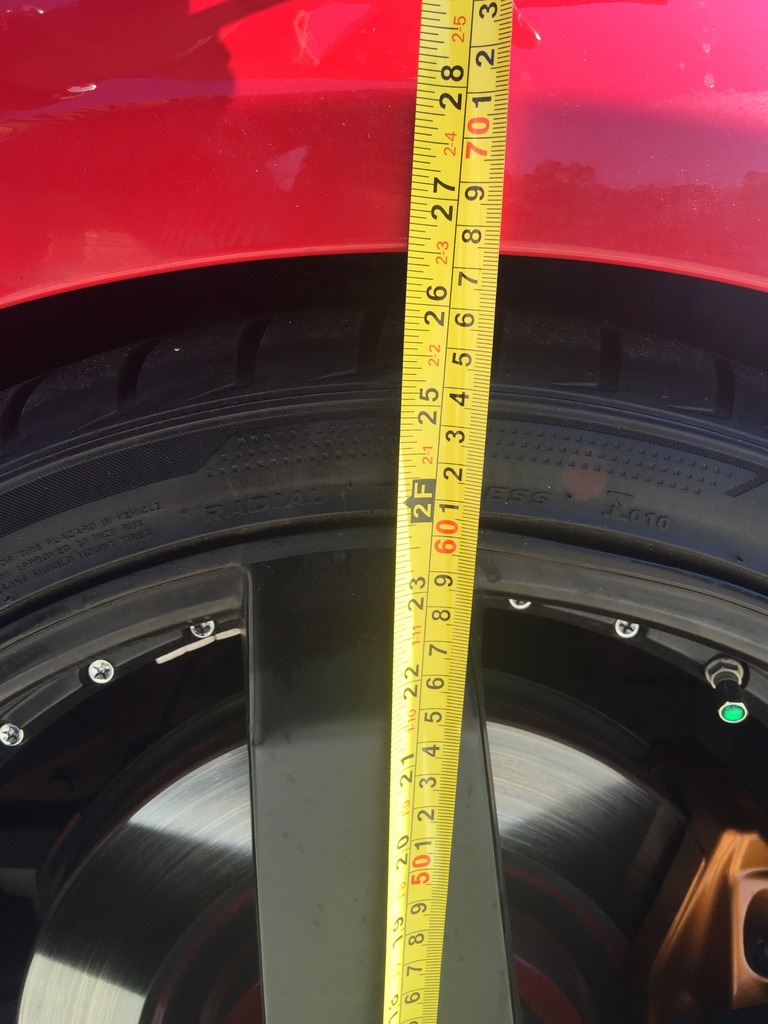
Right now I'm at ~25" on one side and 25.25 on the other.
To raise the fronts, do I put the car on jack stands and release the pinch bolt on the shock bottom(fork) and loosen the lower lock nut then turn the lower shell, or do I leave the pinch tight and instead loosen the upper & lower lock nuts and rotate the whole shock body?
*edit* I see now the brake line mount would rotate with the shock body so only the lower cup must turn. Put the car on stands, put a jack under the lower control arm, Loosen the lower lock ring and the lower fork pinch bolt, then let the jack down a bit and adjust the lower cup...right?
And how about adjusting the rears?
I put 1/4" preload on them.
Right now I'm at ~25" on one side and 25.25 on the other.
To raise the fronts, do I put the car on jack stands and release the pinch bolt on the shock bottom(fork) and loosen the lower lock nut then turn the lower shell, or do I leave the pinch tight and instead loosen the upper & lower lock nuts and rotate the whole shock body?
*edit* I see now the brake line mount would rotate with the shock body so only the lower cup must turn. Put the car on stands, put a jack under the lower control arm, Loosen the lower lock ring and the lower fork pinch bolt, then let the jack down a bit and adjust the lower cup...right?
And how about adjusting the rears?
Last edited by bikezilla; Jul 3, 2016 at 07:54 PM.
You loosen the lower collar and rotate the entire shock body in the lower cup. At least on mine. Is the brake line capture welded to the shock body??? Has to be on there with a cinch bolt. Same with the tears. I'd start with 10mm preload.
Thread Starter
Registered Member
iTrader: (2)
Joined: Oct 2015
Posts: 969
Likes: 278
From: Westchester
I was thinking it would be easier to turn just the cup than the threaded body.
Do I still need to put the car on stands? I figure it would help to unweight the wheel.
Hopefully you can get it sitting proper without too much trouble, pretty dumped right now. The lowest I ever was (on springs) was 25.75" and that was too low for comfortable daily driving. Zero gap at 26.25" is perfect IMO. Your Y-pipe will thank you!
Thread Starter
Registered Member
iTrader: (2)
Joined: Oct 2015
Posts: 969
Likes: 278
From: Westchester
Originally Posted by blnewt
Hopefully you can get it sitting proper without too much trouble, pretty dumped right now. The lowest I ever was (on springs) was 25.75" and that was too low for comfortable daily driving. Zero gap at 26.25" is perfect IMO. Your Y-pipe will thank you!
I see now shock length differential is not 1:1 in height change.
Thread Starter
Registered Member
iTrader: (2)
Joined: Oct 2015
Posts: 969
Likes: 278
From: Westchester
Okay, I adjusted the shock length.
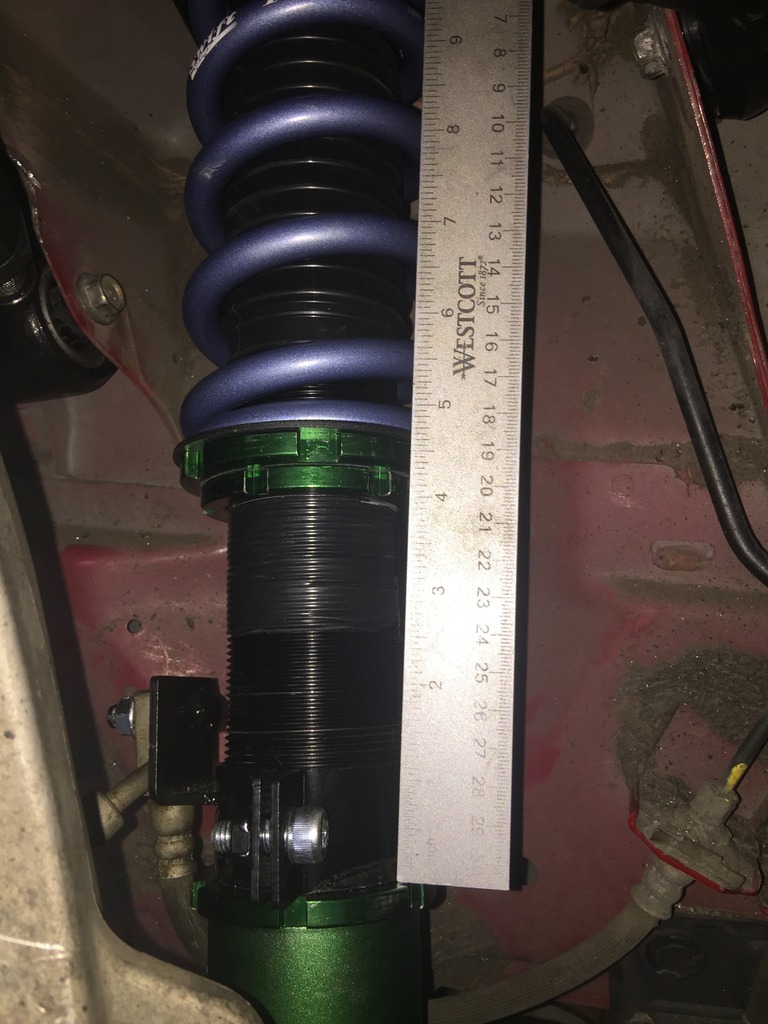
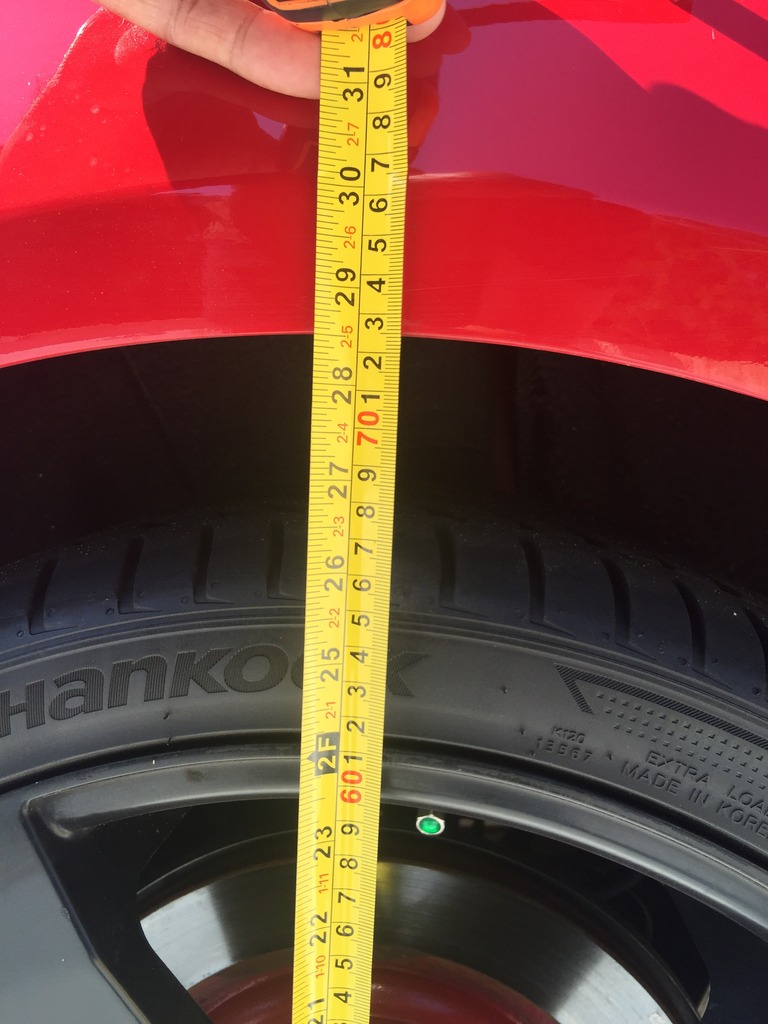
Since 2" off the shock yielded 3.5" drop on the car, I split the difference and lengthened the shock 1" (aka 1"shorter than stock) that put me at ~26.5 on both sides.
I haven't had time to install the rears yet so they stand at ~28.5".
Yes this is a heck of a rake. I'll get to it. The fronts took so much time.
After I install the rear shocks and coils, I'll set the height, let it settle and see where the fronts, and rears sit. I'm shooting for 26.25 as Brad suggested. It looks like it'll be right above the tread. I'm at ~1.5 fingers now.
I did meet with some challenges up front.
First, the new-turnbuckle-style SPC upper control arms have huge bushing mounts and they didn't clear the sheetmetal buckets they sit in.
So in order to get full vertical articulation,
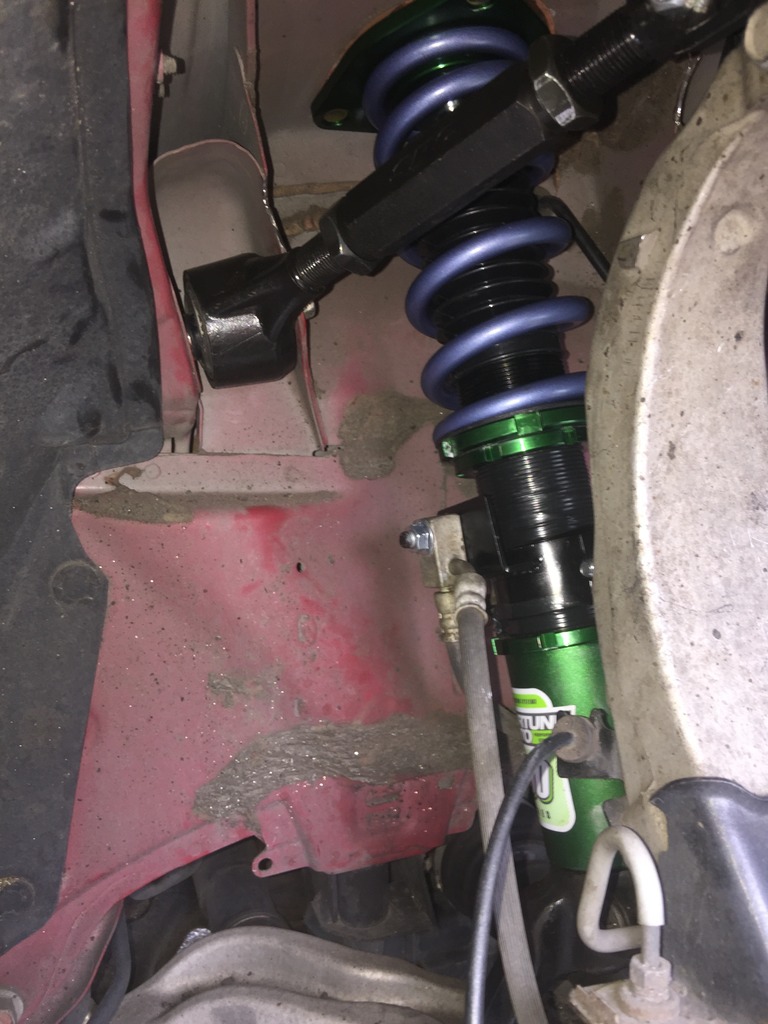
I had to mark and trim all four mounting buckets. Not hard but took some time looking at it and thinking about should cut I or wait to talk to SPC. WTH it's only sheetmetal so I'm a modder now.
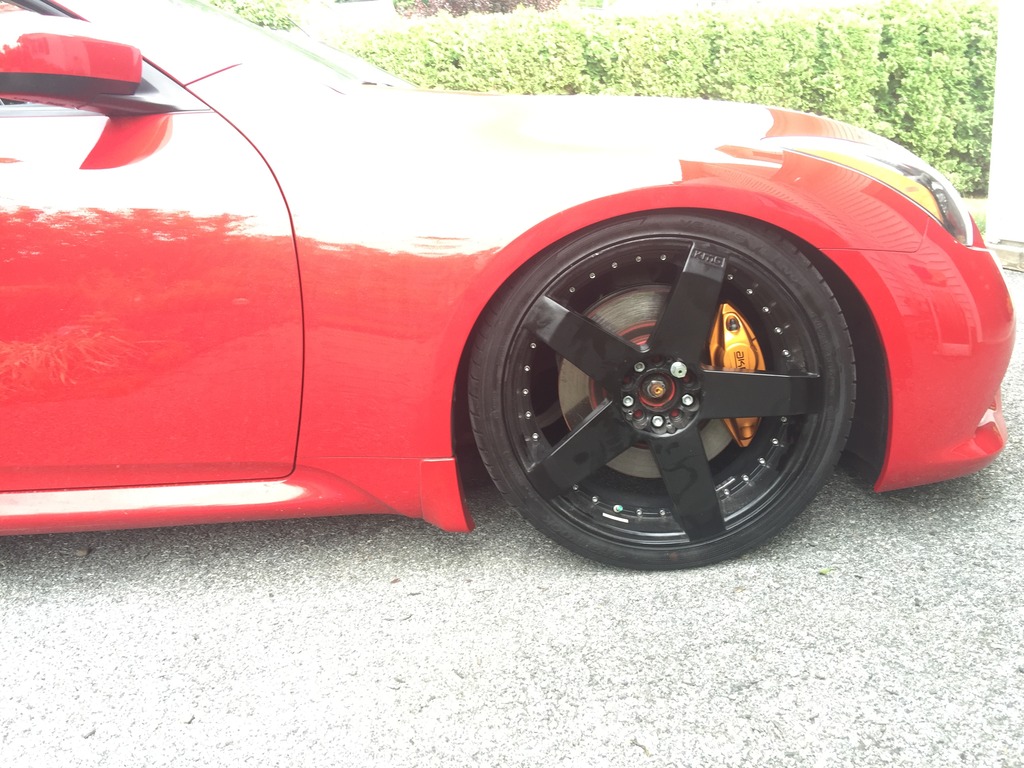
Also at issue is the improved brake line bracket on the FA500s For some reason I could not arrange it so that I could turn the wheels lock-to-lock without snapping off the ABS sensor line.
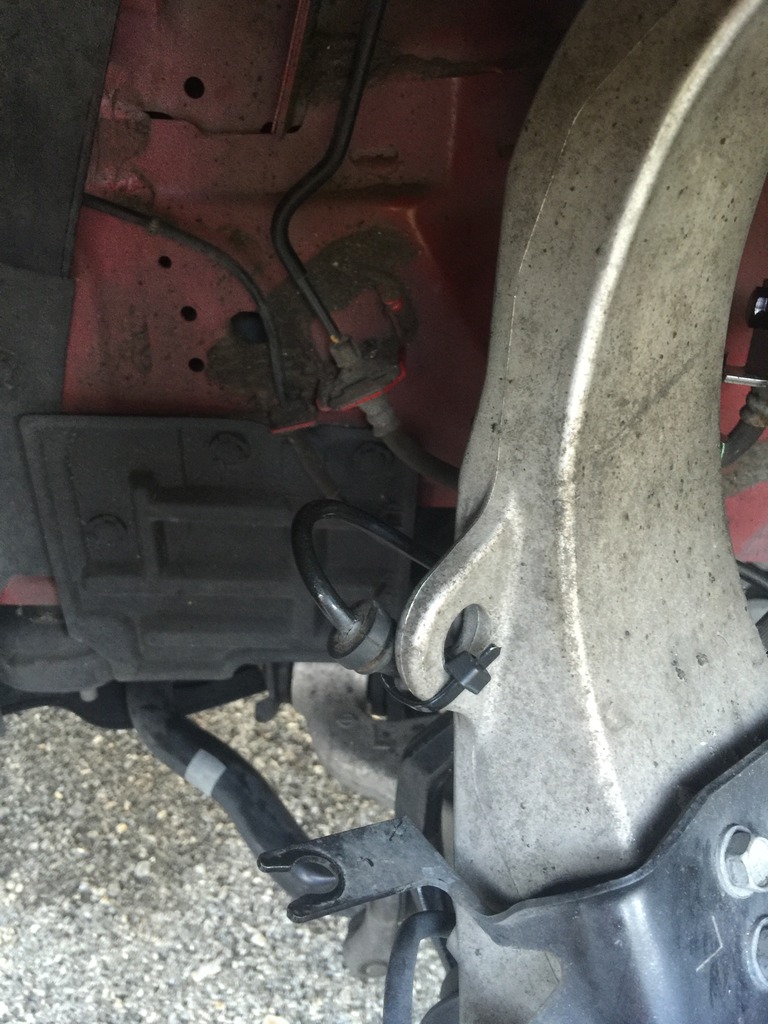
Even the brake line was at risk at extreme points. BUT this is with the suspension hanging loose off the ground. With the car on the ground there is plenty of slack to turn the wheels. Still I don't want some shop guy to put it up on a rack, turn the wheel and rip my ABS off the car. So For now I ziptied one point of the ABS to the knuckle arm. Lots of slack even off the ground.
In the end after the alignment, I'll add some spacers and get them flush.
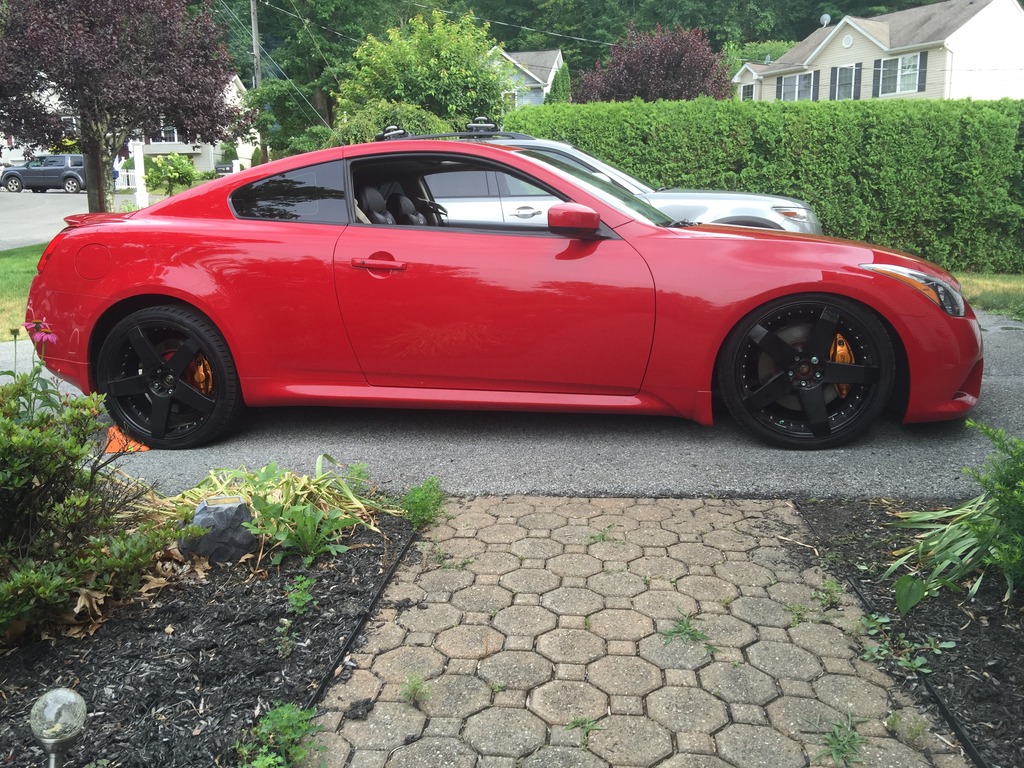
Now about my first ride:
Keep in mind I only eyeballed the alignment by measuring the control arm mount point distances, and that with a change in height from OEM they need to change as well, and the rears are still full OEM.
That said, at 5 clicks from full soft on 11k fronts, they feel really-really good. Slightly firmer, more controlled and very smooth. Kind of like going from a down pillow to memory foam. Maybe not that dramatic but that kind of difference. I would expect I can dial it up to make it even more firm but I'll wait until after I get the rears on, the height dialed and the alignment done. Hopefully this week.
So far I did a test around the neighborhood and an 1-hour commute to work (mixed highway and local roads)
I like the ride and love the look on the front end. This isn't a review yet. I'll do that much later. For now I'm only posting details of the journey.
Since 2" off the shock yielded 3.5" drop on the car, I split the difference and lengthened the shock 1" (aka 1"shorter than stock) that put me at ~26.5 on both sides.
I haven't had time to install the rears yet so they stand at ~28.5".
Yes this is a heck of a rake. I'll get to it. The fronts took so much time.
After I install the rear shocks and coils, I'll set the height, let it settle and see where the fronts, and rears sit. I'm shooting for 26.25 as Brad suggested. It looks like it'll be right above the tread. I'm at ~1.5 fingers now.
I did meet with some challenges up front.
First, the new-turnbuckle-style SPC upper control arms have huge bushing mounts and they didn't clear the sheetmetal buckets they sit in.
So in order to get full vertical articulation,
I had to mark and trim all four mounting buckets. Not hard but took some time looking at it and thinking about should cut I or wait to talk to SPC. WTH it's only sheetmetal so I'm a modder now.
Also at issue is the improved brake line bracket on the FA500s For some reason I could not arrange it so that I could turn the wheels lock-to-lock without snapping off the ABS sensor line.
Even the brake line was at risk at extreme points. BUT this is with the suspension hanging loose off the ground. With the car on the ground there is plenty of slack to turn the wheels. Still I don't want some shop guy to put it up on a rack, turn the wheel and rip my ABS off the car. So For now I ziptied one point of the ABS to the knuckle arm. Lots of slack even off the ground.
In the end after the alignment, I'll add some spacers and get them flush.
Now about my first ride:
Keep in mind I only eyeballed the alignment by measuring the control arm mount point distances, and that with a change in height from OEM they need to change as well, and the rears are still full OEM.
That said, at 5 clicks from full soft on 11k fronts, they feel really-really good. Slightly firmer, more controlled and very smooth. Kind of like going from a down pillow to memory foam. Maybe not that dramatic but that kind of difference. I would expect I can dial it up to make it even more firm but I'll wait until after I get the rears on, the height dialed and the alignment done. Hopefully this week.
So far I did a test around the neighborhood and an 1-hour commute to work (mixed highway and local roads)
I like the ride and love the look on the front end. This isn't a review yet. I'll do that much later. For now I'm only posting details of the journey.
Last edited by bikezilla; Jul 6, 2016 at 12:31 PM.
Thread Starter
Registered Member
iTrader: (2)
Joined: Oct 2015
Posts: 969
Likes: 278
From: Westchester
No pictures today. Got a late start last evening and did the rear passenger side.
It continues to amaze me how much this is really a modification, and not just a simple installation. Plus every part I'm working on is more or less my first time so it's all learning as I go which means simple things take time while I try to understand the function and inter dependency of every bolt I turn and part I move.
There's a whole lot of "you can't do this till you do that" & You can't move this till you move that. But you all have been there right?
Annyway the instructions for the FA500s are very generic, and apparently only for the fronts. So there is no real info on how to adjust the height or set the preload. It wasn't a simple matter of measuring the length of the OEM spring stack and OEM shock. Nope. the FA500 shock minimum i2i is for some reason a bit longer than the OEM shock, and the maximum spring stack height is a bit shorter than the OEM.
Not sure how any of that works, but it was getting really late so I shrugged, took my best guess and ended up 1/4" higher than OEM... Now how that worked out is anyone's guess.
I kinda winged it on the preload, kinda winged it on the shock height. I'll call FA for advice on how to properly set and adjust the rears.
The good news is the EASIEST part was cutting the elongated bolt holes for the toe bolts. That went very quickly. A dremmel and a flex rod is a must. Just get one you WILL use it again for many things.
Oh, and the #&%@er at the local tire shop didn't tighten my wheel-lock lugnuts and one fell off somewhere. Bastard!
Thread Starter
Registered Member
iTrader: (2)
Joined: Oct 2015
Posts: 969
Likes: 278
From: Westchester
Also,
Has anyone installed shock adjuster extenders on a coupe?
The shock mount center seems like it is an inch directly underneath the rear window. Looks like directly beneath the child seat restraint hook.
Even if I were to drill it, and not crack the glass, the extender would be pressed directly against the glass and bent at an extreme angle.