

IPL/Aerodynamic Bumper Swap Idea.


Registered User
Joined: Oct 2011
Posts: 105
Likes: 0
From: New Hampshire
So I just finished hooking my fogs up. Yesterday I tried the whole wheel well thing, leaving the wheel in place. Dirty and awkward and I have no idea how people manage that...I put the car back together. Last night looking at the light placement, I figured that maybe I could just do the lights from the top. I looked, found the following thread:
https://www.myg37.com/forums/d-i-y-i...acement-7.html
It talks about just changing the bulbs, and indeed confirms that the top is the best way to change fog bulbs. I pulled the air intake boxes (see the how to half way down the page in the above link) and opened the fog back EASILY. I didn't want to cut the wires, so I just disconnected them and pulled them back into the fog light cap (see pic). THis got them out of the way of the connectors on the back of the light and got me a bunch more wire to work with. I slapped on my t-connectors on the fog wires, hooked my fogs in a voila! Working fogs! The beautiful part of this, is that it's completely reversible...that was important for me.
So, anyway, worked for me, might not work for others but figured I'd share!
Last edited by hywel; Jan 29, 2012 at 02:26 PM.


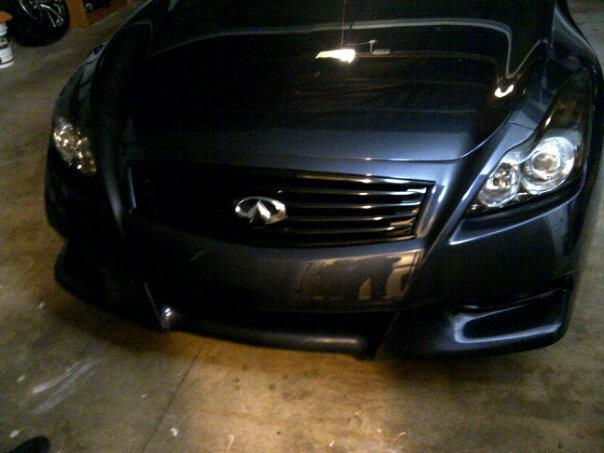
hey guys, I'm now %99 percent done with my bumper, but this is killing me!!! how do I get this thing install back on the new bumper? is totally different design, the screw doesn't fit cuz there's no hole to be fit in there
Last edited by Jayson; Jan 29, 2012 at 09:40 PM.

Registered User
Joined: Oct 2009
Posts: 102
Likes: 3
You need to remove those plastic backs with the screw hole from the old bumper and put it on the new one.

Looks like the sale is over Glad I picked one up when I did
<table style="width:auto;"><tr><td><a href="https://picasaweb.google.com/lh/photo/_efA-MMJH4C5J-sqizpGgdMTjNZETYmyPJy0liipFm0?feat=embedwebsite">< img src="https://lh6.googleusercontent.com/-b-UB1snyYPk/TygGpLT9qAI/AAAAAAAABa4/cpk3GaWa9AA/s800/bumper%2520post.jpg" height="450" width="800" /></a></td></tr><tr><td style="font-family:arial,sans-serif; font-size:11px; text-align:right">From <a href="https://picasaweb.google.com/107359935033248892383/PCPics?authuser=0&feat=embedwebsite">PC Pics</a></td></tr></table>
<table style="width:auto;"><tr><td><a href="https://picasaweb.google.com/lh/photo/_efA-MMJH4C5J-sqizpGgdMTjNZETYmyPJy0liipFm0?feat=embedwebsite">< img src="https://lh6.googleusercontent.com/-b-UB1snyYPk/TygGpLT9qAI/AAAAAAAABa4/cpk3GaWa9AA/s800/bumper%2520post.jpg" height="450" width="800" /></a></td></tr><tr><td style="font-family:arial,sans-serif; font-size:11px; text-align:right">From <a href="https://picasaweb.google.com/107359935033248892383/PCPics?authuser=0&feat=embedwebsite">PC Pics</a></td></tr></table>

Registered User
Joined: Oct 2006
Posts: 138
Likes: 4
Looks like the sale is over Glad I picked one up when I did
<table style="width:auto;"><tr><td><a href="https://picasaweb.google.com/lh/photo/_efA-MMJH4C5J-sqizpGgdMTjNZETYmyPJy0liipFm0?feat=embedwebsite">< img src="https://lh6.googleusercontent.com/-b-UB1snyYPk/TygGpLT9qAI/AAAAAAAABa4/cpk3GaWa9AA/s800/bumper%2520post.jpg" height="450" width="800" /></a></td></tr><tr><td style="font-family:arial,sans-serif; font-size:11px; text-align:right">From <a href="https://picasaweb.google.com/107359935033248892383/PCPics?authuser=0&feat=embedwebsite">PC Pics</a></td></tr></table>
<table style="width:auto;"><tr><td><a href="https://picasaweb.google.com/lh/photo/_efA-MMJH4C5J-sqizpGgdMTjNZETYmyPJy0liipFm0?feat=embedwebsite">< img src="https://lh6.googleusercontent.com/-b-UB1snyYPk/TygGpLT9qAI/AAAAAAAABa4/cpk3GaWa9AA/s800/bumper%2520post.jpg" height="450" width="800" /></a></td></tr><tr><td style="font-family:arial,sans-serif; font-size:11px; text-align:right">From <a href="https://picasaweb.google.com/107359935033248892383/PCPics?authuser=0&feat=embedwebsite">PC Pics</a></td></tr></table>
2011 INFINITI G37 Parts - Infiniti parts
you guys talk about getting the pigtail for the fog light... But getting the pigtail H11 is ONLY if you are installing regular halogen bulb right??
Because from what i can see on the HID kits, I can just plug and play, don't even need to slice any wires.. (unless you are going for double fog light power)
Because from what i can see on the HID kits, I can just plug and play, don't even need to slice any wires.. (unless you are going for double fog light power)
Registered User
Joined: Oct 2006
Posts: 138
Likes: 4
you guys talk about getting the pigtail for the fog light... But getting the pigtail H11 is ONLY if you are installing regular halogen bulb right??
Because from what i can see on the HID kits, I can just plug and play, don't even need to slice any wires.. (unless you are going for double fog light power)
Because from what i can see on the HID kits, I can just plug and play, don't even need to slice any wires.. (unless you are going for double fog light power)

Registered User
Joined: Oct 2008
Posts: 5
Likes: 0
over the weekend i installed my fogs for my bumper since i didnt want to spend the near $100 for a new one so i just put a heat gun to my old one and i was able to make enough room for the fogs to clear i checked for leaks before i reinstalled its been 4 days n no problems

Just thinking...
The top right hand side... The two red/black wires, you can just plug them into the oem fog socket...?? No spicing wires... Just need to tape it up nicely. Then you save yourself a couple dollars and wait time...

