
Custom Grounding Kit


Thread Starter
Registered Member
Joined: Jan 2015
Posts: 620
Likes: 82
From: California, USA
Custom Grounding Kit
So I decided to make my own grounding kit. Instead of stringing the wires serially, I decided to make some custom aluminum grounding blocks. Since I have a Stillen cold air intake, I thought I would make use of the empty bracket space in the fender where the stock airboxes were. Luckily, my work has a machine shop with a waterjet. I designed the blocks with AutoCAD and had them cut on the waterjet, then cleaned up and tapped for 1/4x20.
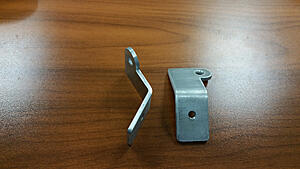
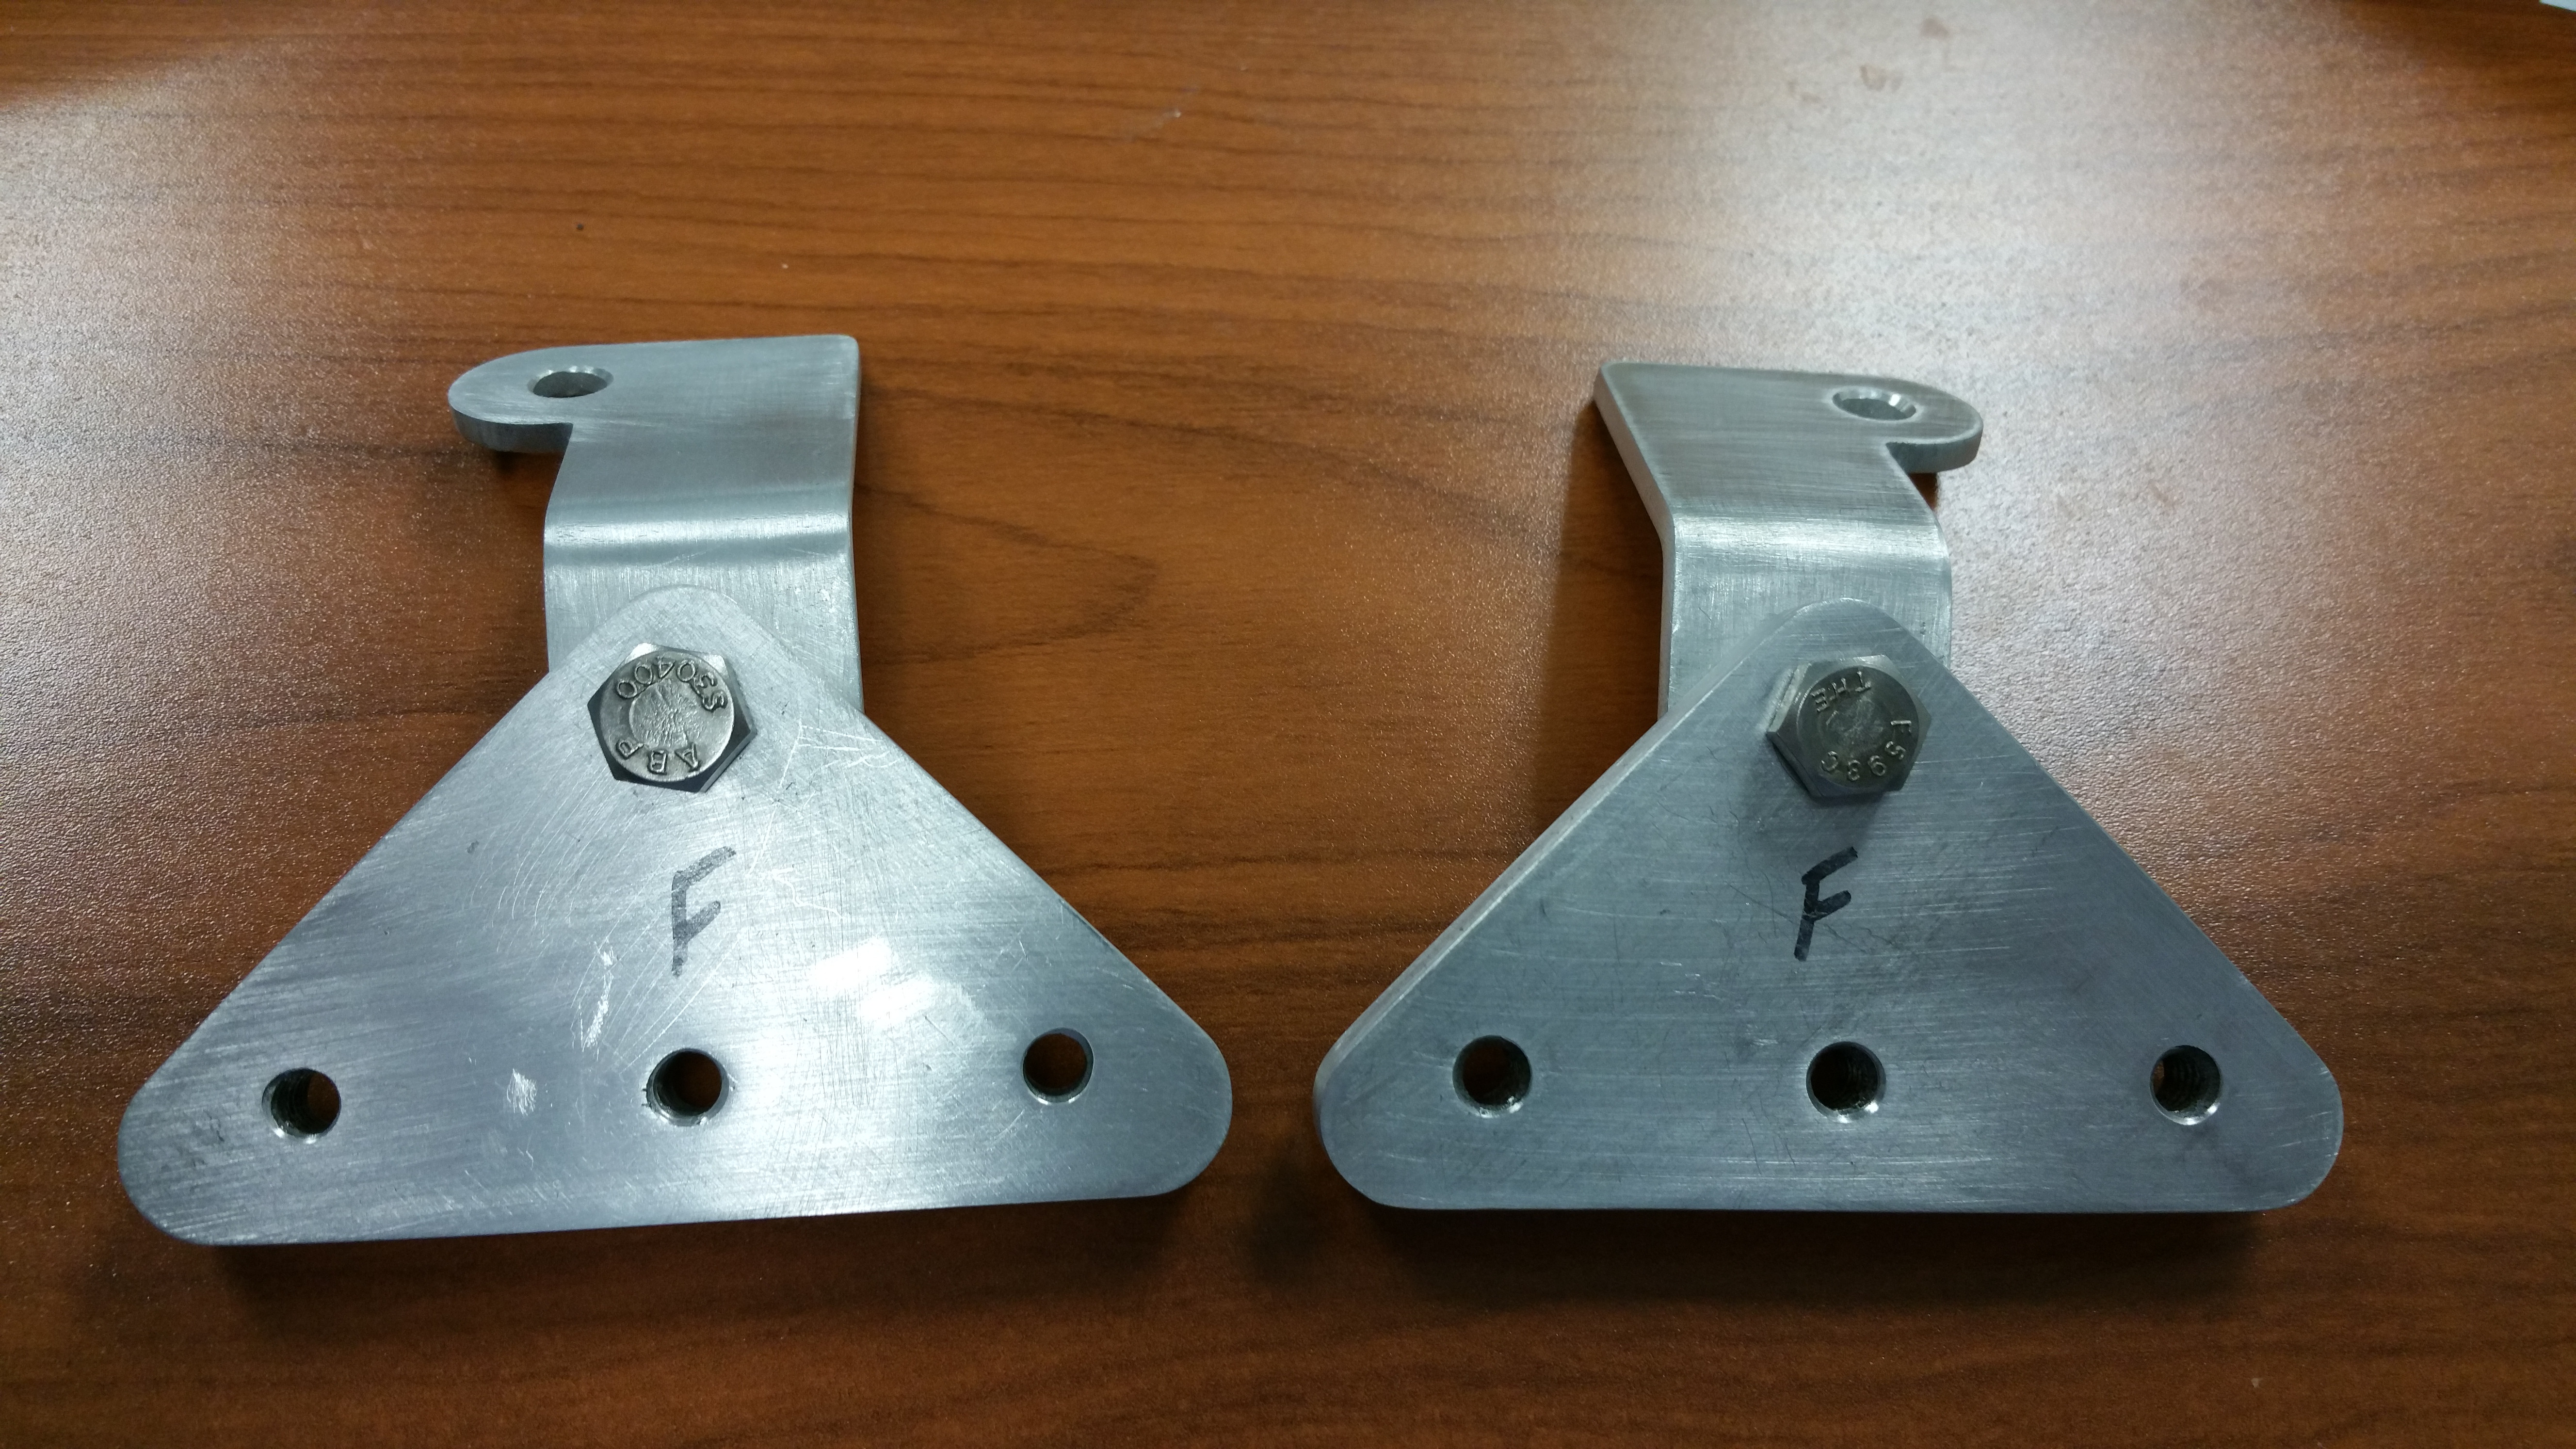
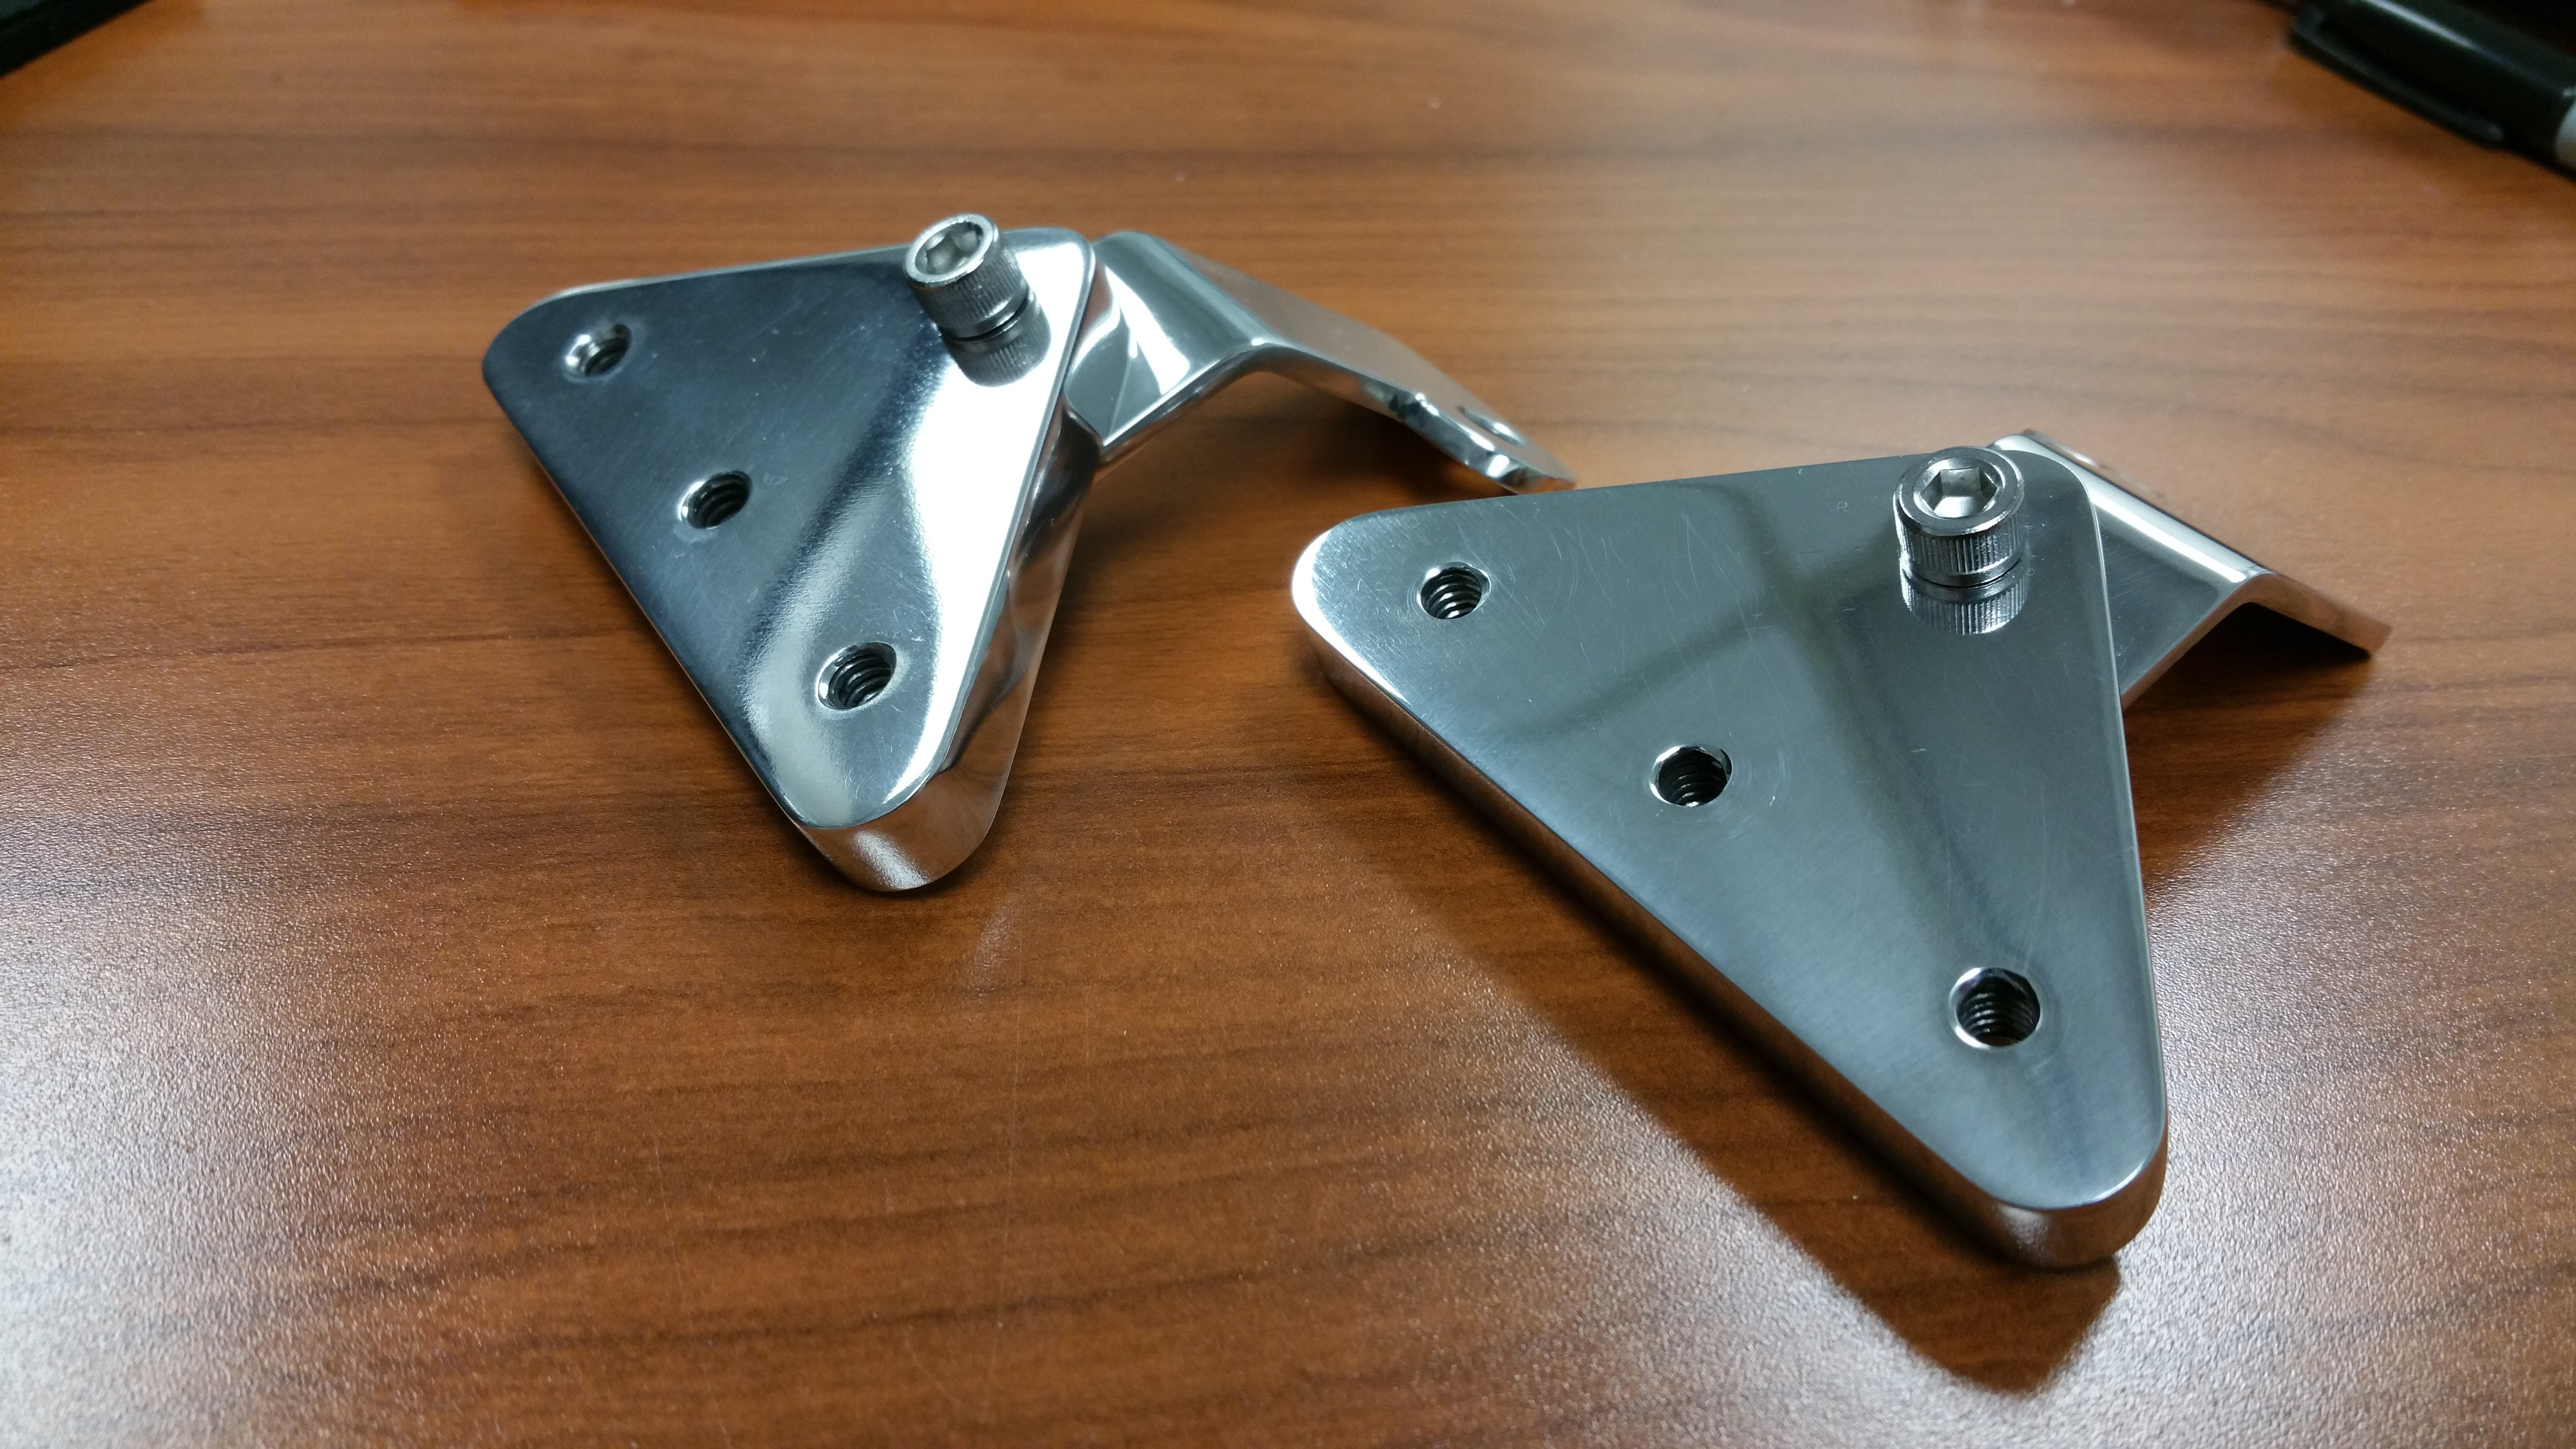
Here are the brackets. Bent at about the same angle as the airbox brackets. Cut from 1/8" aluminum. Through hole for the 10mm bolt (gonna probably end up using VMS fender washers) to the fender and 1/4x20 threads for the block.
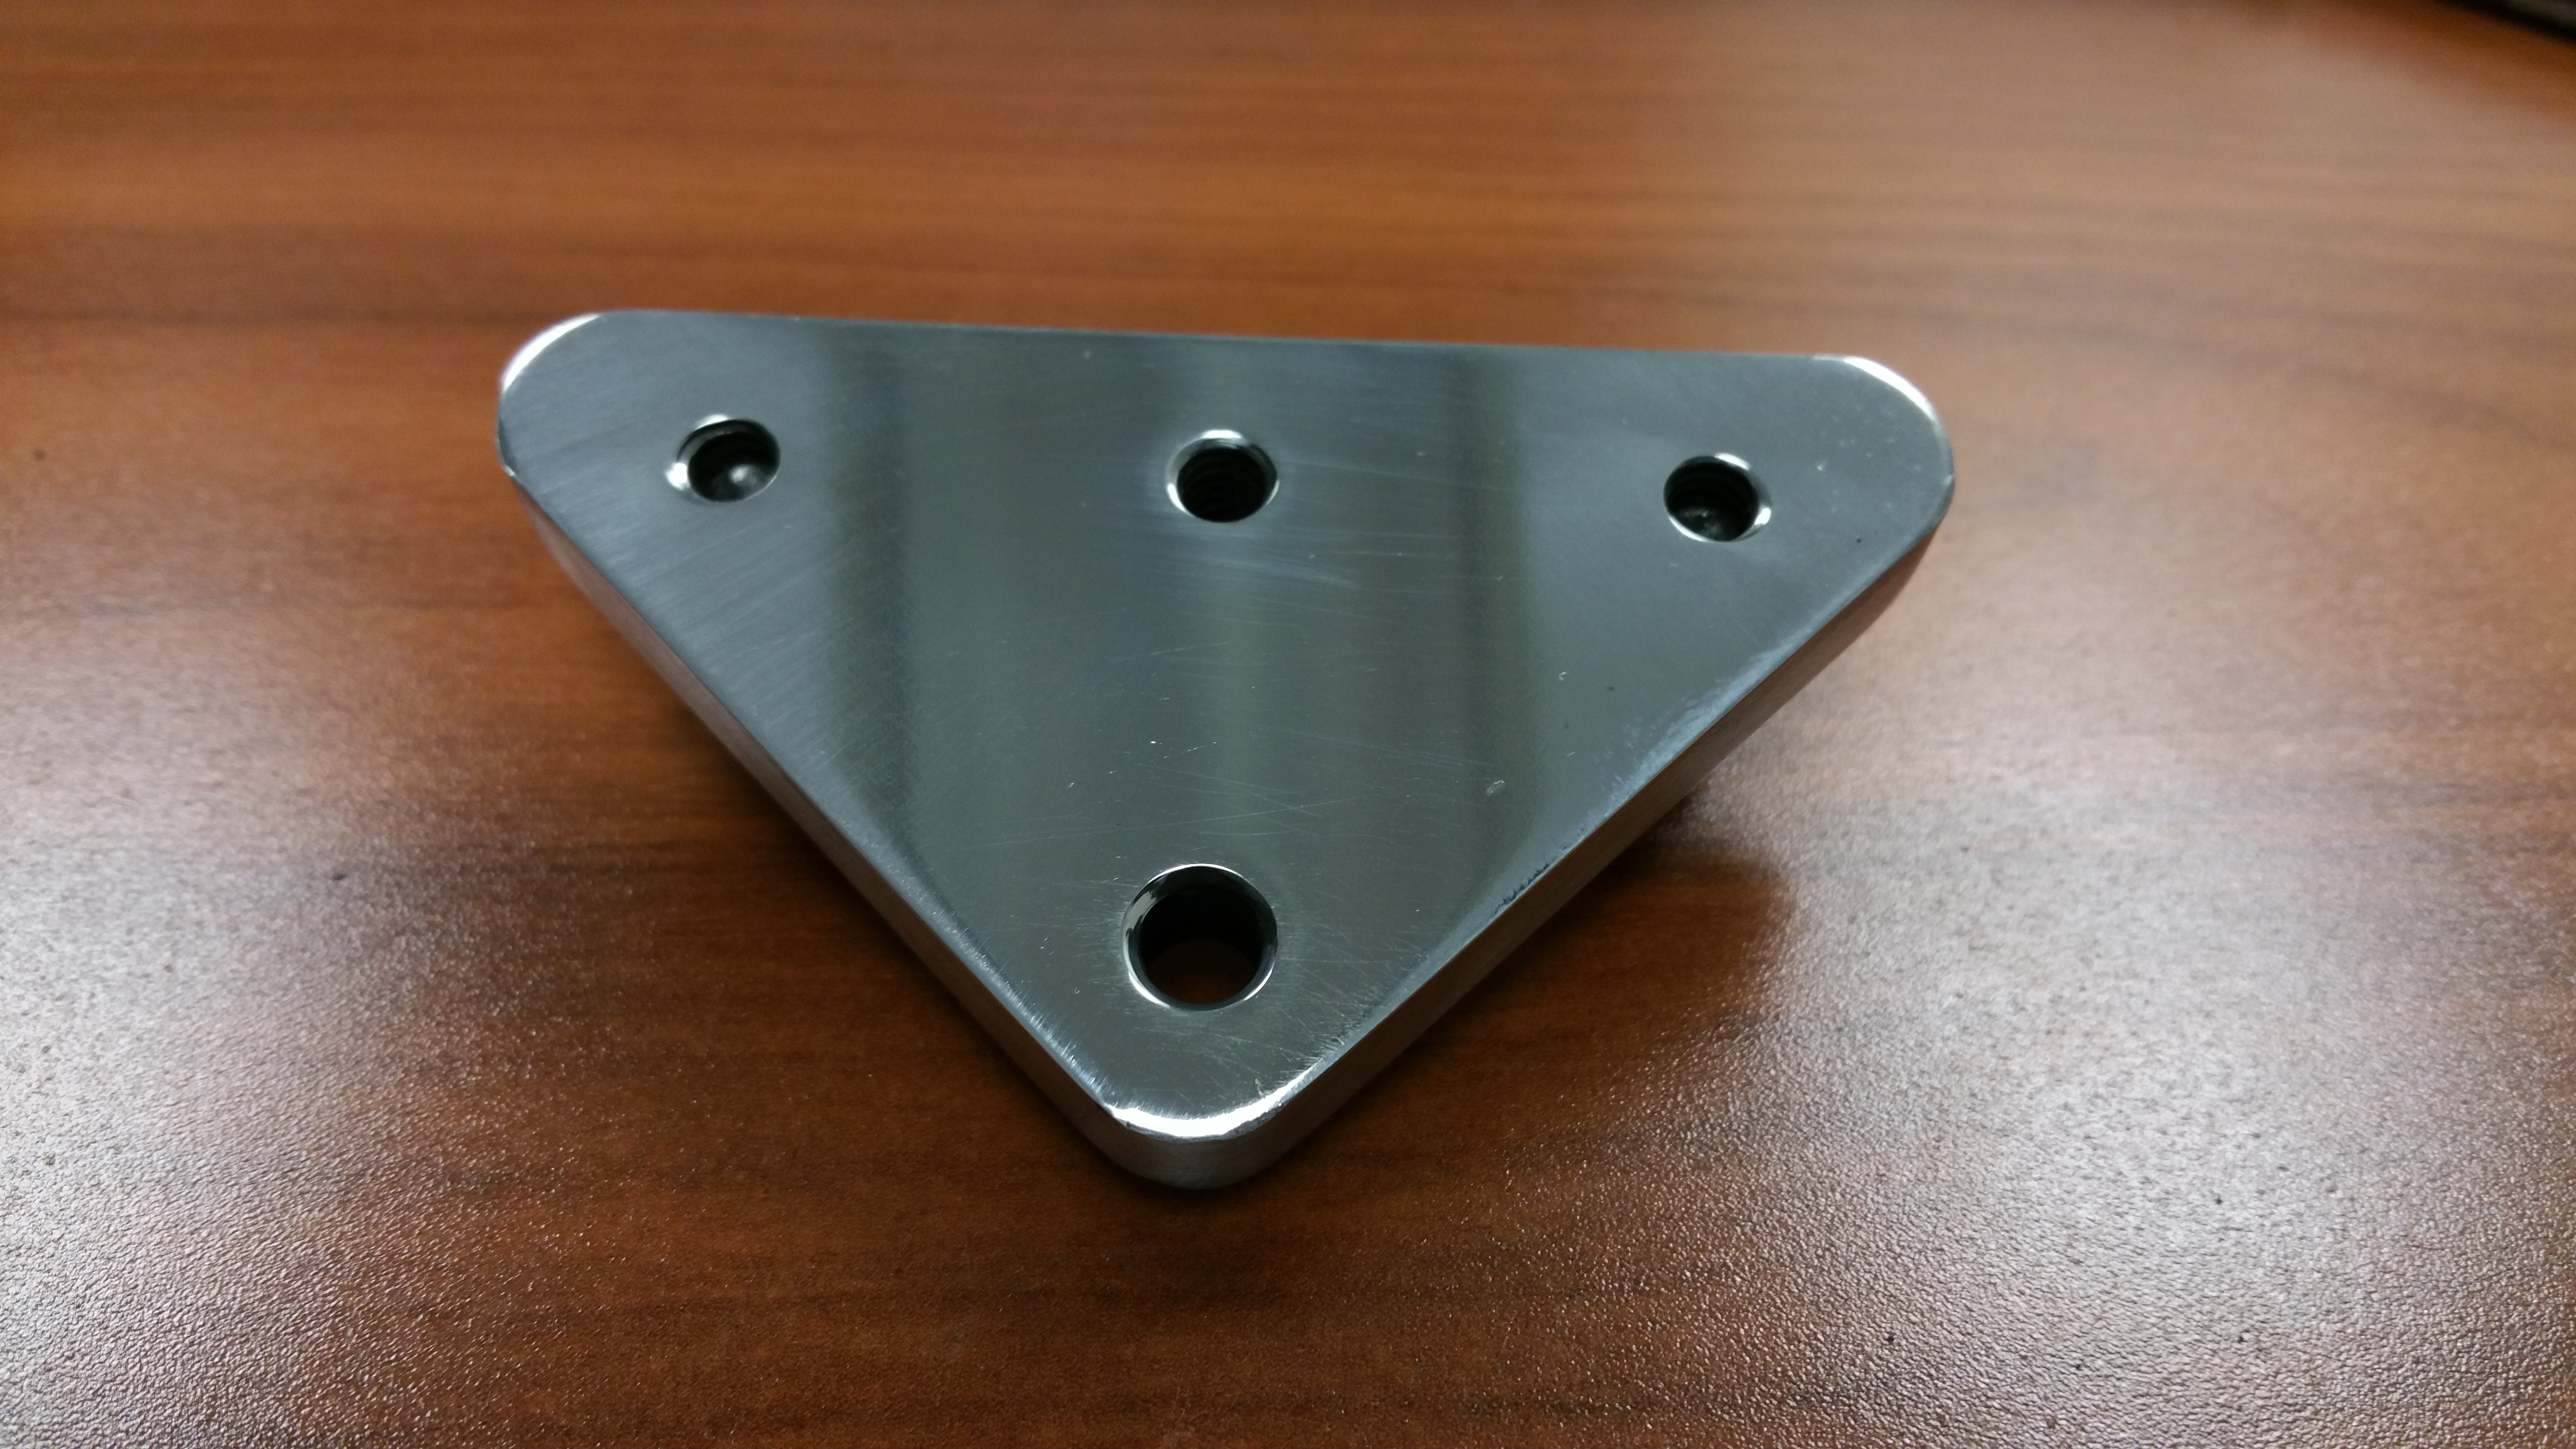
Here are the grounding blocks. Made from 3/8" aluminum. The top has a clearance hole to mount to the bracket. The bottom 3 are 1/4x20 to mount the 8awg grounding cables. Passenger: 1x to the battery, 1x to the wheel well, 1x to the engine. Driver: 1x to the engine, 1x to the wheel well, 1x open (haven't decided what to use that for yet).

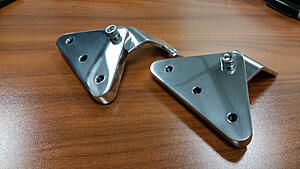
Here they are connected. The next step is to clean them up, hit them with a couple of coats of etching primer, 2 to 3 coats of black, and then a couple of coats of clear.

Will post more pics as it all comes together. Still waiting on the cable and connectors. Will update as it happens.
Here are the brackets. Bent at about the same angle as the airbox brackets. Cut from 1/8" aluminum. Through hole for the 10mm bolt (gonna probably end up using VMS fender washers) to the fender and 1/4x20 threads for the block.

Here are the grounding blocks. Made from 3/8" aluminum. The top has a clearance hole to mount to the bracket. The bottom 3 are 1/4x20 to mount the 8awg grounding cables. Passenger: 1x to the battery, 1x to the wheel well, 1x to the engine. Driver: 1x to the engine, 1x to the wheel well, 1x open (haven't decided what to use that for yet).

Here they are connected. The next step is to clean them up, hit them with a couple of coats of etching primer, 2 to 3 coats of black, and then a couple of coats of clear.
Will post more pics as it all comes together. Still waiting on the cable and connectors. Will update as it happens.
Thread Starter
Registered Member
Joined: Jan 2015
Posts: 620
Likes: 82
From: California, USA
The threads will be unpainted...which I figured would be no different than bolting the grounding kit to the painted strut tower which most have done and with 3/8" stock there should be a decent amount of threaded area. I had thought about masking some of the area where the cables will connect to make for a better connection (no need to ensure ground between the block and the body since the block itself is the grounding point connecting to the battery) but have not yet figured out how I would want that to look.
Last edited by Flakman; Mar 31, 2015 at 07:53 PM.

Thread Starter
Registered Member
Joined: Jan 2015
Posts: 620
Likes: 82
From: California, USA

Banned
Joined: Jan 2013
Posts: 674
Likes: 81
The threads will be unpainted...which I figured would be no different than bolting the grounding kit to the painted strut tower which most have done and with 3/8" stock there should be a decent amount of threaded area. I had thought about masking some of the area where the cables will connect to make for a better connection (no need to ensure ground between the block and the body since the block itself is the grounding point connecting to the battery) but have not yet figured out how I would want that to look.
I would not rely on the thread contact to provide adequate grounding; especially given an aluminum block and supposedly stainless steel bolt?? Face to face contact is the best method for reducing electrical impedance on connections.
Trending Topics


Thread Starter
Registered Member
Joined: Jan 2015
Posts: 620
Likes: 82
From: California, USA
Thanks. Gonna go over them more carefully with the 400 and 600 then polish them out. Will get some pics when done with that portion. Still waiting for cable and sundries to finish everything. Thanks for the input all.
Thread Starter
Registered Member
Joined: Jan 2015
Posts: 620
Likes: 82
From: California, USA
I thought I was going over them more carefully. But doing so on my breaks isn't enough. Gonna take them home and take my time sanding. The polishing made all too clear the lack of sanding 


The buffing wheel is your friend and your enemy. LOL! I think they look pretty damn good right now, those little imperfections won't show when they're under the hood. I'm the same way though, I'm ocd when it comes to shiny stuff. Use lots of water when you're sanding, and try putting your sandpaper on a flat surhace.(a piece of glass is perfect) Keep the pics coming!
Thread Starter
Registered Member
Joined: Jan 2015
Posts: 620
Likes: 82
From: California, USA
This is about as good as I'm gonna get it with the buffing wheel here. I think it hasn't been used for quite some time. Even raking the wheel didn't help a lot. Looks better though. The scratches are gone and it can stand a little cleaning up. But its good to go.
 If they work as well as they look, you're gold. Nice work bro.

