


Just thought I'd share the lastest G install from me :)


Thread Starter
Custom Car Audio
Joined: Feb 2006
Posts: 32
Likes: 0
From: San Jose, CA
Just thought I'd share the lastest G install from me :)
Just finished this G42S Sedan  Goal here is maximum SQ in a show car...
here is a direct copy and paste from my post on diymobileaudio.com.
link here:
2009 Infiniti G42S Sedan Install: Show + Go + SQ Focal - Mosconi - DIYMA.com - Scientific Car Audio - Truth in Sound Quality
-------------------------------------------------------
Hey guys,
Just finished this project, which wins the award for longest distance between the owner of the car and myself -- Vehicle is out of North Carolina
Just it happens, he had the car down in Socal at GTM for a full 4.2 liter stroker motor build plus super charger install, and in between the motor and the SC, he had it shipped up to me for the install.
Lets get started with the goals:
1. To achieve a high level of sound quality, unlike most of my other customers, this car is NOT going to be a daily driver, so we sacrificed steahiness for utility for sound quality.
2. Remove the previously installed system and utilize the existing subwoofer with new equipment everywhere else.
3. Obtain a clean and classy look that goes with the exterior of this show car...Here the owner had two basic requirements: A. Be subtle, clean and simple, he did not want over the top cosmetics, and B. Display the beautiful Focal sub magnet up.
So...thats basically it, the end result is a car that is going to have MEGA horsepower, looks great at car shows, AND possess superb sound quality all at the same time.
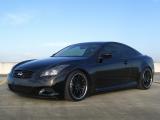
First, three pics of the car from the owner, the car was shipped to me on stock rims and no front bumper (to get it on the truck), so i will use these instead...truly a clean looking ride here!


and here is the previously installed system, whcih had the focal 33kx sub and an audison 5 channel amp (already removed in the pic) along with a bitone and a focal k2p 3 way...not the worst i have seen but we both felt that it didn't live up to the rest of the car, the peeling vinyl didnt help.

Lets get started, since its just the stock headunit, i didnt take a picture of it...so lets start with the Mosconi RTC remote bass **** that i built into one of his blank knockout panels to the left of the steering wheel:

four quick pics of how this was done, first this is the Mosconi RTC with its box:

this was taken apart, and we will retain only the main circuit board unit:

This part was then secured to the knockout panel, with its internal plastic ribbing groundout, and voila, here it is:


Moving onto the front stage. We went with a set of Focal Utopia Be No.7 active set. and the midbass driver went into the stock lower door location.,
Here is the door which had been previously sound proofed with a layer of damper:

So i added another layer of CCF over that:

Adpter baffle rings were made up out of MDF and coated with spray on bedliner:

They were then secured to the factory mounting bracket with OEM bolts:


The focal drivers were then installed and wired up:


The finished assembly was then bolted to the door using OEM hardware:


The same procedure was repeated on the driver side (yeah i know i did the passenger side first this time, variety is the spice of life right? lol)


From past experiences with the newer G sedan, i know that the doors arent too bad with resonance, so i put down a layer of damper around the area of the spekaer:


Moving onto the rest of the front stage. We debated on going with A pillar stealthy mold versus a more on axis dash pod, and in the end, we decided on the latter for the best sound quality. it wasn't an easy mold since there isnt a lot of room on the driver side with the motorized steering column shroud, but in the end, i got it done.
Here they are, each pod houses a set of the Utopia Be Midrange and Tweeter, wrapped in dash matching black vinyl and aiming across at the opposite listener:


here is the front stage as a whole, and my lame attempt at an artist shot by going black and white

And here is what they look like with the grilles in place:


A few build pics of the pods...
first, both sides were heavily taped off and a 10 layers of cloth went on for the initial mold. that was a MAJOR pain in the butt due to the steeply ranked windshield and the fact that on the driver side, i cannot exceed the partition between the dash and the shroud...but 5 hours later...here they are:


once they cured, they were removed from the car:

and trimmed to the desired shape, note on the driver side it follows the contourt of the dash/shroud partition:


rings for the midrange and tweeter were made out of 3/8" mdf, and low heat plastic flush mount boarders were secured to them, and then the two rings were joined together:


Then they were carefully aimed and secured to the base mold:


Grille cloth was then pulled across the shape, resin applied, and allowed to cure...then a duraglass/resin mixture was poured into the inside to strengthen them:


Filler was then applied and the two pods sanded smooth:


Quick test fitment in the car:

The interior of the pods received a layer of sound proofing to help with resonance:

and they were wrapped in vinyl. I did the backside where its against the windshiled in a single piece, so it would look completely blended in behind the dark tint:


The tweeters and midranges were then wired up and installed, with heatshrink at all the connection points, note Focal Blackhole stuff tucked into the pods, this material helps with reducing resonance and elimnating backwaves.


Goal here is maximum SQ in a show car...here is a direct copy and paste from my post on diymobileaudio.com.
link here:
2009 Infiniti G42S Sedan Install: Show + Go + SQ
Focal - Mosconi - DIYMA.com - Scientific Car Audio - Truth in Sound Quality-------------------------------------------------------
Hey guys,
Just finished this project, which wins the award for longest distance between the owner of the car and myself
-- Vehicle is out of North Carolina Just it happens, he had the car down in Socal at GTM for a full 4.2 liter stroker motor build plus super charger install, and in between the motor and the SC, he had it shipped up to me for the install.
Lets get started with the goals:
1. To achieve a high level of sound quality, unlike most of my other customers, this car is NOT going to be a daily driver, so we sacrificed steahiness for utility for sound quality.
2. Remove the previously installed system and utilize the existing subwoofer with new equipment everywhere else.
3. Obtain a clean and classy look that goes with the exterior of this show car...Here the owner had two basic requirements: A. Be subtle, clean and simple, he did not want over the top cosmetics, and B. Display the beautiful Focal sub magnet up.
So...thats basically it, the end result is a car that is going to have MEGA horsepower, looks great at car shows, AND possess superb sound quality all at the same time.
First, three pics of the car from the owner, the car was shipped to me on stock rims and no front bumper (to get it on the truck), so i will use these instead...truly a clean looking ride here!
and here is the previously installed system, whcih had the focal 33kx sub and an audison 5 channel amp (already removed in the pic) along with a bitone and a focal k2p 3 way...not the worst i have seen but we both felt that it didn't live up to the rest of the car, the peeling vinyl didnt help.
Lets get started, since its just the stock headunit, i didnt take a picture of it...so lets start with the Mosconi RTC remote bass **** that i built into one of his blank knockout panels to the left of the steering wheel:
four quick pics of how this was done, first this is the Mosconi RTC with its box:
this was taken apart, and we will retain only the main circuit board unit:
This part was then secured to the knockout panel, with its internal plastic ribbing groundout, and voila, here it is:
Moving onto the front stage. We went with a set of Focal Utopia Be No.7 active set. and the midbass driver went into the stock lower door location.,
Here is the door which had been previously sound proofed with a layer of damper:
So i added another layer of CCF over that:
Adpter baffle rings were made up out of MDF and coated with spray on bedliner:
They were then secured to the factory mounting bracket with OEM bolts:
The focal drivers were then installed and wired up:
The finished assembly was then bolted to the door using OEM hardware:
The same procedure was repeated on the driver side (yeah i know i did the passenger side first this time, variety is the spice of life right? lol)
From past experiences with the newer G sedan, i know that the doors arent too bad with resonance, so i put down a layer of damper around the area of the spekaer:
Moving onto the rest of the front stage. We debated on going with A pillar stealthy mold versus a more on axis dash pod, and in the end, we decided on the latter for the best sound quality. it wasn't an easy mold since there isnt a lot of room on the driver side with the motorized steering column shroud, but in the end, i got it done.
Here they are, each pod houses a set of the Utopia Be Midrange and Tweeter, wrapped in dash matching black vinyl and aiming across at the opposite listener:
here is the front stage as a whole, and my lame attempt at an artist shot by going black and white
And here is what they look like with the grilles in place:
A few build pics of the pods...
first, both sides were heavily taped off and a 10 layers of cloth went on for the initial mold. that was a MAJOR pain in the butt due to the steeply ranked windshield and the fact that on the driver side, i cannot exceed the partition between the dash and the shroud...but 5 hours later...here they are:
once they cured, they were removed from the car:
and trimmed to the desired shape, note on the driver side it follows the contourt of the dash/shroud partition:
rings for the midrange and tweeter were made out of 3/8" mdf, and low heat plastic flush mount boarders were secured to them, and then the two rings were joined together:
Then they were carefully aimed and secured to the base mold:
Grille cloth was then pulled across the shape, resin applied, and allowed to cure...then a duraglass/resin mixture was poured into the inside to strengthen them:
Filler was then applied and the two pods sanded smooth:
Quick test fitment in the car:
The interior of the pods received a layer of sound proofing to help with resonance:
and they were wrapped in vinyl. I did the backside where its against the windshiled in a single piece, so it would look completely blended in behind the dark tint:
The tweeters and midranges were then wired up and installed, with heatshrink at all the connection points, note Focal Blackhole stuff tucked into the pods, this material helps with reducing resonance and elimnating backwaves.
Thread Starter
Custom Car Audio
Joined: Feb 2006
Posts: 32
Likes: 0
From: San Jose, CA
and thats it for the front stage. Here are a few pics of the wiring bundles as they travel from the front of the car to the back, ziptied to the OEM loom every few inches and passing through the back partition wall via grommets:


Here are the bundles as they enter the trunk, against secured every few inches

and all the signal related wires that are tapped into the OEM system (before the stock bose amp), led down the passenger side:

The rear deck subwoofer was removed and area sound proofed:


Now to the trunk...again, the goal here is for simple, tasteful and classy...and after a lot of mocking up, i came up with a design that IMO fullfills those goals...its not over the top, but gives a nice overall cosmetic appeal to anyone looking at it
The new fake floor is wrapped in graphite alcantara, with two Mosconi AS200.4s upfront, whcih sends 200 watts RMS to each midbass, midrange and tweeter, as well as close to 1000 watts to the sub, the Focal 33kx 13" subwoofer is behind them, with a Mosconi 6to8 DSP on the left side, and a Connection SFD-41C combination power/ground block on the right side. all the components are trimmed in white vinyl. I chose the Connection block to give some cosmetic balance against the DSP on the other side.
Note all precise fitment of the flushmount around all the gear


the car also has another party trick...here are two remotes attached to the key...they turn on a simple remote control switch that baths the trunk white lighting. 22 feet of hyper white LED strips from Oznium were used...and lets take a look at what it looks like in the dark

All the edges around the openings glow:


and I thought this was a rather unique view, looking back from the center arm rest access hole:

onto the build pics...first this oddly shaped enclsorue of about 1.5 cubic foot was made up, and secured into the car with the OEM spare tire tie down bolt:


this is the platform for the amps:


this is the top portion of the subbox, whcih is another .15 cubft:

installed into the car along with the side support platforms for the dsp and the dblock:


here are the individual support platforms for the dsp and the dblock, each spaced up accordingly to be level with the top of the amps and the subbox:


Here is the main amp/sub trim piece before and after vinyl:


the two side trim pieces before and after vinyl:


and all three pieces secured to the car:

Here is the main floor piece before and after alcantara:


Three pieces of plexi borders were made up and clouded over:

they were then secured to the underside of the pain floor piece via epoxy and screws:

a layer of HD clear doublesided tape went around the entire outside board of the plexi rings: (the yellow is backing before it was peeled away)

here is what they LED strips look like, just imagine this, except one run of 14 feet and 2 runs of 4 feet:

once the strips were attached to the outter borders, a layer of black duct tape went over them to prevent light leaking out from the sides, the wires for the led strips were run to the approapriate point and a set of female quick disconnects went onto the ends.


and thats the main floor done ready to be put into the car:


and here are the two side pieces before and after alcantara:


and finally, i finish up with some wiring pics of the trunk:


So...how does it sound? quite frankly i am BLOWN AWAY...
the stage is nice and high with a very solid center image. the width is pillar to pillar and the depth is beyond the windshield.
tonality wise...here is the curve i got after just 30 mins of playing around...moving a total of maybe 10 bands across all SEVEN drivers...

its very pleasing to listen to, spectacular detail and midrange resolution, midbass is nice and solid with good impact and the subwoofer blends quite well.
I plan to spend all day tomorrow playing with it so i have even higher hopes for the end result.
anyway, a good way to finish on a high note so i can go on my vacation to San Diego in a few days!
Cheers,
Bing
Here are the bundles as they enter the trunk, against secured every few inches
and all the signal related wires that are tapped into the OEM system (before the stock bose amp), led down the passenger side:
The rear deck subwoofer was removed and area sound proofed:
Now to the trunk...again, the goal here is for simple, tasteful and classy...and after a lot of mocking up, i came up with a design that IMO fullfills those goals...its not over the top, but gives a nice overall cosmetic appeal to anyone looking at it
The new fake floor is wrapped in graphite alcantara, with two Mosconi AS200.4s upfront, whcih sends 200 watts RMS to each midbass, midrange and tweeter, as well as close to 1000 watts to the sub, the Focal 33kx 13" subwoofer is behind them, with a Mosconi 6to8 DSP on the left side, and a Connection SFD-41C combination power/ground block on the right side. all the components are trimmed in white vinyl. I chose the Connection block to give some cosmetic balance against the DSP on the other side.
Note all precise fitment of the flushmount around all the gear
the car also has another party trick...here are two remotes attached to the key...they turn on a simple remote control switch that baths the trunk white lighting. 22 feet of hyper white LED strips from Oznium were used...and lets take a look at what it looks like in the dark
All the edges around the openings glow:
and I thought this was a rather unique view, looking back from the center arm rest access hole:
onto the build pics...first this oddly shaped enclsorue of about 1.5 cubic foot was made up, and secured into the car with the OEM spare tire tie down bolt:
this is the platform for the amps:
this is the top portion of the subbox, whcih is another .15 cubft:
installed into the car along with the side support platforms for the dsp and the dblock:
here are the individual support platforms for the dsp and the dblock, each spaced up accordingly to be level with the top of the amps and the subbox:
Here is the main amp/sub trim piece before and after vinyl:
the two side trim pieces before and after vinyl:
and all three pieces secured to the car:
Here is the main floor piece before and after alcantara:
Three pieces of plexi borders were made up and clouded over:
they were then secured to the underside of the pain floor piece via epoxy and screws:
a layer of HD clear doublesided tape went around the entire outside board of the plexi rings: (the yellow is backing before it was peeled away)
here is what they LED strips look like, just imagine this, except one run of 14 feet and 2 runs of 4 feet:
once the strips were attached to the outter borders, a layer of black duct tape went over them to prevent light leaking out from the sides, the wires for the led strips were run to the approapriate point and a set of female quick disconnects went onto the ends.
and thats the main floor done ready to be put into the car:
and here are the two side pieces before and after alcantara:
and finally, i finish up with some wiring pics of the trunk:
So...how does it sound? quite frankly i am BLOWN AWAY...
the stage is nice and high with a very solid center image. the width is pillar to pillar and the depth is beyond the windshield.
tonality wise...here is the curve i got after just 30 mins of playing around...moving a total of maybe 10 bands across all SEVEN drivers...
its very pleasing to listen to, spectacular detail and midrange resolution, midbass is nice and solid with good impact and the subwoofer blends quite well.
I plan to spend all day tomorrow playing with it so i have even higher hopes for the end result.
anyway, a good way to finish on a high note so i can go on my vacation to San Diego in a few days!
Cheers,
Bing


Trending Topics



All I could say is holy crap!!!! I love the fact that I'm doing a built motor and supercharger...my true love over power is audio....I went to Bing to give a clean simple install that flows with the car. It's beyond anything I could have every imagine! It's the best upgrade to my car at this point for its the upgrade that will get used the most. It sucks that I will not be able to enjoy it until GTM finishes the supercharger install. Even with m scheduling issues Bing was able to knock this on out the box....and even though I'm on th east coast...Bing will have to do all my audio from this point forward!!!!! I'm excited as hell to get this thing back! Thanks again B for the awesome audio and going beyond scope to provide me with my dream audio system....
Chris...
Chris...


Thread Starter
Custom Car Audio
Joined: Feb 2006
Posts: 32
Likes: 0
From: San Jose, CA
it was an ABSOLUTE pleasure working with you Chris, and your enthusiasm for sound quality really motivated me to work harder on your car.
i REALLY wish you could have been here so i can give you a demo of the system.
i gave four of my freinds who are into audio demos and they all left with smiles and lots of headshaking in disbelief afterwards.
i REALLY wish you could have been here so i can give you a demo of the system.
i gave four of my freinds who are into audio demos and they all left with smiles and lots of headshaking in disbelief afterwards.