Need help!! Diy turn as tail diode dynamics


 07-09-2015, 09:04 PM
#33

Nick,
I watched the video. It looks pretty straightforward, so I'm wondering what the difference would be compared to the future plug and play version? Also, what price will the new ones go for?
Could you please PM me a quote for the current DIY kit with resistors to 33177? I think someone here mentioned free shipping too. Thanks.
07-10-2015, 01:29 PM
#34
Former Sponsor
iTrader: (11)

Nick,
I watched the video. It looks pretty straightforward, so I'm wondering what the difference would be compared to the future plug and play version? Also, what price will the new ones go for?
Could you please PM me a quote for the current DIY kit with resistors to 33177? I think someone here mentioned free shipping too. Thanks.
I watched the video. It looks pretty straightforward, so I'm wondering what the difference would be compared to the future plug and play version? Also, what price will the new ones go for?
Could you please PM me a quote for the current DIY kit with resistors to 33177? I think someone here mentioned free shipping too. Thanks.
Shipping is free for U.S. members if you send a PM for the code
Thanks!
Nick C.


The following users liked this post:
Diode Dynamics (07-13-2015)


The following users liked this post:
35Sport (07-20-2015)
07-16-2015, 11:51 PM
#39
Registered User

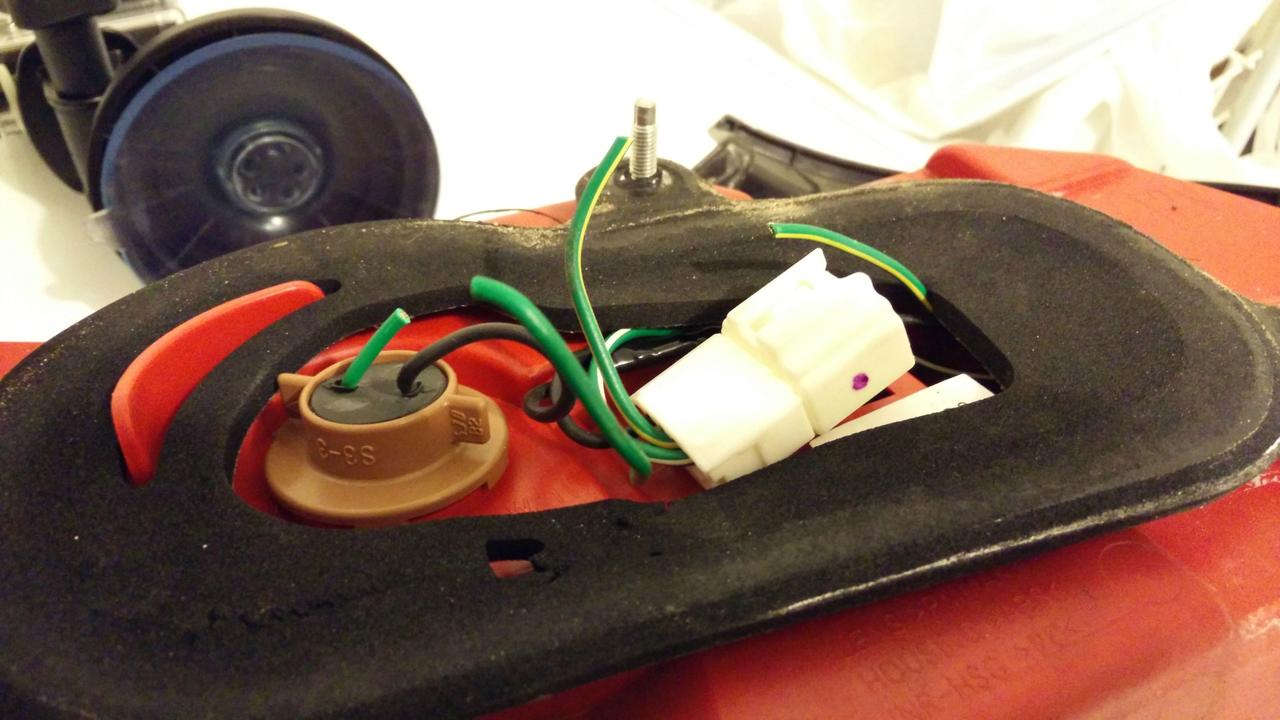
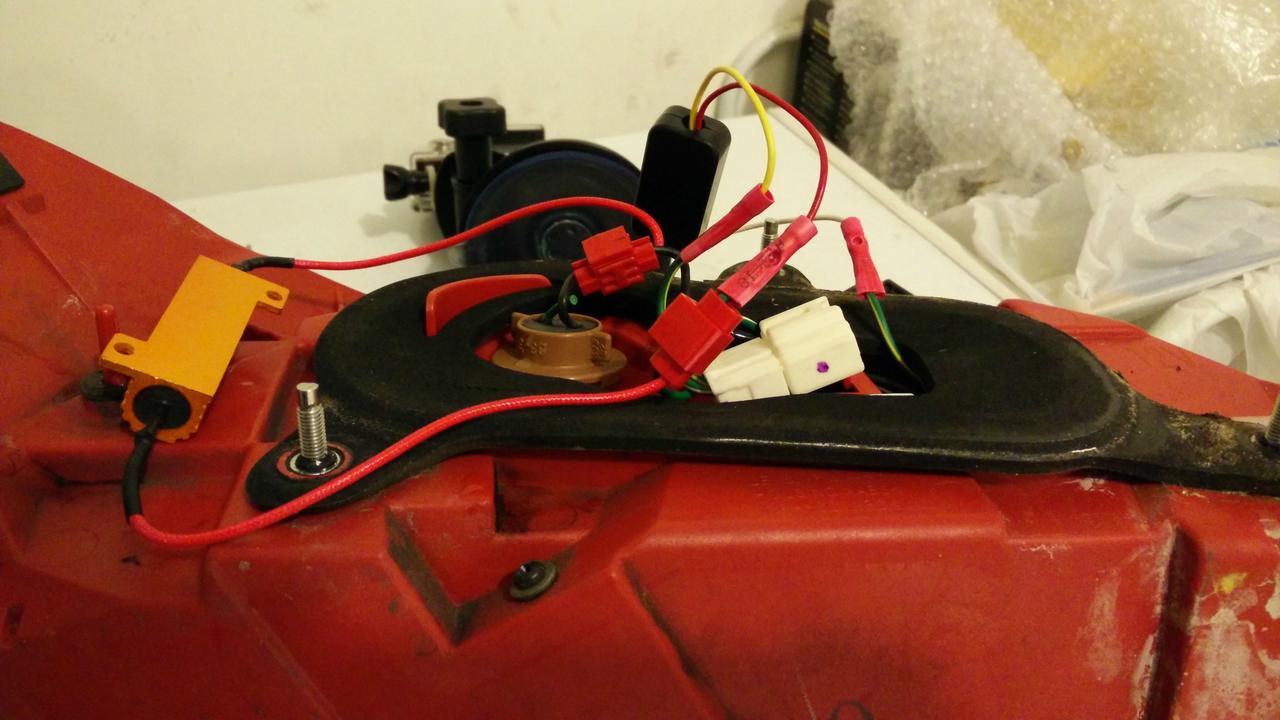
Ordered the DD tail as turn on Monday and got it today. Thanks Nick!

I ended up installing them directly to the taillights. Here are some pictures of the wires cut and the resistor to stop hyperblink.


Diode Dynamics Tail as Turn Infiniti G35/G37 Sedan - YouTube
I ended up installing them directly to the taillights. Here are some pictures of the wires cut and the resistor to stop hyperblink.
Diode Dynamics Tail as Turn Infiniti G35/G37 Sedan - YouTube
It's a bit hard to see which wires go where in those pics. Can you help clarify what to cut and connect? Also what resister did you use? Link?

Last edited by 35Sport; 07-16-2015 at 11:57 PM.
07-17-2015, 12:03 AM
#40
^ I cut the solid green and the green/yellow wire. The resistor goes on the turn signal power (solid green) and ground (black) wire.
I had some extra resistors from when I bought some new switchbacks that I used, if I didn't have them I would've just ordered them from Nick.
I had some extra resistors from when I bought some new switchbacks that I used, if I didn't have them I would've just ordered them from Nick.
The following users liked this post:
35Sport (07-20-2015)
07-17-2015, 12:16 AM
#41
Registered User
^ I cut the solid green and the green/yellow wire. The resistor goes on the turn signal power (solid green) and ground (black) wire.
I had some extra resistors from when I bought some new switchbacks that I used, if I didn't have them I would've just ordered them from Nick.
I had some extra resistors from when I bought some new switchbacks that I used, if I didn't have them I would've just ordered them from Nick.
LED Resistors - Accessories - All Products
Any idea which I should order?
07-17-2015, 01:35 AM
#42
Registered User
Ok so I found this on ebay.
http://www.ebay.com/itm/2PK-50W-6RJ-Load-Resistor-Fix-LED-for-Bulb-Fast-Hyper-Flash-Turn-Signal-Blink/251587652308?_trksid=p2050601.c100085.m2372&_trkparms=aid%3D111001%26algo%3DREC.SEED%26ao%3D1%26asc%3D20140211132617%26meid%3D33f3966dbb1841f49b4f359a26a58e1f%26pid%3D100085%26rk%3D2%26rkt%3D4%26sd%3D321469249106%26clkid%3D7613361429079646482&_qi=RTM2067268
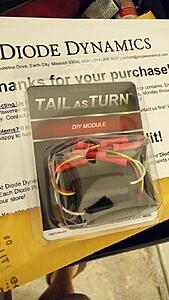
I already ordered this kit.
Tail as Turn? Module, DIY - Tail as Turn Modules - All Products
So it should be as simple as cutting and crimping now
http://www.ebay.com/itm/2PK-50W-6RJ-Load-Resistor-Fix-LED-for-Bulb-Fast-Hyper-Flash-Turn-Signal-Blink/251587652308?_trksid=p2050601.c100085.m2372&_trkparms=aid%3D111001%26algo%3DREC.SEED%26ao%3D1%26asc%3D20140211132617%26meid%3D33f3966dbb1841f49b4f359a26a58e1f%26pid%3D100085%26rk%3D2%26rkt%3D4%26sd%3D321469249106%26clkid%3D7613361429079646482&_qi=RTM2067268
I already ordered this kit.
Tail as Turn? Module, DIY - Tail as Turn Modules - All Products
So it should be as simple as cutting and crimping now
07-20-2015, 09:56 PM
#43
Registered User
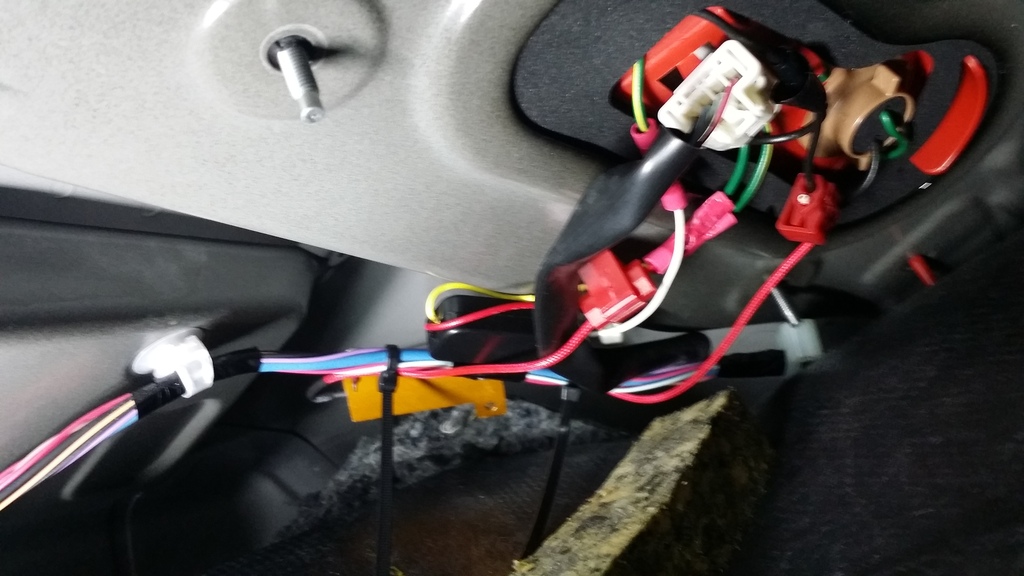
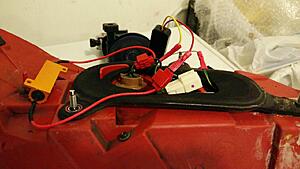
Got all the parts in today and completed the install.
I followed this guide to remove the tail lights.
https://www.myg37.com/forums/d-i-y-i...iler-pics.html
I then followed tonyHTX's instructions above. Keep in mind I have the exact model as tonyHTX 2008 G35S sedan. So the wiring colors may differ in later models.
I followed this guide to remove the tail lights.
https://www.myg37.com/forums/d-i-y-i...iler-pics.html
I then followed tonyHTX's instructions above. Keep in mind I have the exact model as tonyHTX 2008 G35S sedan. So the wiring colors may differ in later models.
Last edited by 35Sport; 07-20-2015 at 10:02 PM.
The following users liked this post:
ttv36 (07-21-2015)
07-21-2015, 04:56 PM
#45

[QUOTE=tonyHTX;3930583]Ordered the DD tail as turn on Monday and got it today. Thanks Nick!
I ended up installing them directly to the taillights. Here are some pictures of the wires cut and the resistor to stop hyperblink.

[/QUOTE
I have a G sedan is this how I would hook it up.

I ended up installing them directly to the taillights. Here are some pictures of the wires cut and the resistor to stop hyperblink.

I have a G sedan is this how I would hook it up.