G37 Sedan
Sponsored by:
Sponsored by:

Put the STI lip on my non-S Sedan

Thread Tools
 
Search this Thread
 
Old 02-04-2018, 04:32 PM
  #1  
Bommerang
Registered Member
Thread Starter
 
Bommerang's Avatar
 
Join Date: Apr 2017
Posts: 107
Received 31 Likes on 24 Posts
Exclamation Put the STI lip on my non-S Sedan

I know theres a very old thread about someone using an 07 STI lip for their sedan, so I took it upon myself to make it a weekend project, insanely happy with how it turned out. So for all us who dont have S models I think this is a great solution for an awesome looking lip! This was done entirely by removing the bumper, using a dremel to cut off the sides on the lip (its too long to just slap on which I believe was the controversy with the old thread), and then bolting it underneath the bumper. Ill update this thread with more pictures, but let me know what you all think

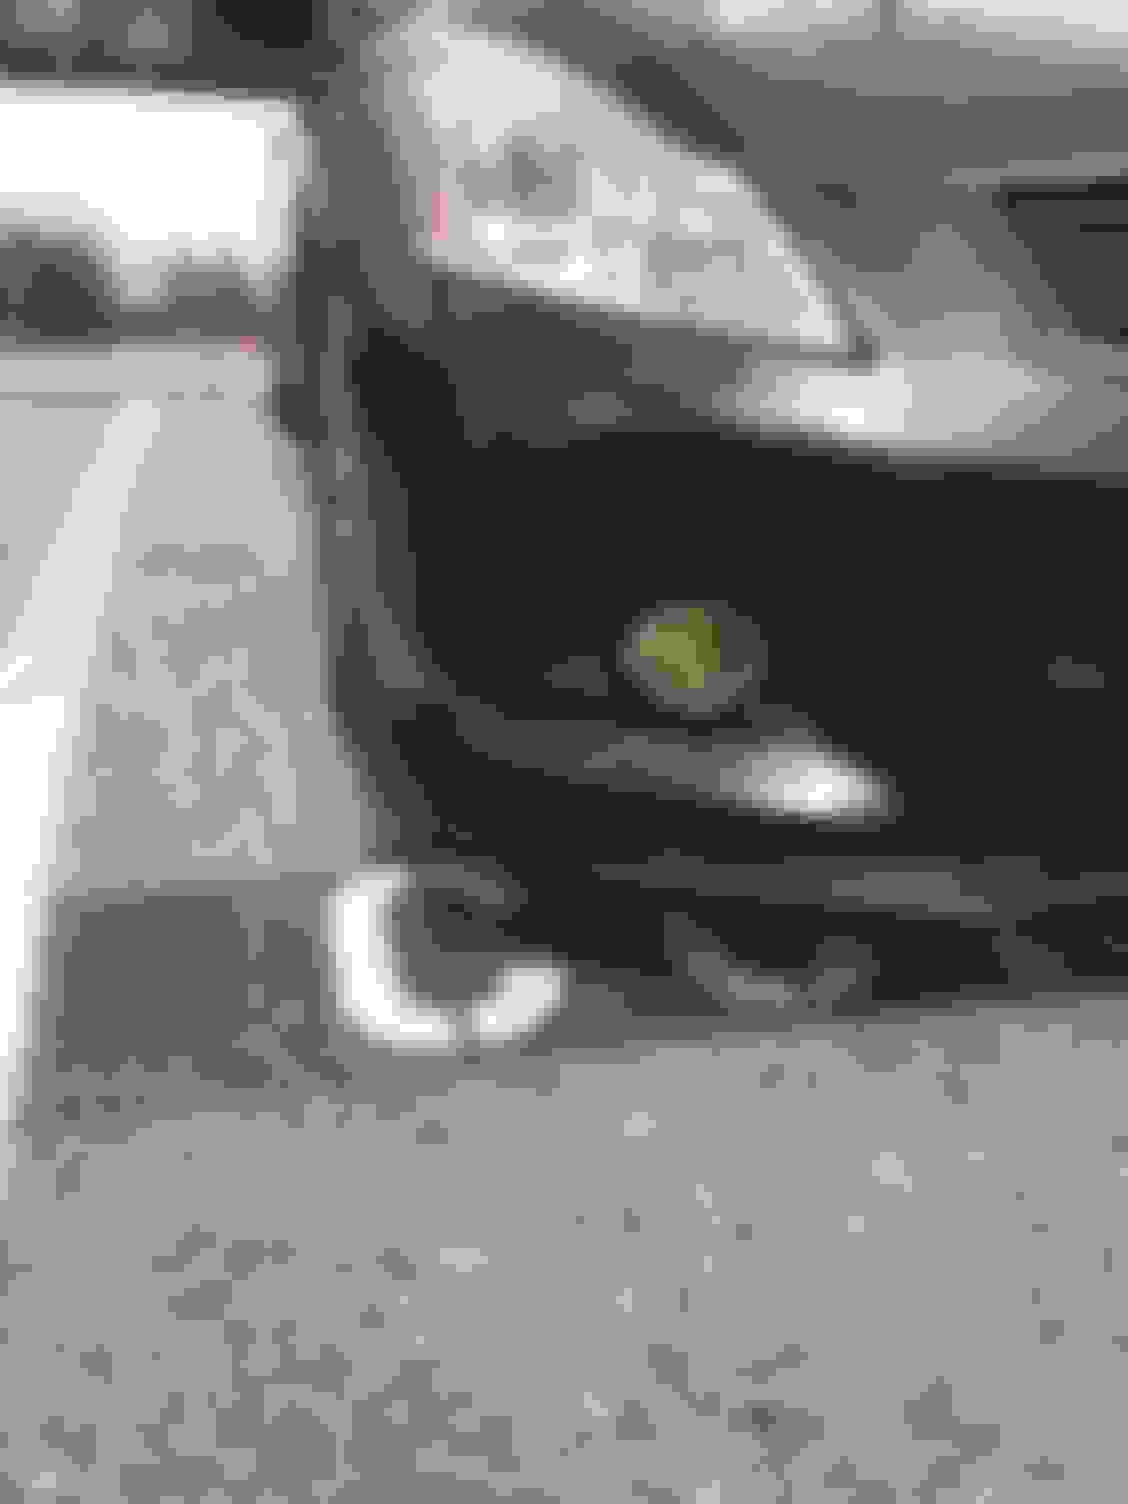
But as you can see it sits nice and flush with no gaps at all, the most annoying part is removing the bumper but it was well worth the effect.

SMALL UPDATE:
LINK TO PURCHASE LIP: https://www.ebay.com/itm/Fit-For-06-...72.m2749.l2649

This is the best lip because it has enough surface area on the bottom flat part where you can put bolts, you could try other STI lips but theres no guarrentee itll fit like this.


UPDATE UPDATE UPDATE!!!
More pics posted below with closer shots of how it looks and a peek of how I bolted it underneath the bumper. As you can see the bottom surface area fits perfectly under the bumper and can be completely bolted without bothering the undertray or that small plastic wall underneath the bumper. Thus it doesn't effect any other general maintenance under the car, and if truly needed can just be unbolted.


A few remarks/notes:
-The bolts are home depot 1/4in hex bolts and hex nuts, I used loctite and a lock nut on the bolts, just to prevent any possibility of highway wind taking it away or the nuts walking themselves off due to vibration. As well as a washer on both ends just to give it a bit more surface area.

-After further inspection and tweaking IT IS possible to do this without removing the bumper, because you can assemble all hardware with the undertray taken off and just by reaching over. Although it is nearly impossible to fit your hands and bolt down the very far right/left sides of the lip, and it would be hard to line things up without the bumper off. Honestly taking off the bumper and taking your time with everything is the best way to do it. (took me 4hrs)

-This lip CANNOT be attached without the cutting the sides off with a dremel. The lip is so long out of the box, it literally touches the tires so it has to be cut down. I used masking tape for this and very carefully had a friend cut it with a dremel, always take your time cutting, because if you cut too far theres no going back.

-I am at the recommended FTG height most of the people of the forums suggest, and have very little scraping issues with the lip. I would go as far to say its semi-lowered friendly, but if you're alot lower than the recommended height or slammed youll probably destroy it lol.

Last edited by Bommerang; 02-10-2018 at 06:41 PM.
The following 5 users liked this post by Bommerang:
-ZS-Carpenter (02-10-2018), andylegend (02-07-2018), blnewt (02-04-2018), Flame (09-26-2020), r2dmax (02-05-2018)
Old 02-04-2018, 05:09 PM
  #2  
GdaddyNY
Registered Member
 
GdaddyNY's Avatar
 
Join Date: Nov 2017
Location: NY, New York
Posts: 239
Received 30 Likes on 29 Posts
Looks awesome. Great work. I’ll be looking forward to your update to this post.
The following users liked this post:
Bommerang (02-04-2018)
Old 02-04-2018, 05:34 PM
  #3  
Invaderzim
Registered Member
 
Invaderzim's Avatar
 
Join Date: Nov 2015
Posts: 164
Received 27 Likes on 22 Posts
It does look good. I remember seeing a pic of one of these on an 11 sport coupe. Looked good on that car also. Might have to have one. Is it fiberglass?

Last edited by Invaderzim; 02-04-2018 at 05:42 PM.
Old 02-04-2018, 06:50 PM
  #4  
mvx
Registered Member
 
mvx's Avatar
 
Join Date: Oct 2016
Posts: 96
Received 20 Likes on 15 Posts
This looks amazing. I should do this in the mean time before switching to a sport bumper.
Old 02-04-2018, 07:10 PM
  #5  
xpcgamer
Registered Member
iTrader: (1)
 
xpcgamer's Avatar
 
Join Date: Jun 2008
Location: South Florida.
Posts: 403
Received 26 Likes on 23 Posts
Looks good. Waiting to see why the bumper needed to come off.
Old 02-04-2018, 08:13 PM
  #6  
Daddy Fat Sacs
Registered Member
iTrader: (15)
 
Daddy Fat Sacs's Avatar
 
Join Date: Jul 2013
Location: Tampa
Posts: 1,705
Received 357 Likes on 249 Posts
Looks great but is it me or is the winglet rubbing on the side of the bumper?
Old 02-04-2018, 08:17 PM
  #7  
blnewt
Movin On!
iTrader: (13)
 
blnewt's Avatar
 
Join Date: Nov 2009
Posts: 24,877
Received 4,941 Likes on 4,174 Posts
Nice job, put a DIY thread together if you have the time and more pics, would be a nice addition here!
The following users liked this post:
Bommerang (02-04-2018)
Old 02-04-2018, 11:02 PM
  #8  
Bommerang
Registered Member
Thread Starter
 
Bommerang's Avatar
 
Join Date: Apr 2017
Posts: 107
Received 31 Likes on 24 Posts
Originally Posted by Daddy Fat Sacs
Looks great but is it me or is the winglet rubbing on the side of the bumper?
Yeah its basically touching because the way the lip is designed for an STI, but it doesn't physically move or rub because its bolted down so its technically one whole piece.
Old 02-04-2018, 11:10 PM
  #9  
Bommerang
Registered Member
Thread Starter
 
Bommerang's Avatar
 
Join Date: Apr 2017
Posts: 107
Received 31 Likes on 24 Posts
Originally Posted by xpcgamer
Looks good. Waiting to see why the bumper needed to come off.
Bumper has to come off if you want to use bolts that go through the bottom of the bumper and lip like I did to have perfect and tight fitment and bolt them together with all bolts hidden. I would assume you could use the self tappers provided, but I wouldn't trust it personally and I don't think the fitment would be perfect, just my observation.
Old 02-04-2018, 11:11 PM
  #10  
Bommerang
Registered Member
Thread Starter
 
Bommerang's Avatar
 
Join Date: Apr 2017
Posts: 107
Received 31 Likes on 24 Posts
Thanks everyone for your replies! Ill snap a bunch more pictures once its sunny and show some underneath shots of how its all bolted together!
The following users liked this post:
r2dmax (02-05-2018)
Old 02-05-2018, 11:07 AM
  #11  
RMB5190
Super Moderator
iTrader: (2)
 
RMB5190's Avatar
 
Join Date: Dec 2016
Location: Maryland
Posts: 3,112
Received 500 Likes on 429 Posts
Great execution. Please post up more pics wen you can and I echo Brad....DIY walkthrough 100%
The following users liked this post:
Bommerang (02-05-2018)
Old 02-05-2018, 08:03 PM
  #12  
guy from norcal
Registered Member
iTrader: (2)
 
guy from norcal's Avatar
 
Join Date: Jun 2012
Location: Sacramento,Ca
Posts: 1,867
Received 352 Likes on 316 Posts
That looks really good.


Just added to my to do list.
The following users liked this post:
Bommerang (02-05-2018)
Old 02-06-2018, 08:43 AM
  #13  
RMB5190
Super Moderator
iTrader: (2)
 
RMB5190's Avatar
 
Join Date: Dec 2016
Location: Maryland
Posts: 3,112
Received 500 Likes on 429 Posts
Gonna need a link to that lip as well...part # works just as well.
Old 02-06-2018, 08:58 AM
  #14  
Daddy Fat Sacs
Registered Member
iTrader: (15)
 
Daddy Fat Sacs's Avatar
 
Join Date: Jul 2013
Location: Tampa
Posts: 1,705
Received 357 Likes on 249 Posts
Originally Posted by RMB5190
Gonna need a link to that lip as well...part # works just as well.
just google 06-07 sti front lip, their $70 shipped on Ebay
The following users liked this post:
guy from norcal (02-06-2018)
Old 02-06-2018, 11:10 AM
  #15  
stiizy
Registered User
 
stiizy's Avatar
 
Join Date: Jan 2008
Location: Staten Island
Posts: 153
Received 7 Likes on 7 Posts
$24.99 Shipped eBay


Quick Reply: Put the STI lip on my non-S Sedan


All times are GMT -4. The time now is 08:39 AM.