
My Sedan is a Little More Bad***


Thread Starter
Registered User
Joined: Jul 2015
Posts: 40
Likes: 13
From: Myrtle Beach, SC
Thanks mezzo, I agree totally that it transforms the car.
Front lip is on order. Michael at Tunerz Store told me that the QAA painted ones were low stock in the warehouse but i he should be able to get one to me in a week or so. I'm a bit relieved, I love Moonlight White, but matching a triple stage paint would've cost quite a bit if I couldn't get a pre-painted one.
I'm hoping to shake off the modding bug after this for a bit... though I did notice today that black chrome headlight housings would look pretty awesome.
Registered Member
Joined: Dec 2003
Posts: 423
Likes: 29
From: West Hills, CA
I'm ready to pull the trigger on one of these. Is there a DIY with pictures? I need to have a reference when I work on projects like this. Makes me very nervous.
Can you tell me how to remove the chrome piece without breaking it now that you are experienced?
Thanks....
Can you tell me how to remove the chrome piece without breaking it now that you are experienced?
Thanks....
Thread Starter
Registered User
Joined: Jul 2015
Posts: 40
Likes: 13
From: Myrtle Beach, SC
Removing the chrome trim was actually pretty easy. There are 4 nuts, 8mm I believe and then two pop clips at either end. I simply removed the nuts, then placed tape up against the chrome piece adjacent to the clips and gently pried them off by sticking a plastic trim pryer underneath and prying against the tape so I didn't mar the paint.
In some of the other DIY's I read they just pushed the pop clips out from underneath.
The instructions are also very step by step. You can download a PDF of them from here:
http://www.infiniti-techinfo.com/TSB...spx?tsbType=AI
Choose the model, and "EX-Exterior" for Accessory Type and the keyword "K6030" for the part number.
The hardest part of the install is steeling yourself to drill holes in your car... (and seeing the dents the punch leaves when you're marking the holes you drill for the pop clips, but those get covered by the wing... so it doesn't matter really.) Using the supplied templates makes it easy, I'm definitely not as brave as blnewt to drill them without the templates like when he installed his.
Read through the instructions until you don't need to refer to each step. Read the various install threads ( Google "G37 Sedan Rear Spoiler DIY" and read through some of the threads it pulls up ) If you're still not comfortable after doing that, it might be worth the peace of mind to let someone install it for you.
Hope this helps.
Oh and anyone else who are considering the factory pre-painted aero... When I was researching before i bought I learned that the more popular colors are either low stock or no longer available from Infiniti and the part numbers will be superceded by the primered wing K6030-1NF4A. (I don't know the part number for the primer front lip spoiler unfortunately). You may want to check availability and order sooner than later.
Last edited by WolfSongX; Aug 11, 2015 at 01:45 AM. Reason: fixed the last sentence

Looking good!
In retrospect I should have gotten my Impul wing painted professionally. I did it myself and it looked great for all about 6 months before the clear coat started fading. Perhaps I did it wrong and didn't spray enough coats. Oh well, valuable experience to learn from I guess.
Also, I could never bring myself to drill holes in the trunk lid.. the spoiler is fairly light (<3 pounds) so I just 3M taped it on. It's been on for a year and withstood 110mph without budging one bit.
Thread Starter
Registered User
Joined: Jul 2015
Posts: 40
Likes: 13
From: Myrtle Beach, SC
For those of you looking for a bit more detail, I took pictures up to the point of removing the chrome strip. I decided to post a few with some notations to make everyone's life a bit easier.
This pic of the trunk interior shows the location of the pop clips, the 8mm nuts, the grommets and the harnesses you need to disconnect. If you don't have a factory camera, then you'll see something slightly different.

This is an exterior shot of the chrome strip removed showing the locations from that side and the locations I did my prying from with the plastic prying tool from my trim kit.

And finally, so it doesn't take you by surprise, here's an action shot of when I removed the trim piece. It's pretty nasty under there... so definitely use those "seal" stickers used to cover up the old holes when you install the new wing.

And as a bonus feature, here's the layout of the camera, trunk button and bracket in the chrome strip. I suggest removing or at least loosening the camera first since the dirt and a bit of adhesive made it difficult to remove the bracket to get to the trunk switch.

Hope this helps anyone who's thinking of tackling this project.
This pic of the trunk interior shows the location of the pop clips, the 8mm nuts, the grommets and the harnesses you need to disconnect. If you don't have a factory camera, then you'll see something slightly different.
This is an exterior shot of the chrome strip removed showing the locations from that side and the locations I did my prying from with the plastic prying tool from my trim kit.
And finally, so it doesn't take you by surprise, here's an action shot of when I removed the trim piece. It's pretty nasty under there... so definitely use those "seal" stickers used to cover up the old holes when you install the new wing.
And as a bonus feature, here's the layout of the camera, trunk button and bracket in the chrome strip. I suggest removing or at least loosening the camera first since the dirt and a bit of adhesive made it difficult to remove the bracket to get to the trunk switch.
Hope this helps anyone who's thinking of tackling this project.


Registered Member
Joined: Dec 2003
Posts: 423
Likes: 29
From: West Hills, CA
I called my dealer for a price quote to install this. They wanted over $300 !!!!
Something about drilling holes bumped the fee.
Looks like I will be doing this myself.
If I don't drill the outside holes, do I still use the clips? What is the best tape to use instead of the outside bolts?
Something about drilling holes bumped the fee.
Looks like I will be doing this myself.
If I don't drill the outside holes, do I still use the clips? What is the best tape to use instead of the outside bolts?

Thread Starter
Registered User
Joined: Jul 2015
Posts: 40
Likes: 13
From: Myrtle Beach, SC
GeezerB... I was on the fence about whether to use the clips or not, but I decided that the wing wasn't coming off, so I decided to go all in.
The templates do make it easy to drill them and the holes are big enough that being a mm off isn't going to ruin the install. I mean you do want to take your time and be as accurate as possible, but there is some wiggle room... which is why the 3M tape is there.
I actually think that the clips are there to make this a 1 person install.
In the instructions it actually tells you to pop the clips in first, then put the bolts in loosely while the wing's held on by the clips. Then you line up the corners of the wing with the templates and then remove the plastic on the tape and start sticking it down, bottom first then working out from the center. The last step is tightening the bolts down. If you have an extra set of hands, the clips are definitely not necessary.
$300 for this install is ridiculous... an experienced tech should be able to do it in under an hour, especially in a well-lit, climate-controlled garage. The instructions are written to go step by step through the complete job, so no digging out the service manual to figure something out. It's all there in plain english and diagrams.
I did it in my driveway. I took my time. I took plenty of breaks due to my bad back and the heat (which was still around 100 degrees F even after the sun went down). I went searching for tools because I'm disorganized. I fought the wind while placing the templates. I had to set up lighting when it got dark. I had my wife and daughter helping (which automatically doubles or triples the time it takes while you stop and explain something and then wait while they figure things out). I had to improvise when the plastic covering the double sided tape broke while I was removing it and I broke one of the clips trying to get the rest of it off.
In spite of all that, I was still only slightly over two and a half hours... and I'm not an experienced tech.
When I ran my tuning shop, I did have several experienced techs working for me and the least competant of them could've easily done it in under an hour. A lot of guys said the install labor was around $100... and I'd consider that fair. $300 is ridiculous.
Thread Starter
Registered User
Joined: Jul 2015
Posts: 40
Likes: 13
From: Myrtle Beach, SC
Just got the shipping confirmation... my front lip will be here on Tuesday... though my wife has specifically requested that I wait for the weekend to install it.
I also ordered the B&I Premium G37 Dash Trim Kit (the small one) in Blackwood. I was going to do vinyl, but I was offered a heck of a deal on their kit and so I got impulsive. I was looking for a specific effect and this kit had it. This kit has the 3D molded pieces as overlay but is the small kit, so it does basically all the aluminum trim on the doors, console, plus pieces for the vents/screen and the steering wheel.
Oh... and my Carsmo ***** are waiting on me when I get home tonight.
But after this, time to cool off for a while while I pay off my credit cards. My wife's Outback needed tires anyways and she managed to pick up a nail that finished them off, so I've also had to buy a set of Michelins for her car as well. My credit cards definitely took a beating this past week

Registered User
Joined: Jan 2015
Posts: 26
Likes: 2
From: Seattle, WA
I called my dealer for a price quote to install this. They wanted over $300 !!!!
Something about drilling holes bumped the fee.
Looks like I will be doing this myself.
If I don't drill the outside holes, do I still use the clips? What is the best tape to use instead of the outside bolts?
Something about drilling holes bumped the fee.
Looks like I will be doing this myself.
If I don't drill the outside holes, do I still use the clips? What is the best tape to use instead of the outside bolts?
Thread Starter
Registered User
Joined: Jul 2015
Posts: 40
Likes: 13
From: Myrtle Beach, SC
Just did this install myself, didn't drill any holes, I just used the one hole that is already drilled and lines up from the oem chrome strip. Also plenty of double-sided tape. It's definitely not going anywhere and it's lined up perfectly. Only part that was a pain was getting the camera into the new spoiler correctly, don't know what I was doing wrong but it didn't want to sit in flush.
I live in the South and I've seen adhesive fail on a basis due to heat and moisture whether the surface was properly prepped or not, so personally I have very little faith in the stuff. I wasn't going to take a chance that my spoiler will rip off at 150mph under aerodynamic load and stress because sooner or later a closed course usually presents itself. The peace of mind involved with drilling the holes far outweighed the terror of drilling them. But that's just me and I'm one of those guys who'd rather have it and not need it, rather than being on the wrong side of that equation... again.

Thread Starter
Registered User
Joined: Jul 2015
Posts: 40
Likes: 13
From: Myrtle Beach, SC
Giving a little lip...
We finally had enough dry weather to install my front lip (which I've had since Tuesday). I did do the full install including the bolts on the sides since this car will eventually see triple digit speeds on a closed course. Install went pretty smoothly... and the results are well worth it. The effect is subtle, but very pleasing.

I'll apologize for my poor framing of the photographs, I'm diabetic and I was pretty hypoglycimic by the end of the install.


Many thanks to Michael at Tunerz Store for tracking this down for me.
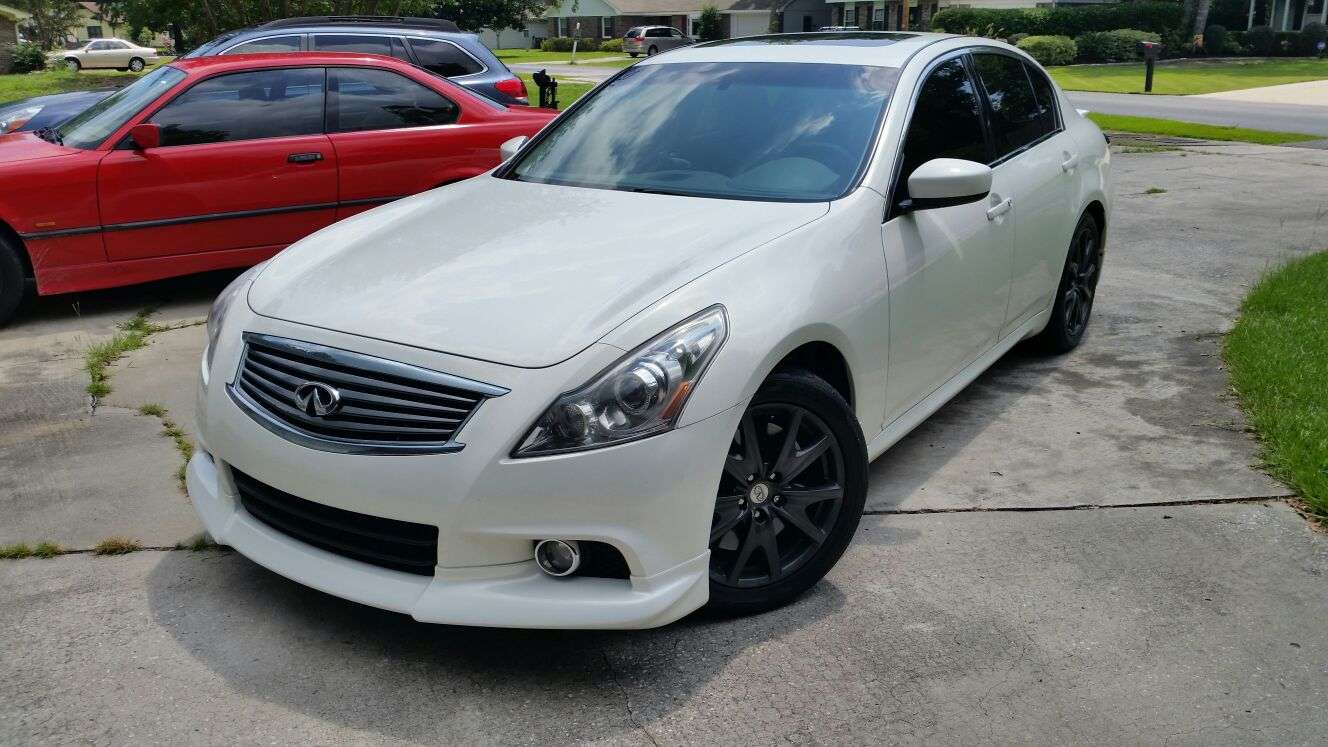
Here's the obligatory "before" shot.... I forgot to take one during the install... so this is an old pic.

I'll apologize for my poor framing of the photographs, I'm diabetic and I was pretty hypoglycimic by the end of the install.
Many thanks to Michael at Tunerz Store for tracking this down for me.
Here's the obligatory "before" shot.... I forgot to take one during the install... so this is an old pic.
Last edited by WolfSongX; Aug 23, 2015 at 08:49 AM.