
Show off your Sedans!


Registered Member
Joined: Jul 2015
Posts: 1,397
Likes: 335
From: Maryland
So I made the jump and custom fitted this lip. Took some work but it came out pretty solid. Also threw on a midnight grill while I was at it. I've also added a bunch more non-visible goodies in the last 2 weeks. Hotchkis sways, cusco stb, and whiteline adjustable end links.

I agree as well. Very nice!!!
Unfortunately, with me at the wheel that would last approximately 90 seconds on my G. Just call me the 'scrape-o-matic'. I am constantly sanding and re-painting my OEM lip. The last time it was an opossum....don't ask...
Sean
Unfortunately, with me at the wheel that would last approximately 90 seconds on my G. Just call me the 'scrape-o-matic'.
I am constantly sanding and re-painting my OEM lip. The last time it was an opossum....don't ask...Sean
Registered Member
Joined: Jul 2015
Posts: 1,397
Likes: 335
From: Maryland
") LOL
LOL

So I made the jump and custom fitted this lip. Took some work but it came out pretty solid. Also threw on a midnight grill while I was at it. I've also added a bunch more non-visible goodies in the last 2 weeks. Hotchkis sways, cusco stb, and whiteline adjustable end links.
<a href="http://s1268.photobucket.com/user/sheetsje/media/2_zpstfezyh5h.jpg.html" target="_blank"><img src="http://i1268.photobucket.com/albums/jj561/sheetsje/2_zpstfezyh5h.jpg" border="0" alt=" photo 2_zpstfezyh5h.jpg"/></a>
<a href="http://s1268.photobucket.com/user/sheetsje/media/2_zpstfezyh5h.jpg.html" target="_blank"><img src="http://i1268.photobucket.com/albums/jj561/sheetsje/2_zpstfezyh5h.jpg" border="0" alt=" photo 2_zpstfezyh5h.jpg"/></a>
So how much would it cost for you to make me one?... LOL

Thanks guys, I completely agree. The mod bug never ends and the list of things I want continues to grow. These are both on the "backlog"


Registered Member
Joined: Jul 2015
Posts: 1,397
Likes: 335
From: Maryland


No, that's not correct. However, it is a common misunderstanding.
All RWD Sedans get the same sways, regardless of Sport Package. The only suspension difference between the non-Sport Journey and the Sport Journey (and 6MT) are the shocks. Add to that the tighter steering, larger wheels, and performance tires... it certainly feels different. But the swaybars are the same, Zoster. Honest.
If $1000 is the hard cap for mods to this G37S, then absolutely sways and an intake kit. That's probably the best fit to the budget.
So yeah, it must be the 2009+ G37.
Being a Dad to a 12 year old girl, I actually know what "bae" means. I've heard her use it a number of times, because... well, she's a 12 year old girl.

 These pics make me wish I had a decent camera along with the skills to take such beautiful pictures.
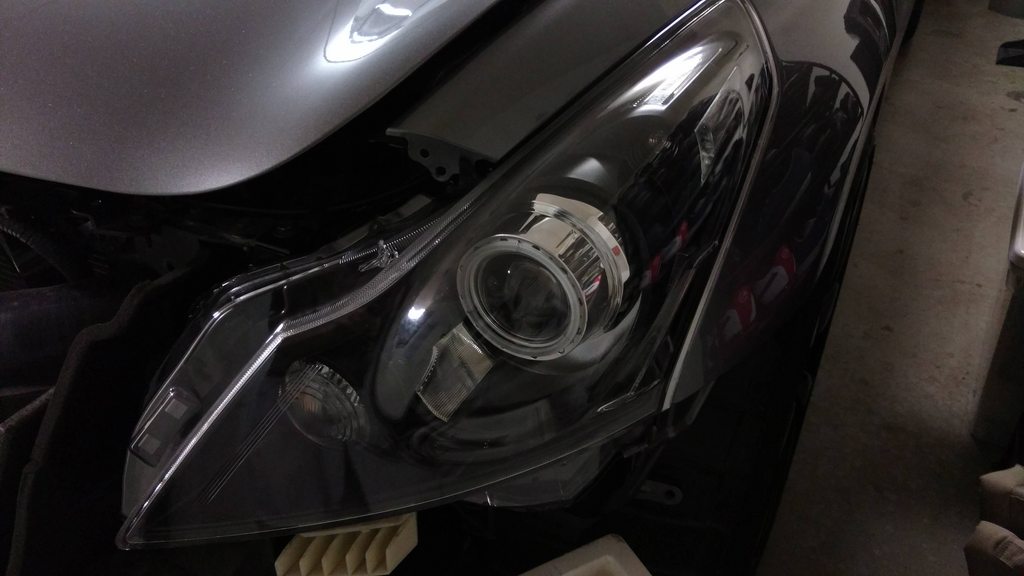
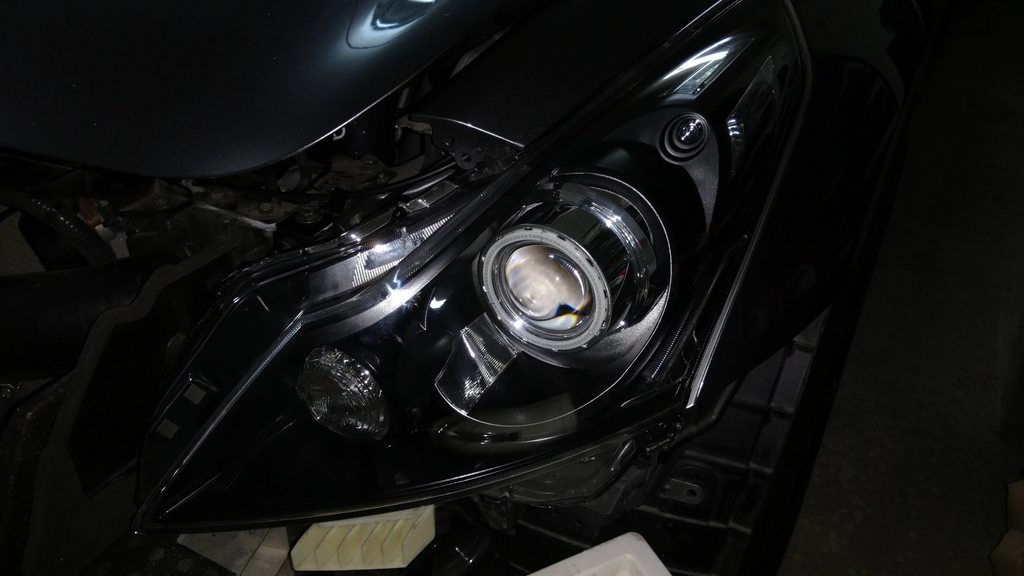
Please post up a close up pic of your headlights when you get a chance... Those look like they turned out really nice for DIY.
FYI... I was just up in Paso Robles and Monterey this past weekend doing some wine tasting with my wife and some friends. If I had know you were down that way we could have tried to meet up for a drink or something.

Very nice!!! By chance did you document your process for the lights? I'm thinking of doing mine next week, but need some suggestions on the halo's and process.


Car looks amazing, Mark! These pics make me wish I had a decent camera along with the skills to take such beautiful pictures.
Please post up a close up pic of your headlights when you get a chance... Those look like they turned out really nice for DIY.
FYI... I was just up in Paso Robles and Monterey this past weekend doing some wine tasting with my wife and some friends. If I had know you were down that way we could have tried to meet up for a drink or something.
These pics make me wish I had a decent camera along with the skills to take such beautiful pictures.Please post up a close up pic of your headlights when you get a chance... Those look like they turned out really nice for DIY.
FYI... I was just up in Paso Robles and Monterey this past weekend doing some wine tasting with my wife and some friends. If I had know you were down that way we could have tried to meet up for a drink or something.
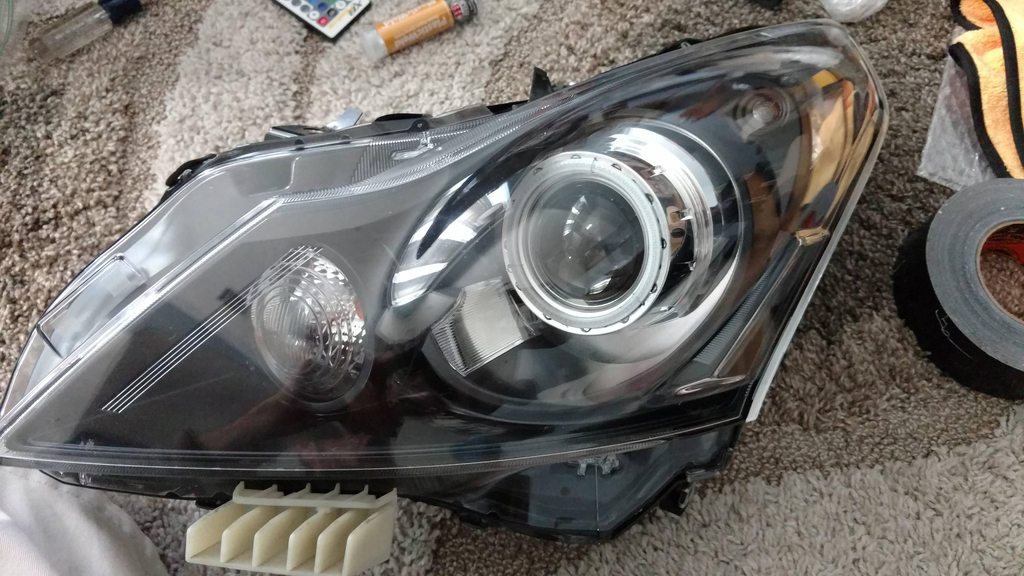
I used this post for some inspiration / pointers / visual on the cutoff shield:
https://www.myg37.com/forums/build-t...ml#post3983315
I ended up bugging MaQG37 via PM about his process, which helped me a LOT.
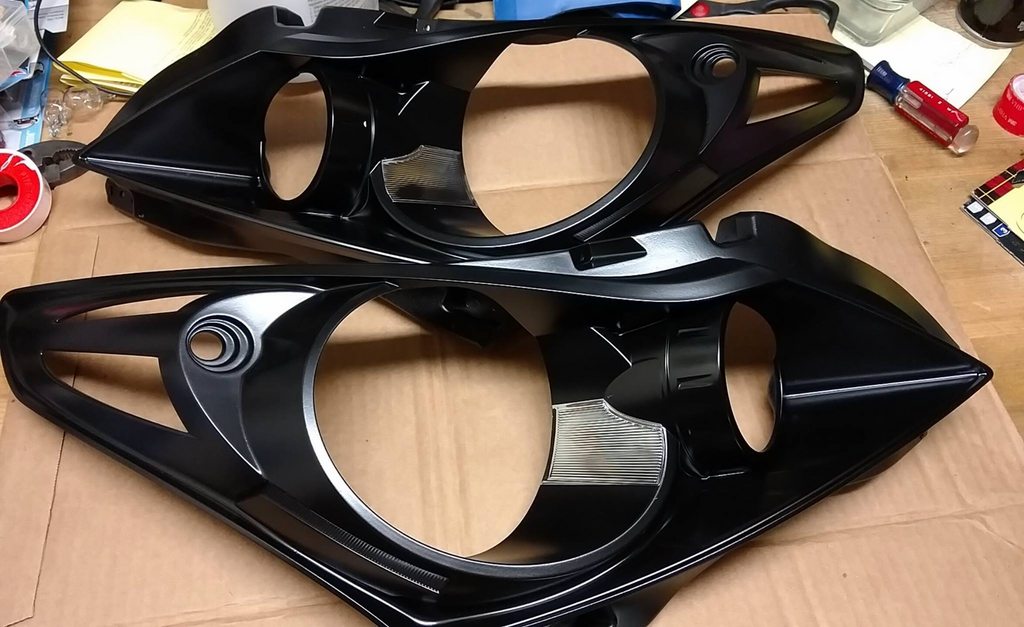
I used plastic primer and satin black high temp paint. I didn't paint the chrome strip right near the projector, since that's where the bubbling issue is worst. I ended up painting the side reflector, because my trial with Nite-shadez was disasterous.
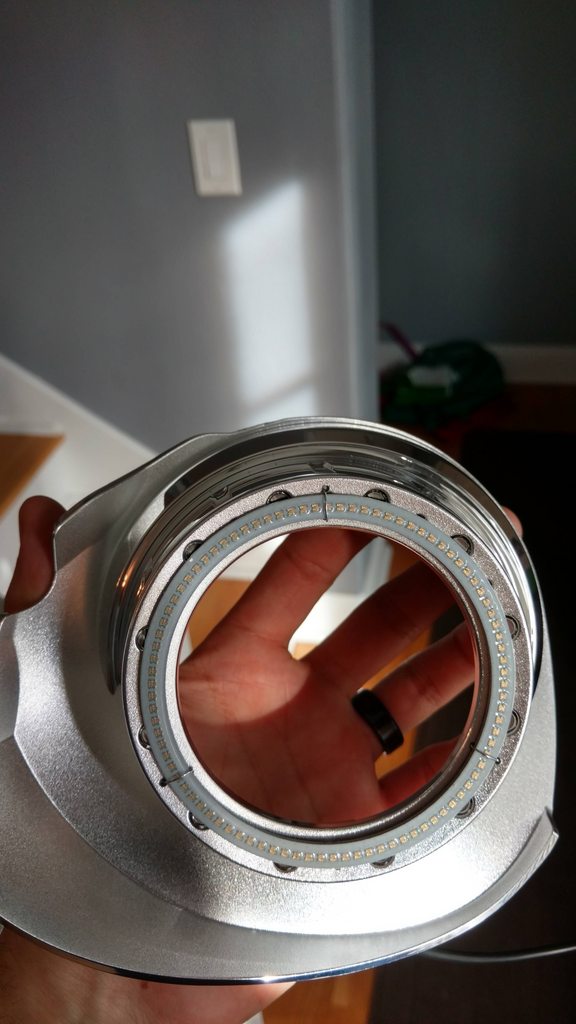
I modded the shield to get that nice razor's edge cutoff (as shown in MaQG37's linked above). I added the STI-R lenses, as well. Those required making a few additional spacers out of a cereal box, using the one already in there as a template.
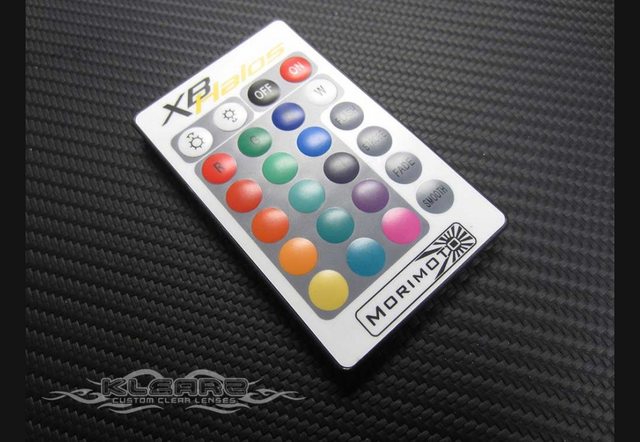
The halos are the 90mm Morimotos found here:
https://www.theretrofitsource.com/mo...=49387%2C49545
You will need to buy the controller, which gives you the ability to change the colors via remote, change modes, turn on/off, etc. The attachment instructions that come with them are exactly what I used; drill holes on either side and run a wire around it, which gets twisted behind. You can't see it unless you're VERY close, and there is no glue to let go under high-heat conditions. I added JB Weld PlasticWeld to lock the twisted wire behind the shrouds. I drilled through the back of the light housing to run the halo wiring, which I sealed up with more PlasticWeld.
The controller is mounted under the hood on the passenger side, at the top of the fender under the weather stripping. The modules are all zip-tied and HD two-sided taped to various places. There's also a great grounding point right there. The halos are run through a relay that has the trigger wire spliced from the hot on the 12v plug in the console. It gets run through the massive "grommet" at the base of the windshield on the passenger side. This was done because the switched sources in the engine bay are all on computer controlled modules (or something like that), so I didn't want to mess with those.
*** Pro tip: Get a 12v source (I use my R/C battery charger power supply) to power the controller so you can test BEFORE sealing the lights back up!!! ***
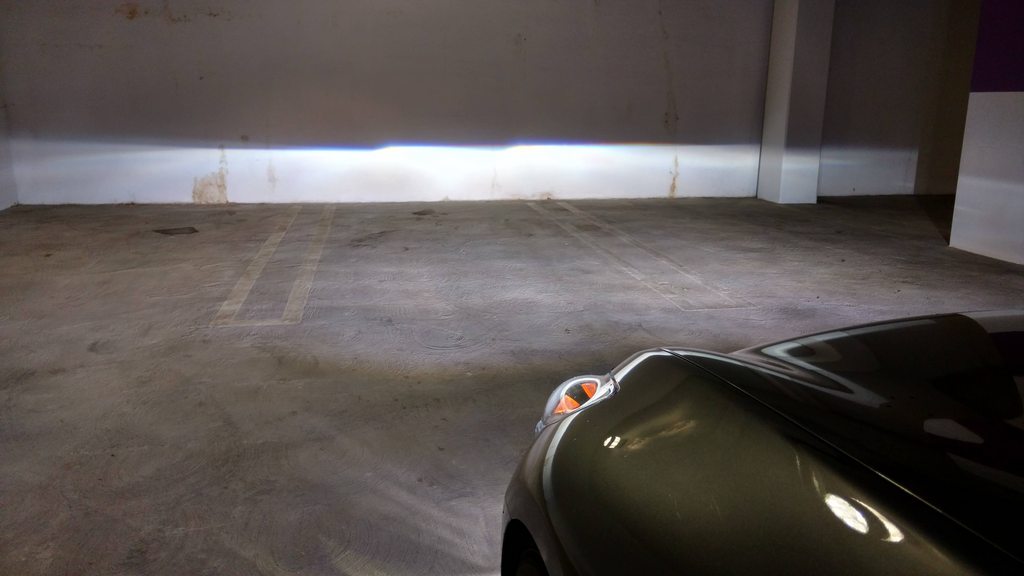
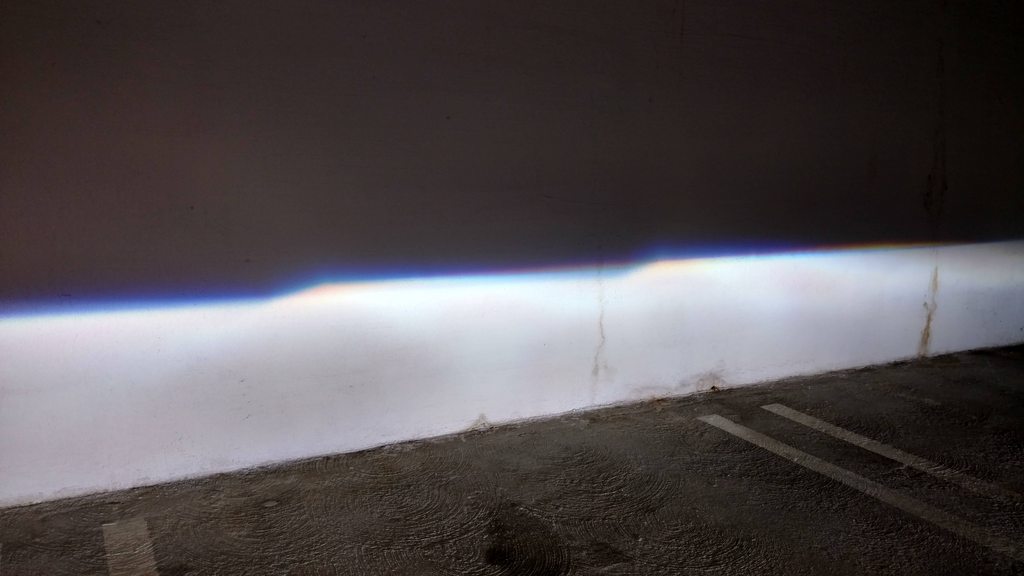
And the pics, because... well, yay pics!

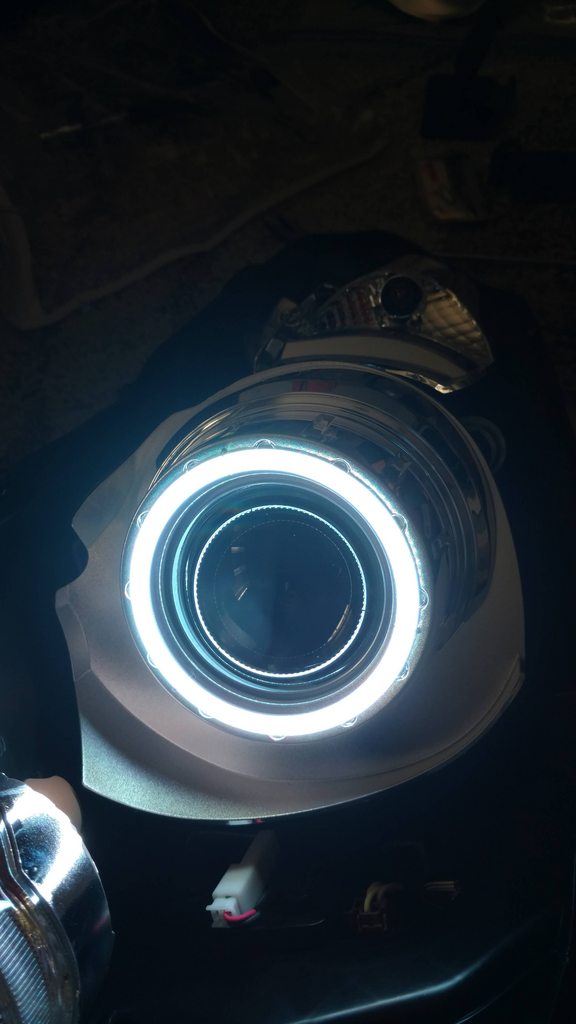

And here's a little demo of what you can do via remote (which looks like this):
 )
)Last edited by lobuzz311; Mar 21, 2016 at 06:03 PM.
