
Betty's Garage Grounding Wires DIY - 15 minute Installation

Betty's Garage Grounding Wires DIY - 15 minute Installation
This is for those who have received the Grounding Wire sets and are ready to install. Got 15 minutes? Then you've got time to install these.
First and foremost, ALWAYS REMEMBER TO DISCONNECT THE NEGATIVE BATTERY CABLE ANYTIME YOU ARE DOING ANYTHING WITH YOUR CAR'S ELECTRICAL SYSTEM. I can't stress that enough. A fried ECU is extremely unlikely, but why take the chance of a $1200 mistake that could have been solved so easily.
Tools you'll need:
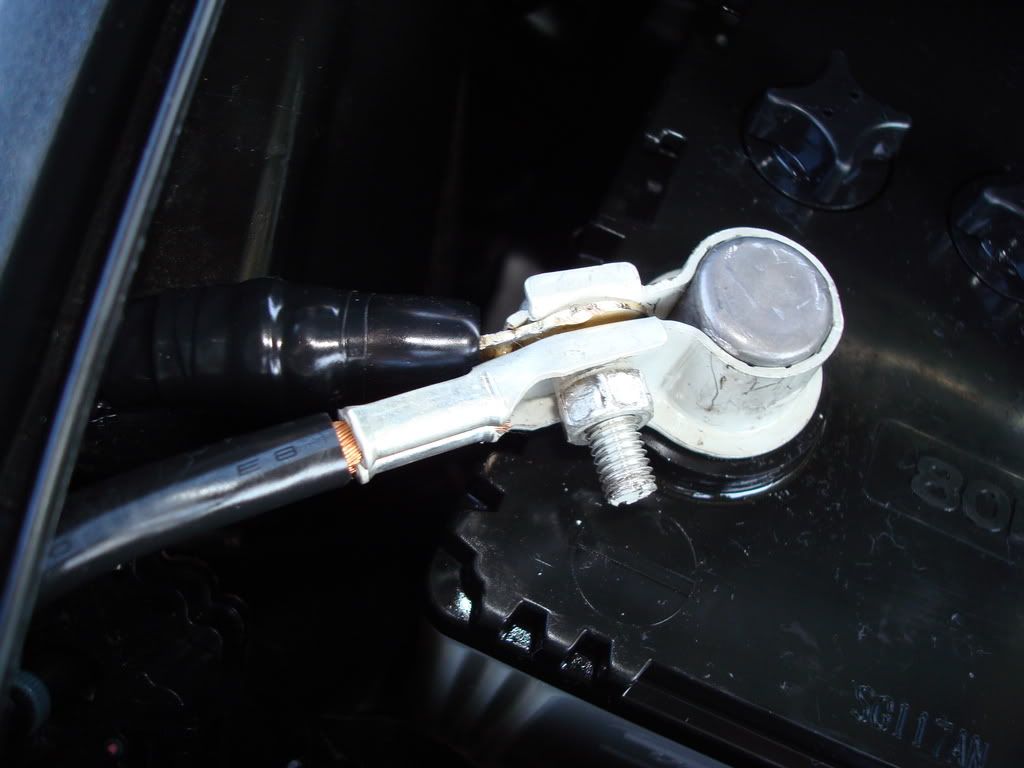
2. Connect either end of the longest wire to the negative battery cable as shown. Don't reconnect it to the battery until the very last step.
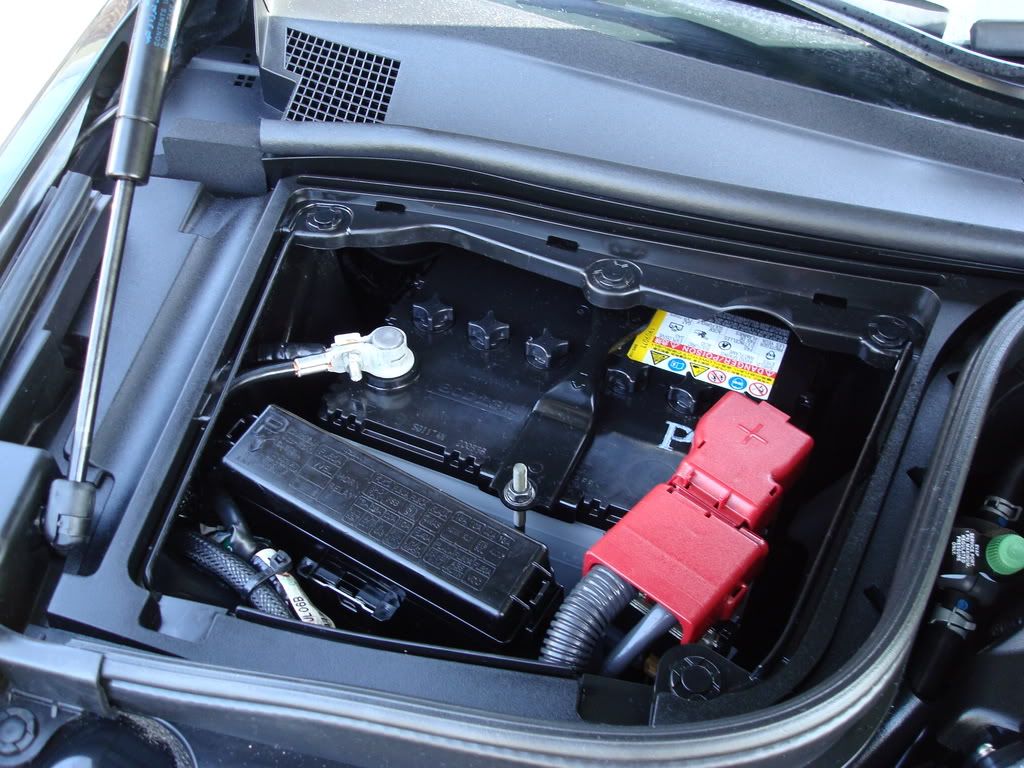
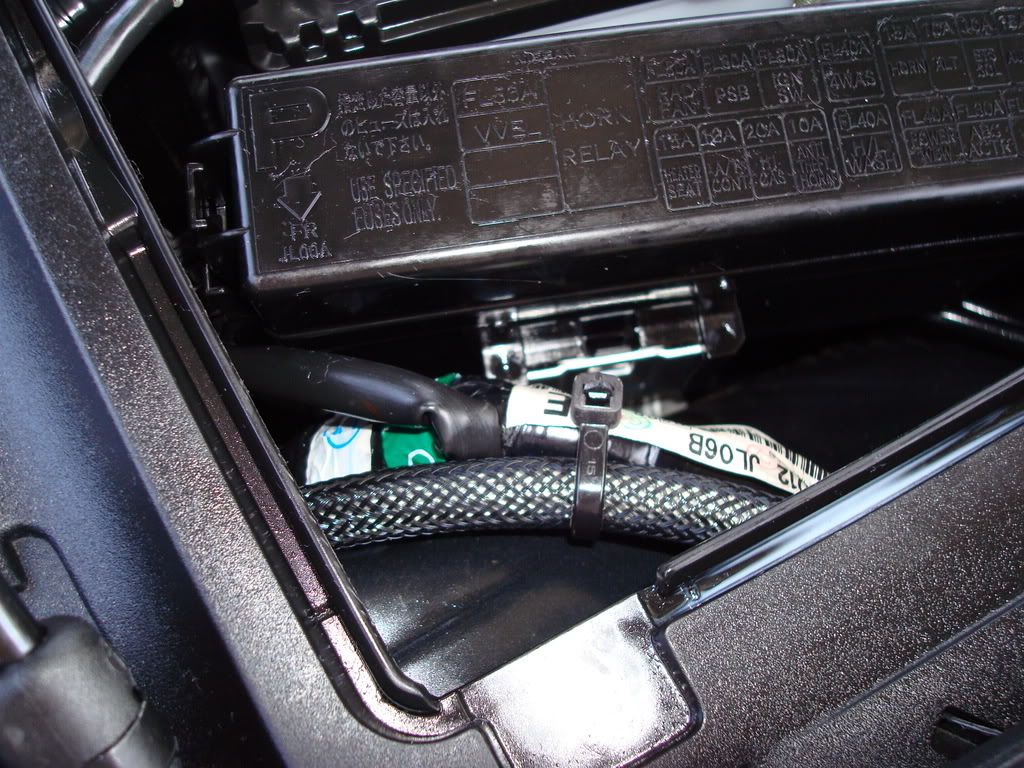
3. Run the wire along the bundled wires that exit the front of the battery box. There is enough room to run it through the same grommet. Use the included cable ties to attach it to the bundle of wires already there to make a clean and stock looking installation.
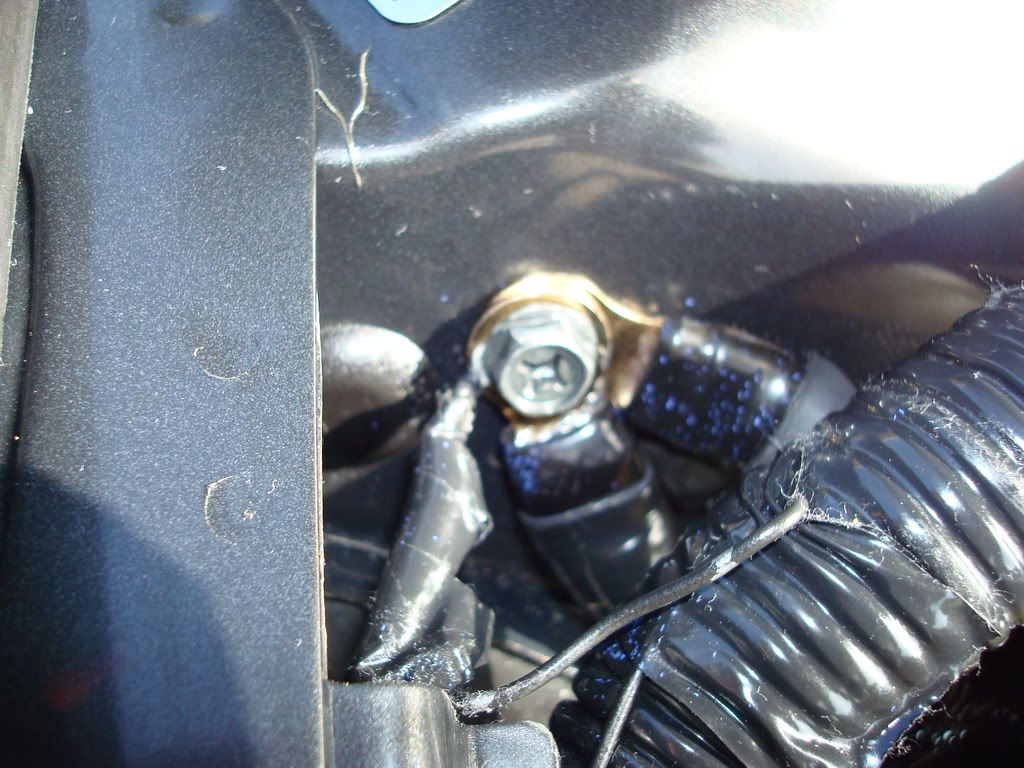
4. Connect the other end of the longest wire to the bolt shown here where there is a tiny ground wire already attached to the front of the strut tower on the passenger side right behind the power steering fluid reservoir. I ran mine underneath the reservoir bracket. Don't screw the bolt back in yet.
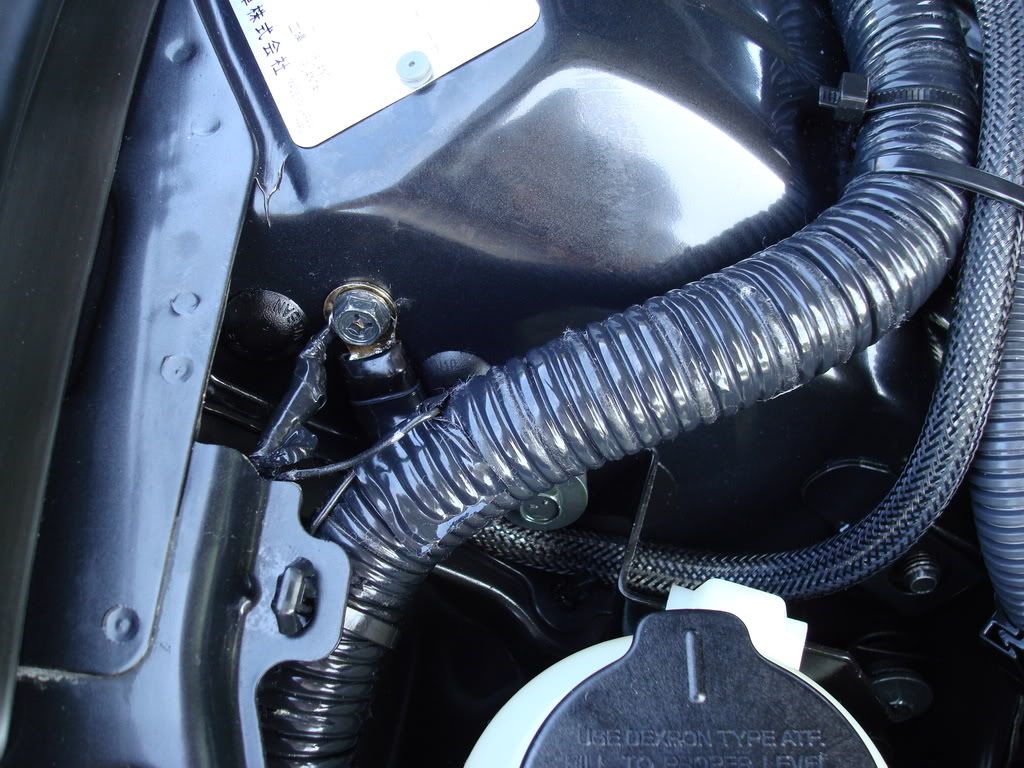
5. Attach either end of the second longest wire to the same bolt where you just terminated the first one. Be sure to place both grounding wire ring terminals underneath the puny wire. Screw the bolt back in tight.
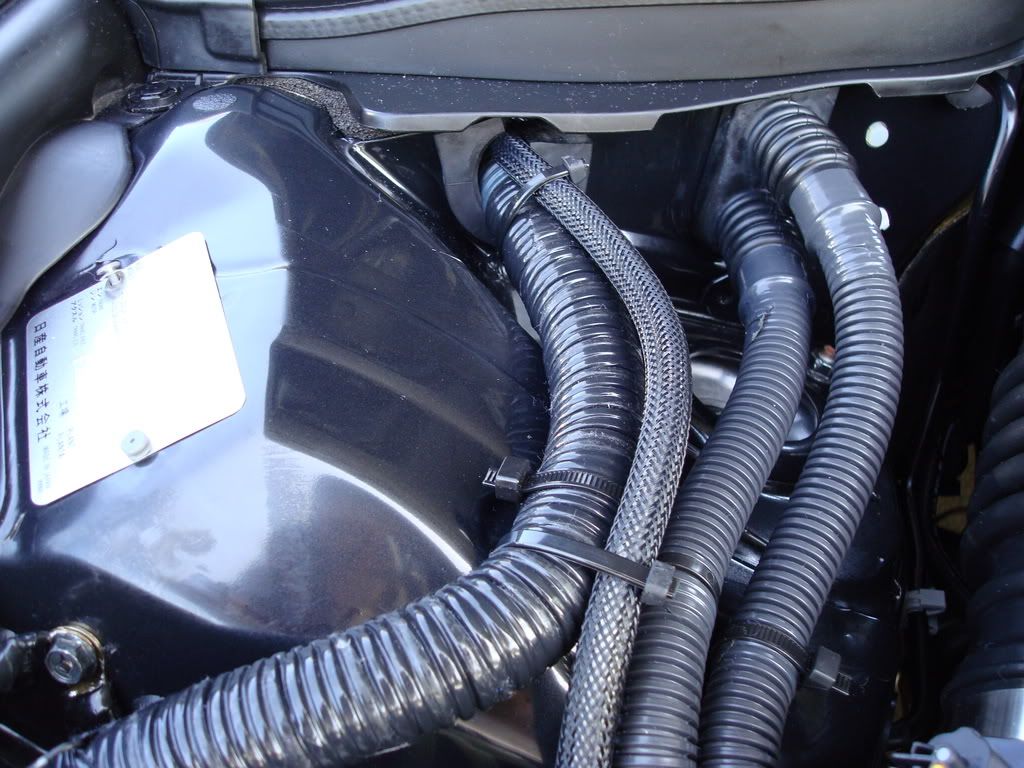
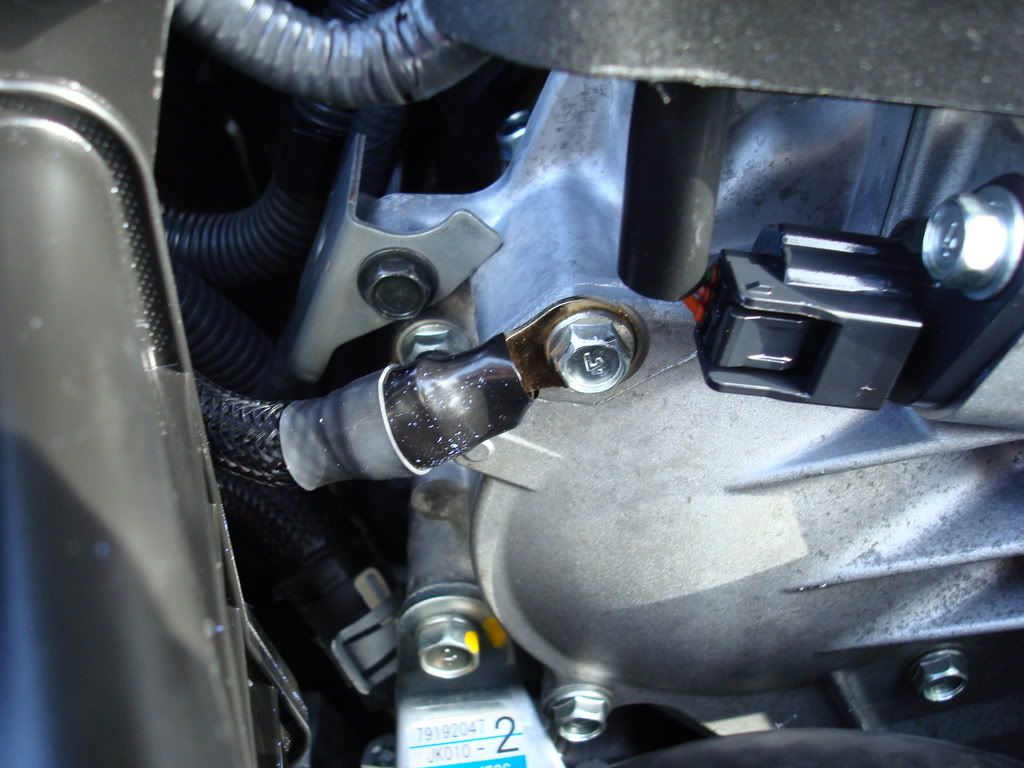
6. Run the second longest wire underneath the passenger side intake tubing and attach to the bolt shown here on the front to the engine block (passenger side). Screw the bolt back in tight.
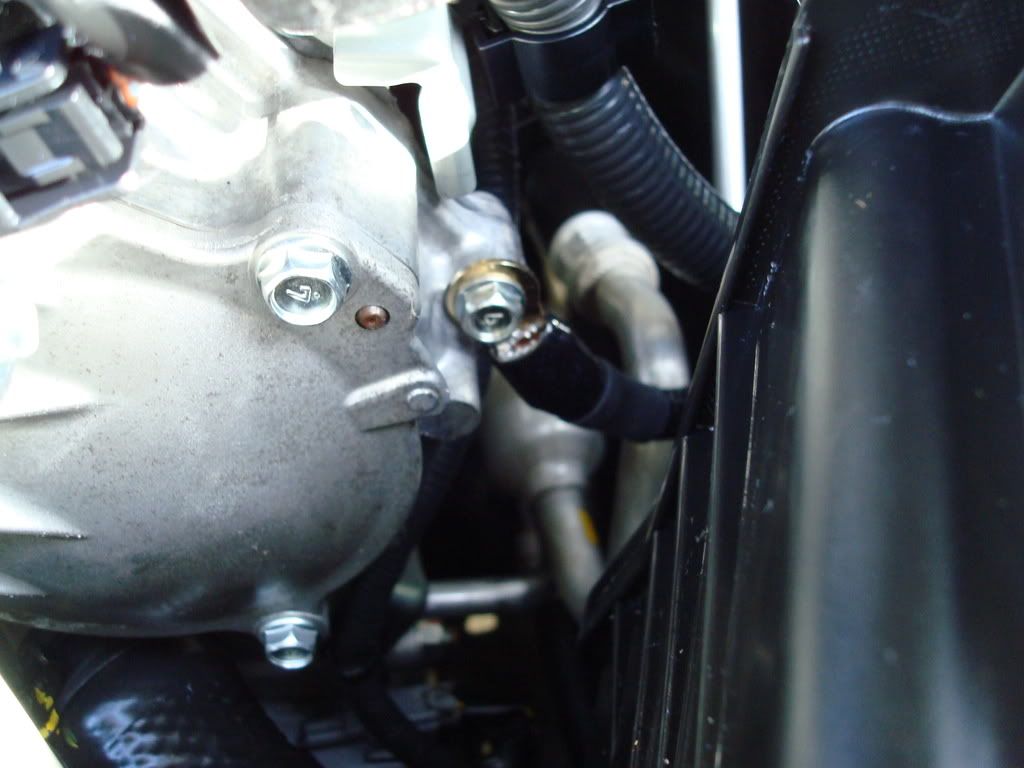
7. Attach either end of the shortest wire to the bolt shown here on the front to the engine block (driver side). You may need a deep socket or short extension here. Screw the bolt back in tight.
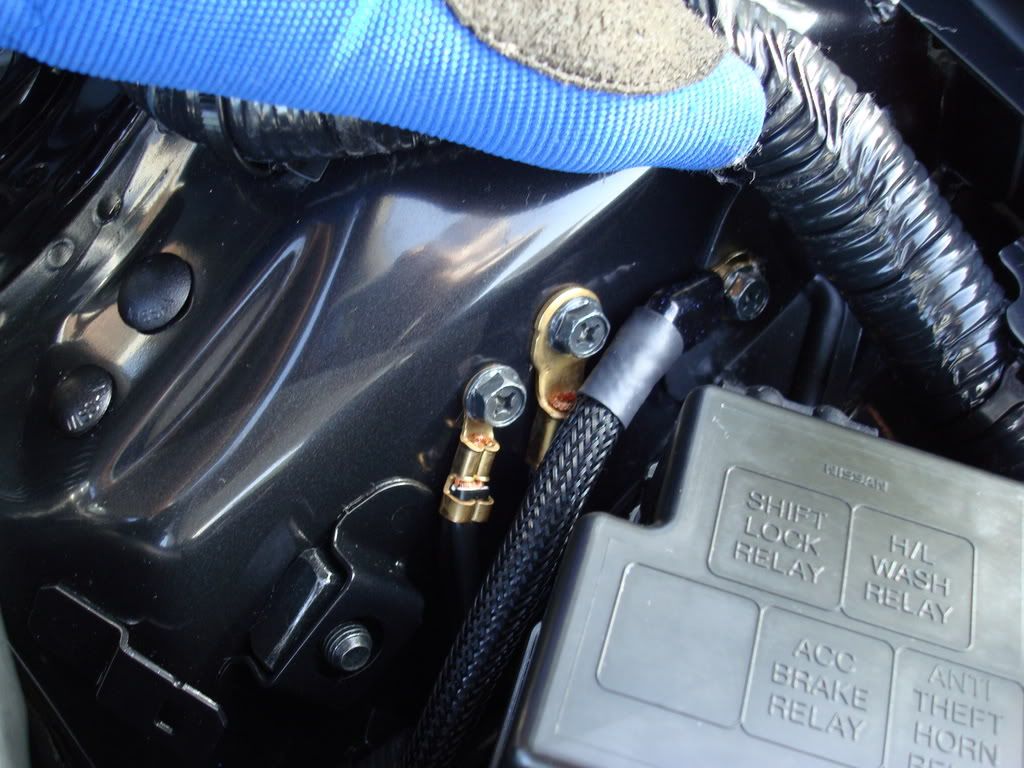
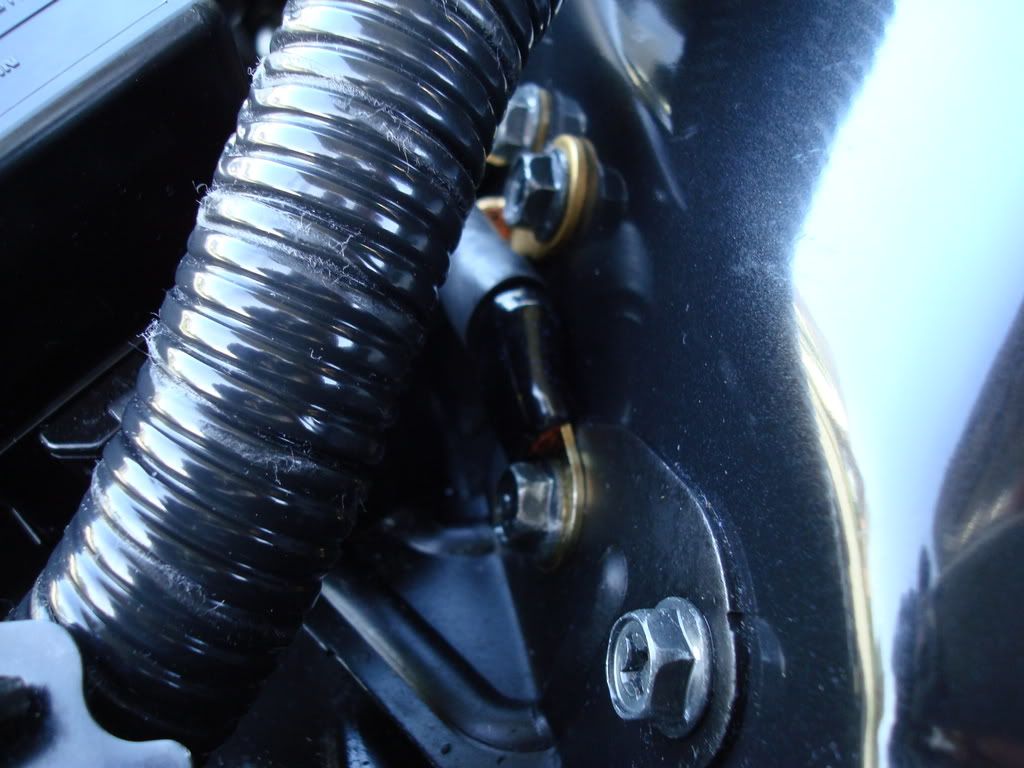
8. Run the shortest wire underneath the passenger side intake tubing and attach the other end of the short wire to the bolt shown here that holds the bracket for the relay box. Screw the bolt back in tight.
9. Reconnect the negative battery cable (along with the longest wire) and tighten.
Voila! You are done.
Gentlemen, start your engines!
First and foremost, ALWAYS REMEMBER TO DISCONNECT THE NEGATIVE BATTERY CABLE ANYTIME YOU ARE DOING ANYTHING WITH YOUR CAR'S ELECTRICAL SYSTEM. I can't stress that enough. A fried ECU is extremely unlikely, but why take the chance of a $1200 mistake that could have been solved so easily.
Tools you'll need:
- deep 10 mm socket (if you don't have a deep 10 mm socket you can use a short extension)
- ratchet
2. Connect either end of the longest wire to the negative battery cable as shown. Don't reconnect it to the battery until the very last step.
3. Run the wire along the bundled wires that exit the front of the battery box. There is enough room to run it through the same grommet. Use the included cable ties to attach it to the bundle of wires already there to make a clean and stock looking installation.
4. Connect the other end of the longest wire to the bolt shown here where there is a tiny ground wire already attached to the front of the strut tower on the passenger side right behind the power steering fluid reservoir. I ran mine underneath the reservoir bracket. Don't screw the bolt back in yet.
5. Attach either end of the second longest wire to the same bolt where you just terminated the first one. Be sure to place both grounding wire ring terminals underneath the puny wire. Screw the bolt back in tight.
6. Run the second longest wire underneath the passenger side intake tubing and attach to the bolt shown here on the front to the engine block (passenger side). Screw the bolt back in tight.
7. Attach either end of the shortest wire to the bolt shown here on the front to the engine block (driver side). You may need a deep socket or short extension here. Screw the bolt back in tight.
8. Run the shortest wire underneath the passenger side intake tubing and attach the other end of the short wire to the bolt shown here that holds the bracket for the relay box. Screw the bolt back in tight.
9. Reconnect the negative battery cable (along with the longest wire) and tighten.
Voila! You are done.
Gentlemen, start your engines!


Registered User
Joined: Nov 2007
Posts: 192
Likes: 0
So... question of the hour - I'm planning to order, but my concern is that if I ever return to the stealership with an electrical related anomaly (i.e., ECU, radio, etc.), could they blame this mod and make my life hell? Regardless of the stealership being right or wrong, could this cause a fight?
Lee
Lee
Premier Member
Joined: Jul 2007
Posts: 3,346
Likes: 3
From: Colorado Springs, CO
Well the problem with electronics on the car (from what I hear) they are usually not covered under the warrenty that long. I might be wrong so someone can answer this but it has been something I have been told.
Trending Topics
So... question of the hour - I'm planning to order, but my concern is that if I ever return to the stealership with an electrical related anomaly (i.e., ECU, radio, etc.), could they blame this mod and make my life hell? Regardless of the stealership being right or wrong, could this cause a fight?
Lee
Lee


i have issue with transmission again(delay, surge,etc) can dealership blame it on grounding kit? if grounding kits have nothing to do with the transmission,
i will just take my car as is... but if not im taking it off before take my car to dealership
i will just take my car as is... but if not im taking it off before take my car to dealership
Answered in your thread, but I'd take it off. Highly unlikely the wires could cause a problem, but take them off temporarily and save yourself the hassle if the dealer would care.

Registered Member
Joined: Jul 2008
Posts: 1,093
Likes: 0
I recently purchased the 4gauge CF grounding kit from you, and yesterday night attempted to install.
Step 3, I'm not sure how to start running it through the same grommet. Should I thread it in from the outside? or do i need to expand the grommet or push the existing wire tubing to slip it in?
Step 8, The wire tubing seems to be pretty tightly connected and very much in the way. How do I move this away w/o damaging anything to make room to unscrew the bolt?
3. Run the wire along the bundled wires that exit the front of the battery box. There is enough room to run it through the same grommet. Use the included cable ties to attach it to the bundle of wires already there to make a clean and stock looking installation.
8. Run the shortest wire underneath the passenger side intake tubing and attach the other end of the short wire to the bolt shown here that holds the bracket for the relay box. Screw the bolt back in
tight.
PS. The grounding wires look great =)
Last edited by Black Betty; Nov 29, 2008 at 07:16 PM.

Uh-oh! I'm sorry, I forgot what you even asked me about. That's no way to do business, my bad. Shoot me a PM and whatever it was, I'll give you a special price for forgetting about you.