When you click on links to various merchants on this site and make a purchase, this can result in this site earning a commission. Affiliate programs and affiliations include, but are not limited to, the eBay Partner Network.
Hello, I couldn�t find any modern write ups for the Z1 heater hose connector, so I made one using the new style of connector. This is on the VQ37VHR on my 2010 X Sedan, but is essentially universal Things you will need:
Coolant
Side Cutters
1-2 Zip Ties
Long Pliers
Shorter Pliers
Rag
Bin for plastic Clips
Lube
2 long screwdrivers (flathead)
1 normal screwdriver (flathead) Optional:
Gloves (hot engine and also 1� in Minnesota)
Towel to protect Paint from leaning on it
flashlights if not well Lit.
The Install: 1: Zip tie the hose with the green cap to the hose next to it. This will make you able to access the connector clamps much much easier.
2: Remove Battery Cover (passenger side), Strut bar (if applicable and in the way), Small S shaped weather stripping on passenger side, long weather stripping along top of engine bay, battery shroud (few clips easily visible), and the shroud right under windshield above the cabin air filter (also a few clips)
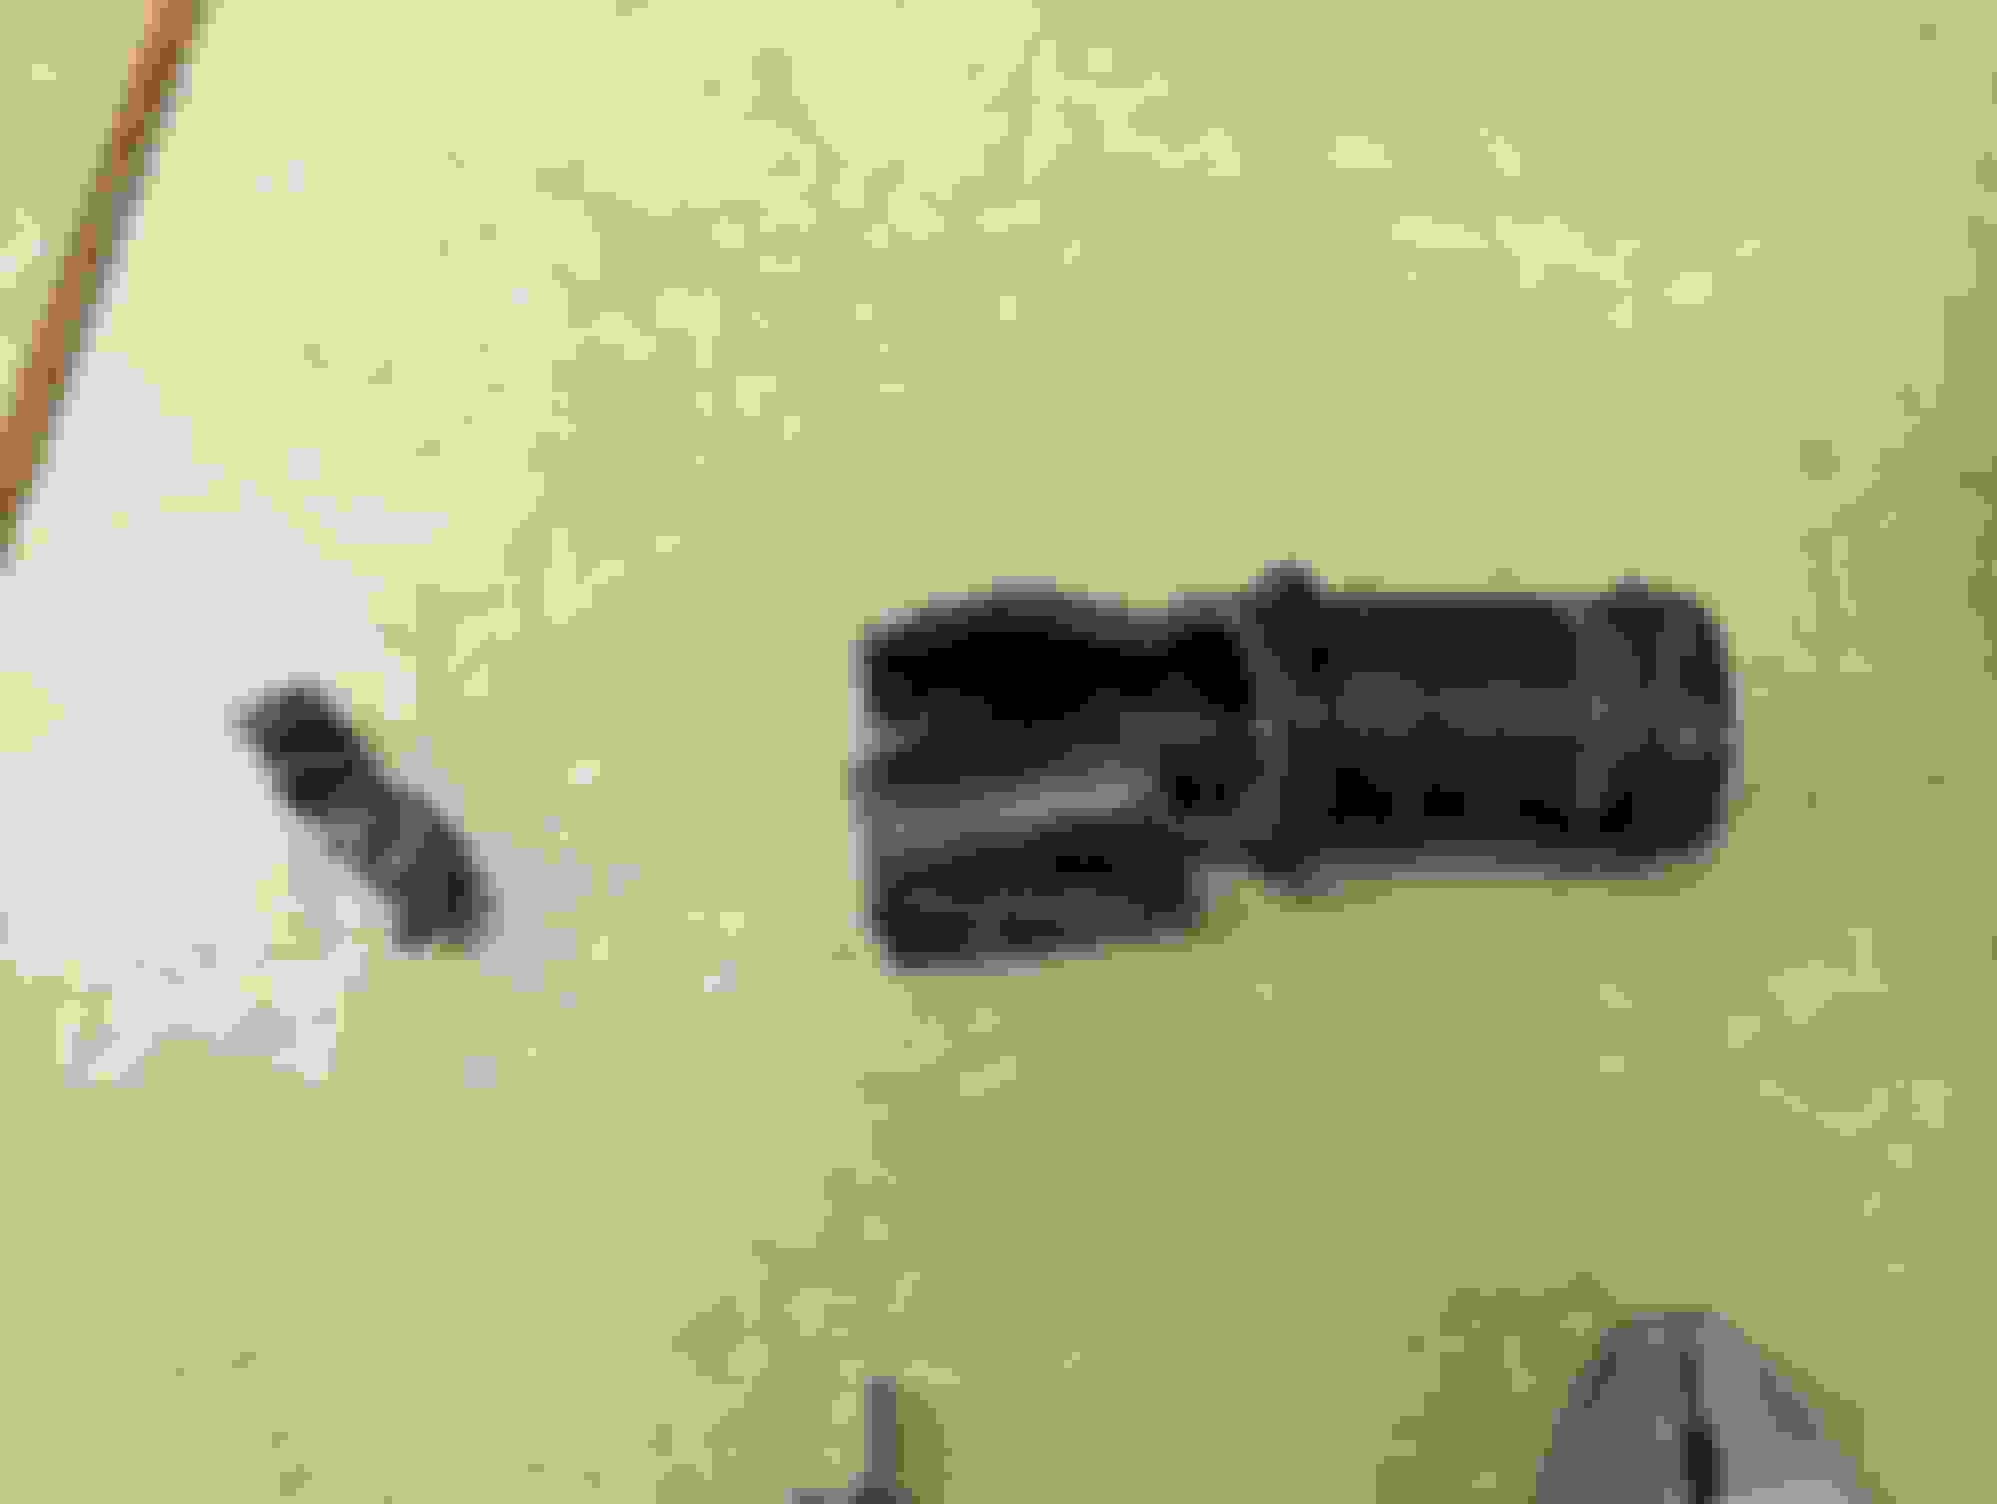
3: Use Long Pliers to bring both spring clips to one side of the split in the Heater hose connector. Once they are both on one side, use 2 screwdrivers against each other to slide the hose closer to the battery off the plastic piece. Once hose is fully off use the end of the screwdriver to stuff a small rag in the hole so coolant doesn�t flow out. It won�t be a ton but it�s better to be cleaner. Once it stops you can use the screwdriver to see the end of the hose better. 4:Remove both spring clips from the opposite hose. You should be left with just the connector in one hose. Slowly pull the connector out with a smaller pliers making sure not to rip the hose out of the firewall, just take it slow. 5: Grab new connector. Picture below is old connector next to new connector. 6: use a rag to apply a small amount of lubricant to each flared end of the connector. As Small amount as possible. Place hose clamp over hose before installing one side of the connector in place. Make sure screw on clamp and bleeder valve are both facing up and easily accessed. 7: Snug the first clamp, then slide the next clamp over the other hose before pulling the hose onto the open side of the connector. Make the second clamp Tight before tightening them both fully with a flathead. Make sure both screws are easily accessed.
8: After both sides are tightened, Remove zip tie from the hose you installed earlier, Replace all trim peices in the opposite order you removed them in (make sure all your clips go back in and also weather stripping is properly snugged). And admire. 9: Once fully reinstalled. Start your car and make sure no coolant is leaking out of the new connector. I drove mine around the block once, checked the connector, then rang it out a little bit on a long road. No coolant leaks here! If any coolant leaks out or your coolant reservoir is low, top it off before you drive.
Bonus: reinstall your battery bracket so the battery isn�t loose
Extra Info: This install took me about 35 minutes ignoring lapses in focus. If your engine is super hot, let it cool down a little before you try and remove stuff. The connector cost me 38$ not including shipping and got here in 3 days. Here is the link to the Connector
(I added the 2$ hose clamps) Good luck!
Here is a photo of my old, cracked connector, this is after 95k miles. I�m very glad I replaced it when I did.
Thanks for the writeup and pics, this is an oft failed portion of the G's coolant system and might finally be the motivation for me to get this thing done (finally)
Yeah well, I am a professional procrastinator. The battery finally gave way so my maintenance list is growing. Although I put about 12 miles on the car since New Years so that's a good thing. Or is it?
Good write up Rpmwoleva. I like your approach as you keep the old connector intact during the process which minimizes the amount of plastic debris that can accidently get in the cooling system. Is the crack shown a result of using the pliers to pull out the old connector? Also, no need for hose pinch or reach pliers?
Last edited by socketz67; Apr 7, 2023 at 06:09 AM.
Just did mine. As with everyone else, it seems my connector wasn't long for this world on my 2012 with 77k. It was in one piece, but started breaking apart as soon as I put any pressure on it with my pliers.
A couple notes, in case they help someone else. I am far from an expert mechanic, so do this at your own risk!
1 - I couldn't get the first side off using screwdrivers as the OP did. Fortunately I had just enough room to get my hands in there and pull it apart that way. I ended up with a few marks and bruises on my hands and wrists, but at least it's done.
2 - OP doesn't mention bleeding the cooling system after this. Again, I am far from an expert here, but I think a bleed would be required after doing this since air definitely gets into the system. My process was to open this new bleed screw while adding new coolant and stop when coolant started running out of the bleed screw. Then I started the car, opened the bleed screw, and left it open until coolant started coming out. Then, I followed this:
I also revved the car up to 2k rpm a few times until I didn't get any more bubbles coming out. it was about 25 minutes of bleed time until the lower rad hose was hot and I wasn't getting any more bubbles. If I did something stupid, let me know!
I went for a long drive after this and the coolant gauge stayed right where it should and after the initial coolant that I spilled burned off, I didn't smell any coolant in the car, so I think/hope I got it.
Originally Posted by socketz67
Also, no need for hose pinch or reach pliers?
I picked up 90 degree long reach pliers and line clamps from Harbor Freight in prep for doing this job. The 90 degree long reach pliers were definitely nice, but I suspect I could have managed without. I did not end up using the line clamps as it is really tight in there.
Yikes Let it bleed
Last edited by PDG; Apr 8, 2023 at 07:01 PM.
Reason: Formatting and spelling
My hands just recently healed from when I changed mine. The oem spring clamps had a mind of their own and preferred to be left alone for another 10 years. Backing them away from the hose enough to work the coupler loose was the toughest part for me as there was so little space.
Installing the new coupler with standard hose clamps was a breeze.
I went the extra mile and changed the hoses while I was at it. Everything I tried failed. I thought an 11" curved head long pair of pliers would work but they were TOO SHORT.
The only thing that worked and made the entire job a 30-minute job (after spending 1.5 hours failing) was to buy a 16" Pair of Pliers from Harbor Freight. They came in a pair and the tip was bent 90 degrees to make getting off the two hose clamps straight forward. Problem solved. $12.50 with a 20% coupon. Pliers on the left. comes in a pack of 2. 16"
Good write up Rpmwoleva. I like your approach as you keep the old connector intact during the process which minimizes the amount of plastic debris that can accidently get in the cooling system. Is the crack shown a result of using the pliers to pull out the old connector? Also, no need for hose pinch or reach pliers?
The crack is not a result of prying it out, it�s a cheap plastic peice that easily deteriorates. Also, no need for fancy tools, I got it done just fine with the basic stuff I have inherited.
I went the extra mile and changed the hoses while I was at it. Everything I tried failed. I thought an 11" curved head long pair of pliers would work but they were TOO SHORT.
The only thing that worked and made the entire job a 30-minute job (after spending 1.5 hours failing) was to buy a 16" Pair of Pliers from Harbor Freight. They came in a pair and the tip was bent 90 degrees to make getting off the two hose clamps straight forward. Problem solved. $12.50 with a 20% coupon. Pliers on the left. comes in a pack of 2. 16"
I understand your position, I considered changing the tubes fully as well, but as mine were in good condition still, I chose to not do it, as it�s so cramped back there trying to do basic things, I can�t imagine the hell you went through.
I've put this off too long, and just ordered the aluminum connector. So... remove all the trim from around the battery in order to access this connector. Got it.
Weird how in my head this connector was underneath the car, and not from up top. But I never went any deeper into this project beyond knowing it should be done before it goes bad.
Interesting. May have been easier to get to if it were accessible from under the car. Looks like an easy job on the surface, that is till you try to get those 10-11 year old spring clamps open and moved away from the center of the plastic connector. Getting that connector unfused from the hoses on both sides without dropping pieces inside the coolant track is also tricky as it wants to disintegrate if any force is applied. Clever idea to disassemble the battery assembly to make more room for your hands.