DIY: HDMI Port
#1
Average Joe

Thread Starter
HDMI Port
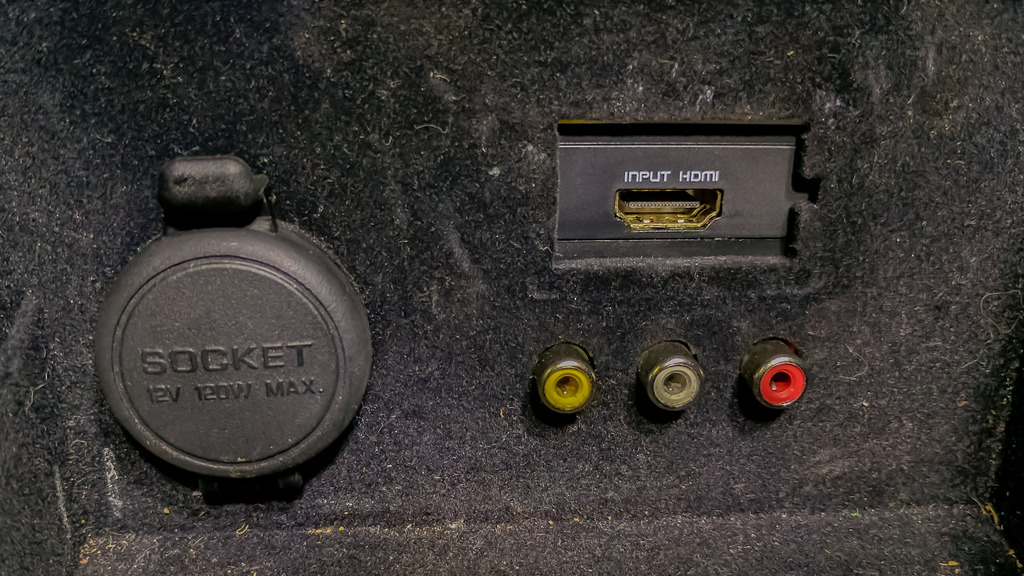
Due to the overwhelming response on the G37 Coupes and Sedans Facebook group, I have decided to put together a quick DIY on how I made this mod happen. I would like to apologize up front for the lack of pictures. I would have taken more along the way if I had planned on making a formal guide.
This is a mod for the earlier G37's with RCA jacks in the center console (2008-2010 I believe). I don't have any use for the iPod connector, so I decided to put this in its place.
This goes hand in hand with the NavTool DIY I posted up here: https://www.myg37.com/forums/d-i-y-i...9-navtool.html
Items needed:
HDMI to RCA converter box (here's where I got mine: https://smile.amazon.com/gp/product/...?ie=UTF8&psc=1 )
Phillips screwdriver
Wire strippers
RCA cables
Multimeter (to check continuity)
Soldering iron
Epoxy or double sided foam tape
First, gain access to the RCA module. it will require removing the cup holders and differs between the automatic and manual versions.
Disconnect the cable from the RCA module and remove the two Phillips screws that secure the box to the center console.
Now that you have the module in hand, you'll find 4 tabs that hold the top and bottom pieces of the module together. Open up the module and you'll be left with the PCB. (shown here with the solder pads called out)
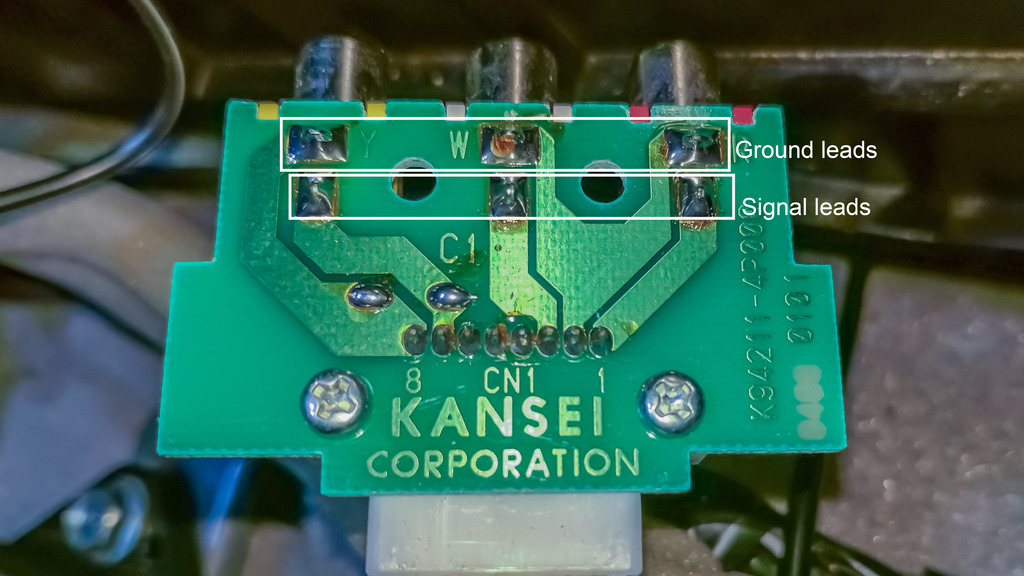
Next, cut the RED and WHITE RCA cables so that you have about 6" to work with. Strip back the insulation to expose the ground and signal wires. Solder the signal wires to the signal leads on the PCB, and the ground wires to the ground leads. (Leave the yellow cable alone, as it will connect directly to the NavTool box. If you are not using a NavTool, then you can attach the yellow wire the same way as the other two.) Check continuity with a multimeter to ensure connections are good. The ground is the shroud around the center pin, and the signal is the center pin itself.
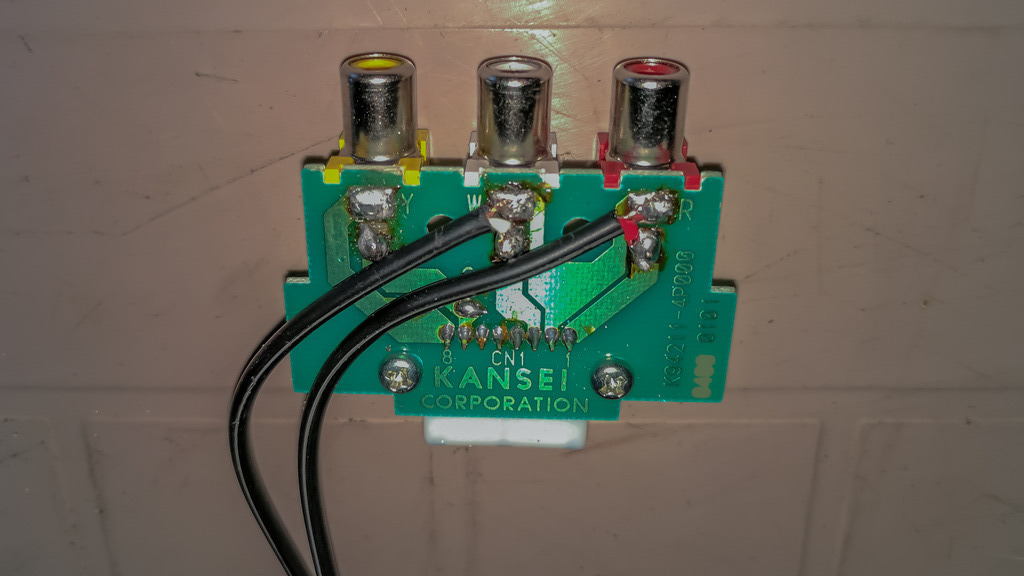
Place the PCB back into the top part of the module. Remove any plastic that will interfere with closing it back up. Also, at this point, I applied some foam tape and shrink tube to help secure everything.
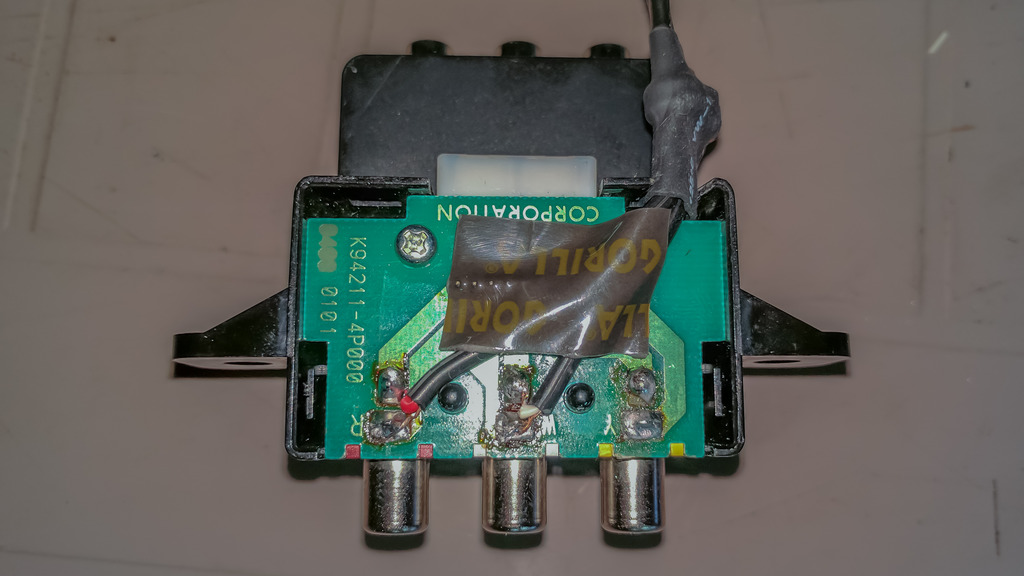
Finish reassembling the module, taking care not to pinch the RCA wires you just added. You can now attach the HDMI converter box to the top of the RCA module. You can use double sided foam tape or epoxy. I ended up using both, foam tape to hold it down in the middle and epoxy around the edges.
After that is complete and the epoxy (if used) is dry, connect the RCA cables into the HDMI box. You'll end up with a stacked module that looks like this:
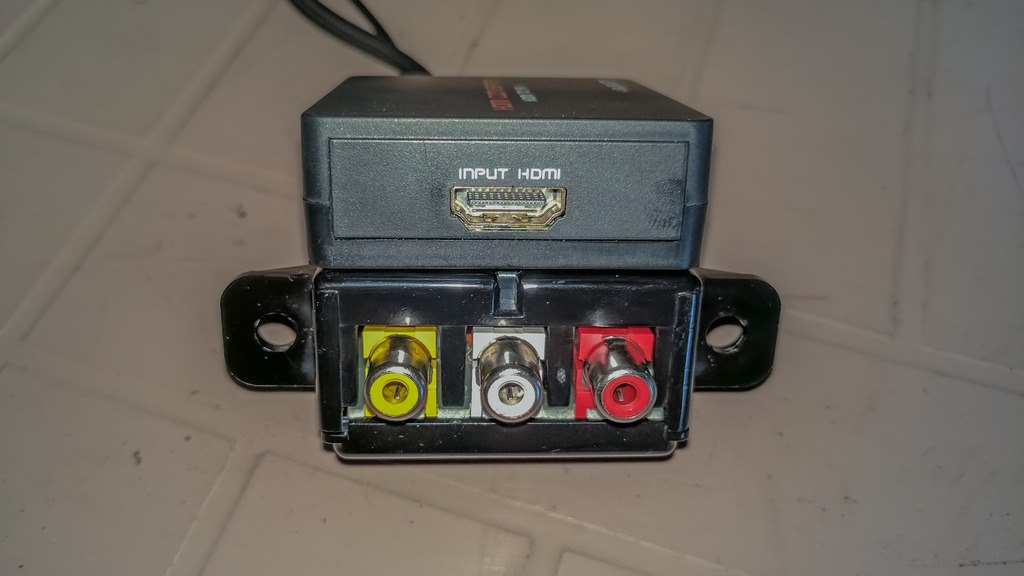
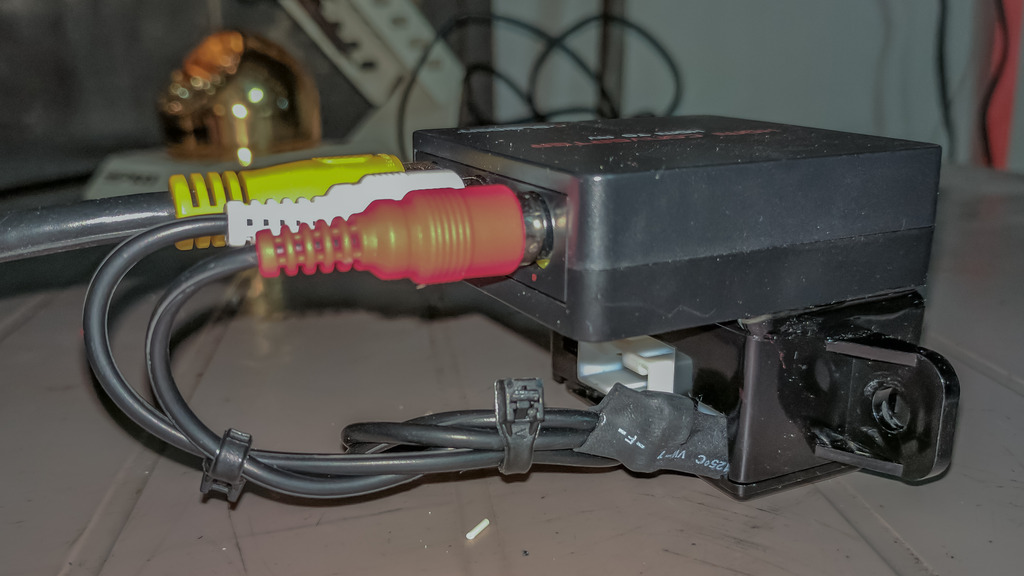
If you haven't done so already, remove the iPod connector and cable to make room for the HDMI port. Replace the screws and reconnect the cable to the RCA module. At this time, if you are using a NavTool or similar unit, connect the yellow video cable to the proper input (Video 1 for NavTool).
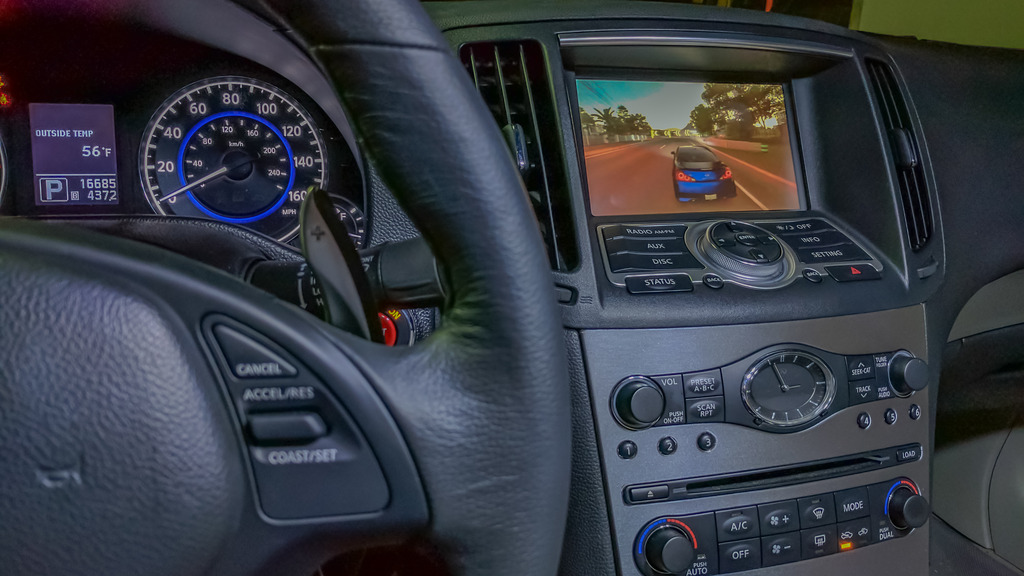
Test to make sure that everything works as intended. Remember, even though NavTool allows video to display regardless of the mode that you are in, to have audio you'll need to be on the 'AUX' input.
Put everything back together and enjoy your work!
#2
Attachment 130934
Due to the overwhelming response on the G37 Coupes and Sedans Facebook group, I have decided to put together a quick DIY on how I made this mod happen. I would like to apologize up front for the lack of pictures. I would have taken more along the way if I had planned on making a formal guide.
This is a mod for the earlier G37's with RCA jacks in the center console (2008-2010 I believe). I don't have any use for the iPod connector, so I decided to put this in its place.
This goes hand in hand with the NavTool DIY I posted up here: https://www.myg37.com/forums/d-i-y-i...9-navtool.html
Items needed:
HDMI to RCA converter box (here's where I got mine: https://smile.amazon.com/gp/product/...?ie=UTF8&psc=1 )
Phillips screwdriver
Wire strippers
RCA cables
Multimeter (to check continuity)
Soldering iron
Epoxy or double sided foam tape
First, gain access to the RCA module. it will require removing the cup holders and differs between the automatic and manual versions.
Disconnect the cable from the RCA module and remove the two Phillips screws that secure the box to the center console.
Now that you have the module in hand, you'll find 4 tabs that hold the top and bottom pieces of the module together. Open up the module and you'll be left with the PCB. (shown here with the solder pads called out)
Attachment 130935
Next, cut the RED and WHITE RCA cables so that you have about 6" to work with. Strip back the insulation to expose the ground and signal wires. Solder the signal wires to the signal leads on the PCB, and the ground wires to the ground leads. (Leave the yellow cable alone, as it will connect directly to the NavTool box. If you are not using a NavTool, then you can attach the yellow wire the same way as the other two.) Check continuity with a multimeter to ensure connections are good. The ground is the shroud around the center pin, and the signal is the center pin itself.
Attachment 130936
Place the PCB back into the top part of the module. Remove any plastic that will interfere with closing it back up. Also, at this point, I applied some foam tape and shrink tube to help secure everything.
Attachment 130937
Finish reassembling the module, taking care not to pinch the RCA wires you just added. You can now attach the HDMI converter box to the top of the RCA module. You can use double sided foam tape or epoxy. I ended up using both, foam tape to hold it down in the middle and epoxy around the edges.
After that is complete and the epoxy (if used) is dry, connect the RCA cables into the HDMI box. You'll end up with a stacked module that looks like this:
Attachment 130938
Attachment 130939
If you haven't done so already, remove the iPod connector and cable to make room for the HDMI port. Replace the screws and reconnect the cable to the RCA module. At this time, if you are using a NavTool or similar unit, connect the yellow video cable to the proper input (Video 1 for NavTool).
Test to make sure that everything works as intended. Remember, even though NavTool allows video to display regardless of the mode that you are in, to have audio you'll need to be on the 'AUX' input.
Put everything back together and enjoy your work!
Attachment 130940

