
DIY: Hockey puck pads for jack & stands


Thread Starter
Registered Member
iTrader: (6)
Joined: Mar 2009
Posts: 546
Likes: 97
From: San Jose, CA
Hockey puck pads for jack & stands
So this is a bit of a silly DIY, but I thought I'd post it up, in case someone hasn't heard of it.
I was working on my exhaust and putting my jack stands under the pinch welds caused them to bend. The G has pretty thin metal down there, so this is not terribly surprising.
Now my jack stands aren't the best, because they don't have the little groove for pinch welds. They are pretty flat and the raised edges don't make contact with anything, so the entire weight of the car is on the pinch weld.
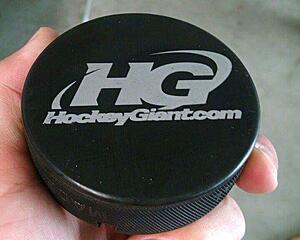
So the easy (and very cheap) solution is to make some pads from hockey pucks. I have a Hockey Giant store in town, and they carry new, never used pucks for $1.29:
Regulation Ice Hockey Puck
You can get them other places, obviously, but this was the cheapest I found.
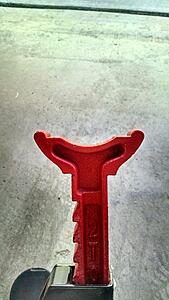
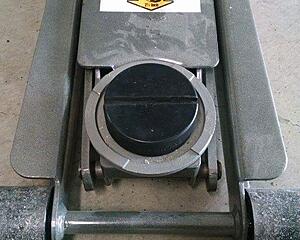
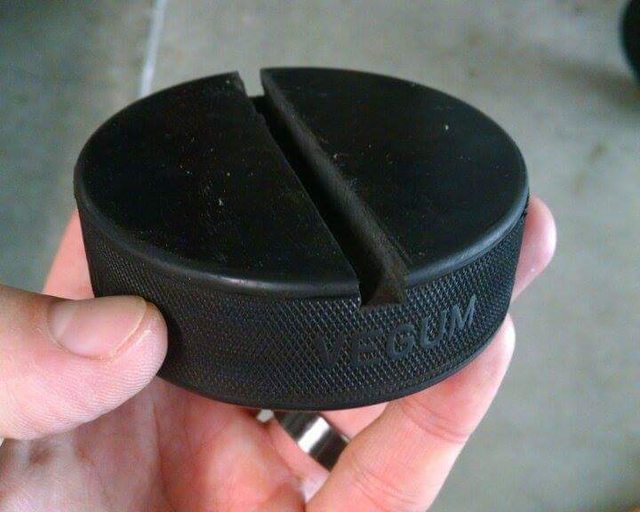
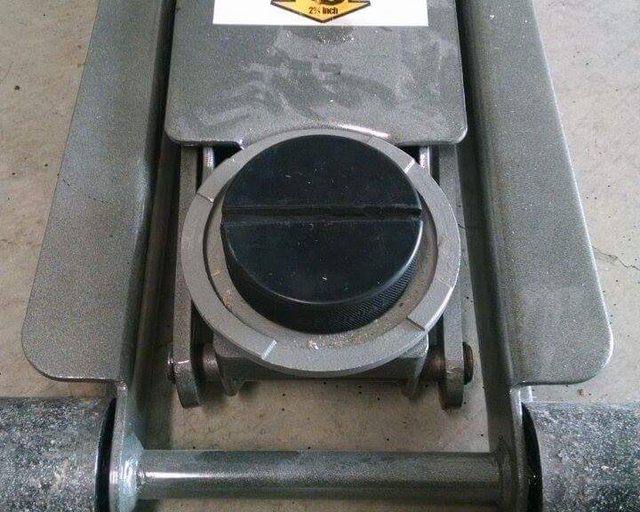
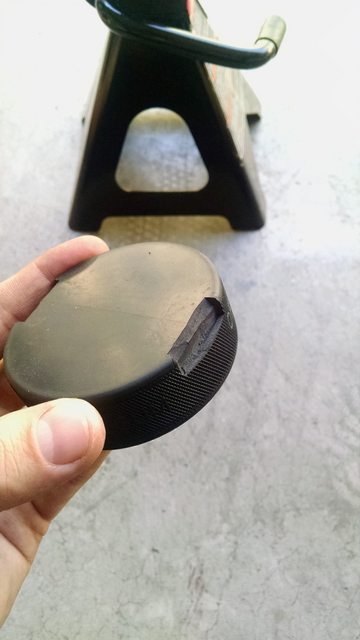
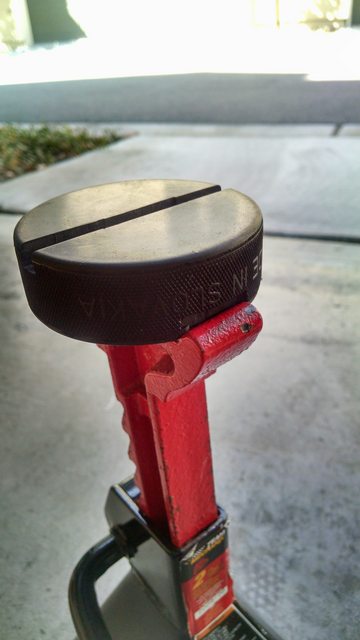
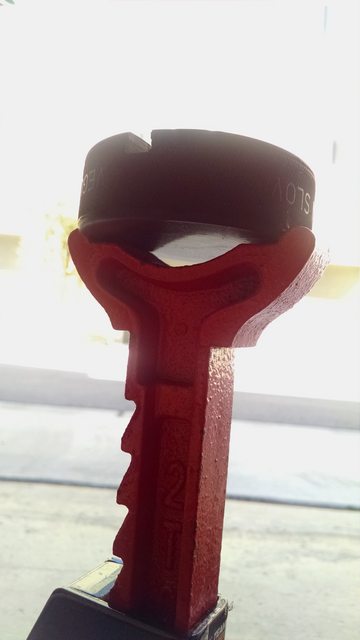
For the floor jack, you just need to cut a groove down the middle of the puck. It doesn't have to be very wide and you want to make sure it's not deeper than the pinch weld is tall. You want the car to sit on the weld, not the flat metal above it, as the pinch weld is the structural piece. (Mine ended up being about 1/4" deep and 1/4" wide)
Mark 2 parallel lines with a knife / razor / pencil / whatever and straight edge where your channel will go.
With the widest chisel you have and a hammer, cut the sides of your channel. Make a visual note of how far you have to chisel in to get the channel as deep as you want it. For me, it was just about 3/4 of the way up the tapered part of the chisel. Also, make sure the flat side is facing out, and the taper is towards the middle of your channel to keep the walls nice and flat.
Once both sides are cut down, use a very narrow chisel to come in from the side and cut the bottom out. Once it gets hard to push in, cut in from the face of the puck, perpendicular to your channel to remove the piece of rubber, and continue on.
It doesn't have to be perfect, but you can clean up your channel where needed once it's all cut out.

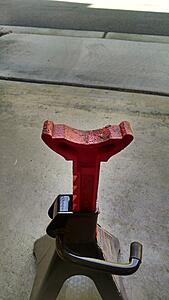
For the jack stand pad, I cut out little end slots that sit over the raised edges on the stand. They slots hit at about 1/2 way up the rounded part of the side edge on the stand (on purpose). To make it sit better, I cut down the corner at 45 degrees. Now it hits right on the edges, conforming to the rounded edge, and is very stable.
Make sure to keep these slots perpendicular to your channel, as you want the pinch weld to be in the same orientation as it would be without the pad.
Sorry about not having any in-progress pics, but hopefully it's clear enough...


I was working on my exhaust and putting my jack stands under the pinch welds caused them to bend. The G has pretty thin metal down there, so this is not terribly surprising.
Now my jack stands aren't the best, because they don't have the little groove for pinch welds. They are pretty flat and the raised edges don't make contact with anything, so the entire weight of the car is on the pinch weld.

So the easy (and very cheap) solution is to make some pads from hockey pucks. I have a Hockey Giant store in town, and they carry new, never used pucks for $1.29:
Regulation Ice Hockey Puck
You can get them other places, obviously, but this was the cheapest I found.
For the floor jack, you just need to cut a groove down the middle of the puck. It doesn't have to be very wide and you want to make sure it's not deeper than the pinch weld is tall. You want the car to sit on the weld, not the flat metal above it, as the pinch weld is the structural piece. (Mine ended up being about 1/4" deep and 1/4" wide)
Mark 2 parallel lines with a knife / razor / pencil / whatever and straight edge where your channel will go.
With the widest chisel you have and a hammer, cut the sides of your channel. Make a visual note of how far you have to chisel in to get the channel as deep as you want it. For me, it was just about 3/4 of the way up the tapered part of the chisel. Also, make sure the flat side is facing out, and the taper is towards the middle of your channel to keep the walls nice and flat.
Once both sides are cut down, use a very narrow chisel to come in from the side and cut the bottom out. Once it gets hard to push in, cut in from the face of the puck, perpendicular to your channel to remove the piece of rubber, and continue on.
It doesn't have to be perfect, but you can clean up your channel where needed once it's all cut out.
For the jack stand pad, I cut out little end slots that sit over the raised edges on the stand. They slots hit at about 1/2 way up the rounded part of the side edge on the stand (on purpose). To make it sit better, I cut down the corner at 45 degrees. Now it hits right on the edges, conforming to the rounded edge, and is very stable.
Make sure to keep these slots perpendicular to your channel, as you want the pinch weld to be in the same orientation as it would be without the pad.
Sorry about not having any in-progress pics, but hopefully it's clear enough...
Last edited by lobuzz311; Aug 21, 2015 at 08:09 PM.

Registered Member
iTrader: (1)
Joined: Nov 2011
Posts: 1,397
Likes: 245
From: Happiest Place on Earth
Thanks, nice & simple 
This morning I changed the transmission & rear diff oil and I dont really like to use the jack stand on the pinch welds. I'll use this tip next time.
This morning I changed the transmission & rear diff oil and I dont really like to use the jack stand on the pinch welds. I'll use this tip next time.
Nice write up. Was wondering if you put the puck on it's side for the jackstand and cut about the top 2/3rd off so it's just above the outside edges, then cut a groove in that for the pinch weld?? Looks like it's perfect for the floor jack.
Thread Starter
Registered Member
iTrader: (6)
Joined: Mar 2009
Posts: 546
Likes: 97
From: San Jose, CA
I went out and measured the thickness of the puck vs the width of the jack stand, and they are more or less identical. The way I have the puck, the width of the notch is just about exactly the width of the jack stand. This keeps the puck centered on the jack stand in both directions. Doing it on the side would keep it centered very nicely one way, but then you would be relying on the weight of the car pushing down on it to keep it centered the other way. I'm not sure I'd feel comfortable with that. If they made pucks that were 1.5-2x as thick, I think this would work brilliantly...

Registered Member
iTrader: (8)
Joined: Dec 2010
Posts: 1,871
Likes: 223
From: Katy (close to Houston)
I use this method for my floor jack but find it a bit much for my jackstands. Quick tip, you can use rags as reinforcement for you jack stands without hurting your pinch welds.
Hmmm, interesting idea. BRB...
I went out and measured the thickness of the puck vs the width of the jack stand, and they are more or less identical. The way I have the puck, the width of the notch is just about exactly the width of the jack stand. This keeps the puck centered on the jack stand in both directions. Doing it on the side would keep it centered very nicely one way, but then you would be relying on the weight of the car pushing down on it to keep it centered the other way. I'm not sure I'd feel comfortable with that. If they made pucks that were 1.5-2x as thick, I think this would work brilliantly...
I went out and measured the thickness of the puck vs the width of the jack stand, and they are more or less identical. The way I have the puck, the width of the notch is just about exactly the width of the jack stand. This keeps the puck centered on the jack stand in both directions. Doing it on the side would keep it centered very nicely one way, but then you would be relying on the weight of the car pushing down on it to keep it centered the other way. I'm not sure I'd feel comfortable with that. If they made pucks that were 1.5-2x as thick, I think this would work brilliantly...

Registered Member
Joined: Dec 2007
Posts: 246
Likes: 61
Not a bad way to save $10 if you can locate pucks that cheap & don't mind doing the labor. Nice post! I never thought about using them on jackstands (but mine never mar the frame rails, I don't use them on the pinch weld spots...only the jack).
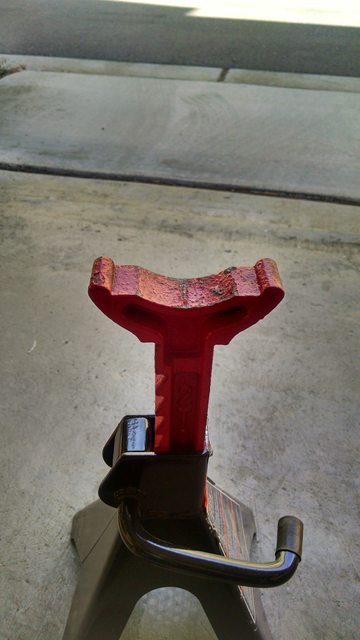
Other option for lazier among us...and who want pure urethane so no risk of the puck cracking.
1 ea Universal Red Floor Jack Disk Pad Adapter for Pinch Weld Side Jackpad | eBay
Other option for lazier among us...and who want pure urethane so no risk of the puck cracking.
1 ea Universal Red Floor Jack Disk Pad Adapter for Pinch Weld Side Jackpad | eBay
Trending Topics
Thread Starter
Registered Member
iTrader: (6)
Joined: Mar 2009
Posts: 546
Likes: 97
From: San Jose, CA
Not a bad way to save $10 if you can locate pucks that cheap & don't mind doing the labor. Nice post!
Other option for lazier among us...and who want pure urethane so no risk of the puck cracking.
1 ea Universal Red Floor Jack Disk Pad Adapter for Pinch Weld Side Jackpad | eBay
Other option for lazier among us...and who want pure urethane so no risk of the puck cracking.
1 ea Universal Red Floor Jack Disk Pad Adapter for Pinch Weld Side Jackpad | eBay
The item you linked is the clearly the better product, so that's a great option if you don't want to make one!

Registered Member
Joined: May 2015
Posts: 187
Likes: 23
I just replaced my passenger front wheel bearing and hub assembly. I put the jackstand's under the frame rail and dropped the car on it. No problems! Why are you guys using the pinch weld and not the frame? Am i missing something?

Yes, those are the ONLY areas in the unibody rails that are reinforced to handle the vehicle weight, loading up other areas along the rail may cause serious damage.

Registered Member
Joined: Jun 2015
Posts: 34
Likes: 3
From: The Creek (Walnut that is)
Jack stand pads
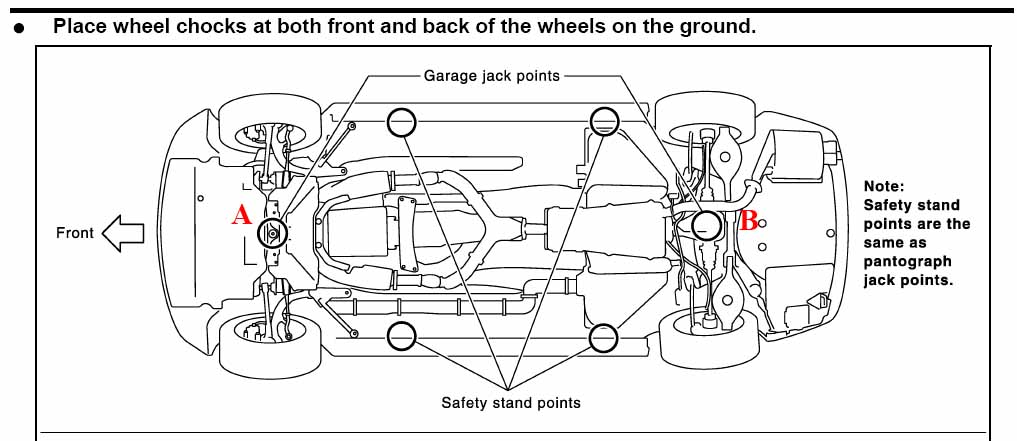
So when people sat they are bending the pinch weld (seam) are you perpendicular to seam or parallel to it? I always place stands just inside the seam on the 4 reinforced rectangular sections parallel to seams. Also using these helps:
2 Piece Rubber Pads for Jack Stand
2 Piece Rubber Pads for Jack Stand