
DIY: 08 S coupe tsx-r lens swap


Thread Starter
Registered User
Joined: Dec 2013
Posts: 106
Likes: 8
08 S coupe tsx-r lens swap
So I was looking to see how to do this, and found nothing concrete. I would like for this to be concrete with picture of how to lens swap a 2008 G37s coupe lens from stock to tsx-r.
Plenty of DIY on opening headlights and whatnot, so this first picture is where we will start. Headlight opened, and some plastic around the lens removed.
1st pic- everyone knows how to open the headlights. If you don't check for some other DIY's, this one is for tsx-r lenses. This shot is from the side. The metal ring you see on the side of the lens, holds the lens.
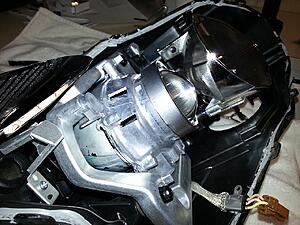
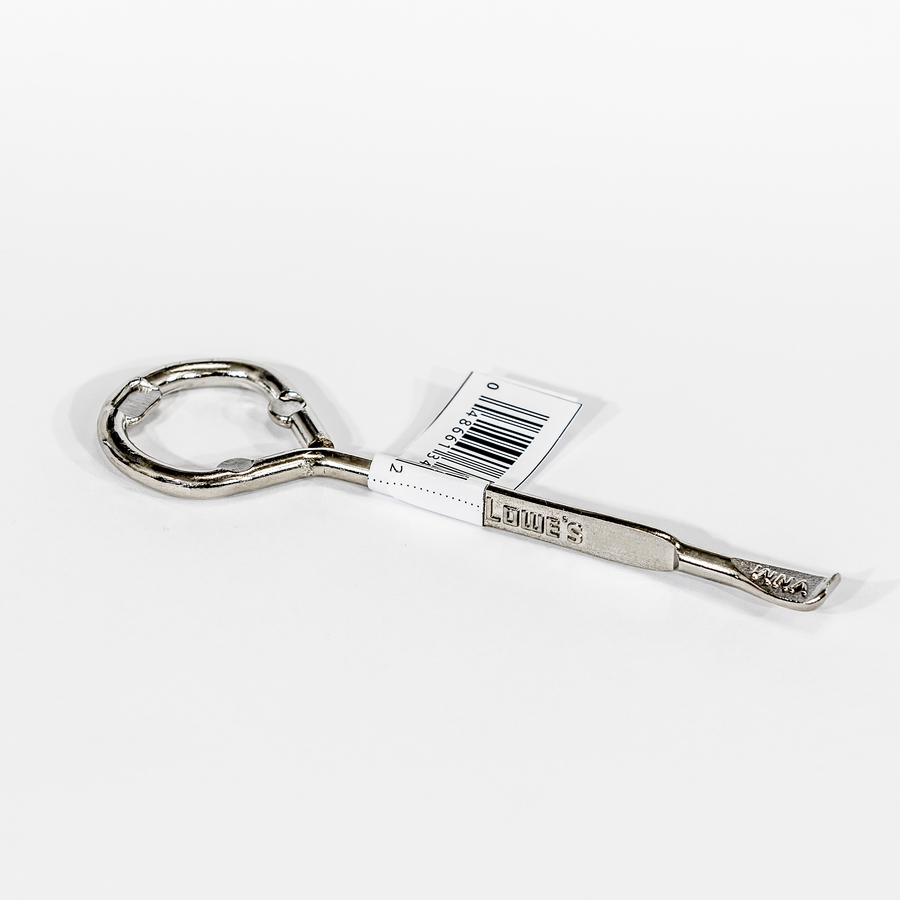
2nd pic- I don't have a pic here, but see the crimps in the metal ring in the first picture? There are 4 crimps around the metal ring which are holding it on. You will need to pry these crimps open a little before trying to remove the lens. To do this I used a paint can opener. I guess there is a second picture, here it is.
Plenty of DIY on opening headlights and whatnot, so this first picture is where we will start. Headlight opened, and some plastic around the lens removed.
1st pic- everyone knows how to open the headlights. If you don't check for some other DIY's, this one is for tsx-r lenses. This shot is from the side. The metal ring you see on the side of the lens, holds the lens.
2nd pic- I don't have a pic here, but see the crimps in the metal ring in the first picture? There are 4 crimps around the metal ring which are holding it on. You will need to pry these crimps open a little before trying to remove the lens. To do this I used a paint can opener. I guess there is a second picture, here it is.
Thread Starter
Registered User
Joined: Dec 2013
Posts: 106
Likes: 8
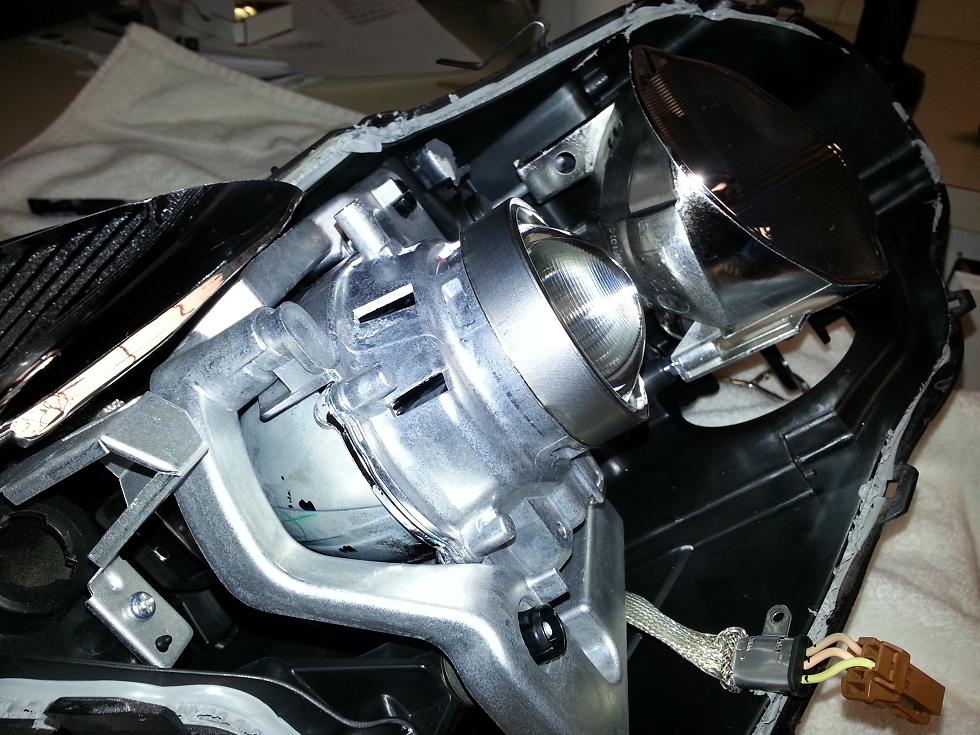
3rd pic- Once you have attempted to release the 4 crimps on the metal ring, you will need to get it off. To do this I used pliers, but instead of using them to pinch, I used them to pry open. This is the best pic I could get. Use common sense to get your pliers to grab the edge of the ring. Work your way around the ring and pop it off. Here is my pliers method

4th pic- So work your way around the ring. It will start to come off

5th pic- The ring is off, the lens is free to be removed.

6th pic- It is time to add a spacer. I did not pay for a spacer, I have no idea if I need a spacer (due to conflicting internet information), but I added a small spacer. This spacer you can barely see is 1x cardboard cereal box. If I get a nice cutoff, great. If not, I doubt I open this back up. When I can test I will show you what these look like but it is 7 degrees outside.

7th- just a pic of the lens on top of the spacer

4th pic- So work your way around the ring. It will start to come off
5th pic- The ring is off, the lens is free to be removed.
6th pic- It is time to add a spacer. I did not pay for a spacer, I have no idea if I need a spacer (due to conflicting internet information), but I added a small spacer. This spacer you can barely see is 1x cardboard cereal box. If I get a nice cutoff, great. If not, I doubt I open this back up. When I can test I will show you what these look like but it is 7 degrees outside.
7th- just a pic of the lens on top of the spacer
Thread Starter
Registered User
Joined: Dec 2013
Posts: 106
Likes: 8
Guess my pics are not working. Any advice as to how to fix this? Too big?
Anyways
8- put the ring back on over your new tsx-r lens which is resting on the spacer, and push hard to crimp the metal ring back into the 4 locations it was originally crimped.
9. reassemble headlight
Anyways
8- put the ring back on over your new tsx-r lens which is resting on the spacer, and push hard to crimp the metal ring back into the 4 locations it was originally crimped.
9. reassemble headlight

Thread Starter
Registered User
Joined: Dec 2013
Posts: 106
Likes: 8
I did not mean to offend...
I Read your post probably a dozen times. I was unable to draw a clear conclusion as to what I was getting myself into for the lens swap.
"You can see the lines molded/etched into the OEM lens." Not from your picture I couldn't.
No information as to removing the lens housing... which I found to be completely unnecessary but your pictures all of a sudden show it out of the headlight and you are already tapping the tabs back in.
You did not use any spacer, but there is no picture of your cutoff in the thread and no mention as to if you wish you used one. I plan on posting my cutoff as soon as I am able to adjust my headlights.
ANYWAYS, again- I did not mean to offend, but your post left me with a LOT of questions as to the lens swap. Hoped mine would help someone who was left in the same boat as me. Feel free to use any of my pics to update your DIY which I agree is better at this point. Mine was a work in progress.
Thanks for providing more details w/ the lens swap, each DIY seems to bring new info to the table. GoFightNgyuen covered a pretty broad range in his big DIY so nice to have a different look at the project. Never hurts to have several DIY threads on a project as some points might be missed in one thread and become clear when you read another or different ways to do the same thing but may make sense in one and not the other, etc.
BTW, both you guys detailed how crappy the coupe lens cover secures the lens. That really does look like a poor setup, the sedans cover seem much more secure.
As far as posting pics, try www.imageshack.com and just right click on your pic (on imageshack once you expand the pic) to copy, then just a simple paste to your thread, no need to copy the link URL.
Look forward to your cutoff pics.

Thread
Thread Starter
Forum
Replies
Last Post
m3clubracer
Engine, Drivetrain & Forced-Induction
26
Aug 23, 2015 11:57 AM
bikerjosh
Body Interior Exterior Lighting
5
Aug 19, 2015 11:26 PM

