
DIY: How To Install Headerback Exhaust


How To Install Headerback Exhaust
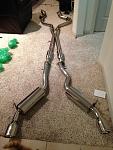
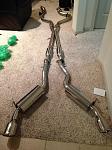
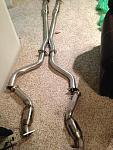
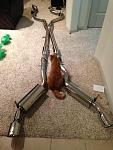
Hello Everyone. It's time yet again to suffer through my stupid jokes to get a DIY on how to do something. This time, I'll be (attempting) DIY install of my new Fast Intentions High flow Catalytic converters, also known as HFC's. I will also be installing my new Fast Intentions Cat Back Exhaust (stainless steel polished with new x-pipe.) The install will be long, since I haven't really found a great DIY online for this particular car. Hopefully the mistakes I'll make will save you some time.
I've bugged Lance, and the good people at Fast Intentions have seen fit to finally grant me my much-awaited exhaust.
Materials:
2xHigh Flow non-resonated catalytic converters
1xupgraded x-pipe (resonated)
2xlead pipes
2x axleback mufflers/exhaust tips
assorted nuts, bolts, and crush gaskets
Tools:
WD 40
Full Ratchet set (sizes TBD)
Assorted crescent wrenches
Jack stands
Jack/Drive up Jacks
LOTS of extensions, all the research I *have* read indicates you'll need 1/2 fittings for everything, so go ahead and get the 1/2 sized socket set.
Towels to protect your new exhaust from the floor you're working on
Shop light or headlamp
cheater bar
cold drinks
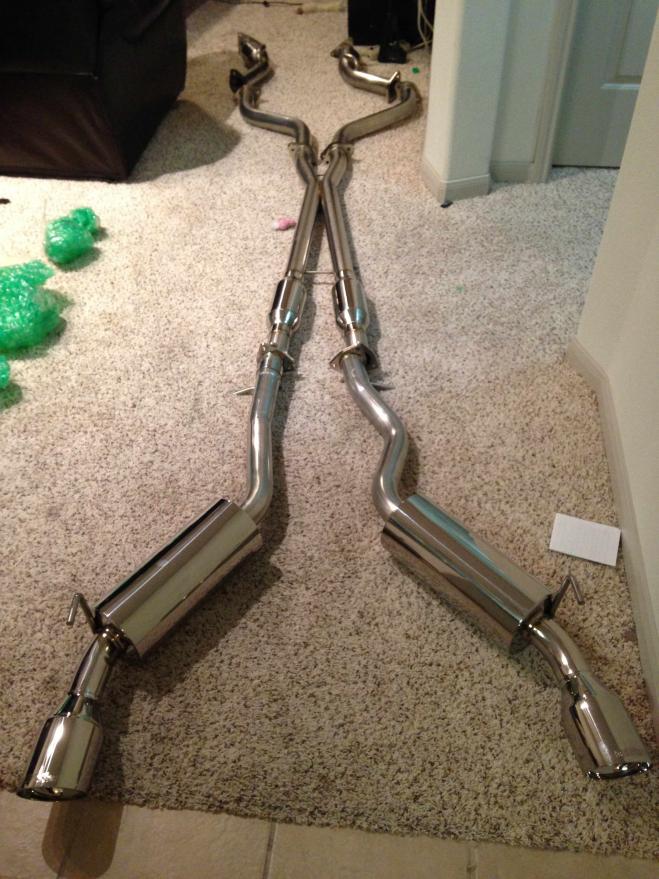
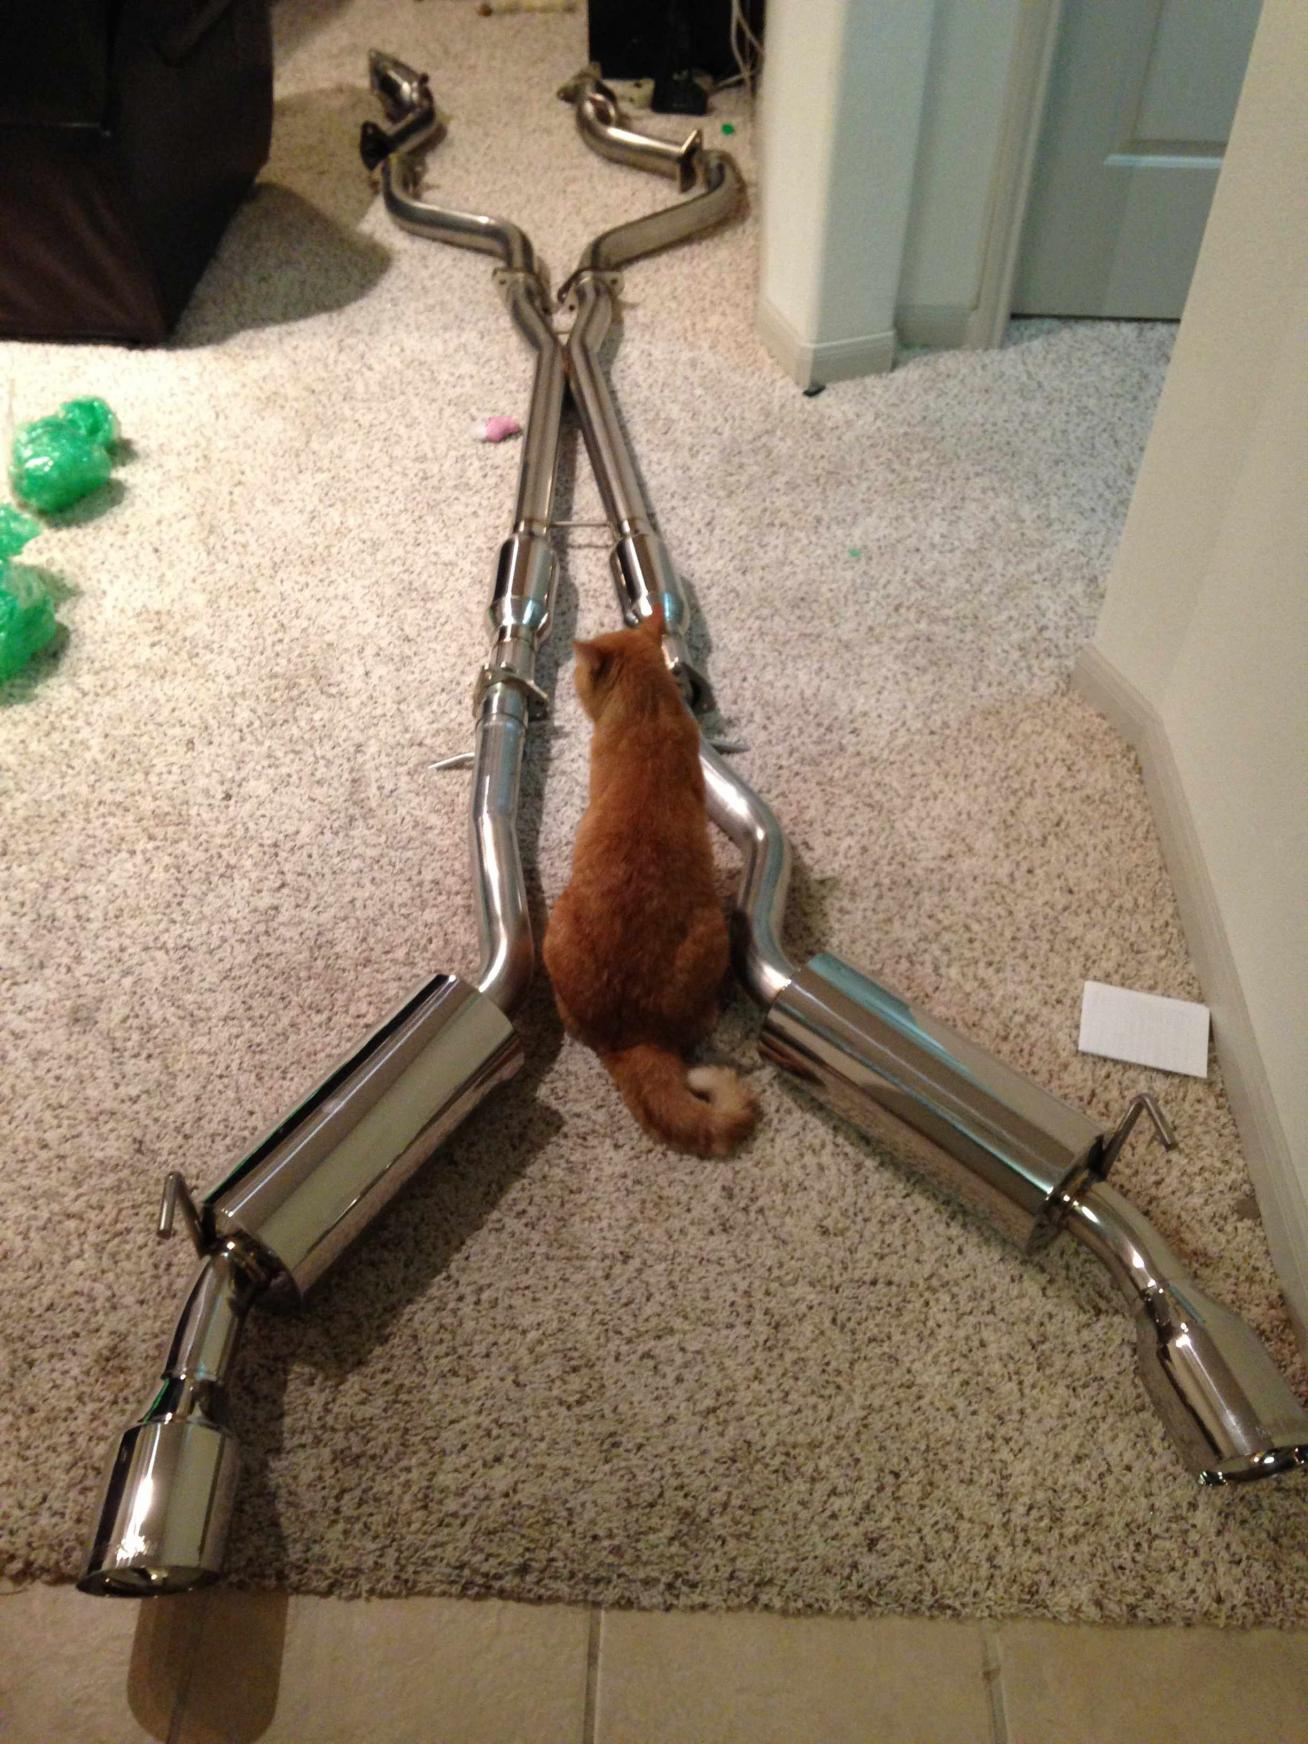
It's late, and I just got my shipment. I'll be doing the install tomorrow, and upload pics once everything is done. For now, I'll post up pics of the exhaust sitting arranged on the floor. Tomorrow I'll come clean up this post and add in the rest of the writeup/pics/what worked/what didn't work.
If you've got tips and hints before I get started, let me know. Apologies for crap pictures/video/advice.
I've bugged Lance, and the good people at Fast Intentions have seen fit to finally grant me my much-awaited exhaust.
Materials:
2xHigh Flow non-resonated catalytic converters
1xupgraded x-pipe (resonated)
2xlead pipes
2x axleback mufflers/exhaust tips
assorted nuts, bolts, and crush gaskets
Tools:
WD 40
Full Ratchet set (sizes TBD)
Assorted crescent wrenches
Jack stands
Jack/Drive up Jacks
LOTS of extensions, all the research I *have* read indicates you'll need 1/2 fittings for everything, so go ahead and get the 1/2 sized socket set.
Towels to protect your new exhaust from the floor you're working on
Shop light or headlamp
cheater bar
cold drinks
It's late, and I just got my shipment. I'll be doing the install tomorrow, and upload pics once everything is done. For now, I'll post up pics of the exhaust sitting arranged on the floor. Tomorrow I'll come clean up this post and add in the rest of the writeup/pics/what worked/what didn't work.
If you've got tips and hints before I get started, let me know. Apologies for crap pictures/video/advice.


*whew* okay. I got everything installed. It took me about 8 hours yesterday, all in, so it'll probably take you shop savvy types 3 or so hours. I'll outline the tentative steps below. Pics are in the album here:
<div style="width:480px;text-align:right;"><embed width="480" height="360" src="http://pic2.pbsrc.com/flash/rss_slideshow.swf" flashvars="rssFeed=http%3A%2F%2Ffeed1314.photobuck et.com%2Falbums%2Ft579%2FGoFightNguyen%2Ffeed.rss" type="application/x-shockwave-flash" wmode="transparent" /><a href="javascript:void(0);" target="_blank"><img src="http://pic.photobucket.com/share/icons/embed/btn_geturs.gif" style="border:none;" /></a><a href="http://s1314.photobucket.com/user/GoFightNguyen/library/" target="_blank"><img src="http://pic.photobucket.com/share/icons/embed/btn_viewall.gif" style="border:none;" alt="GoFightNguyen's album on Photobucket" /></a></div>
1. WAIT FOR ENGINE + Exhaust TO COOL DOWN.
2. Disconnect the negative terminal to your battery.
3. Pop hood, remove your air intakes.
4. Jack up the car, put it on jack stands, and get under there.
5. Unplug and remove the O2 sensors. If you have a slit socket, it makes it much easier, but I managed to get it off with a crescent wrench and some (lots) elbow grease. I went ahead and screwed them into the new cats, this prevents damage and keeps you from mixing up driver or passenger side.
6. Use a 14mm socket + 10" extension + ratchet to get to the upper inside bolts (one per cat) that you can break from the bottom of the car.
7. Get claustrophobic and skitter out from under the car.
8. Go into the engine bay and use a ridiculous amount of extensions + universal joints to get a 14mm socket on to the header to cat bolts. The passenger side is fairly easy, the engine block doesn't really get into the way very much. I found it easier to go underneath the breather hoses with your ratchet set up. Get some shop towels/rags and use it to pad your ratchet extensions wherever they might butt up against wire bundles or metal parts. This will let the extension press against it and help you develop torque on the end through those universal joints.
If you're very very lucky, you'll just break off those bolts. Don't panic. This is good, your cats should come with new bolts anyways, so don't sweat it. Congratulate yourself on your astounding ability to twist a metal bolt in two. If you're like me, you're flexing at the mirror.
The passenger side is pretty easy, I tried for a long time to avoid having to disassemble anything else to get to the driver side header to cat bolts, but couldn't. Basically, you'll have to remove and push the steering shaft knuckle out of the way.
9. Get under the car, mark it with a sharpie, then unbolt the lower bolt that connects the steering shaft knuckle to the steering rack. You should be able to now remove and push the steering shaft + knuckle up and out of the way
10. Use an ungodly amount of muscle and extensions and get after those last two header to cat bolts. Take a break, congratulate yourself on completing the hardest part of the DIY.
11. While under the car, go ahead and break your connection from the stock cats to the old Y-Pipe.
12. You should just barely be able to use the flexi connection to wiggle the Y-pipe and remove the stock cats.
13. Throw stock cats into the yard and tell them you don't love them anymore.
14. Unbolt the ypipe from the old midpipe. You can leave the crossbrace there for now, it'll help take some of the weight in the next step.
15. Remove the left and right covers that hide the bolts holding the bracket that holds the rubber coupling that holds your xpipe. This is the easiest way I found to remove it. The cover is bolted on with 10mm heads, and the screws in the bracket are 14mm.
16. Unbracket and release the kraken, er, xpipe from the muffler. Pull off the rubber gaskets by twisting and pulling and save them for laters. Give the xpipe the yard treatment.
17. Remove the left and right covers that protect your muffler brackets. There are two on each side, but they aren't symmetrical. I can't think of a good way to describe locations, but you're smart, and I have faith you can find them.
18. Gently release the stock muffler and send it to join the rest of your old exhaust. At this point, you should be done with the removal process, have a drink, and take a break.
19. Install your new cats, I went ahead and torqued the O2 sensors in instead of trying to do it while under the car. I didn't have a problem with them being in the way since Fast Intentions was clever enough to add a bung and a side pipe for them to sit out of the way.
20. Install your gaskets on the cats, and use one header to cat bolt to hold everything together. Hand tight is fine for now. Put the other bolts in and hand tighten them so you can approximate where the cats will sit when they are all nice and tight. Torque down the header to cat bolts with your extension collection. Fast Intentions' exhaust is only hung off via the catalytic converters and the rubber hangars at the mufflers. Tighten your cat bolts like you mean business. Don't forget to line up your steering shaft knuckle with the steering rack and retighten the bolt.
This is about the time I started getting really annoyed with the whole operation. Sorry there aren't lots (any) pictures of the next procedures. I'll try to walk you through it.
21. Get your lead pipes and install them appropriately. I've only ever installed FI stuff, so it's up to you to figure out orientation and suchlike. Tony and Dan at FI put divots on the flanges so you can orient and bolt them correctly, it's a very nice touch in an otherwise confusing operation.
22. Bolt your lead pipes on hand tight and go check out your tailpipes.
23. Remove the heat shield from the back of the car, it is fastened with 5x 10mm bolts. Use tin snips or a hacksaw to trim off the hanging portion. If you don't, it will interfere with your muffler fit.
24. Remove the evap cover (3x 14mm bolts), and toss it. You'll need to find the fuel line that might be affected by heat. Use a piece of heat wrap and zipties to cover the fuel line.
25. Reinstall the rubber gaskets + brackets you removed earlier and get some white lithium grease in there to lube it up.
26. Thread your mufflers in from the back of the car. They should sit below your sway bar. Have a friend hold on to them while you push the steel rod hanging off the muffler into the rubber gaskets. Let them hang out.
27. Remove the brace, there are 4 x 14mm bolts here.
28. Slide your xpipe under the car and get a couple bolts hand tight to hang it. Reinstall your cross brace.
29. Bolt up your lead pipes to the x pipe first, then have someone rotate your hanging mufflers to make them orient correctly. Bolt these hand tight as well. Make sure your gaskets are oriented correctly.
30. If you're like me, by now you're probably thoroughly pissed and tired. Go back and tighten and torque down all the bolts from the FRONT OF THE CAR TO THE REAR. You'll have a lot more range of motion from front to back than the other way around.
31. Put all your braces, covers, and pieces where they need to go.
32. Reinstall your intakes, reconnect your battery, and start it up.
Last edited by GoFightNguyen; Aug 24, 2013 at 03:00 PM.
If there's anything you have specific questions about, drop me a PM. I had a lot of fun putting this in and I couldn't be happier with the results. I'll do my best to edit and clarify things. Let me know what you think of the writeup and I'll go back and change things to make it easier to understand.

Registered Member
Joined: Feb 2010
Posts: 392
Likes: 31
From: Madison, WI
I'm installing ART pipes this weekend, so thanks for this write up for me to reference. Also i literally laughed out loud when I read "13. Throw stock cats into the yard and tell them you don't love them anymore.".

I just installed my FI RHFC on my 08 G37S with 70K miles. It is a California car and those demon bolts were rusted on there pretty good. I would rate this DIY 8/10 difficulty.
Here are some tips:
-Spray WD40 a couple of days before.
-Do not use long impact socket on the driver side just use a regular 14mm socket because the steering column will be in the way.
-Do not resort to using 9/16 or you will round the bolt like I did.
-If you do round the bolt purchase a bolt extractor socket.
-Have a 20 inch extension bar, 1/2 socket.
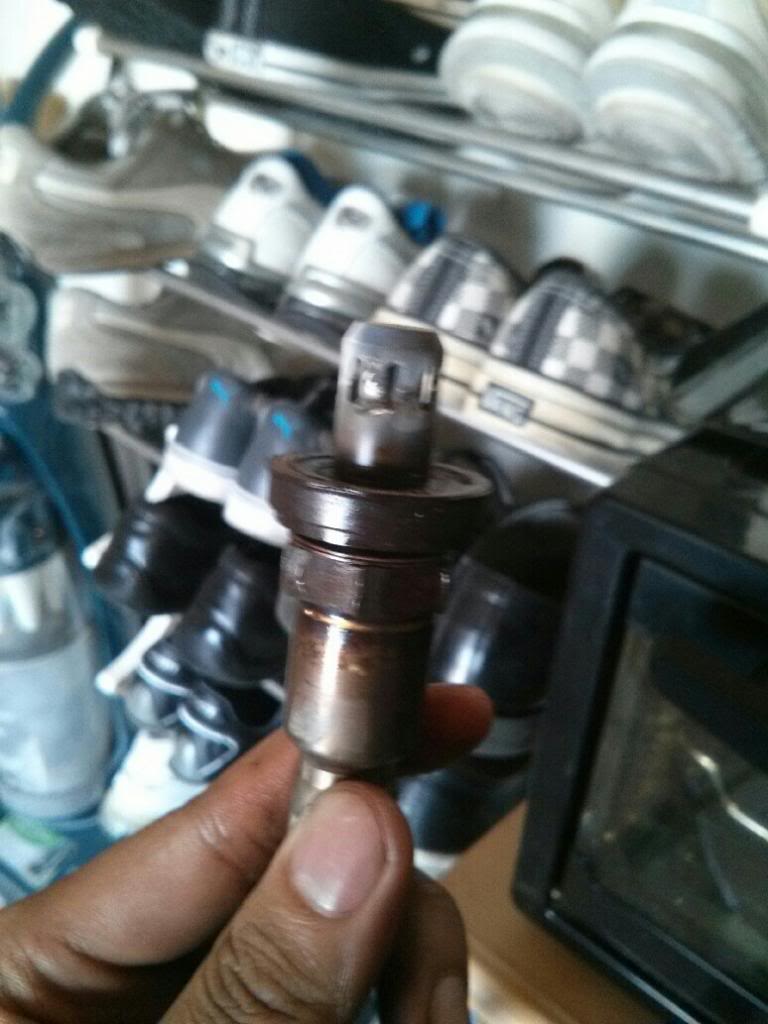
-Be prepared to purchase some new O2 sensors if your car is old and has 70K miles like mine. I recommend some used ones on eBay.
-Remove the O2 sensors off the car.
Check out my O2 sensors, this was not my fault and I have no idea why they seem to be fused with my OEM cats. I applied so much torque that I broke of the driver's side threading...

Here are some tips:
-Spray WD40 a couple of days before.
-Do not use long impact socket on the driver side just use a regular 14mm socket because the steering column will be in the way.
-Do not resort to using 9/16 or you will round the bolt like I did.
-If you do round the bolt purchase a bolt extractor socket.
-Have a 20 inch extension bar, 1/2 socket.
-Be prepared to purchase some new O2 sensors if your car is old and has 70K miles like mine. I recommend some used ones on eBay.
-Remove the O2 sensors off the car.
Check out my O2 sensors, this was not my fault and I have no idea why they seem to be fused with my OEM cats. I applied so much torque that I broke of the driver's side threading...

I didn't use an impact wrench for any of it, but it would have definitely helped. Heat + mileage = fused O2 sensors. Good additions, this is a japanese car, don't resort to imperial sockets!
Exhaust looks good!
Exhaust looks good!
Trending Topics
Me neither I used a breaker bar for the demon bolts my crappy Craftsman gun didn't have enough torque to even budge the bolt. Anyways thanks for the write up! Wouldn't have been able to do this without your help.


Oh this was a major pita on my car even with 45k on it. Installed art pipes and e370 exhaust. Such a headache. Started at 12 noon and didn't finish till 10am the next day, albeit 1 hour break for dinner and I also installed stillen gen3 intake.
Didn't have an impact so everything was done by hand.
One thing to note, when tightening up the cat bolts, and you use the extensions from the engine bay, you need to torque it higher than what you set the torque wrench to. Because of the length of the extensions exists a mechanical property called torsion which basically means some of the twist you do goes into twisting the extension. The longer the extension, the more torsion.
I never did the math, but I believe I tightened up the top bolt 10-15 ft.lb more than the recommendation. If you have any questions feel free to pm me

Thread
Thread Starter
Forum
Replies
Last Post

