
DIY: Painted Engine Cover


Registered User
Joined: Aug 2014
Posts: 40
Likes: 0
From: Massachusetts
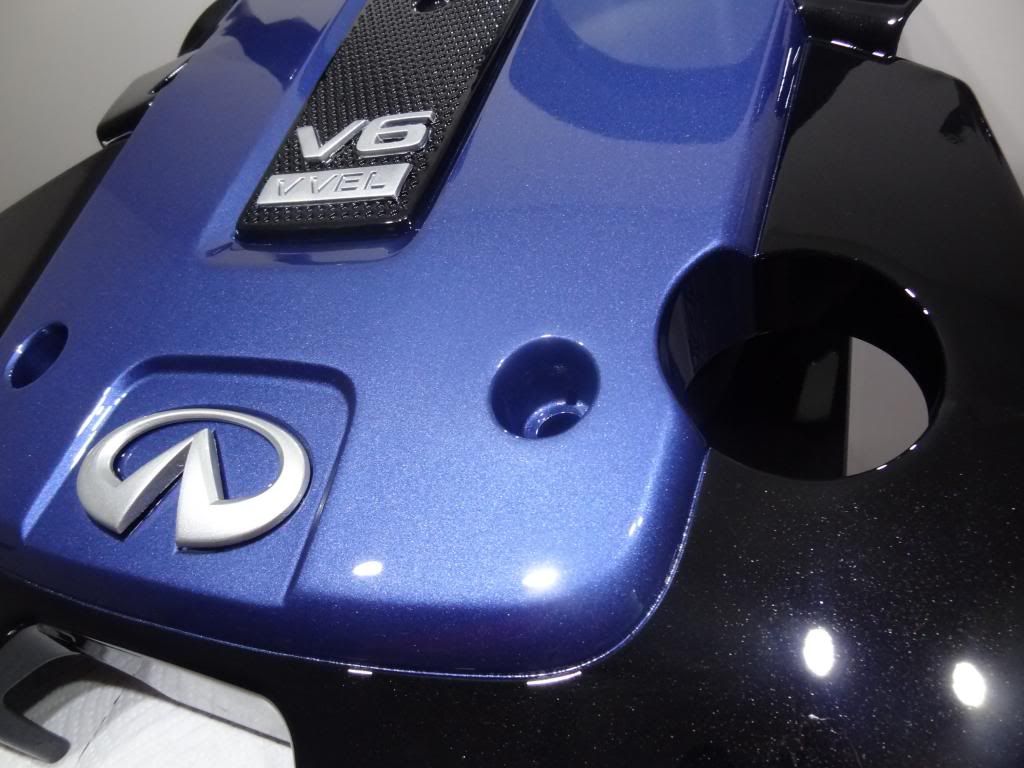
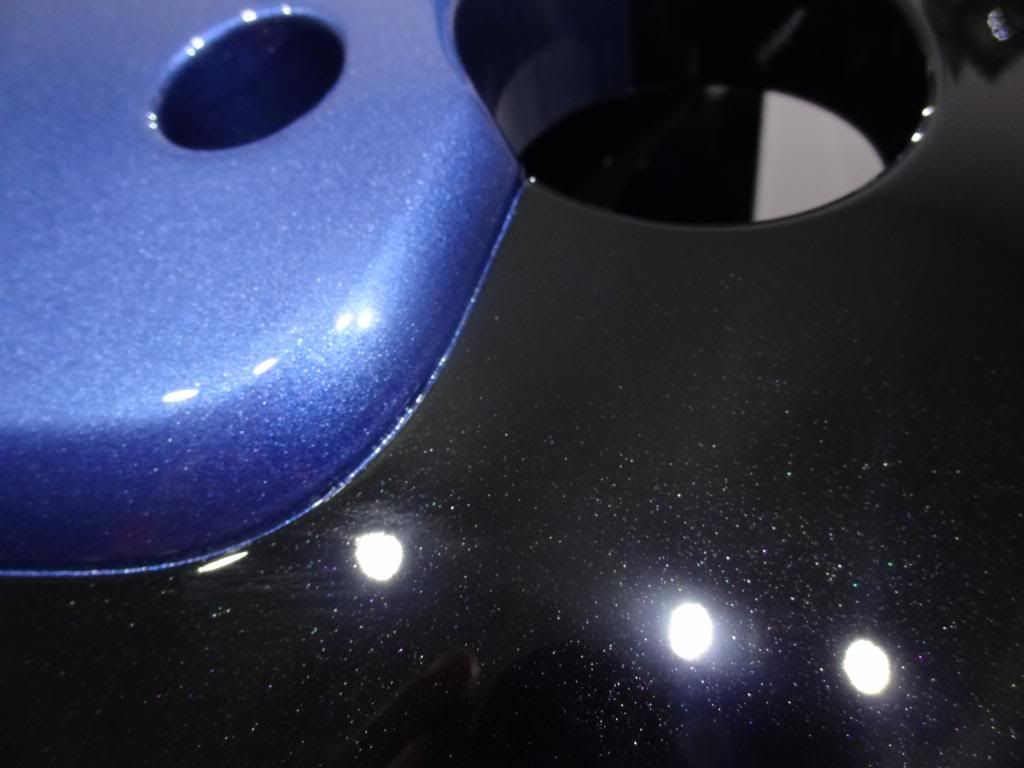
 in Lapis Blue! With a black pearl base!
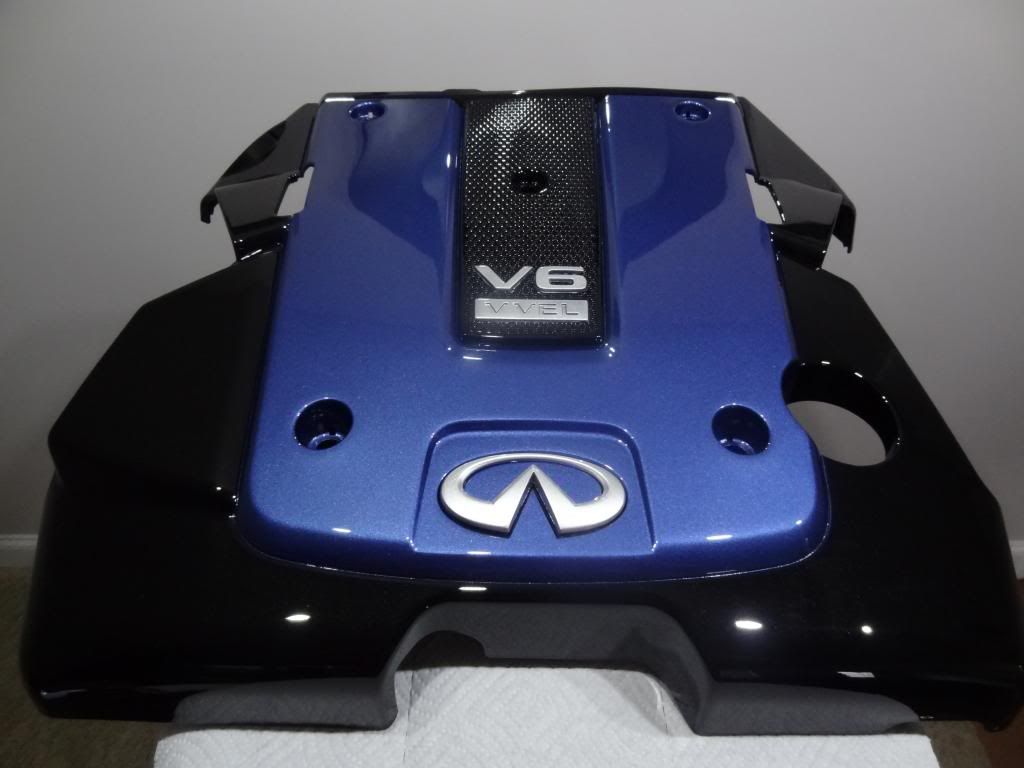
Ok so help me to get the order straight.
I've degreased the plastic pieces, sanded them down, degreased again and washed them off briefly with water.
I use the plastic adhesion promoter next and then the primer filler?
Followed by the color of my choice and 3 coats of clear.
Let dry for 24 hours.
Then I wet sand the hell out of all the pieces until it's smooth and shiny. Then paint the middle of the engine cover followed by clear coating everytiing?
Last edited by Redfire32; Feb 28, 2016 at 03:06 AM.
Ok so help me to get the order straight.
I've degreased the plastic pieces, sanded them down, degreased again and washed them off briefly with water.
I use the plastic adhesion promoter next and then the primer filler?
Followed by the color of my choice and 3 coats of clear.
Let dry for 24 hours.
Then I wet sand the hell out of all the pieces until it's smooth and shiny. Then paint the middle of the engine cover followed by clear coating everytiing?
I've degreased the plastic pieces, sanded them down, degreased again and washed them off briefly with water.
I use the plastic adhesion promoter next and then the primer filler?
Followed by the color of my choice and 3 coats of clear.
Let dry for 24 hours.
Then I wet sand the hell out of all the pieces until it's smooth and shiny. Then paint the middle of the engine cover followed by clear coating everytiing?

Ok so I reached the midway point last night with my engine bay project. I haven't gotten to the color painted portion or the tedious wet sanding part just yet, but overall I'm very happy with how things are turning out. Here are some progress pics.
1st I pulled the 2 smaller plastic covers at the top left & right hand corners. Then I took out the engine cover and the piece that connects to the top of the front bumper. Since I had everything opened up and engine degreaser on hand I decided to give the engine bay its first cleaning since I bought the car.
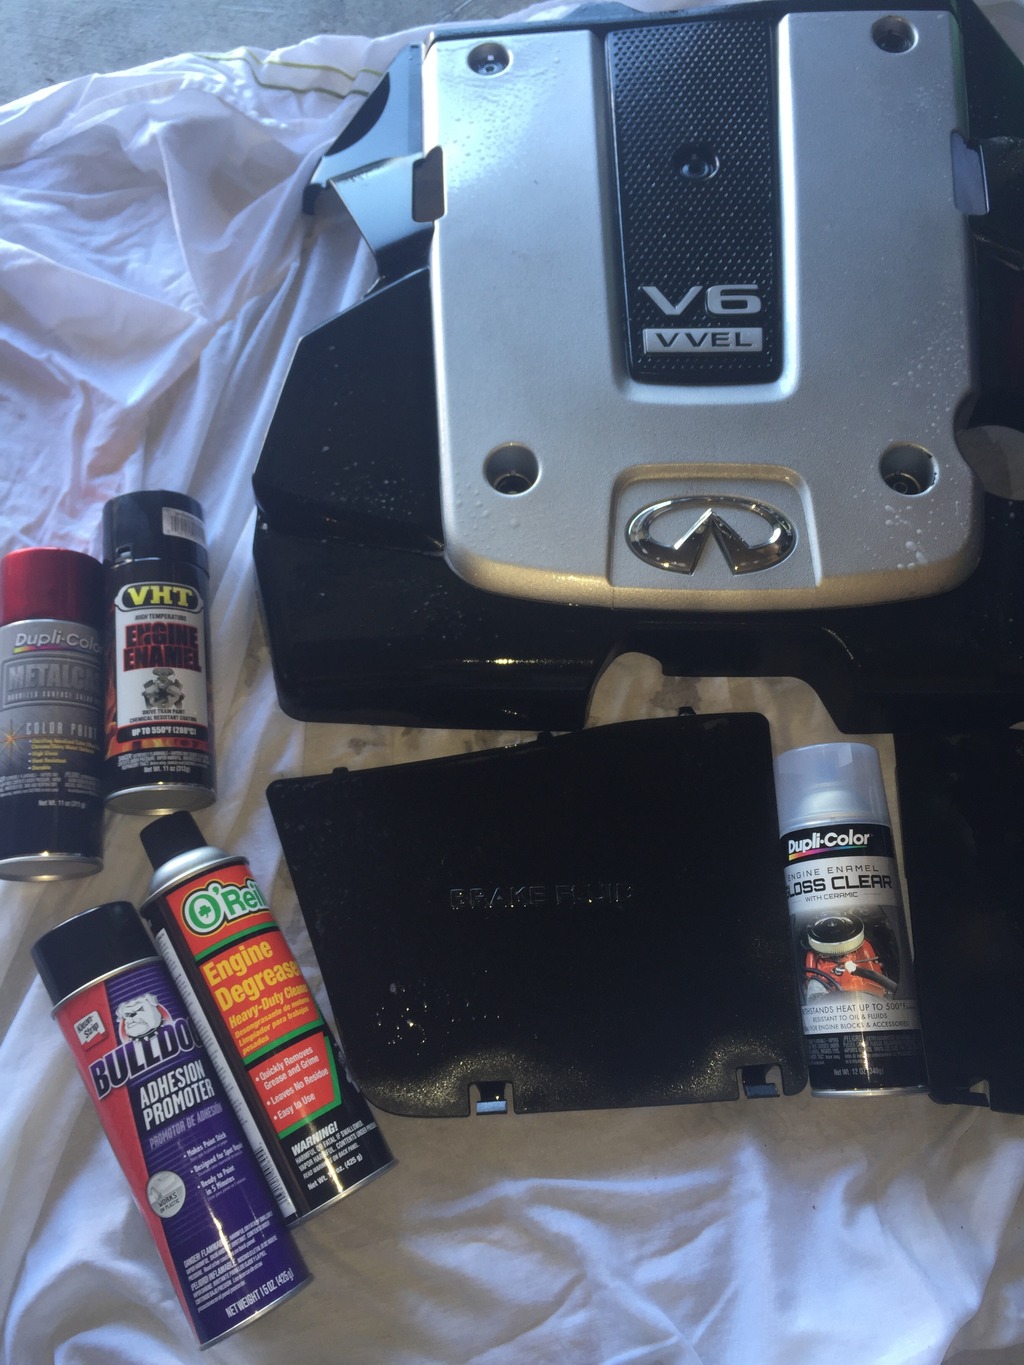
Next I laid down a drop cloth and got all the plastic pieces & supplies laid out together.
Now it was time to start following the combined DIY from gofightGuen and JPSBLACK.
1-Degreased all the plastic parts
2-320 grit sandpaper to rough up the parts
3-Degrease again and give all the parts a quick rinsing with the water hose
4-Dried off the excesss water and started to tape off all the edges
5-removed the Infiniti symbol from the engine cover with 4 quick snaps of some needle nose pliers (will reattach with epoxy once project is finished
6-set up my garage closet with drop clothes to form a makeshift paint booth
7-used a medium gadge wire to hand the plastic pieces up in my new paint booth
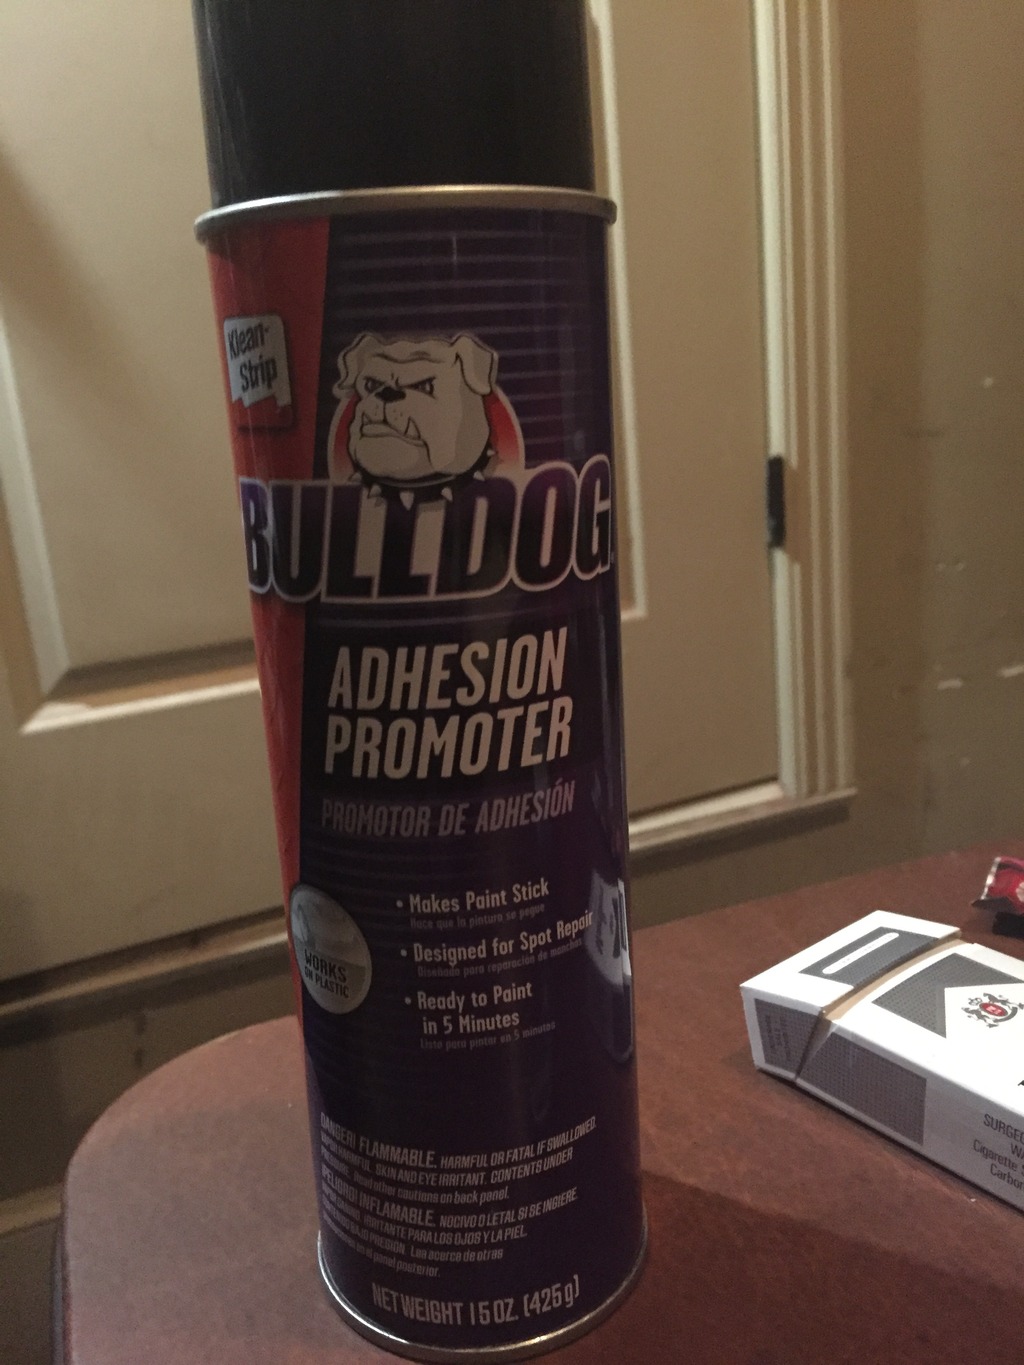
8-Hit all the engine bay parts with Bulldog adhesion promoter- 2 light coats and one med wet coat as per instructions...waiting 10 min between coats
9- hit all bay parts with automotive primer filler (per instructions 2 light coats and one med to wet coat)
This step was a bit surprising to me BC I didn't realize primer filler was white in color.
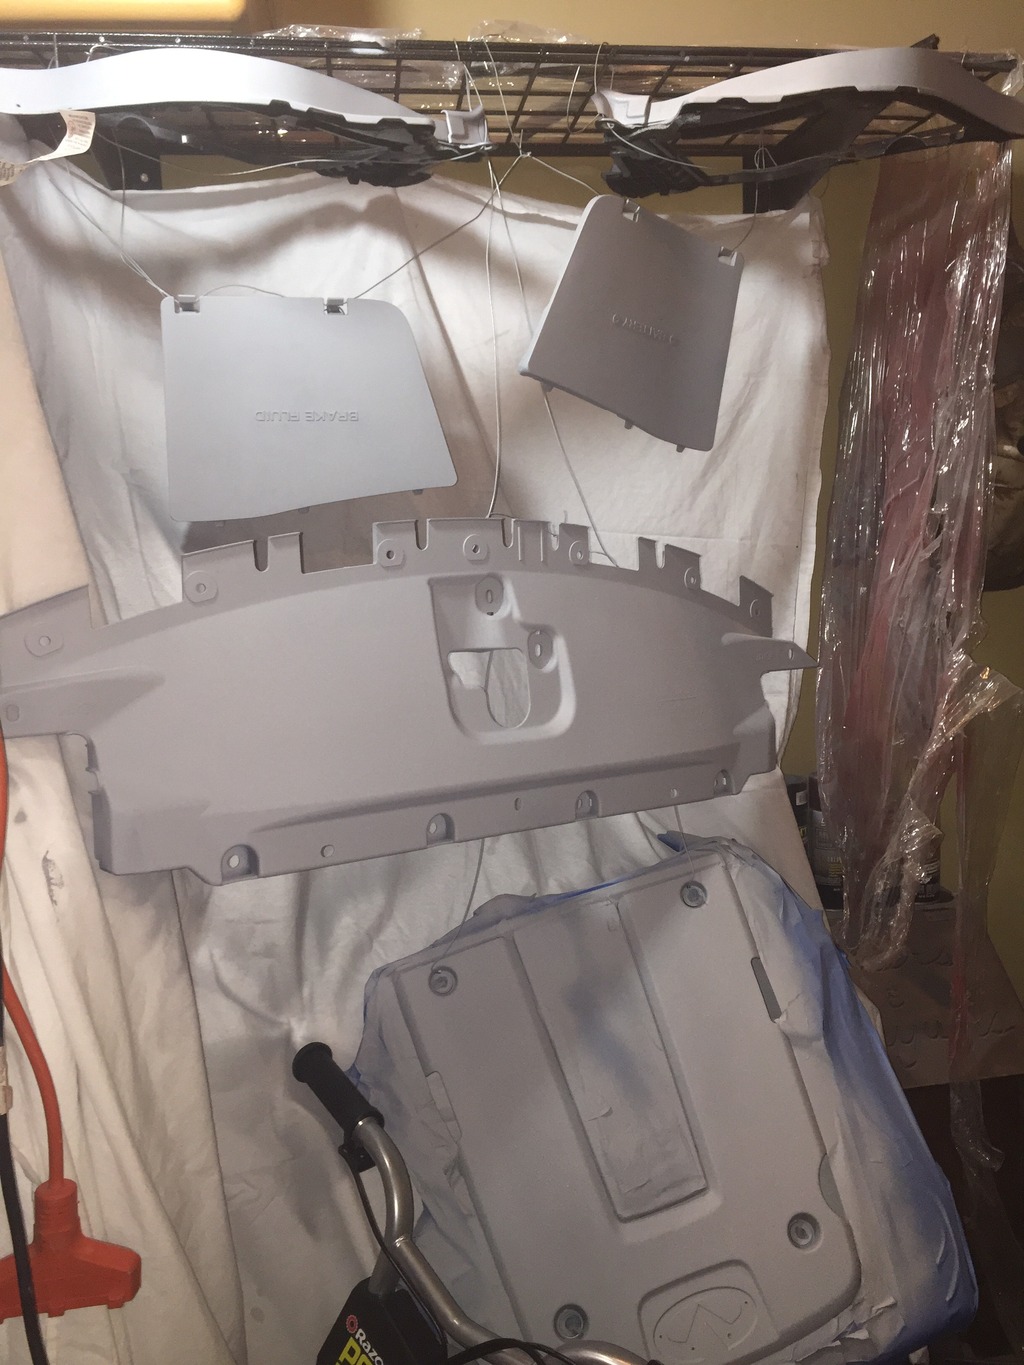
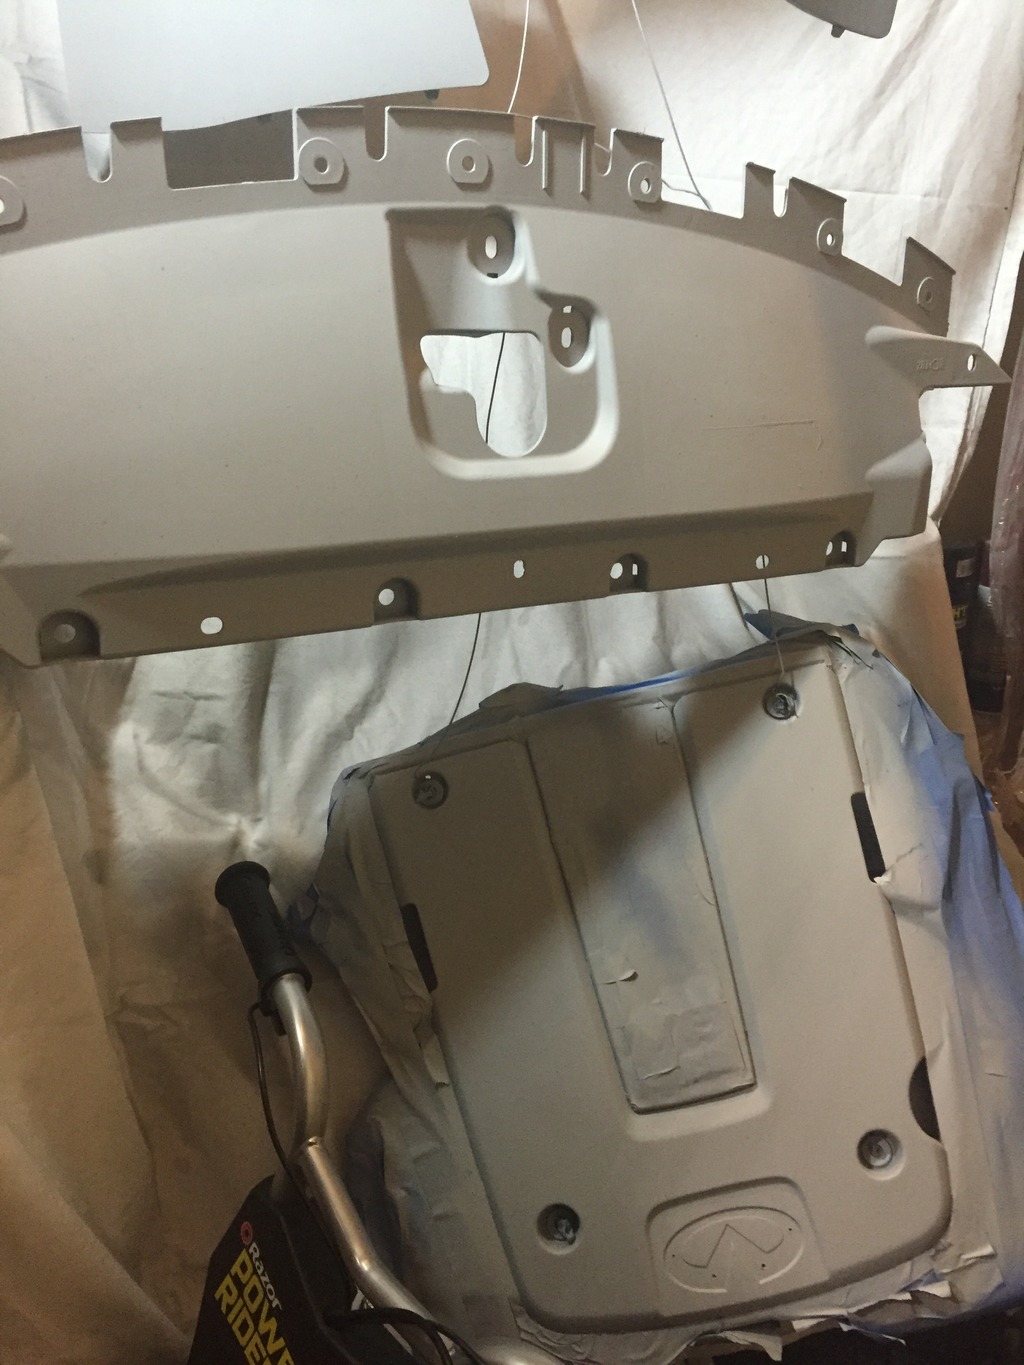
There you have it. My progress so far. I'd say it took me around 2hours including runnin to autozone to buy the adhesion promoter and other paints, clear coat, etc.
Does anyone know if I should wet sand before I throw the gloss black or a combo of the anodized red & gloss black on there?
I think I'm supposed to allow the work I've done to dry for 24 hours, then get my paint and clear coats on, and finally get the awful wet sanding it all to a shiny silky smooth masterpiece done last (everyone cross your fingers and/or pray that this comes out looking something like what JP's work. If I can get 70% of the results he gets I'll be one happy a$$ modding SOB.
1st I pulled the 2 smaller plastic covers at the top left & right hand corners. Then I took out the engine cover and the piece that connects to the top of the front bumper. Since I had everything opened up and engine degreaser on hand I decided to give the engine bay its first cleaning since I bought the car.

Next I laid down a drop cloth and got all the plastic pieces & supplies laid out together.

Now it was time to start following the combined DIY from gofightGuen and JPSBLACK.
1-Degreased all the plastic parts
2-320 grit sandpaper to rough up the parts
3-Degrease again and give all the parts a quick rinsing with the water hose
4-Dried off the excesss water and started to tape off all the edges
5-removed the Infiniti symbol from the engine cover with 4 quick snaps of some needle nose pliers (will reattach with epoxy once project is finished
6-set up my garage closet with drop clothes to form a makeshift paint booth
7-used a medium gadge wire to hand the plastic pieces up in my new paint booth
8-Hit all the engine bay parts with Bulldog adhesion promoter- 2 light coats and one med wet coat as per instructions...waiting 10 min between coats

9- hit all bay parts with automotive primer filler (per instructions 2 light coats and one med to wet coat)
This step was a bit surprising to me BC I didn't realize primer filler was white in color.


There you have it. My progress so far. I'd say it took me around 2hours including runnin to autozone to buy the adhesion promoter and other paints, clear coat, etc.
Does anyone know if I should wet sand before I throw the gloss black or a combo of the anodized red & gloss black on there?
I think I'm supposed to allow the work I've done to dry for 24 hours, then get my paint and clear coats on, and finally get the awful wet sanding it all to a shiny silky smooth masterpiece done last (everyone cross your fingers and/or pray that this comes out looking something like what JP's work. If I can get 70% of the results he gets I'll be one happy a$$ modding SOB.
Last edited by Redfire32; Feb 28, 2016 at 01:24 PM.


Registered Member
Joined: Oct 2021
Posts: 182
Likes: 18
From: Colorado
Just commenting on this thread because there are some amazing beautiful color combos and finishes here, I just have to say!! Too bad when I got my G37 that Infiniti emblem on the engine bay cover was missing, so it'll be harder to make mine look anywhere near as nice as y'all

Registered Member
Joined: Oct 2023
Posts: 2
Likes: 0
Bringing back the engine cover projects!

Ever since I saw all of your posts about these Beautiful under the hood photos, I had to give it a chance. I definitely wish I sanded it down more and smoothed it out, debating if I should attempt wet sanding the clear coat after 24 hours or just leave it. Either way I love how it's turned out, will send pictures once it's on the car!


Thread
Thread Starter
Forum
Replies
Last Post