
DIY: How to remove interior trim (lower dash).

DIY: How to remove interior trim (lower dash).
I'm sure there are some other threads on here with a lot of the same information but I had a hard time finding them and I've had a few PM's asking for these pictures. The main reason for this post is to make these pictures available to those who are fighting mounting tabs. A look at what the tab looks like and how it is positioned is usually what helps me get these things off.
I helped Her install a lighting accent kit so we took some pictures along the way. She really doesn't like the brushed aluminum trim pieces so I took this time to learn how to get the dash trim pieces out.
1. The first thing to remove is the side finisher (left). It is only held on by clips. The best thing to do is start at the bottom and get the bottom clips to pop out. I have a generic interior trim removal tool that I picked up from my local auto store. It works pretty good here. Here is the dash with the side finisher removed.
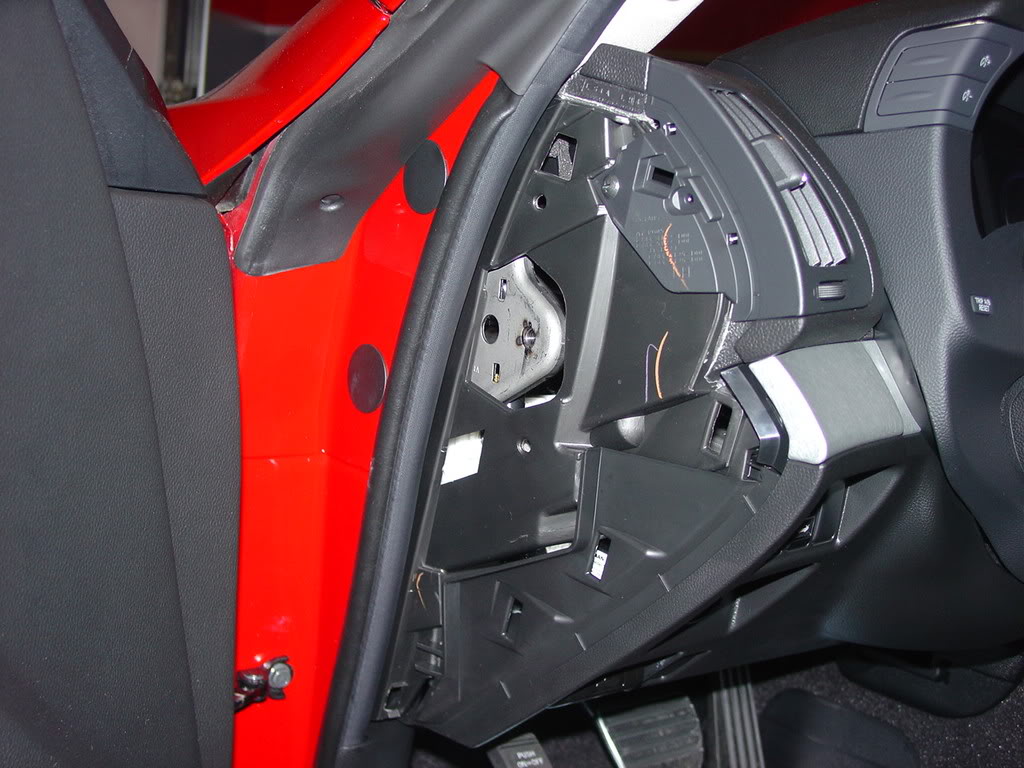
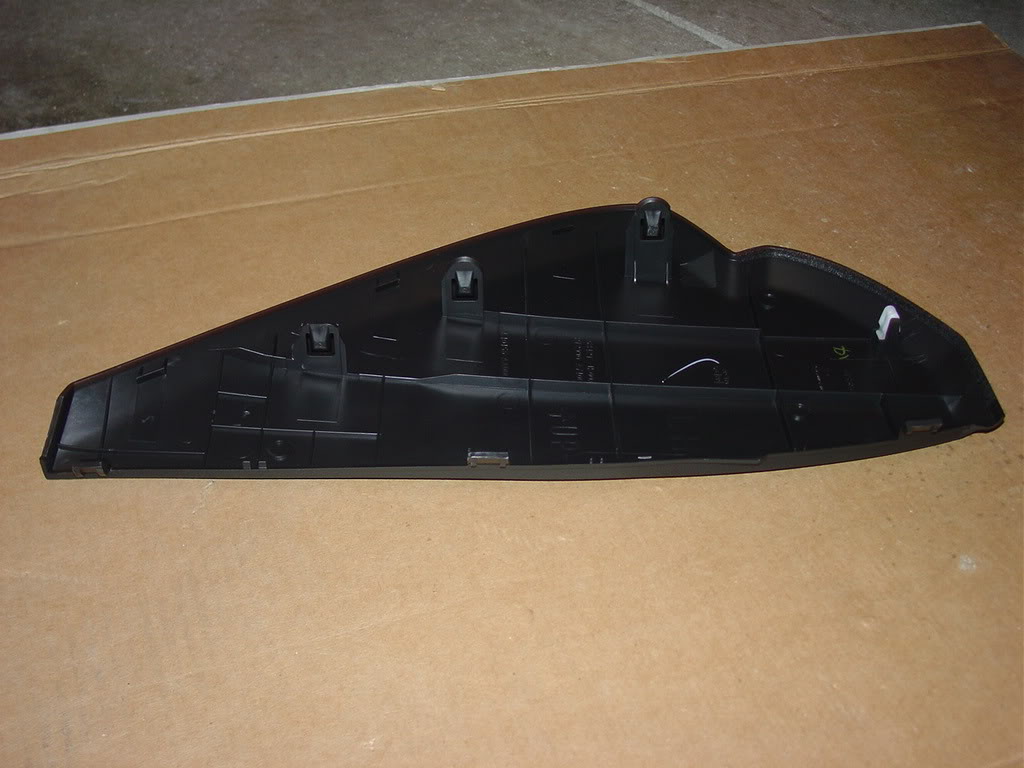
2. Here is a look at the back side of the finisher.
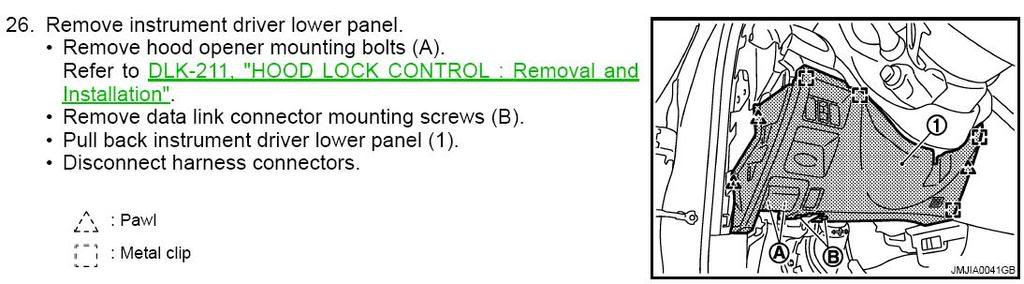
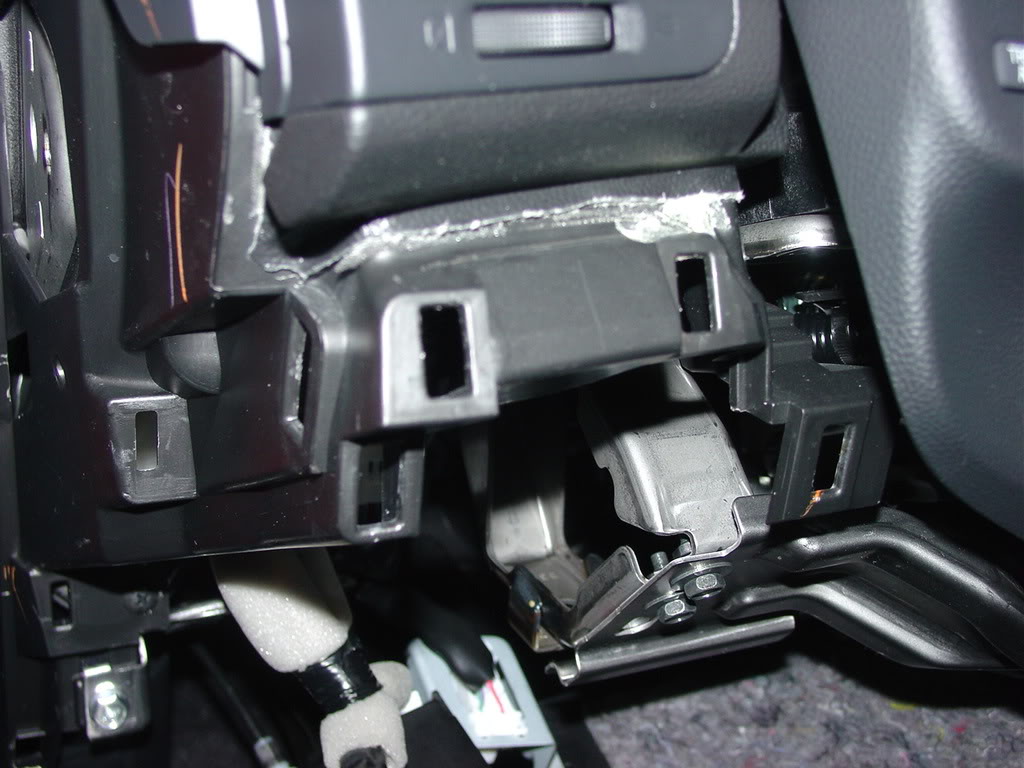
3. The next panel to remove is the lower panel on the driver's side. It starts by removing two mounting screws for the hood opener and two screws for the OBDII connector. After that the only thing left to do is pull the panel towards the rear of the car. There are only four or five clips holding the panel on. After the panel is loose/removed, there is one sensor that needs to be removed from the panel. You can either unclip the wire connector or unscrew the whole sensor assembly. I failed to get a good picture of this panel, so here is the shop manual step.
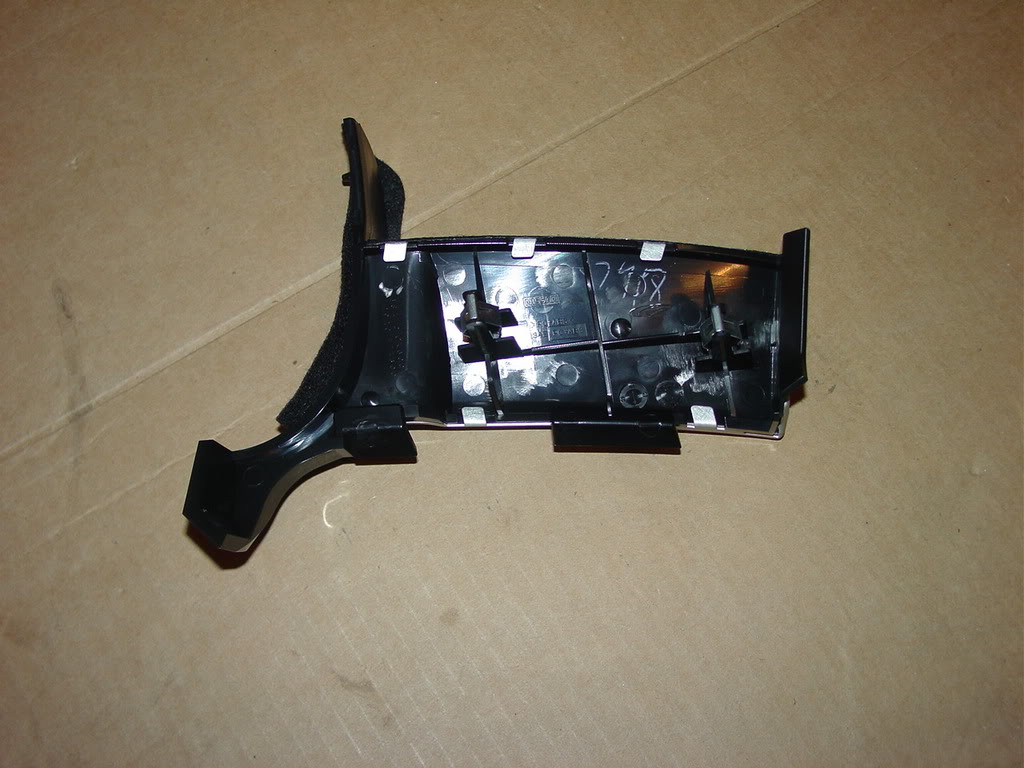
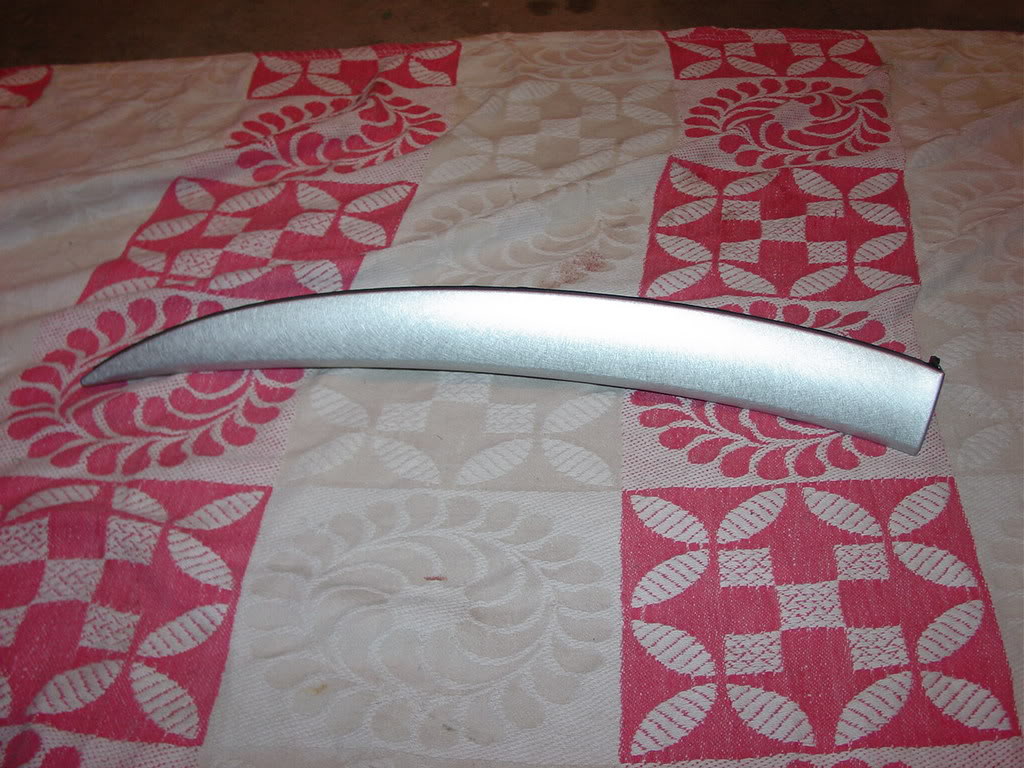
4. Now it's time for the little brushed aluminum trim piece (if that is what you are after). This piece is held on by two clips and a tight fit. The best way to remove this piece is to get your fingers behind the clips and push them through the holes rather than pulling on the trim piece. Here is the piece removed.
5. Here is the space the piece attaches too.
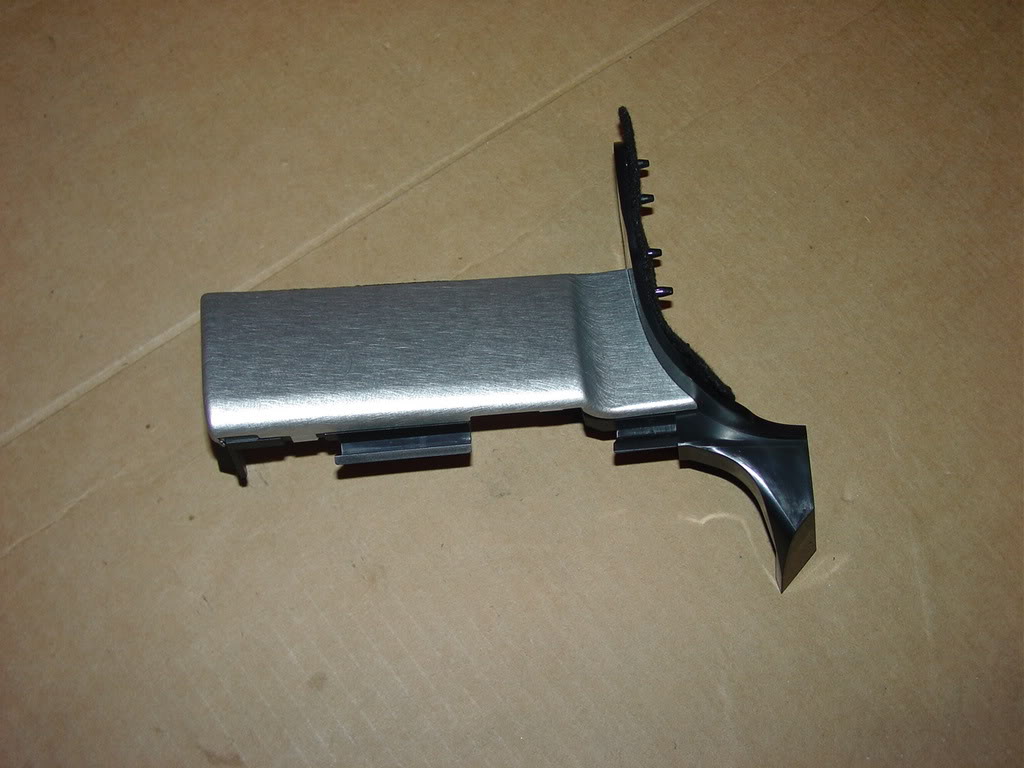
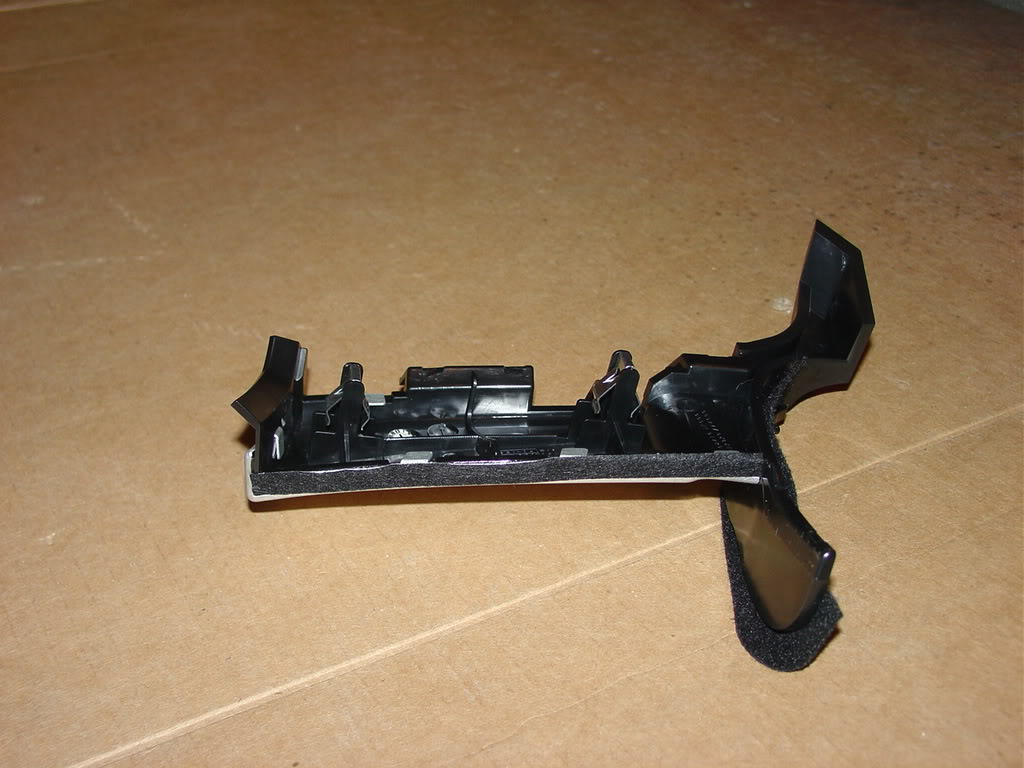
6. A shot of the back side of the piece.
7. A better look at the clips.
8. Now on to the passenger side. Start with the side finisher (right).
9. It's the same as the driver's side, held on by clips, start at the bottom. Don't mind the other missing parts, this picture is out of sequence.
10. A look at the clips.

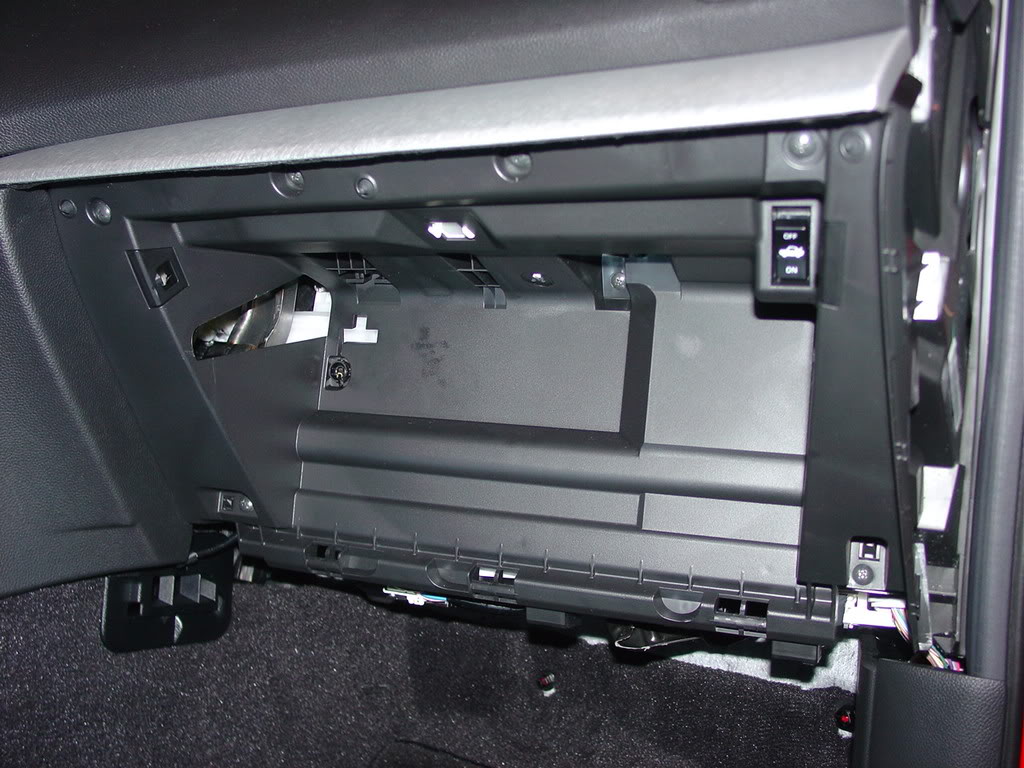
11. Next is the passenger lower cover. The are no screws or bolts here. Just pull down and then back.
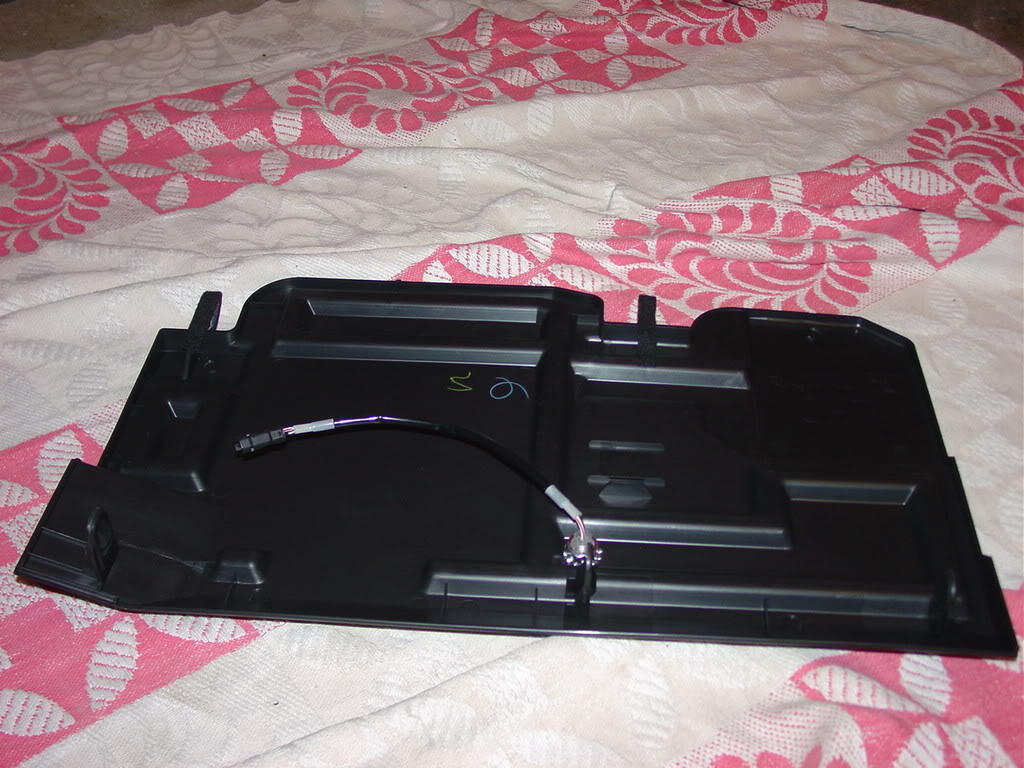
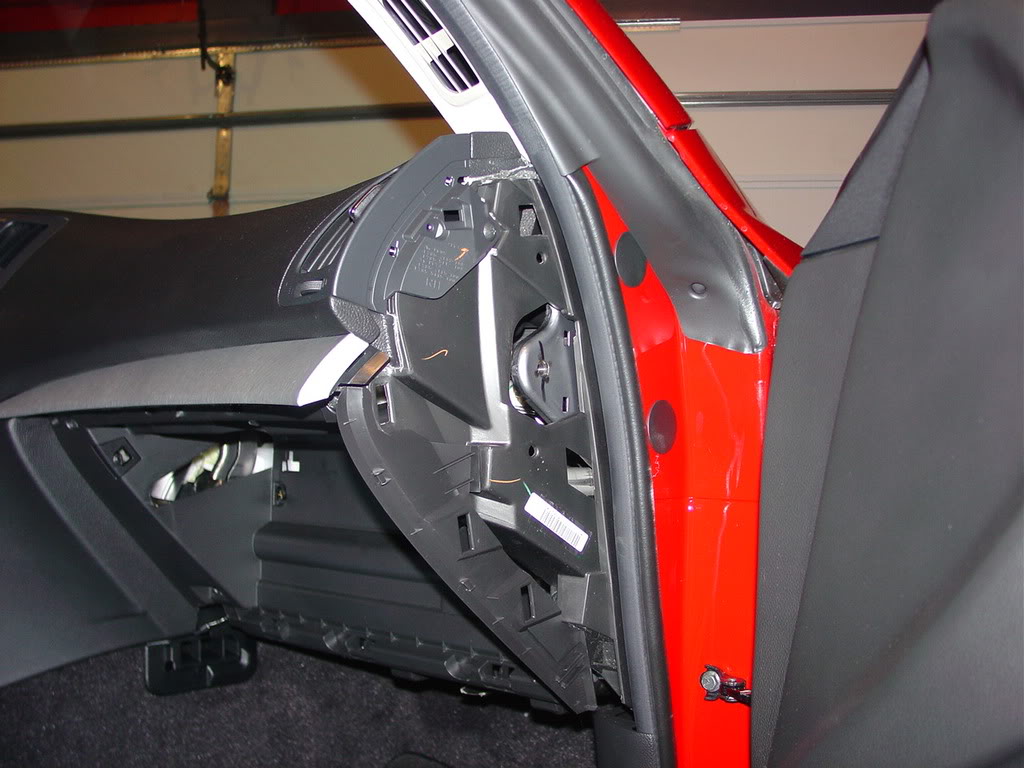
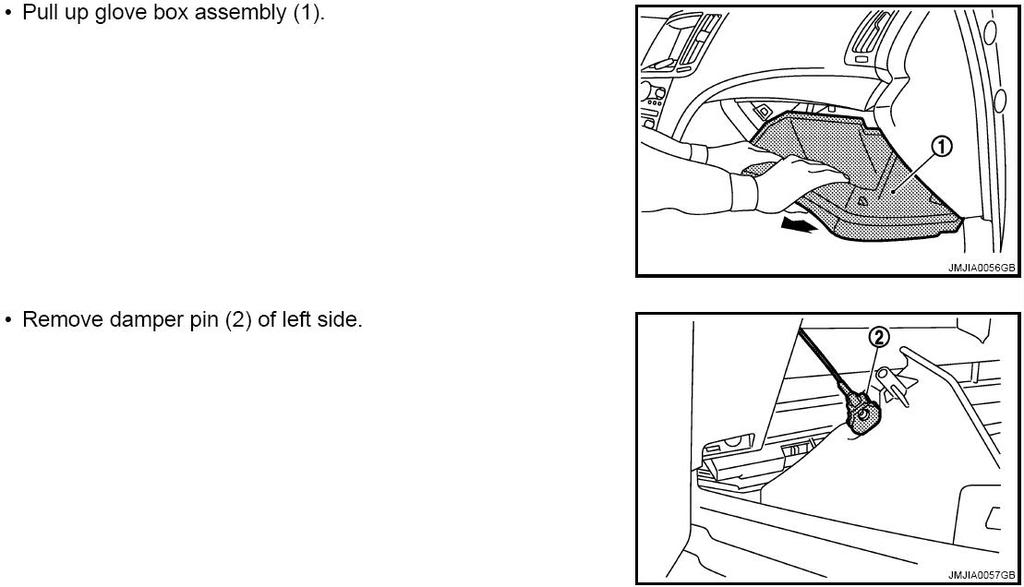
12. Tricky step warning. The glove box is held in by it's own weight. It's a matter of pulling the glove box down and lifting the back/bottom of the glove box up. The goal is to get the tabs out of the slots. After the glove box is disconnected from the bottom, a string that is used as a damper must be disconnected. This is from the shop manual.
13. A look at the tabs on the bottom of the glove box.
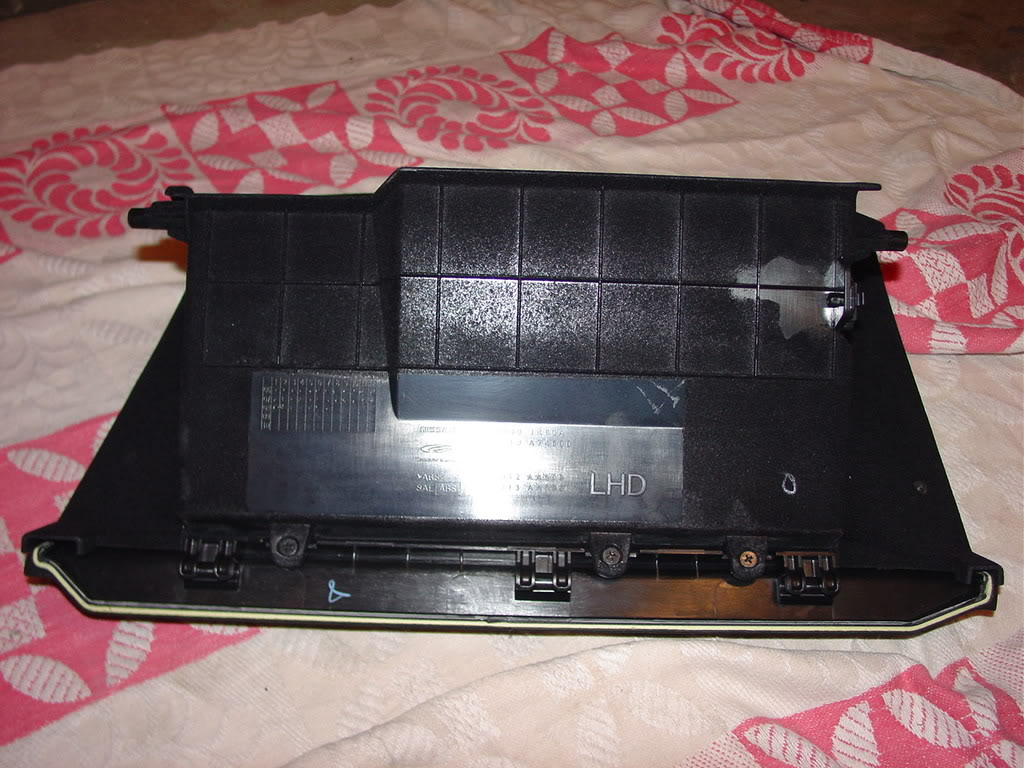
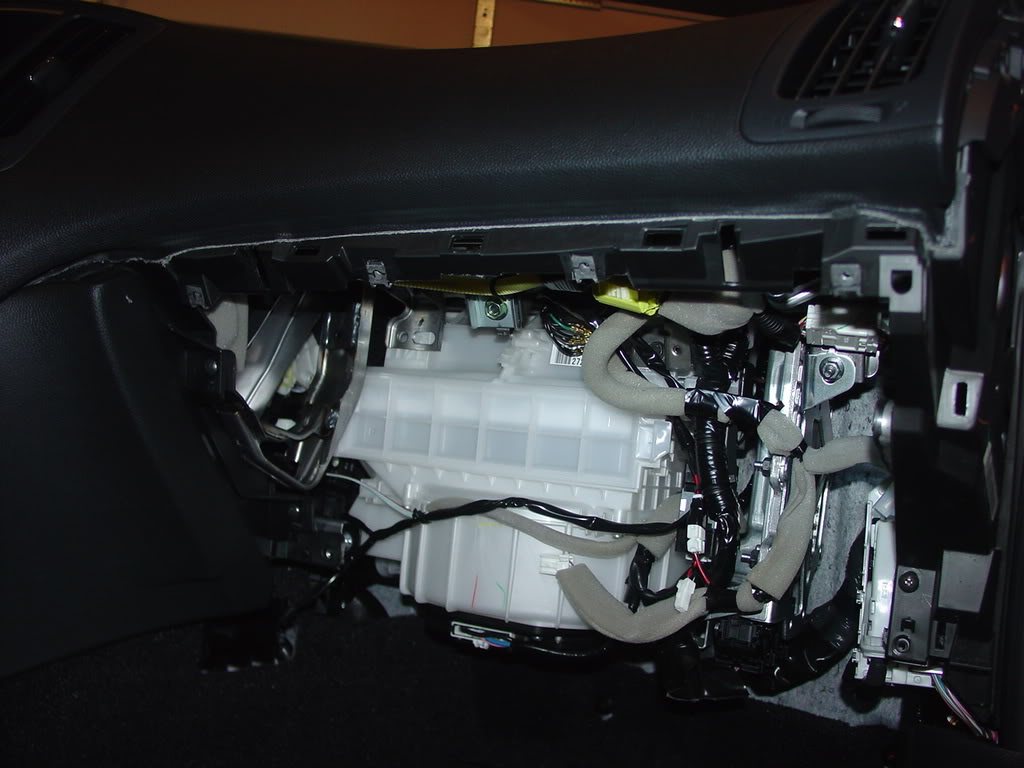
14. Now your left with this panel. There are seven screws that need to be removed and then a number of tabs hold the panel in place. The panel needs to be pulled straight back. I'm sorry, I do not have a good picture of the back side of this panel. I blame Her.
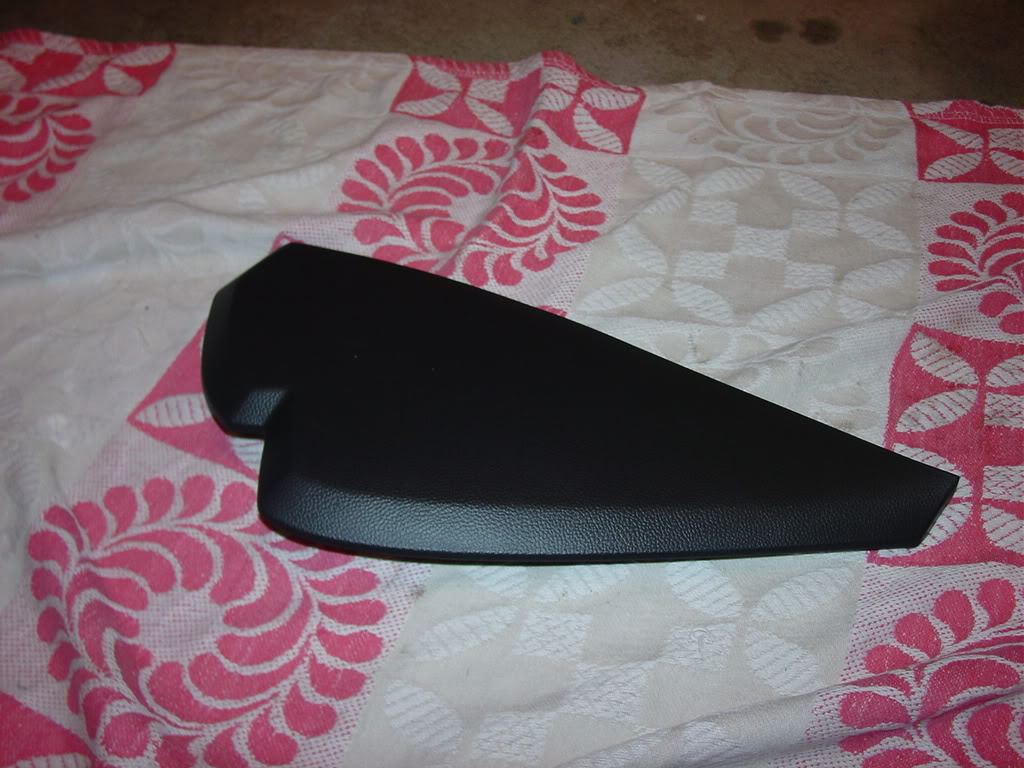
15. Once that panel is removed you can pull the passenger side brushed aluminum trim piece. It's held on by four clips and it's easy to get to the back side of the clips so best thing to do is push the clips through. Here is a look at the dash where the trim piece mounts to.
16. A look at the back of the trim piece so you can see the clips.

17. Honestly, I just took this out to see if I could do it.
I helped Her install a lighting accent kit so we took some pictures along the way. She really doesn't like the brushed aluminum trim pieces so I took this time to learn how to get the dash trim pieces out.
1. The first thing to remove is the side finisher (left). It is only held on by clips. The best thing to do is start at the bottom and get the bottom clips to pop out. I have a generic interior trim removal tool that I picked up from my local auto store. It works pretty good here. Here is the dash with the side finisher removed.
2. Here is a look at the back side of the finisher.
3. The next panel to remove is the lower panel on the driver's side. It starts by removing two mounting screws for the hood opener and two screws for the OBDII connector. After that the only thing left to do is pull the panel towards the rear of the car. There are only four or five clips holding the panel on. After the panel is loose/removed, there is one sensor that needs to be removed from the panel. You can either unclip the wire connector or unscrew the whole sensor assembly. I failed to get a good picture of this panel, so here is the shop manual step.
4. Now it's time for the little brushed aluminum trim piece (if that is what you are after). This piece is held on by two clips and a tight fit. The best way to remove this piece is to get your fingers behind the clips and push them through the holes rather than pulling on the trim piece. Here is the piece removed.
5. Here is the space the piece attaches too.
6. A shot of the back side of the piece.
7. A better look at the clips.
8. Now on to the passenger side. Start with the side finisher (right).
9. It's the same as the driver's side, held on by clips, start at the bottom. Don't mind the other missing parts, this picture is out of sequence.
10. A look at the clips.
11. Next is the passenger lower cover. The are no screws or bolts here. Just pull down and then back.
12. Tricky step warning. The glove box is held in by it's own weight. It's a matter of pulling the glove box down and lifting the back/bottom of the glove box up. The goal is to get the tabs out of the slots. After the glove box is disconnected from the bottom, a string that is used as a damper must be disconnected. This is from the shop manual.
13. A look at the tabs on the bottom of the glove box.
14. Now your left with this panel. There are seven screws that need to be removed and then a number of tabs hold the panel in place. The panel needs to be pulled straight back. I'm sorry, I do not have a good picture of the back side of this panel. I blame Her.
15. Once that panel is removed you can pull the passenger side brushed aluminum trim piece. It's held on by four clips and it's easy to get to the back side of the clips so best thing to do is push the clips through. Here is a look at the dash where the trim piece mounts to.
16. A look at the back of the trim piece so you can see the clips.
17. Honestly, I just took this out to see if I could do it.
Here is something that will get you started in the right direction for now.
https://www.myg37.com/forums/audio-v...l-removal.html
I like to know where the clips are so I'll take good pictures of the back of the panel.

Registered User
Joined: Mar 2006
Posts: 1,182
Likes: 2
From: Long Island, NY
I have half the pictures I need and plan on pulling the drivers side door panel later this week. I'll see what I can do.
Here is something that will get you started in the right direction for now.
https://www.myg37.com/forums/audio-v...l-removal.html
I like to know where the clips are so I'll take good pictures of the back of the panel.
Here is something that will get you started in the right direction for now.
https://www.myg37.com/forums/audio-v...l-removal.html
I like to know where the clips are so I'll take good pictures of the back of the panel.

if you can figure out where the rattling is coming from (which clip), u can use a small flat head screw driver to widen the clip back out...you can do this by driving and listening for the noise...once you figure out where the noise is coming from (let's say ur door), put ur finger around that location and push while ur driving....if u still hear the noise, then obviously it's not coming from that clip...move around until u find a place where u've pushed, and the noise has disappeared....remember that spot, then go home and disassemble ur door and most likely it's the clip closes to the place where u've pushed ur finger....if it's a plastic clip, and ur afraid ur gonna break it when bending the tabs out..a tip i learned from the honda forums is you can use thin weather strip, cut into little small pieces...and tape it around the hole on the metal frame (doesn't have to look nice), that way, the weather strip will absorb most of the vibrations coming from the plastic panel rubbing against the metal...

Registered User
Joined: Mar 2006
Posts: 1,182
Likes: 2
From: Long Island, NY
if you can figure out where the rattling is coming from (which clip), u can use a small flat head screw driver to widen the clip back out...you can do this by driving and listening for the noise...once you figure out where the noise is coming from (let's say ur door), put ur finger around that location and push while ur driving....if u still hear the noise, then obviously it's not coming from that clip...move around until u find a place where u've pushed, and the noise has disappeared....remember that spot, then go home and disassemble ur door and most likely it's the clip closes to the place where u've pushed ur finger....if it's a plastic clip, and ur afraid ur gonna break it when bending the tabs out..a tip i learned from the honda forums is you can use thin weather strip, cut into little small pieces...and tape it around the hole on the metal frame (doesn't have to look nice), that way, the weather strip will absorb most of the vibrations coming from the plastic panel rubbing against the metal...
Thanks for the info! I know the noise is coming from somewhere around the speaker, if I have to take the door panel off I'm going to put rubber/weather stripping around every clip.
Trending Topics


https://www.myg37.com/forums/d-i-y-i...oor-panel.html


Premier Member
Joined: Nov 2015
Posts: 298
Likes: 40
From: The Woodlands
This is what these forums are all about! More than 6 years later and exactly what I need. Looking forward to getting vinyl and dip samples then tearing down the interior. Thanks from the future.