
DIY installing IGT CF interior pieces


DIY installing IGT CF interior pieces
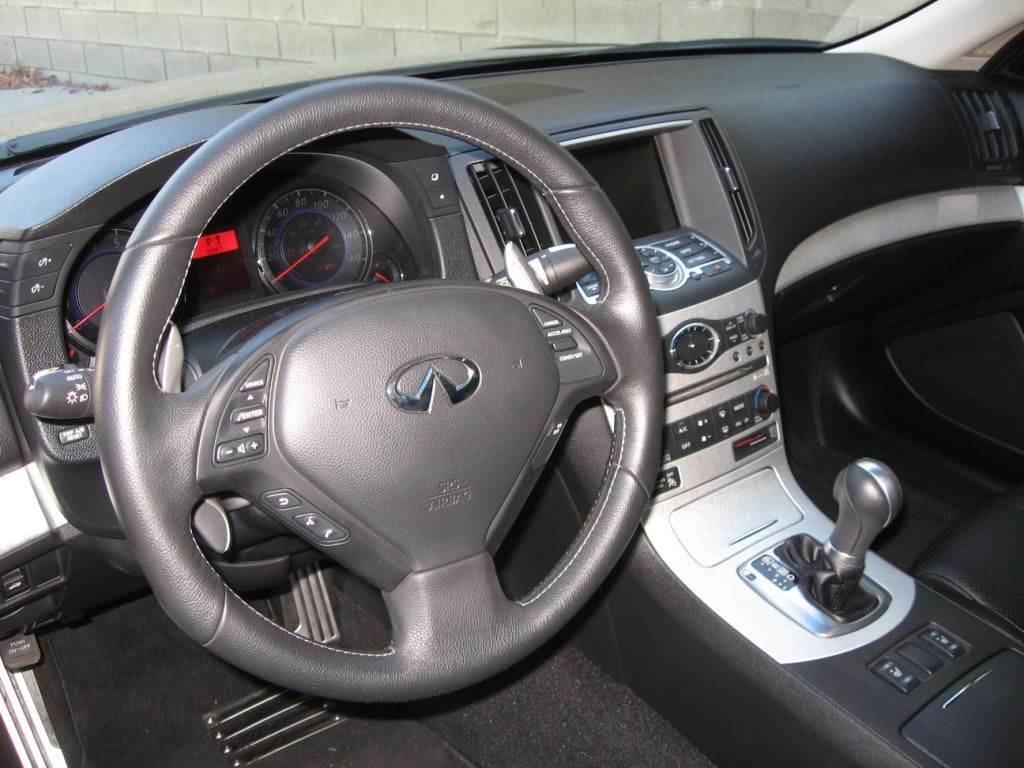
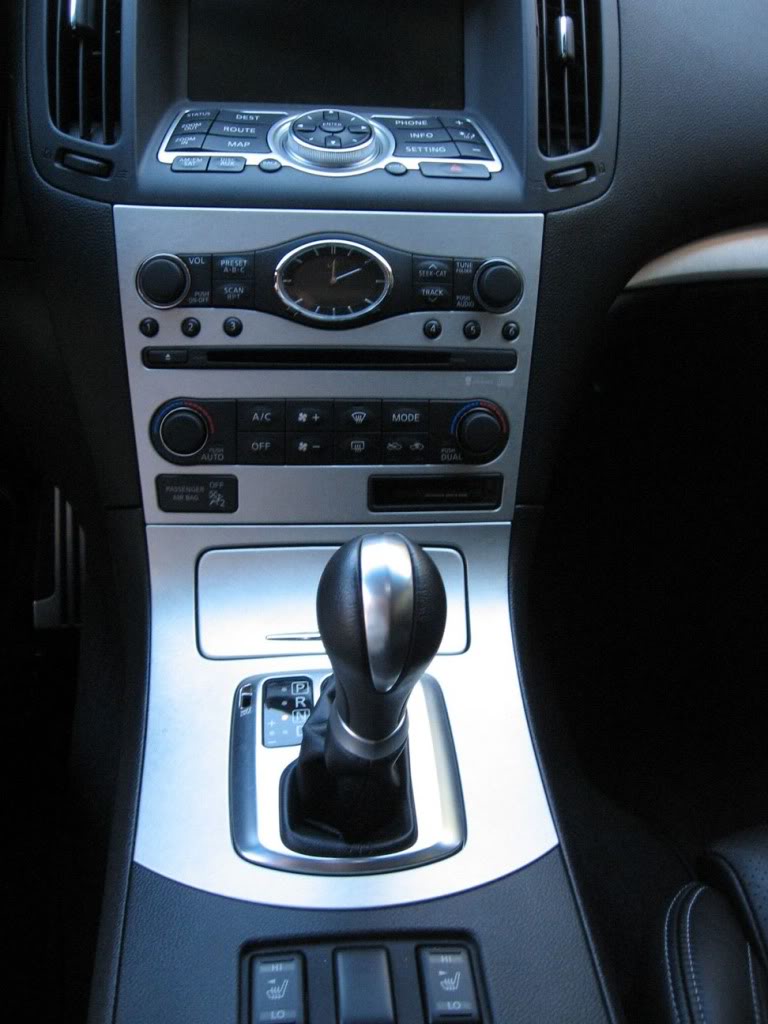
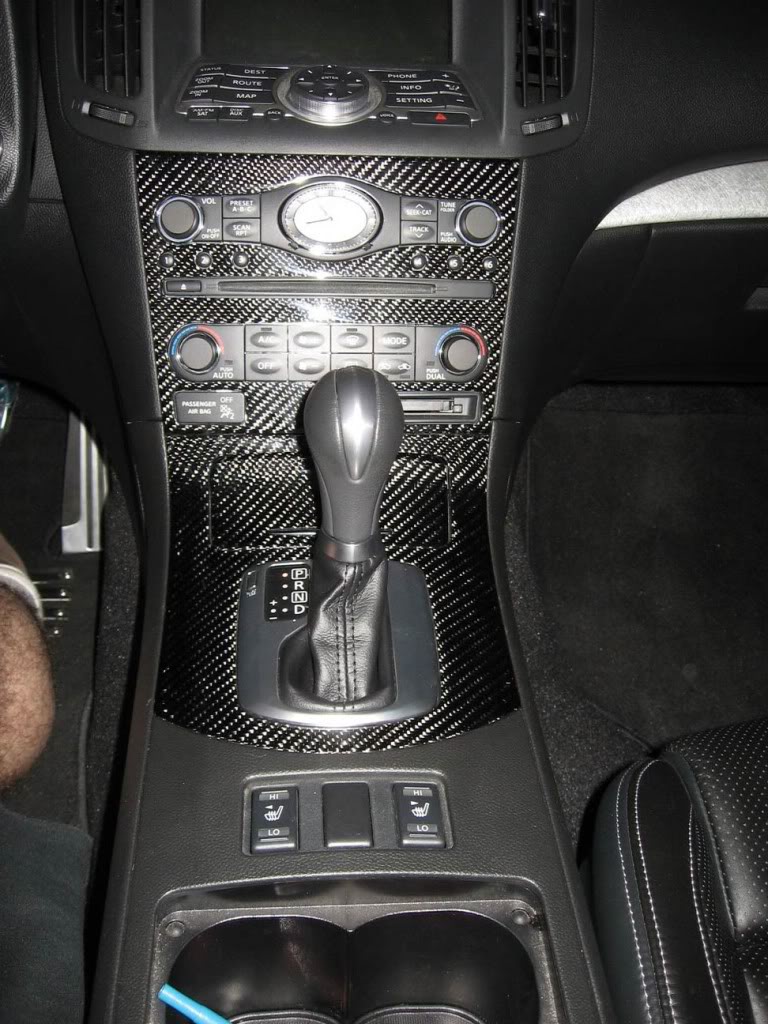
Well I am very happy to present the TRUE replacement Carbon Fiber Interior pieces. It took a while to get the pieces but they are well worth the wait. So to start here a pics of the interior before.
Now we should all know how to take apart the center console so I won't dig into that. If you don't know do a search.
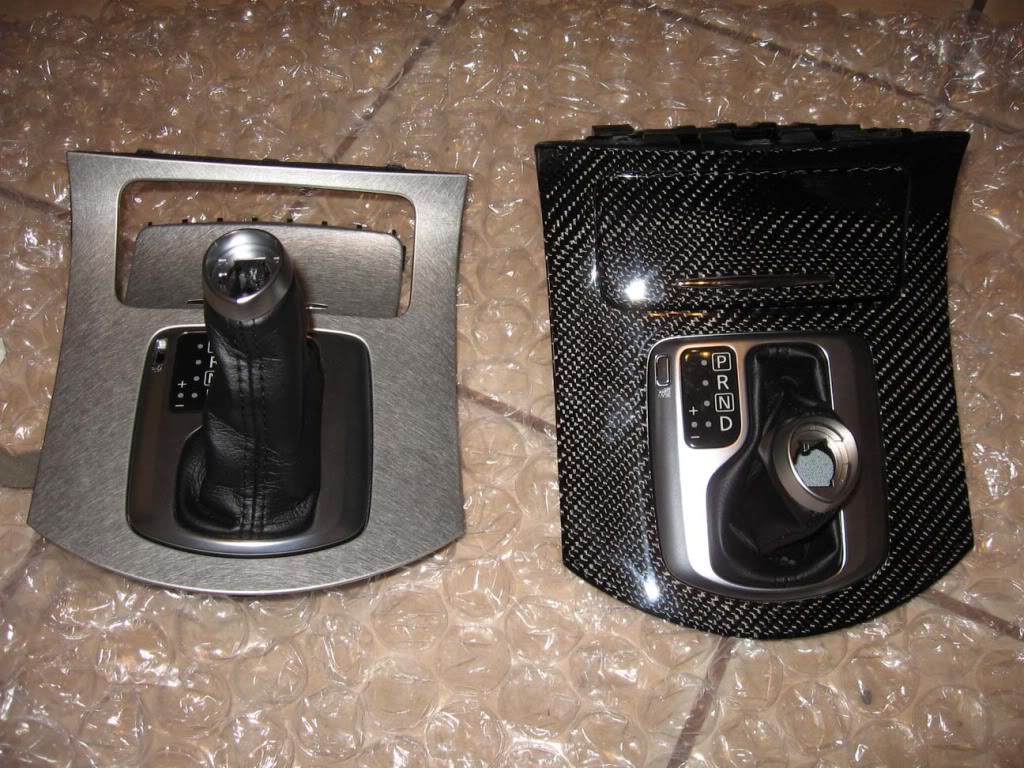
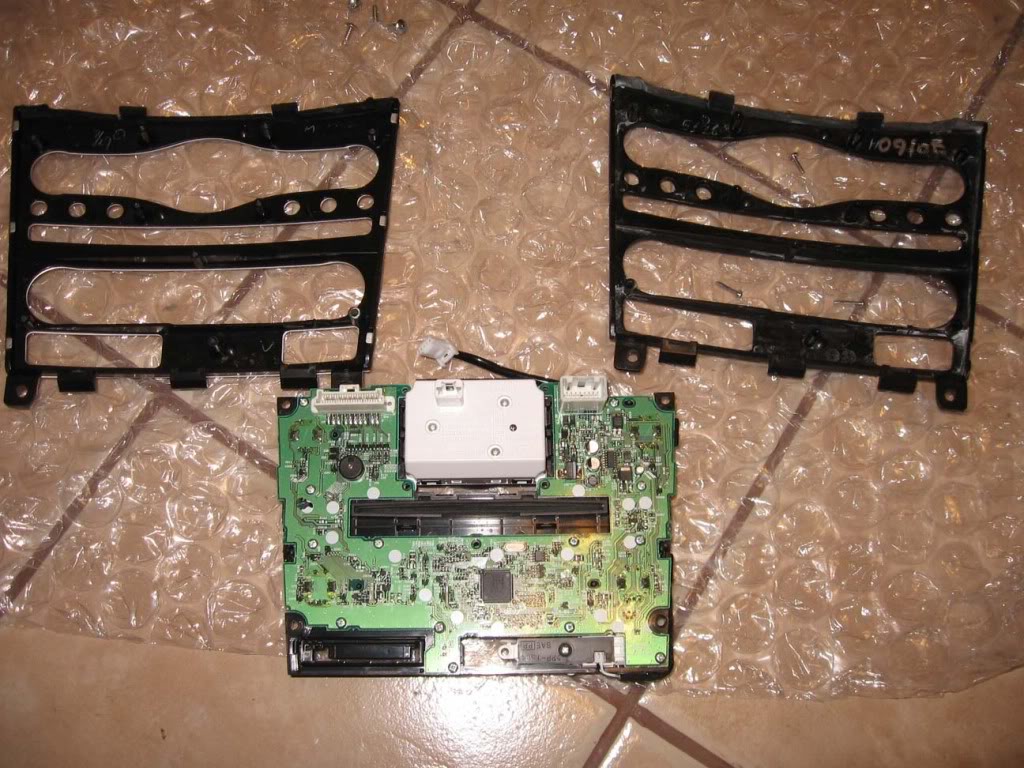
Here are the shifter console finisher pieces out of the car. As you can see they are both complete pieces. Pull one out put in the new one and you are done. The whole ash tray assembly comes with the new CF pieces, along with the gear indicator and shift boot. Very easy swap.
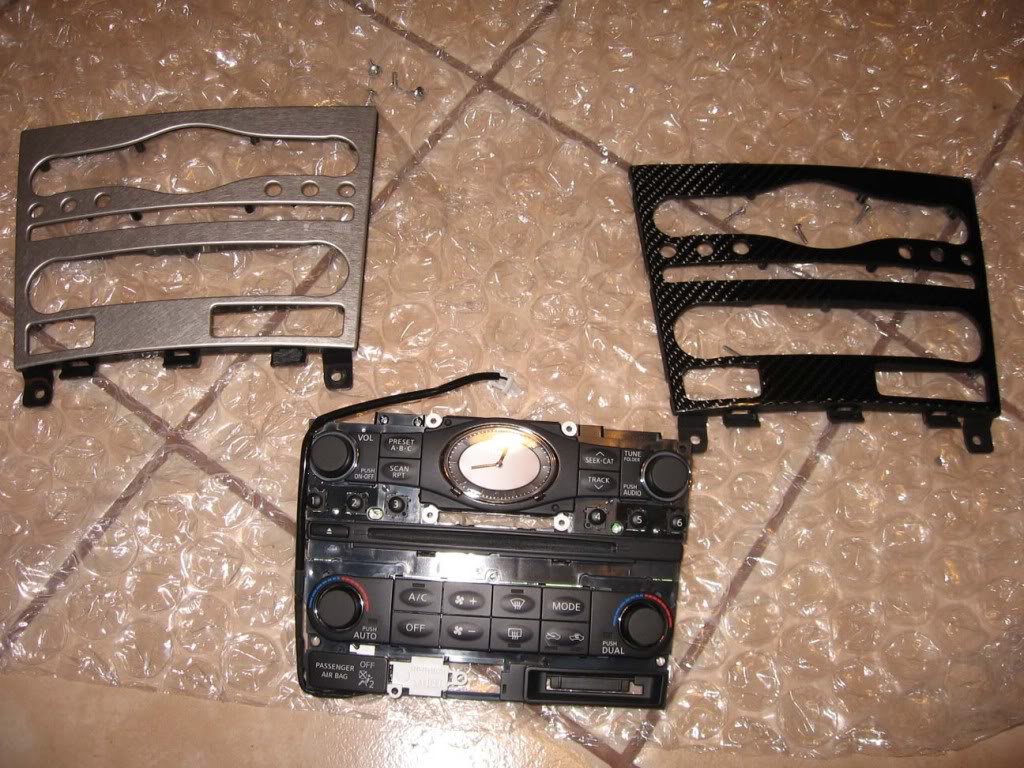
The next part is a little more difficult, the radio cover.
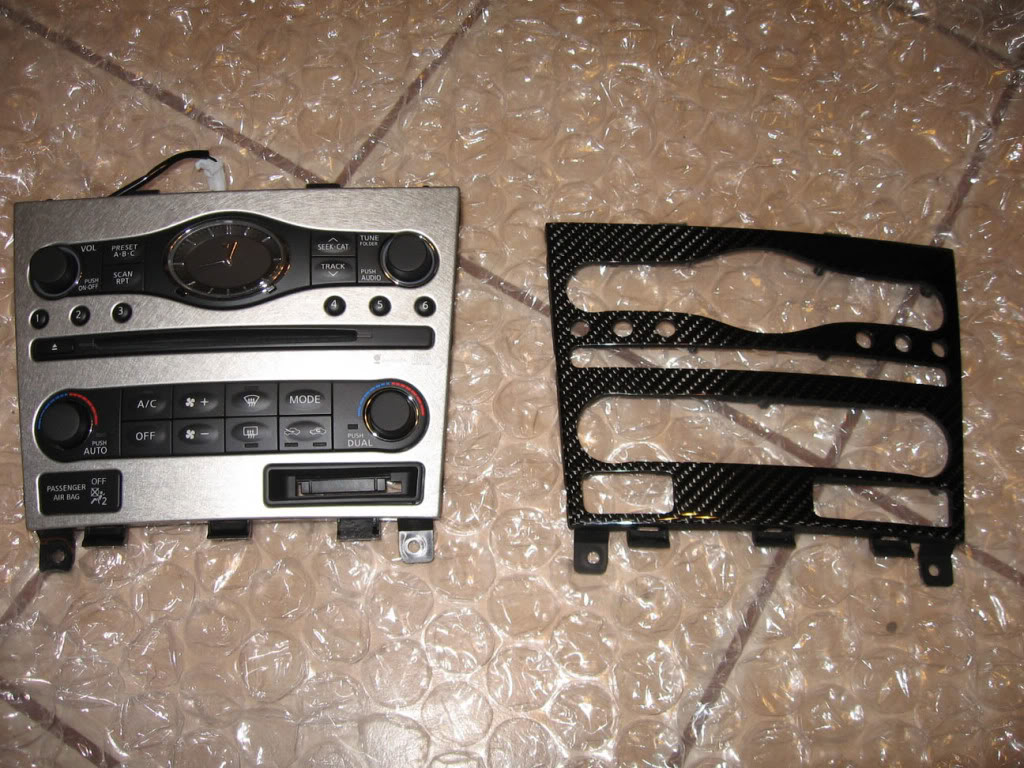
As you can see the only piece you get here is the CF cover. Not too hard to swap though. There are like 6 or 7 screws on the back of the unit. Unscrew those and the whole electronic portion of the unit comes off.
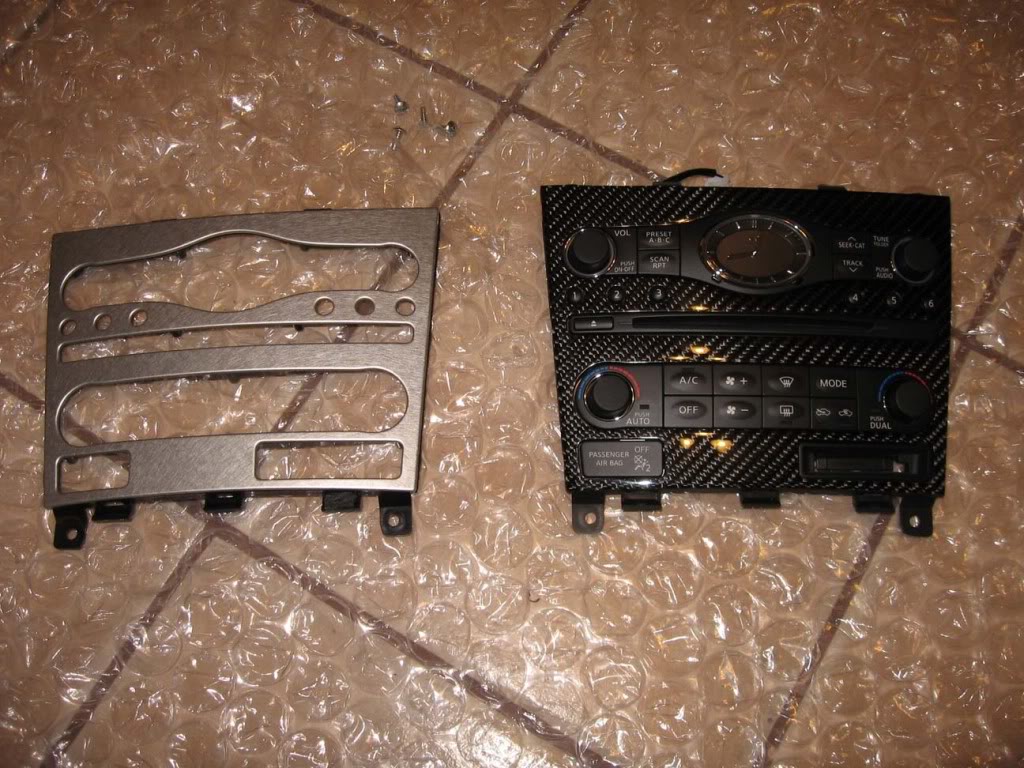
As you can see the cover pieces are identical. The mounting tabs and screw holes are all there. Just unscrew the electronic portion from the aluminum panel and screw it back onto the CF panel.
Then you can install the 2 pieces back into the dash. EASY.
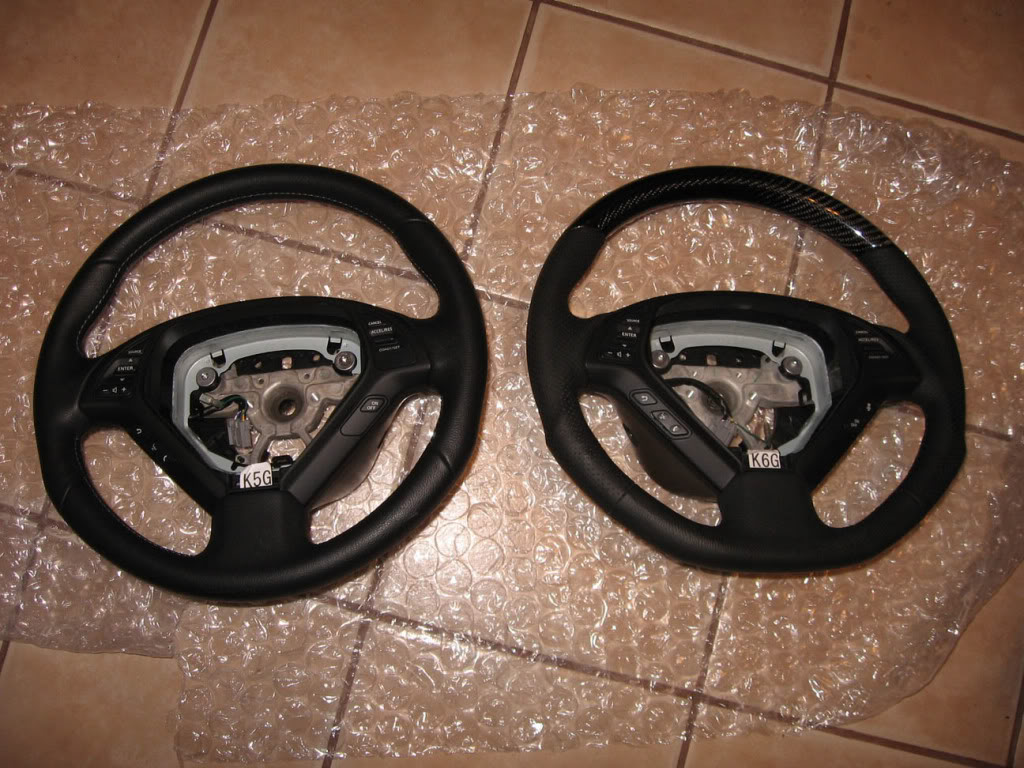
Next the steering wheel. BE SURE YOU DISCONNECT THE BATTERY FOR THIS STEP AT LEAST, IF NOT FOR THE WHOLE PROCESS. You don't want the AIRBAG going off.
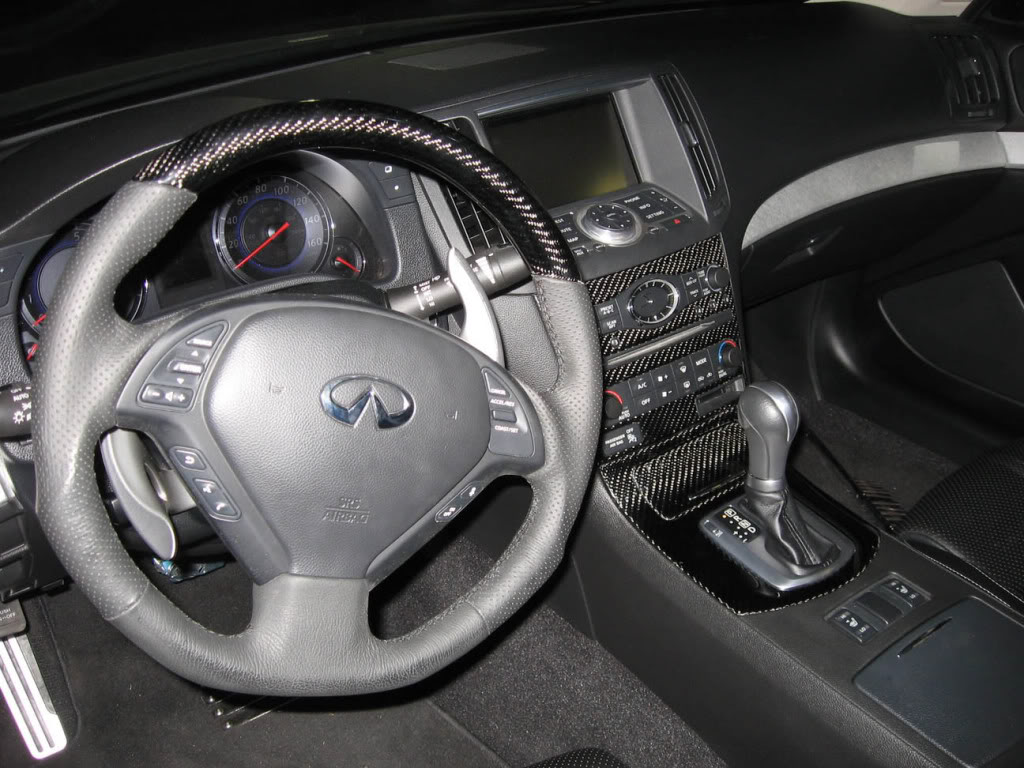
Again beautiful craftsmanship on the whole wheel. With the new leather wrapping and CF top portion.
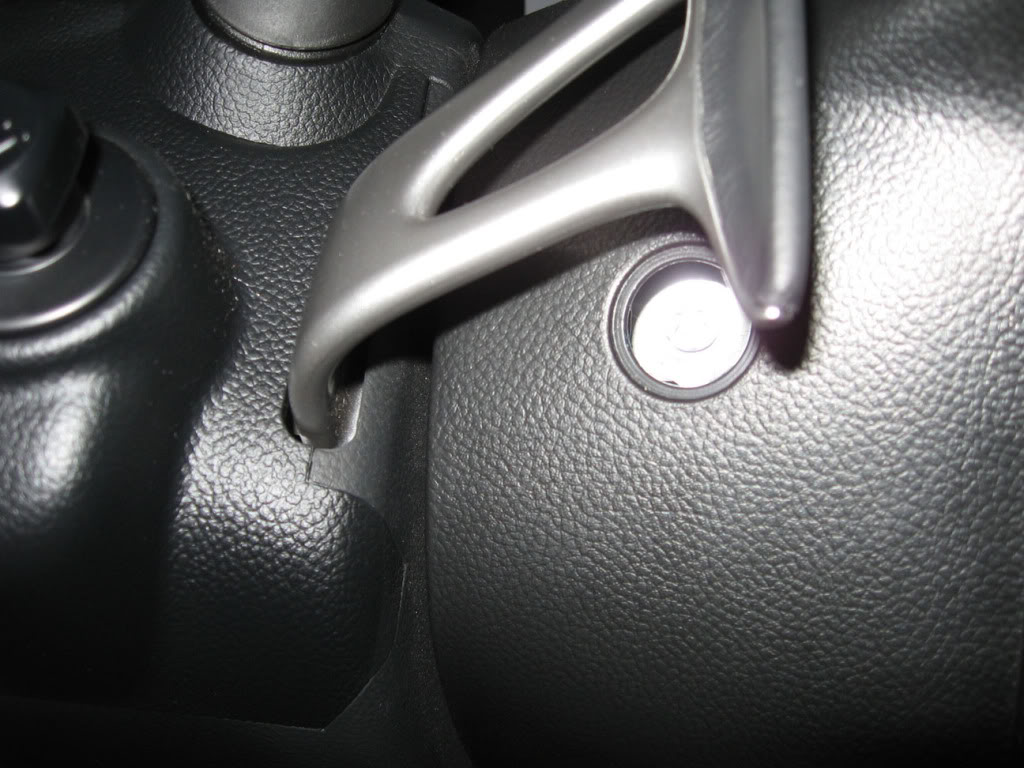
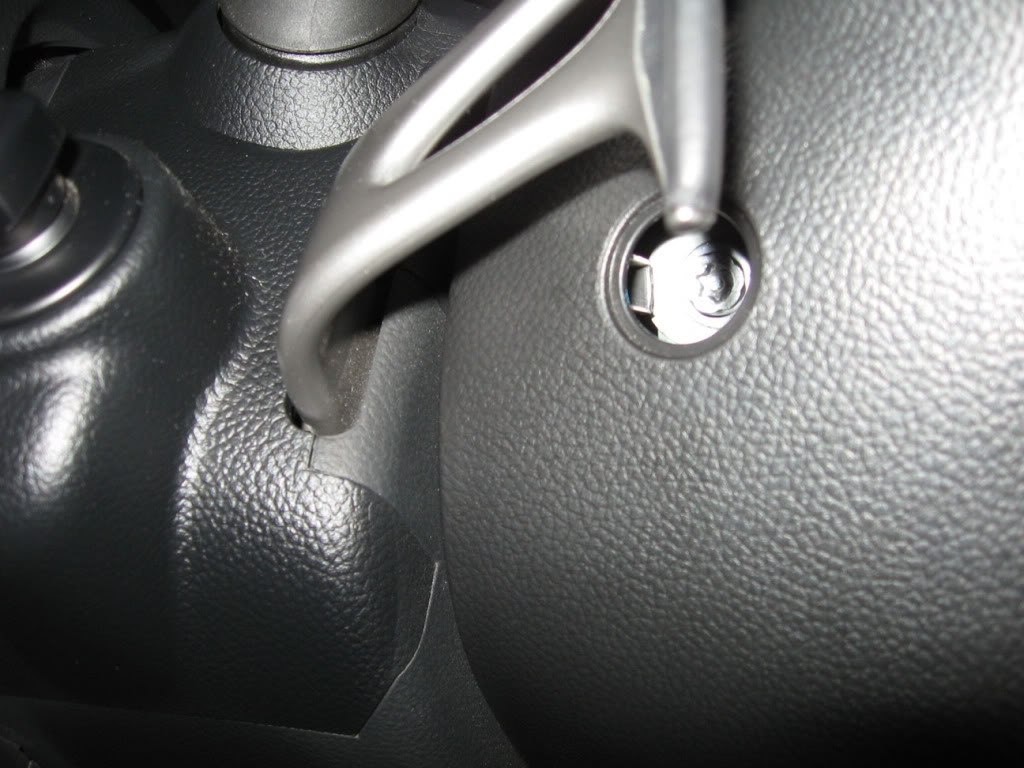
To remove the steering wheel, there are little round covers on the lower right and left of the base of the wheel. About at the 8 and 4 o'clock positions. Take the covers off and expose the safety TORX screws underneath. It is like a regular TORX bit, but with a small piece protruding out of the center of the screw. The size of the TORX is T-30.
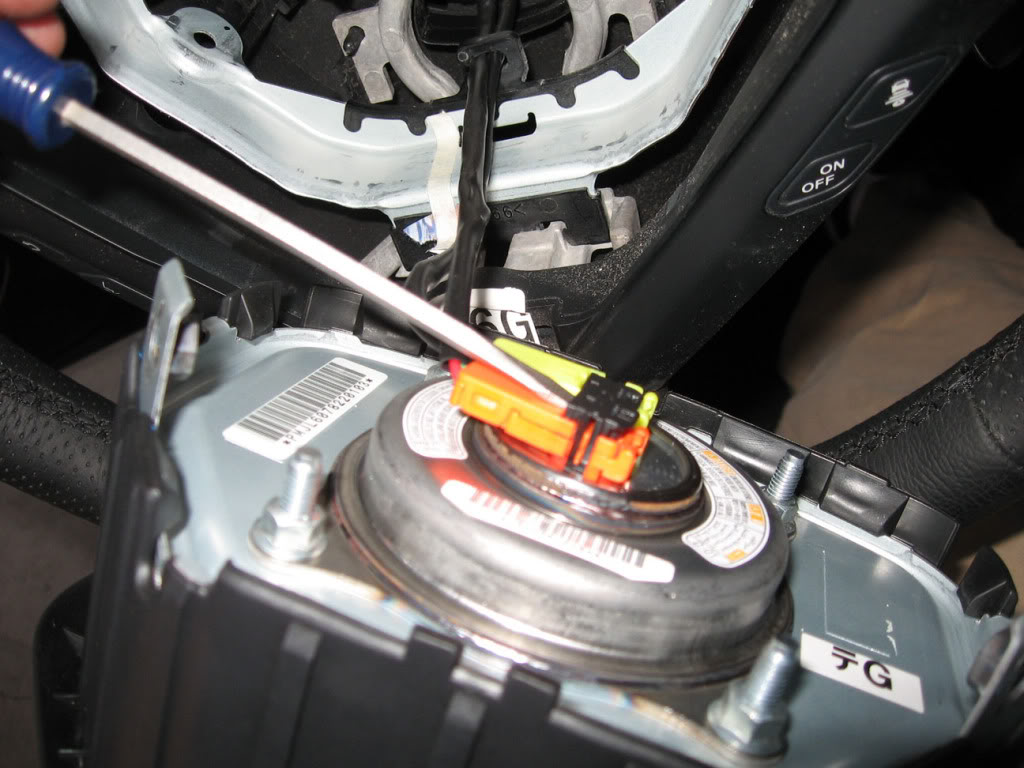
That will release the airbag unit. Pull out the center section which is the airbag. You will find 2 wires connected to the airbag. Stick a small flat head screwdriver under the black safety clip as shown and pry it up.
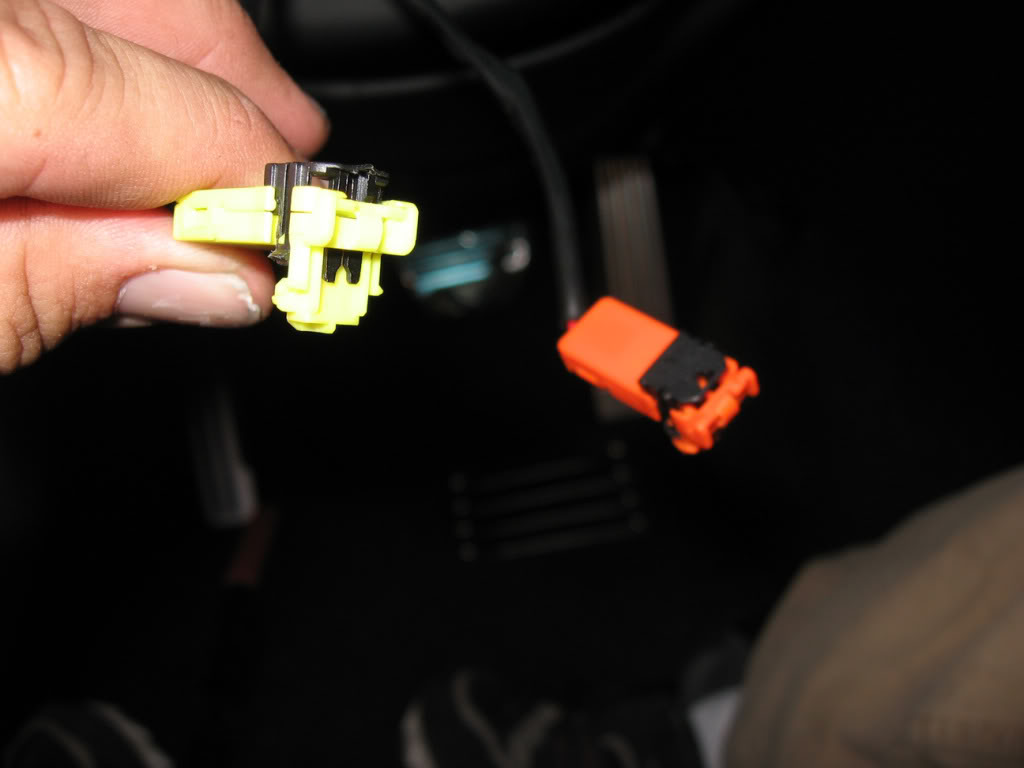
Now the 2 connectors should pull right off, and should look like this.
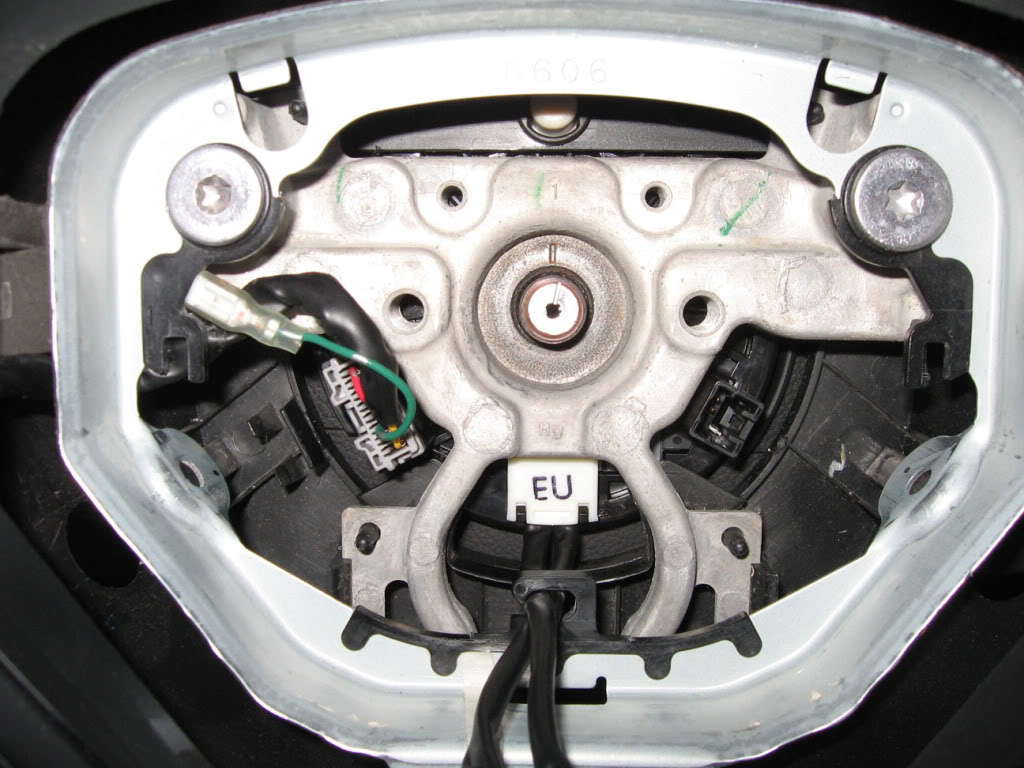
With the airbag gone you can now access the 19mm nut that holds on the steering wheel. Unscrew that and disconnect the connector for the wheel controls and the whole steering wheel will pull off with ease.

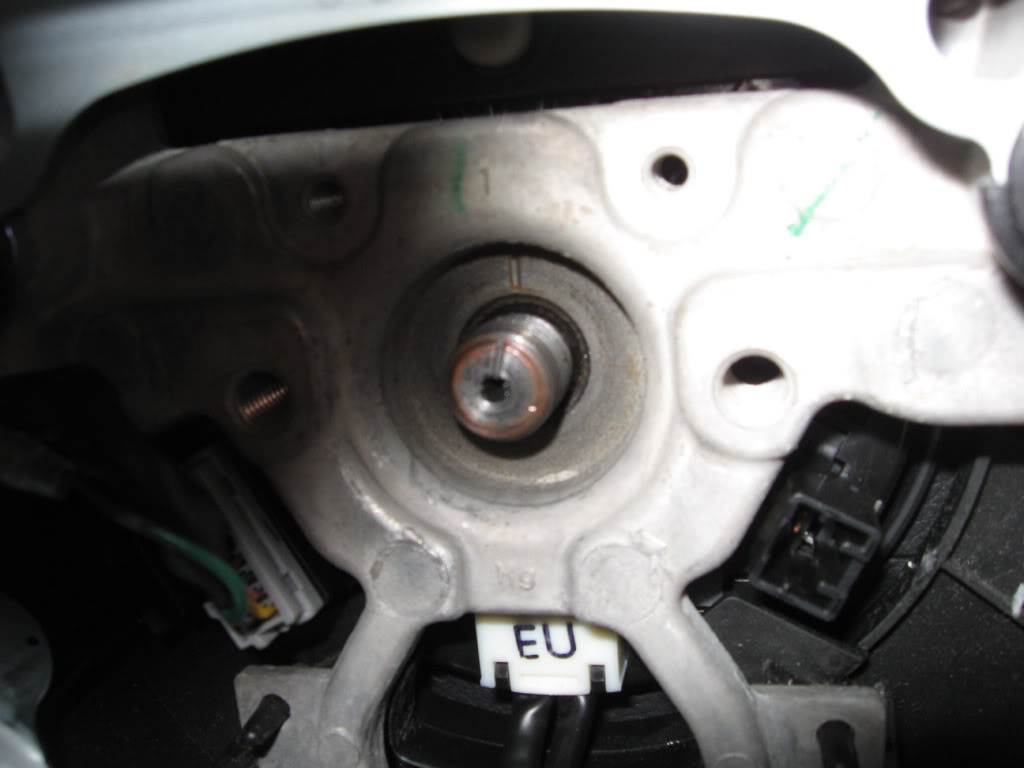
BE very careful not to twist or turn the center ring after the wheel has been taken off. It is not detrimental but the wheel might not line up perfectly like it did before and you will have to get an alignment to straighten the steering wheel.
As you can see in the next pics there are alignment markings on the center shaft and the steering wheel to get the wheel installed straight. Line them up and push the wheel on.
Screw back on the 19mm nut, connect the connector and the wheel is back on. For the airbag just slide in the 2 connectors to the appropriate color and push down the safety clips. Slide the airbag unit back into the steering wheel and screw back in the 2 screws that you had previously taken out. Push in the plastic covers and you are done.
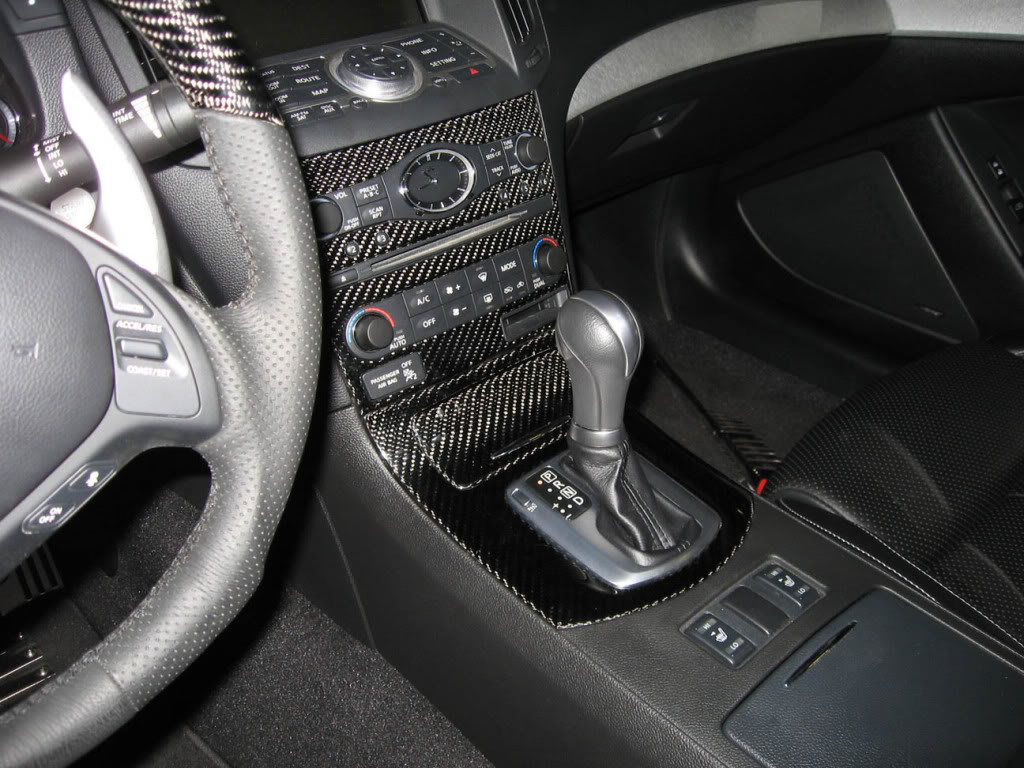
Now sit back and crack open a beer and marvel at the brand new look of your car.
Now we should all know how to take apart the center console so I won't dig into that. If you don't know do a search.
Here are the shifter console finisher pieces out of the car. As you can see they are both complete pieces. Pull one out put in the new one and you are done. The whole ash tray assembly comes with the new CF pieces, along with the gear indicator and shift boot. Very easy swap.
The next part is a little more difficult, the radio cover.
As you can see the only piece you get here is the CF cover. Not too hard to swap though. There are like 6 or 7 screws on the back of the unit. Unscrew those and the whole electronic portion of the unit comes off.
As you can see the cover pieces are identical. The mounting tabs and screw holes are all there. Just unscrew the electronic portion from the aluminum panel and screw it back onto the CF panel.
Then you can install the 2 pieces back into the dash. EASY.
Next the steering wheel. BE SURE YOU DISCONNECT THE BATTERY FOR THIS STEP AT LEAST, IF NOT FOR THE WHOLE PROCESS. You don't want the AIRBAG going off.
Again beautiful craftsmanship on the whole wheel. With the new leather wrapping and CF top portion.
To remove the steering wheel, there are little round covers on the lower right and left of the base of the wheel. About at the 8 and 4 o'clock positions. Take the covers off and expose the safety TORX screws underneath. It is like a regular TORX bit, but with a small piece protruding out of the center of the screw. The size of the TORX is T-30.
That will release the airbag unit. Pull out the center section which is the airbag. You will find 2 wires connected to the airbag. Stick a small flat head screwdriver under the black safety clip as shown and pry it up.
Now the 2 connectors should pull right off, and should look like this.
With the airbag gone you can now access the 19mm nut that holds on the steering wheel. Unscrew that and disconnect the connector for the wheel controls and the whole steering wheel will pull off with ease.
BE very careful not to twist or turn the center ring after the wheel has been taken off. It is not detrimental but the wheel might not line up perfectly like it did before and you will have to get an alignment to straighten the steering wheel.
As you can see in the next pics there are alignment markings on the center shaft and the steering wheel to get the wheel installed straight. Line them up and push the wheel on.
Screw back on the 19mm nut, connect the connector and the wheel is back on. For the airbag just slide in the 2 connectors to the appropriate color and push down the safety clips. Slide the airbag unit back into the steering wheel and screw back in the 2 screws that you had previously taken out. Push in the plastic covers and you are done.
Now sit back and crack open a beer and marvel at the brand new look of your car.


 .
.
Yes I did. But the process that they are being made takes a bit longer. So I am still waiting for them. I wanted to keep the swoosh of the aluminum along the whole dash, and just add the CF trim.


Trending Topics


Nice. Doug has done it again.
You should've tried to drive it F1 style:

__________________
Best Car Insurance | Auto Protection Today | FREE Trade-In Quote
You should've tried to drive it F1 style:
__________________
Best Car Insurance | Auto Protection Today | FREE Trade-In Quote

 Those may be hairy *** B@LLS!