
DIY: G37 all headlight bulb replacement


The metal A clip should unlatch and just push it up and it will stay up, then insert the new bulbs, and bring the A clip down and latch it just like it was when the OEM bulb was in.
You shouldn't have to force the bulb through, it should fit right through no problem.
You shouldn't have to force the bulb through, it should fit right through no problem.
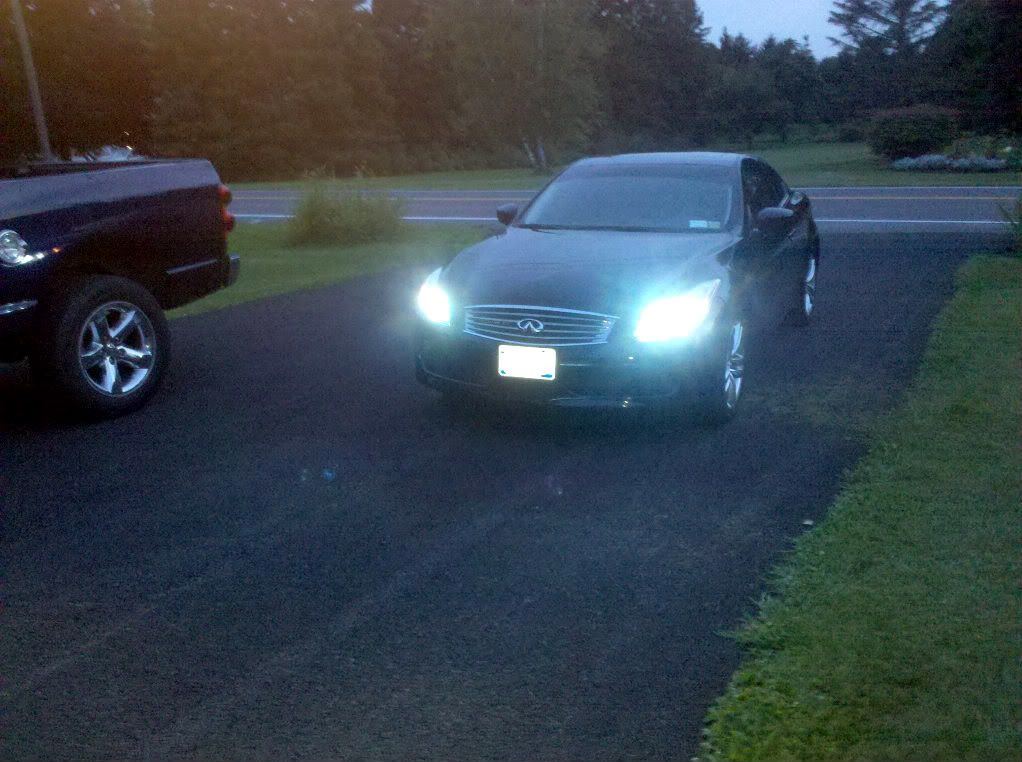
what is everyone using for city light/parking lights/ yellow ugly bulb under the fog light i bought PIAA 194/168 plasma blue bulbs i was gonna put them back by my license plate but after changing my HID heads last night i notice those yellow bulbs are gross, what will do the trick?
Also, anybody who has used an HID ballast upgrade kit for the fogs, how does the HID bulb fit through the HI metal housing? I tried to force it through and i think i might have broke the bulb and i know i touched it with my fingers, does anybody know what I should do, it says use rubbing alcohol to clean it. and the metal clips that everyone is talking about unclipping instead of unscrewing the two screws on the sides of the foglight housing are getting in the way of me putting the new HID bulbs in, has anyone had this problem, also i unattached the top of my windsheild washer res. is there anything else i can do in there to get my hands in there and be able to get in there to see what i'm doing, i'm going from the top and from the wheel well. i got so frustrated with the HID ballast kit last night that I'm driving around with absolutely no fogs in at all right now.
Has anybody had to cut a hole in the dust cap so the ballast kit can fit through it?

Registered User
Joined: Jul 2010
Posts: 246
Likes: 2
I unclip it and take the old out, but the new bulb like wont fit the hid doesn't fit idk it will fit but I have to force it. But it wont go all the way in because the bottom.of that metal clip gets in the way and seriously there's not enough room for me to get both my hands in there.
Registered User
Joined: Jul 2010
Posts: 246
Likes: 2
Took me a while to install my fog lights, lots of soldering and getting into tight places, no one wants to here this but i took my bumper off for the HID foglight kit install it was soo much easier to actually get up under the headlight and use two hands it was much easier to solder, it was not very easy to do really anything from the top, it took a while to put the new HID wires through the dust cap, but in the end all worth it, my lights look great, the only thing is i never realized before when the high beams are on the fogs turn off that's kind of annoying, but they look great i have 8000K hid head lights and 10000K hid fog lights, next will be the Iron Man head lights once I get enough money together

Order placed  Discount code for iJDMtoys.com "GOJDM" or "JDMFAN" got me 15% off my order.
1) Garax D2S Xenon Replacement HID Light Bulbs - 6000K
2) Osram Powered HID Conversion Kit with slim digital HID ballasts (H11/H8 for Fog lights - 6000K)
Will get some pictures in a bit of my current setup, PIAA Xtreme White H8 Fogs and Stock HIDs to get the comparison going. Install Pictures to follow!
Discount code for iJDMtoys.com "GOJDM" or "JDMFAN" got me 15% off my order.1) Garax D2S Xenon Replacement HID Light Bulbs - 6000K
2) Osram Powered HID Conversion Kit with slim digital HID ballasts (H11/H8 for Fog lights - 6000K)
Will get some pictures in a bit of my current setup, PIAA Xtreme White H8 Fogs and Stock HIDs to get the comparison going. Install Pictures to follow!
Order placed Discount code for iJDMtoys.com "GOJDM" or "JDMFAN" got me 15% off my order.
1) Garax D2S Xenon Replacement HID Light Bulbs - 6000K
2) Osram Powered HID Conversion Kit with slim digital HID ballasts (H11/H8 for Fog lights - 6000K)
Will get some pictures in a bit of my current setup, PIAA Xtreme White H8 Fogs and Stock HIDs to get the comparison going. Install Pictures to follow!
Discount code for iJDMtoys.com "GOJDM" or "JDMFAN" got me 15% off my order.1) Garax D2S Xenon Replacement HID Light Bulbs - 6000K
2) Osram Powered HID Conversion Kit with slim digital HID ballasts (H11/H8 for Fog lights - 6000K)
Will get some pictures in a bit of my current setup, PIAA Xtreme White H8 Fogs and Stock HIDs to get the comparison going. Install Pictures to follow!
NOTE: The metal clip that holds the bulb in place is a little tricky and hard to see, so take you're time to feel around and bend it inward and up out of the way.
* For the HID conversion kit for the fog lamps you can go through the fender for the driver side but NOT for the passenger side. The washer fluid reservoir in the way on that side, so you have to go through the underside shielding, which makes seeing what you're doing a bit difficult.
Also NOTE: When you insert the HID bulb or H8 into the fog light housing, look at it from the front as you apply forward pressure and turn the bulb to lock it in place, Making sure that all three prongs are above the mounting tabs or the bulb will not seat properly. I also took the extra time to find a spot to zip-tie the ballasts so that they would not be loose and sliding around. This is easier to do on the driver side because of the better visibility and availability of random holes to use as anchors.
* And as always, Be sure to test each lamp before closing up the fender and under engine shielding. Total install time was about 1.5 hours including testing, mounting and figuring the first side out

Last edited by TONY37X; Sep 8, 2010 at 08:15 PM.

Registered User
Joined: Aug 2010
Posts: 5
Likes: 0
From: Los Angeles
so i was trying to change the small bulbs on top of the head lights the 194 i believe and i did the drivers side no problem but when i tried to do the passenger side i some how manged to drop the light i was replacing it with into the housing
 i know im an idiot! any idea on how to get it out?? i tried everything from trying to fish it out with a clothes line to sticking some tape onto a screw driver and trying to get it to stick and pulling it out. any ideas on what i should do hopefully with out ripping the car apart since i am not experienced at all. you think INFINITI would have a problem if i tried to take it in for service to fix that since i was changing the bulbs?
i know im an idiot! any idea on how to get it out?? i tried everything from trying to fish it out with a clothes line to sticking some tape onto a screw driver and trying to get it to stick and pulling it out. any ideas on what i should do hopefully with out ripping the car apart since i am not experienced at all. you think INFINITI would have a problem if i tried to take it in for service to fix that since i was changing the bulbs?

Registered User
Joined: Aug 2010
Posts: 991
Likes: 5
From: Philadelphia
so i was trying to change the small bulbs on top of the head lights the 194 i believe and i did the drivers side no problem but when i tried to do the passenger side i some how manged to drop the light i was replacing it with into the housing i know im an idiot! any idea on how to get it out?? i tried everything from trying to fish it out with a clothes line to sticking some tape onto a screw driver and trying to get it to stick and pulling it out. any ideas on what i should do hopefully with out ripping the car apart since i am not experienced at all. you think INFINITI would have a problem if i tried to take it in for service to fix that since i was changing the bulbs?
i know im an idiot! any idea on how to get it out?? i tried everything from trying to fish it out with a clothes line to sticking some tape onto a screw driver and trying to get it to stick and pulling it out. any ideas on what i should do hopefully with out ripping the car apart since i am not experienced at all. you think INFINITI would have a problem if i tried to take it in for service to fix that since i was changing the bulbs?<a href="http://s1224.photobucket.com/albums/ee368/scottybegood1/Car/?action=view¤t=IMAG0091.jpg" target="_blank"><img src="http://i1224.photobucket.com/albums/ee368/scottybegood1/Car/IMAG0091.jpg" border="0" alt="Photobucket"></a>
Registered User
Joined: Aug 2010
Posts: 5
Likes: 0
From: Los Angeles
No no it fell into where you plug the light into the actual housing I can see it sitting there. I guess when I came to twist the socket into the housing the bulb was not on tight. The problem is its a inch drop I'd say from the whole to the bottom and it is slanted so keep rolling to the side.
Last edited by blackg37420; Sep 23, 2010 at 02:44 PM.

Registered Member
Joined: Sep 2010
Posts: 51
Likes: 0
Didnt take a close look at night but there is one bulb thats is not even close to headlights color, is that the park or fog bulbs from factory?
Is there an aftermarket bulb that can be swapped to match the headlights better?
Is there an aftermarket bulb that can be swapped to match the headlights better?
Registered User
Joined: Aug 2010
Posts: 107
Likes: 0
From: Houston, TX
I just installed LED city lights through the hood, few tips: (works for city and fog lights)
1. remove the intake boxes for easy access, unbolt it from the chassis and unrelease it from the rubber hose... and jerk it straight up to remove it. there are 2 guiding pins on the bottoms that will come out with a quick jerk. (remove the filters first to grab onto the intake box easier).
2. On the passenger side, remove the window washing fluid neck for even more room.
unclip the clip on top with a Phillips screwdriver, then twist the neck off( it disconnect from the reservoir and will come off cleanly assuming it wasn't overfilled.


Registered User
Joined: Sep 2010
Posts: 44
Likes: 0
Okay... so I unscrewed the screw that holds the A clip which secures the HID bulb on driver side. I can't seem to put it back in since the space is soo small. Will it be fine with just the A clip holding it in? I mean it's pretty secure when I tried to wiggle it around and what not. The passenger side I didn't unscrew and everything went well. Let me know what you guys think about my driver side.