Review Dr Colorchip Touch Up Paint Kit
 09-15-2011, 05:48 AM
#1

Dr Colorchip Touch Up Paint Kit
My front bumper and lip were riddled with tons of rock chips from driving on SoCal highways and from making the 400 mile trip between NorCal and SoCal so often every year. I've had my bumper and lip for a 1 year and 5 months. I originally bought an OEM touch up paint pen and tried it out, and I just did not like using it. It was messy and doing each chip takes forever. I did some searching online and came upon this touch up paint kit called Dr Colorchip. I believe some of you have have heard of it or used it before.
I bought their basic touch up paint kit which included:
1/2 oz color matched paint
1oz of their SealAct blending solution
1 small paint brush
1 nitrile glove
1 white cloth
The whole process of using this kit is pretty simple. You can take a look on their website Dr.ColorChip Custom Automotive Touch-Up Paint Kit - Dr. ColorChip: Automotive Paint Chip Repair Systems for videos and examples. Basically, you lightly paint/blot the chips with the paint and brush. You then smear the paint flat around the chip. Let the paint dry for 5 minutes or more (according to them you could even let it dry for 2 hours, but I let it dry for about 10-15 mins). Grab the white cloth they supplied or any other lint free cloth, apply some of the SealAct blending solution to the cloth and wipe away the excess paint that is not actually filling the chip. Then buff the area off with a microfiber towel.
I followed the instructions for my whole front bumper and lip. It took a total of about 4-5 hours for me to finish it all. It worked well but my main gripe is that the videos on their website make it seem like wiping away the excess paint is easy. But since the 1oz bottle of SealAct they provided seemed like it wasn't enough, I used it sparingly. The less of the solution you use the more elbow grease you're going to need to put into wiping away the excess paint. After doing the whole front bumper and lip, I ended up with about half of my paint and 1/3 of my SealAct solution remaining. Overall I liked the results of this kit.
Here are the before and after pictures:
Before
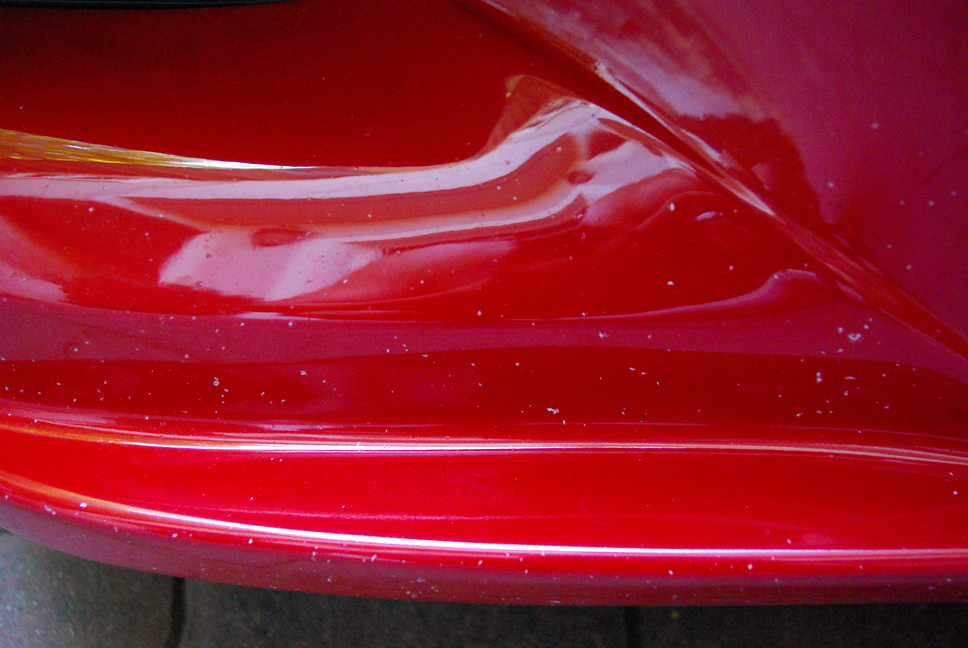


After
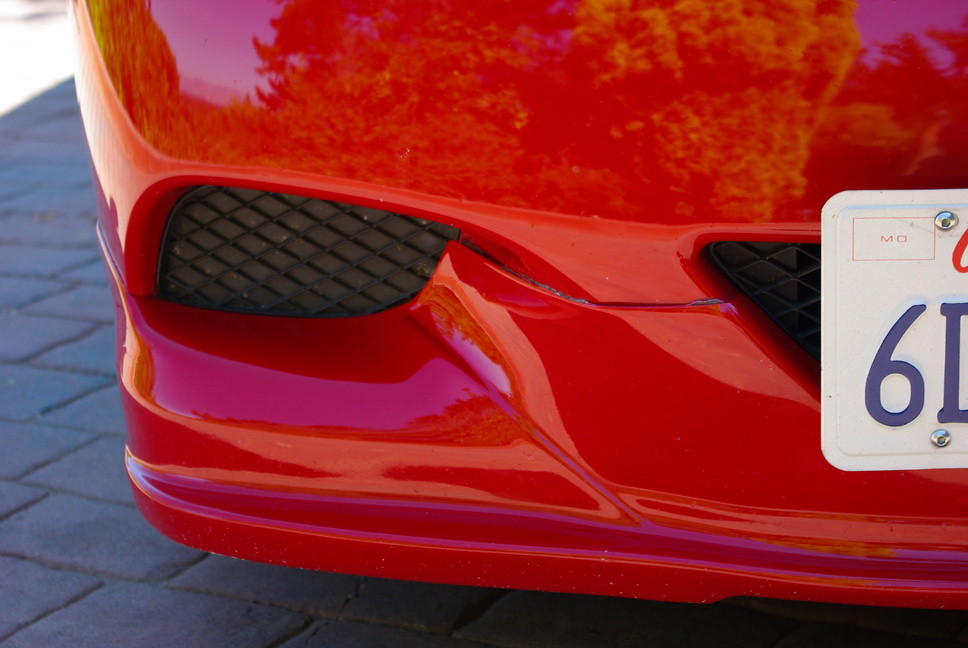
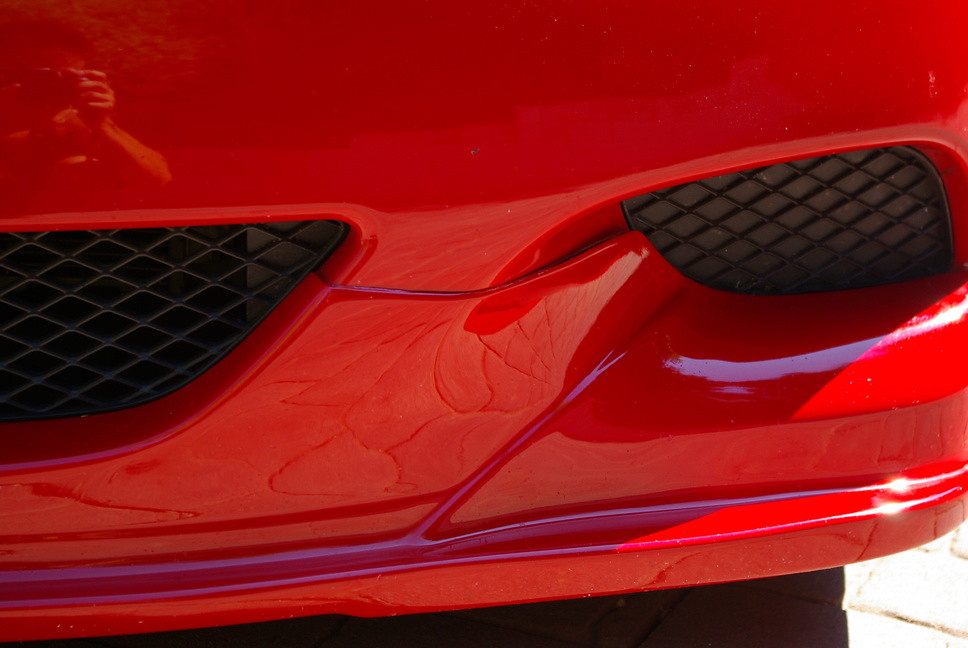
Of course, this cannot replace repainting a whole bumper. The pictures can't really show it but if you stick your face next to the bumper, you will still see the indents the chips have made. But from 3 feet and further you cannot tell at all that there were chips. This is also due to the fact that the paint matched pretty well. And before you guys mention it, I did not decide to touch up the very bottom of the lip as you don't really see it when standing up (and I was also tired of working on the car). And yes the double sided tape on my lip is wack. If you got any questions, let me know.
I bought their basic touch up paint kit which included:
1/2 oz color matched paint
1oz of their SealAct blending solution
1 small paint brush
1 nitrile glove
1 white cloth
The whole process of using this kit is pretty simple. You can take a look on their website Dr.ColorChip Custom Automotive Touch-Up Paint Kit - Dr. ColorChip: Automotive Paint Chip Repair Systems for videos and examples. Basically, you lightly paint/blot the chips with the paint and brush. You then smear the paint flat around the chip. Let the paint dry for 5 minutes or more (according to them you could even let it dry for 2 hours, but I let it dry for about 10-15 mins). Grab the white cloth they supplied or any other lint free cloth, apply some of the SealAct blending solution to the cloth and wipe away the excess paint that is not actually filling the chip. Then buff the area off with a microfiber towel.
I followed the instructions for my whole front bumper and lip. It took a total of about 4-5 hours for me to finish it all. It worked well but my main gripe is that the videos on their website make it seem like wiping away the excess paint is easy. But since the 1oz bottle of SealAct they provided seemed like it wasn't enough, I used it sparingly. The less of the solution you use the more elbow grease you're going to need to put into wiping away the excess paint. After doing the whole front bumper and lip, I ended up with about half of my paint and 1/3 of my SealAct solution remaining. Overall I liked the results of this kit.
Here are the before and after pictures:
Before
After
Of course, this cannot replace repainting a whole bumper. The pictures can't really show it but if you stick your face next to the bumper, you will still see the indents the chips have made. But from 3 feet and further you cannot tell at all that there were chips. This is also due to the fact that the paint matched pretty well. And before you guys mention it, I did not decide to touch up the very bottom of the lip as you don't really see it when standing up (and I was also tired of working on the car). And yes the double sided tape on my lip is wack. If you got any questions, let me know.


 09-16-2011, 03:20 AM
#7
No it is not. Rock chips will not only chip off the paint but push the paint/coat around the chip outwards which makes it uneven and not flat. This is just touch up paint to cover up the chips. You can still feel the dents and such with your hands. If you really wanted to make the paint smooth again you'd probably have to wetsand the whole bumper.
Trending Topics


Thread
Thread Starter
Forum
Replies
Last Post
cconklin2
Private Classifieds
7
01-09-2016 07:21 PM
automotive, chip, custom, drcolorchip, ga, gm, kit, lawrenceville, msds, paint, repair, review, sealact, touch, touchup