Build Threads

AccuAir Elevel Build Thread

Old Dec 19, 2012 | 08:55 AM
  #16  
AnotherG37's Avatar
AnotherG37
Thread Starter
Registered User
iTrader: (2)
 
Joined: Feb 2012
Posts: 112
Likes: 10
From: Avon, IN
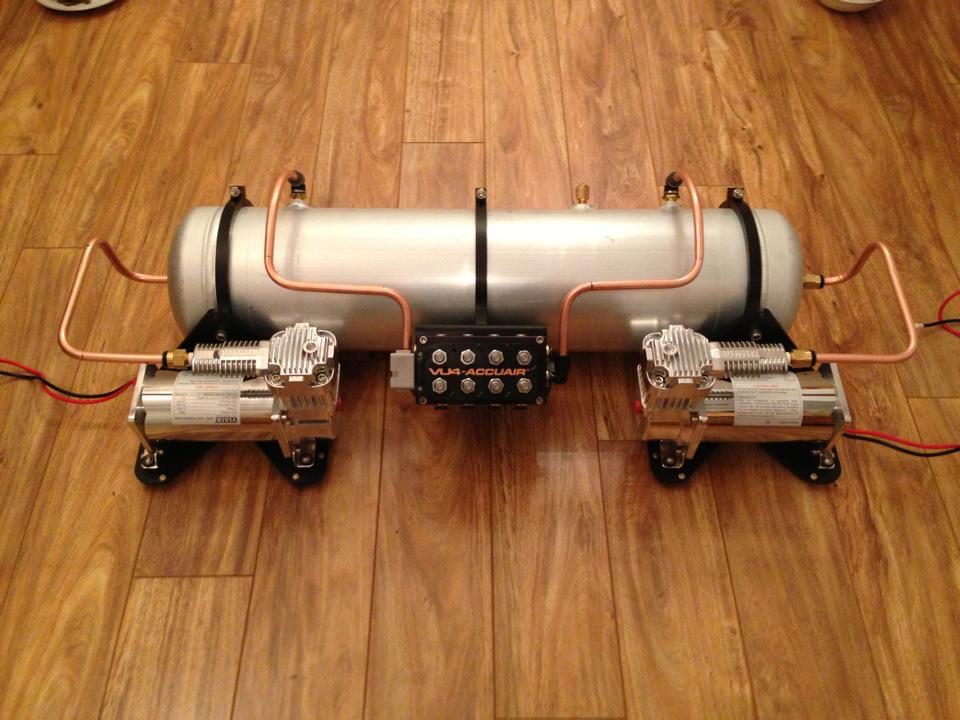
A buddy and I made the copper hard lines for the tank last night. I've seen several people do this and liked the contrast it brings to it. I'm sure most of you know but copper is so easy to damage when trying to bend it. Found online if you fill the tube with sand when trying to bend it you will get nice rounded corners. Didn't have sand laying around the house so we used the next best thing, salt. It worked awesome and all the corners turned out awesome. I will be polishing the lines before I install them as well.
Attached Thumbnails AccuAir Elevel Build Thread-air.jpg  
Reply
Old Dec 19, 2012 | 09:15 AM
  #17  
07IMLG's Avatar
07IMLG
Registered User
iTrader: (1)
 
Joined: Mar 2012
Posts: 28
Likes: 9
From: Stockton
Looks good!! Cant wait to see how low it goes
Reply
Old Dec 21, 2012 | 03:35 PM
  #18  
AnotherG37's Avatar
AnotherG37
Thread Starter
Registered User
iTrader: (2)
 
Joined: Feb 2012
Posts: 112
Likes: 10
From: Avon, IN
Started polishing the copper hard lines last night. Love the way they look all polished up. The tank should be polished soon as well.
Attached Thumbnails AccuAir Elevel Build Thread-polished.jpg  
Reply
Old Dec 21, 2012 | 03:47 PM
  #19  
Diego@Vossen's Avatar
Diego@Vossen
Former Sponsor
iTrader: (2)
 
Joined: Aug 2010
Posts: 3,838
Likes: 271
From: Miami, FL
Sweet.

Reply
Old Dec 23, 2012 | 04:32 AM
  #20  
Emon Crew's Avatar
Emon Crew
Registered User
 
Joined: Nov 2007
Posts: 234
Likes: 0
Originally Posted by AnotherG37
Started polishing the copper hard lines last night. Love the way they look all polished up. The tank should be polished soon as well.
Damnnn that polish is lookin sweet! Can't wait to see this thread continue and the finished results. I'm living vicariously through you right now my friend!
Reply
Old Jan 3, 2013 | 04:52 PM
  #21  
AnotherG37's Avatar
AnotherG37
Thread Starter
Registered User
iTrader: (2)
 
Joined: Feb 2012
Posts: 112
Likes: 10
From: Avon, IN
Little update! Bags showed up today. Gonna start installing them tonight. Will install the leveling sensors this weekend. Should have full pics of install this weekend.
Attached Thumbnails AccuAir Elevel Build Thread-8342767107_7e0461ca7d_c.jpg  
Reply
Old Jan 3, 2013 | 04:57 PM
  #22  
Diego@Vossen's Avatar
Diego@Vossen
Former Sponsor
iTrader: (2)
 
Joined: Aug 2010
Posts: 3,838
Likes: 271
From: Miami, FL
So sweet man, can't wait ^^^^
Reply
Old Jan 3, 2013 | 05:02 PM
  #23  
Rikter's Avatar
Rikter
Registered User
iTrader: (7)
 
Joined: Apr 2008
Posts: 344
Likes: 14
Looking good and subscribed. Any reason you didn't go with Airrex for your bag/strut assembly?
Reply
Old Jan 5, 2013 | 10:21 PM
  #24  
AnotherG37's Avatar
AnotherG37
Thread Starter
Registered User
iTrader: (2)
 
Joined: Feb 2012
Posts: 112
Likes: 10
From: Avon, IN
Originally Posted by Rikter
Looking good and subscribed. Any reason you didn't go with Airrex for your bag/strut assembly?
I already had KW V3 coils, love the quality of their struts\shocks so I wanted to stick with that route.
Reply
Old Jan 5, 2013 | 10:54 PM
  #25  
AnotherG37's Avatar
AnotherG37
Thread Starter
Registered User
iTrader: (2)
 
Joined: Feb 2012
Posts: 112
Likes: 10
From: Avon, IN


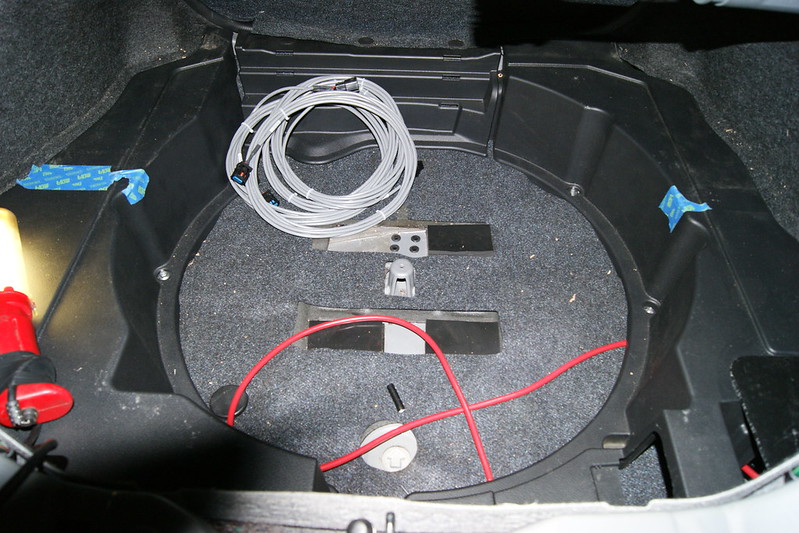
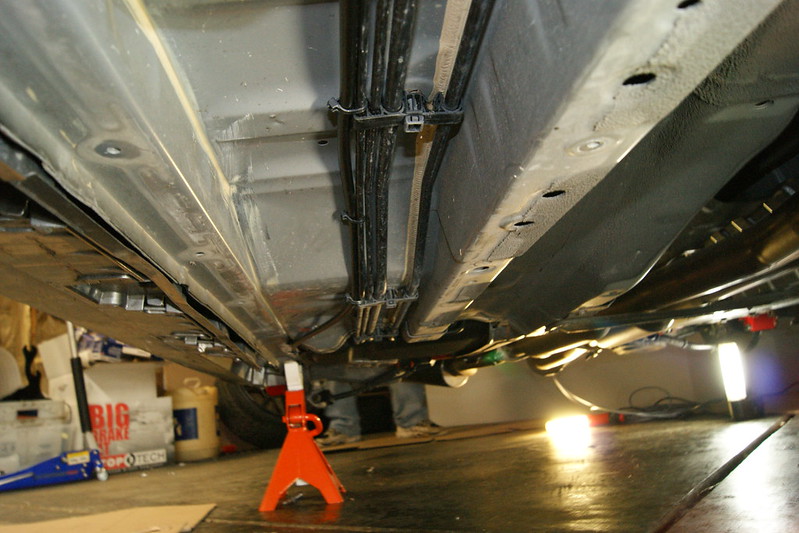
Had to remove spare tire to get everything to properly fit. Drilled 4 holes for the air lines to pass through and installed grommets.


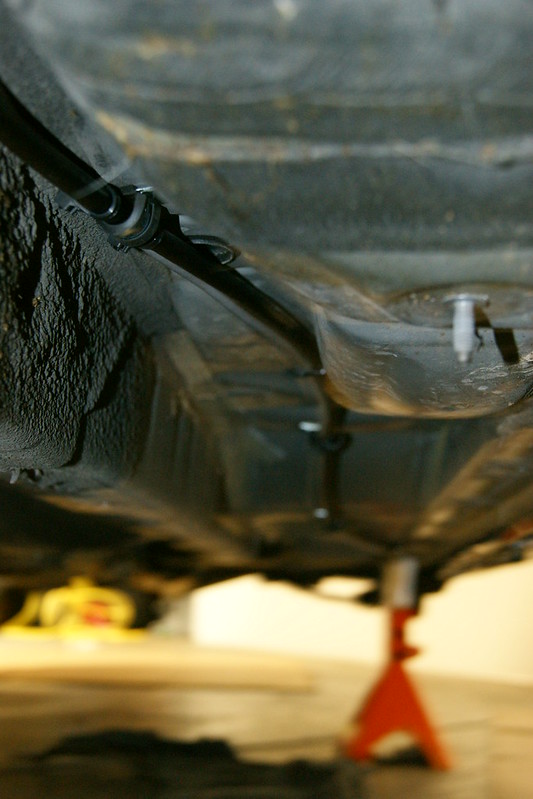
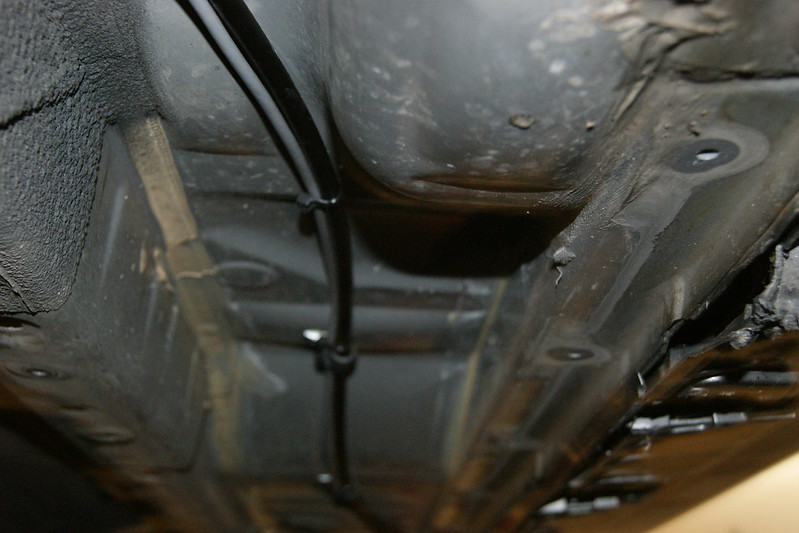
Was able to run the air lines up above the plastics on each side of the car. I attached them to the hardlines on the passenger side and used fasteners on the drivers side. There is an indent up front but the coil over where the line came out that worked perfect.


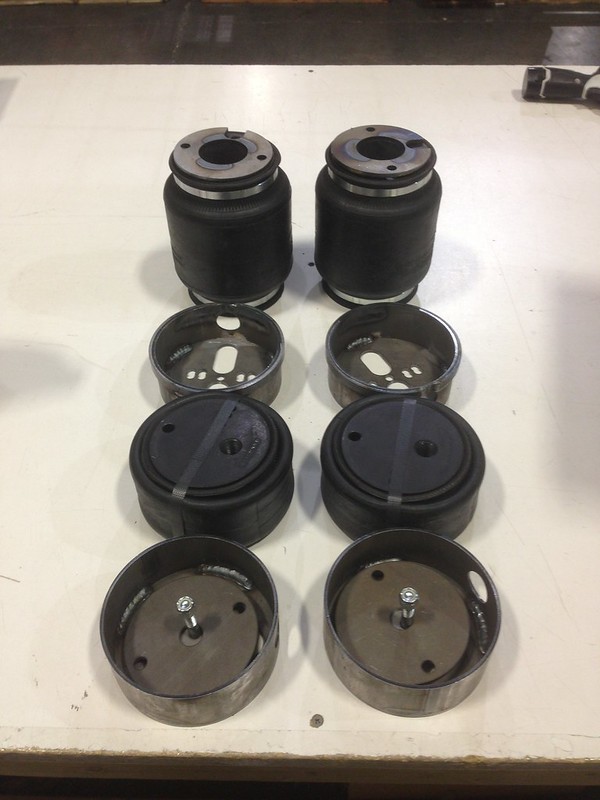
Brackets, front and rear bags.


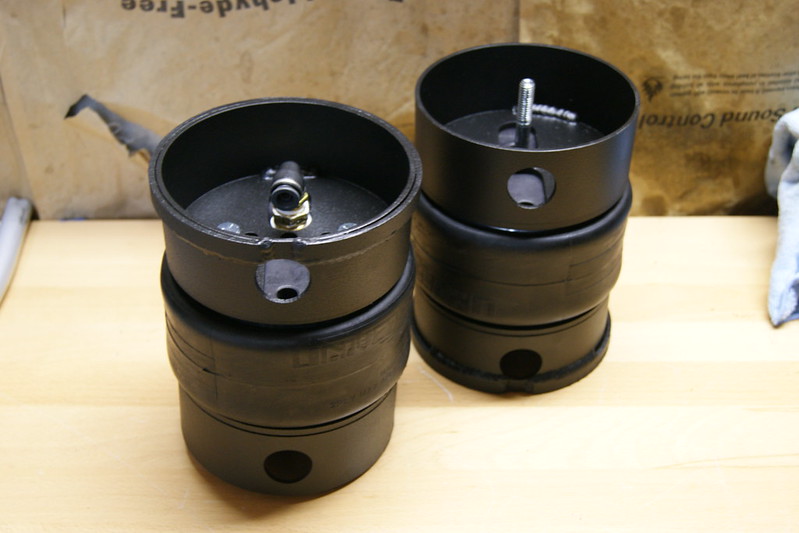
Rear bags assembled. The threaded portion faces down in the rear spring bucket. You will need to drill a hole to install it.


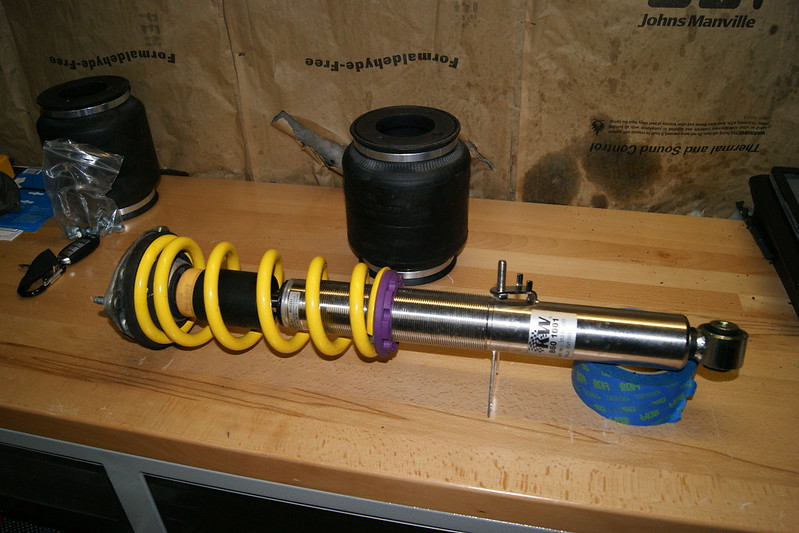
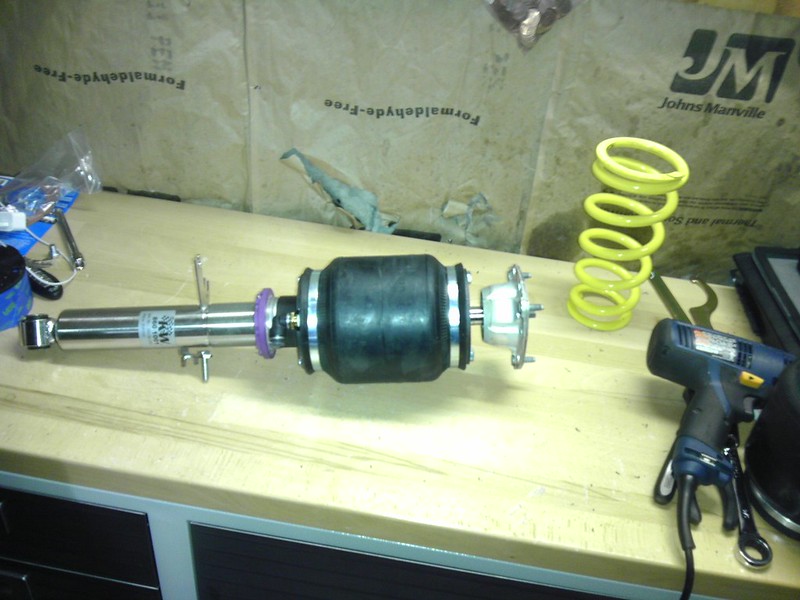
Front coilover prior and after assembly.


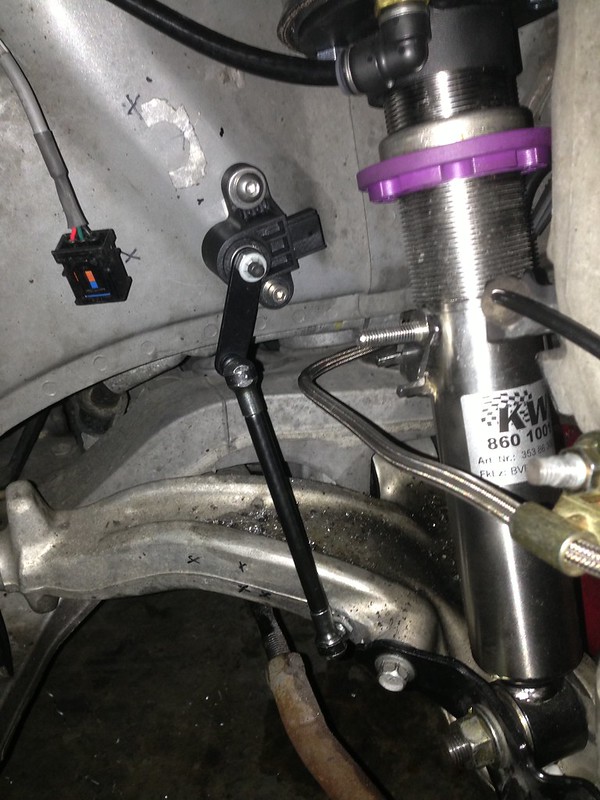
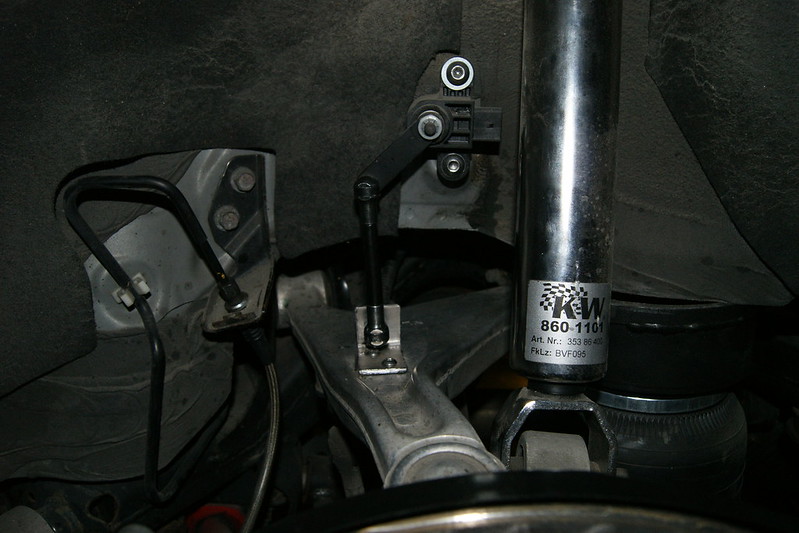
Elevel sensors were a little difficult to install but not horrible. The cannot exceed more than 2.75 inches of travel and require at least an inch of travel. The more travel you have the more accurate your system will be. Ending up having 2.5 inches in the front and 2.25 inches in the rear.


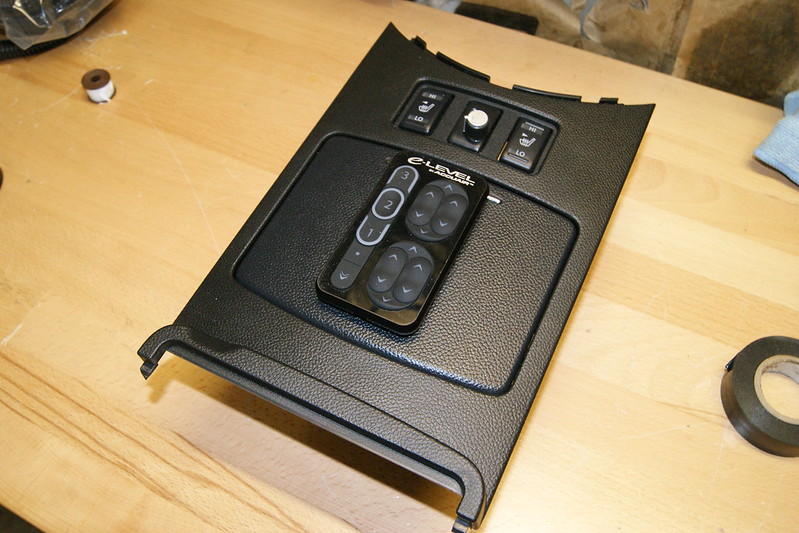
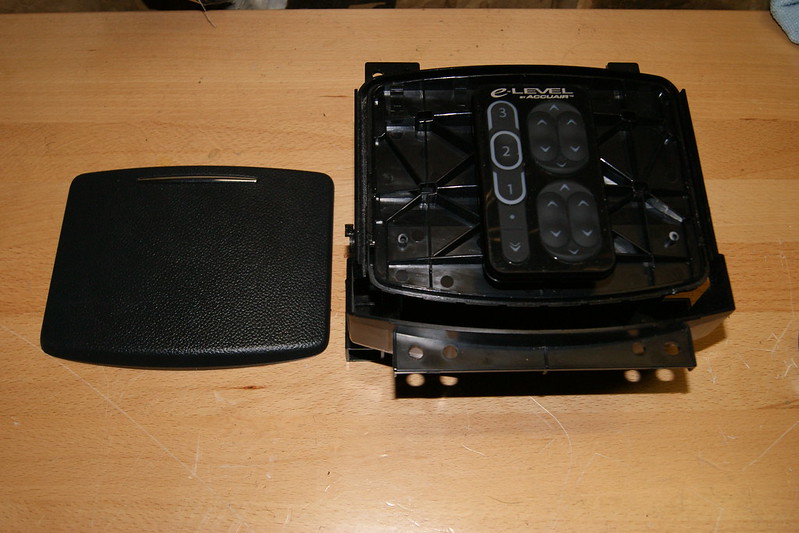
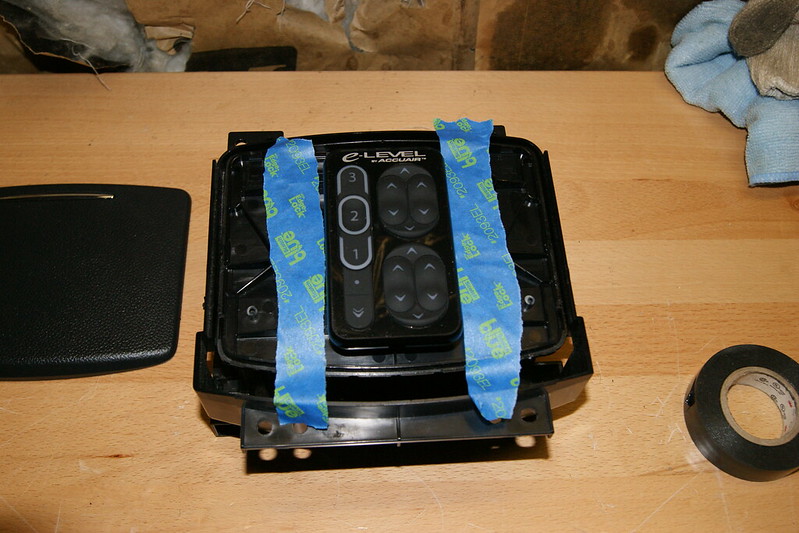
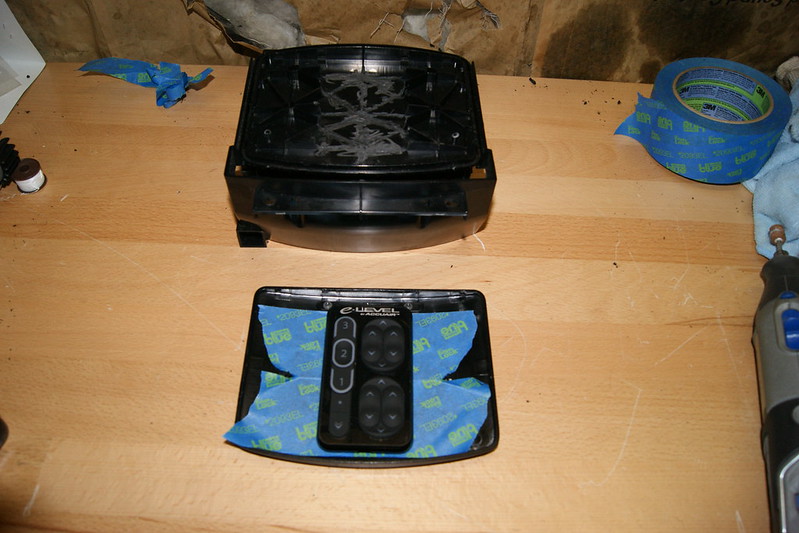
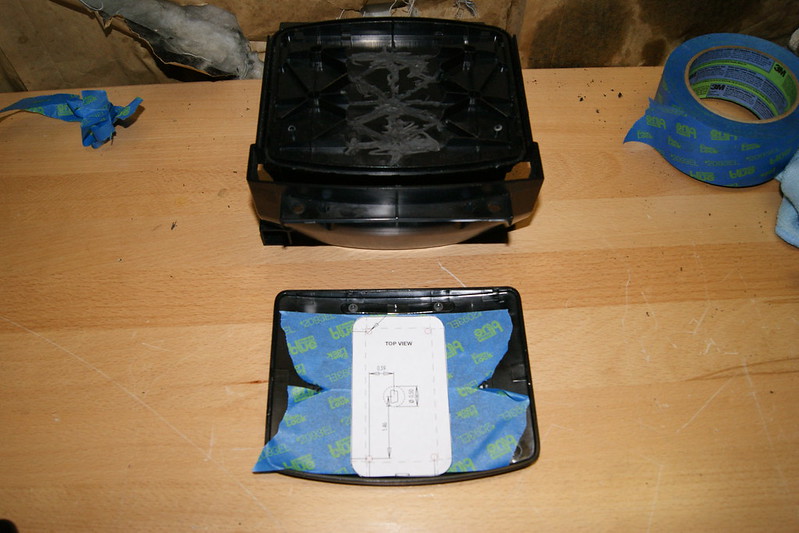
I wanted to mount the controller in a unique place as most people just run the wire to the front and let it sit out. I found the cupholder lid was actually the perfect size and it would still be functional with the touchpad installed. It worked great. I wasn't too happy with the way the lines turned out on the lid so I ordered another one.

I am awaiting on some custom trunk pieces and getting my tank painted so I will have pics of that as well soon.
Reply
Old Jan 6, 2013 | 12:13 AM
  #26  
Diego@Vossen's Avatar
Diego@Vossen
Former Sponsor
iTrader: (2)
 
Joined: Aug 2010
Posts: 3,838
Likes: 271
From: Miami, FL
Incredible work nate!!!!
Reply
Old Jan 6, 2013 | 03:55 AM
  #27  
Zydan's Avatar
Zydan
Registered Member
 
Joined: Jul 2009
Posts: 614
Likes: 17
So nice~ in for future updates.
Reply
Old Jan 7, 2013 | 01:29 PM
  #28  
dvsgp6's Avatar
dvsgp6
Registered User
 
Joined: Aug 2010
Posts: 31
Likes: 0
From: So Cal - La Mirada
saw your setup on IG looks great!
Reply
Old Jan 7, 2013 | 06:46 PM
  #29  
fairladyz34's Avatar
fairladyz34
Registered User
iTrader: (4)
 
Joined: Oct 2010
Posts: 1,360
Likes: 7
From: Central NJ
nice clean setup bro. There are actually pre exsisting holes in the trunk that route right to the rear fender wells.
Reply
Old Jan 7, 2013 | 07:27 PM
  #30  
AnotherG37's Avatar
AnotherG37
Thread Starter
Registered User
iTrader: (2)
 
Joined: Feb 2012
Posts: 112
Likes: 10
From: Avon, IN
Originally Posted by Diego@Vossen
Incredible work nate!!!!
Originally Posted by Zydan
So nice~ in for future updates.
Originally Posted by dvsgp6
saw your setup on IG looks great!
Thanks guys. Awaiting on a few trunk pieces, getting my tank painted and I'll have some more pics

Originally Posted by fairladyz34
nice clean setup bro. There are actually pre exsisting holes in the trunk that route right to the rear fender wells.
Thanks man. I was not aware of that. The way the VU4 faces straight down it was easier to just route them all down. Plus when the rear bags are aired out and the car is on jacks the actually come free from the spring cups so having them under the car works for that as well. Where are the pre existing holes at? I may move the Elevel sensor wire through them.
Reply

Thread Tools
Search this Thread

All times are GMT -4. The time now is 03:17 AM.