GTR Rear Taillight Overlays
 05-02-2013, 11:07 PM
#1

GTR Rear Taillight Overlays
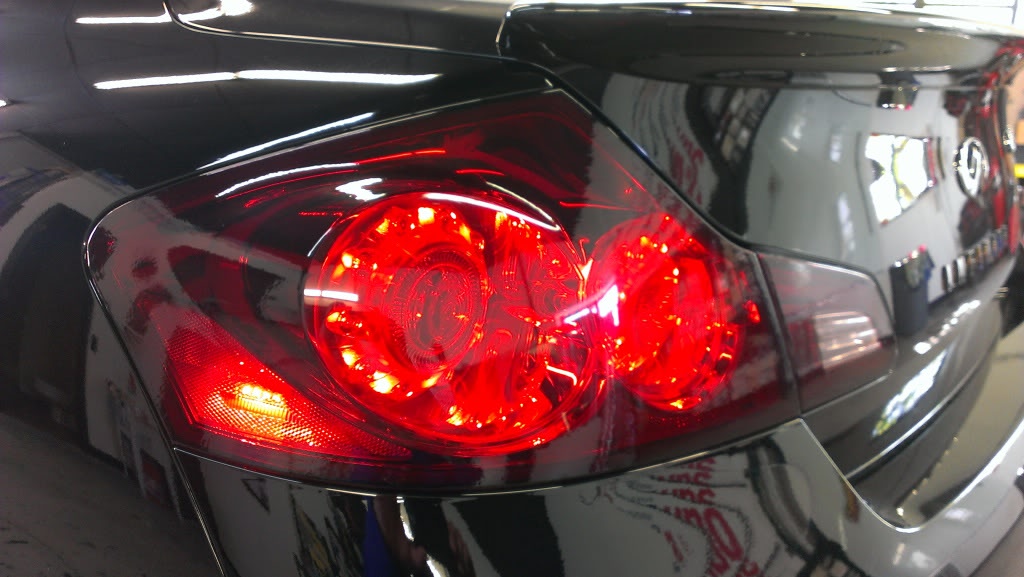
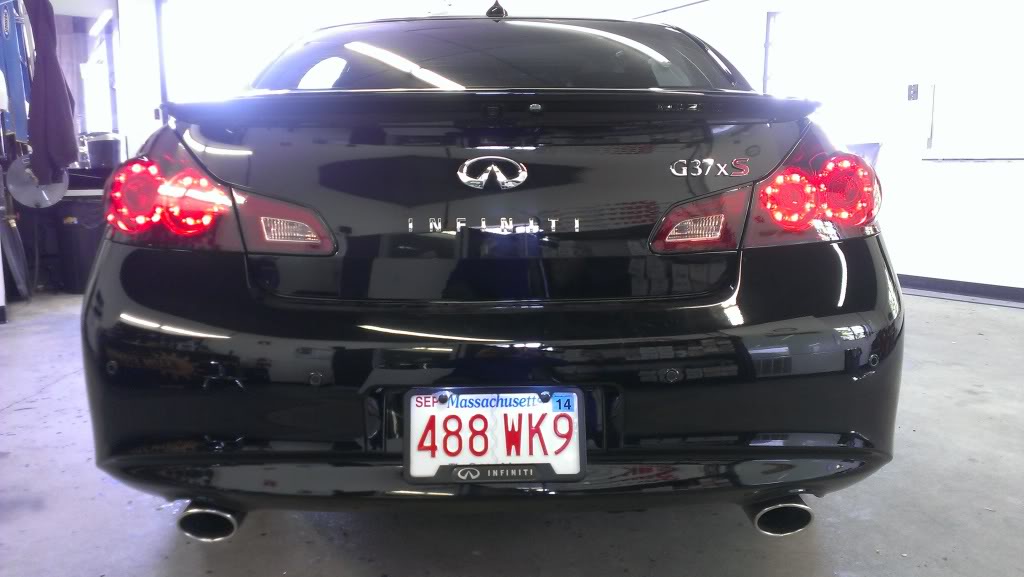
Went to Rob @ Sun Stoppers in Stoughton, MA today and decided to have him custom cut a set of GTR rear overlays, which are similar to Andy's (Bluebatmobile), but with Smoked Lumin-x film which is a bit thicker.
Cost was $100 installed.
Time of install was an hour.
Here is a couple of quick pics I took at the shop:
This was a decision I made after purchasing overlays from Andy, but was unable to contact/locate a qualified installer within the Boston area...I've contacted 7 different installers and only one attempted the install but failed.
I currently worked out a resolution with Andy and have returned the 2 sets of overlays he sent me for the Carbon Fiber Rear Valence instead.
Pics will be posted when done.
Comments welcome
Cost was $100 installed.
Time of install was an hour.
Here is a couple of quick pics I took at the shop:


This was a decision I made after purchasing overlays from Andy, but was unable to contact/locate a qualified installer within the Boston area...I've contacted 7 different installers and only one attempted the install but failed.
I currently worked out a resolution with Andy and have returned the 2 sets of overlays he sent me for the Carbon Fiber Rear Valence instead.
Pics will be posted when done.
Comments welcome

The following users liked this post:
Ft W Crew (05-05-2013)
05-02-2013, 11:31 PM
#2
Looks like a nice clean install, were you happy w/ end result (any bubbling or off-center placement)?
I installed GTRs from Andy, took a bit of getting the hang of it since it was my first vinyl project, but not too bad once you figure out how to work the vinyl w/ heat & patience. Was able to place them just about dead-on and didn't have any bubbling or creases. I got a bit tired of the look though since up close they looked like they were indeed overlays rather than blending perfectly. I ended up painting my tails GTR style & the result has a very factory look. The main problem I had w/ the overlays were the distinct edges where the vinyl cutout edges met the lenses.
I just did a carbon wrap valance and really love the look, exceeded my expectations by quite a bit. I think you'll really like the nice contrast it provides back there. The carbon wrap vinyl (at least the 3M 1080 wrap vinyl) has air release technology so air bubbles aren't a concern like they were w/ the headlight/taillight vinyl)
BTW Dragion have you considered some debadging back there?
Your car's looking real good these days!
Last edited by blnewt; 05-03-2013 at 12:07 AM.
The following users liked this post:
dragion (05-03-2013)
05-03-2013, 12:29 AM
#3
Looks like a nice clean install
I installed GTRs from Andy, took a bit of getting the hang of it since it was my first vinyl project, but not too bad once you figure out how to work the vinyl w/ heat & patience. I ended up painting my tails GTR style & the result has a very factory look. The main problem I had w/ the overlays were the distinct edges where the vinyl cutout edges met the lenses.
I just did a carbon wrap valance and really love the look, exceeded my expectations by quite a bit. I think you'll really like the nice contrast it provides back there.
BTW Dragion have you considered some debadging back there?
Your car's looking real good these days!
I'm just so relieved that this little mod is finally complete...been pulling hairs to find someone competent to do Andy's overlay install. I had to make an alternative decision and have Rob do a custom install instead.
The edges are pretty clean and can't really be distinguished from the rest of the lens unless you look really close and run your fingers over them. I might need to go back and see if the 2 inner lens can be a bit tighter to the edge...seems to be not quite flush, unless it needs time to heal.
As far as the rear valence goes...was it difficult to install?
I think I needed some kind of contrast back there...the bottom rear just blends in too much with the rest.
I considered a diffuser, but the CF overlay will do the job.
Since I'm leasing, I only removed the dealerships badge and don't plan on removing any of the OEM badging...I know it will look cleaner, but don't want to bother with re-installing them at the end of the lease.
I debadge both of my previous FXs and actually prefer themt that way.
Thanks again for the complement!

Night pics:


More comments...
Last edited by dragion; 05-03-2013 at 12:37 AM.
05-03-2013, 12:51 AM
#4
Thanks Brad.
I'm just so relieved that this little mod is finally complete...been pulling hairs to find someone competent to do Andy's overlay install. I had to make an alternative decision and have Rob do a custom install instead.
The edges are pretty clean and can't really be distinguished from the rest of the lens unless you look really close and run your fingers over them. I might need to go back and see if the 2 inner lens can be a bit tighter to the edge...seems to be not quite flush, unless it needs time to heal.
As far as the rear valence goes...was it difficult to install?
I think I needed some kind of contrast back there...the bottom rear just blends in too much with the rest.
I considered a diffuser, but the CF overlay will do the job.
Since I'm leasing, I only removed the dealerships badge and don't plan on removing any of the OEM badging...I know it will look cleaner, but don't want to bother with re-installing them at the end of the lease.
I debadge both of my previous FXs and actually prefer themt that way.
Thanks again for the complement!
More comments...
Understood about leasing and not wanting to get too aggressive w/ removing oem stuff. Vinyl is perfect for cases like this
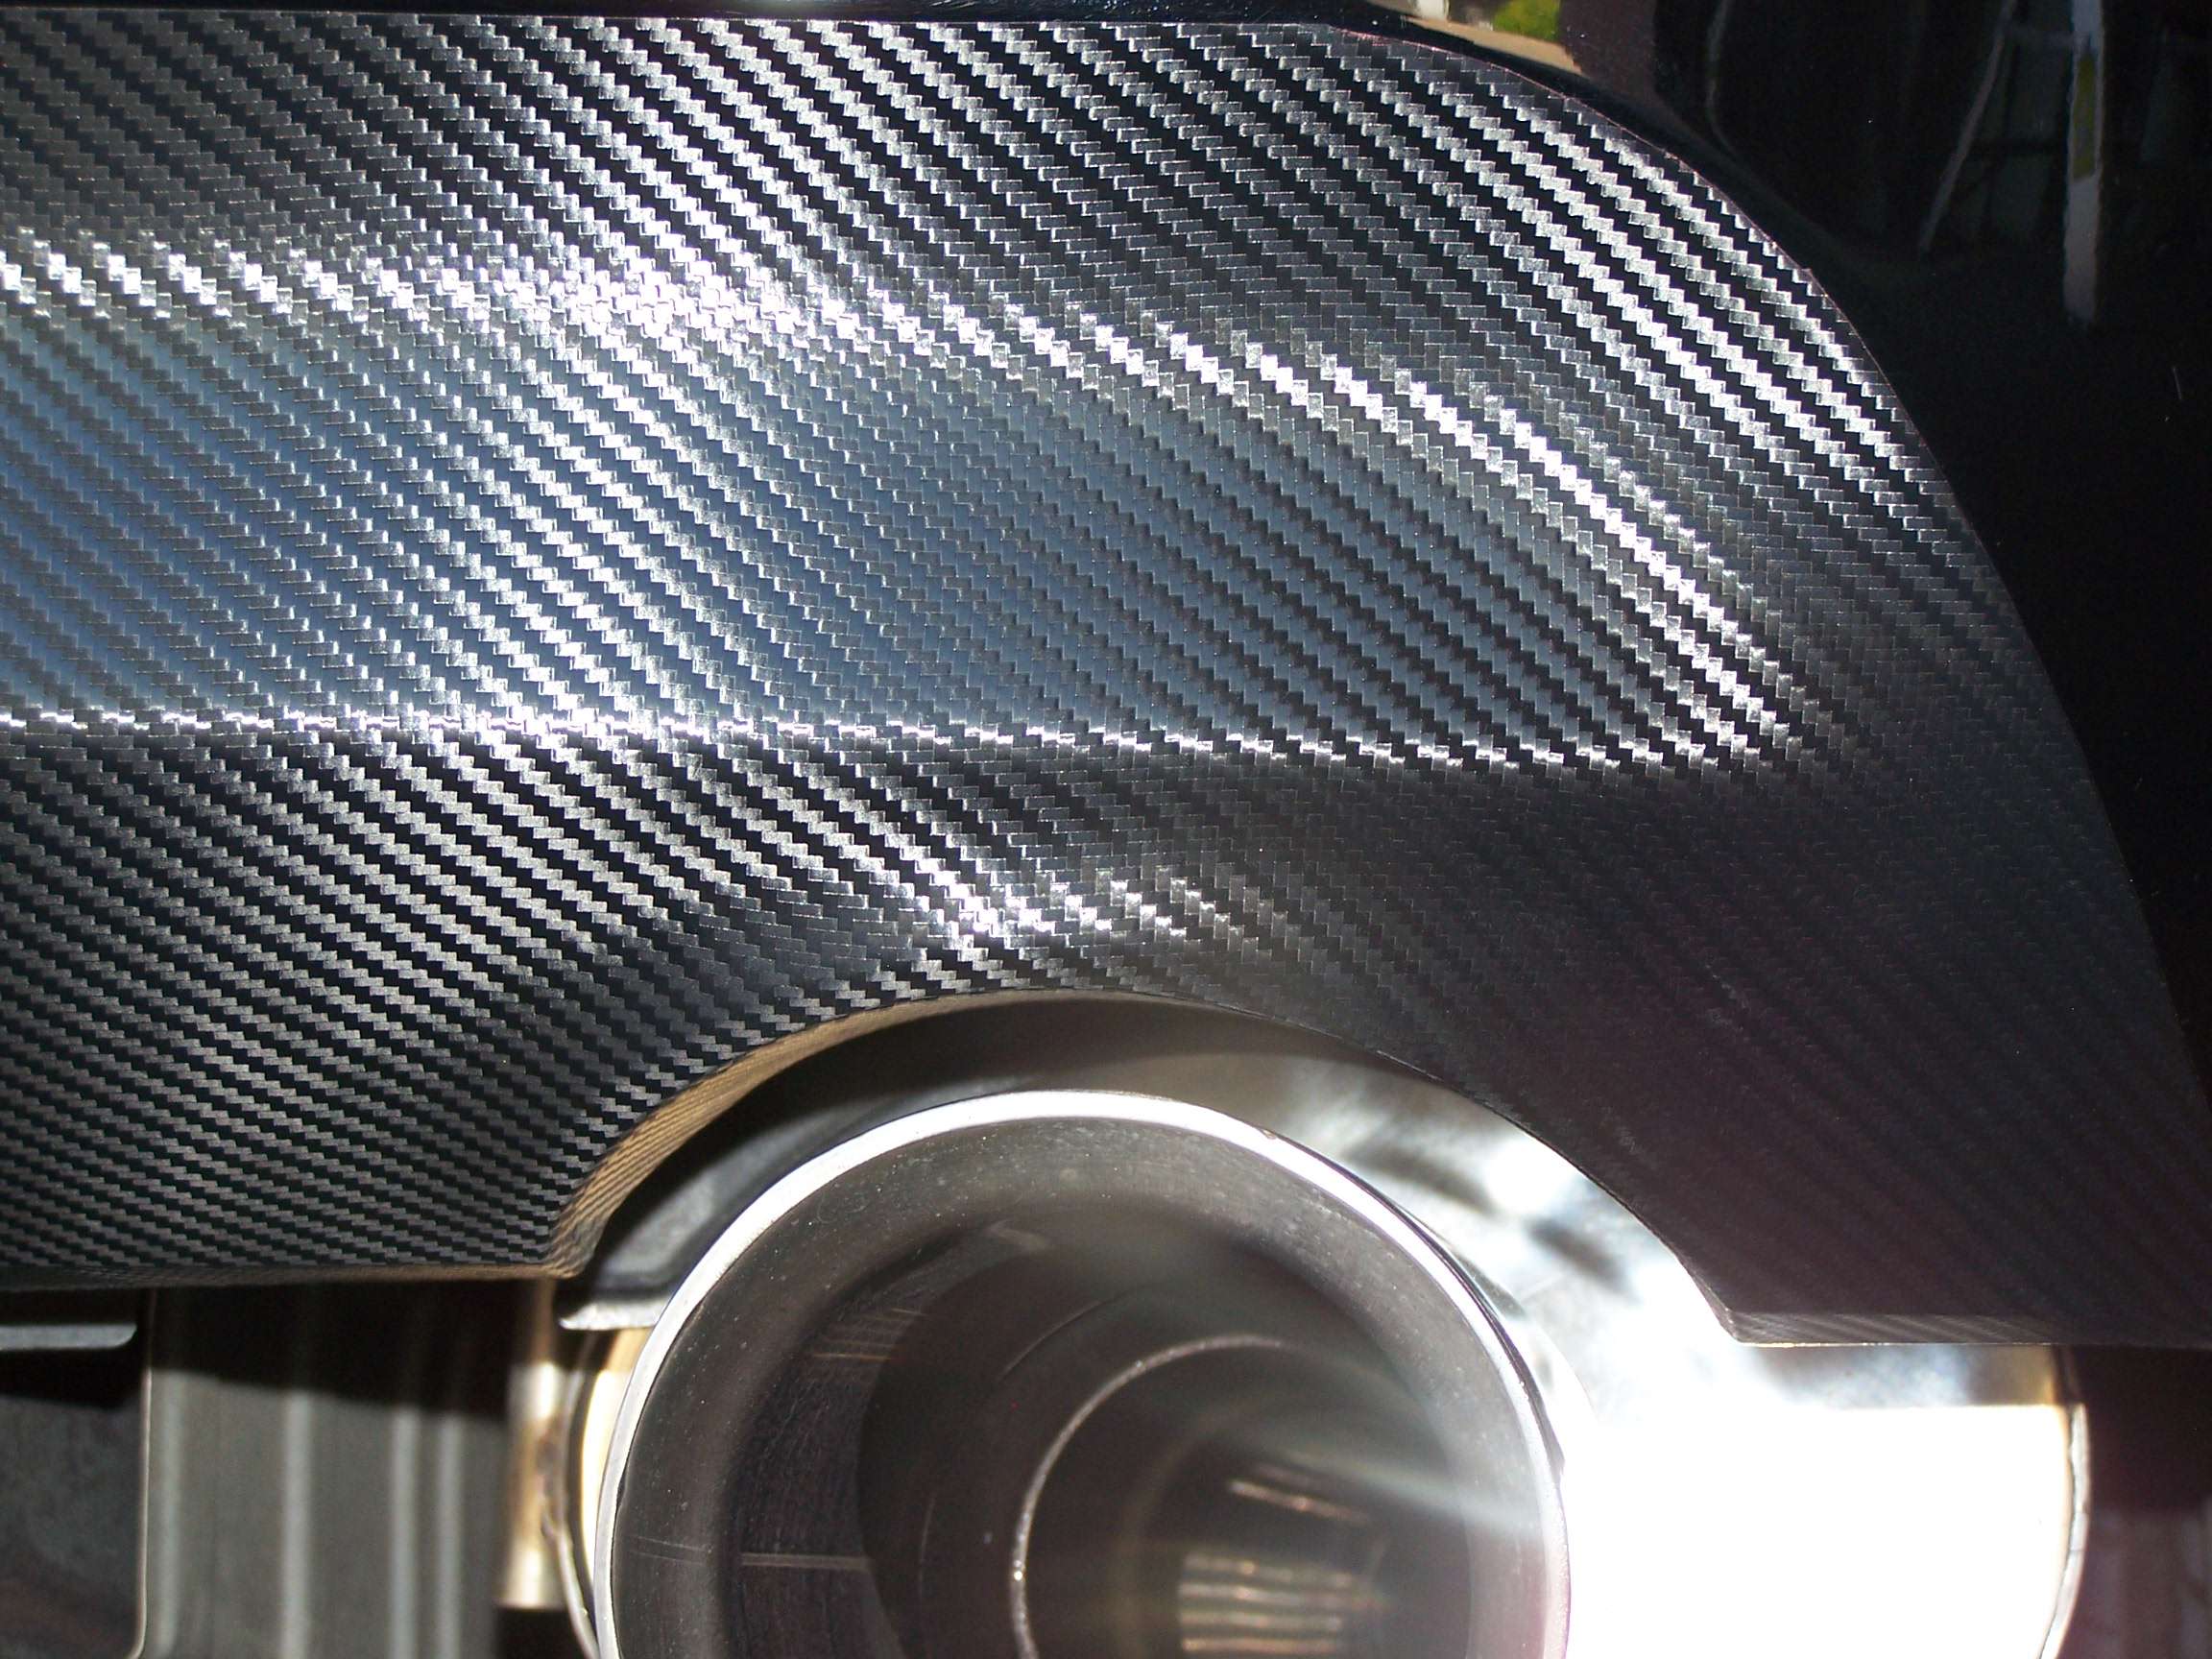
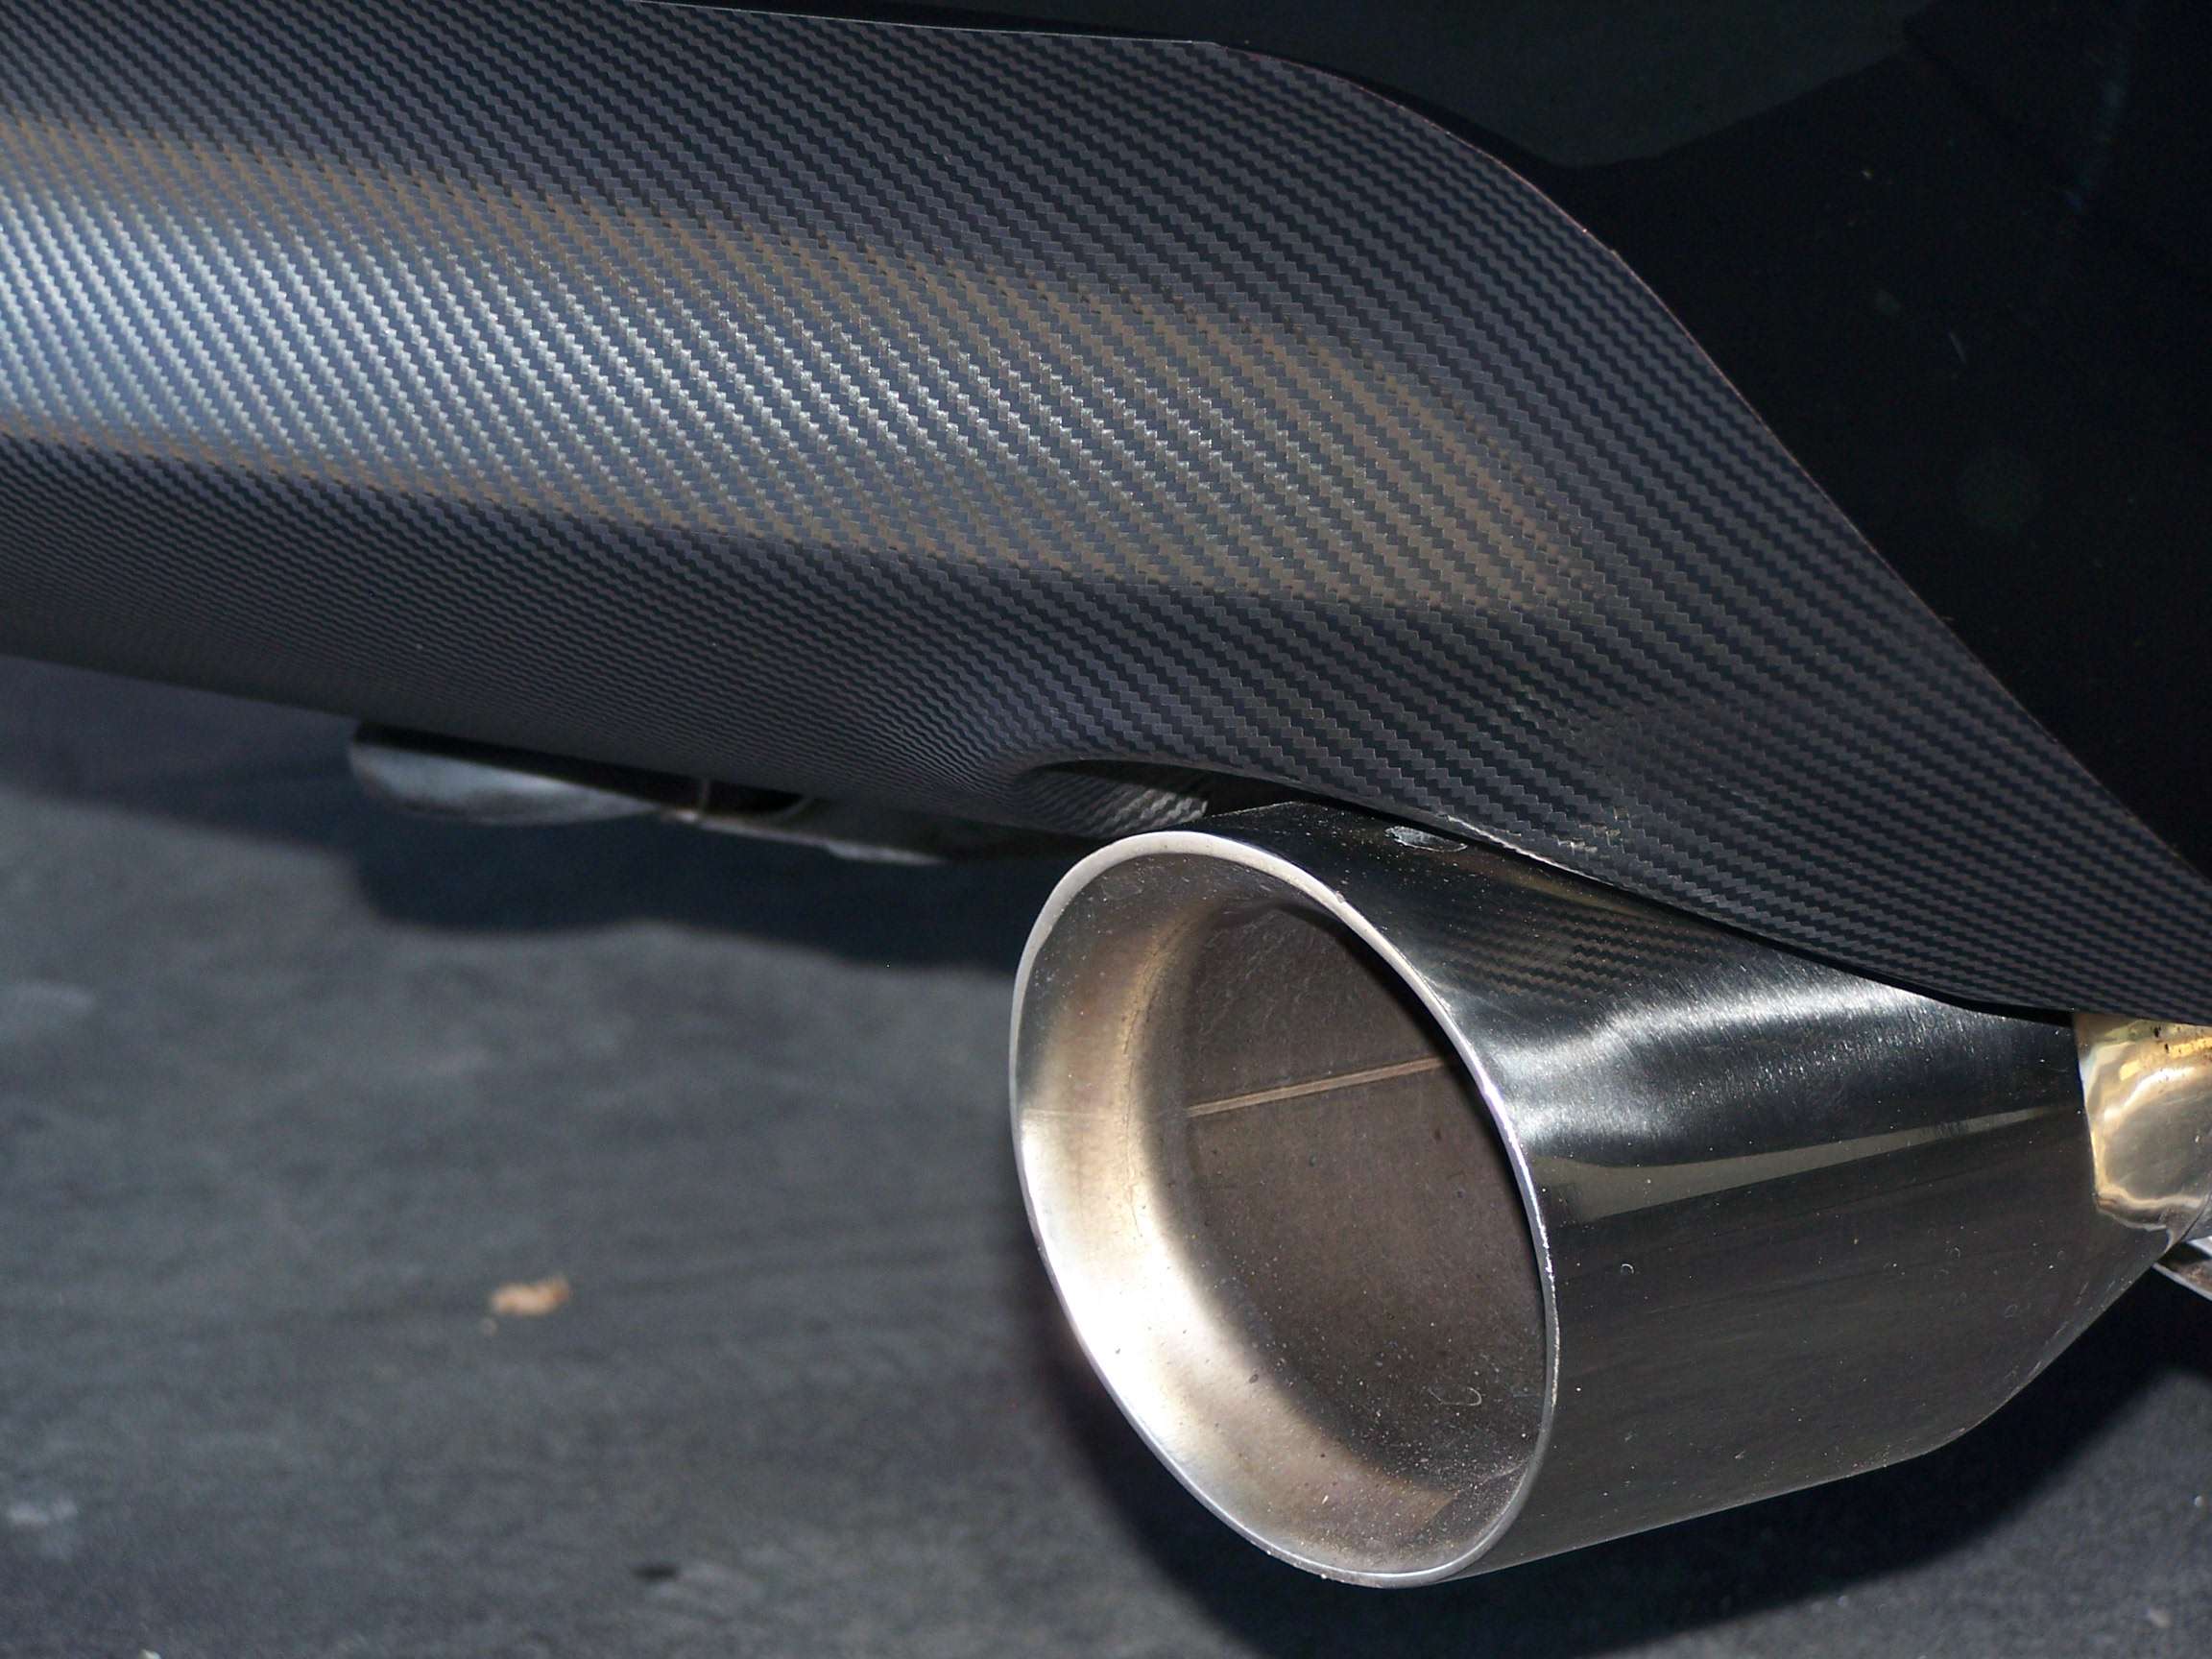
The Valance was real easy, but I've done quite a bit of vinyl projects so I might not be the best person to ask. You should drop your mufflers a bit. I just removed the 2 nuts on each rear rubber clamp then put a small piece of 2x4 between the muffler can and body to keep it down from the valance about an inch, this will give you enough room to get the vinyl fully under that area. Here's a couple pics
If there's any particular question you have let me know
The following users liked this post:
dragion (05-03-2013)
05-03-2013, 01:33 AM
#5

Those tail overlays look great. Looks like a quality job. It's good to hear that Andy made the situation right. He seems like a stand up guy.
Blnewt, do you use a soapy solution when you install your vinyl for proper positioning?
Blnewt, do you use a soapy solution when you install your vinyl for proper positioning?
The following users liked this post:
dragion (05-03-2013)
05-03-2013, 08:33 AM
#6
The great thing about the wrap vinyl is the air release channels, air doesn't build up under the sheet so it's much easier to deal w/ them. As far as positioning a dry sheet, get the sheet in the general area and just lightly tack it in a few places to hold it there, then go back and position it exactly where it needs to be w/ a simple lift and retack The wrap vinyl is pretty good about being able to reposition several times over, when you apply heat, then lift & reposition it gets less pliable and the adhesion starts to decrease.
And yep, dealt w/ Andy @ BlueBat a few times and he's THE MAN when it comes to vinyl auto accents, good prices too
The following users liked this post:
dragion (05-03-2013)
05-03-2013, 08:47 AM
#7
Administrator

iTrader: (9)
Looks great, OP. That smokey look suits a black car so much better than bright red, better even than opaque. I like what you've done.
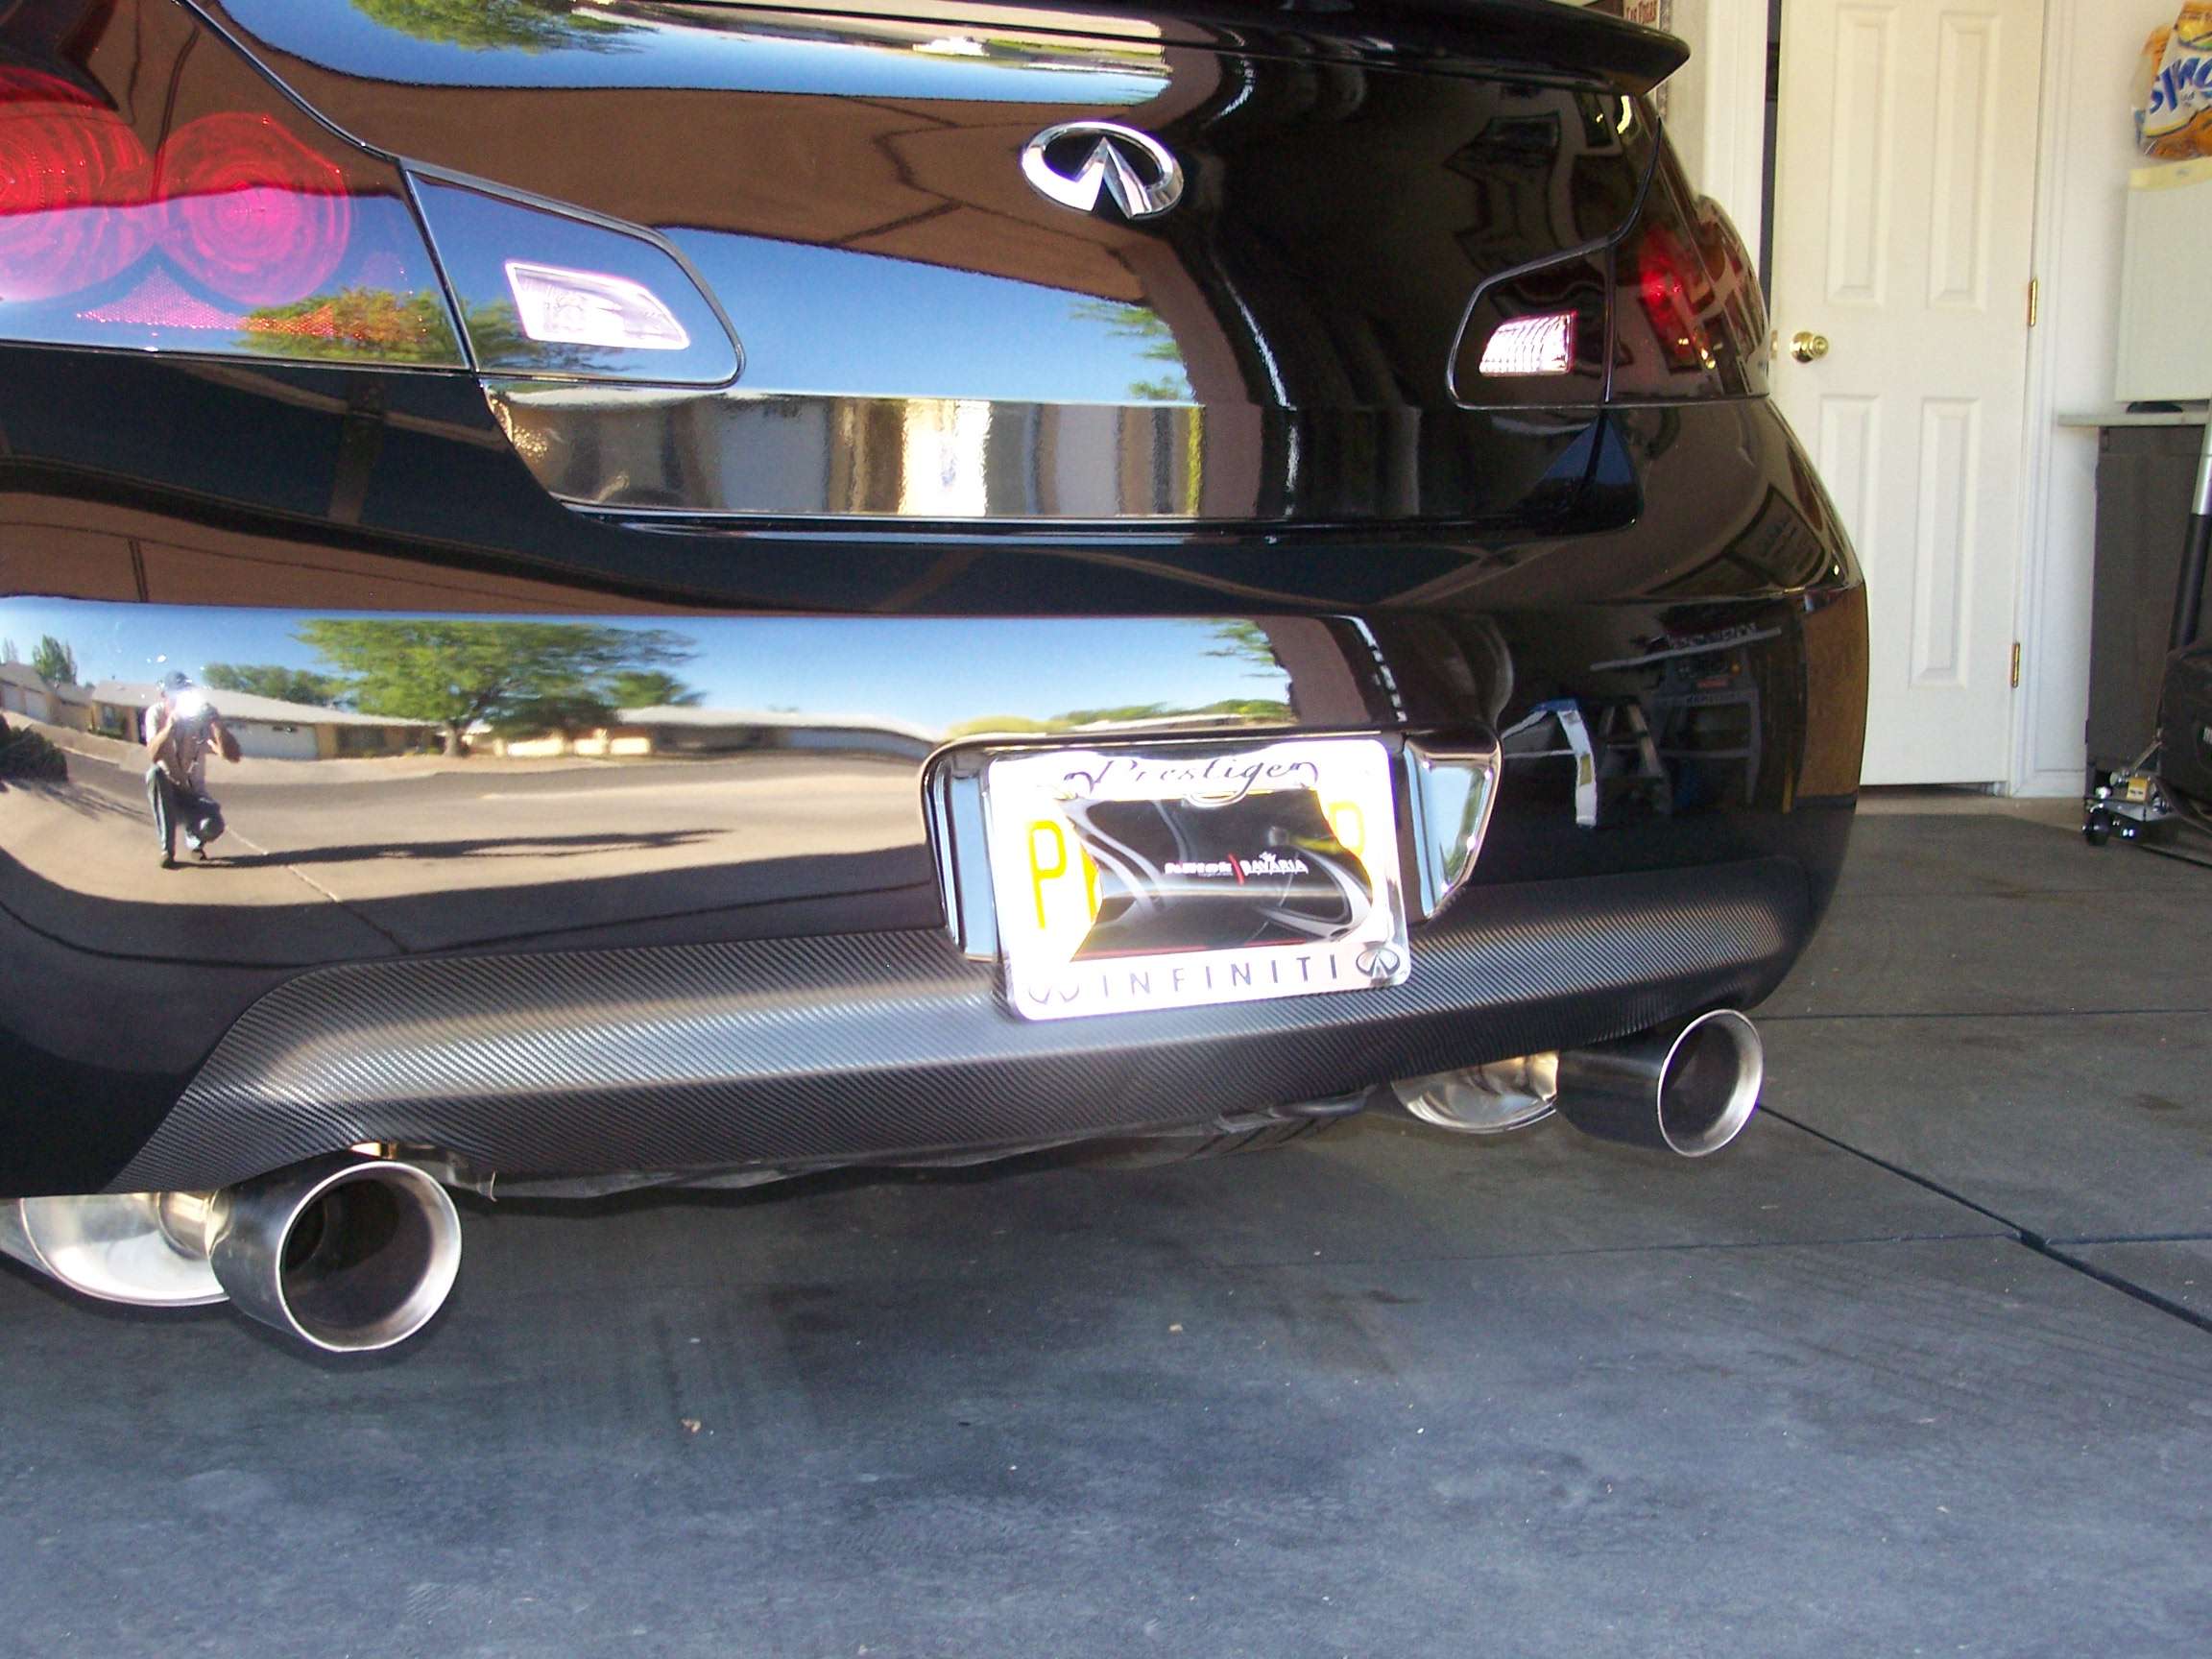
It will look even better when you get that lower bumper wrapped. You're probably worried how that will look since the 2010+ bumper wraps around the corners, unlike Newt's 2009 bumper. But try not to over-think the difference. It's still going to look excellent.
Here's a tip: when wrapping the bumper, unbolt the mufflers so they hang down (with some kind of support). That way you can better access the scalloped area over the tips. Wish I had thought of that when I originally had the bumper wrapped, because the first shop butchered the job, and I had to go elsewhere for clean-up. I still would like to re-do it, or have it painted satin black, but the only way there's noticeable issues is if you're looking at the area from underneath, which is only me and my mechanic, so...
Anyway, good luck. Looking forward to seeing your new look.
Last edited by Rochester; 05-03-2013 at 08:53 AM.
The following users liked this post:
dragion (05-03-2013)
Trending Topics

 05-03-2013, 09:10 PM
#10
Those do look nice, the separation on the night pics looks great. In your install it's easier to assume it's tinted rather than vinyl, since you used the tinted sheet. My overlays were the solid opaque black so it was much easier to see where the vinyl ended.
Understood about leasing and not wanting to get too aggressive w/ removing oem stuff. Vinyl is perfect for cases like this
The Valance was real easy, but I've done quite a bit of vinyl projects so I might not be the best person to ask. You should drop your mufflers a bit. I just removed the 2 nuts on each rear rubber clamp then put a small piece of 2x4 between the muffler can and body to keep it down from the valance about an inch, this will give you enough room to get the vinyl fully under that area.
If there's any particular question you have let me know

Looks great, OP. That smokey look suits a black car so much better than bright red, better even than opaque. I like what you've done.
It will look even better when you get that lower bumper wrapped. You're probably worried how that will look since the 2010+ bumper wraps around the corners, unlike Newt's 2009 bumper. But try not to over-think the difference. It's still going to look excellent.
Here's a tip: when wrapping the bumper, unbolt the mufflers so they hang down (with some kind of support). That way you can better access the scalloped area over the tips. Wish I had thought of that when I originally had the bumper wrapped, because the first shop butchered the job, and I had to go elsewhere for clean-up. I still would like to re-do it, or have it painted satin black, but the only way there's noticeable issues is if you're looking at the area from underneath, which is only me and my mechanic, so...
Anyway, good luck. Looking forward to seeing your new look.
I'm just glad that Andy is willing to exchange the GTR overlays for the rear CF Valance...I'm sure it will improve the look of the rear end.
Thanks to both you and Brad for the installation suggestions...most likely will have Rob do the install.
Hopefully Andy received the overlays today and will be shipping the valence out soon...pics will be posted.
The following users liked this post:
blnewt (05-03-2013)
The following users liked this post:
dragion (05-04-2013)
The following users liked this post:
dragion (05-05-2013)


The following users liked this post:
dragion (05-06-2013)
 .
.