DIY: Front Bumper Removal/install
 05-08-2014, 08:54 AM
#46


If you're just using self tapping screws, I actually think not taking off the bumper is better. When you pull the bumper off, it flexes quite a lot and won't sit *exactly* how it sits on the car. If you attach a lip with it off the car, it probably won't fit perfectly when you try to reattach everything.
 05-08-2014, 08:58 AM
#47

If you're just using self tapping screws, I actually think not taking off the bumper is better. When you pull the bumper off, it flexes quite a lot and won't sit *exactly* how it sits on the car. If you attach a lip with it off the car, it probably won't fit perfectly when you try to reattach everything.
Aaah - good point. Hadn't thought about that. Oh well, guess I'll flop around on the floor and try and do it the old fashioned way. Thanks.
 11-03-2014, 05:25 PM
#49
Registered User

I just installed the Takeda intake and there are two extra screws that you have to remove when you take the fender liner out. It is on the same line as the first screw right at the edge of the fender and bumper, but this screw is further inside by the head light. I used a 10mm deep well with an extension to get to it.
I did not see the above mentioned so I will put it out there. I did what the OP posted and the bumper wouldn't budge. Did some exploring and that when I found 2 more screws. And I say screw because they screw into plastic wing nuts of some kind. They are definitely not bolts. I wish I took pics to but I didnt.
I did not see the above mentioned so I will put it out there. I did what the OP posted and the bumper wouldn't budge. Did some exploring and that when I found 2 more screws. And I say screw because they screw into plastic wing nuts of some kind. They are definitely not bolts. I wish I took pics to but I didnt.
11-25-2014, 10:43 PM
#50

DIY: Bumper Install/Removal
There is an extra bolt not shown in the original post within the engine bay. It is located on the left and right side with the black arrows. I used an extended 10mm ratchet to remove this. Also there are TWO bolts (located with the red arrow) located inside the wheel well in which i used the same extended ratchet to remove these. All in all for my first time removing the bumper it took me about an hour. Great DIY otherwise. I have a 2011 g37 sedan as well.
02-13-2015, 10:17 PM
#51

Hey guys, while taking off the bumper tonight, one of the clips on the bumper bracket (passenger side) that holds the bumper broke off.
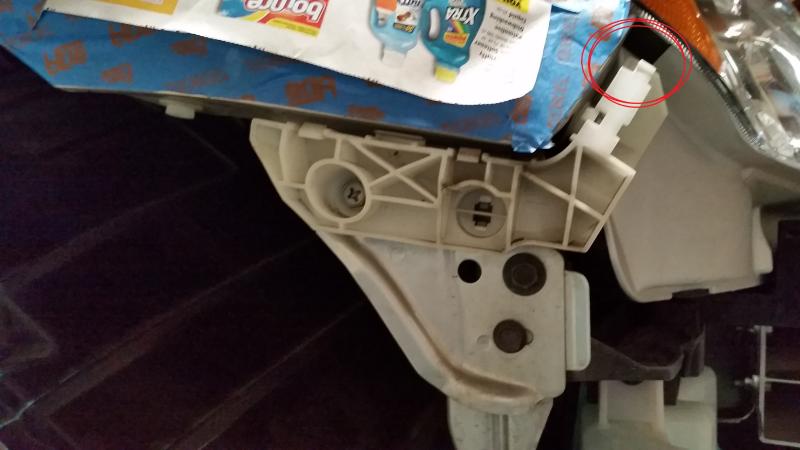
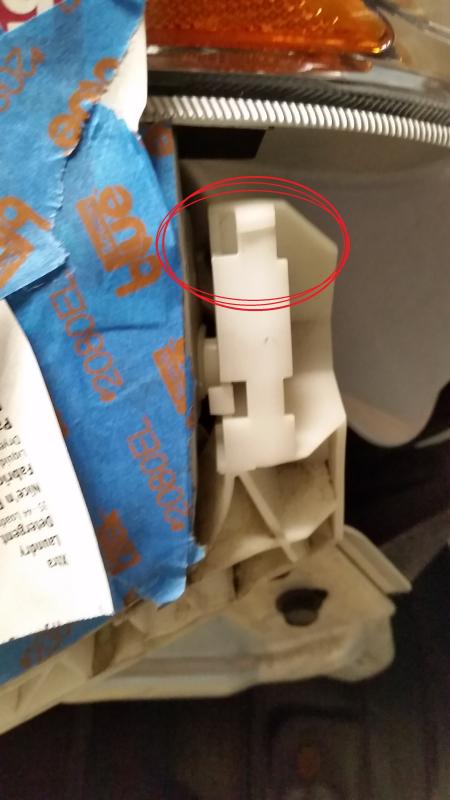
Note that that piece has 2 clips that the bumper goes into and the upper clip broke. Do I need to buy a new bracket because of that broken clip or would the bumper still hold? Would I be able to super glue or melt the plastic back together? Anyone know the part number for the bracket by any chance?
Please let me know...thanks in advance.
 01-19-2016, 07:51 PM
#53

Any help would be greatly appreciated!!!


 07-20-2017, 09:50 PM
#58
Does anyone have the part # for these pegs / clips? Mine were not cooperating, and I broke a number of them pulling off my bumper. I searched through every part diagram I could think of, but none of them have that rubber trim, let alone the clips.
Any help would be greatly appreciated!!!
Any help would be greatly appreciated!!!
10-06-2018, 05:14 PM
#59
Registered User

Join Date: Oct 2018
Posts: 2
Likes: 0
Received 0 Likes
on
0 Posts
Headlight
I have a 2012 infiniti g37 sedan i have a question my passager side headlight popped out some and I was wondering is the only way to fix it do I have to take my front bumper all the way out? Please help me with this problem thank you
06-30-2020, 10:53 AM
#60

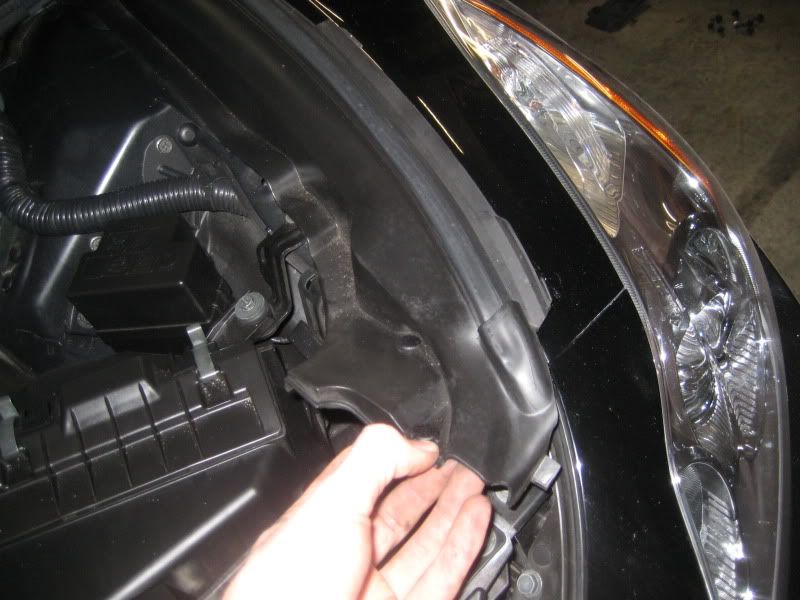
4. Next remove the screw from the bumper bracket (10mm). You'll see that all that is holding it in place is a piece of plastic. The bracket itself slides right out.(black screw on silver plate in photo)
(NOTE FOR REINSTALLATION: be careful with reassembling the bumper bracket, it screws into plastic, and it will break if overtightened)
Attachment 172587