
My "Evil Iron-Man" LED DIY


Thread Starter
Registered User
Joined: Jan 2013
Posts: 126
Likes: 18
From: San Diego, CA
My "Evil Iron-Man" LED DIY
Hey guys,
I noticed that nobody did a DIY write up for the "Iron-Man" LED mod so I decided to make one.
This is my first write up so if you have any suggestions, let me know.
Materials:
1) 28, 5050 SMD LED's from Superbrightleds.com
They are the same LED's used by Oneighty for their Iron-Man mod. They work really well, and are very bright. I chose to go with the 5500k natural white which goes perfectly with our stock 4300k HID bulbs, but if your running anything higher than 4300k I would suggest using the Cool White because their Natural White will not match anything higher.
2) Metallic Black Duplicolor Engine Enamel Spray Paint
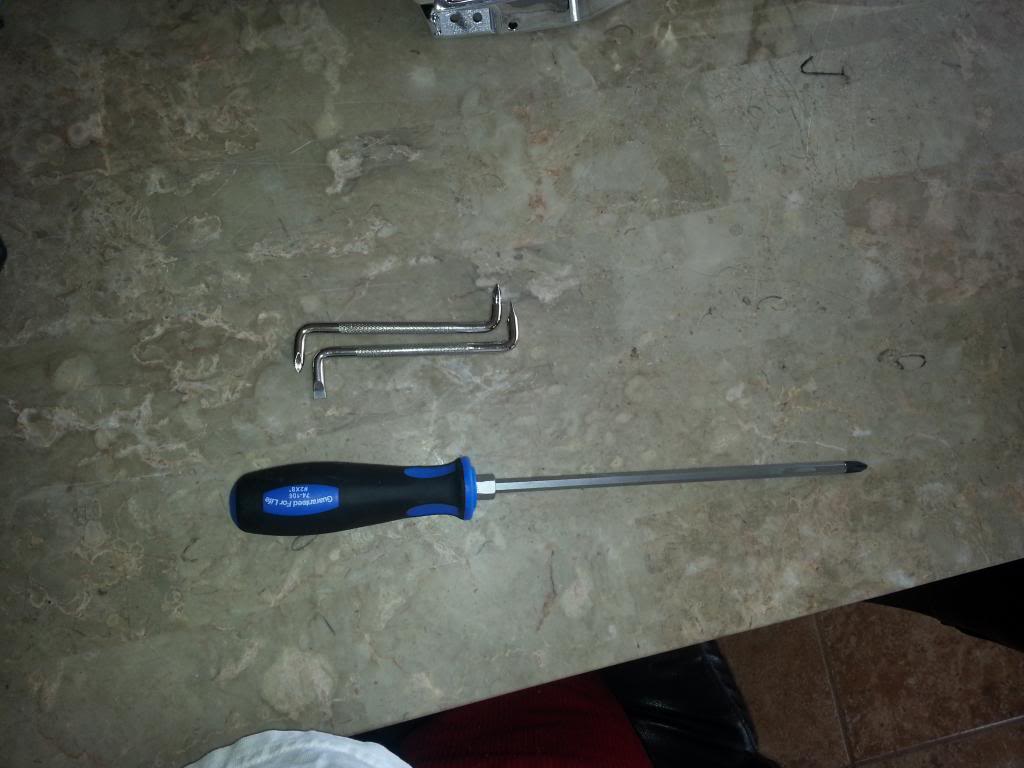
Tools:
1) Painter's Tape
2) L shaped Phillips screw driver
5) 12" Phillips screw driver
I am using a camera phone so the pictures really don't do the LED's justice. They are much brighter then they appear in the pictures. I had to lower the exposure all the way in order to any shots.
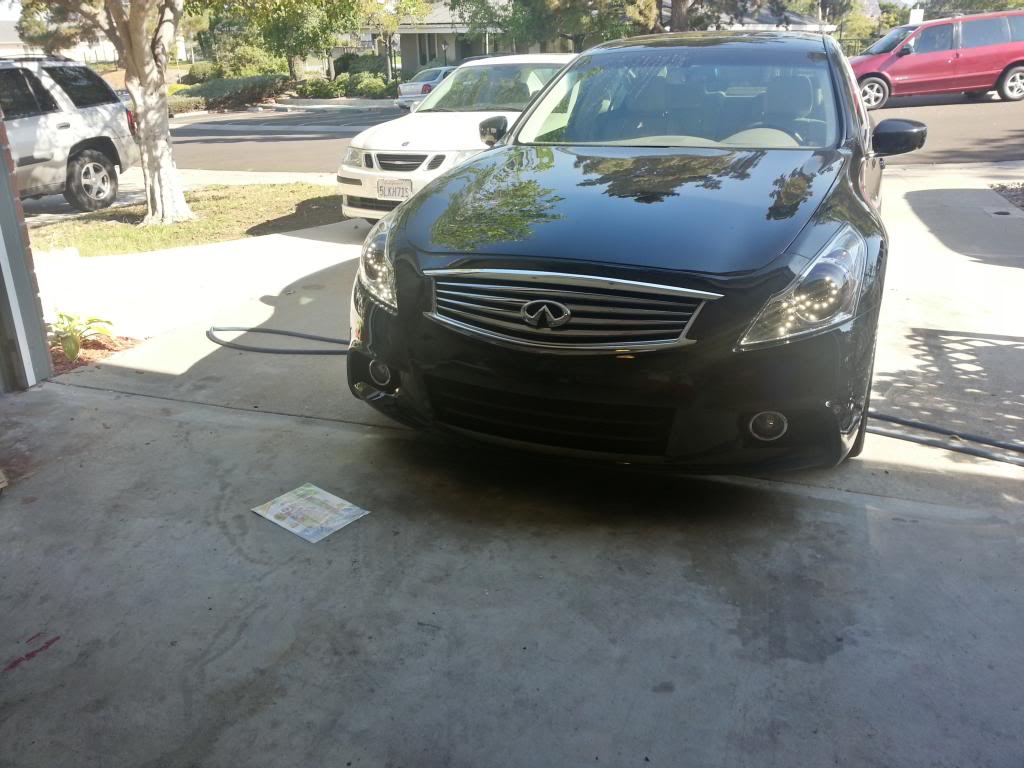
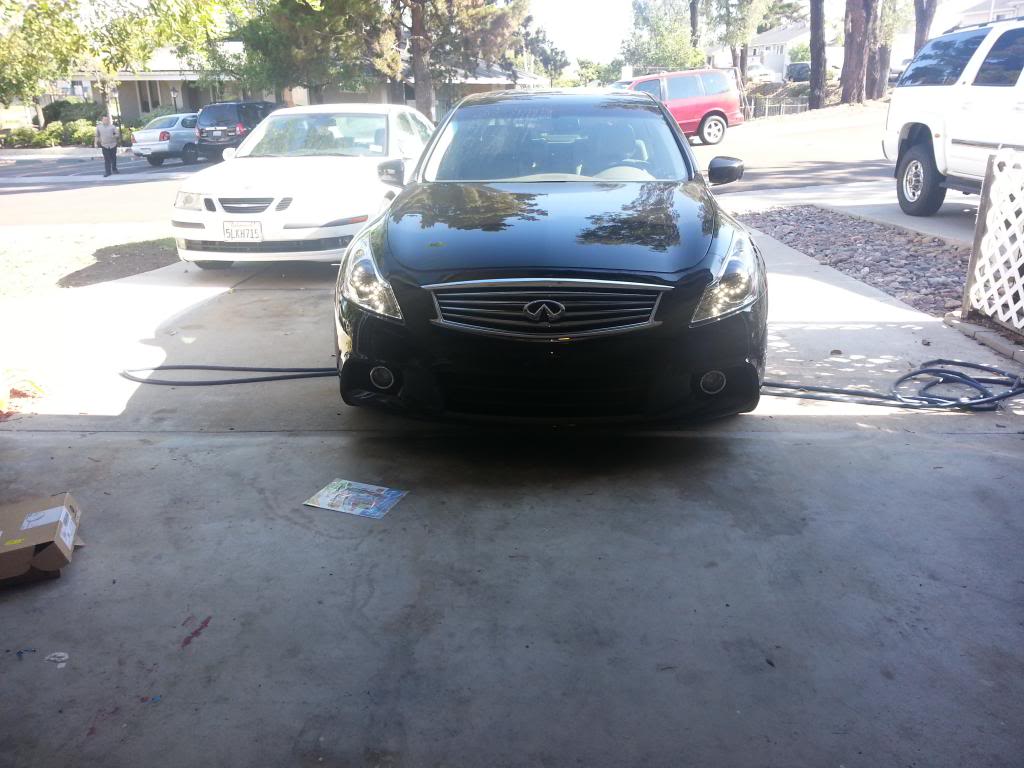
First things first, the outcome.
Step 1
Remove the front bumper. I used a DIY write up from the forum. This write up is for the coupe, but its the same process:
https://www.myg37.com/forums/d-i-y-i...ns/185489-diy-
quick-headlight-removal-w-pics.html?referrerid=348941
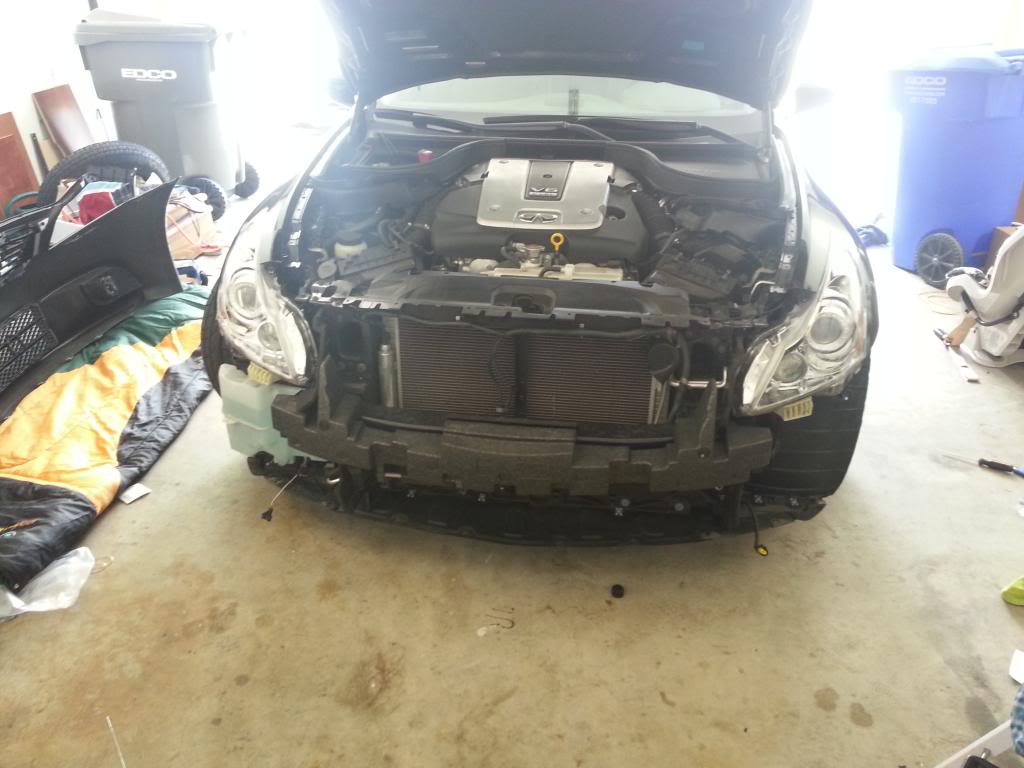
Once the bumper is removed all the bolts that hold the headlight in place will be exposed. I believe there are 5 total.
Step 2
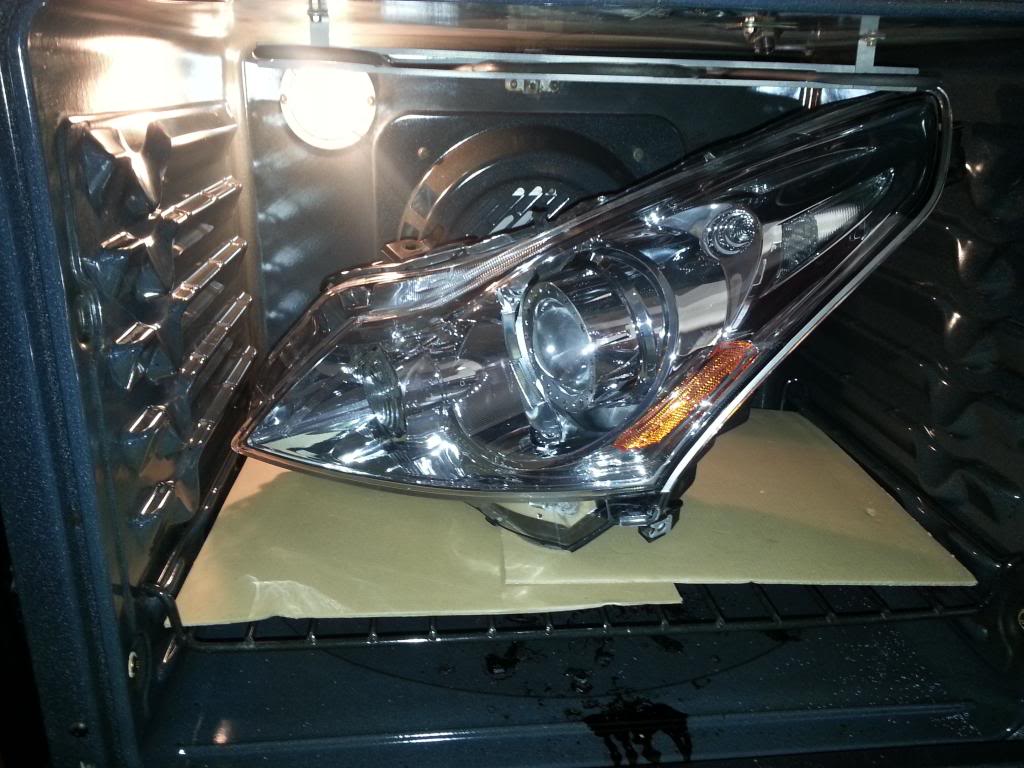
Heat your oven to 200 degrees and bake the headlight for 10-11 minuets. I read somewhere on the forum 200 degrees for 8 minuets but these headlights (at least mine) but these headlights are sealed up pretty good and 8 minuets just didn't heat the glue enough to separate the headlight .
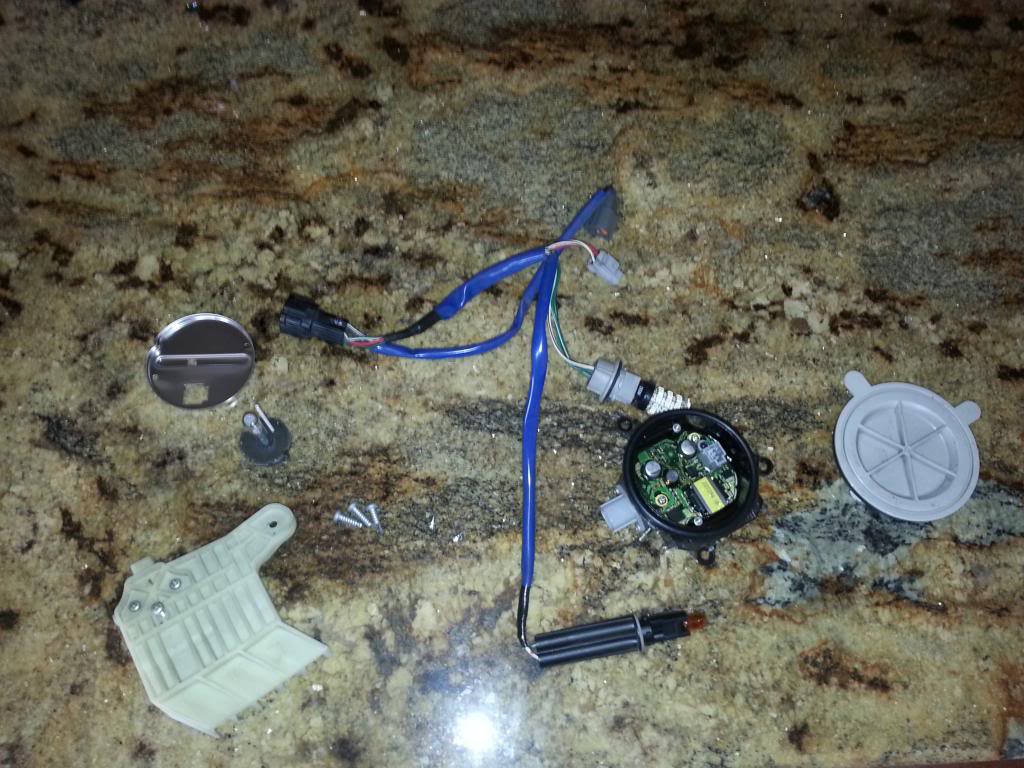
Remove all electrical components in the headlight before you bake it. The only wire harness I was not able to remove is for the high beam servo. Baking the headlight with it still in place did no harm.
There is a bracket on the bottom side of the headlight and 4 screws at each corner holding the backside of the headlight to the lens. Remove those.
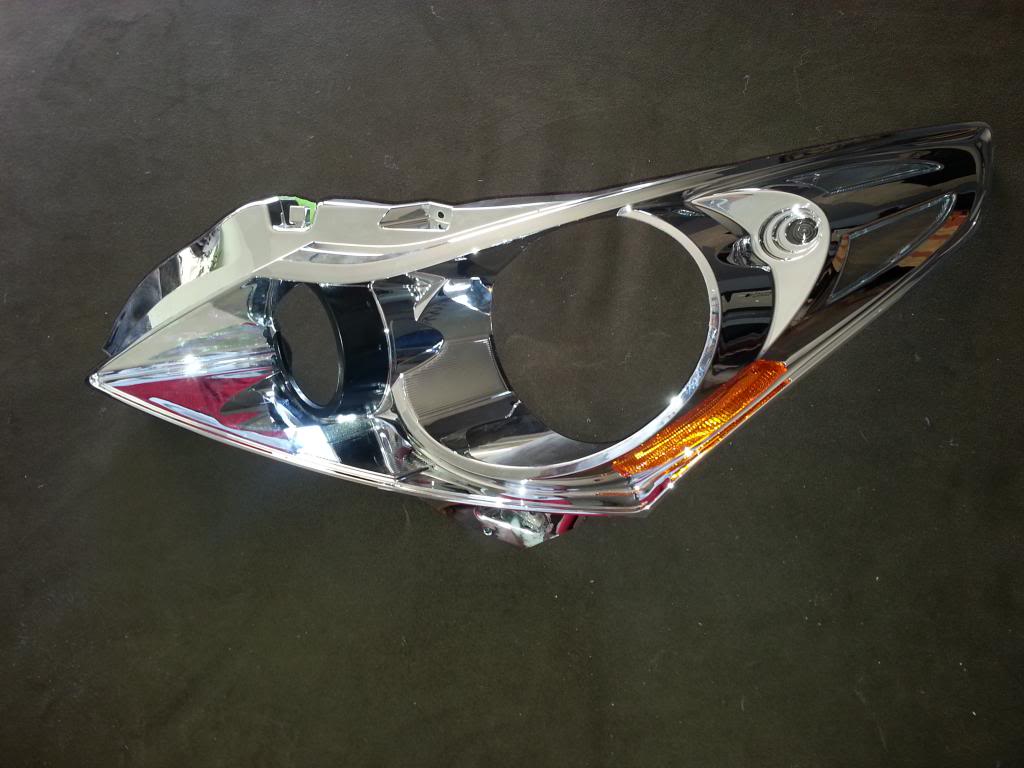
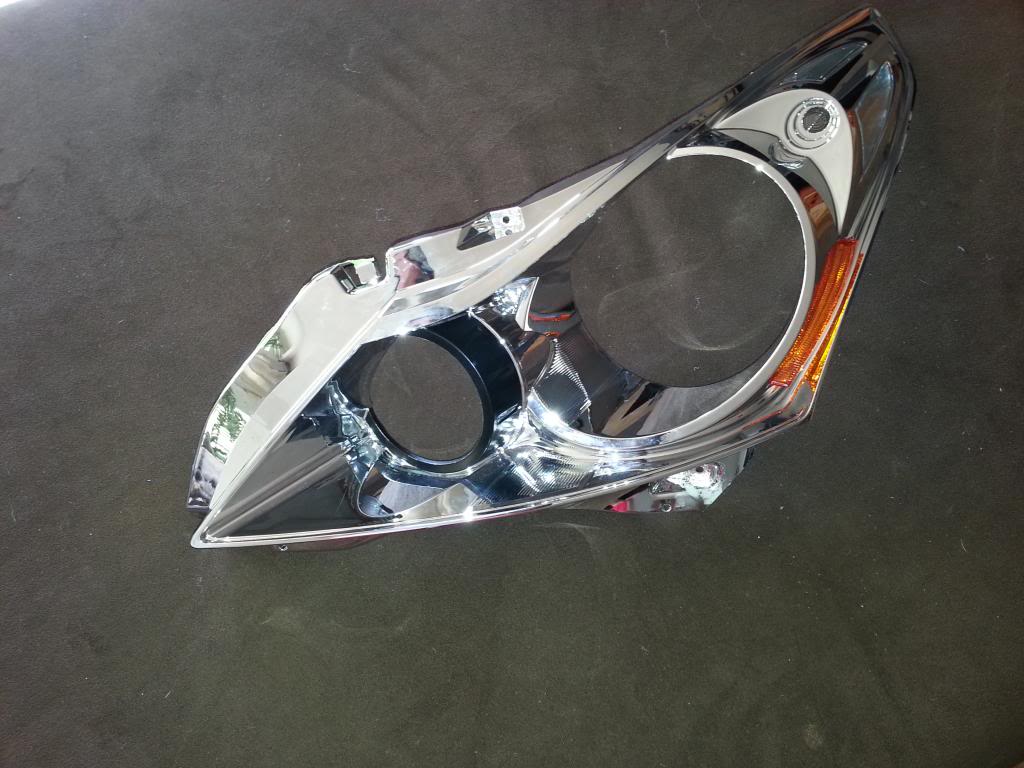
Step 3
Once you have opened up the headlight you will notice that the chrome bezel is attached to the front lens. Remove the 3 screws that hold it to the lens.
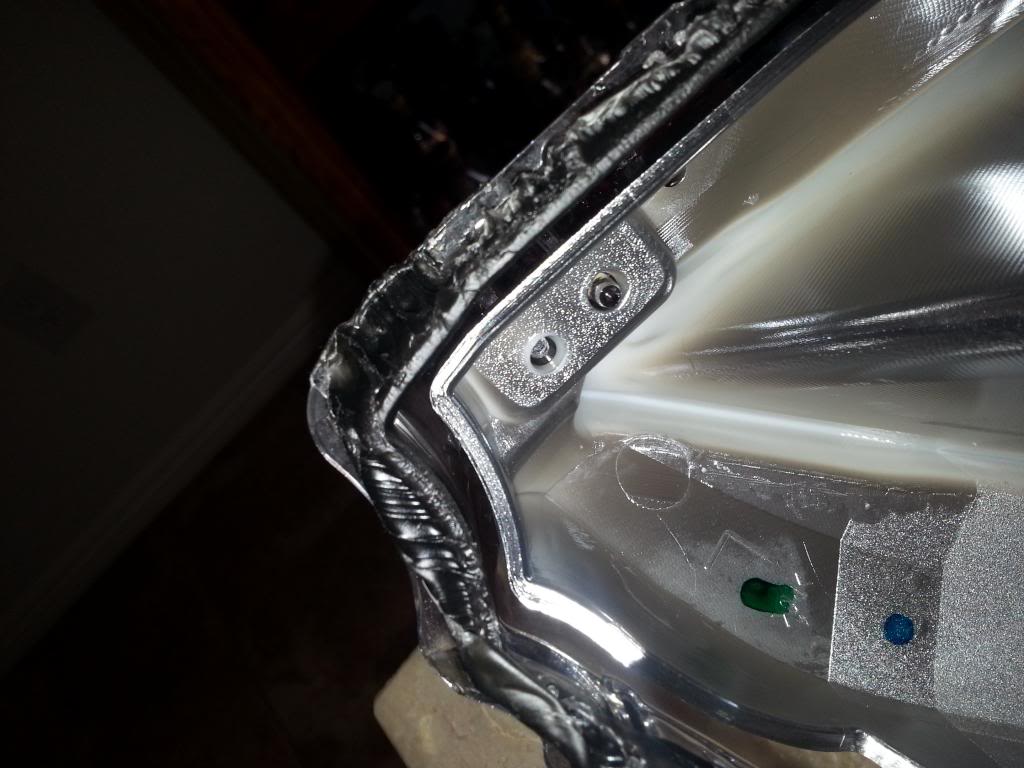
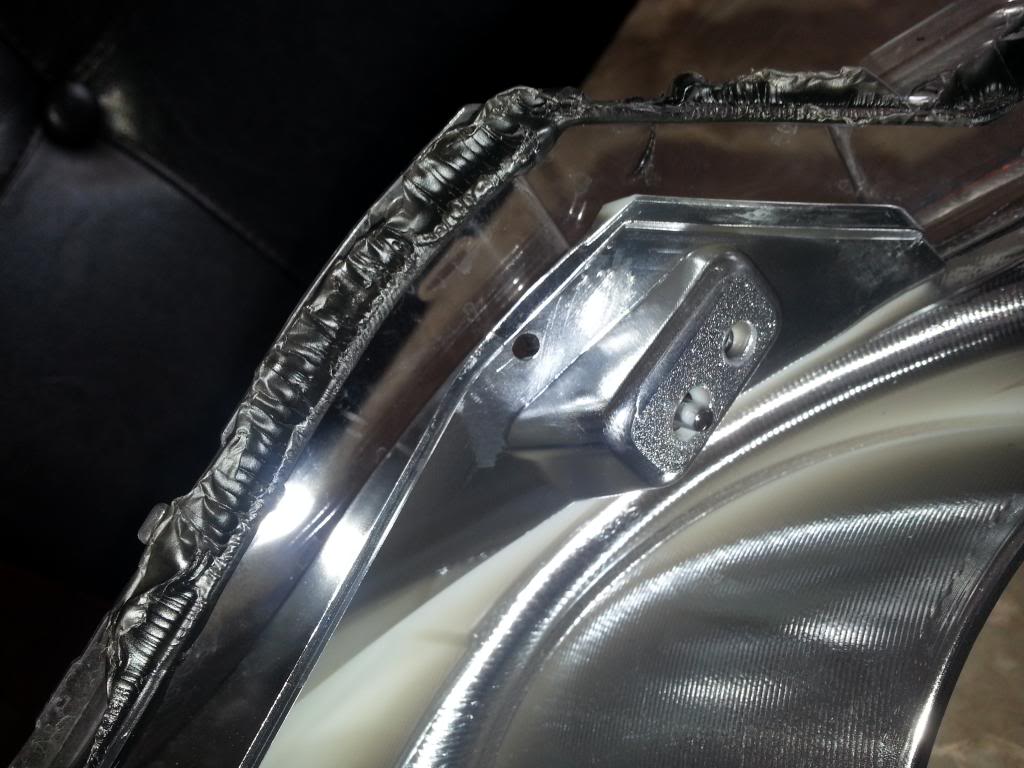
Once removed it should look like this
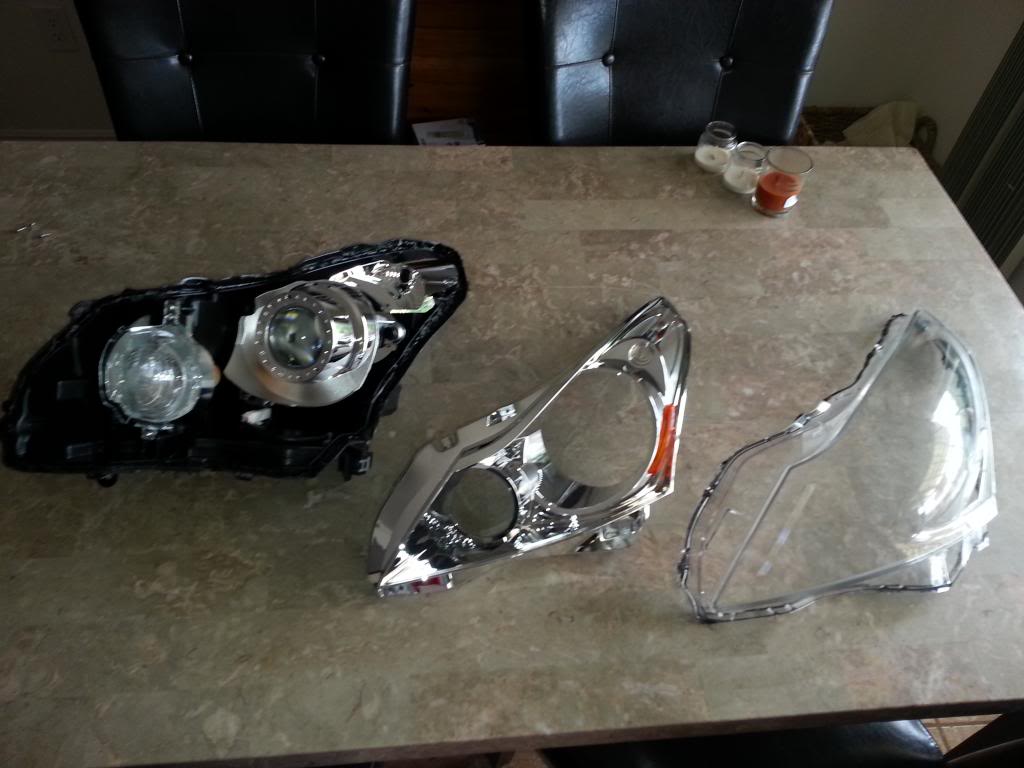
Step 4
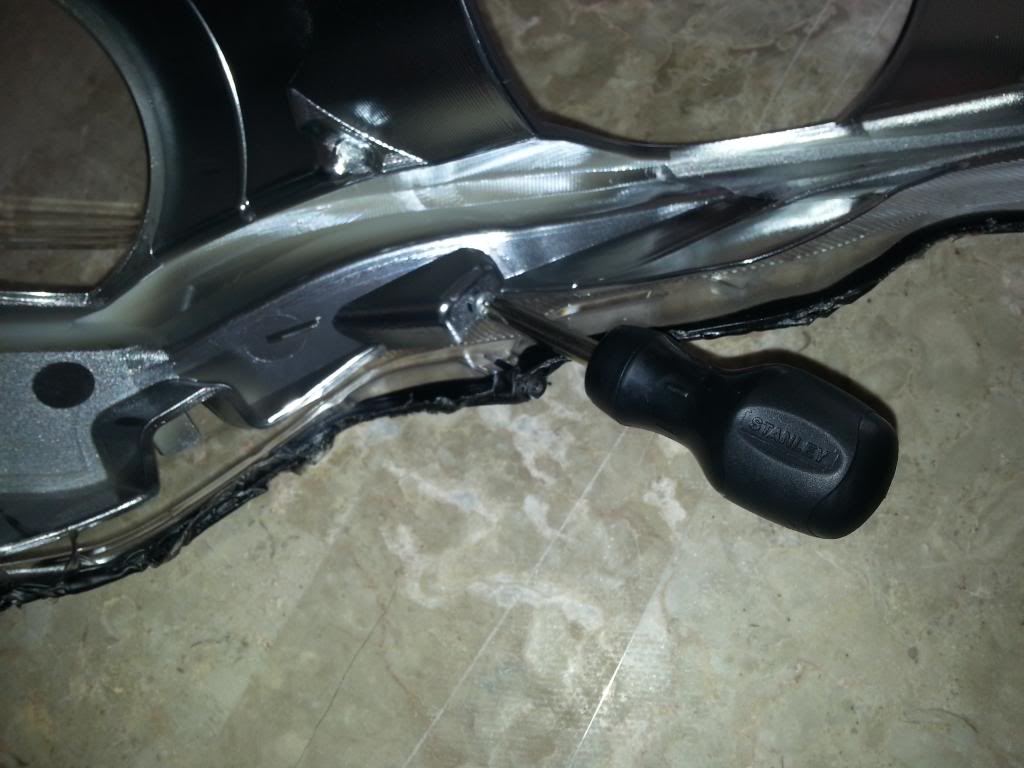
Remove the projector shroud. There are 2 screws holding it in place, one that you can easily see and will need the L shaped phillips screw driver to remove and one on the other side. You need a long phillips screw driver to remove the other screw on the opposite side.
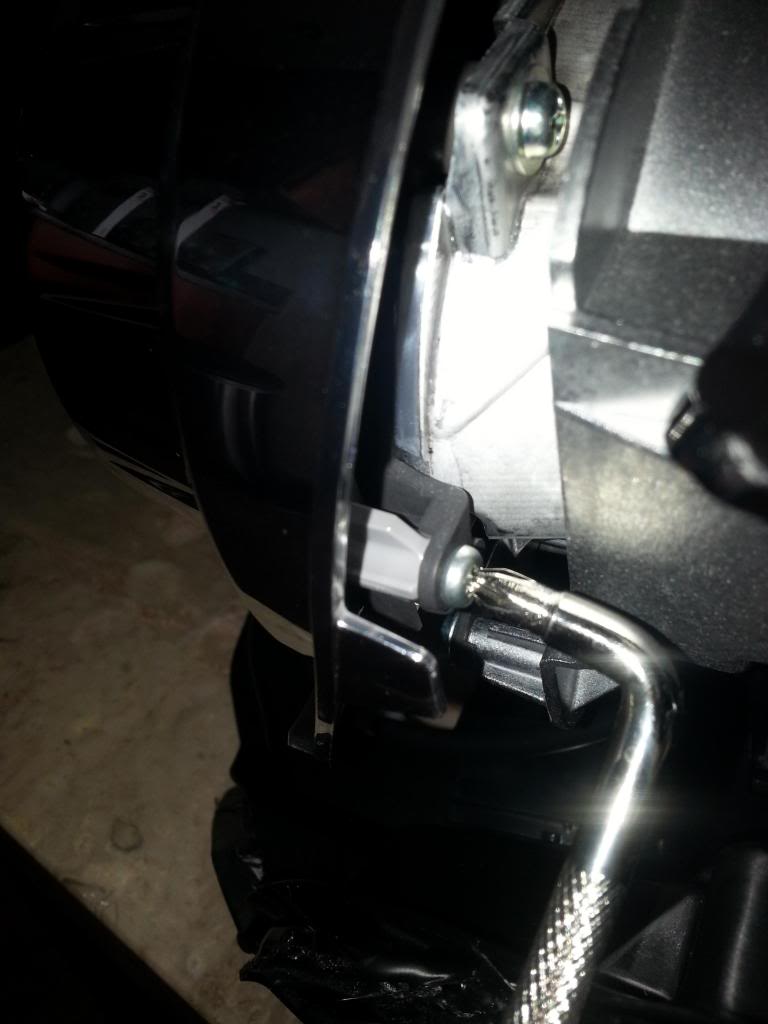
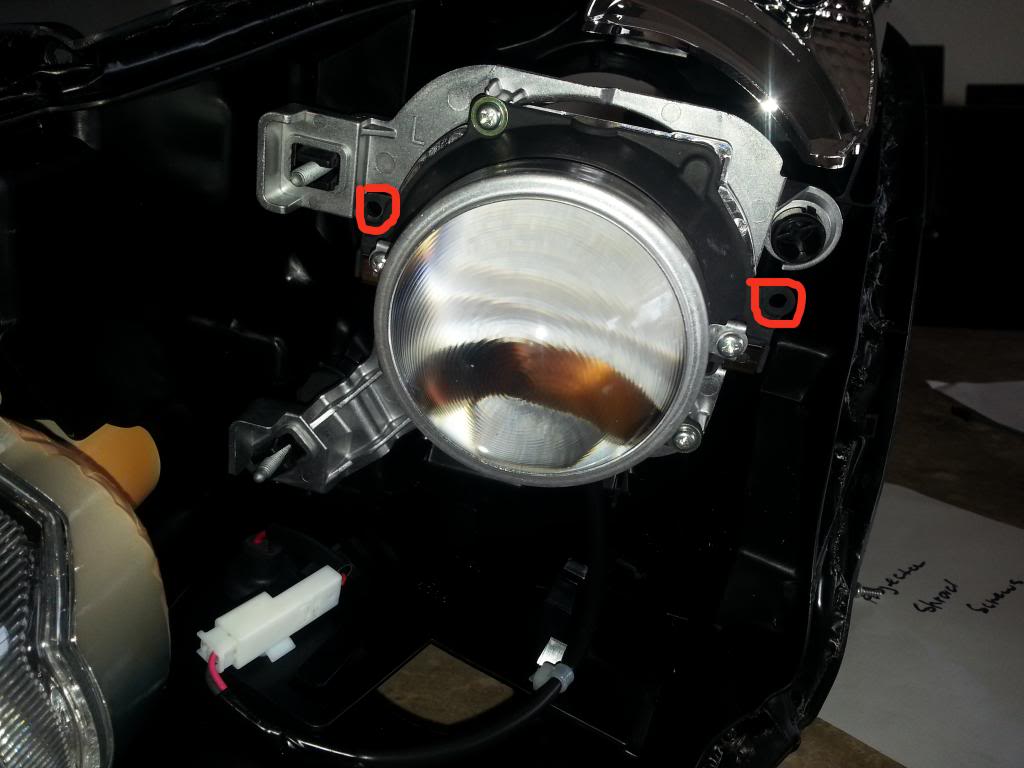
Step 5
Paint the shroud. Pretty self explanatory here. The LED housing is black, so you probably don't want to stick them on your chrome shroud.
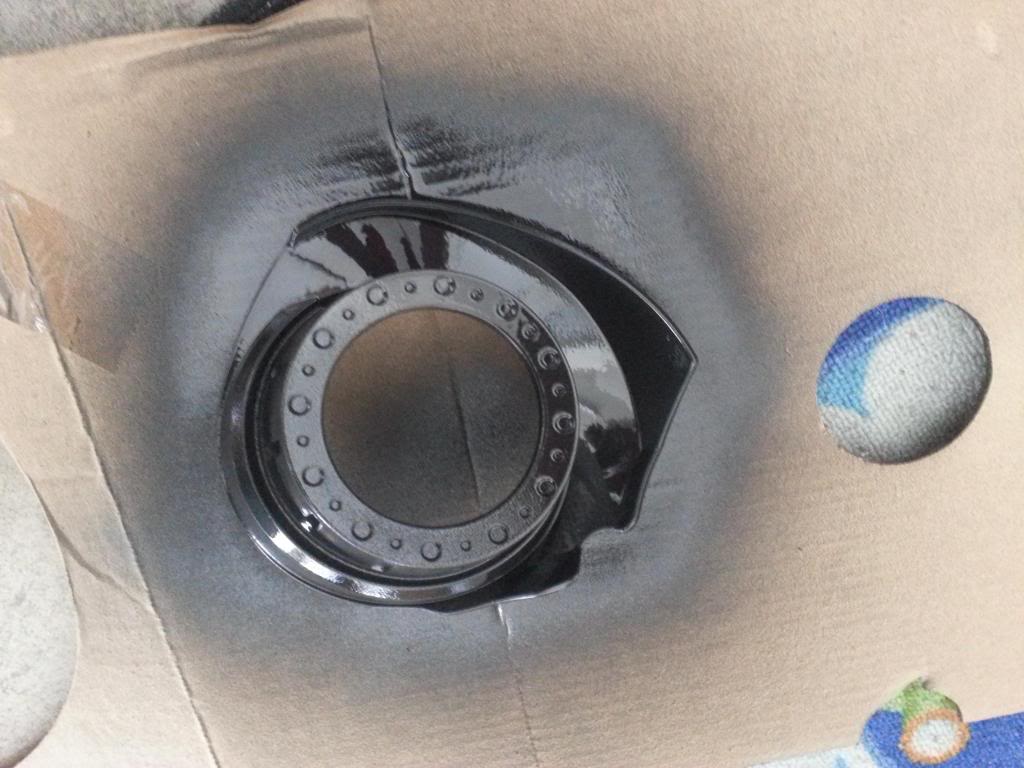
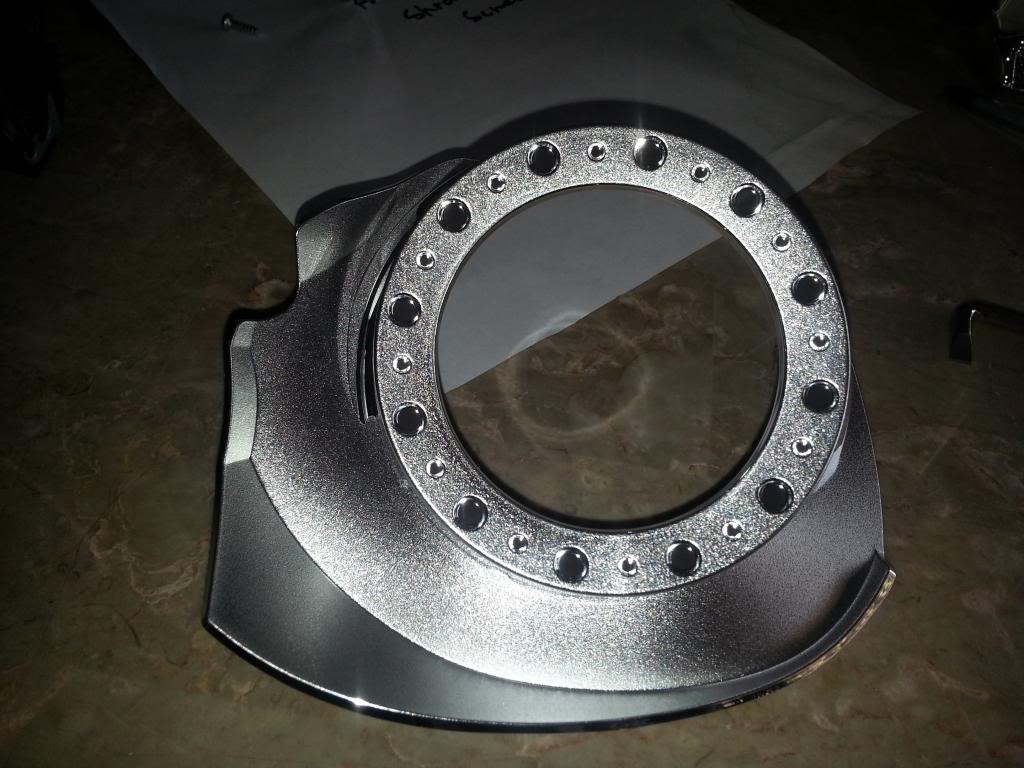
Step 6
Tape and paint the the chrome bezel

Should look something like this when finished. I didn't want to paint the whole headlight because there is a lot of chrome on my car and I thought it might not look right with an all black front end.
The fun part, mounting the LED's onto the shroud and the bezel Step 6
The 5050 SMD LED's from superbrightleds.com come with double sided tape, may not seem so reliable but it has proven to be very sticky. The wire attached to the LED's are very slim so it fits perfectly between the shroud and the projector

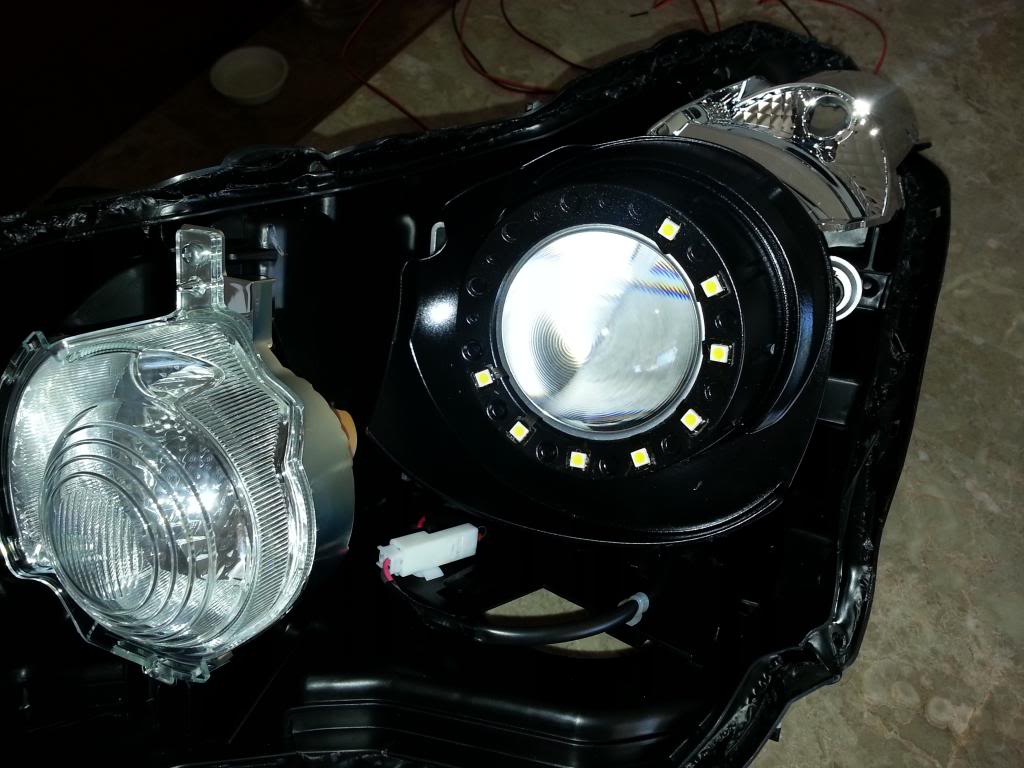
Its the same process mounting the LED's to the chrome bezel
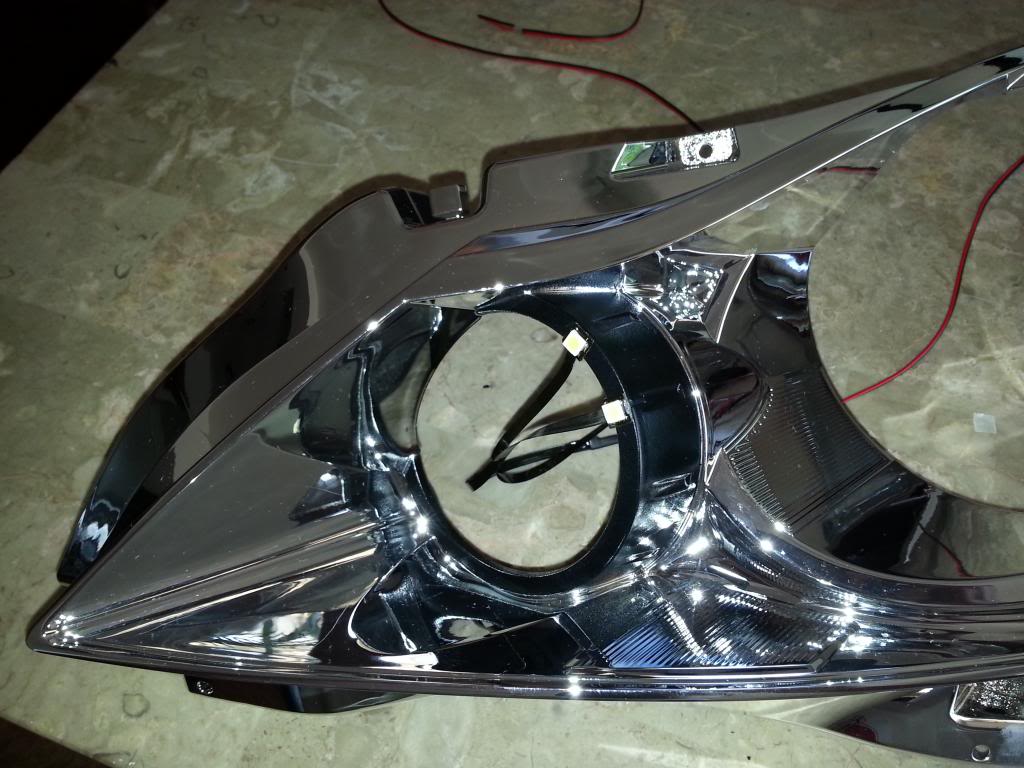
It should look something like this after you have mounted all LED's to the shroud and bezel.
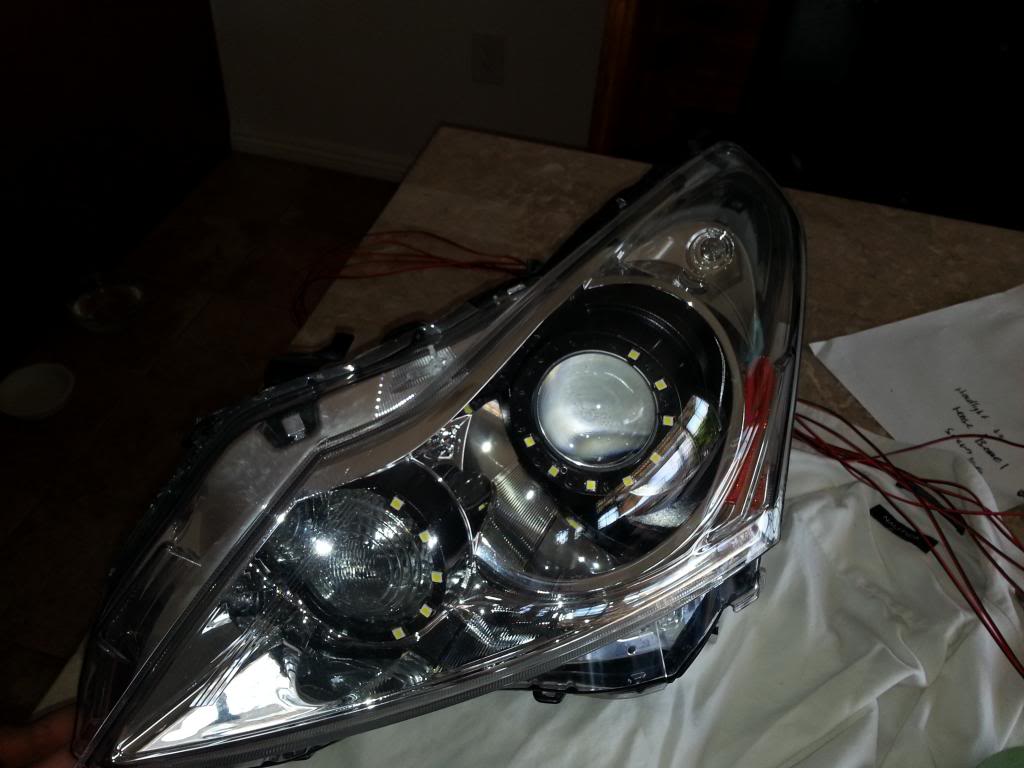
Secure the lens to the headlight and place in the oven at 200 degrees for 8-10 minuets. Apply pressure and make adjustments to the lens to ensure it sits perfectly on the headlight.
Re-Install the ballast, ignitor and all bulbs and harnesses.
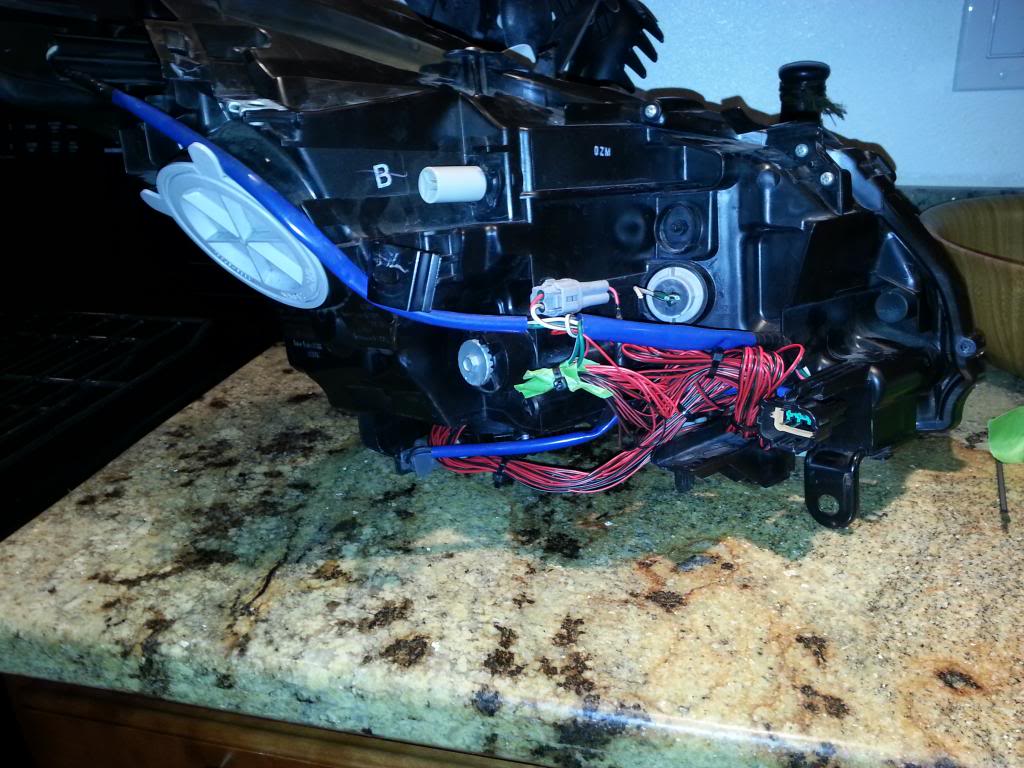
I wired my the LED's to the parking lights/blinkers (for now) because it was late and I was being lazy, but I would recommend purchasing a relay kit and finding a lead that turns on with the car that way they will turn on and off with the car.
I ordered STI-r clear lenses from theretrofitsource.com but something happened during the shipping process so I wont receive them until the end of this week. I plan on opening my headlights again to install the clear lenses as well as re-wiring the LED's.
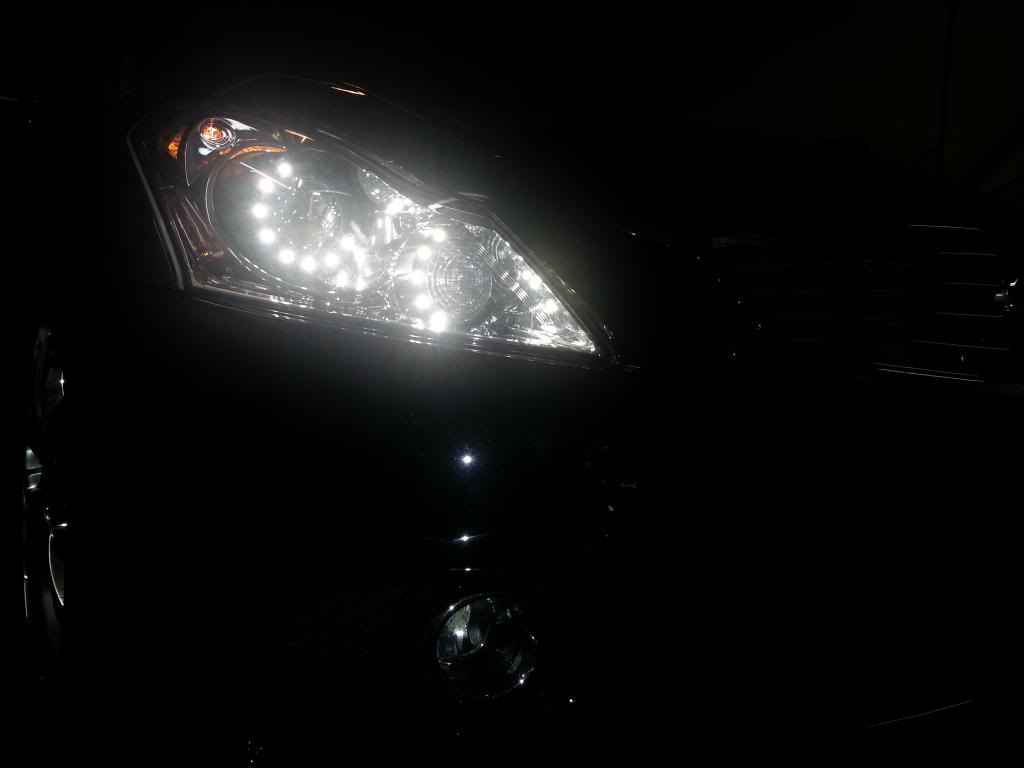
Here's some shots of them in action.
[/URL]
I noticed that nobody did a DIY write up for the "Iron-Man" LED mod so I decided to make one.
This is my first write up so if you have any suggestions, let me know.
Materials:
1) 28, 5050 SMD LED's from Superbrightleds.com
They are the same LED's used by Oneighty for their Iron-Man mod. They work really well, and are very bright. I chose to go with the 5500k natural white which goes perfectly with our stock 4300k HID bulbs, but if your running anything higher than 4300k I would suggest using the Cool White because their Natural White will not match anything higher.
2) Metallic Black Duplicolor Engine Enamel Spray Paint
Tools:
1) Painter's Tape
2) L shaped Phillips screw driver
5) 12" Phillips screw driver

I am using a camera phone so the pictures really don't do the LED's justice. They are much brighter then they appear in the pictures. I had to lower the exposure all the way in order to any shots.
First things first, the outcome.

Step 1
Remove the front bumper. I used a DIY write up from the forum. This write up is for the coupe, but its the same process:
https://www.myg37.com/forums/d-i-y-i...ns/185489-diy-
quick-headlight-removal-w-pics.html?referrerid=348941

Once the bumper is removed all the bolts that hold the headlight in place will be exposed. I believe there are 5 total.
Step 2
Heat your oven to 200 degrees and bake the headlight for 10-11 minuets. I read somewhere on the forum 200 degrees for 8 minuets but these headlights (at least mine) but these headlights are sealed up pretty good and 8 minuets just didn't heat the glue enough to separate the headlight .
Remove all electrical components in the headlight before you bake it. The only wire harness I was not able to remove is for the high beam servo. Baking the headlight with it still in place did no harm.

There is a bracket on the bottom side of the headlight and 4 screws at each corner holding the backside of the headlight to the lens. Remove those.

Step 3
Once you have opened up the headlight you will notice that the chrome bezel is attached to the front lens. Remove the 3 screws that hold it to the lens.


Once removed it should look like this

Step 4
Remove the projector shroud. There are 2 screws holding it in place, one that you can easily see and will need the L shaped phillips screw driver to remove and one on the other side. You need a long phillips screw driver to remove the other screw on the opposite side.


Step 5
Paint the shroud. Pretty self explanatory here. The LED housing is black, so you probably don't want to stick them on your chrome shroud.


Step 6
Tape and paint the the chrome bezel

Should look something like this when finished. I didn't want to paint the whole headlight because there is a lot of chrome on my car and I thought it might not look right with an all black front end.


The fun part, mounting the LED's onto the shroud and the bezel Step 6
The 5050 SMD LED's from superbrightleds.com come with double sided tape, may not seem so reliable but it has proven to be very sticky. The wire attached to the LED's are very slim so it fits perfectly between the shroud and the projector


Its the same process mounting the LED's to the chrome bezel

It should look something like this after you have mounted all LED's to the shroud and bezel.

Secure the lens to the headlight and place in the oven at 200 degrees for 8-10 minuets. Apply pressure and make adjustments to the lens to ensure it sits perfectly on the headlight.
Re-Install the ballast, ignitor and all bulbs and harnesses.

I wired my the LED's to the parking lights/blinkers (for now) because it was late and I was being lazy, but I would recommend purchasing a relay kit and finding a lead that turns on with the car that way they will turn on and off with the car.
I ordered STI-r clear lenses from theretrofitsource.com but something happened during the shipping process so I wont receive them until the end of this week. I plan on opening my headlights again to install the clear lenses as well as re-wiring the LED's.
Here's some shots of them in action.
[/URL]

Great writeup, and the result looks good. Even if the Ironman isn't on somebody's list the way you detailed the headlight removal and shroud/bezel details will be very helpful to those just wanting to paint their lights. You should post this in the DIY section too, nice work! Look forward to hearing how you like the Sti-Rs, I love mine! And when you open them up might be a nice addition to detail the lens swap since I forgot to, and I haven't seen anyone else really detail the swap itself.
Thread Starter
Registered User
Joined: Jan 2013
Posts: 126
Likes: 18
From: San Diego, CA
Great writeup, and the result looks good. Even if the Ironman isn't on somebody's list the way you detailed the headlight removal and shroud/bezel details will be very helpful to those just wanting to paint their lights. You should post this in the DIY section too, nice work! Look forward to hearing how you like the Sti-Rs, I love mine! And when you open them up might be a nice addition to detail the lens swap since I forgot to, and I haven't seen anyone else really detail the swap itself.
Thanks! I'm definitely really anxious to get the STI's installed. The stock beam is very distorted. I'll post some shots of the beam when I get them installed.

Did the leds come prewired? The only ones I can find on the sbl site arent wired. Thanks!
Edit - nm I found them. For those looking, theyre the accent lights, not in the smd section
Edit - nm I found them. For those looking, theyre the accent lights, not in the smd section
Thread Starter
Registered User
Joined: Jan 2013
Posts: 126
Likes: 18
From: San Diego, CA
Thread Starter
Registered User
Joined: Jan 2013
Posts: 126
Likes: 18
From: San Diego, CA
Trending Topics

Registered User
Joined: Jul 2013
Posts: 111
Likes: 5
Not sure if you use your foglights for function, if not foglight led mod using the same round oem housing would look nice as DRL addition, like some Prius and Chevy volts have.
Working my way to my fog's to do this,
Looking for the right H1 LED bulb.


just ordered my leds. I'm inspired from this post! 
I'm a little scared about baking the headlights, but I figure that it can't be harder than doing my headliner by myself (without a diy!)
Any tips on getting the lens off? I've seen some conflicting info out there - (use a screwdriver / don't use one, etc)
I'm a little scared about baking the headlights, but I figure that it can't be harder than doing my headliner by myself (without a diy!)
Any tips on getting the lens off? I've seen some conflicting info out there - (use a screwdriver / don't use one, etc)
just ordered my leds. I'm inspired from this post!
I'm a little scared about baking the headlights, but I figure that it can't be harder than doing my headliner by myself (without a diy!)
Any tips on getting the lens off? I've seen some conflicting info out there - (use a screwdriver / don't use one, etc)
I'm a little scared about baking the headlights, but I figure that it can't be harder than doing my headliner by myself (without a diy!)
Any tips on getting the lens off? I've seen some conflicting info out there - (use a screwdriver / don't use one, etc)
Thread Starter
Registered User
Joined: Jan 2013
Posts: 126
Likes: 18
From: San Diego, CA
You just want to get one corner lifted up and pry it off by just grabbing that corner and pulling up w/ steady pressure (be sure to remove all the phillips screws first). The first light I did I tried prying all around the perimeter and it just left ugly pry marks around the gray housing and didn't effectively lift the lens, just concentrate in one corner and once you get it to lift you can reheat the light again for the same duration & temp to easily lift the rest of the cover. And while you've got it open be sure to change your lens to an STiR lens, much better cutoff w/ a nice blue flicker around the cutoff point The Retrofit Source online: headlight upgrades for all applications has them, and reseal w/ the butyl tape that is also available at ^^
my headlights are open right now, just waiting for the sti-r lenses to get here. Hopefully tomorrow. I'll do up a DIY for the swap - there definitely isn't one out there for the 37 sedan that I could find.