
My "New New" Gauge Cluster (Red Needles)


i actually emailed him before messing with my cluster and he sold me some of the red lighting gel that i tried before re-soldering. his write up and one on a 370z forum who swapped his LEDs were what made me start thinking about doing it.
i did not put the older cluster in. i dont know if you can swap the center MID display. i think that is what houses the odo info. i know it is in the ECU also, but the cluster and ECU are "mated". once the gauge cluster is apart, the center display does come off as once piece and it could easily be swapped with one from a '10 cluster (though '10 clusters are very hard to find out of totaled cars resulting in a much higher price). i dont know if swapping them will work though. while it physically can be swapped, there is a ribbon cable connecting it that has probably 40 wires. if even one of them has changed since 07-09, it could fry the whole system. too much risk for me.
i did not put the older cluster in. i dont know if you can swap the center MID display. i think that is what houses the odo info. i know it is in the ECU also, but the cluster and ECU are "mated". once the gauge cluster is apart, the center display does come off as once piece and it could easily be swapped with one from a '10 cluster (though '10 clusters are very hard to find out of totaled cars resulting in a much higher price). i dont know if swapping them will work though. while it physically can be swapped, there is a ribbon cable connecting it that has probably 40 wires. if even one of them has changed since 07-09, it could fry the whole system. too much risk for me.

Registered Member
Joined: May 2010
Posts: 307
Likes: 37
From: Romania
The center LCD should be the same on 08-10.
Only backlight is different.The backlight should be easy to change, by replacing the backlight LED.
However, on the 10, the temp is displayed on the top of the menu.
On the 08-09 is a separate menu just like the MPG
That difference is from ECU firmware, not from display itself.
Only backlight is different.The backlight should be easy to change, by replacing the backlight LED.
However, on the 10, the temp is displayed on the top of the menu.
On the 08-09 is a separate menu just like the MPG
That difference is from ECU firmware, not from display itself.
Registered Member
Joined: May 2010
Posts: 307
Likes: 37
From: Romania
Yes. About LCD backlight, is 100% TRUE
If you are not an experienced electronist, be very careful.
If you damage the LCD ribon, the LCD wont work enymore.
That ribon strip is very fragile.
The LED's are on the side or at the botom of the LCD.
Registered Member
Joined: May 2010
Posts: 307
Likes: 37
From: Romania


Are these just Surface Mount LEDs? I have done numerous bike clusters to change the color, if thats all it is I may get creative with mine in the near futer =) I have tons of those things all dif colors laying around.
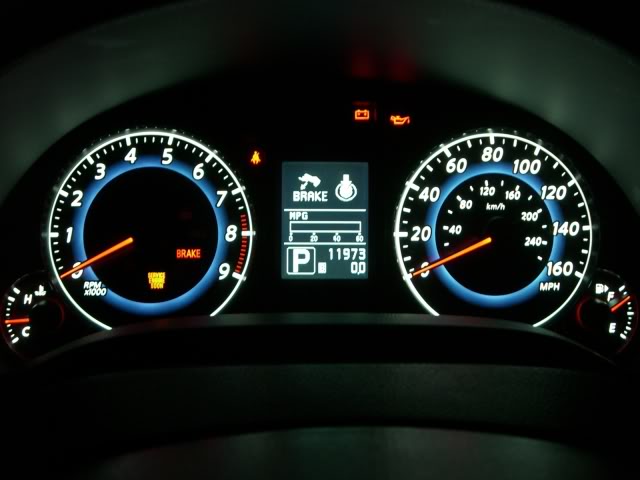
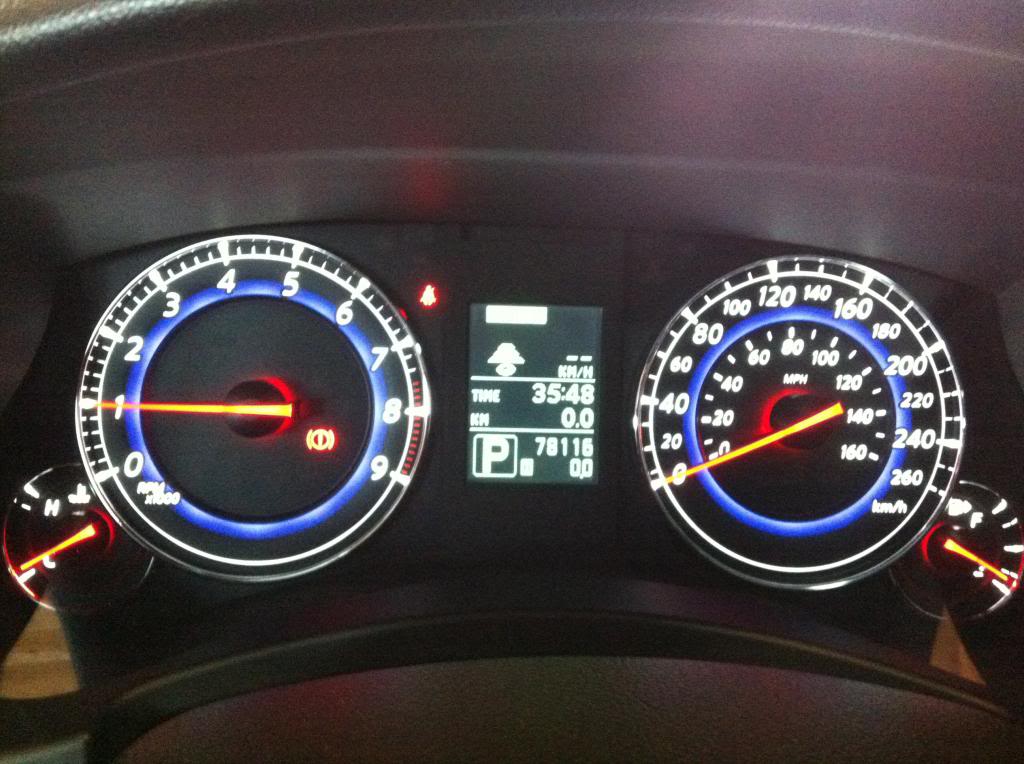
originally all amber:
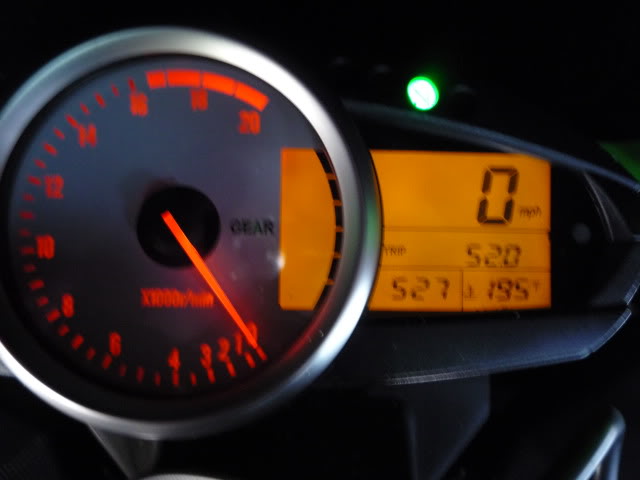
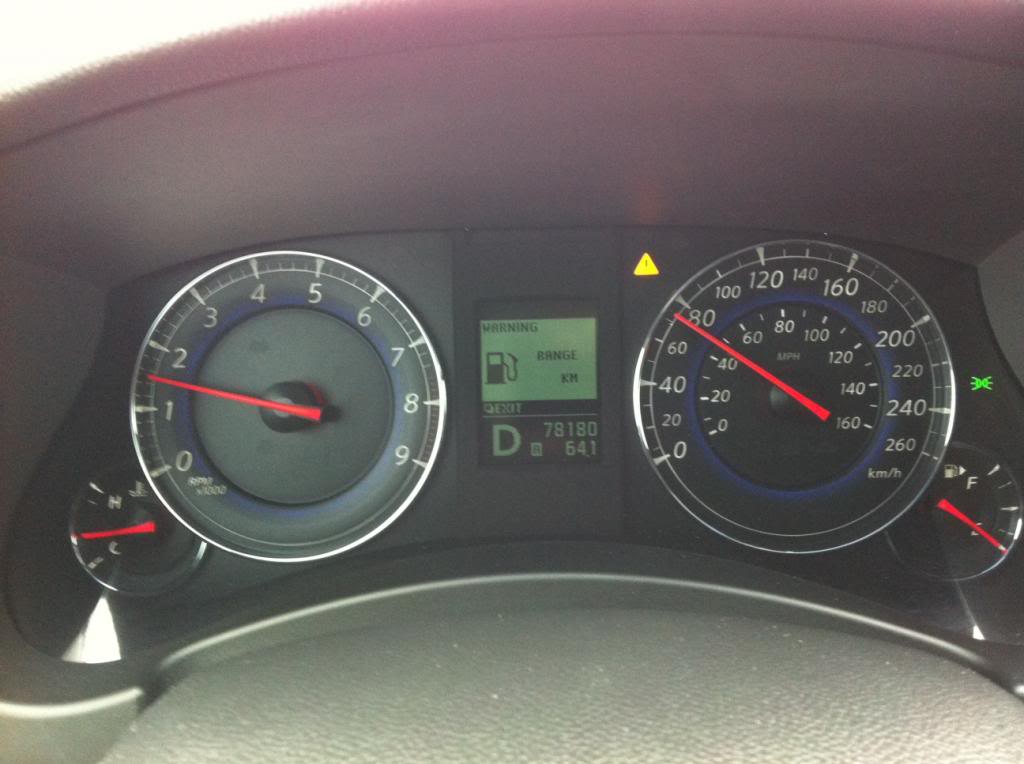
then to this


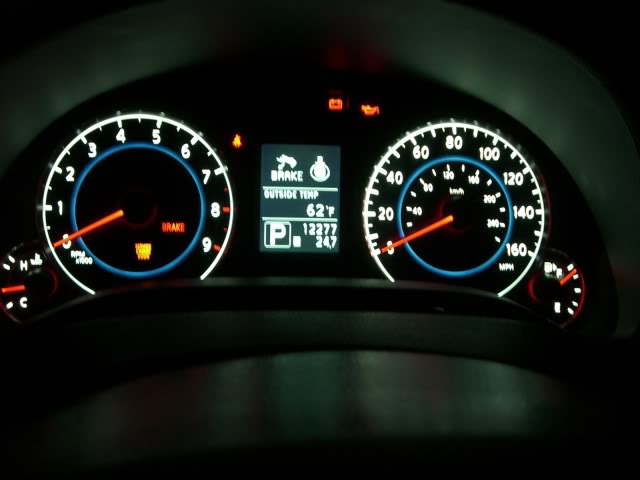
originally all amber:
then to this

Thread Starter
Registered User
Joined: Feb 2008
Posts: 40
Likes: 1
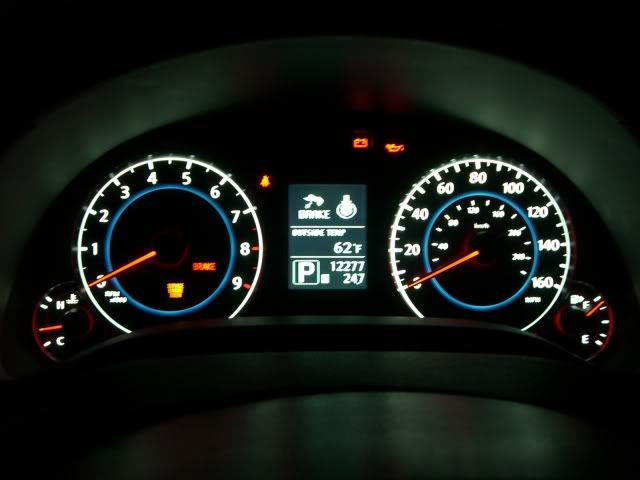
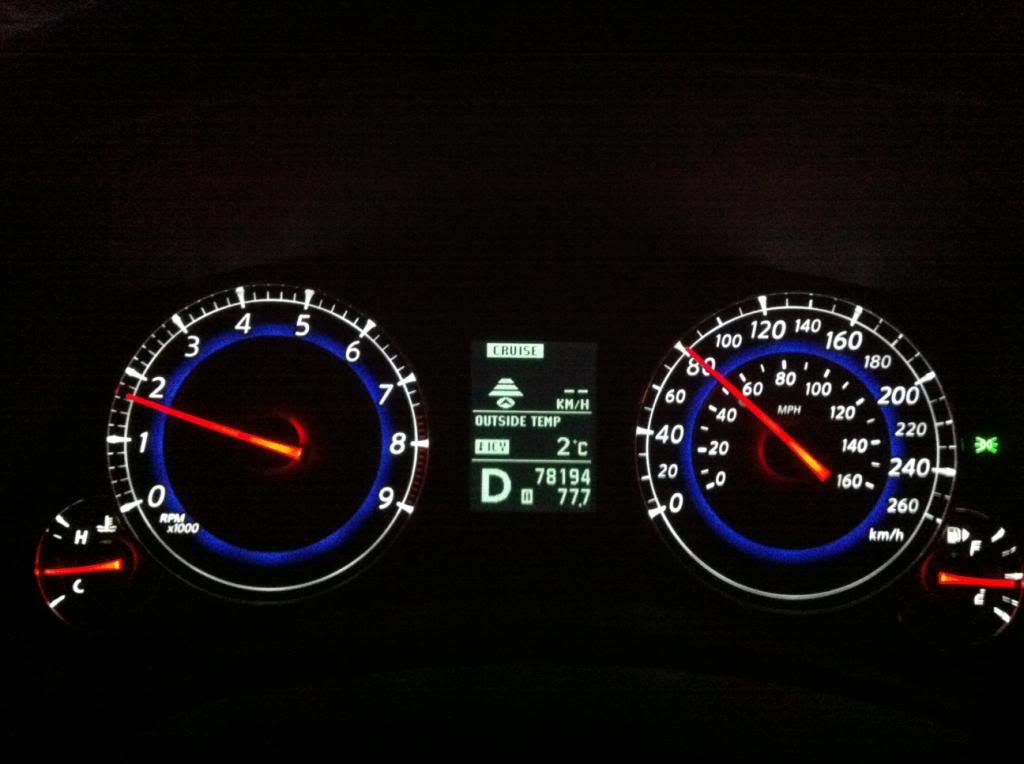
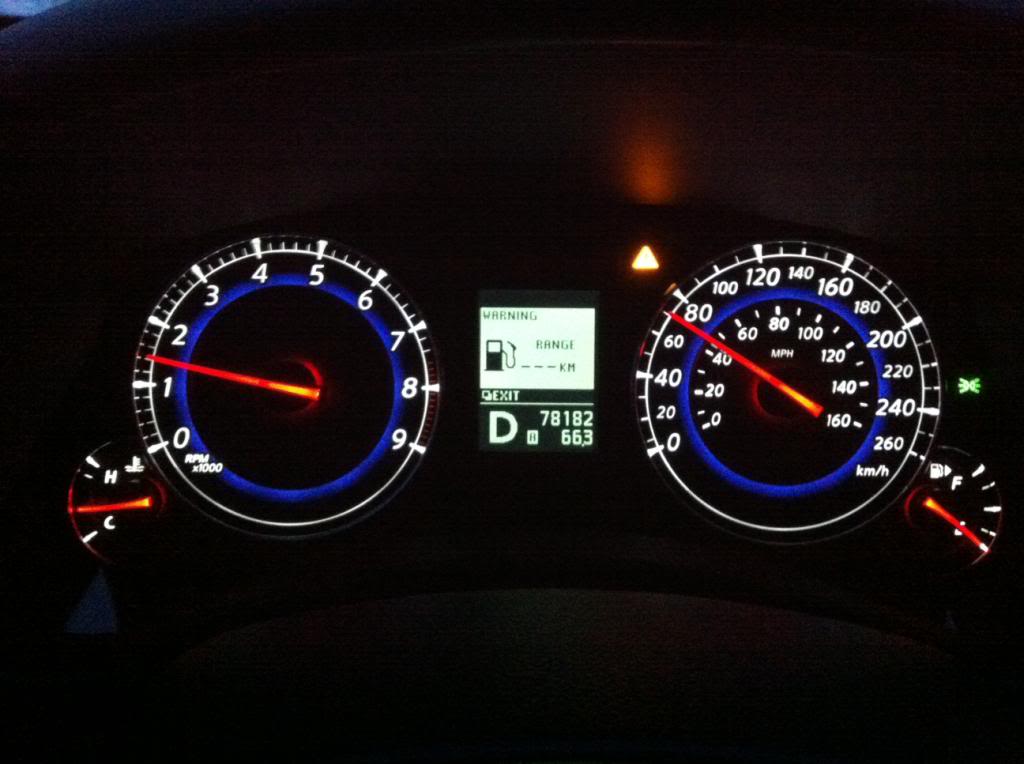
installed version 4 of my cluster today. decided to see how i liked the look of the '10 faces with the red needles. i think i like it. i dont really know why, but the dimmer backlighting with the headlights on looks better with my newest set up. and the white numbers look "whiter". the pictures dont show the difference the way my eyes perceive them.
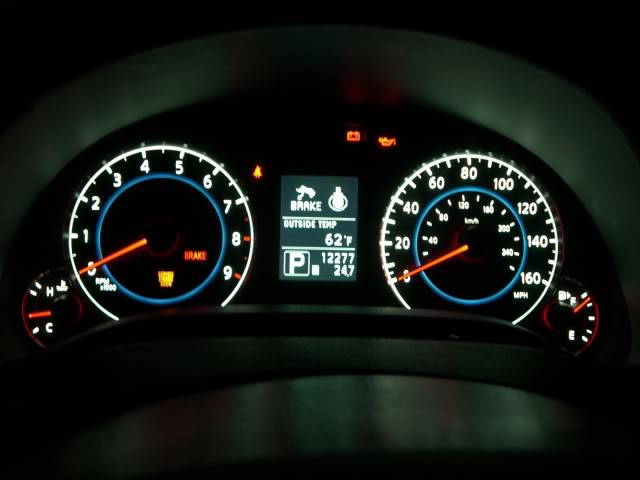
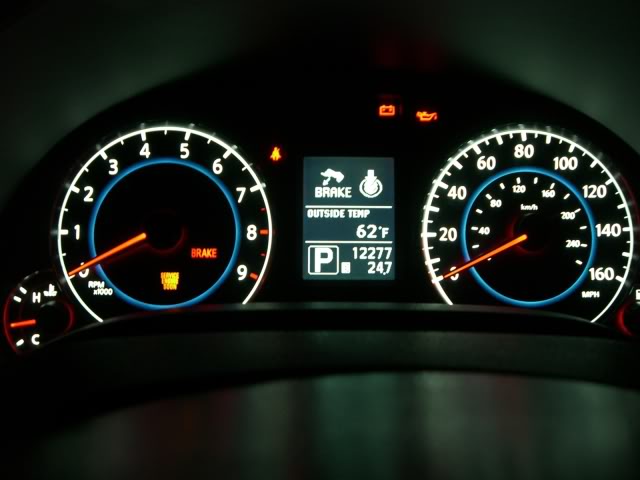
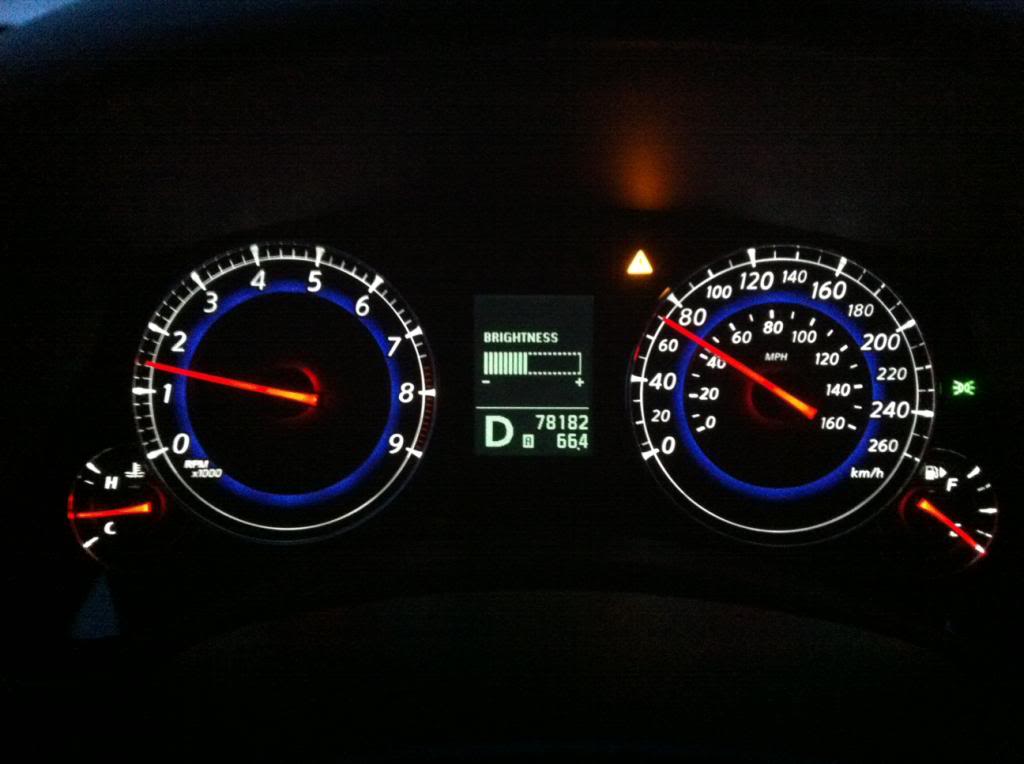
and the "previous" version for comparison
and the "previous" version for comparison


Registered User
Joined: Mar 2013
Posts: 12
Likes: 2
From: Niagara Falls-New York / Toronto, ON
hi guys, came across this post a few weeks ago and started ordering parts for my led backlight change on my ex35 with the red screen.
Our ex35 clusters come out in 2 simple steps so i got it out in no time at all.
I took lots of pics but I will post a few to show people how its done, not a lot of pics of our clusters taken apart.
Warning: Please be careful, it is your car, I have messed around with this stuff before and I was extremely patient with the disassembly. As good news, to replace the backlight, you DO NOT have to remove the needles or recalibrate anything. The screen comes off on its own.
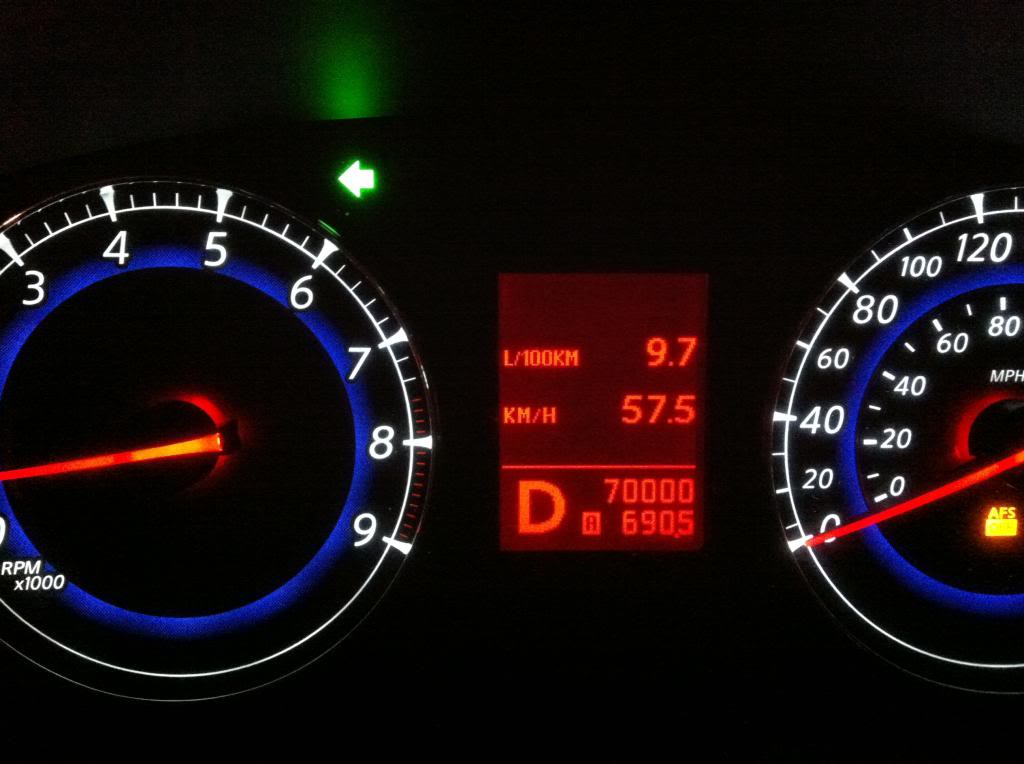
Step 1: remove cluster from vehicle -- Original red cluster backlight
Step 2: Remove the front plastic cover
Step 3: Remove the rear black plastic cover
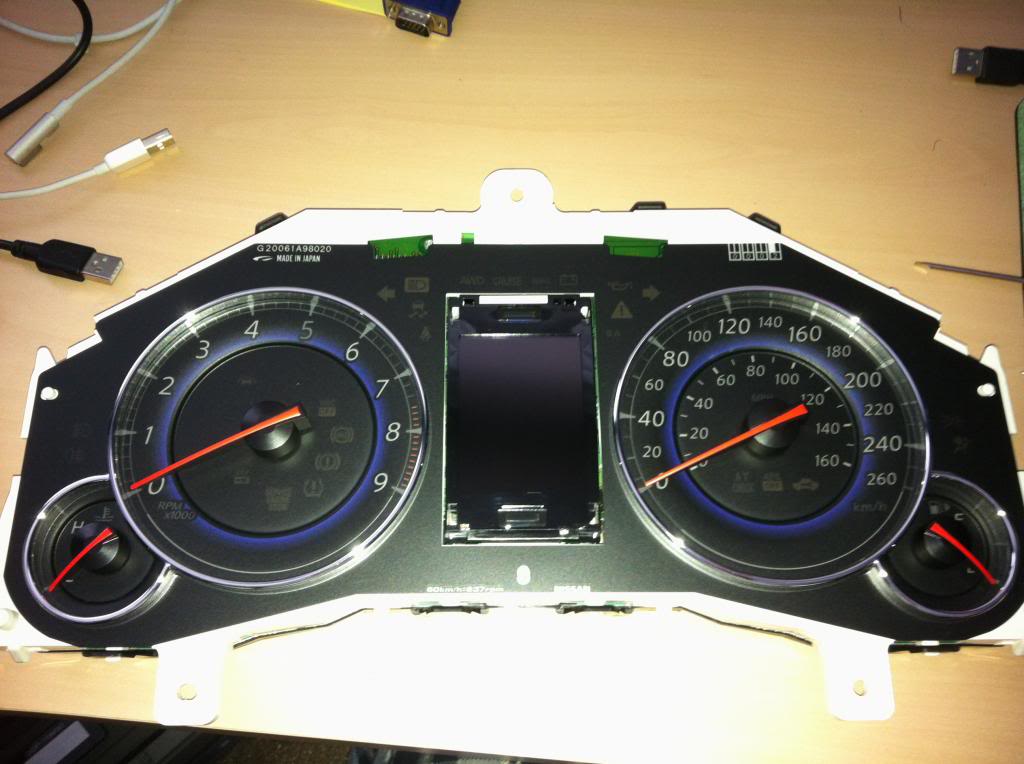
Step 4: remove the 4 screws at the back of the board (screen will become loose now).
Step 5: Disconnect the white ribbon cable
Step 6: Remove screen from cluster, set cluster aside in a safe place.
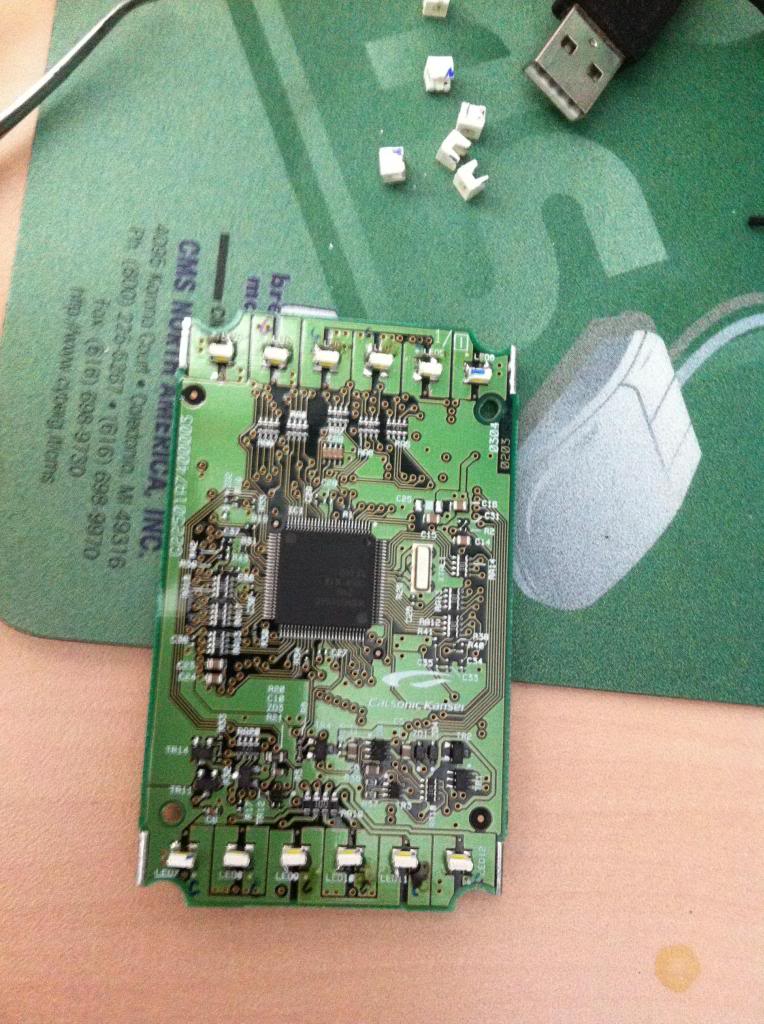
Step 7: Disconnect rear ribbon cables from the rear green pcb.
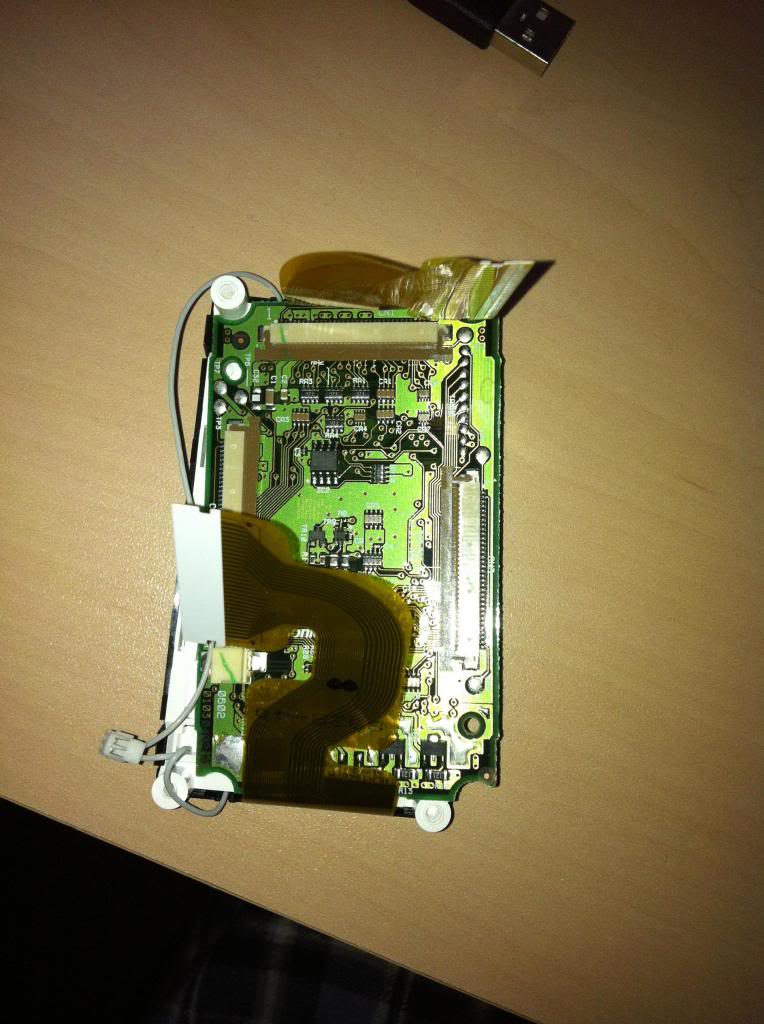
Step 8: Remove the green pcb board to uncover the leds from the backlight.
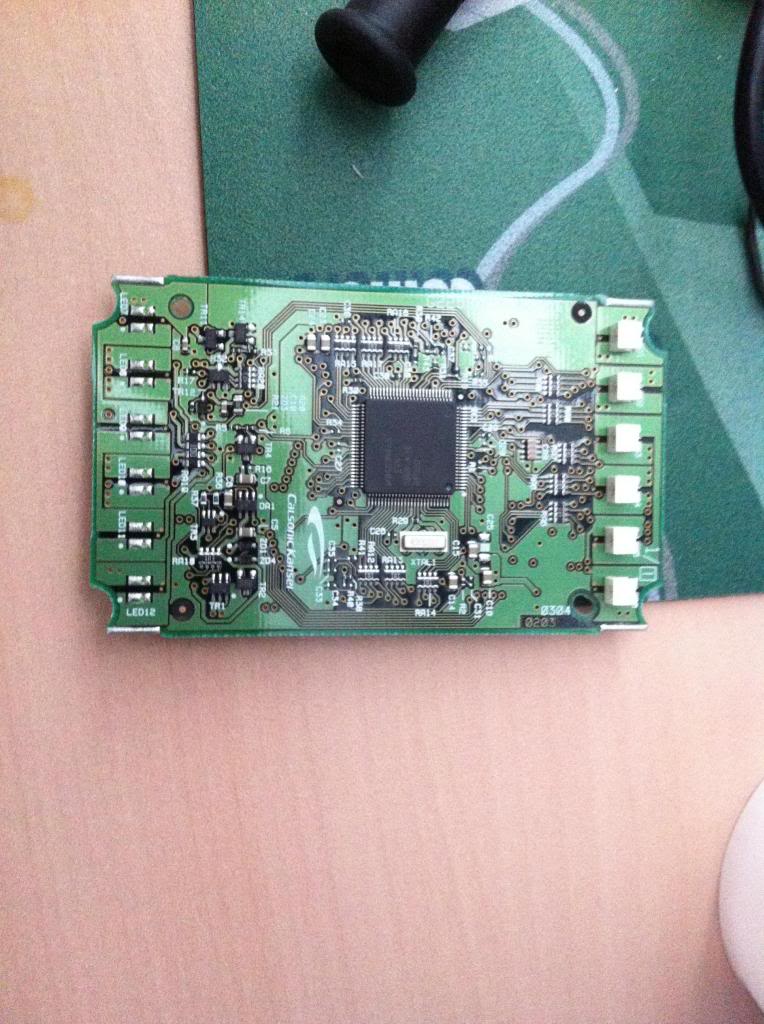
Original backlight specs
Red smd KA-4040 angle view leds. These are relatively impossible to find, so i used 3528 SMD white leds and soldered them on their side.
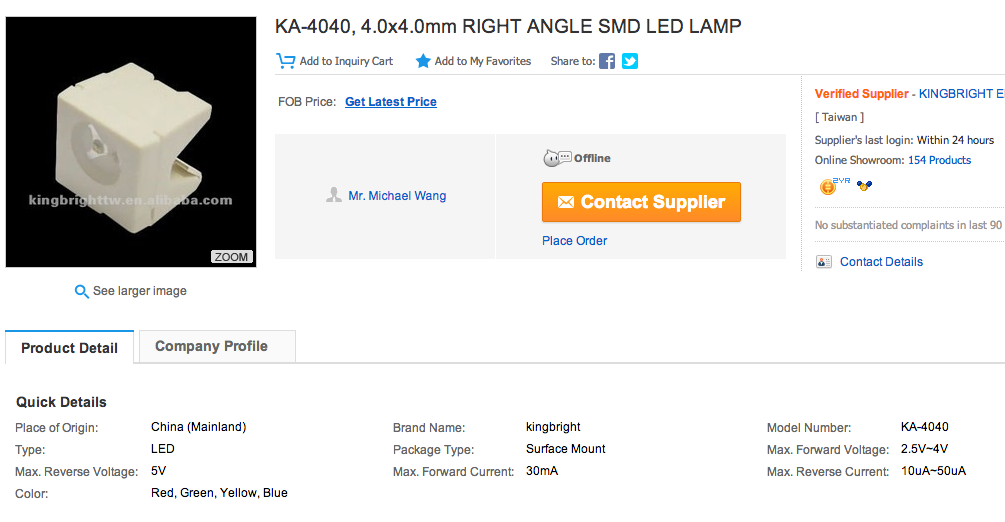
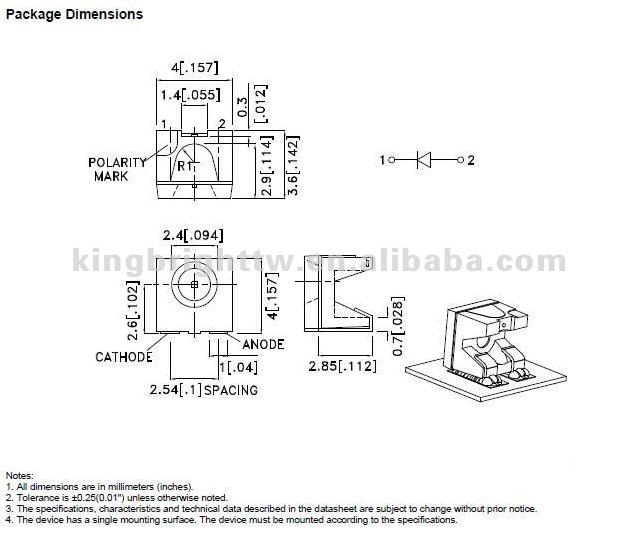
You will need the following spec sheets to identify which corner is the anode and cathode of each led you are replacing. The board conveniently has cathode markings with a white dot
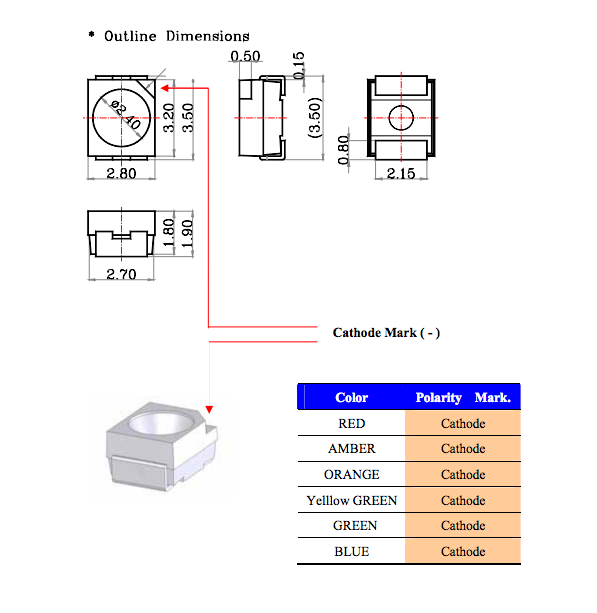
Step 9: Start removing the original leds (remove ALL leds first since it is easier and more space for you to work)
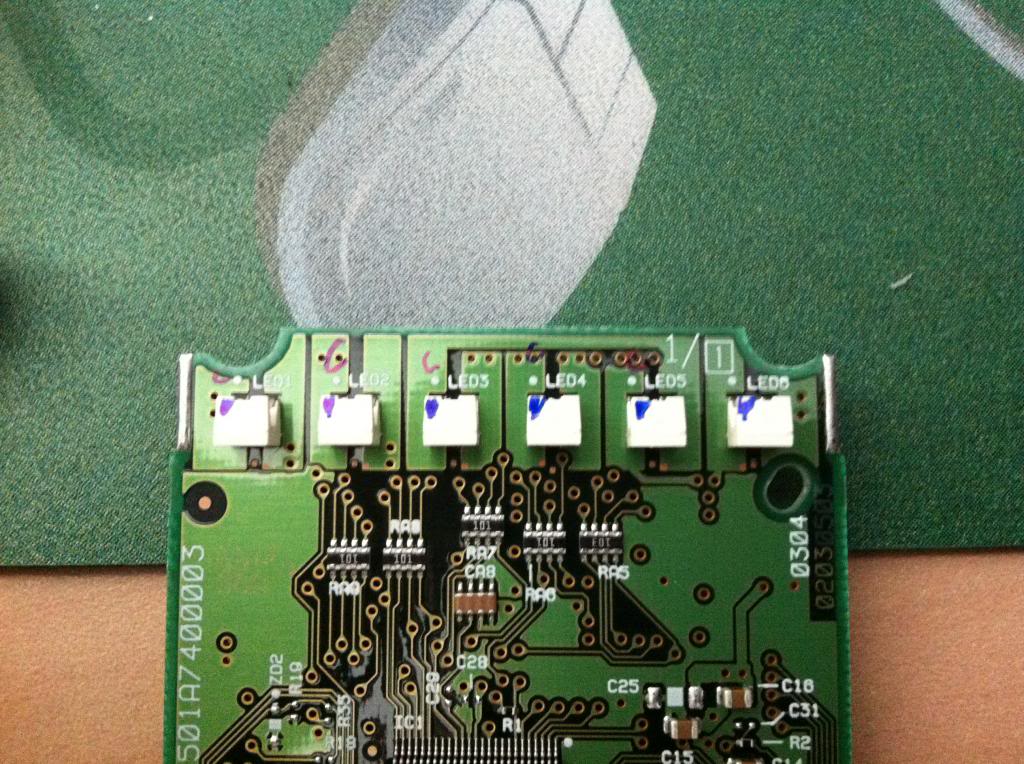
Step 10: Solder on the new leds paying attention to cathode markings as indicated by the blue sharpie
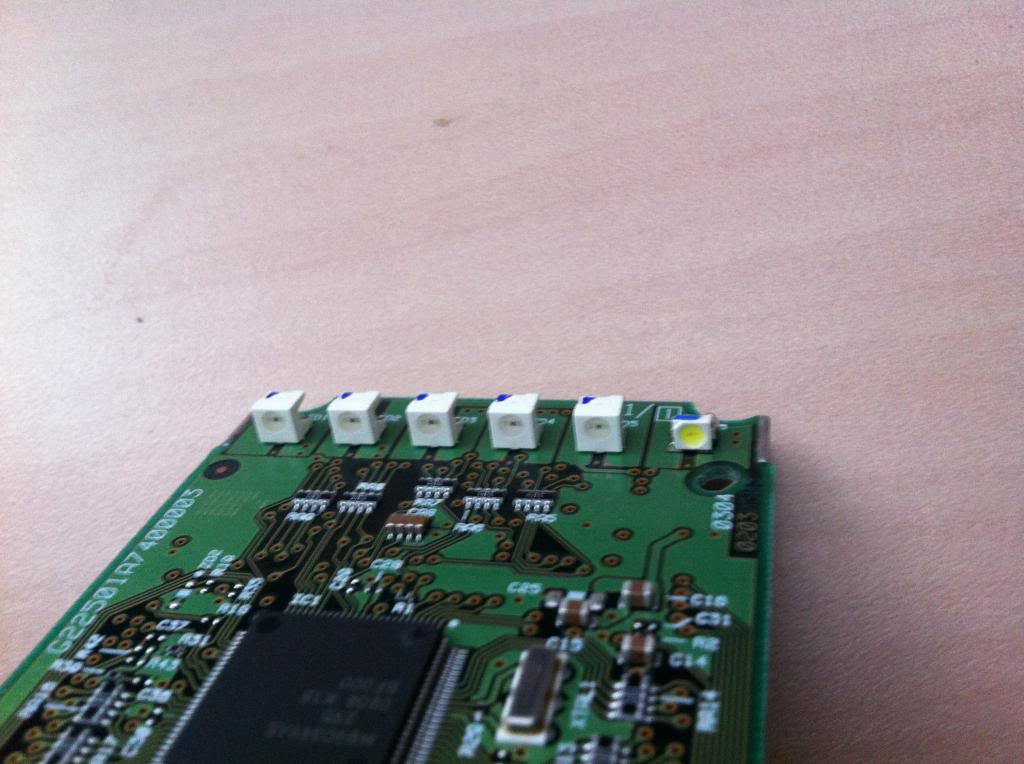
Step 11: You will notice the pcb has another 6 led slots for more leds, i didnt have time to test if these worked or not so i soldered leds into them anyways. Finished product with white leds posted below.
Step 12: Reverse order of disassembly, clean cluster and screen before putting it all together.

Step 13: Enjoy your new white display
Taken in garage during the day, i will post nighttime pics this evening.
Taken outside daylight
Taken at night, medium brightness as shown later
Brighter setting, extremely even lighting, notice the white background on the gas warning, one setting under max brightness
Overall notes
- the new backlight was easy to install with 3528 leds
- it does seem a bit dimmer than the red, this may be because the new leds run typically around 3.2v and the red ones were made for 2.4v. A step above this would be to track the resistors that are responsible for the step down conversion or wiring the backlight directly to a power source. Mine has full functionality as it stands and I find it a nice touch to the interior lighting. It is definitely visible during the day at medium brightness which is what I kept it at anyways.
- light white/blue tinge to it, but much better on the eyes than the red backlight
I bought 100 leds to do this project not knowing how the array was organized, some have 20-30 leds directly behind the screen instead of the tv like setup in the infiniti clusters.
If anyone wants to have this mod done, you can always contact me and arrange to have this mailed out. I am into a lot of led mods from hidplanet.com under the name linuxglobal.
Parts needed for mod
- 6/12 white 3528 smd leds
- variable W soldering iron + solder etc
- flathead, phillips screwedriver
- patience
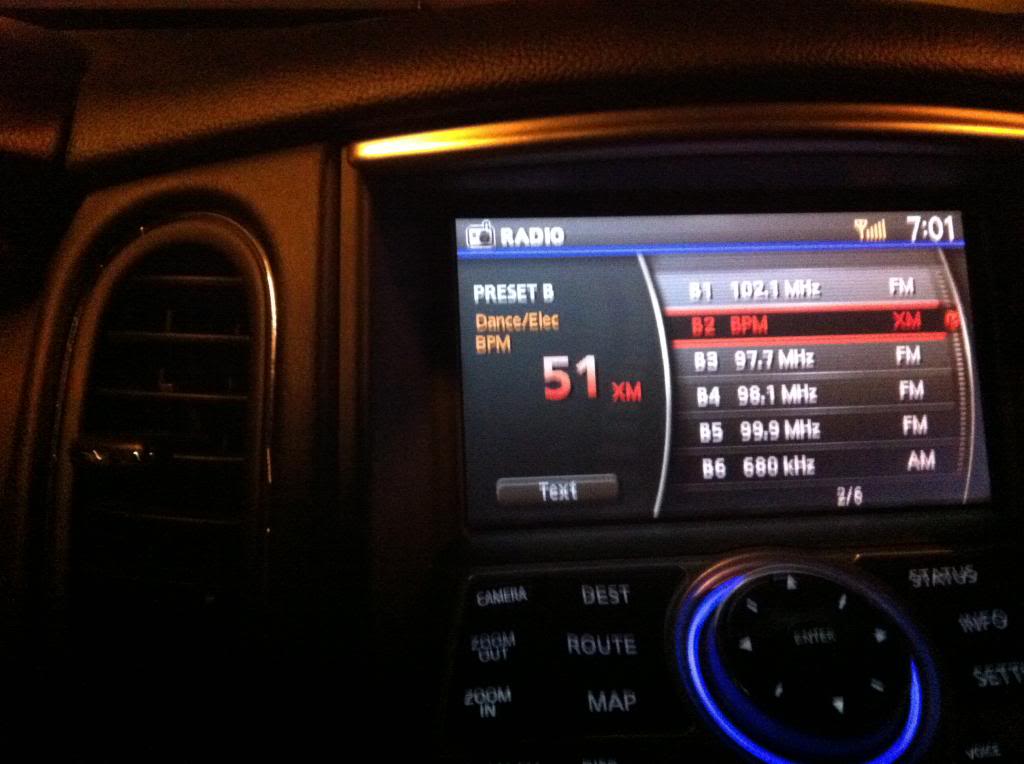
Next project: Navi screen led backlight for us folks in colder climate where the ccfl has a nice start up delay
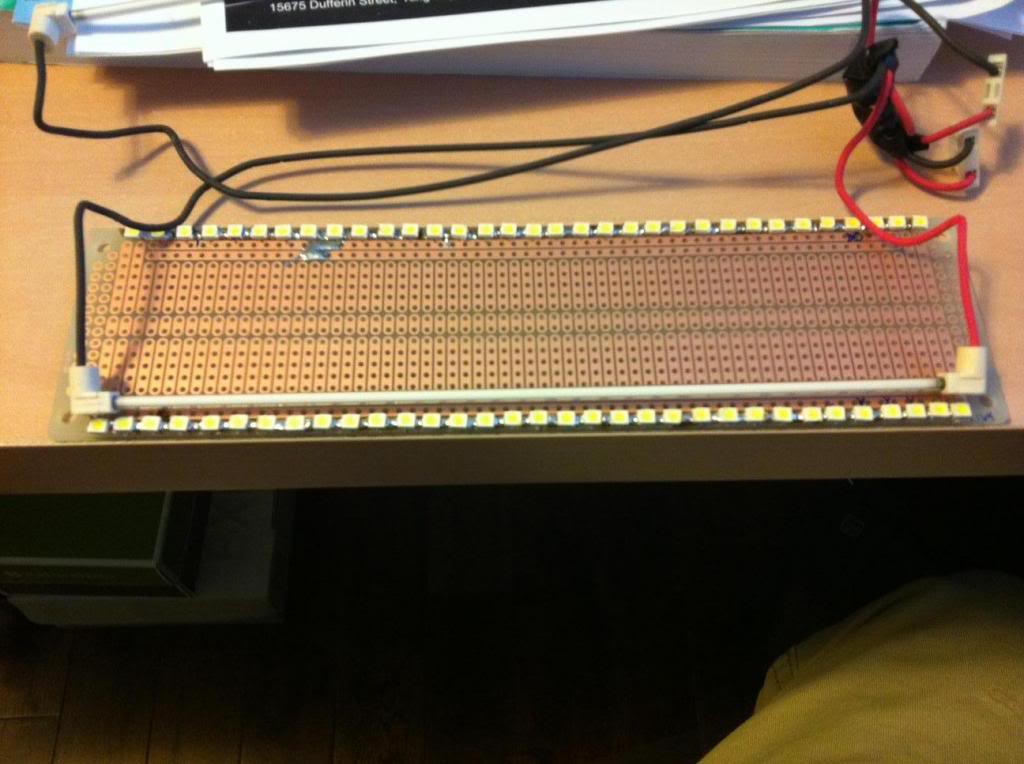
Homemade 33 series led array (one top, one bottom what will be cut later) - 7" lcd tube for sizing 165mm long
Custom start buttons are also no biggie, Im waiting on custom coloured leds for the LOCK-ACC-ON lights
Hope you guys found this helpful
Our ex35 clusters come out in 2 simple steps so i got it out in no time at all.
I took lots of pics but I will post a few to show people how its done, not a lot of pics of our clusters taken apart.
Warning: Please be careful, it is your car, I have messed around with this stuff before and I was extremely patient with the disassembly. As good news, to replace the backlight, you DO NOT have to remove the needles or recalibrate anything. The screen comes off on its own.
Step 1: remove cluster from vehicle -- Original red cluster backlight
Step 2: Remove the front plastic cover
Step 3: Remove the rear black plastic cover
Step 4: remove the 4 screws at the back of the board (screen will become loose now).
Step 5: Disconnect the white ribbon cable
Step 6: Remove screen from cluster, set cluster aside in a safe place.
Step 7: Disconnect rear ribbon cables from the rear green pcb.
Step 8: Remove the green pcb board to uncover the leds from the backlight.
Original backlight specs
Red smd KA-4040 angle view leds. These are relatively impossible to find, so i used 3528 SMD white leds and soldered them on their side.
You will need the following spec sheets to identify which corner is the anode and cathode of each led you are replacing. The board conveniently has cathode markings with a white dot
Step 9: Start removing the original leds (remove ALL leds first since it is easier and more space for you to work)
Step 10: Solder on the new leds paying attention to cathode markings as indicated by the blue sharpie
Step 11: You will notice the pcb has another 6 led slots for more leds, i didnt have time to test if these worked or not so i soldered leds into them anyways. Finished product with white leds posted below.
Step 12: Reverse order of disassembly, clean cluster and screen before putting it all together.
Step 13: Enjoy your new white display
Taken in garage during the day, i will post nighttime pics this evening.
Taken outside daylight
Taken at night, medium brightness as shown later
Brighter setting, extremely even lighting, notice the white background on the gas warning, one setting under max brightness
Overall notes
- the new backlight was easy to install with 3528 leds
- it does seem a bit dimmer than the red, this may be because the new leds run typically around 3.2v and the red ones were made for 2.4v. A step above this would be to track the resistors that are responsible for the step down conversion or wiring the backlight directly to a power source. Mine has full functionality as it stands and I find it a nice touch to the interior lighting. It is definitely visible during the day at medium brightness which is what I kept it at anyways.
- light white/blue tinge to it, but much better on the eyes than the red backlight
I bought 100 leds to do this project not knowing how the array was organized, some have 20-30 leds directly behind the screen instead of the tv like setup in the infiniti clusters.
If anyone wants to have this mod done, you can always contact me and arrange to have this mailed out. I am into a lot of led mods from hidplanet.com under the name linuxglobal.
Parts needed for mod
- 6/12 white 3528 smd leds
- variable W soldering iron + solder etc
- flathead, phillips screwedriver
- patience
Next project: Navi screen led backlight for us folks in colder climate where the ccfl has a nice start up delay
Homemade 33 series led array (one top, one bottom what will be cut later) - 7" lcd tube for sizing 165mm long
Custom start buttons are also no biggie, Im waiting on custom coloured leds for the LOCK-ACC-ON lights
Hope you guys found this helpful
Last edited by LGmobile; Mar 8, 2013 at 12:32 AM. Reason: Updated nighttime pics
Nice Work!
Some of my LED behind the odometer burnt out and wondering if you could help re-solder it on. Was able to remove the cluster, which was a PITA, (not sure about the EX) but my soldering skill lack so couldn't get them fixed.. By chance you located in SoCal?
Some of my LED behind the odometer burnt out and wondering if you could help re-solder it on. Was able to remove the cluster, which was a PITA, (not sure about the EX) but my soldering skill lack so couldn't get them fixed.. By chance you located in SoCal?