DIY: DIY: The Headlight Full Monte: Strips, Halos & Demon Eyes
#1
I really wanted to get a nice halo kit done for my lights. But dayaaaaaam the light building services are really pricey. A good friend, Roger, convinced me it really was no big deal to do it myself.
Note to self, Roger has a talent for understatement.
Seriously though, I figured if I'm going to do this myself there's no point in half-stepping, I'm going to jam every feature I can in there while I have it open. Wooh boy. All you PMs know about requirements creep.
I have renewed respect for the pros at OneEighty those folks earn every friggin penny.
So my build goal: (All components purchased from Starry Night Halos)
- Dual RGBW Demon Eyes
- Painted internal housing and shrouds
- Dual projector halos RGBA+ chasing + sequential switchback
- Dual city light halos (inset for half-circle) RGBA+ chasing + sequential switchback
- Dual sequential switchback tube strips
- Bluetooth controllers
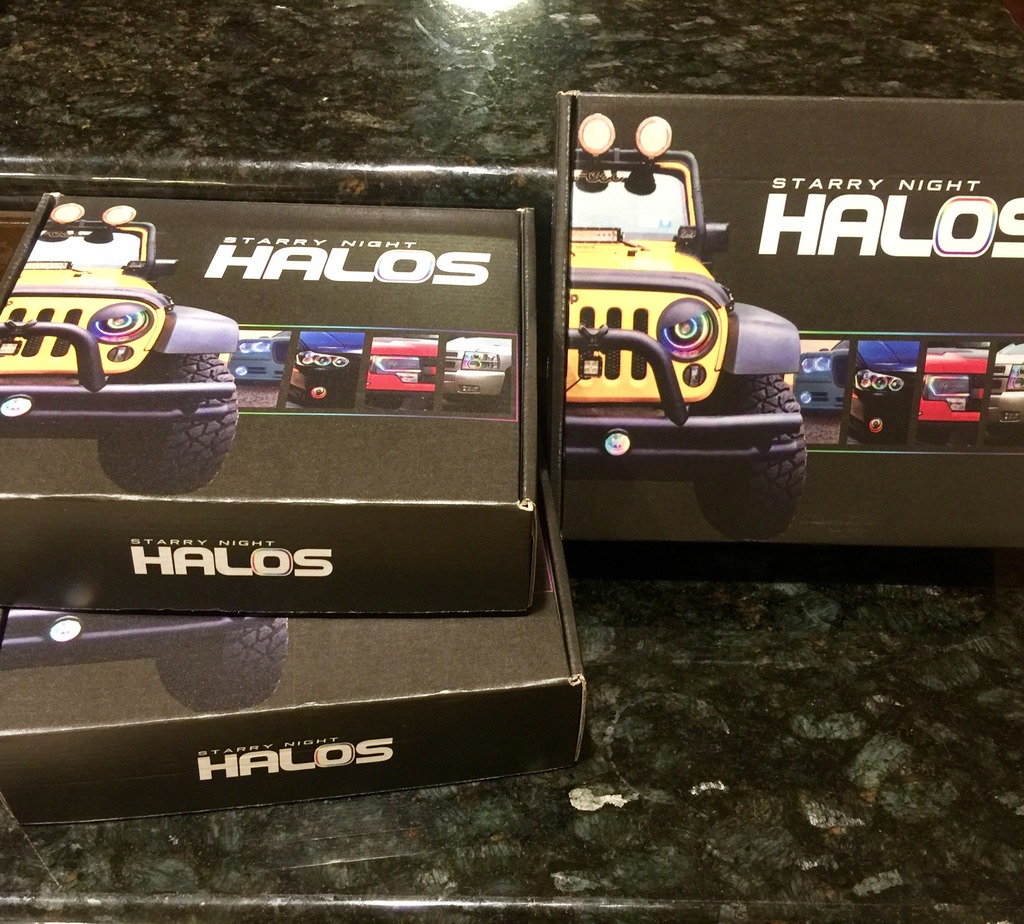
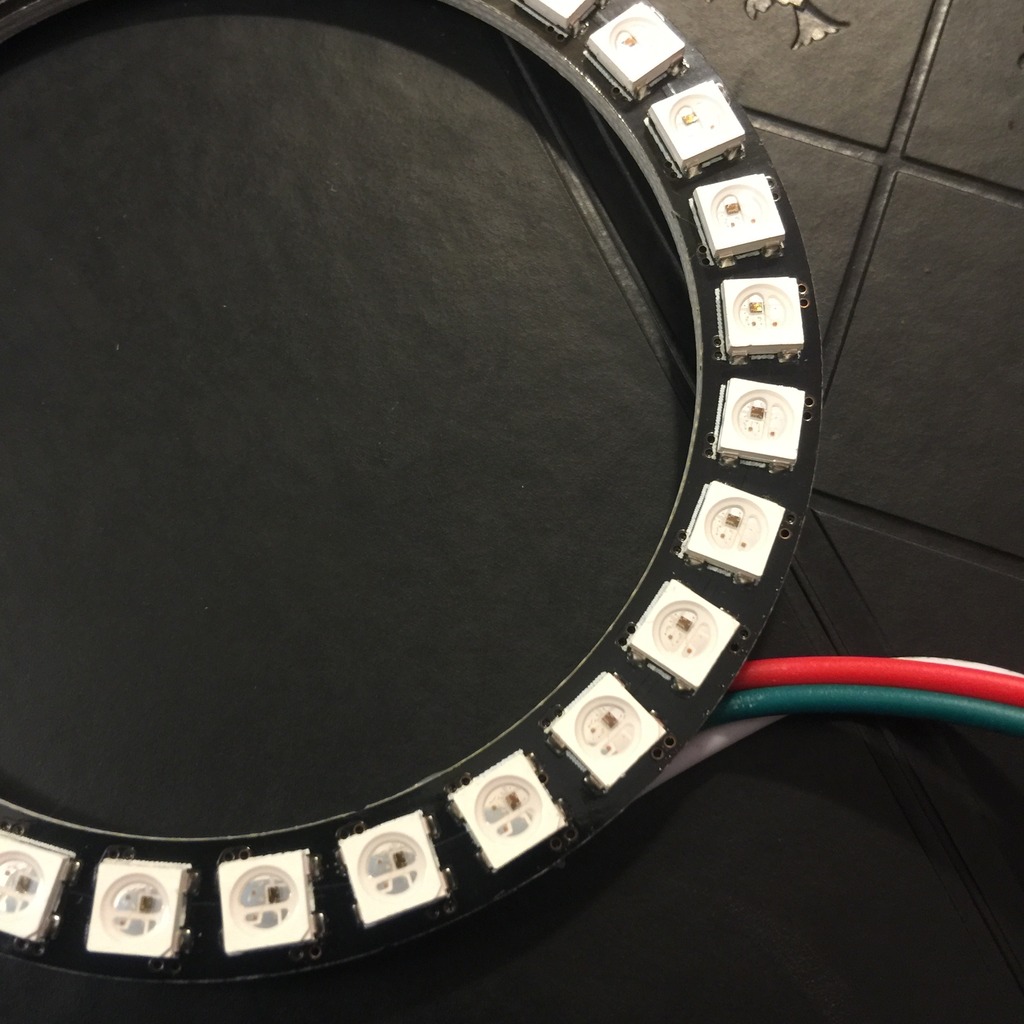
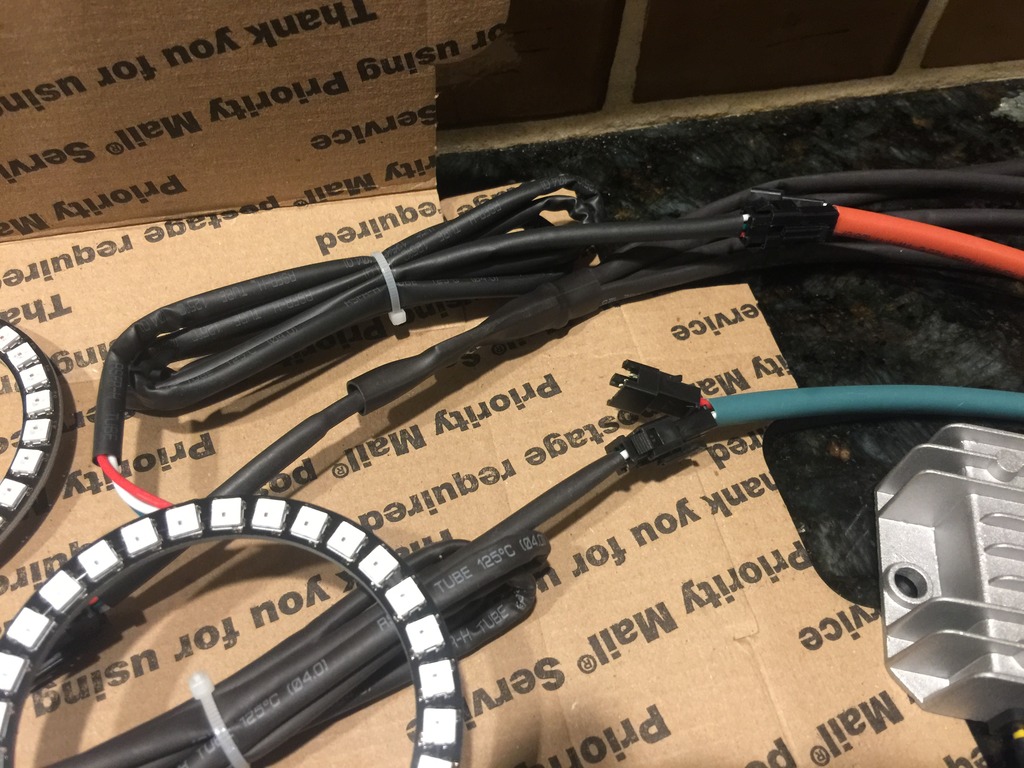
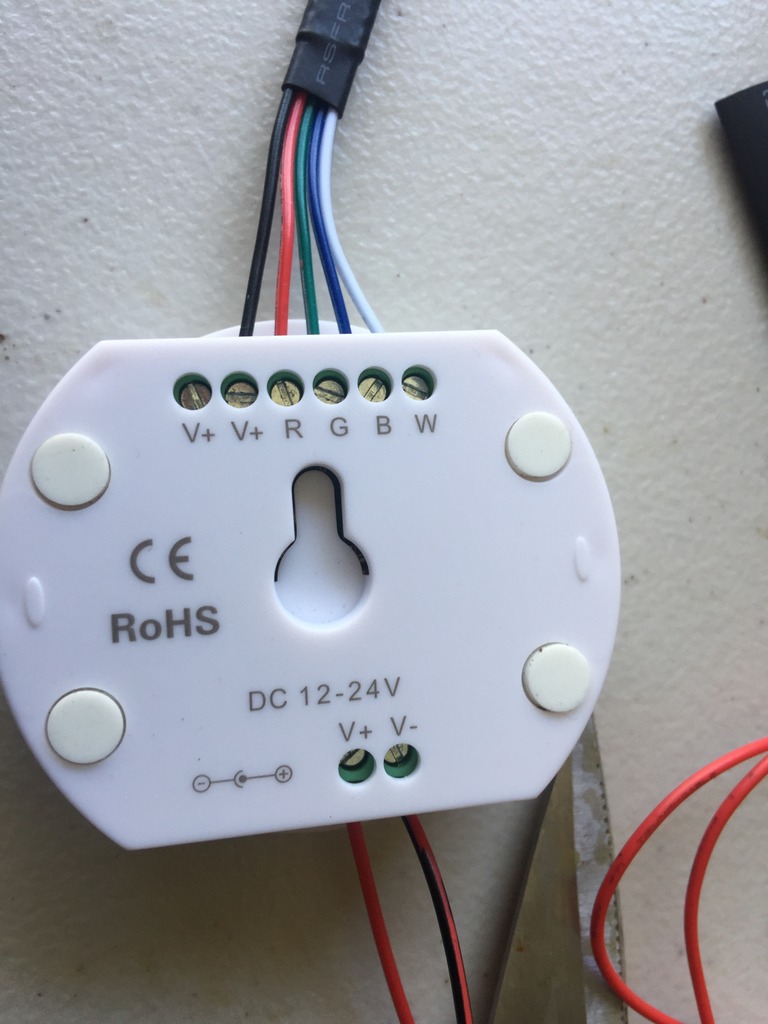
Halo Bluetooth controller
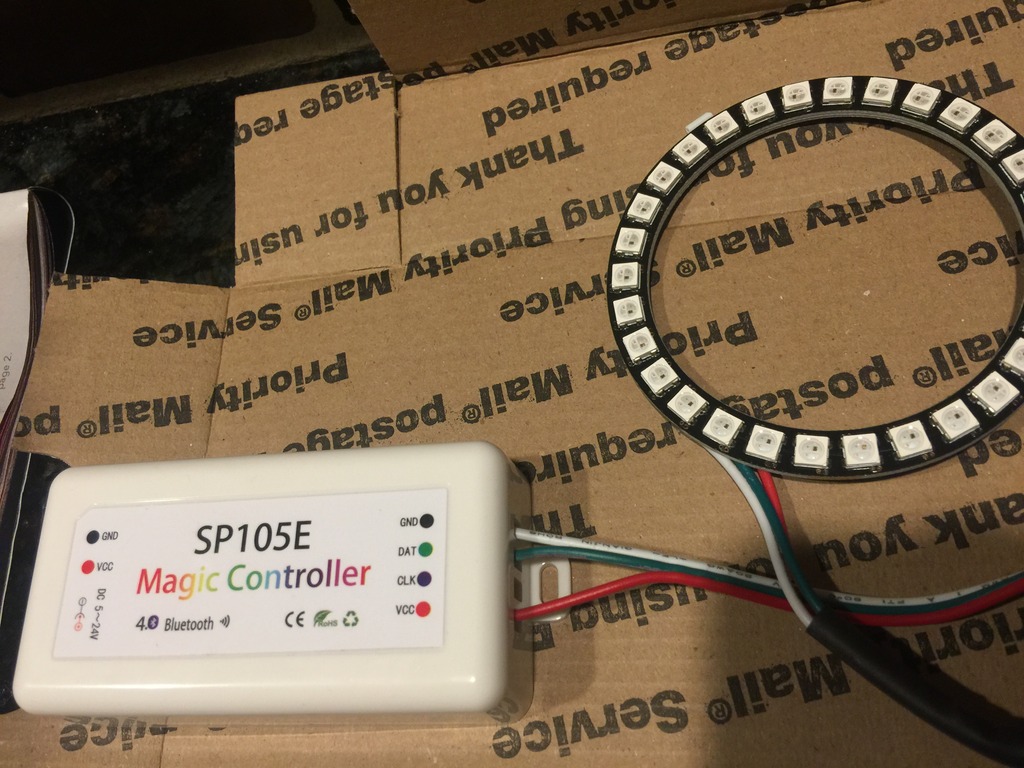
Demon Eye Bluetooth controller
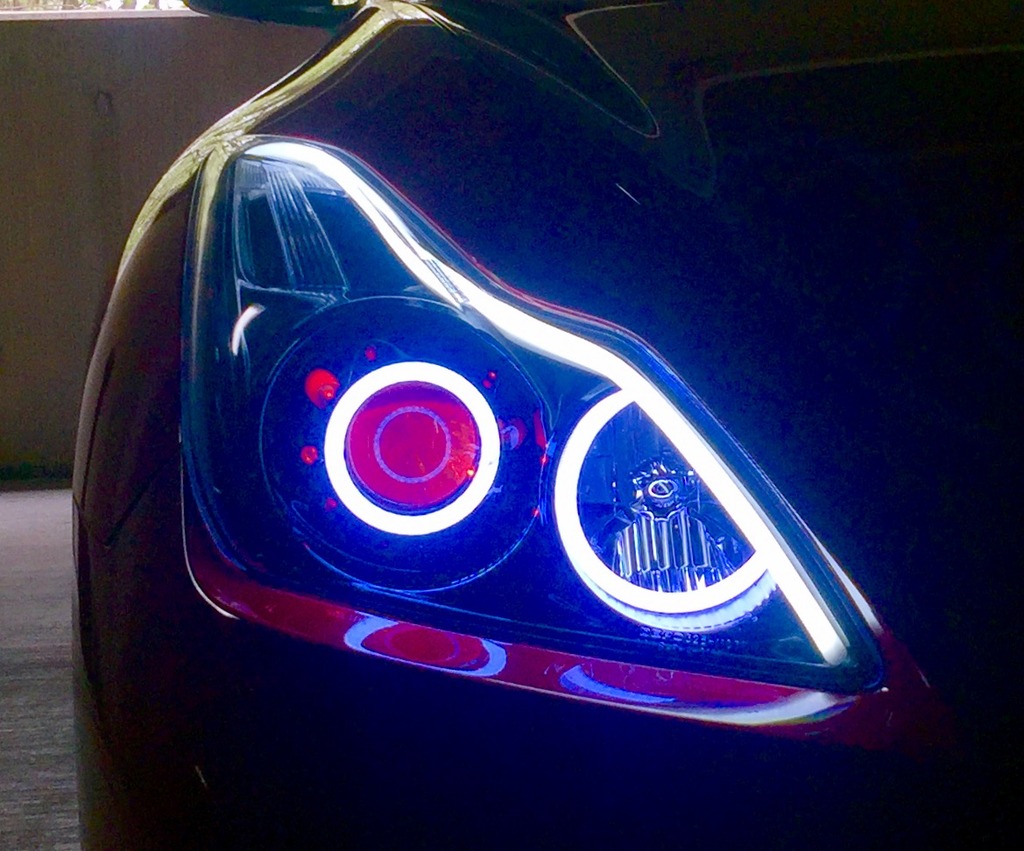
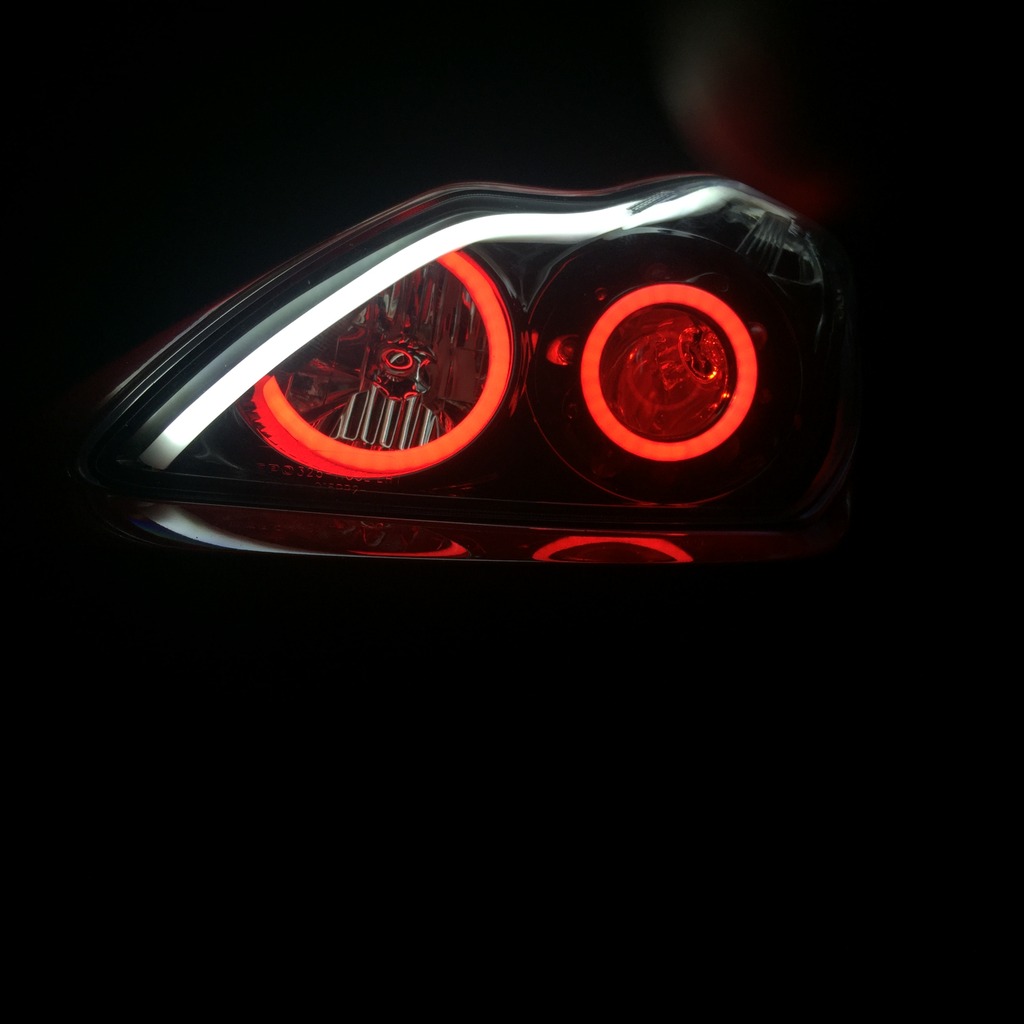
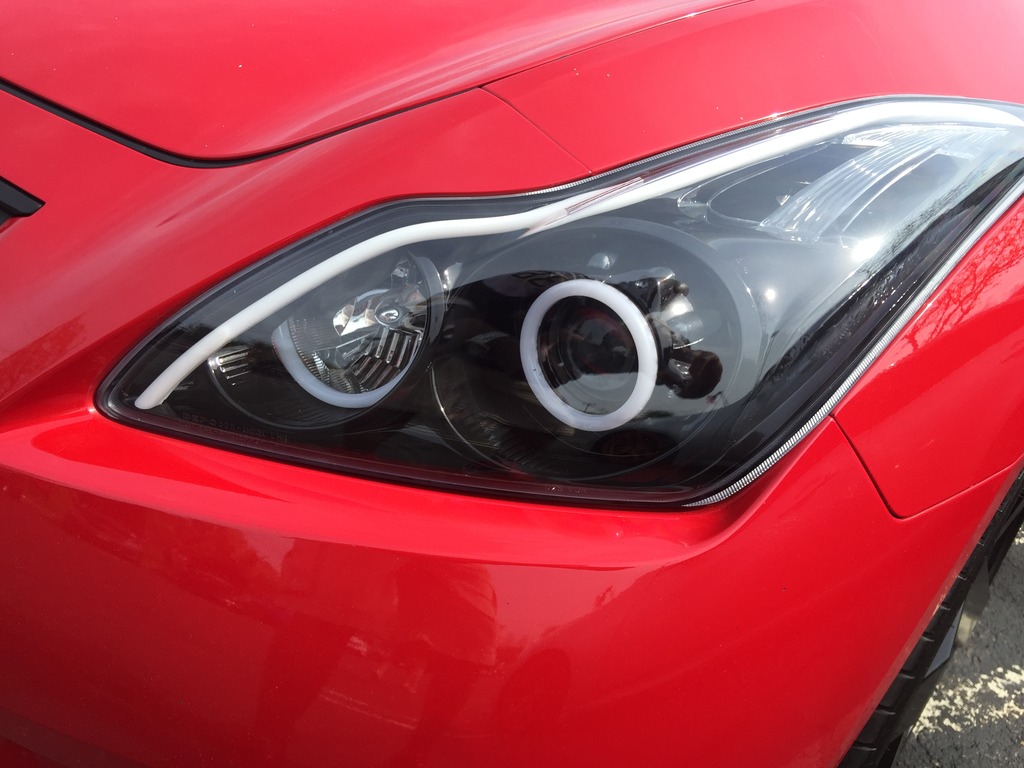
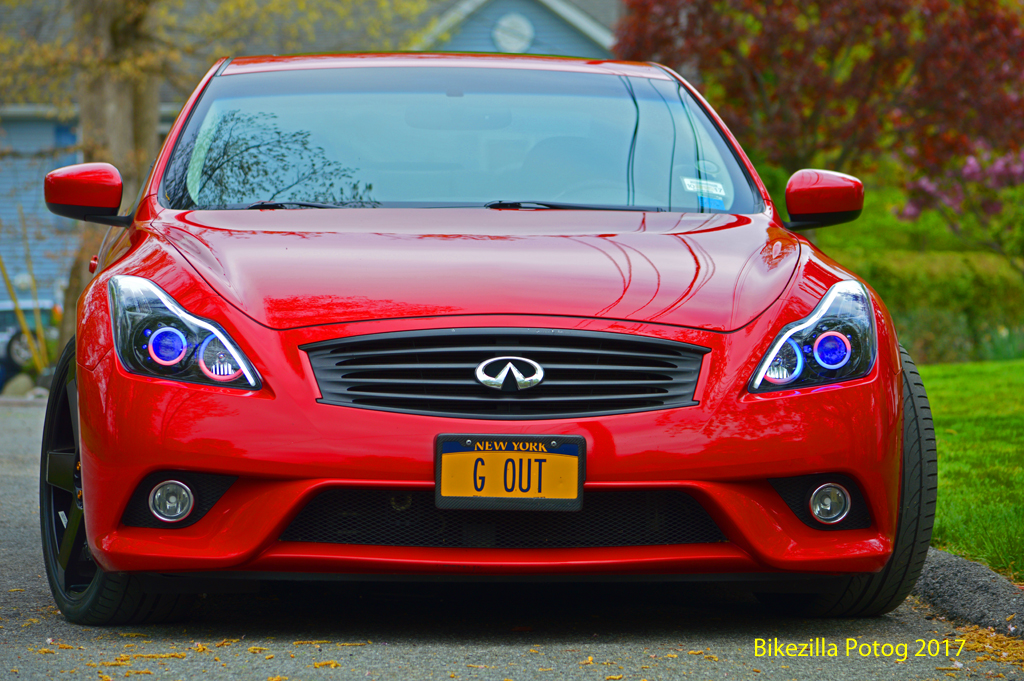
The results:
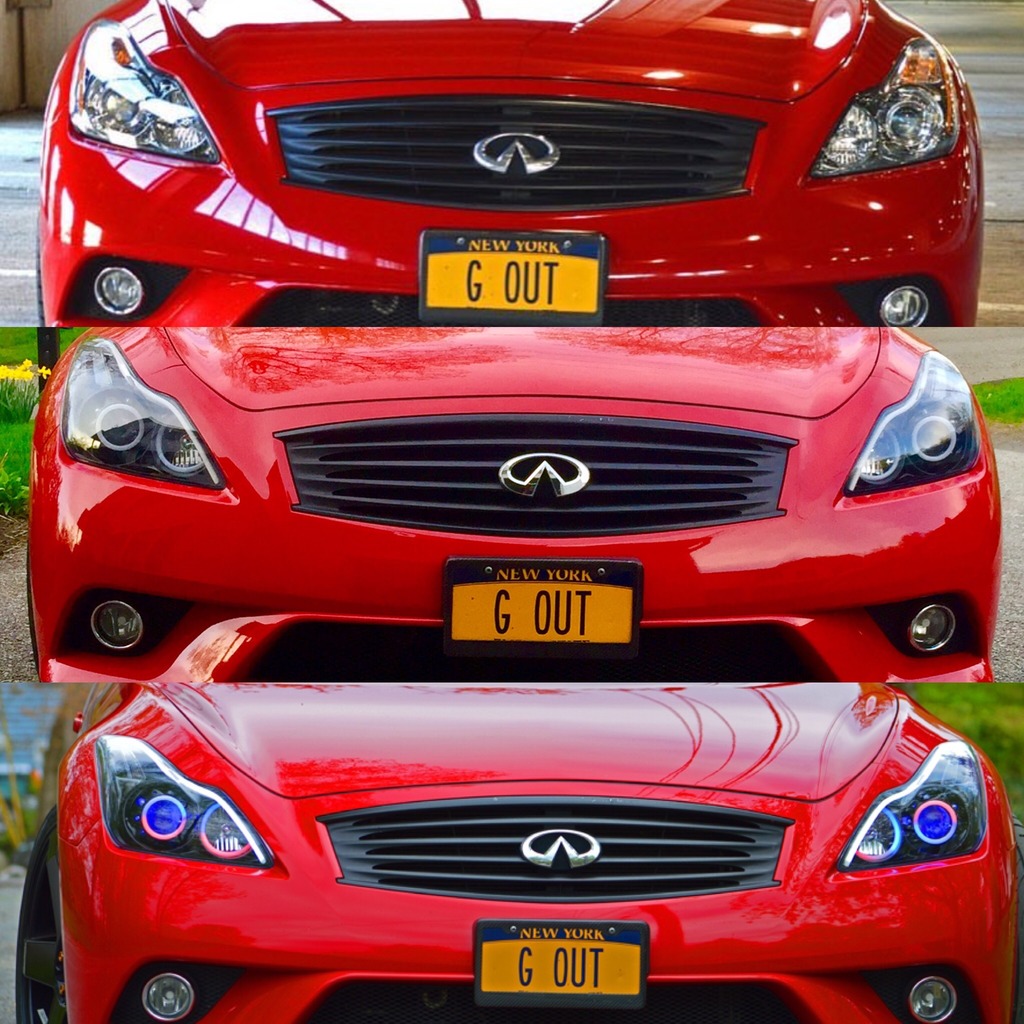
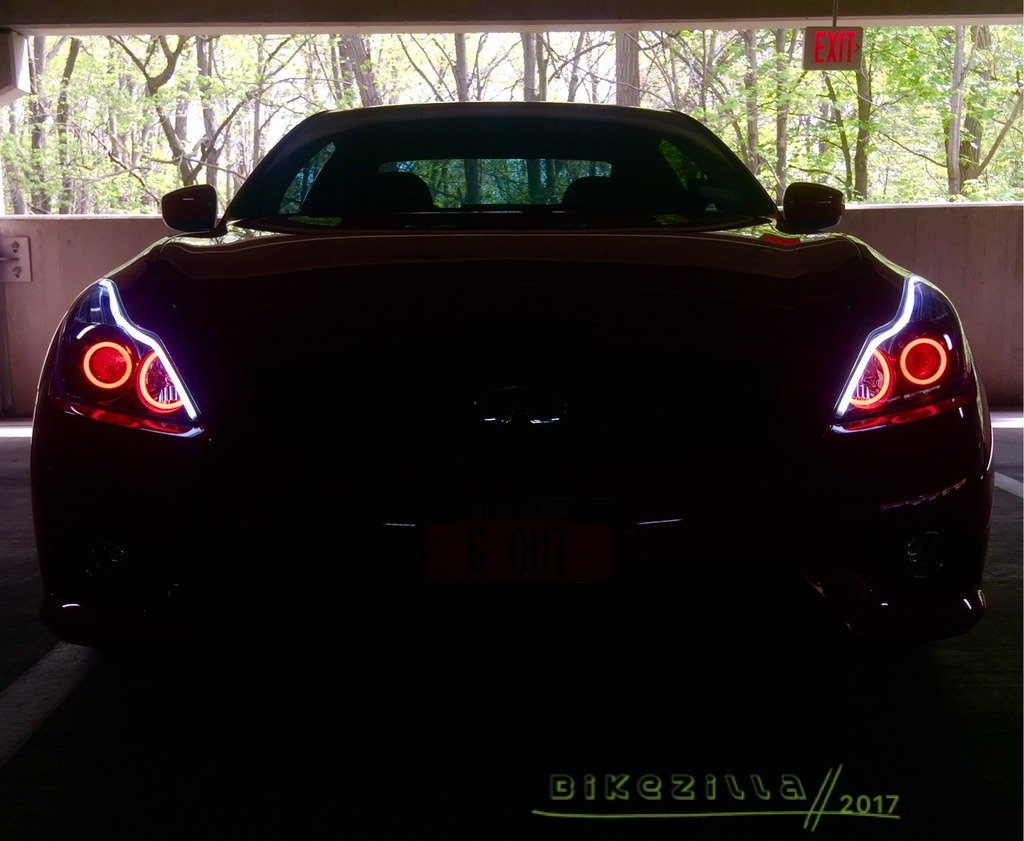
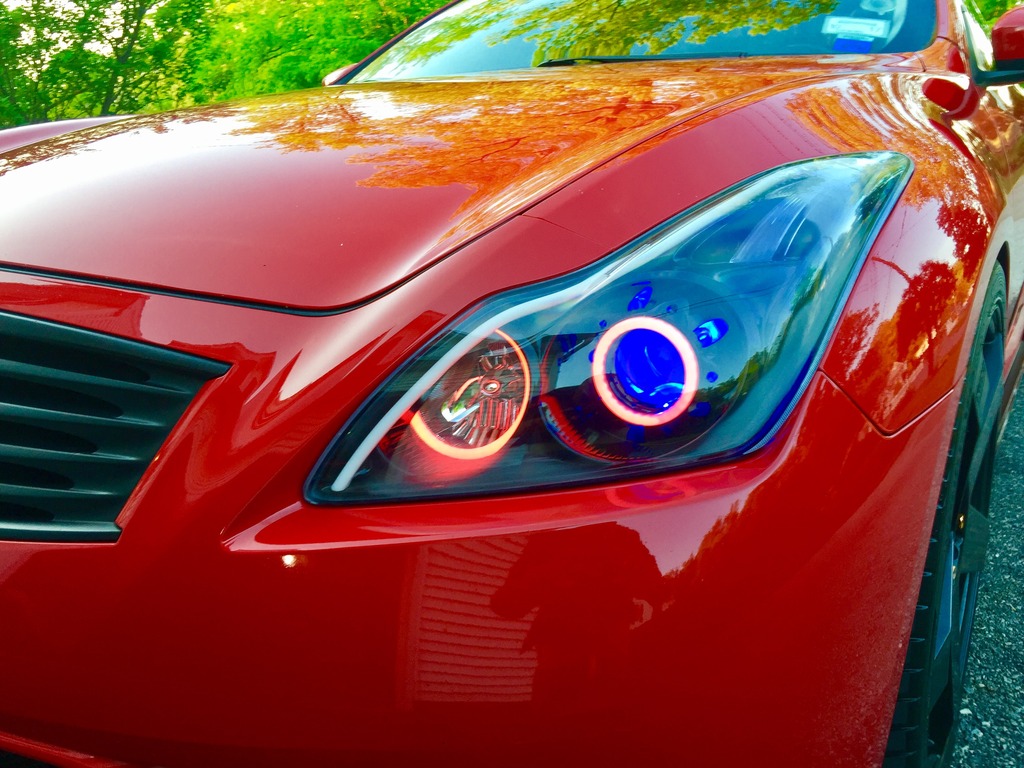
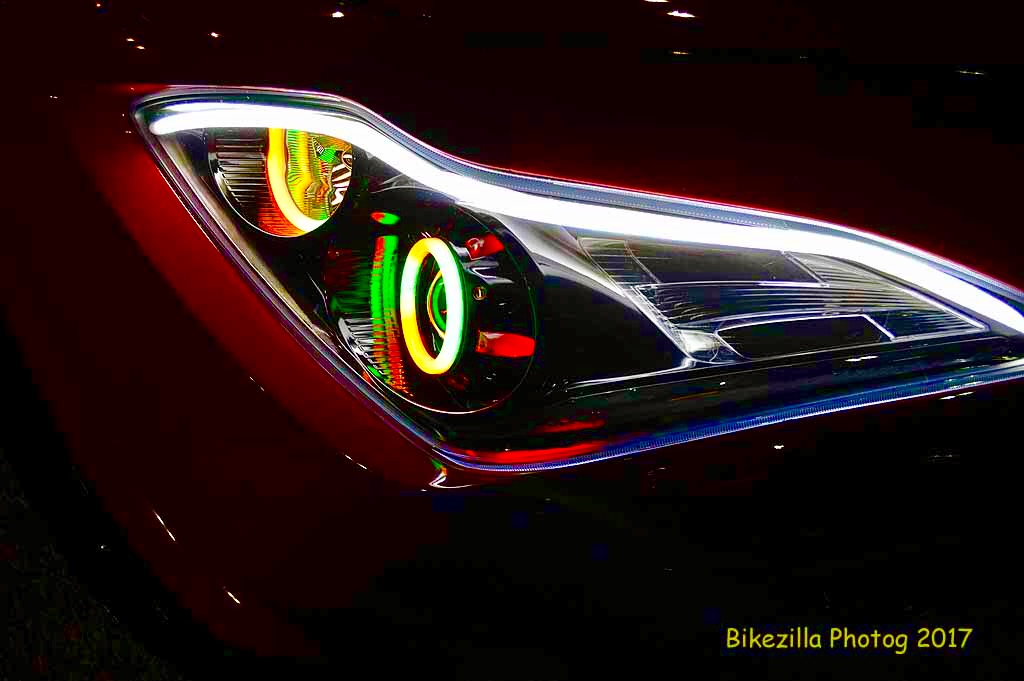
I'll post a vid and a description of the features after the write-up.
One of the reasons why I decided to do this myself is I wanted to avoid having to go back and forth to a service. Nothing wrong with that except for me it'd be an hour and a half trip each way for the removal, I'd still have to arrange for spares, then go back for installations and possibly adjustments. At least if I do it myself I know I can find the jerk who messed up real easy, in any convenient mirror.
I searched for a spare set of head lights but the prices were rather high. $550-$650 for one side with broken tabs and who knows what other problems.
Brand new, OEM headlights are something like $1600 each. Neither option seemed practical for me. Especially since this is largely an experiment. And I'm not about to try to learn how on my pristine OEMs.
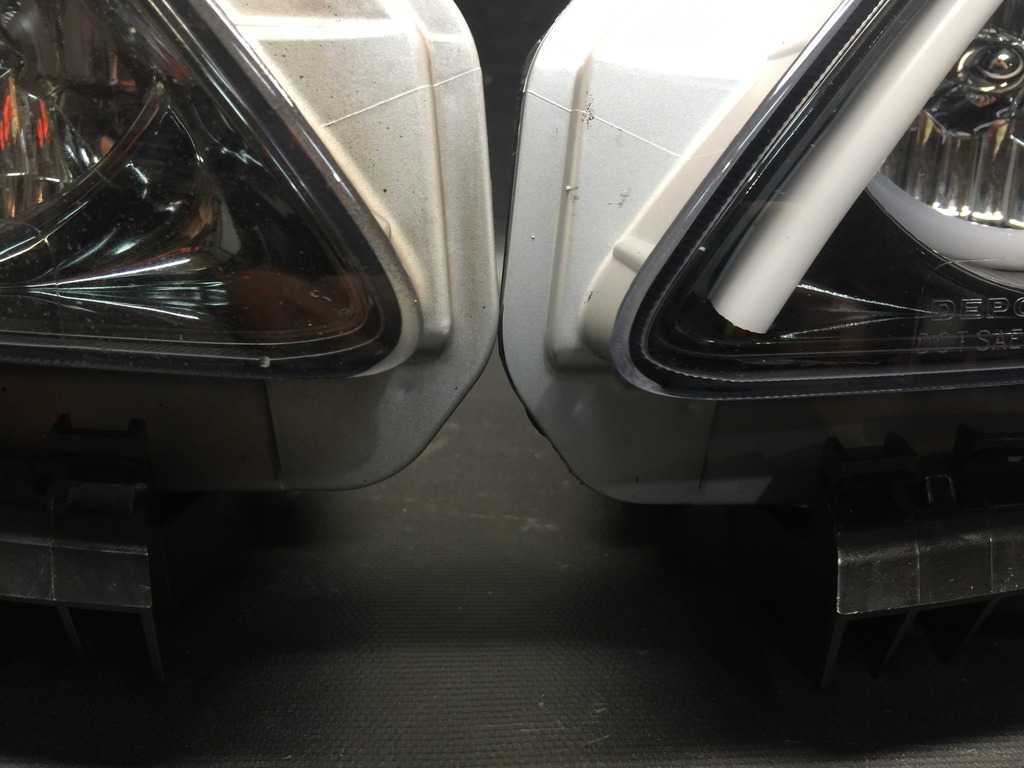
SO I bought a new replacement set from Depo on eBay. ~$700 for a brand spanking new pair.
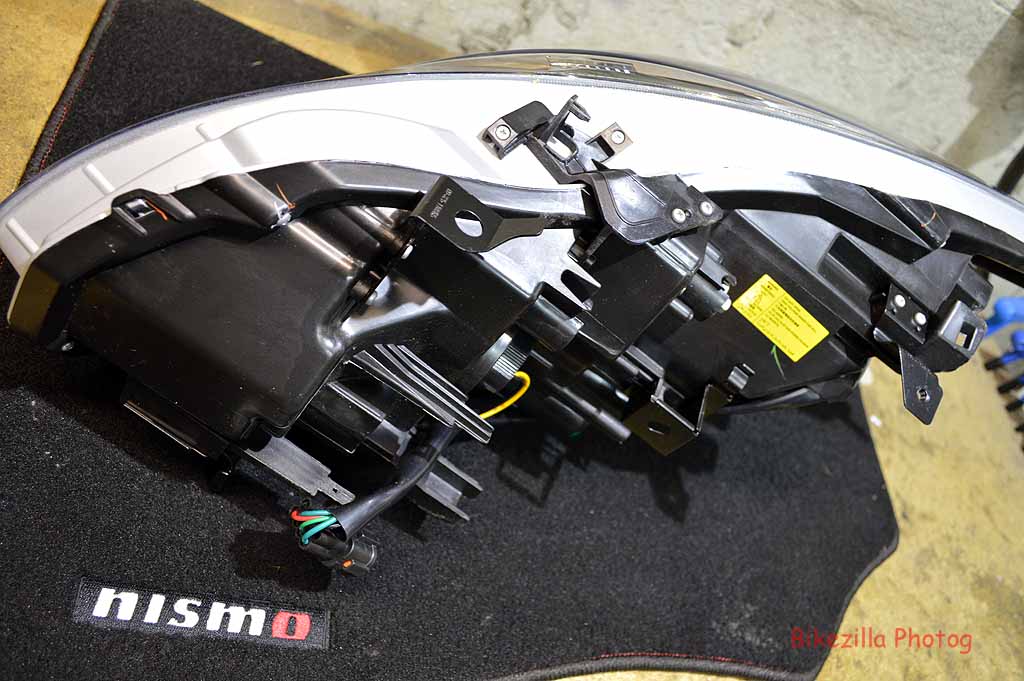
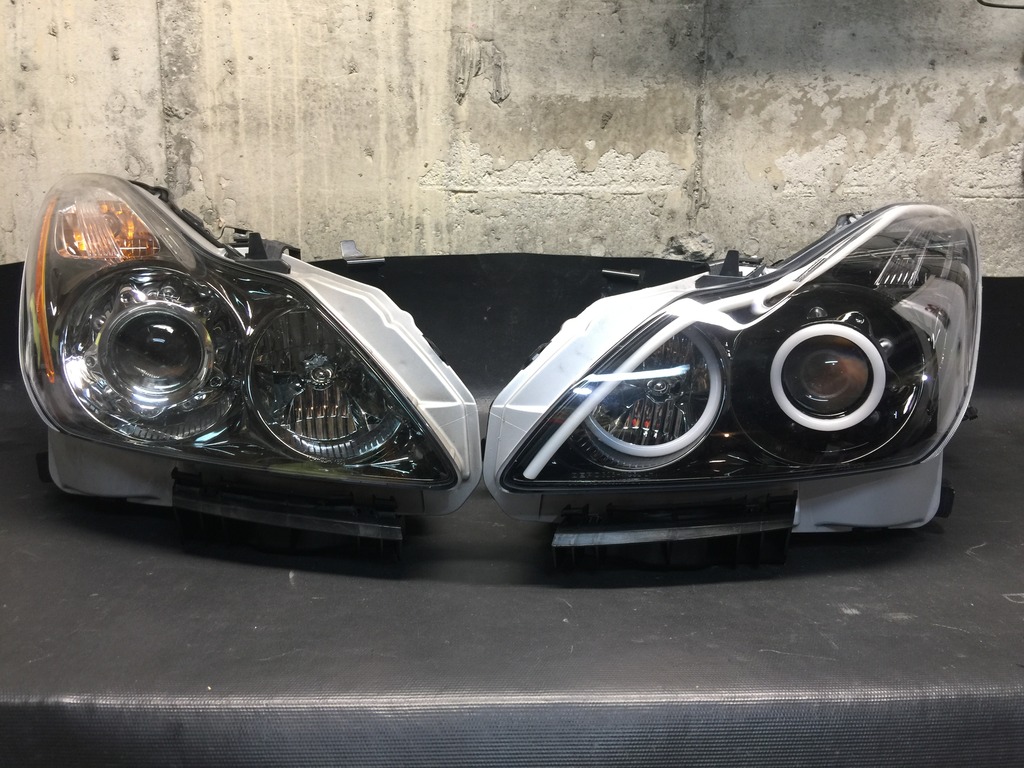
It was a risk as I've never dealt with them but it turned out to be a real win. The Depo lights are absolutely top quality inside and out. No cheap knockoff half-spec approximations. They describe them as OE-R (Original Equipment Replacements) That pretty much nails it.
Well packaged and properly wrapped
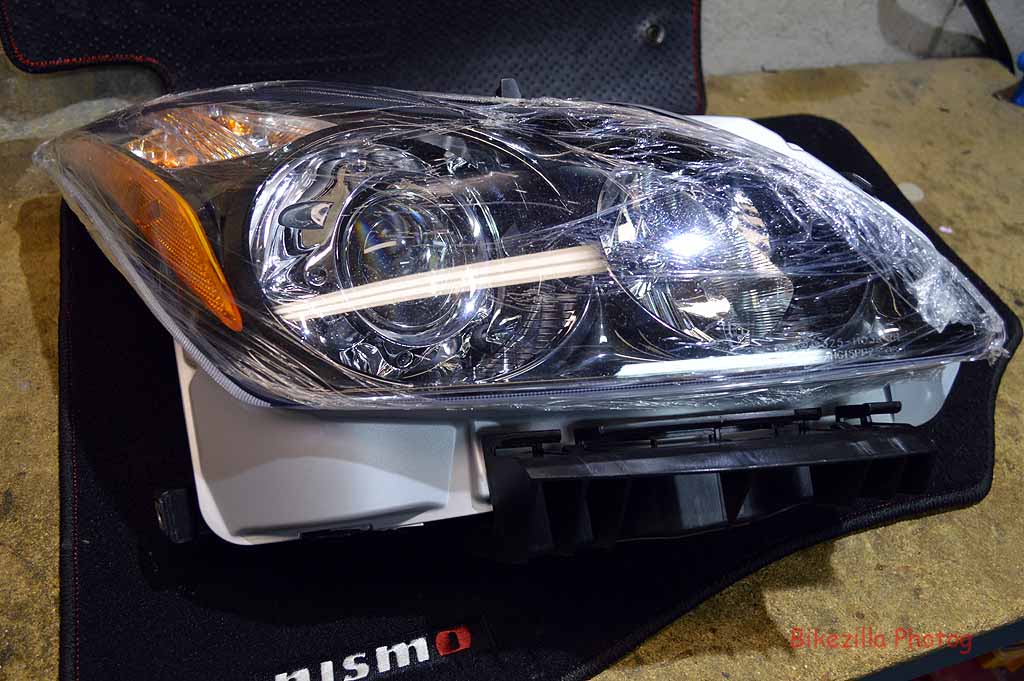
Crystal clear lens already installed. Housing is dark black-chrome.
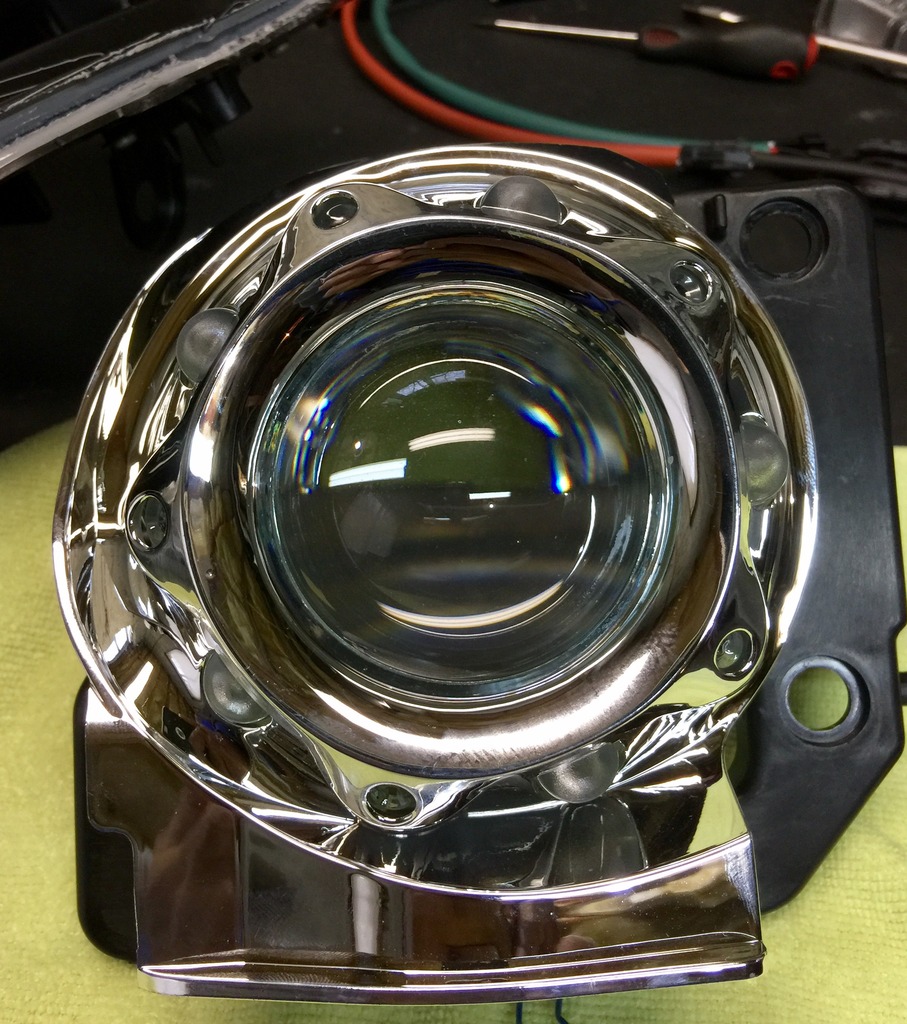
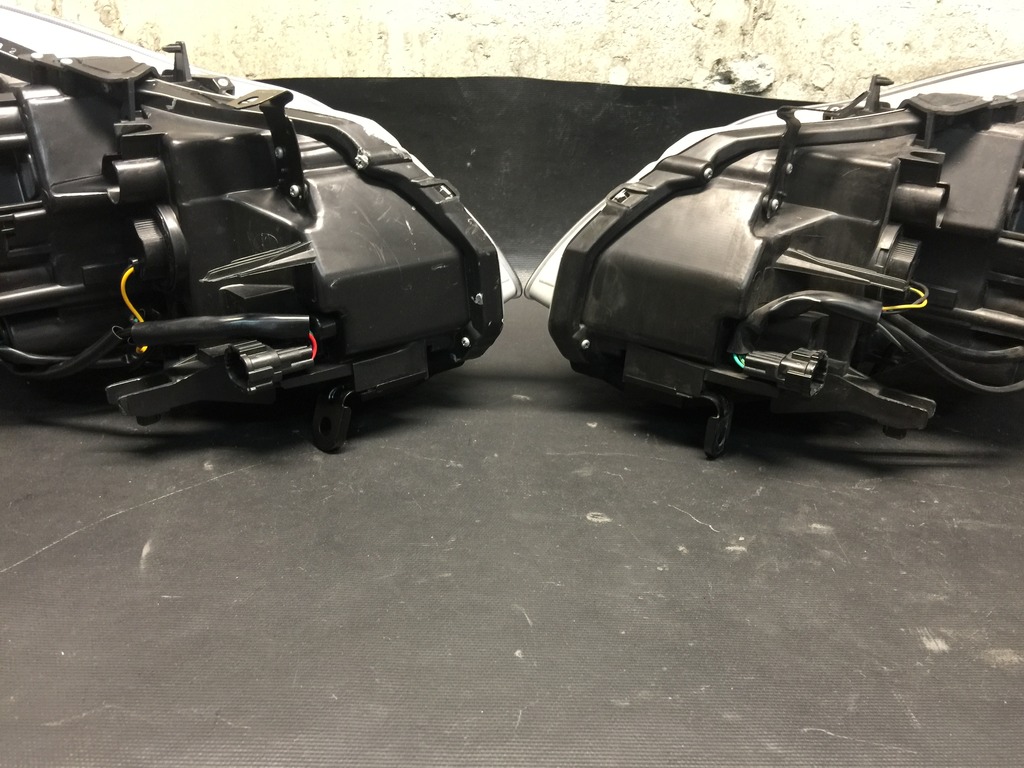
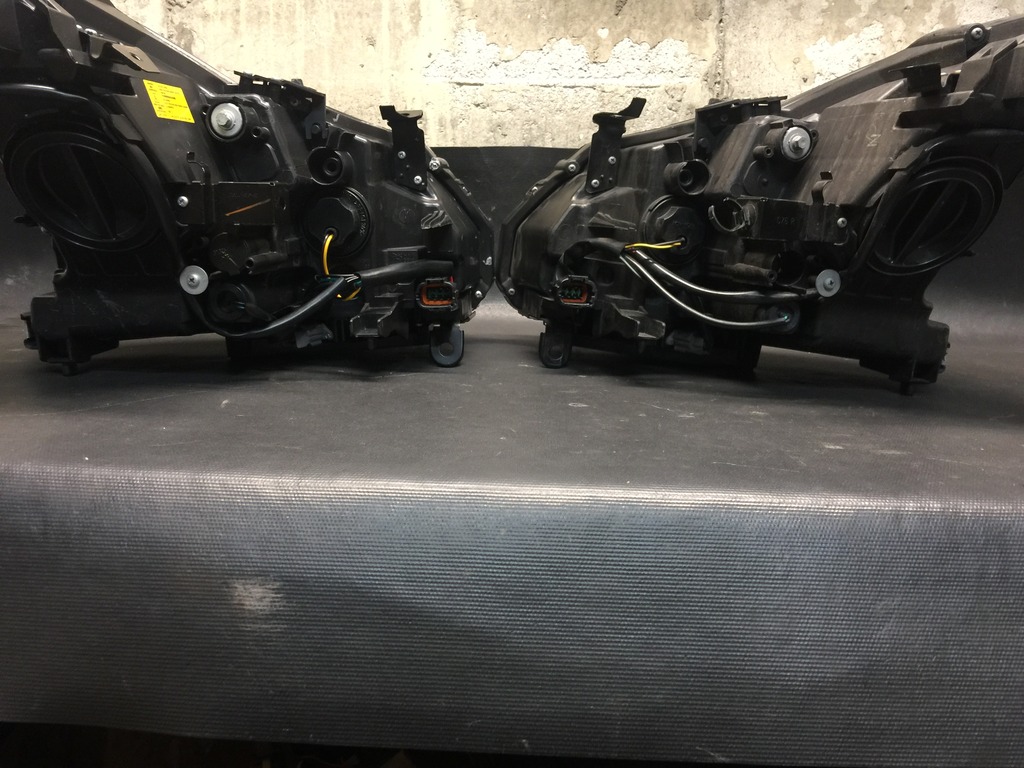
Quality parts all around
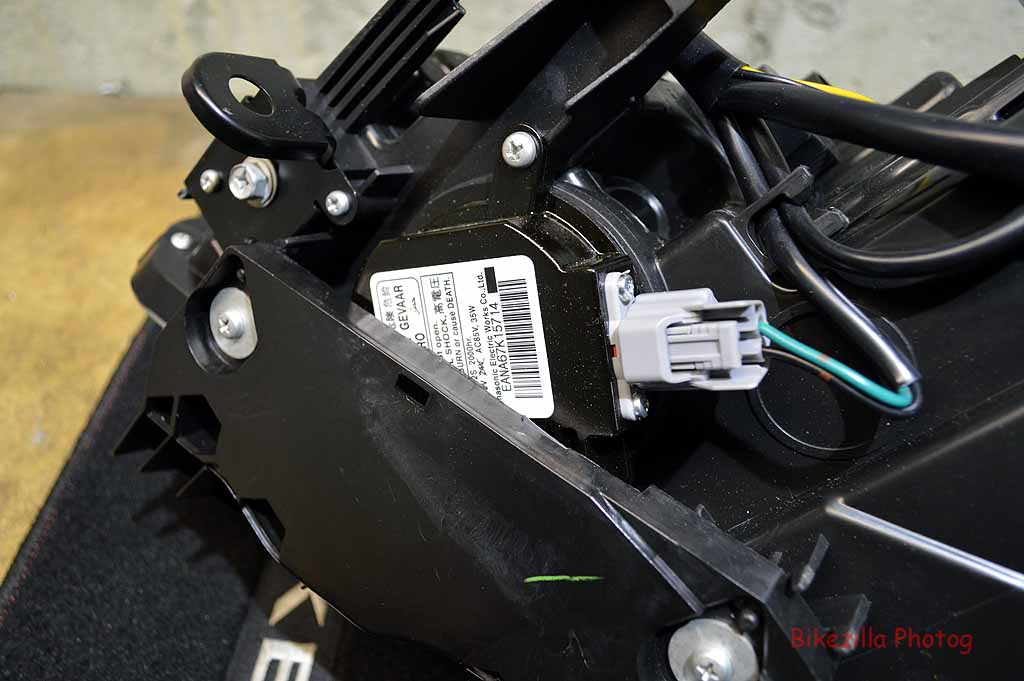
Everything in exactly the same place as OEM
Note to self, Roger has a talent for understatement.
Seriously though, I figured if I'm going to do this myself there's no point in half-stepping, I'm going to jam every feature I can in there while I have it open. Wooh boy. All you PMs know about requirements creep.
I have renewed respect for the pros at OneEighty those folks earn every friggin penny.
So my build goal: (All components purchased from Starry Night Halos)
- Dual RGBW Demon Eyes
- Painted internal housing and shrouds
- Dual projector halos RGBA+ chasing + sequential switchback
- Dual city light halos (inset for half-circle) RGBA+ chasing + sequential switchback
- Dual sequential switchback tube strips
- Bluetooth controllers


Halo Bluetooth controller

Demon Eye Bluetooth controller

The results:


I'll post a vid and a description of the features after the write-up.
One of the reasons why I decided to do this myself is I wanted to avoid having to go back and forth to a service. Nothing wrong with that except for me it'd be an hour and a half trip each way for the removal, I'd still have to arrange for spares, then go back for installations and possibly adjustments. At least if I do it myself I know I can find the jerk who messed up real easy, in any convenient mirror.
I searched for a spare set of head lights but the prices were rather high. $550-$650 for one side with broken tabs and who knows what other problems.
Brand new, OEM headlights are something like $1600 each. Neither option seemed practical for me. Especially since this is largely an experiment. And I'm not about to try to learn how on my pristine OEMs.
SO I bought a new replacement set from Depo on eBay. ~$700 for a brand spanking new pair.
It was a risk as I've never dealt with them but it turned out to be a real win. The Depo lights are absolutely top quality inside and out. No cheap knockoff half-spec approximations. They describe them as OE-R (Original Equipment Replacements) That pretty much nails it.
Well packaged and properly wrapped

Crystal clear lens already installed. Housing is dark black-chrome.

Quality parts all around

Everything in exactly the same place as OEM


Last edited by bikezilla; 05-30-2017 at 08:08 PM.
The following 4 users liked this post by bikezilla:
#2
************************************************** ******
Opening & Closing
************************************************** ******
180 created an awesome DYI explaining how to remove the bumper and headlights:
https://www.myg37.com/forums/d-i-y-i...al-w-pics.html
The Retrofit Resource made some great vids on how to open and reseal the headlamps.
The retrofit resource Opening:
I was reluctant to heat the headlight very long so I had to work really hard to open the first one and took serveral returns to the oven.
The retorfit resource Closing:
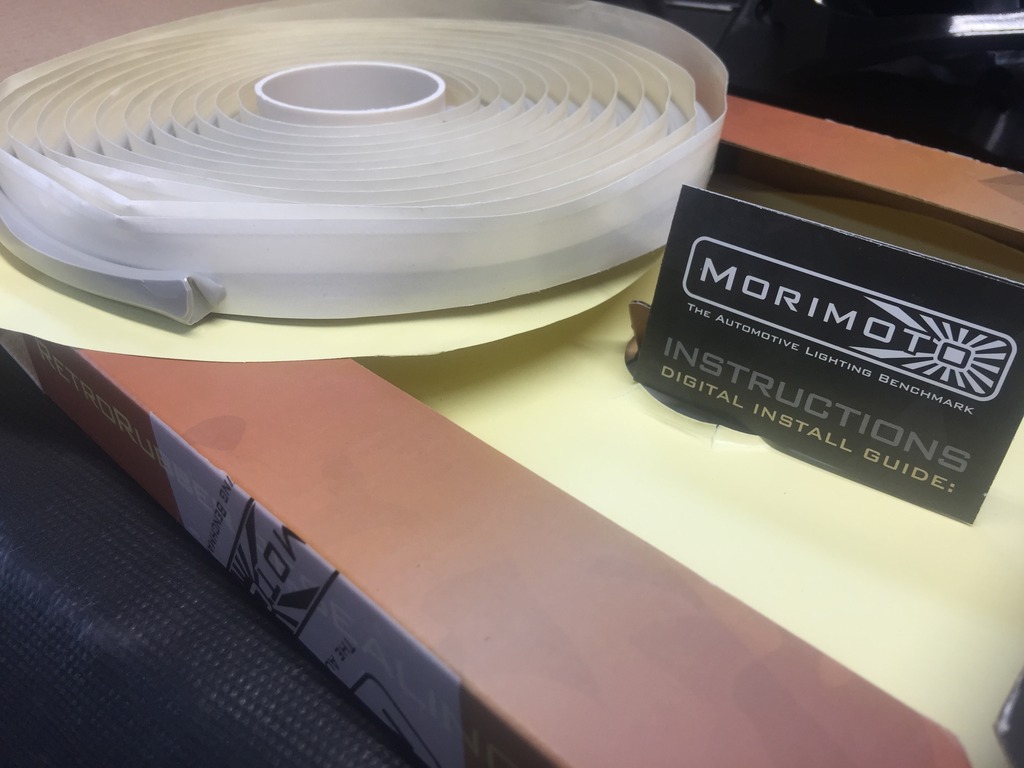
I used Morimoto butyl to reseal as described in the video above.
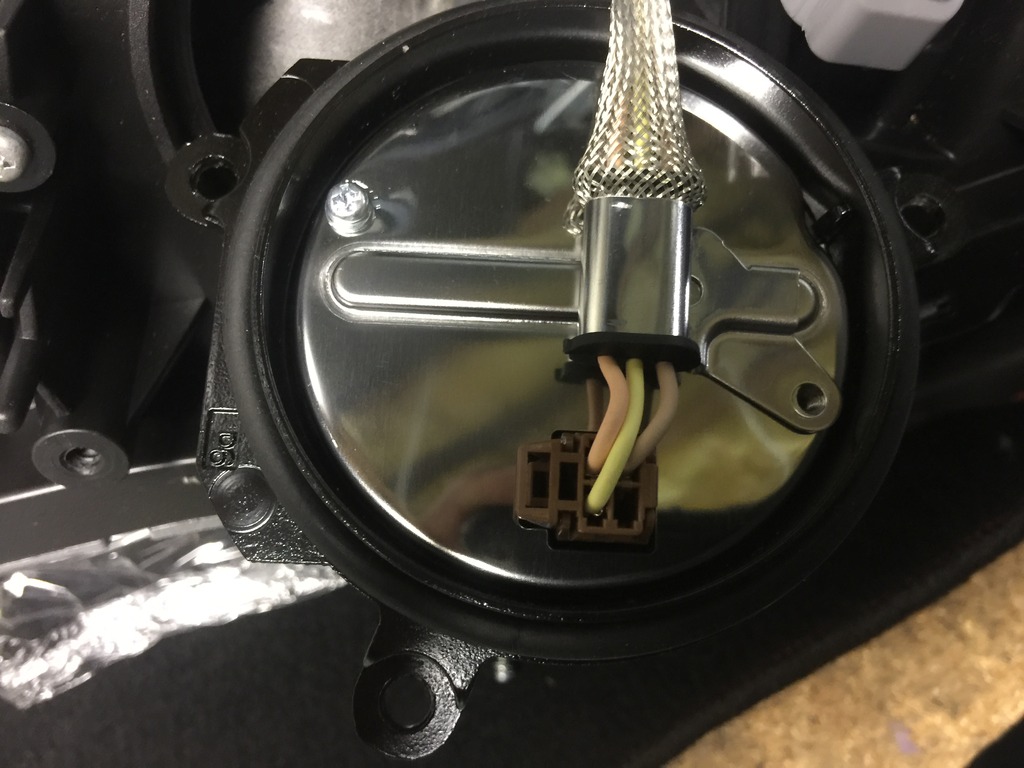
Basically, I removed the wire harness, the top plastic alignment pin and the balast and cover.
I also removed the small sealing screws on the back then put the unit on a small dry towel on a cookie sheet on the bottom of the oven. Preheated to 250 degs. Leave it in for about 8 mins. I also removed the main lamp access door plug to allow better heat circulation.
One thread I read, someone suggested resting the headlamp on a damp towel. This turned out to be a major problem when it came time to seal it up as it created steam inside the headlight. I'll get to that later. You don't need to dampen the towel.
Headlights are sealed with a butyl glue. It firms up at room tempature. Kind of like hard taffy. It softens at higher tempatures. You can use an oven to soften the entire seal or work in parts with a heat gun. I chose the oven method.
It was nerve racking. I was worried about damaging the units but just take your time, be brave, be patient and work in sections. I used gloves to hold the headlights and a plastic drywall spatula to pry them open without gouging the seams. TRS suggested a mechanical spreading tool also. This would have been helpful, but not necessary as the video demonstrated.
Of course make sure you have a good padded workspace to lay the lamp down while prying it open.
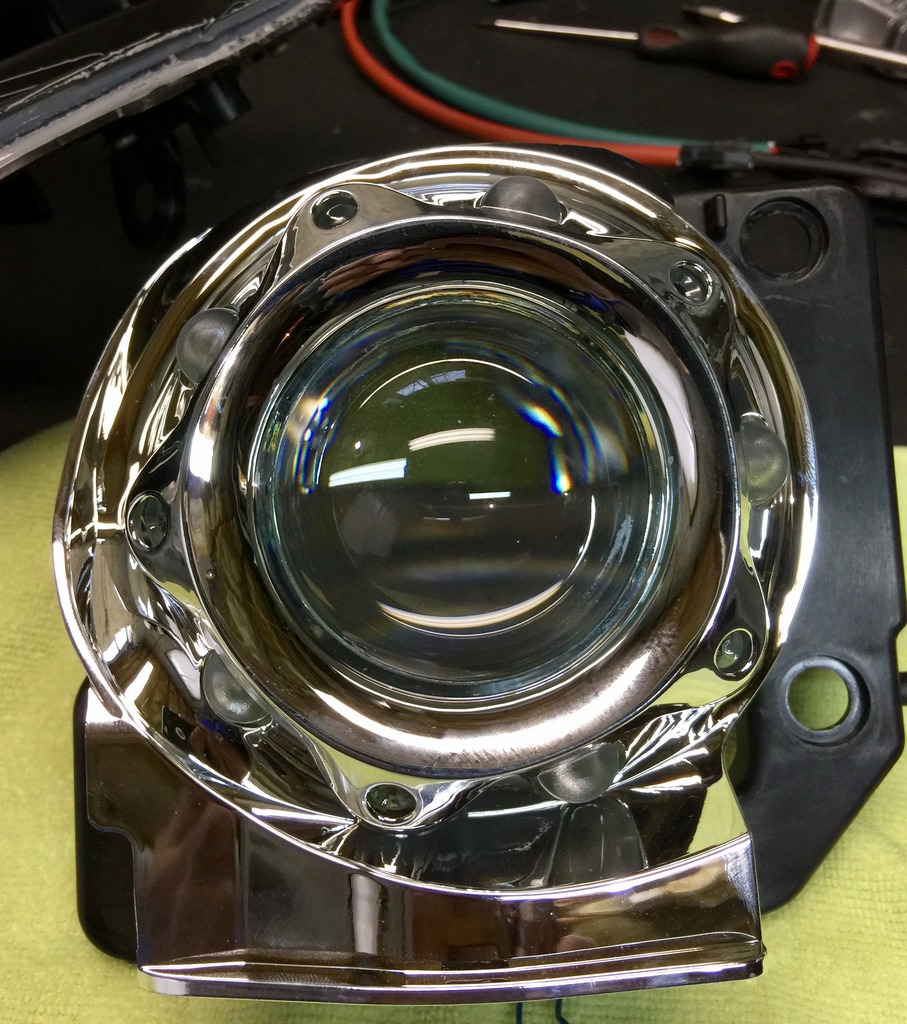
Once open, the quiality of the Depo headlamp really shows. everything is tight, bright and just right.
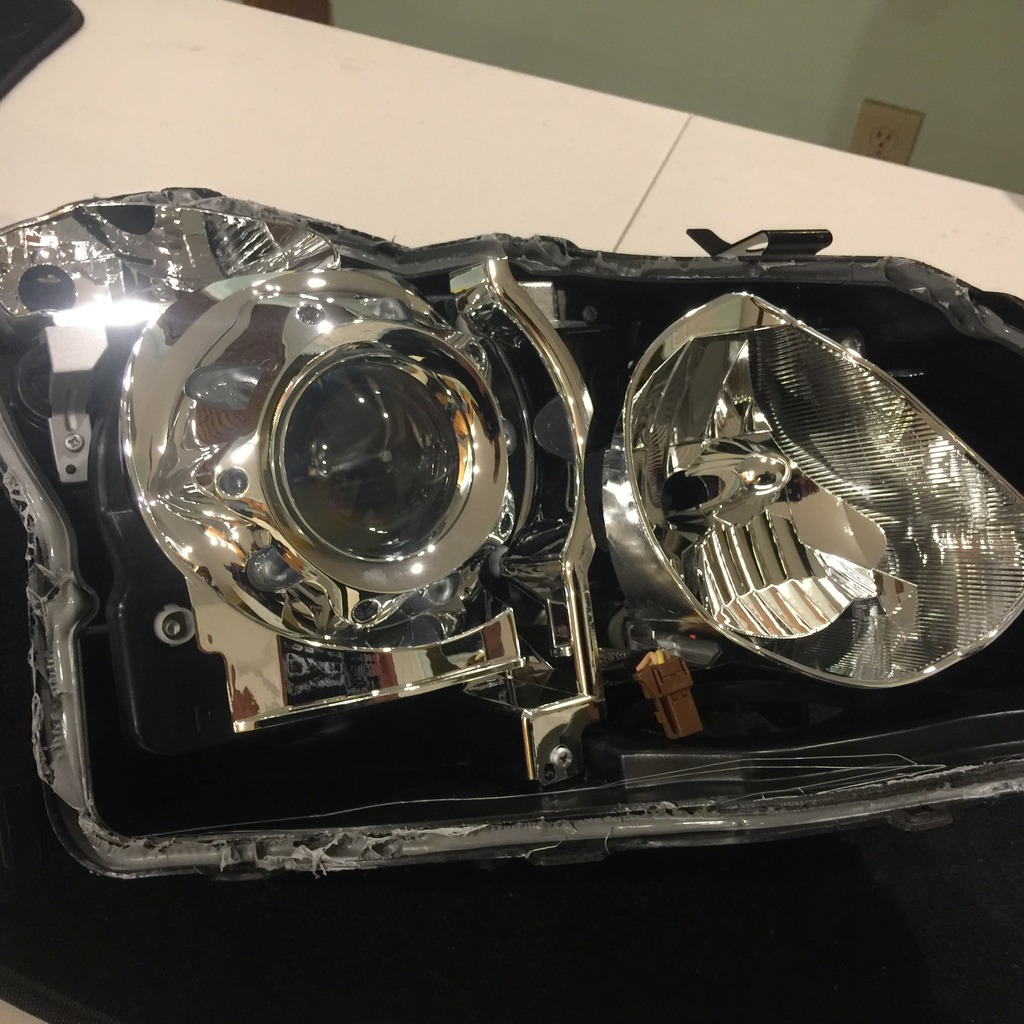
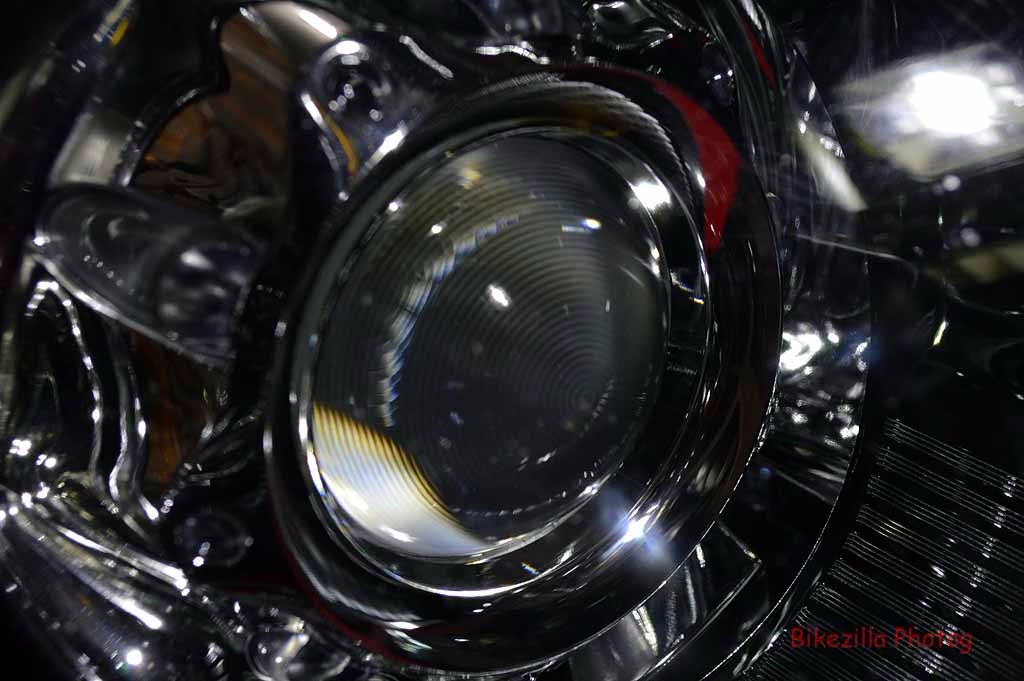
OEM concentric circle cut lens:
Depo's crystal clear lens
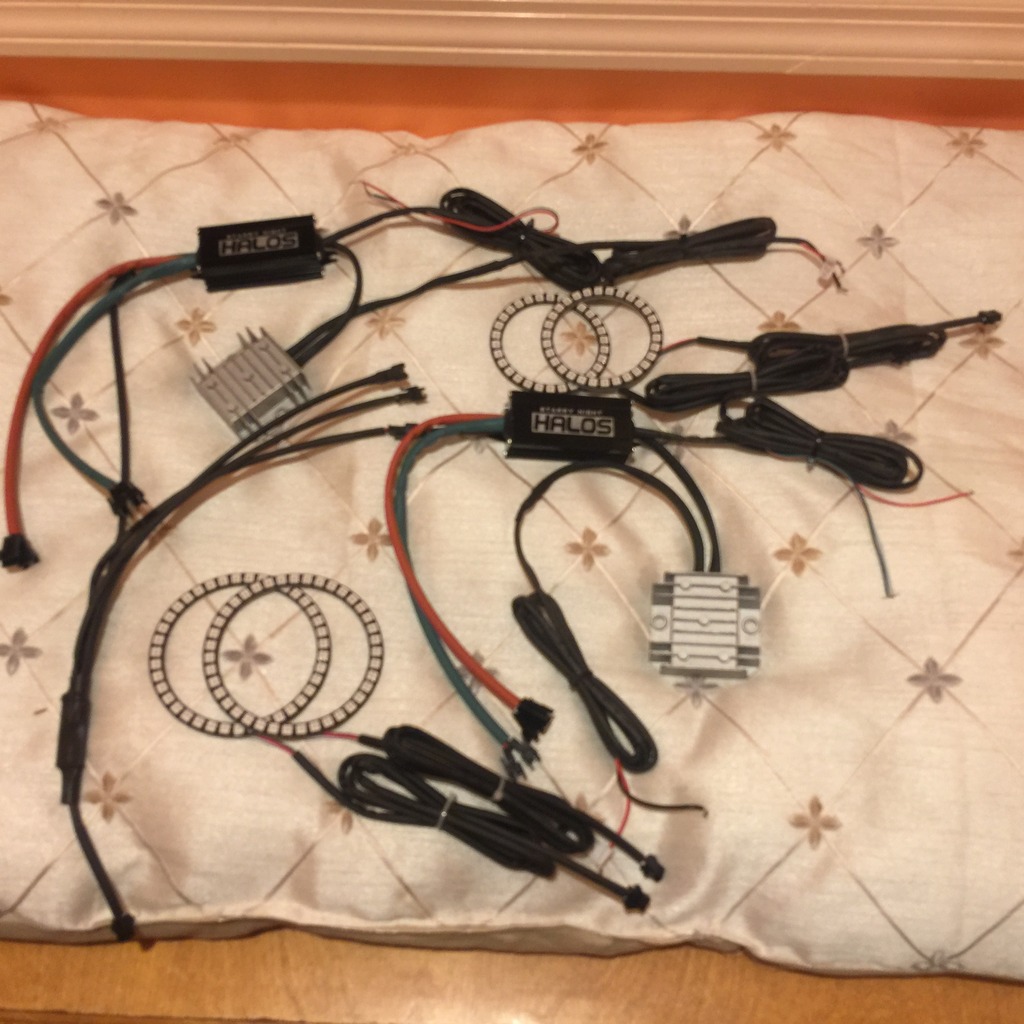
There's a lot of gear to install:
(2)80mm RGBA+ halos, (2)110mm RGBA+ halos, (2) RGBW DEs & (2) 24" SSB tube strips. Plus drivers, converters and bluetooth controllers.
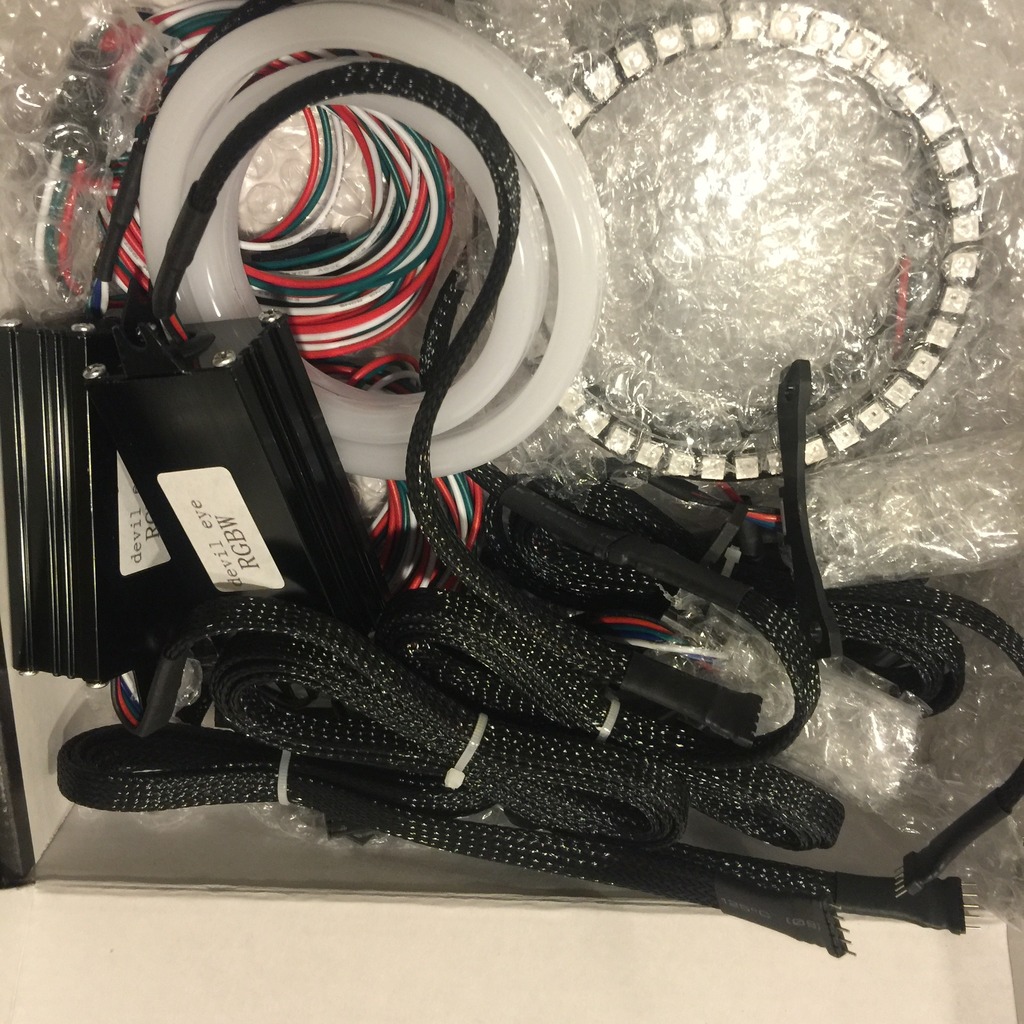
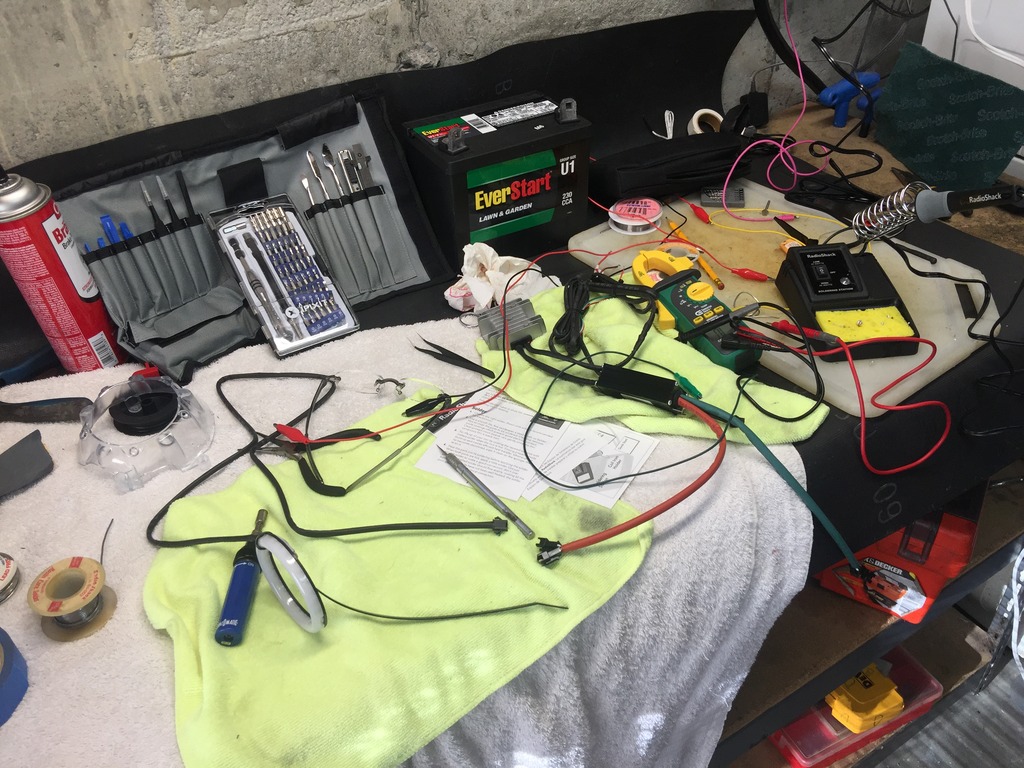
And this is probably half the tools and supplies I used
Opening & Closing
************************************************** ******
180 created an awesome DYI explaining how to remove the bumper and headlights:
https://www.myg37.com/forums/d-i-y-i...al-w-pics.html
The Retrofit Resource made some great vids on how to open and reseal the headlamps.
The retrofit resource Opening:
The retorfit resource Closing:
I used Morimoto butyl to reseal as described in the video above.

Basically, I removed the wire harness, the top plastic alignment pin and the balast and cover.

I also removed the small sealing screws on the back then put the unit on a small dry towel on a cookie sheet on the bottom of the oven. Preheated to 250 degs. Leave it in for about 8 mins. I also removed the main lamp access door plug to allow better heat circulation.
One thread I read, someone suggested resting the headlamp on a damp towel. This turned out to be a major problem when it came time to seal it up as it created steam inside the headlight. I'll get to that later. You don't need to dampen the towel.
Headlights are sealed with a butyl glue. It firms up at room tempature. Kind of like hard taffy. It softens at higher tempatures. You can use an oven to soften the entire seal or work in parts with a heat gun. I chose the oven method.
It was nerve racking. I was worried about damaging the units but just take your time, be brave, be patient and work in sections. I used gloves to hold the headlights and a plastic drywall spatula to pry them open without gouging the seams. TRS suggested a mechanical spreading tool also. This would have been helpful, but not necessary as the video demonstrated.
Of course make sure you have a good padded workspace to lay the lamp down while prying it open.
Once open, the quiality of the Depo headlamp really shows. everything is tight, bright and just right.

OEM concentric circle cut lens:

Depo's crystal clear lens

There's a lot of gear to install:
(2)80mm RGBA+ halos, (2)110mm RGBA+ halos, (2) RGBW DEs & (2) 24" SSB tube strips. Plus drivers, converters and bluetooth controllers.


And this is probably half the tools and supplies I used

The following 3 users liked this post by bikezilla:
#3
************************************************** ********************
Initial internal disassembly
************************************************** *********************
Once I removed the clear lens, I unscrewed the inner shroud to seperate it from the lens.
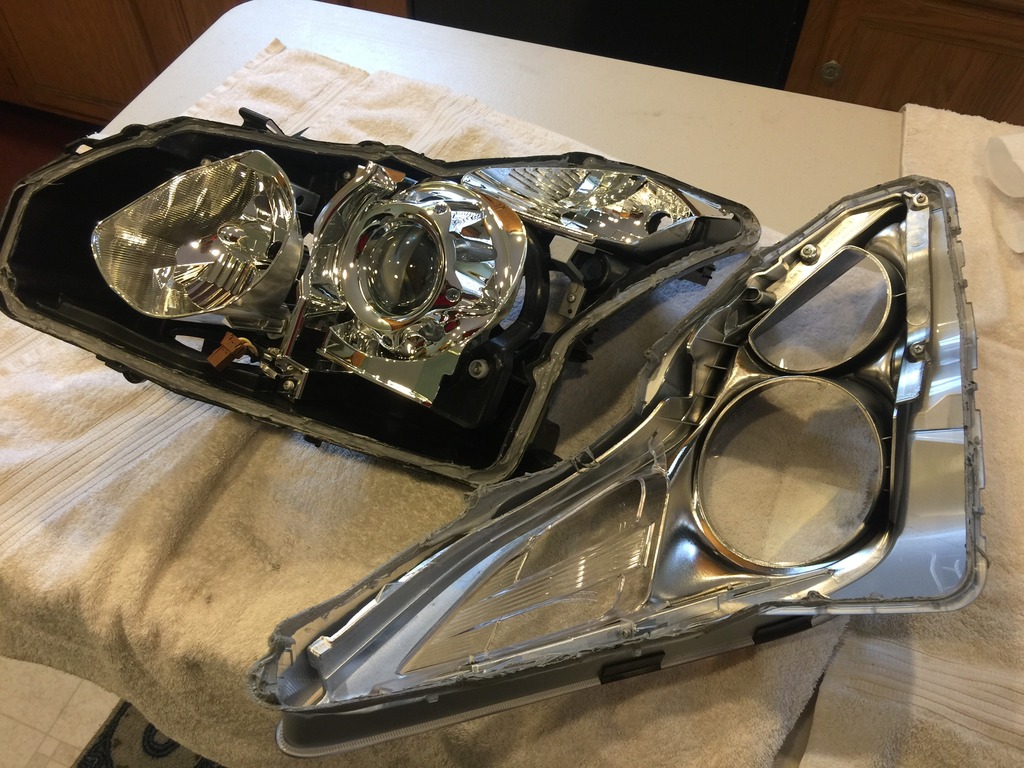
I then unclipped the projector shroud, removed the attaching screws and pulled the projector assembly out. Then turned it over and removed the three shroud mounting screws, and removed the crome shroud and clear plastic inner shroud lens. (different from the crystal glass projector lens)
I also removed and painted the chrome upper turn signal reflector cone, but left the "lens" for it clear, just in case I needed to run the bulb as a fall-back.
************************************************** ******************
Demon Eye
************************************************** ******************
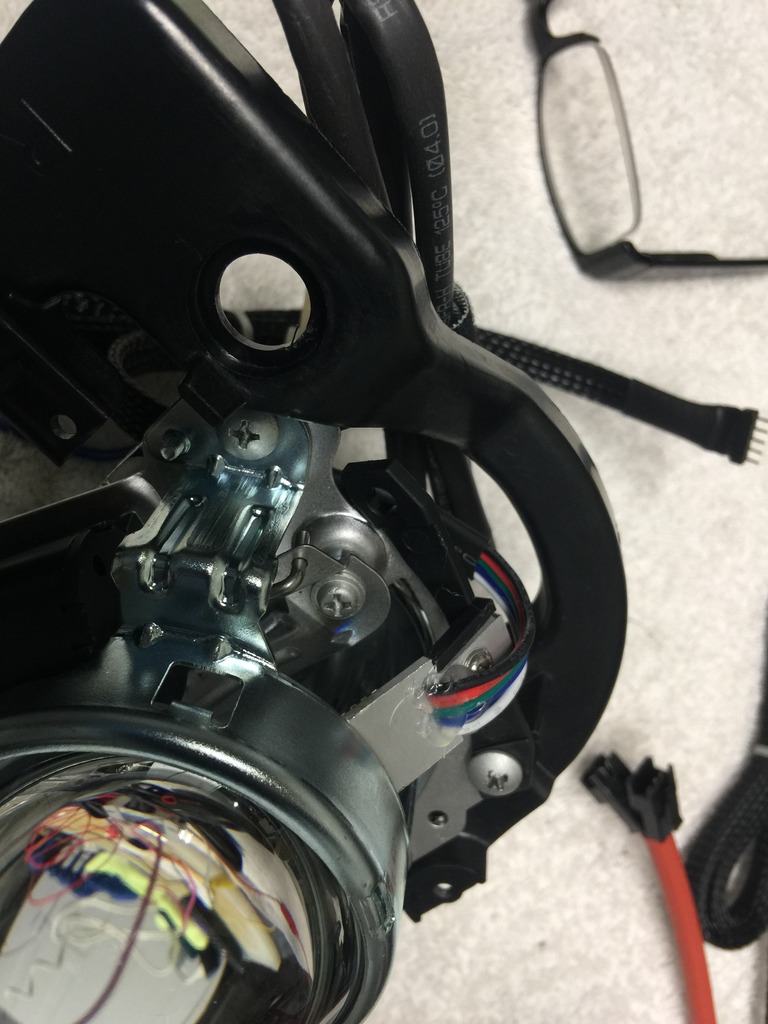
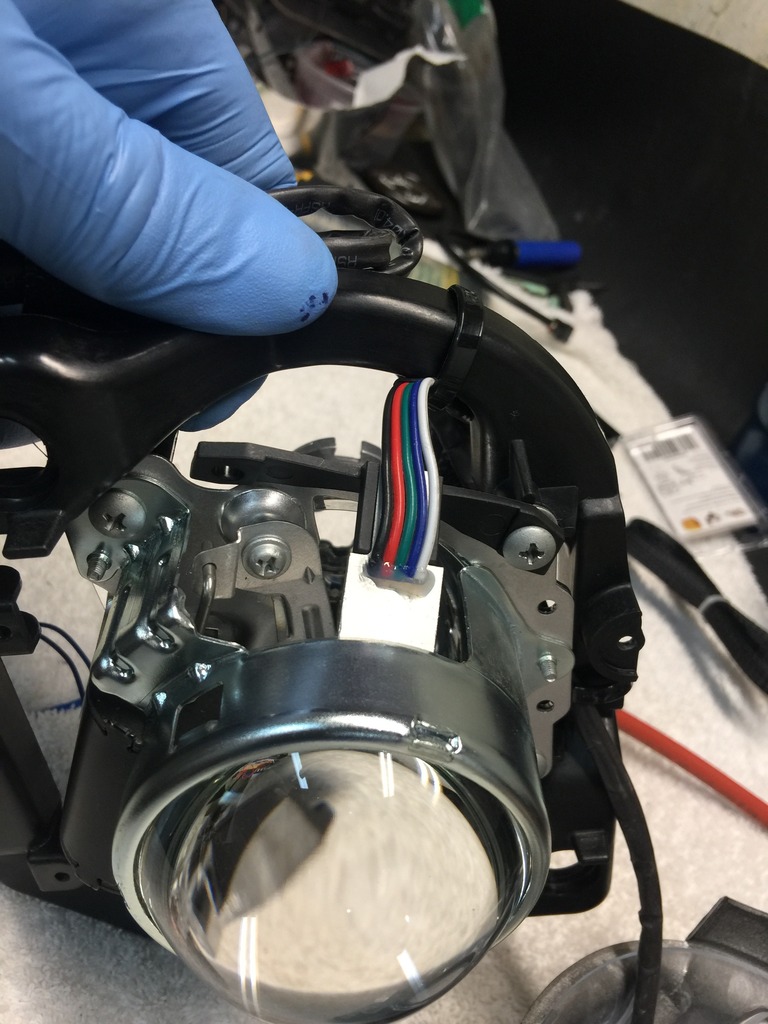
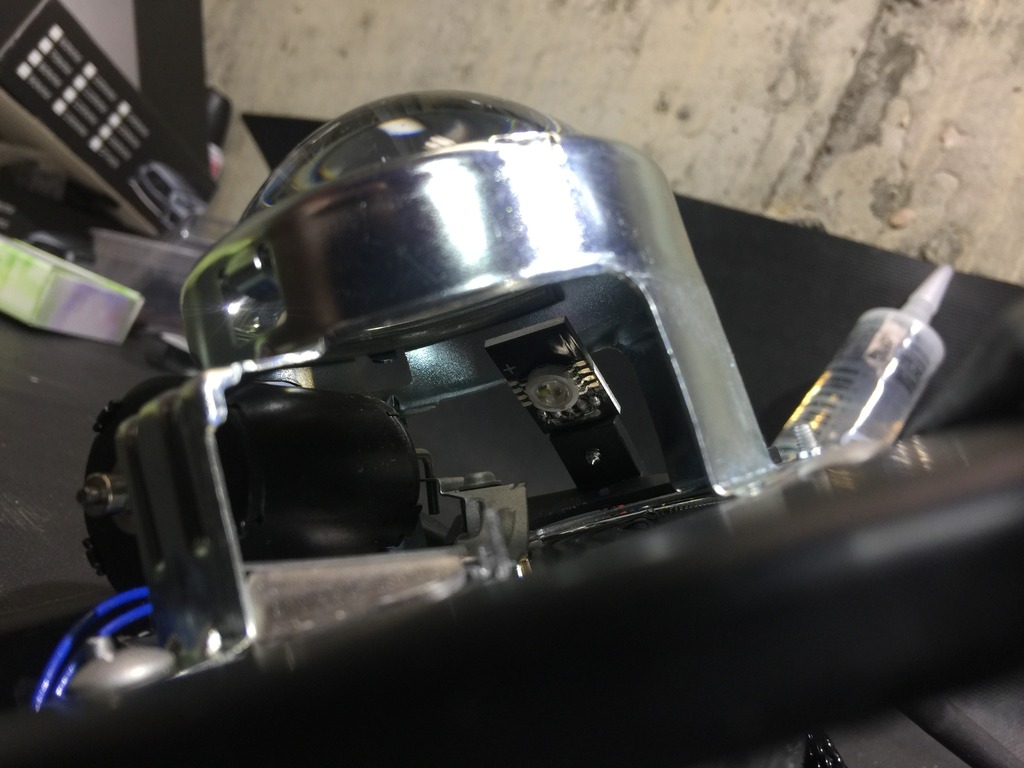
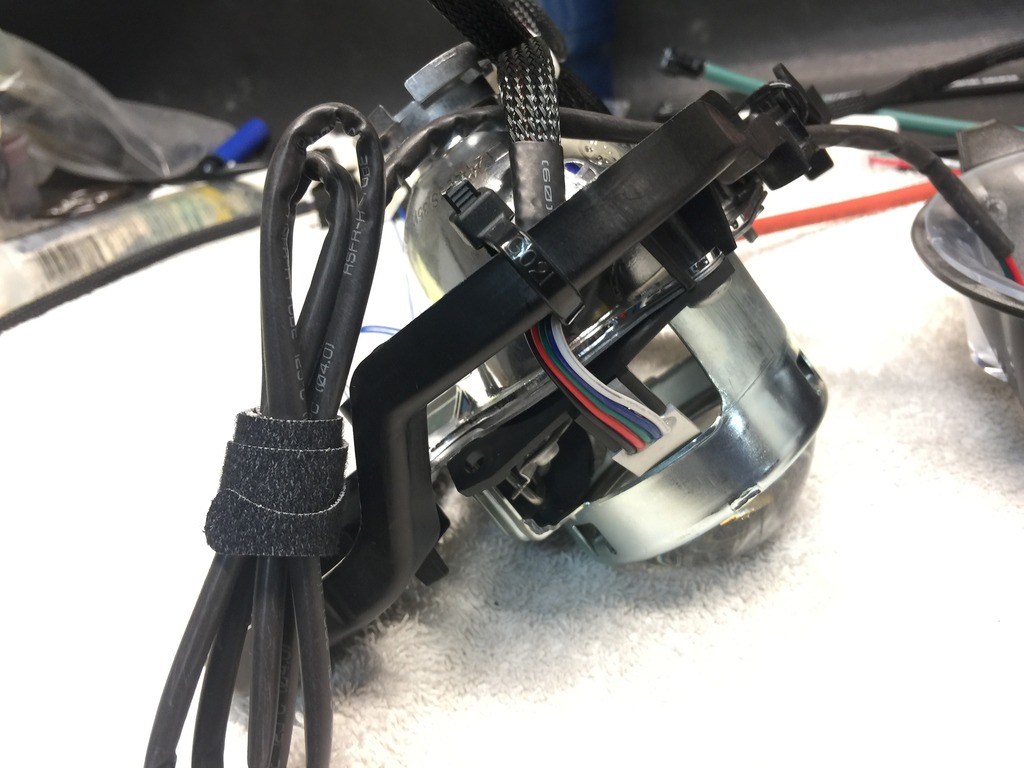
With the projector shroud removed I was able to install the demon eye. This was the easiest element to install. The mounting adaptor on the DE did not line up with the screws on the projector shell. So I mounted only one bracket screw with the DE LED slightly bent and inside the projector shell. But with the LED pointing back towards the inside of the reflector. Not towards the crystal lens. This way it could fire backwards from the corner and not block any of the light coming from the main xenon bulb or cast a shadow through the lens. I secured the leads with zip ties to the the projector frame.
Initial internal disassembly
************************************************** *********************
Once I removed the clear lens, I unscrewed the inner shroud to seperate it from the lens.

I then unclipped the projector shroud, removed the attaching screws and pulled the projector assembly out. Then turned it over and removed the three shroud mounting screws, and removed the crome shroud and clear plastic inner shroud lens. (different from the crystal glass projector lens)
I also removed and painted the chrome upper turn signal reflector cone, but left the "lens" for it clear, just in case I needed to run the bulb as a fall-back.
************************************************** ******************
Demon Eye
************************************************** ******************
With the projector shroud removed I was able to install the demon eye. This was the easiest element to install. The mounting adaptor on the DE did not line up with the screws on the projector shell. So I mounted only one bracket screw with the DE LED slightly bent and inside the projector shell. But with the LED pointing back towards the inside of the reflector. Not towards the crystal lens. This way it could fire backwards from the corner and not block any of the light coming from the main xenon bulb or cast a shadow through the lens. I secured the leads with zip ties to the the projector frame.


The following 3 users liked this post by bikezilla:
#4
************************************************** ****************
Projector 80mm Halo
************************************************** ****************
*Before painting*
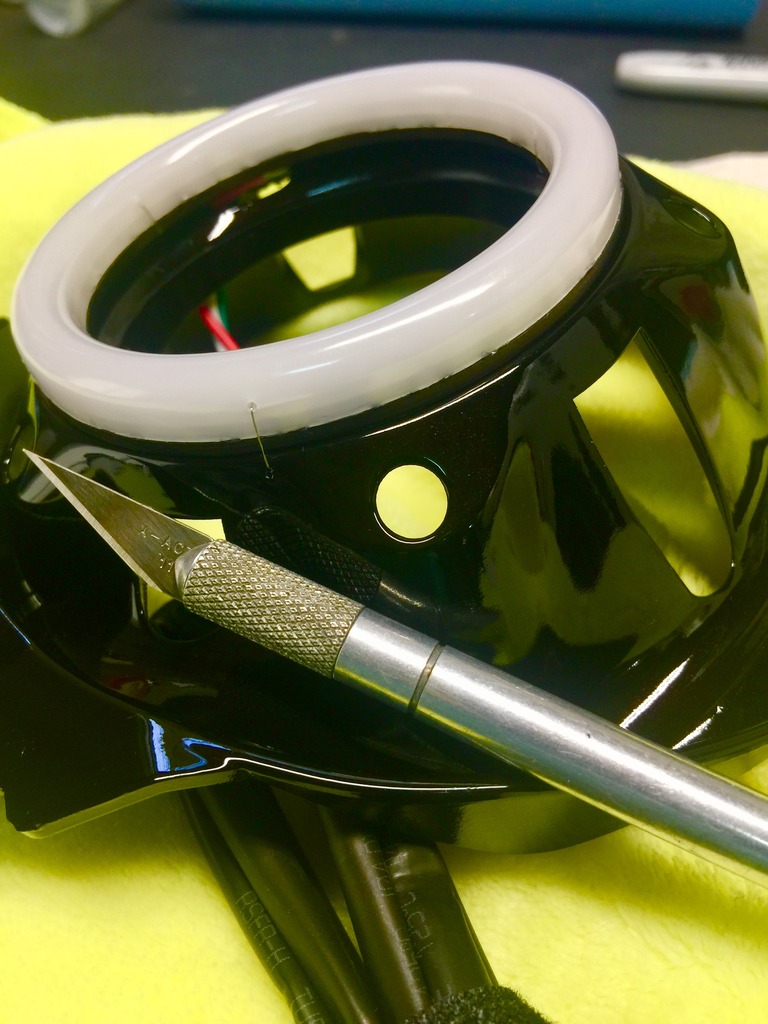
For the projector shroud, I lined up the halo with the plastic difuser on the shroud. I marked off where the wires are soldiered underneath and dremmeled an oval hole large enough go thread the wire connector through.
I then seated the halo flat and marked off three evenly spaced points for the anchor wire. I made sure the hole in the diffuser was above and in-between the LED elements. then I drilled a 1/32" hole through both sides of the diffuser and one more on each side of the shroud directly beneath the hole on the diffuser.
 [/URL]
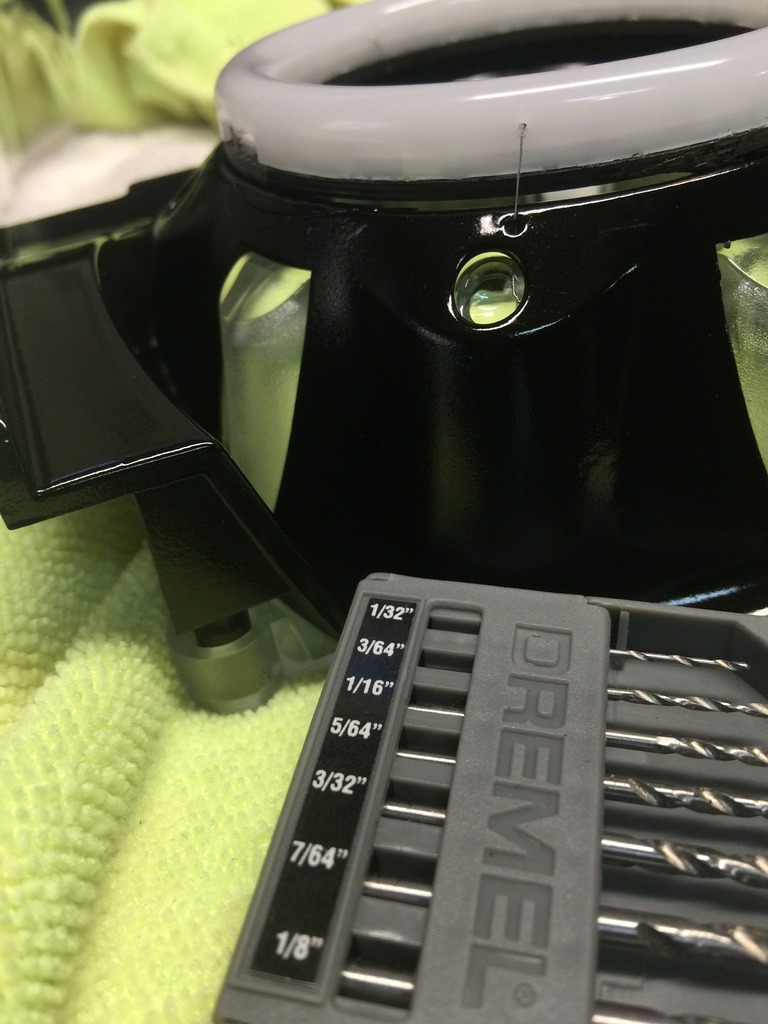
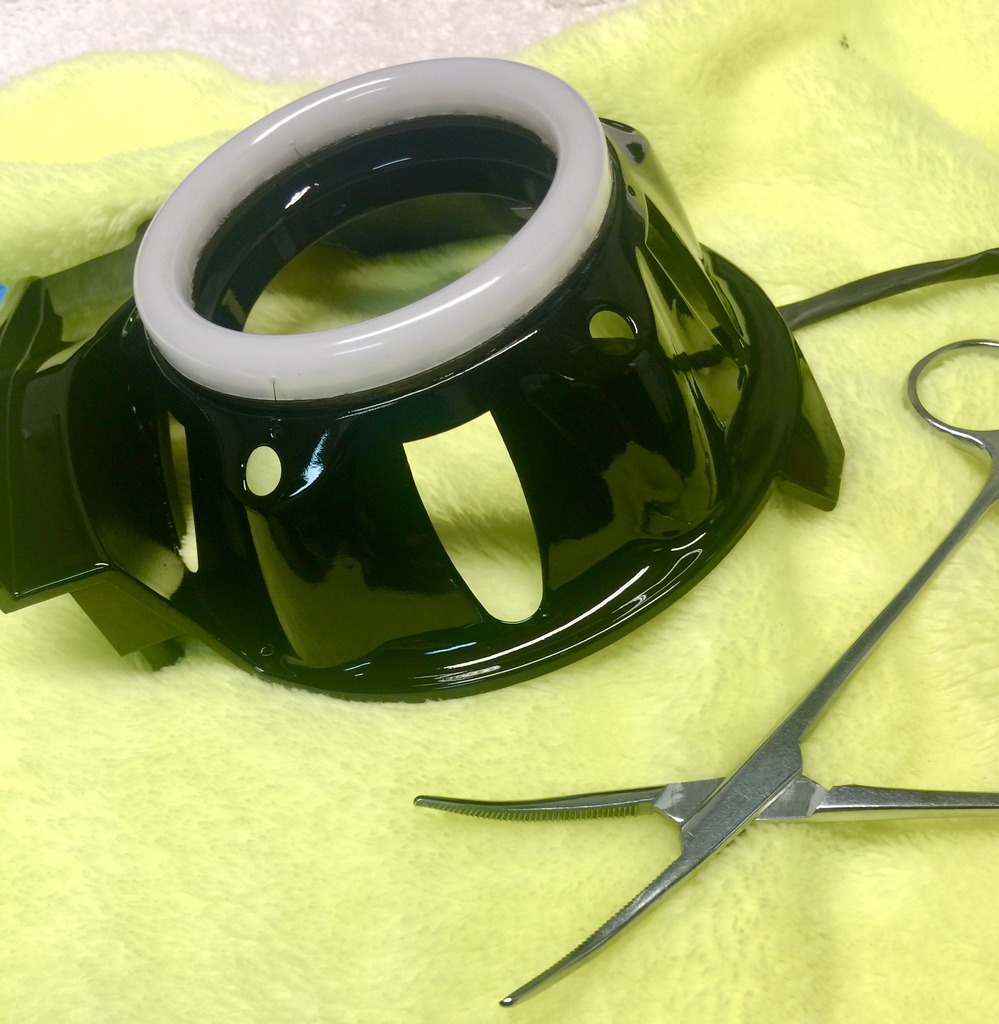
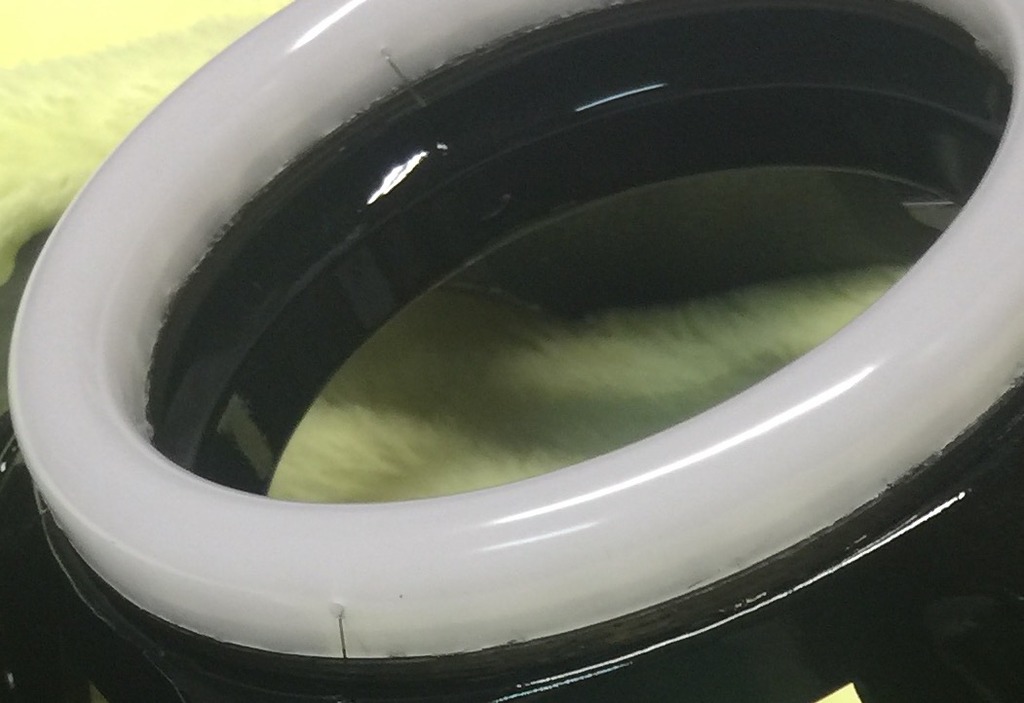
After 3 coats of primer, 3 coats of Malbec black and three coats of professional clear coat (wet-sanded between coats...IT IS WORTH IT REALLY)
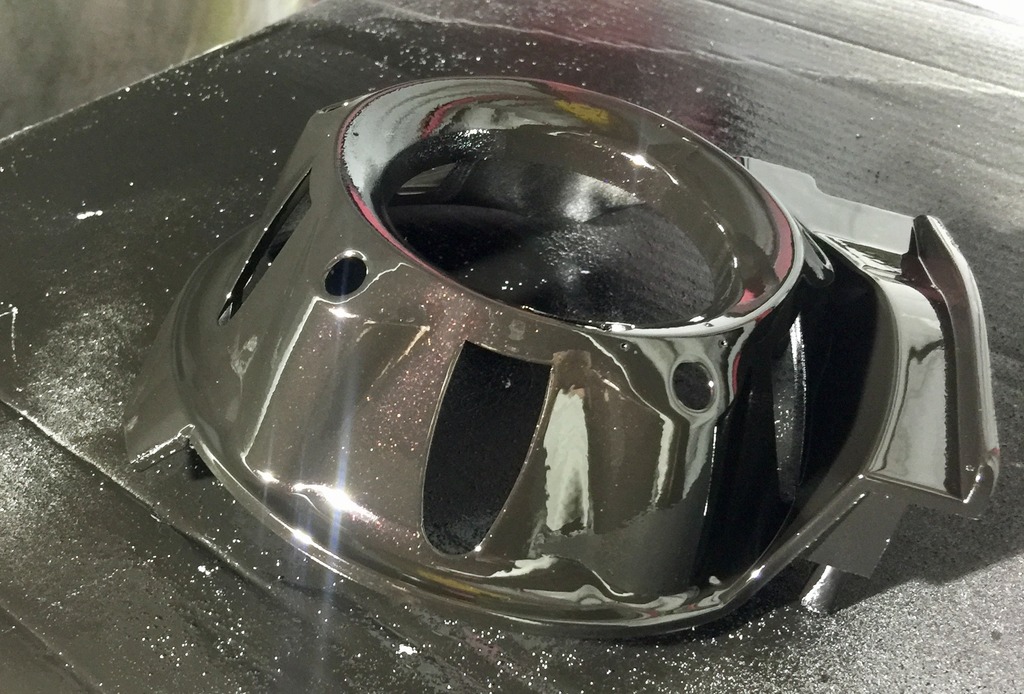
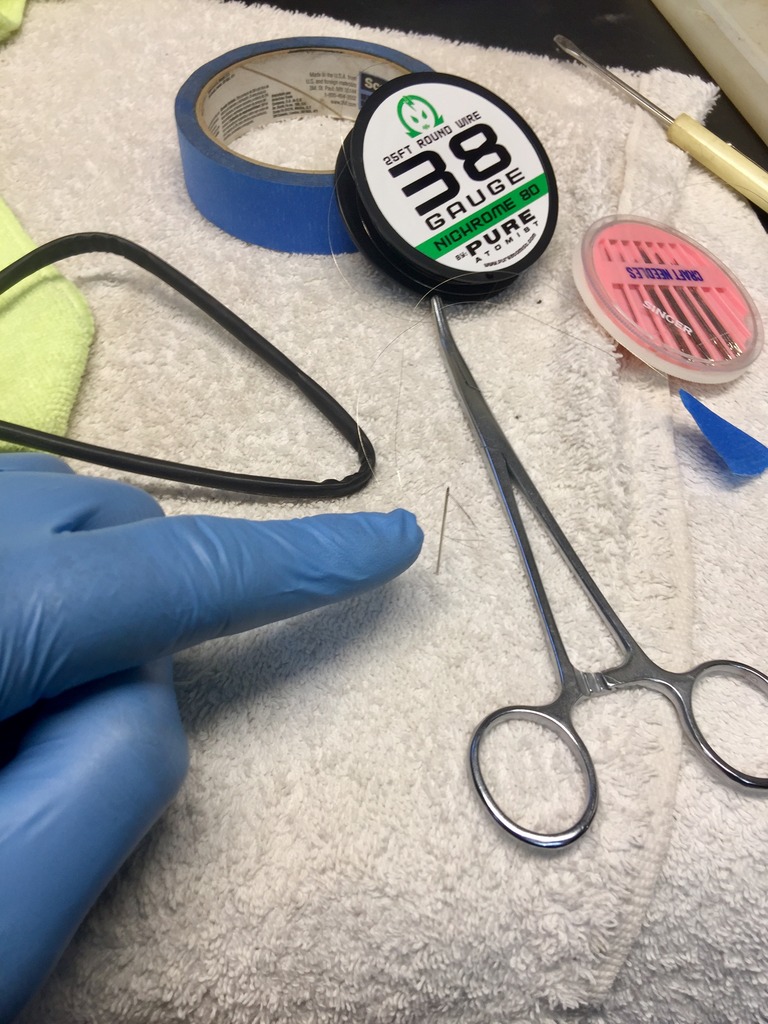
I mounted the diffuser to the Halo with tiny dabs of clear silicone cauk along the edge to hold it in place while working. I then threadded the wire through a sewing needle and pulled a double strand through the diffuser. Then through the mounting holes in the housing. Twisting them tight with foreceps. To control light leakage, I covered the holes from the back side with high tempature foil ducting tape. I dabbed the glued side where the hole would be with a black sharpie to black out the foil.
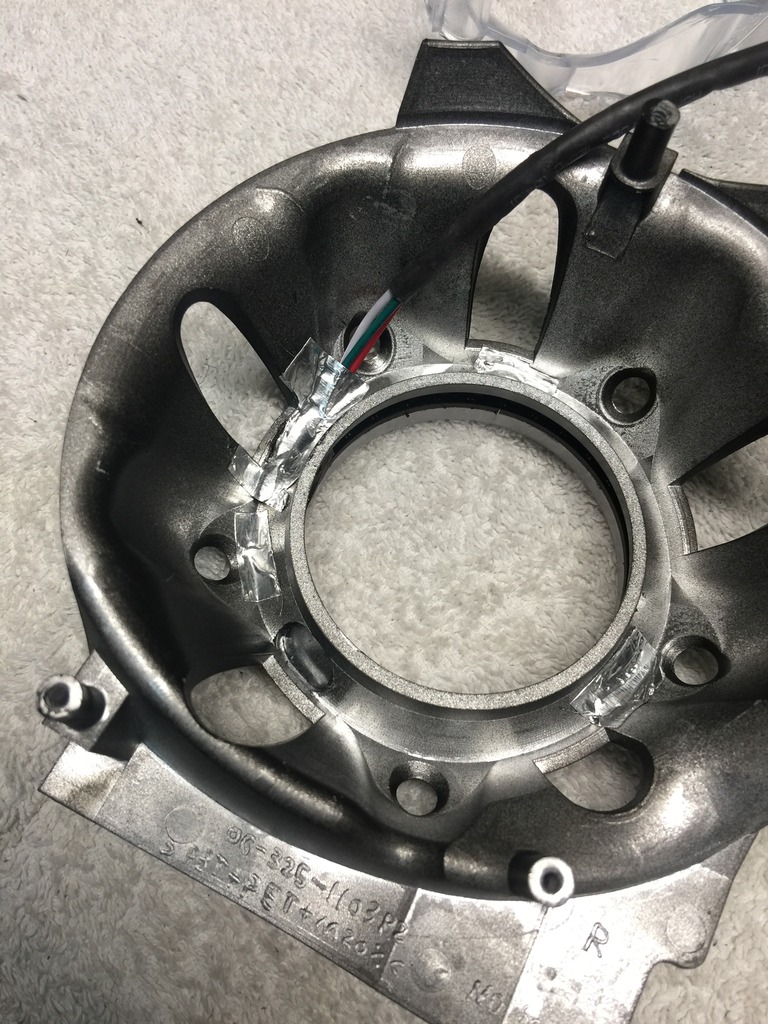
I also used the black sharpie to darken the edge of the halo as the cut unfinished PCB wasn't nearly as black as the shroud. I ran 3 or 4 coats of sharpie. The PCB sucked it right up so I expect it'll stay black.
Projector 80mm Halo
************************************************** ****************
*Before painting*
For the projector shroud, I lined up the halo with the plastic difuser on the shroud. I marked off where the wires are soldiered underneath and dremmeled an oval hole large enough go thread the wire connector through.
I then seated the halo flat and marked off three evenly spaced points for the anchor wire. I made sure the hole in the diffuser was above and in-between the LED elements. then I drilled a 1/32" hole through both sides of the diffuser and one more on each side of the shroud directly beneath the hole on the diffuser.
 [/URL]


After 3 coats of primer, 3 coats of Malbec black and three coats of professional clear coat (wet-sanded between coats...IT IS WORTH IT REALLY)

I mounted the diffuser to the Halo with tiny dabs of clear silicone cauk along the edge to hold it in place while working. I then threadded the wire through a sewing needle and pulled a double strand through the diffuser. Then through the mounting holes in the housing. Twisting them tight with foreceps. To control light leakage, I covered the holes from the back side with high tempature foil ducting tape. I dabbed the glued side where the hole would be with a black sharpie to black out the foil.

I also used the black sharpie to darken the edge of the halo as the cut unfinished PCB wasn't nearly as black as the shroud. I ran 3 or 4 coats of sharpie. The PCB sucked it right up so I expect it'll stay black.

The following 3 users liked this post by bikezilla:
#5
************************************************** ****************
City Light D-Apeture 110mm Halo
************************************************** ****************
The 110mm halo was a bit more tricky to mount. I needed to trim out notches inside the inner shroud to allow it to seat on the round apature.
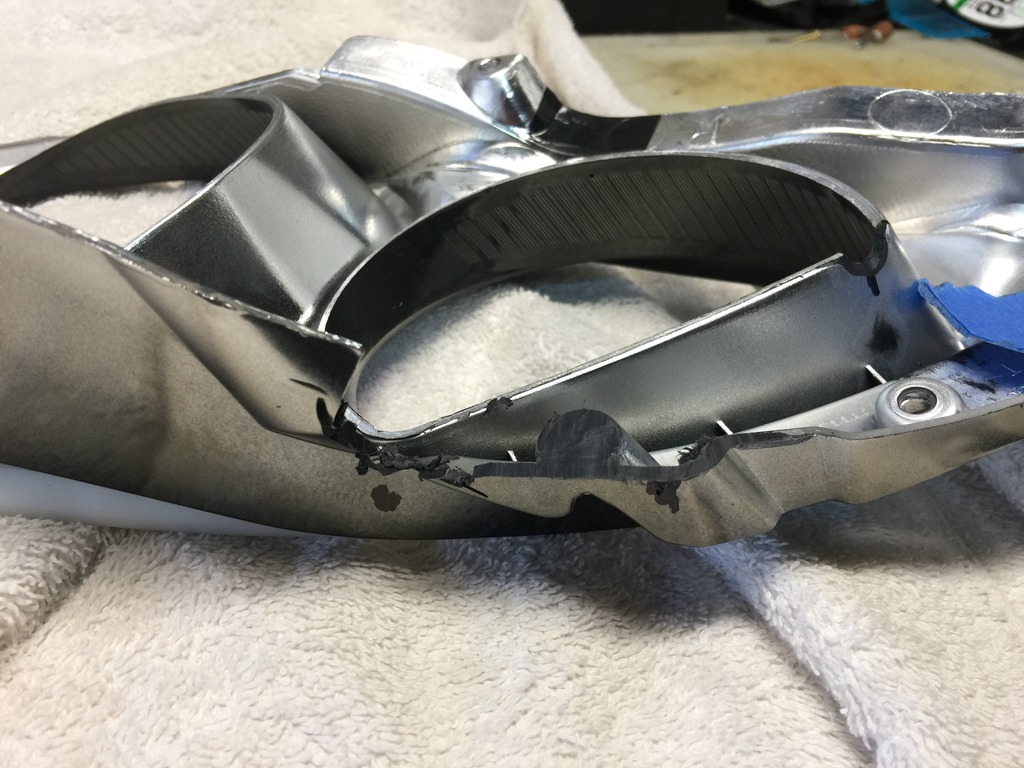
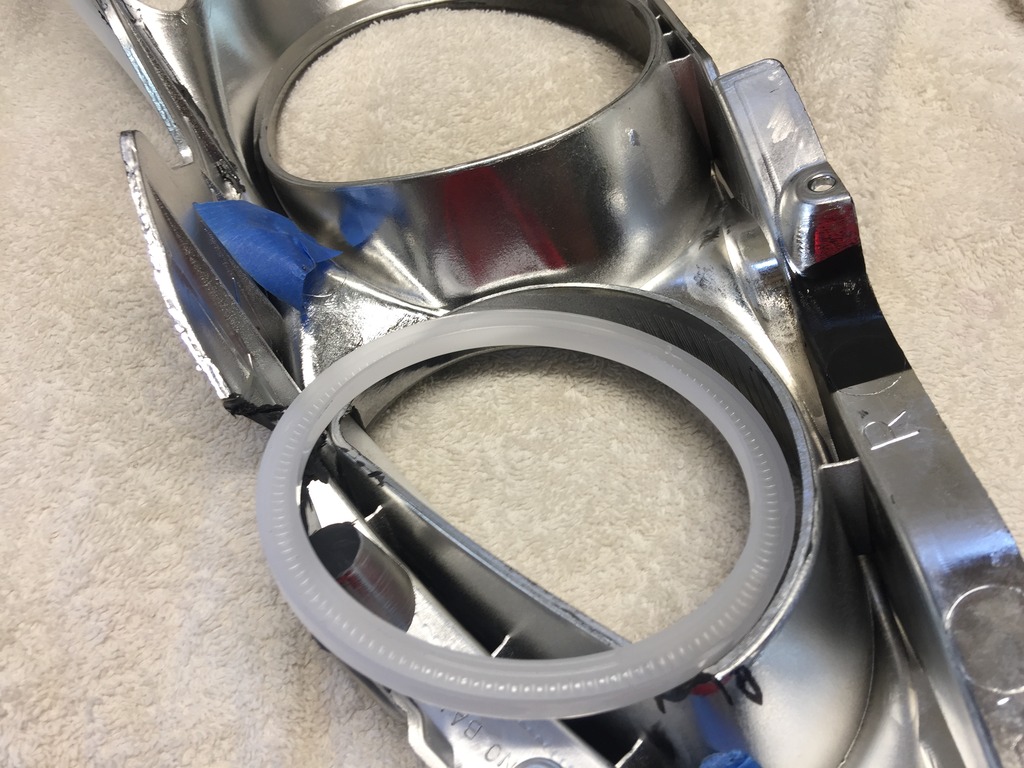
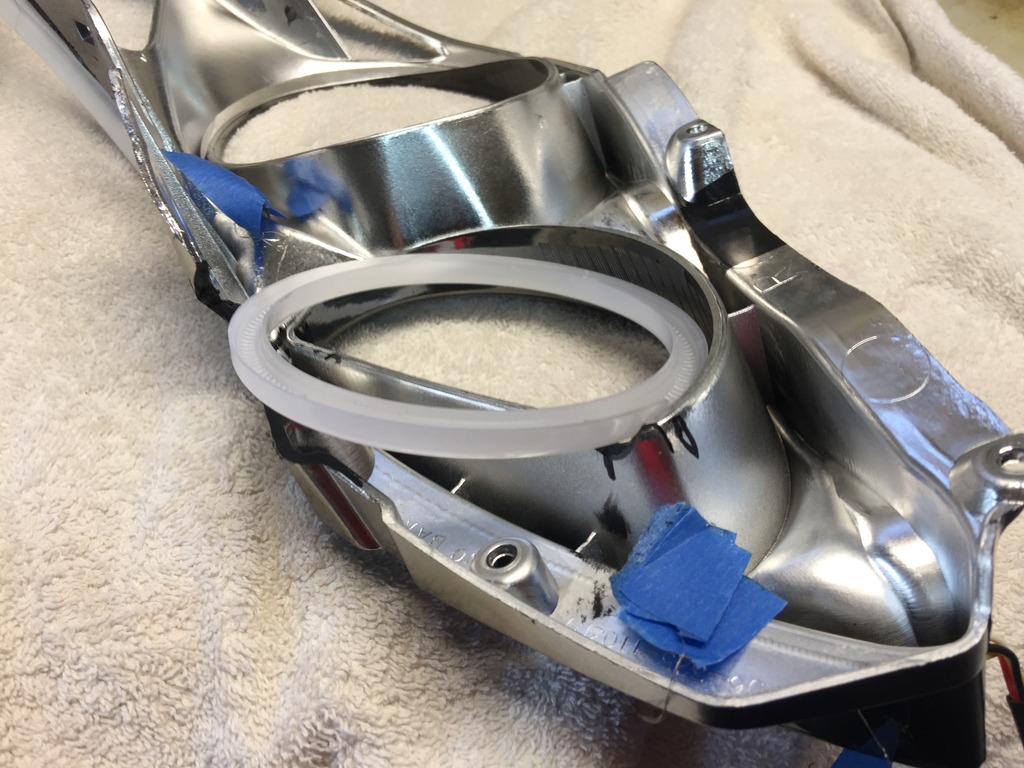
What is not pictured is that I secured the halo on the top inside with zip ties, and tipped the bottom part inside the apeture. To keep it from pivoting out, I drilled a hole in the bottom center back edge of the apature, set the halo in front of it and put a zip tie through the hole. This created a bump large enough to keep the halo from sliding back out of the D-apature but remained invisible and no anchor wires were necessary.
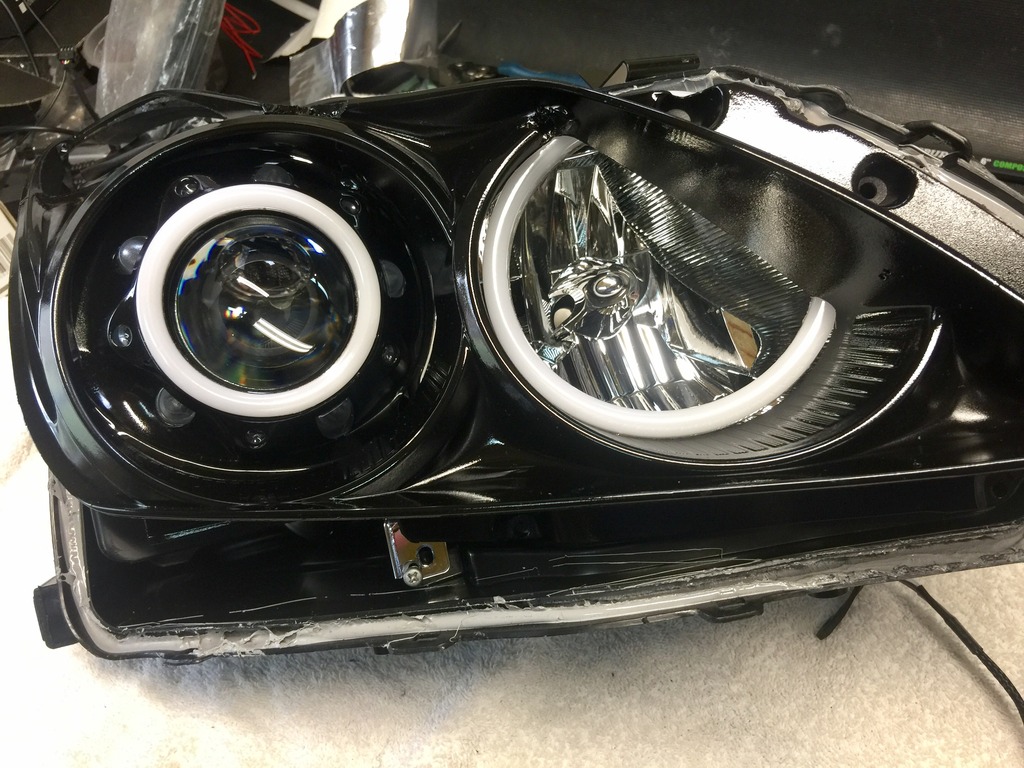
I chose not to darken the halo edges with a sharpie, since I left the reflector chrome I think it blended with the white diffuser better.
Since the halo did not sit perfectly within the apeture, I laid a strip of black wire along the backside edge inside the housing, held in place with hot glue. This filled the thin gap along the edge of the halo and blocks any light leakage around the edges.
City Light D-Apeture 110mm Halo
************************************************** ****************
The 110mm halo was a bit more tricky to mount. I needed to trim out notches inside the inner shroud to allow it to seat on the round apature.


What is not pictured is that I secured the halo on the top inside with zip ties, and tipped the bottom part inside the apeture. To keep it from pivoting out, I drilled a hole in the bottom center back edge of the apature, set the halo in front of it and put a zip tie through the hole. This created a bump large enough to keep the halo from sliding back out of the D-apature but remained invisible and no anchor wires were necessary.

I chose not to darken the halo edges with a sharpie, since I left the reflector chrome I think it blended with the white diffuser better.
Since the halo did not sit perfectly within the apeture, I laid a strip of black wire along the backside edge inside the housing, held in place with hot glue. This filled the thin gap along the edge of the halo and blocks any light leakage around the edges.
The following 3 users liked this post by bikezilla:
#6
************************************************** ********************
Sequential Switchback Strips
************************************************** ********************
It took me forever to work out how and where to cut to place the switchback tube. Inside the tube is a pair of foil metal strips with white LEDs on one and yellow on the other (Back to back). This is inserted in a soft flexible silicone tube. It is super slick silicone so you can pretty much forget about securing it with glue. I used micro nicrome wire. As I did with the projector halo.
I mitered the lower edge where it meets the front bottom of the inner housing, and made an access hole there to feed the elements through. This way the hole was small enough to be covered by the silicon tube. Otherwise I would have to either cut the connector off the wire or make the hole bigger to feed the connector through. Since it is inside the sealed headlight I didn't want any unnessary splices.
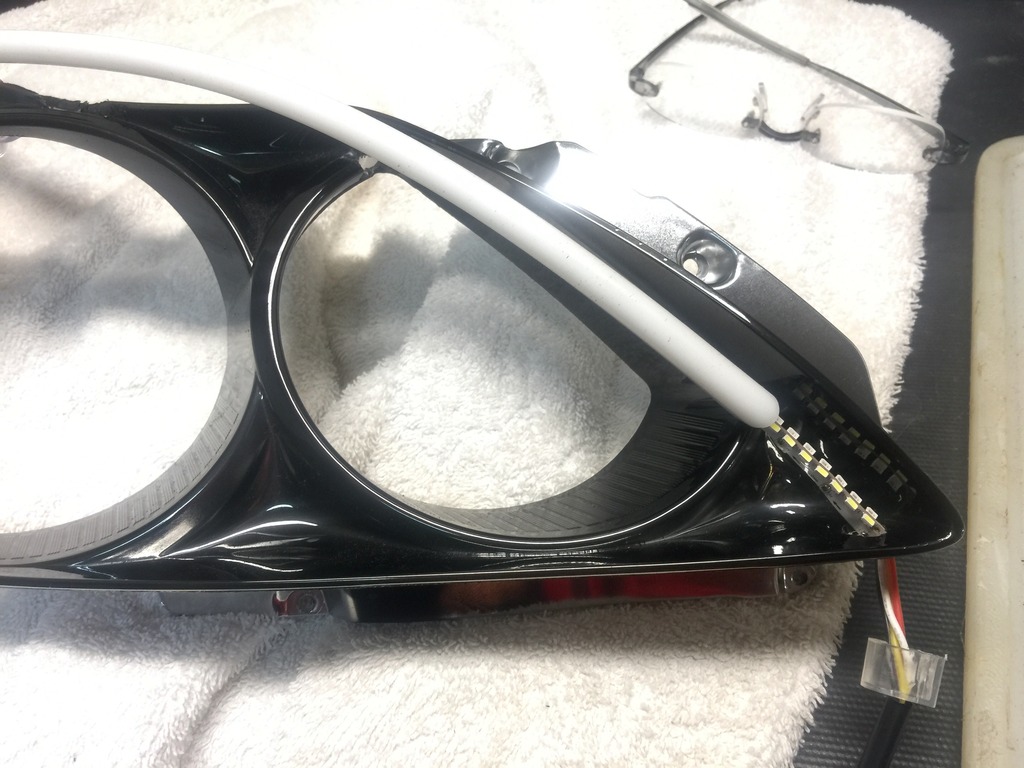
In order to route the tube along the top edge I did some research and found an installer on instagram notched their shroud near the top rear to transition it as the the lens and the inner housing gets closer to each other. I measured, and guesssed a dozen times before I worked up the courage to drill a hole on the far end, then dremmeled a chanel that same width to make a grove for the SBT. I did this before painting of course.
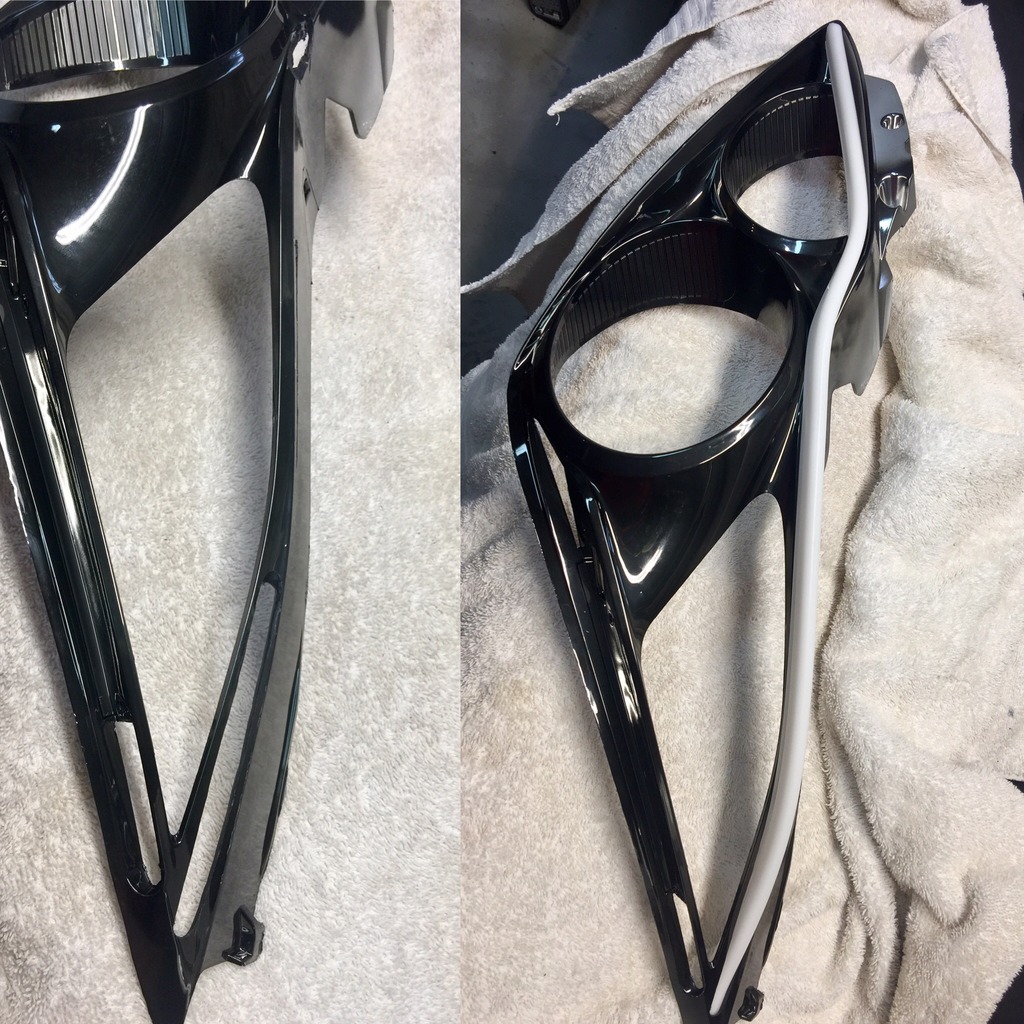
I also notched the top corner near the d-shaped city light apeture and made some small holes to wire it down along the top edge.
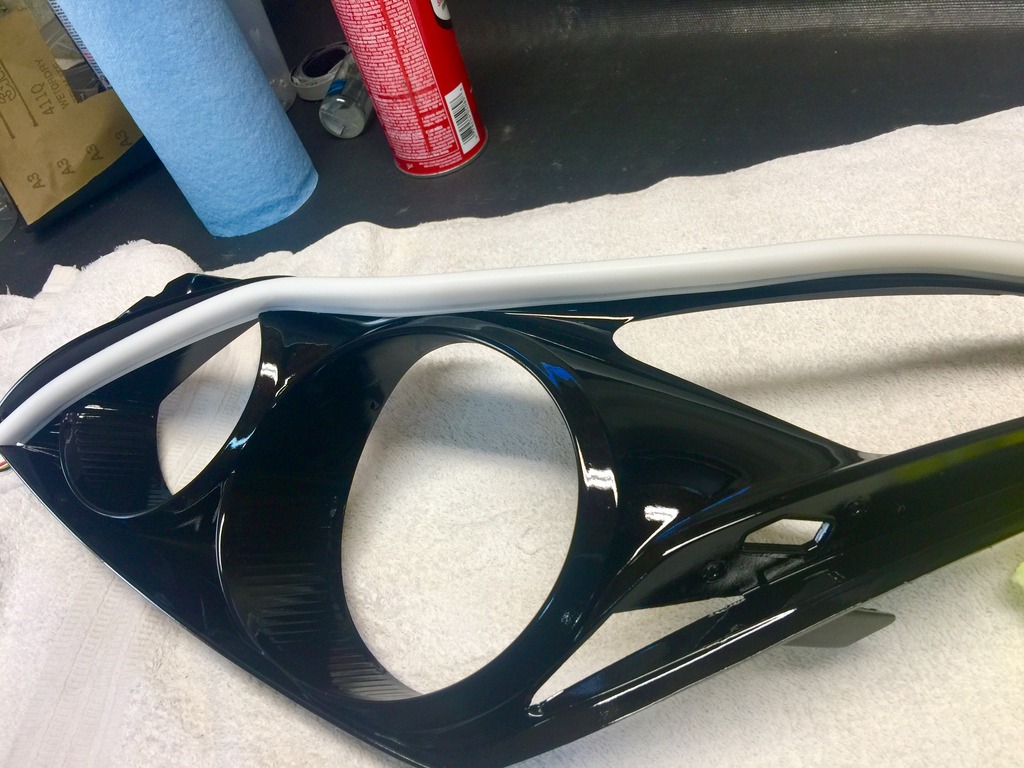
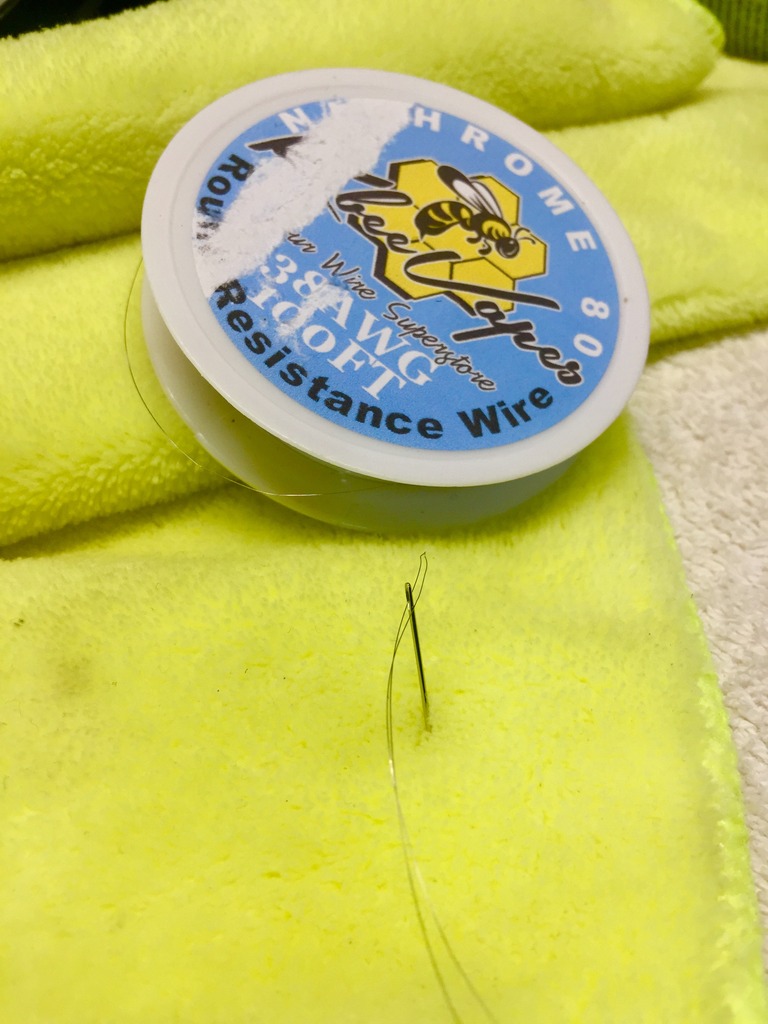
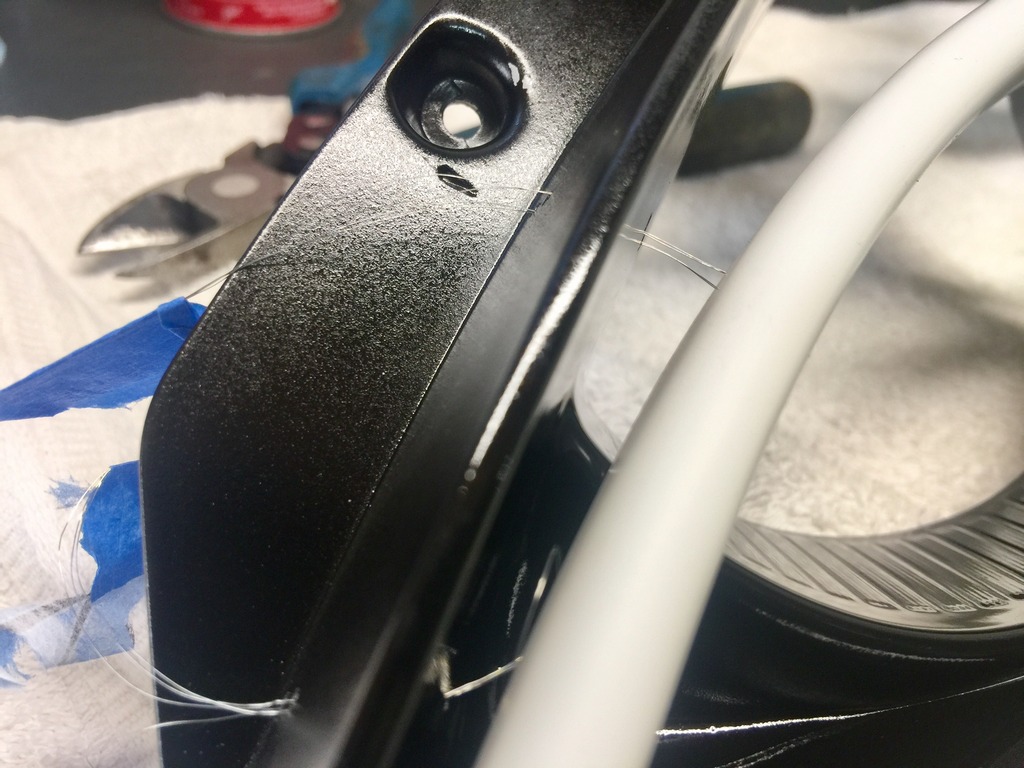
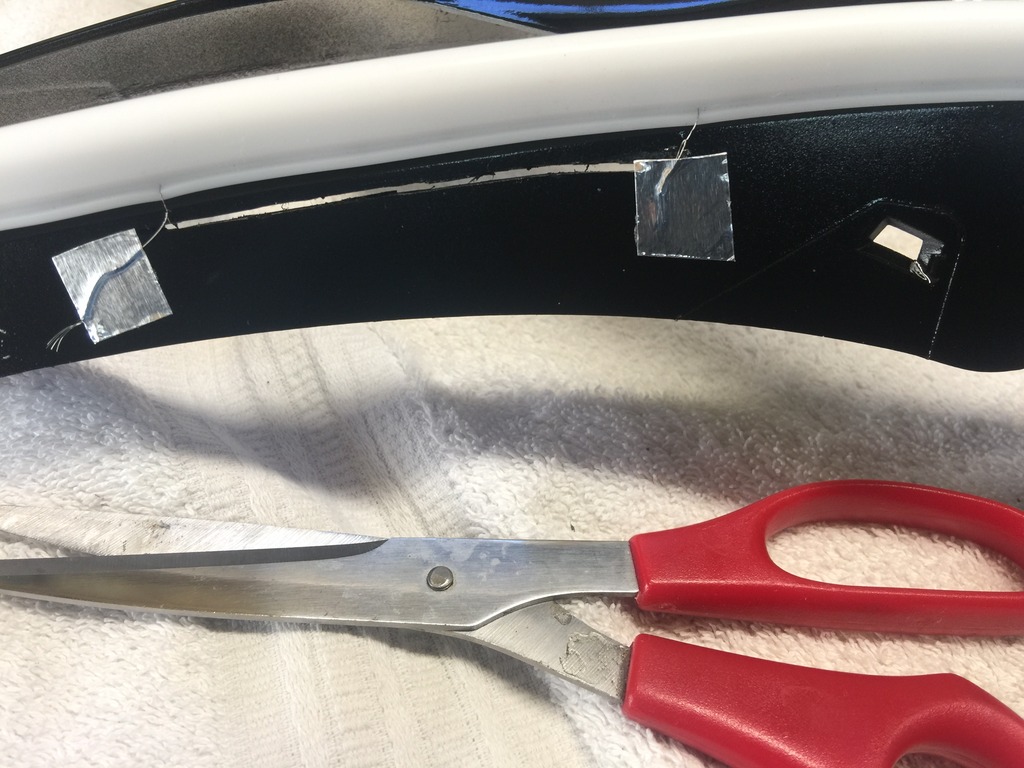
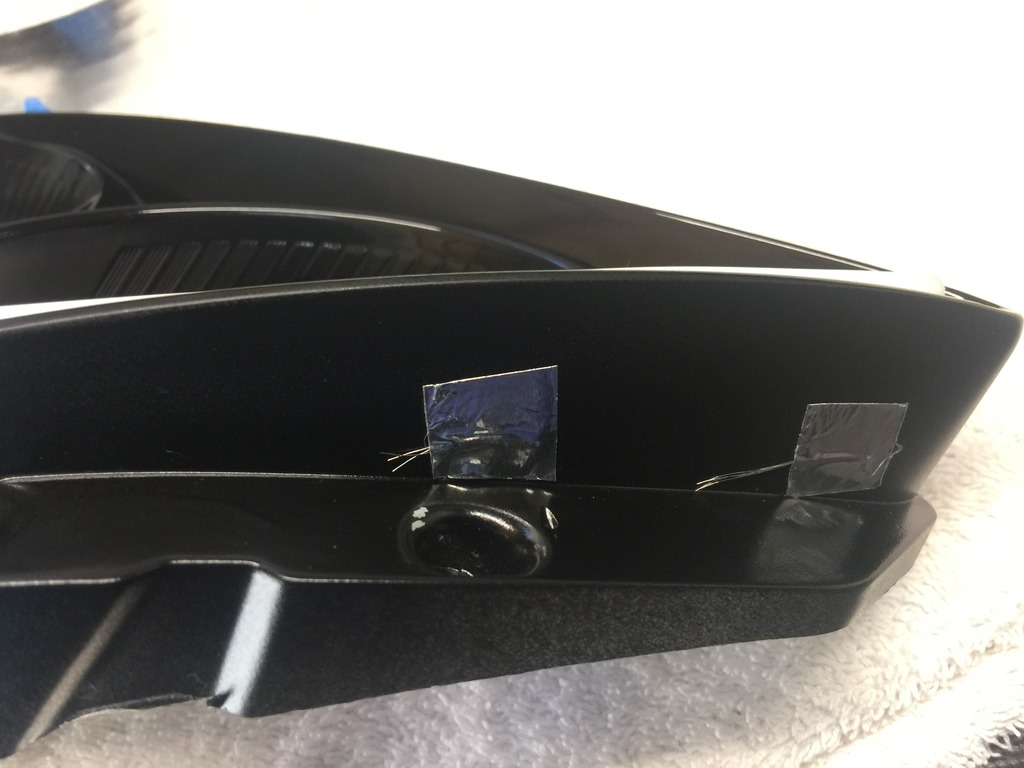
Note, to avoid damaging the SSB light elements I had to thread the anchor wire through the bottom edge of the silicone tube making sure not to penetrate the foil strip that powers the micro LEDs.
Sequential Switchback Strips
************************************************** ********************
It took me forever to work out how and where to cut to place the switchback tube. Inside the tube is a pair of foil metal strips with white LEDs on one and yellow on the other (Back to back). This is inserted in a soft flexible silicone tube. It is super slick silicone so you can pretty much forget about securing it with glue. I used micro nicrome wire. As I did with the projector halo.
I mitered the lower edge where it meets the front bottom of the inner housing, and made an access hole there to feed the elements through. This way the hole was small enough to be covered by the silicon tube. Otherwise I would have to either cut the connector off the wire or make the hole bigger to feed the connector through. Since it is inside the sealed headlight I didn't want any unnessary splices.

In order to route the tube along the top edge I did some research and found an installer on instagram notched their shroud near the top rear to transition it as the the lens and the inner housing gets closer to each other. I measured, and guesssed a dozen times before I worked up the courage to drill a hole on the far end, then dremmeled a chanel that same width to make a grove for the SBT. I did this before painting of course.

I also notched the top corner near the d-shaped city light apeture and made some small holes to wire it down along the top edge.


Note, to avoid damaging the SSB light elements I had to thread the anchor wire through the bottom edge of the silicone tube making sure not to penetrate the foil strip that powers the micro LEDs.
The following 3 users liked this post by bikezilla:
#7
************************************************** *
Painting
************************************************** *
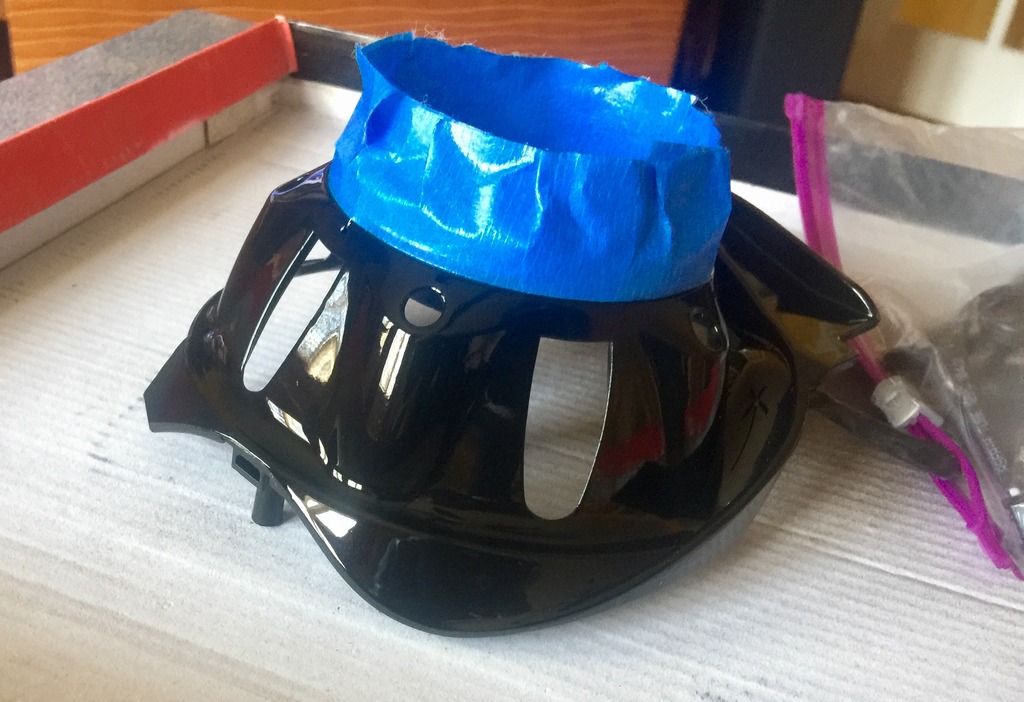
first tried some cheap black Krylon spary paint and didn't like the results even with consumer clear coating. So I bought OEM Malbec Black spray paint and OEM pro-type clear coating from automotivetouchup.com. This stuff is the bomb! the color is truly OEM and the clear is much smoother and nicer than retail stuff. I wet sanded between clear coats. At first I didn't think it necessary but the difference was night and day. And wet sanding only took an extra 5 mins to do.
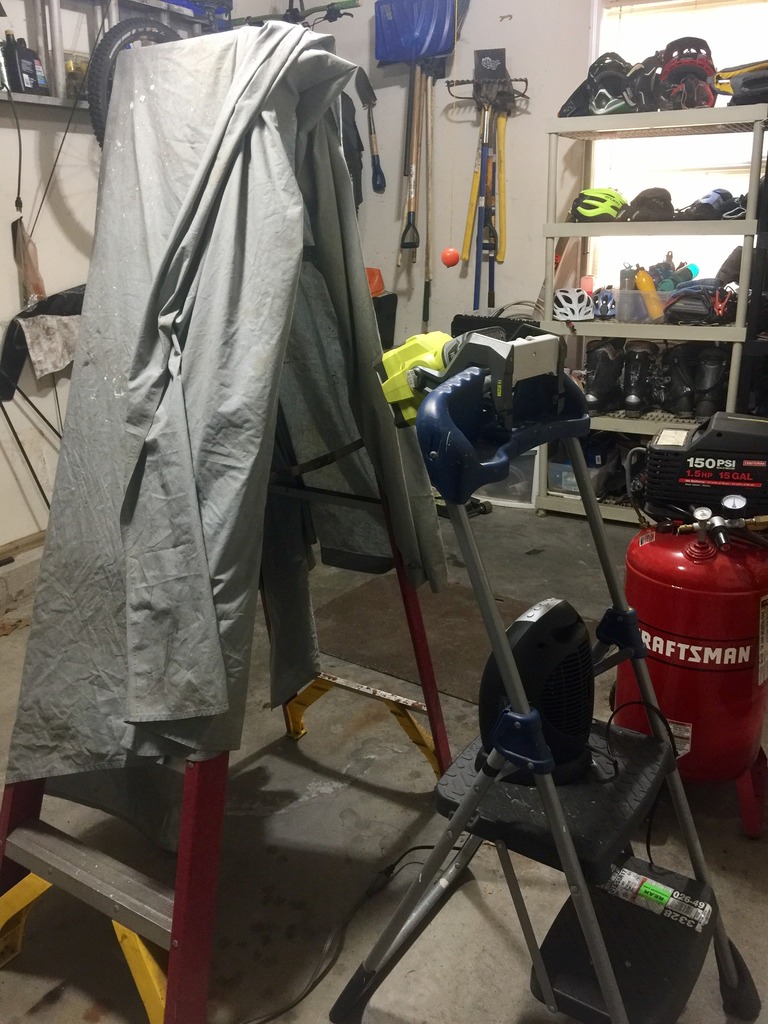
I made a makeshift painting tent on a folding ladder and old sheet and put a space heater and work light on a step ladder to illuminate and heat the space. (it was kind of cold in the garage at the time) I also kept the paint in the house so it was at room tempature when used.
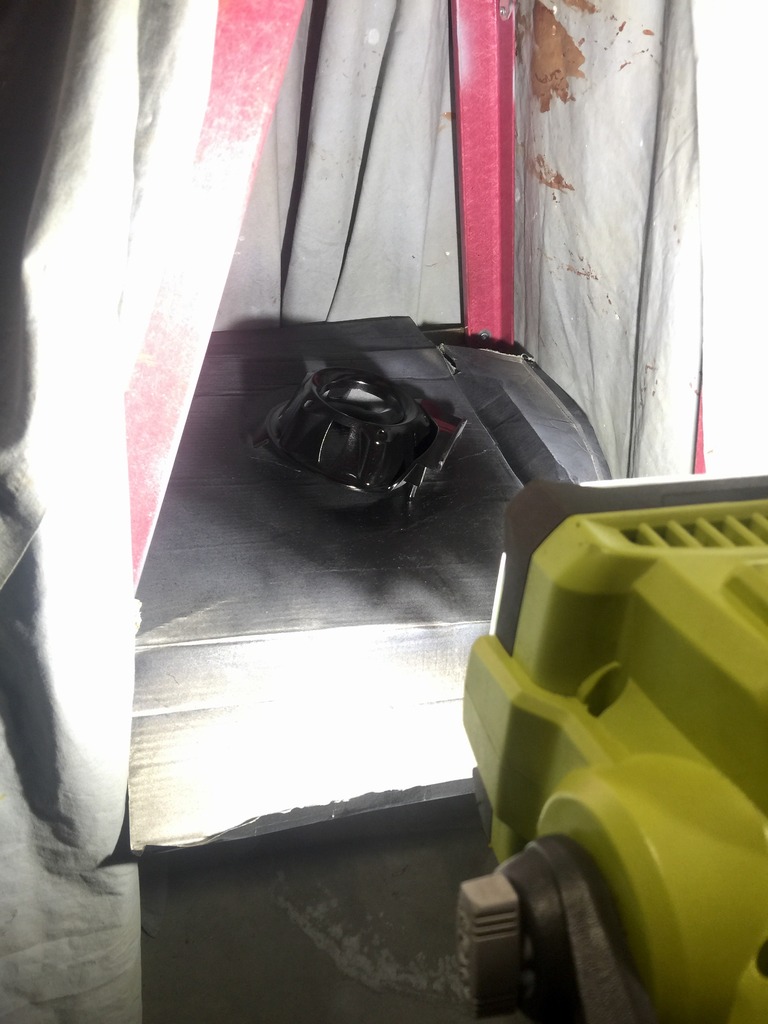
I then scuffed up the chrome projector shroud, and black-chrome inner housing using a green 3m pad. Cleaned it off with compressed air then a micro fiber sprayed with brake cleaner as solvent. Then put on three coats of primer. (I used VHT high tempature primer)
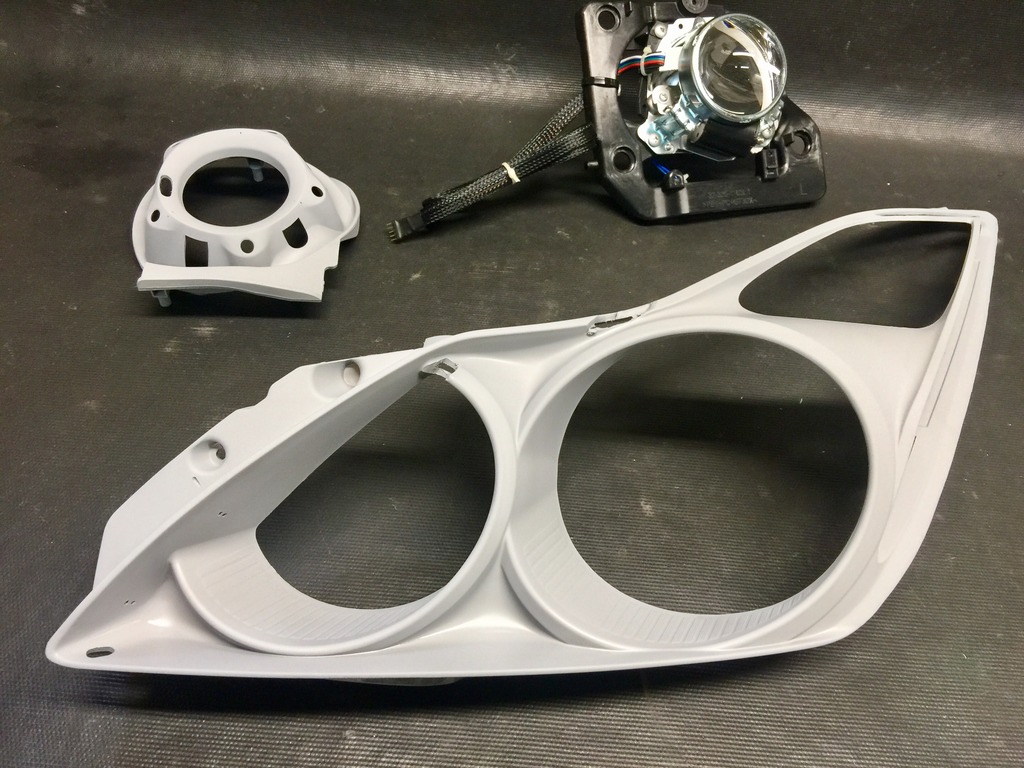
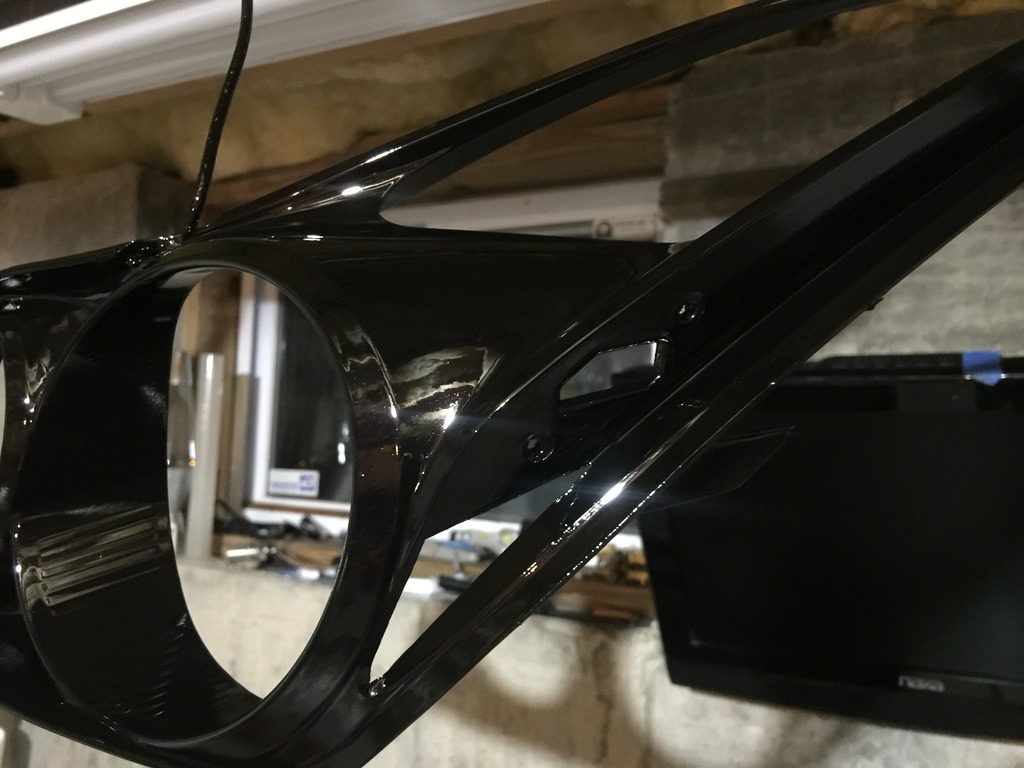
While working I mistakenly laid a contaminated microfiber towel on a cured painted surface and it ruined the finish. Wet sand and re-clearcoat fixed it up nicely. THen I got hot glue stuck on it, and repainted it again.
Then when I baked the first set closed, steam from the damp towel etched the perfect finish and ruined it.
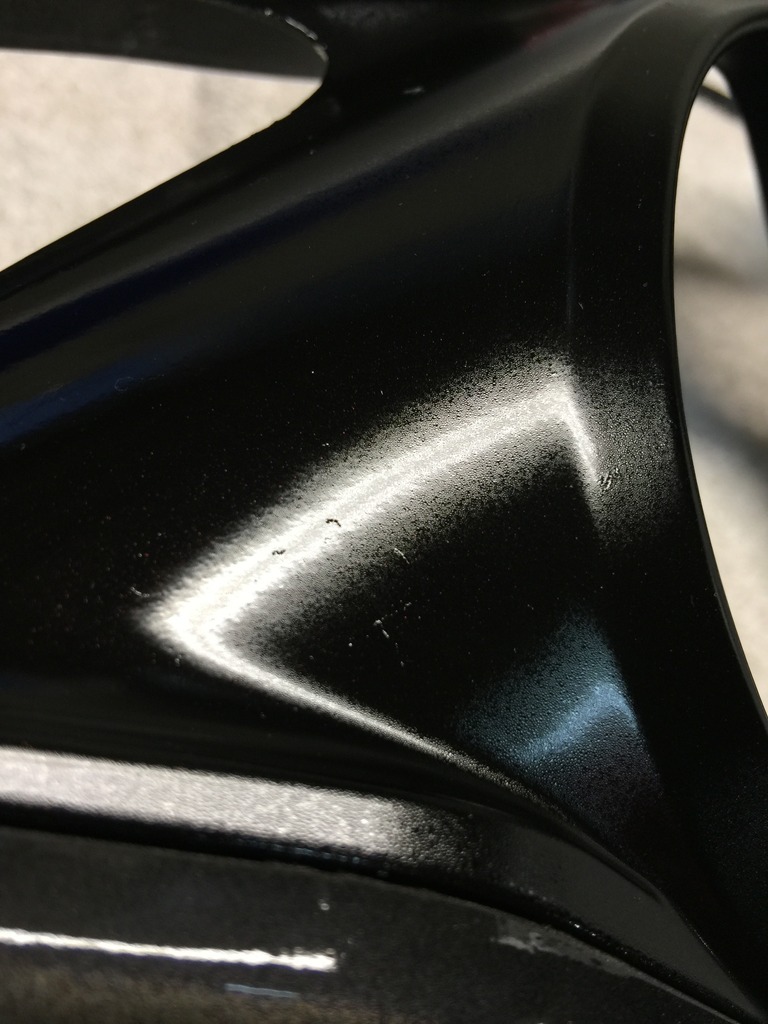
So I reopened it, dismantled, wetsanded and re-re-re-cleared again. So I guess I got pretty good at it.
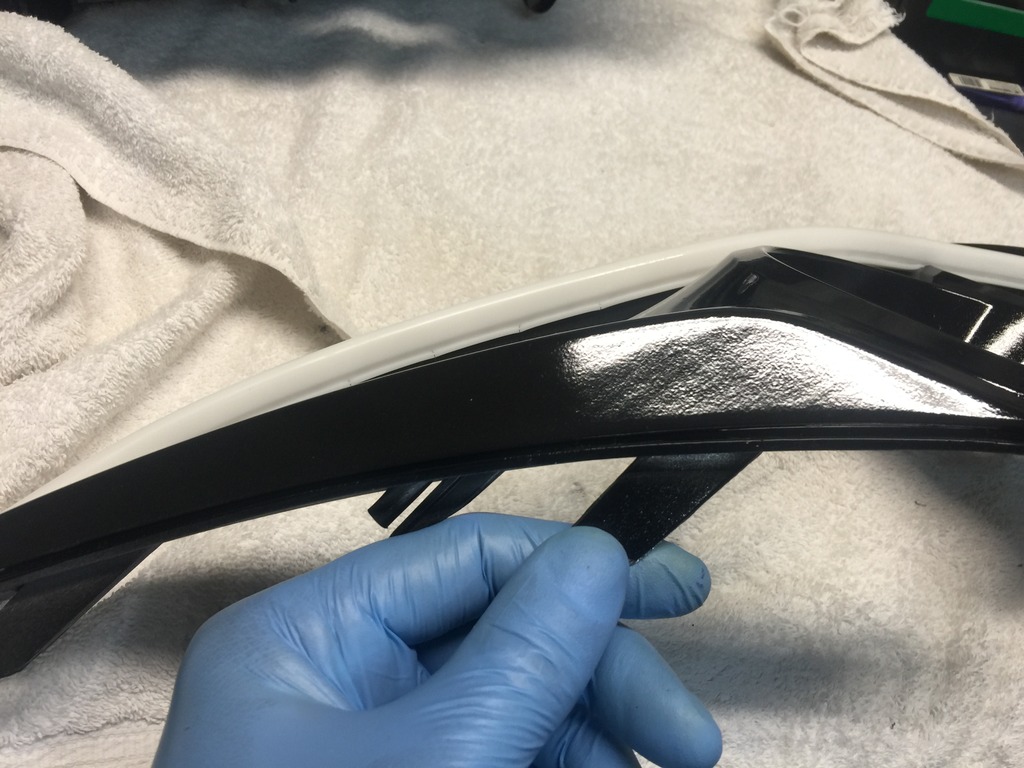
For the amber side reflector, I wasn't satified with it just plain black, so I wrapped it with 3M black reflective tape.
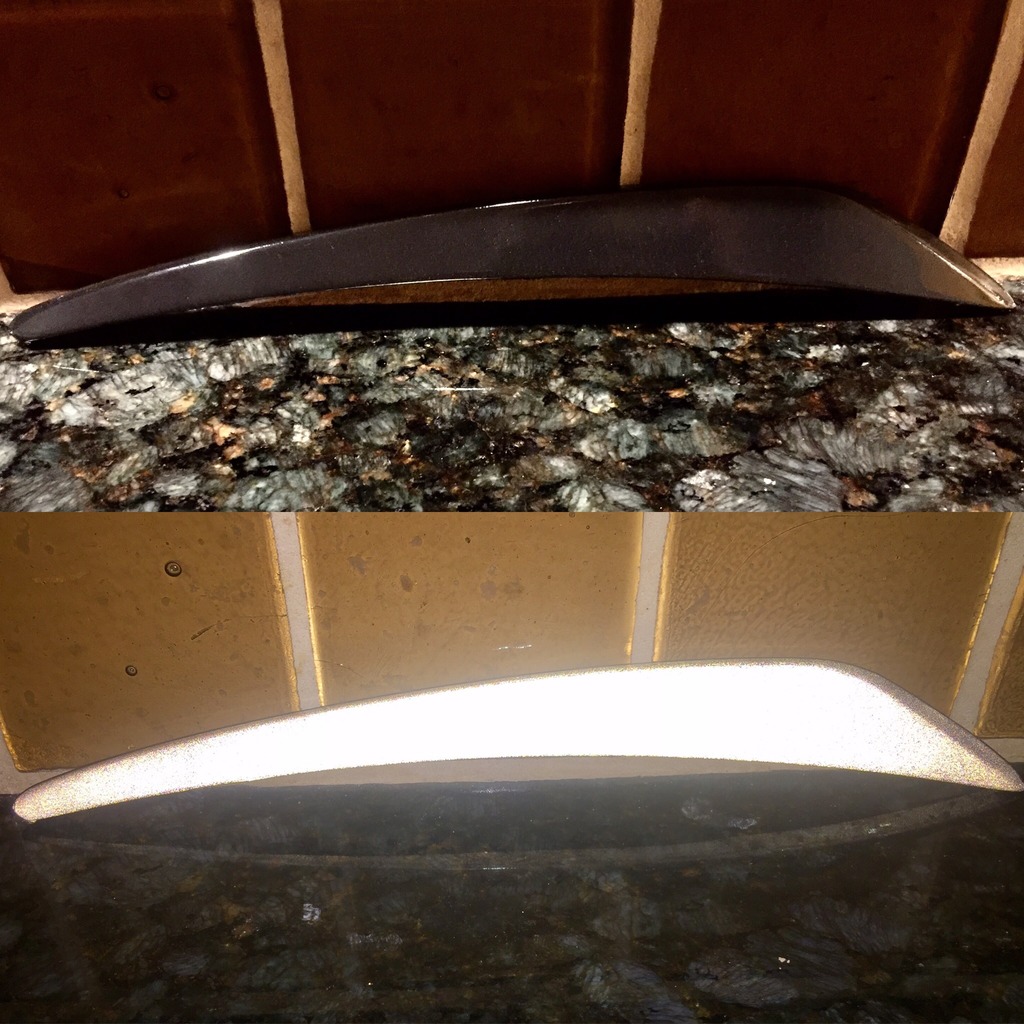
3M Black reflective tape looks black in natural light. Reflects white when hit directly from projected light.
Painting
************************************************** *
first tried some cheap black Krylon spary paint and didn't like the results even with consumer clear coating. So I bought OEM Malbec Black spray paint and OEM pro-type clear coating from automotivetouchup.com. This stuff is the bomb! the color is truly OEM and the clear is much smoother and nicer than retail stuff. I wet sanded between clear coats. At first I didn't think it necessary but the difference was night and day. And wet sanding only took an extra 5 mins to do.
I made a makeshift painting tent on a folding ladder and old sheet and put a space heater and work light on a step ladder to illuminate and heat the space. (it was kind of cold in the garage at the time) I also kept the paint in the house so it was at room tempature when used.


I then scuffed up the chrome projector shroud, and black-chrome inner housing using a green 3m pad. Cleaned it off with compressed air then a micro fiber sprayed with brake cleaner as solvent. Then put on three coats of primer. (I used VHT high tempature primer)


While working I mistakenly laid a contaminated microfiber towel on a cured painted surface and it ruined the finish. Wet sand and re-clearcoat fixed it up nicely. THen I got hot glue stuck on it, and repainted it again.
Then when I baked the first set closed, steam from the damp towel etched the perfect finish and ruined it.

So I reopened it, dismantled, wetsanded and re-re-re-cleared again. So I guess I got pretty good at it.

For the amber side reflector, I wasn't satified with it just plain black, so I wrapped it with 3M black reflective tape.

3M Black reflective tape looks black in natural light. Reflects white when hit directly from projected light.

The following 4 users liked this post by bikezilla:
Trending Topics
#8
************************************************** ****************
Harness exit
************************************************** ****************
There is one group of wires for the demon eye, one for the 80mm halo, one for the 110mm halo and one for the SSB tube. each group has 3 or more wires. that's a lot.
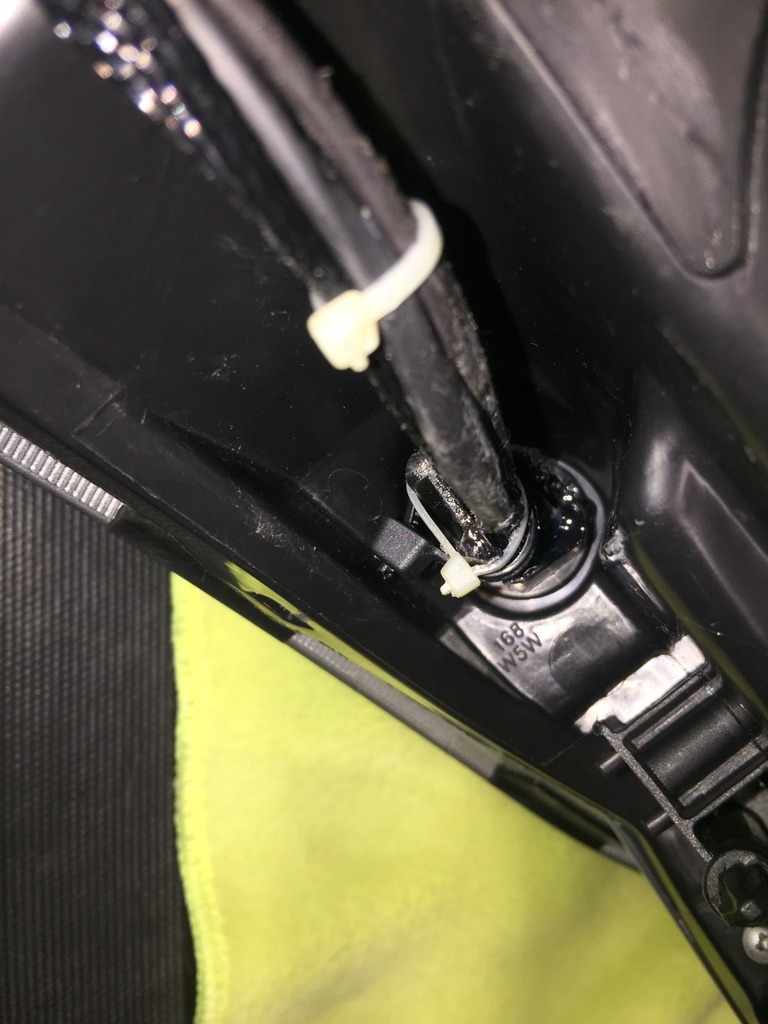
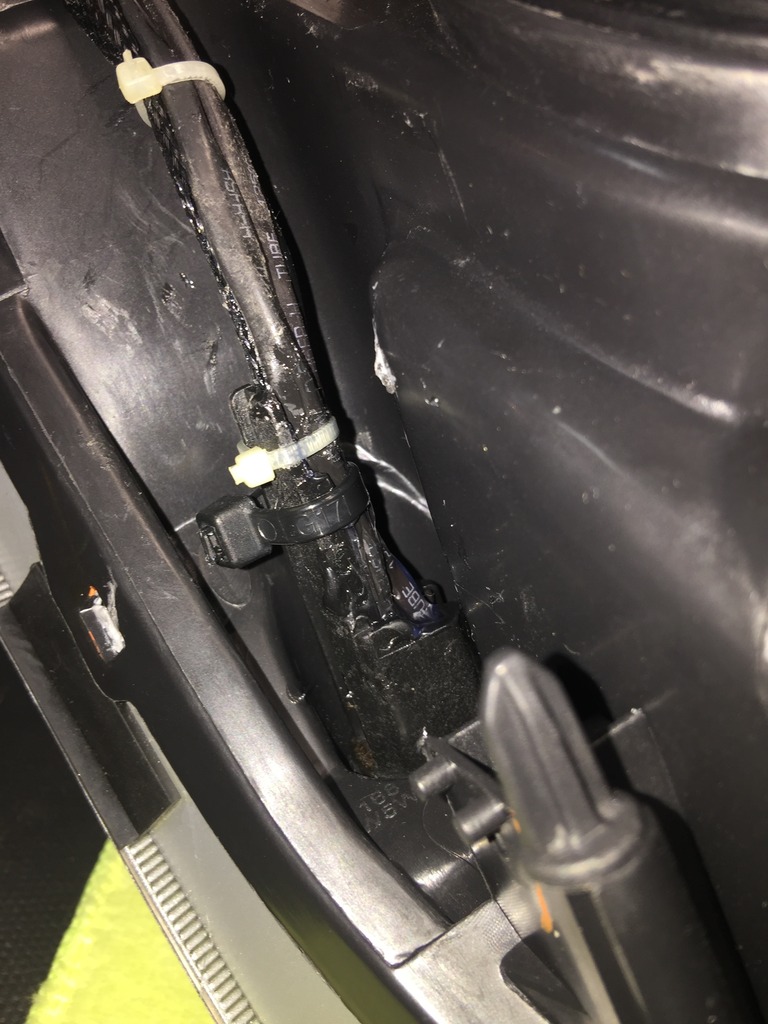
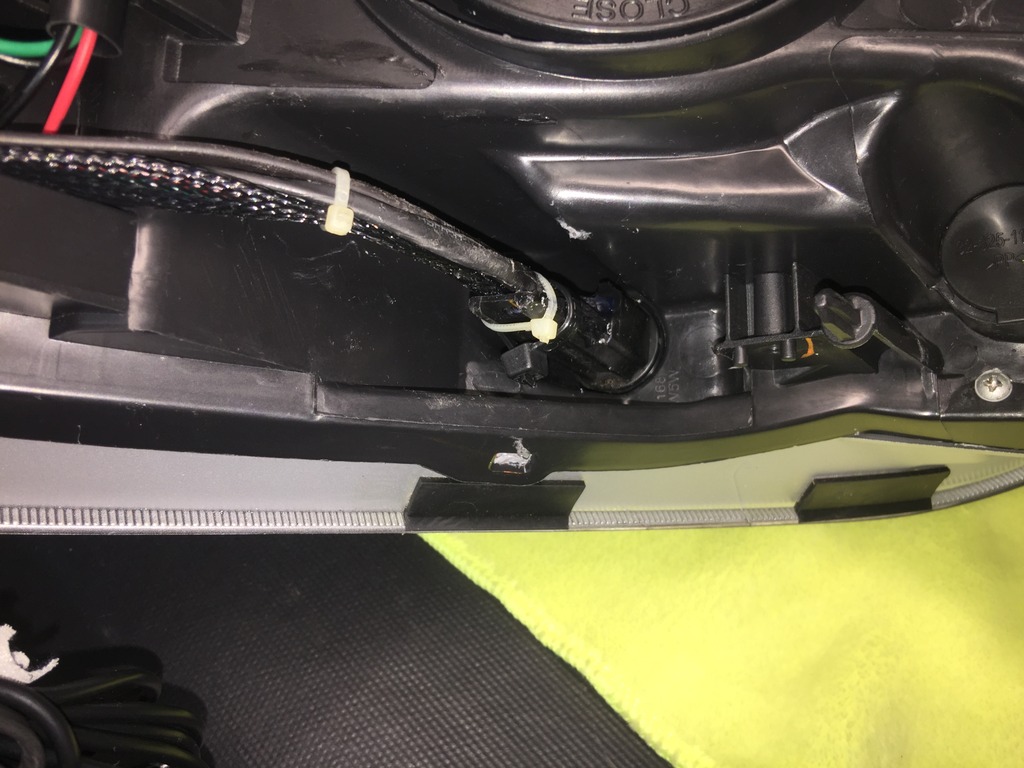
Since I blacked out the amber side reflector, the small sidemarker light was no longer needed. So what I did was clip the light socket wire, and drill out the twist-in plug interface, and notch it. I threaded the rubber o-ring onthe wires and layed the wires down with clear silicone cauking between the wires in the notch. Added more silicone on the outside, and ziptied it to the twist plug tang. This created a reuseable waterproof interface.


The following 3 users liked this post by bikezilla:
#9
************************************************** ****************
Main wiring
************************************************** ****************
Wiring up was a lot of work as well.
I ran the two halos, DE and SSBT from the passenger side to the driver's side and bundled and connected the harnesses, converters, and drivers in the space above the driver side fog lamp. The passenger side has a washer resivoir so this side was better go collect all the gear.
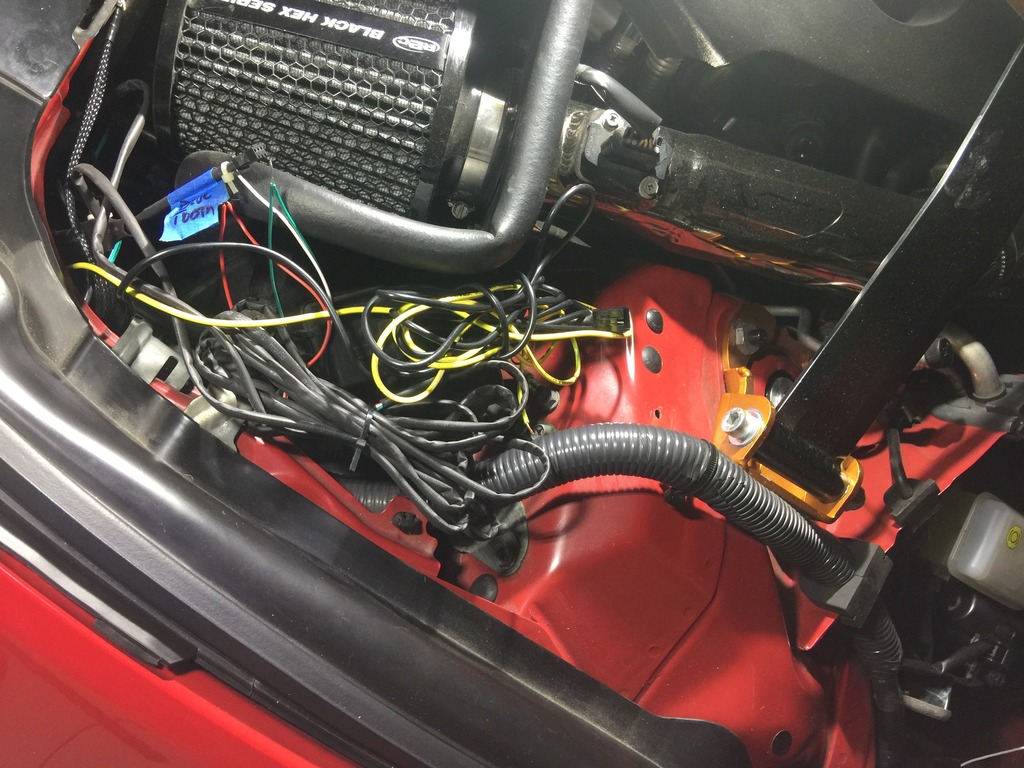
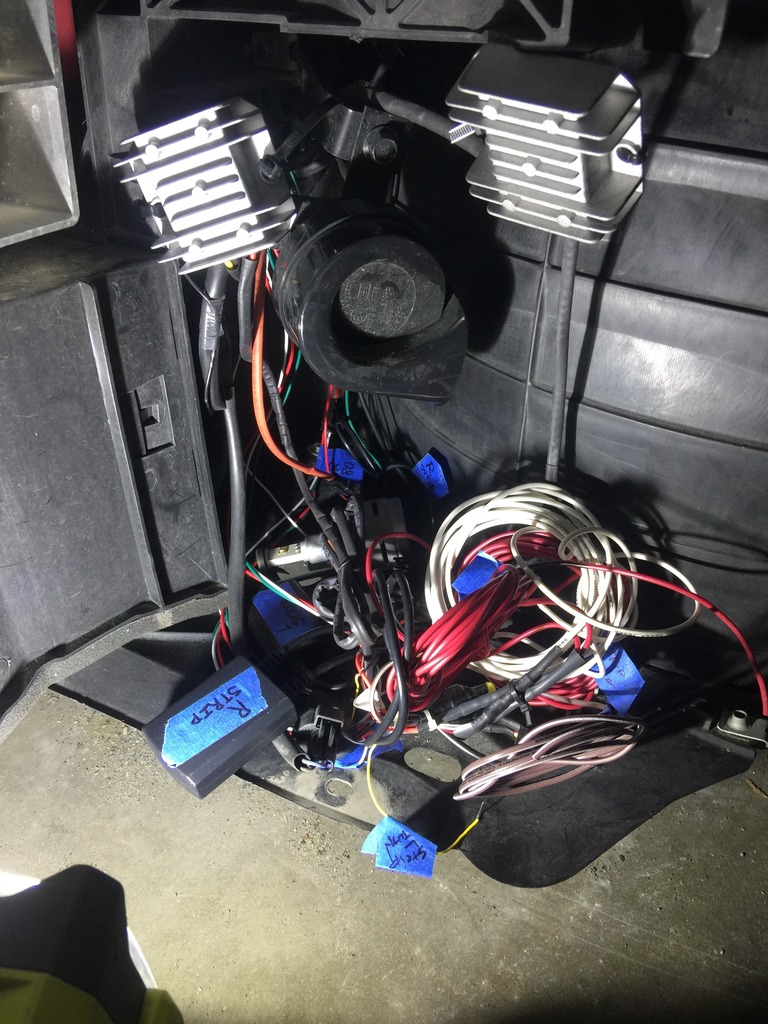
I taped all the connectors just to be sure and zip tied all the loose bundles.
Also I had intended to enter the cabin on the driver's side with the wires for the bluetooth controllers and power taps, but it's virtually impossible to snake a wire through the main driver side harness boot beneath the power brake gear. The wire bundle in the boot is too thick and the angle into the cabin is too tight.
So I routed the wires inside the upper fender, across the power brake compartment, under the windshield cowl, and into the harness boot on the passenger side.
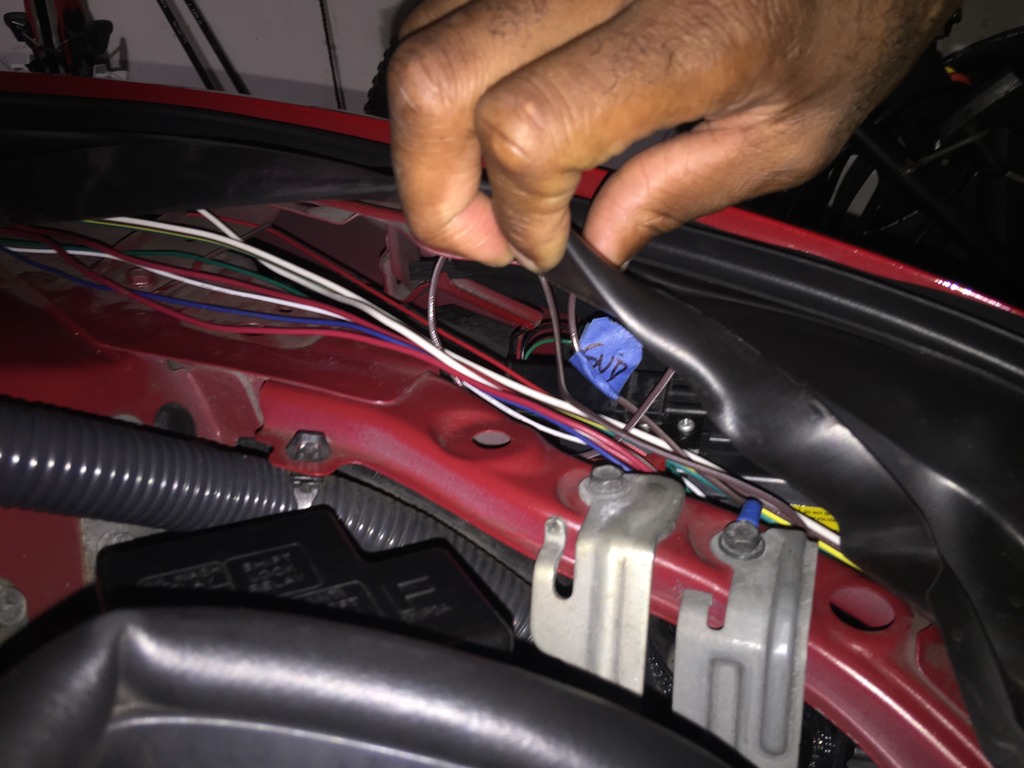
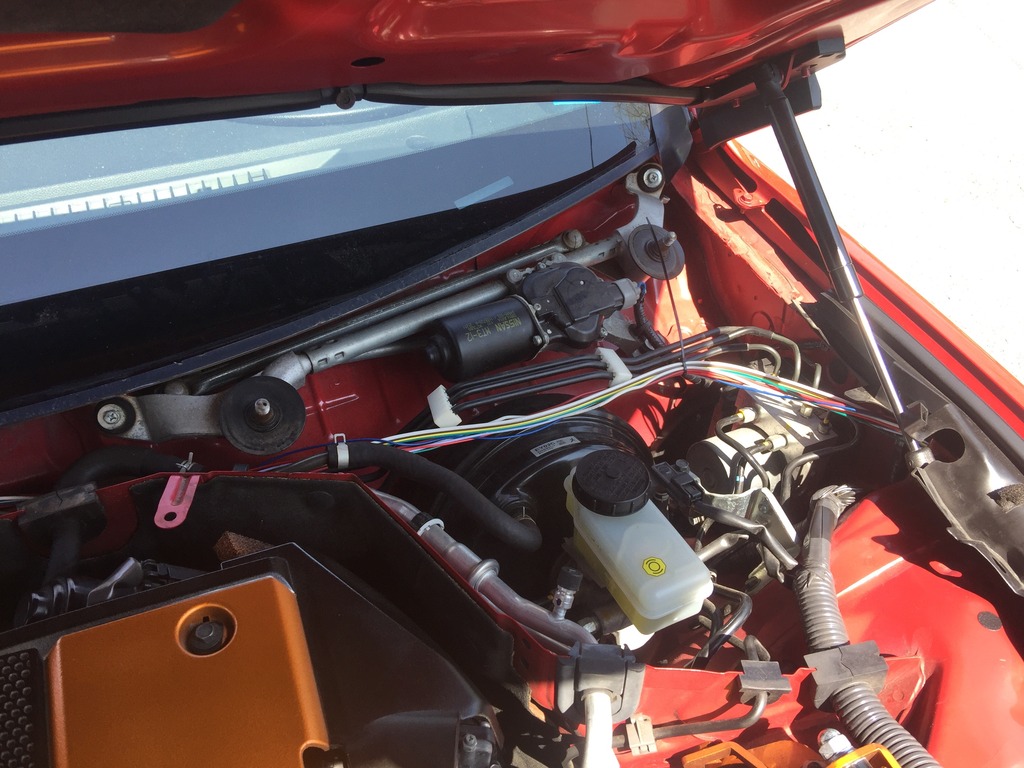
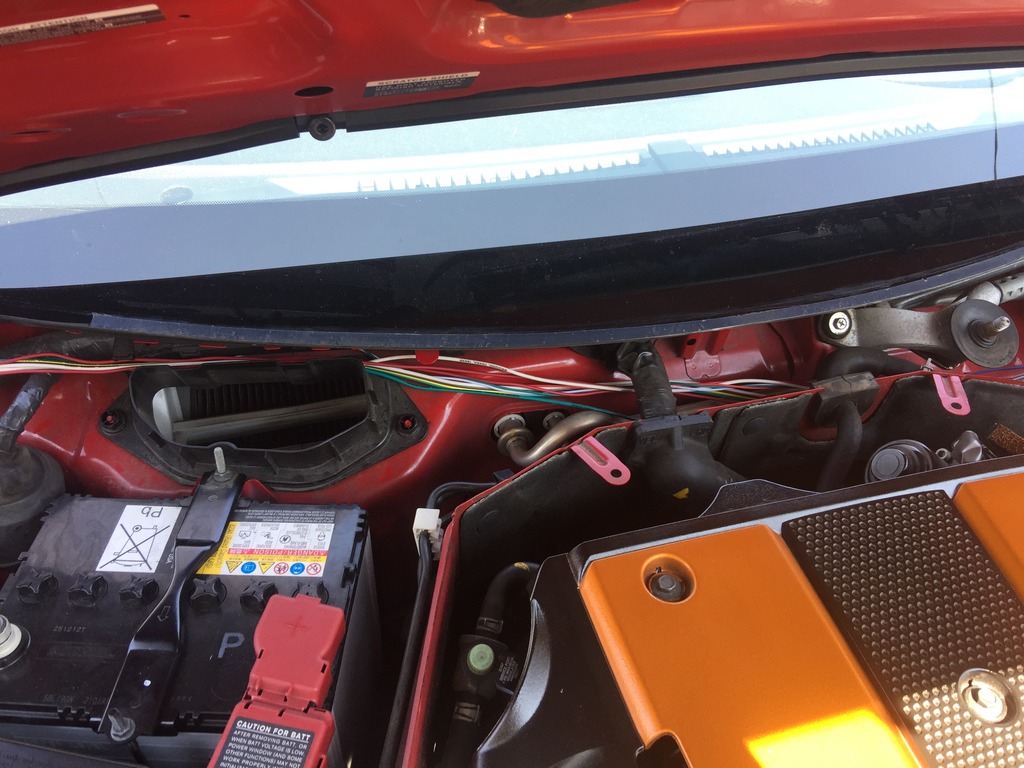
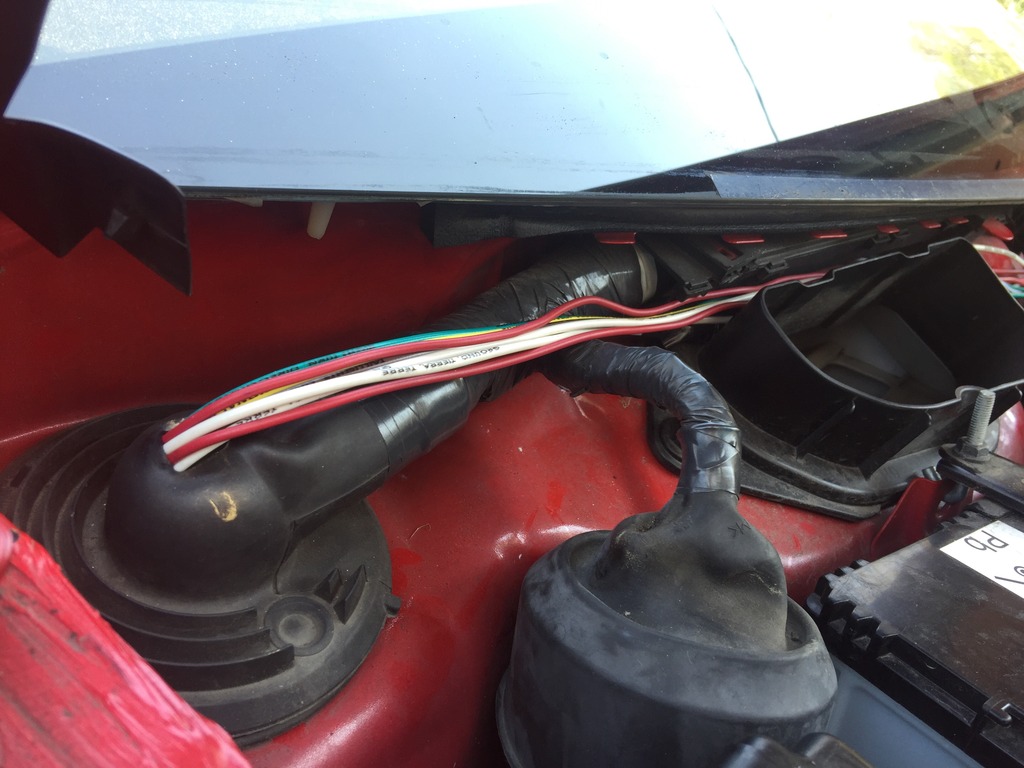
This left the control and power wires behind the glove box, I secured and connected the bluetooth controllers there, and ran the power lines across through a gap behind the cener console, underneath the steering column and into the fuse panel. I used micro fuse taps. one for always on to drive the SSBT so it can function as a hazard signal even when the car is off. And one for Acc-on power to feed the halos and DEs only when the acc or ign is on.
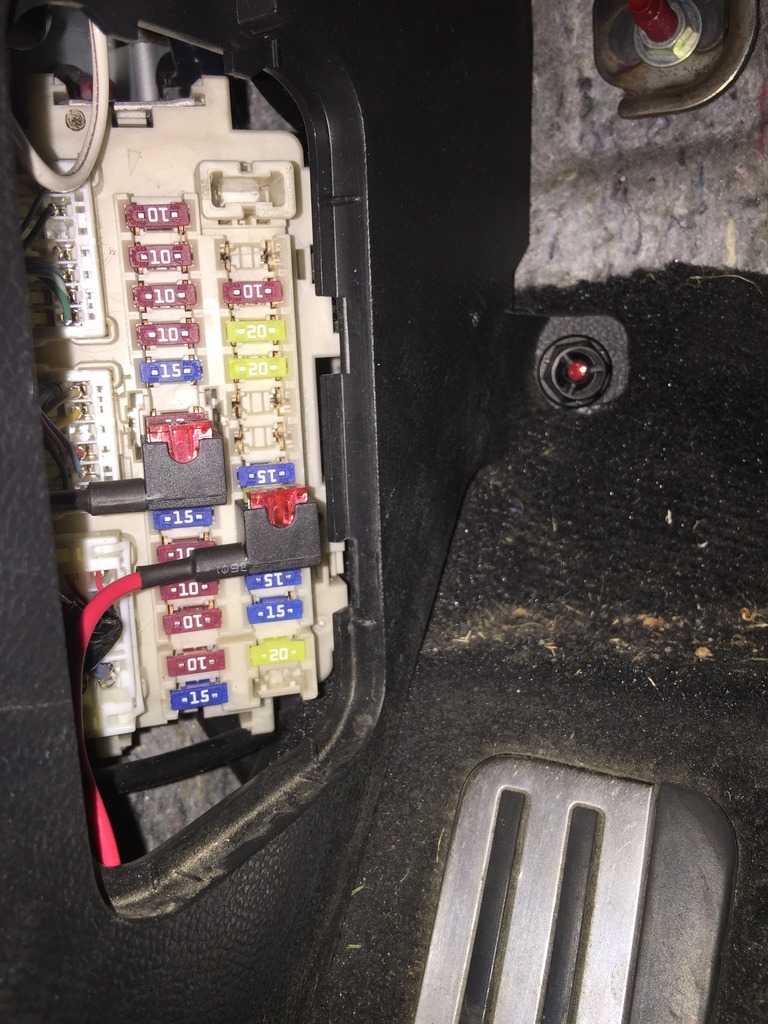
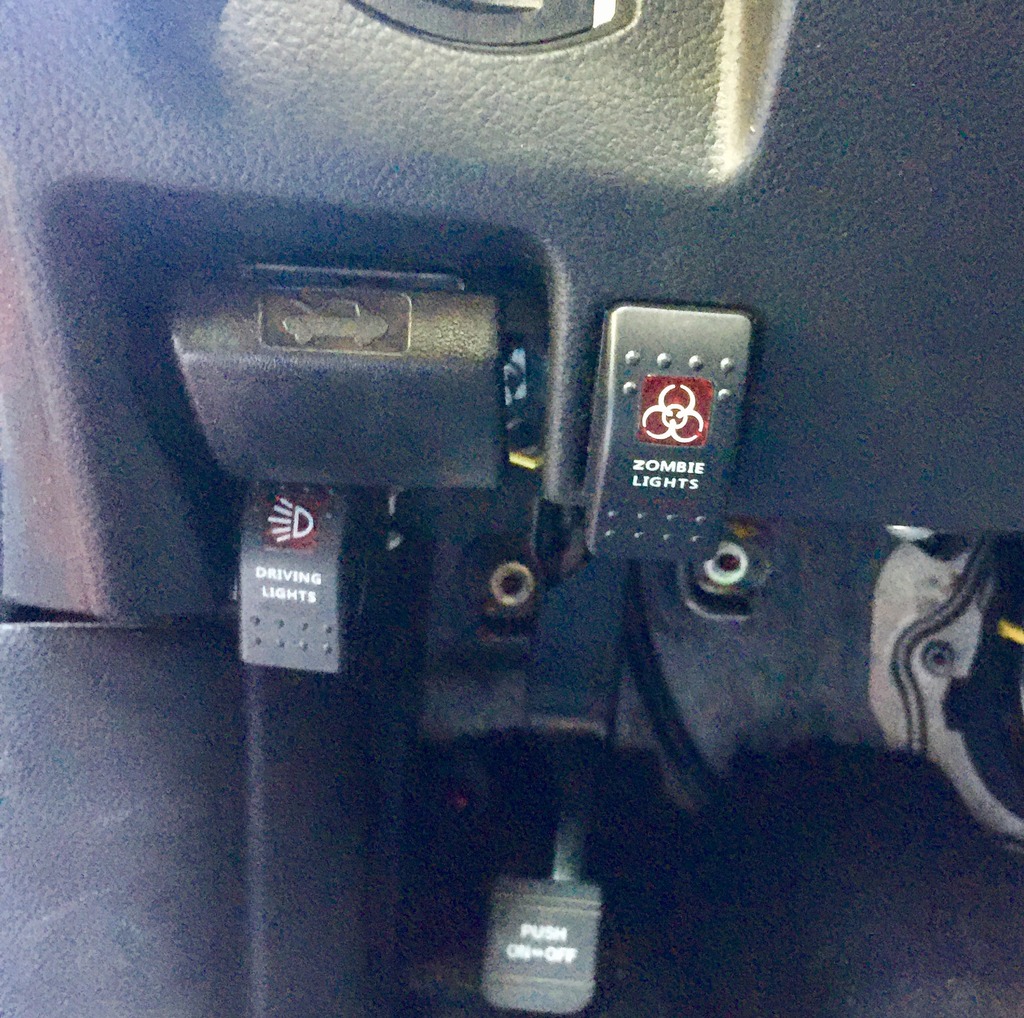
I also added one switches to each so I can disable the white SSB drl function at night and I can disable the halos and DEs' during the day. Having a quick kill on the halos removes the worry about remembering to use the bluetooth app to turn the halos off. It's not recommended have the halos on with the headlights (probabably because of the projector heat) and I don't want to wonder if I took off a flashing color mode that could get me pulled over.
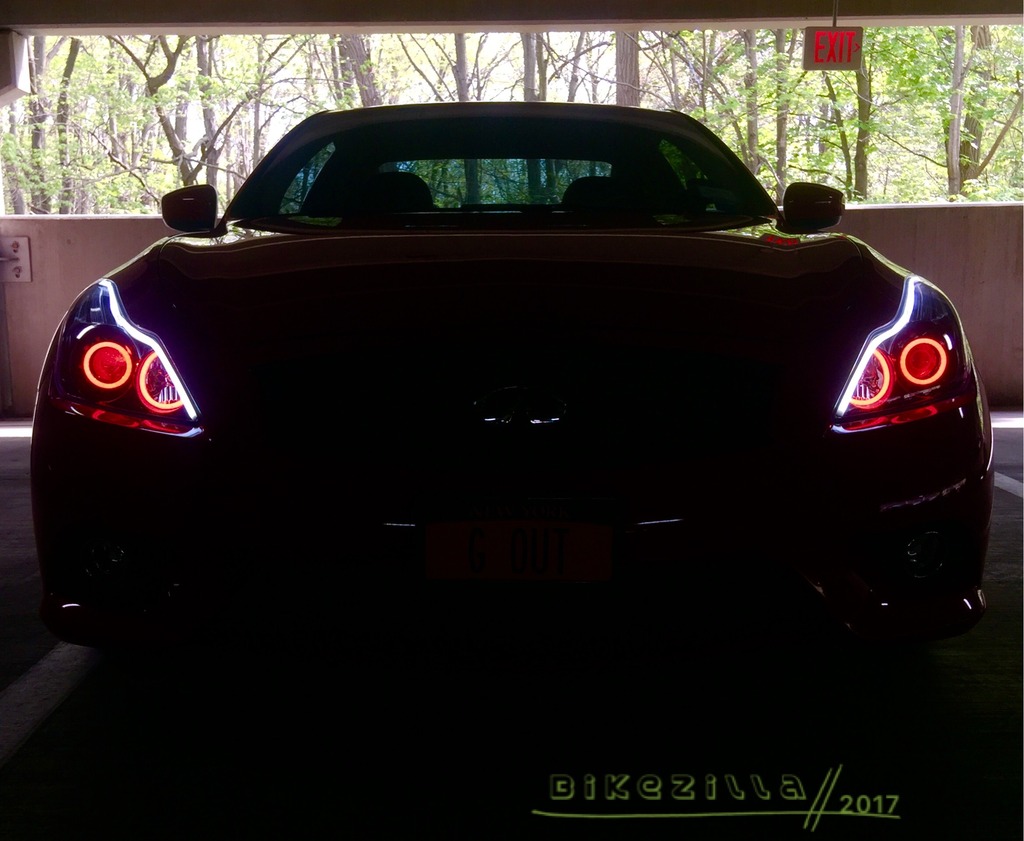
I do sometimes drive with the halos on in solid white mode.
Fins.
Main wiring
************************************************** ****************
Wiring up was a lot of work as well.
I ran the two halos, DE and SSBT from the passenger side to the driver's side and bundled and connected the harnesses, converters, and drivers in the space above the driver side fog lamp. The passenger side has a washer resivoir so this side was better go collect all the gear.


I taped all the connectors just to be sure and zip tied all the loose bundles.
Also I had intended to enter the cabin on the driver's side with the wires for the bluetooth controllers and power taps, but it's virtually impossible to snake a wire through the main driver side harness boot beneath the power brake gear. The wire bundle in the boot is too thick and the angle into the cabin is too tight.
So I routed the wires inside the upper fender, across the power brake compartment, under the windshield cowl, and into the harness boot on the passenger side.


This left the control and power wires behind the glove box, I secured and connected the bluetooth controllers there, and ran the power lines across through a gap behind the cener console, underneath the steering column and into the fuse panel. I used micro fuse taps. one for always on to drive the SSBT so it can function as a hazard signal even when the car is off. And one for Acc-on power to feed the halos and DEs only when the acc or ign is on.

I also added one switches to each so I can disable the white SSB drl function at night and I can disable the halos and DEs' during the day. Having a quick kill on the halos removes the worry about remembering to use the bluetooth app to turn the halos off. It's not recommended have the halos on with the headlights (probabably because of the projector heat) and I don't want to wonder if I took off a flashing color mode that could get me pulled over.

I do sometimes drive with the halos on in solid white mode.
Fins.


The following 5 users liked this post by bikezilla:
blnewt (05-26-2017),
Daddy Fat Sacs (05-26-2017),
Kanwal (02-19-2019),
Quiver (05-26-2017),
SkysG37 (10-14-2019)
#10
Registered Member
iTrader: (15)
Wow just read through all of this. First great write up and thank you for taking the time to take pics and document this out! I'm actually tackling my headlights this weekend and it gave me a few extra tips with mounting. 
Just a couple questions, what grit did you sand with chrome with and what grit did you do the wet sanding with?
Lastly do you have any pics close up of the shrouds in the sunlight? I want to see how well the Malbec turned out, thanks!

Just a couple questions, what grit did you sand with chrome with and what grit did you do the wet sanding with?
Lastly do you have any pics close up of the shrouds in the sunlight? I want to see how well the Malbec turned out, thanks!
The following users liked this post:
Quiver (05-26-2017)
#12
This thread was perfect timing, I'm planning on doing my headlights very soon so this was awesome. Do you have the link for the ebay headlights? So you would recommend I not mess with my OEM pair? Would my car lose significant value for a halo mod?
#13
Wow just read through all of this. First great write up and thank you for taking the time to take pics and document this out! I'm actually tackling my headlights this weekend and it gave me a few extra tips with mounting. 
Just a couple questions, what grit did you sand with chrome with and what grit did you do the wet sanding with?
Lastly do you have any pics close up of the shrouds in the sunlight? I want to see how well the Malbec turned out, thanks!

Just a couple questions, what grit did you sand with chrome with and what grit did you do the wet sanding with?
Lastly do you have any pics close up of the shrouds in the sunlight? I want to see how well the Malbec turned out, thanks!
Thanks Sacs!
to scuff up the chrome I used basic green scotchbrite pads. I didn't try to remove the chrome just scuff it enough to provide a good bonding surface for the primer.
I used 600 grit 3M wet sanding paper between clear coats.
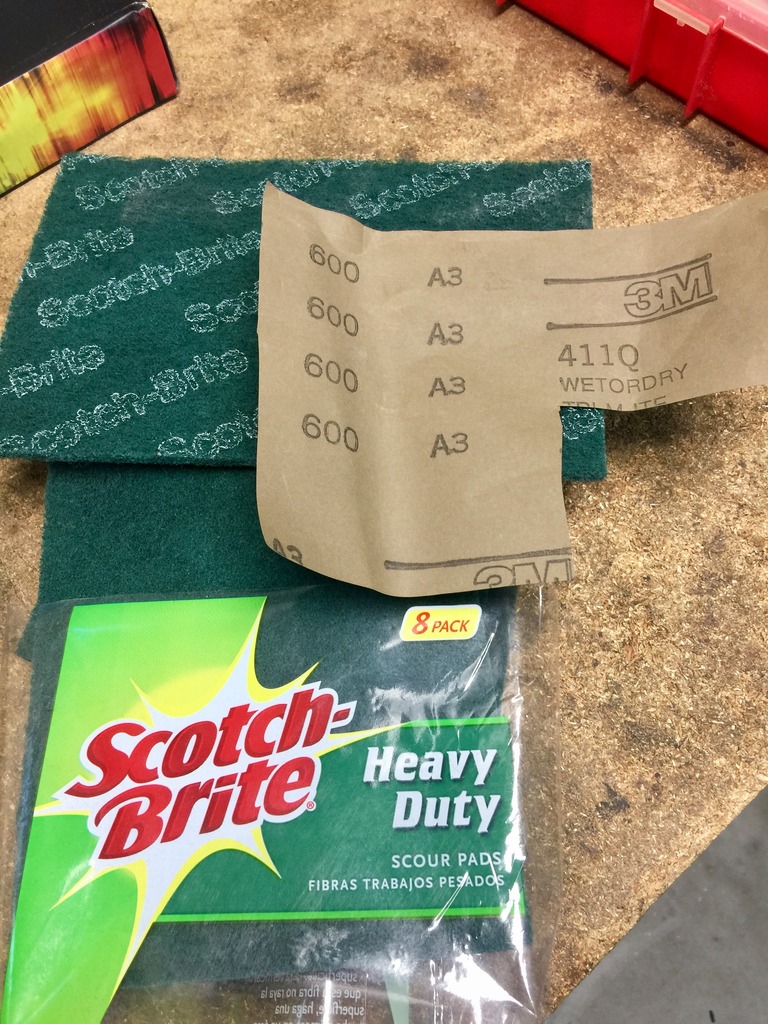
The paint instructions recommend wet sanding between the color coats and not between clear. I was resistant to wetsanding until I needed to fix some mistakes. Then I realized how easy and effective it was. Wetsanding between clear coats worked out very nicely for me, despite the vendor's recommendations. No harm in following their advice though.
Another helpful thing to have handy was a lawnmower battery and a 10-pack of alligator clip test leads. The battery was only like $19 from Walmart and the leads were $7 from Radioshack. (I'm sure you can find them somewhere else now)
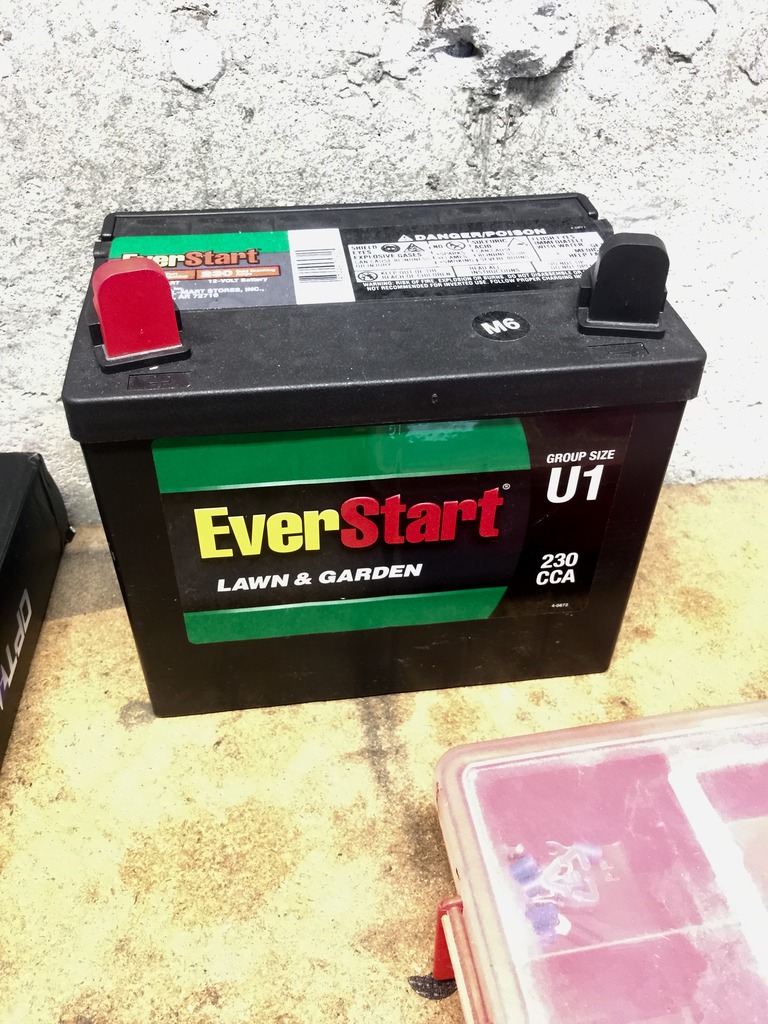
Having that inexpensive battery and test leads made it very easy and quick to test the halos before during and after installation, and to play with it.

I'll have to work on some closeup shots of the shrouds and inner housing. The reflections and UV properties of the lens make it hard to photograph the metallic flake in the Malbec black.
Last edited by bikezilla; 05-26-2017 at 06:04 PM.
The following users liked this post:
Daddy Fat Sacs (05-26-2017)
#15

Looking back, I paid $750 for the pair. Try searching for
"Depo 325-1103L-Ashn2 325-1103R-Ashn2 Replacement Pair Headlight For Infiniti G37"
Or elements of this on both ebay and google. The best price I see right now is $800/pair but keep looking, I've seen it drop to $700. Just be careful to inspect the pictures and descriptions to ensure they are Depos and not something else.
As far as value for for your car, the moment you mod your headlights their resale value is limited to a narrow band of enthusiasts. Trade-in or resale of the car will be affected by modded headlights regardless of the brand. So I figured I might as well mod some OE-Rs and save my OEMs for when (if) I return the car to stock for resale.
Oh and if anyone is considering buying Starry Night components, they're having a Memorial Day sale right now. They often have discount sales on major holidays.


