
DIY: Headlight restoration


Thread Starter
Registered Member
iTrader: (1)
Joined: Nov 2011
Posts: 1,397
Likes: 245
From: Happiest Place on Earth
Wet sand in one direction. Then the opposite direction with the next finer grit. Very important to always keep it wet and rinse away grit periodically.
g/l


Hmmm.
Any update on how well the lights are holding up?
I don't have much oxidation yet, but there are lots of hairline scratches so I'm not sure if I should start grinding away with sandpaper?
Anyone try spraying clear after finished to avoid having to reapply sealant?
Any update on how well the lights are holding up?
I don't have much oxidation yet, but there are lots of hairline scratches so I'm not sure if I should start grinding away with sandpaper?
Anyone try spraying clear after finished to avoid having to reapply sealant?
BTW, those cracks, here's a thread on those, might be worth a trip to your dealer

Headlight Spider Cracks b/c Vinyl Overlay? - G35Driver

Registered Member
Joined: Feb 2013
Posts: 458
Likes: 6
Hmmm.
Any update on how well the lights are holding up?
I don't have much oxidation yet, but there are lots of hairline scratches so I'm not sure if I should start grinding away with sandpaper?
Anyone try spraying clear after finished to avoid having to reapply sealant?
Any update on how well the lights are holding up?
I don't have much oxidation yet, but there are lots of hairline scratches so I'm not sure if I should start grinding away with sandpaper?
Anyone try spraying clear after finished to avoid having to reapply sealant?
I was thinking of trying these
Headlight Film Covers | Lamin-x Protective Films


Thread Starter
Registered Member
iTrader: (1)
Joined: Nov 2011
Posts: 1,397
Likes: 245
From: Happiest Place on Earth

Thread Starter
Registered Member
iTrader: (1)
Joined: Nov 2011
Posts: 1,397
Likes: 245
From: Happiest Place on Earth
wow, I guess I missed this post 
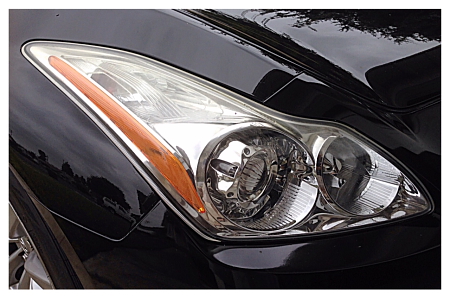
anywho, here is a picture I took this morning with my cell phone.
The lights still look pretty good, not as sharp as they looked when I first did the restoration but considering I wash my G and rub on the lens every week I think they are still looking good
anywho, here is a picture I took this morning with my cell phone.
The lights still look pretty good, not as sharp as they looked when I first did the restoration but considering I wash my G and rub on the lens every week I think they are still looking good


Registered Member
Joined: Apr 2019
Posts: 7
Likes: 2
From: Janesville, WI


Thread
Thread Starter
Forum
Replies
Last Post