
DIY: Wrapping Key Fob


Thread Starter
Registered User
iTrader: (6)
Joined: Jul 2011
Posts: 801
Likes: 14
From: Orange County, CA
Wrapping Key Fob
So this is only my second attempt at wrapping. I know I probably did some things that could be done easier. If so, let me know  If it makes it easier for myself and everyone else I'll add it into my steps and remove mine in its place.
I apologize for the quality of the pictures. Cell phone pics are horrible. It's my first DIY so I will hopefully make a better one and not so sloppy if I ever do another
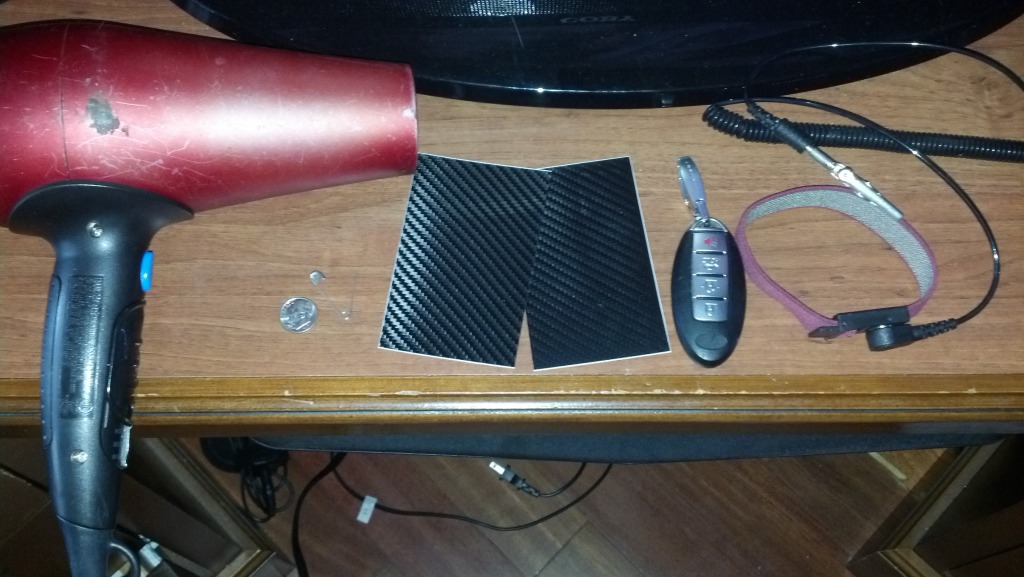
So lets start with Materials
-Scissors
-Wrap style of your choice (for this one I used 3M's 1080 Carbon Fiber)
-Needle
-Pry tool (I used a dime)
-Knife/Razor
-Blow Dryer/Heat Gun
-Grounding Wrist Strap (optional but recommended)
-Adhesive (I used superglue)
(You should get the best materials to make the job easier. I am on vacation and will be using whatever I have in my car/luggage at the time.)
Let me take a moment to talk about the wrap with everyone. I previously purchased my Brushed Titanium wrap from Auto Vinyl Solutions. I then decided I wanted to try others out as well. So I contacted 3M and they gave me a Sample Packed. It is every single on of their 1080 wraps cut into small squares perfect to wrap your keyfob with. Now I urge you to buy their product. I am telling you about their free sample pack because I feel that if you see how easy it is to use that you will want to buy their wrap for other projects you will have in mind. They make a quality product which is hard to find in todays world were everything is focused on mass numbers and cheapest production cost. So order their sample pack for free and play around with their selection of styles (brushed metals are insanely cool looking) but support them if you enjoy their product
Now lets tear your key down into pieces shall we?
Step 1.
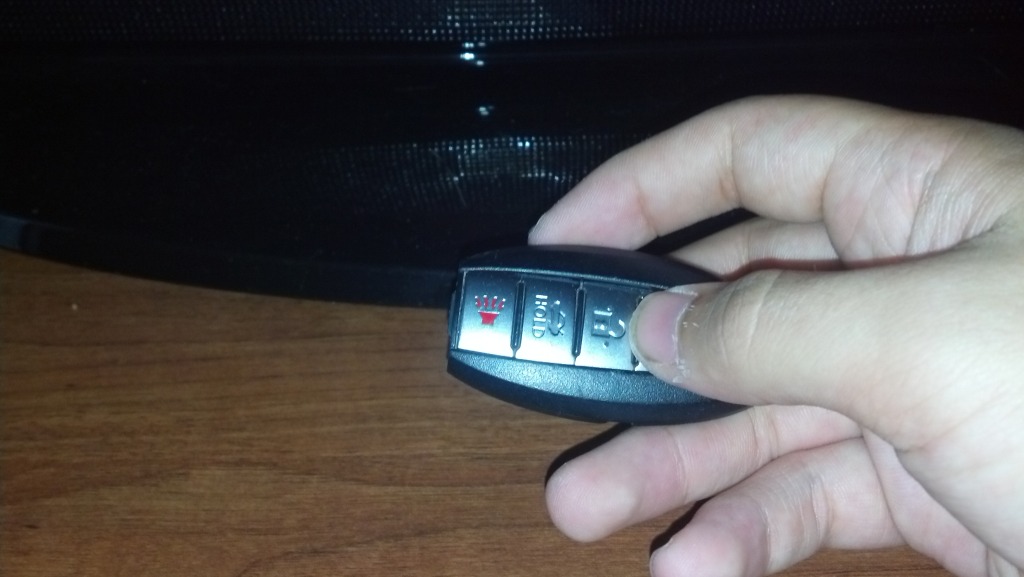
Remove the key (simple enough)
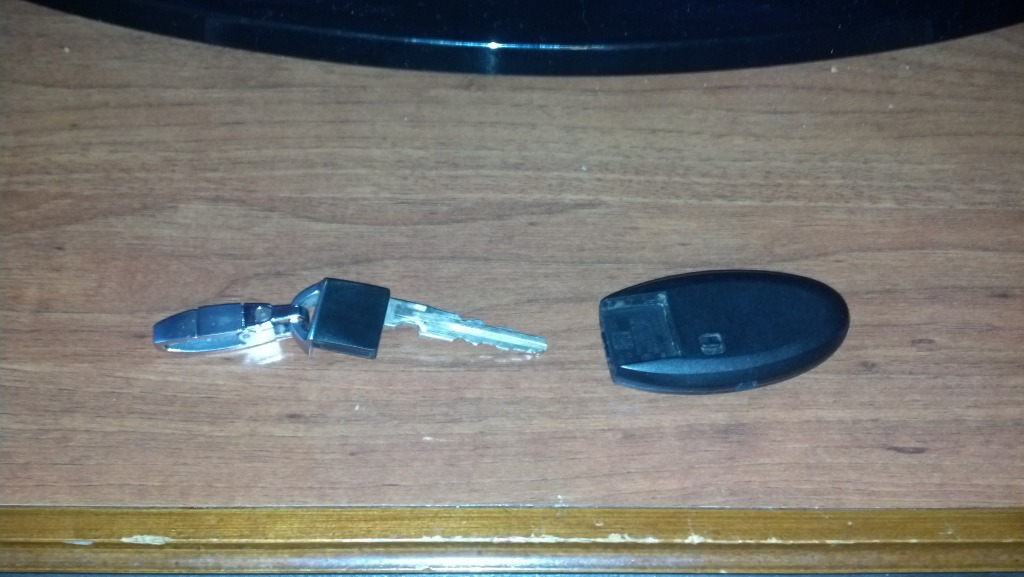
Step 2.
Use your pry tool starting from the top and work your way around (same way you would replace your battery)
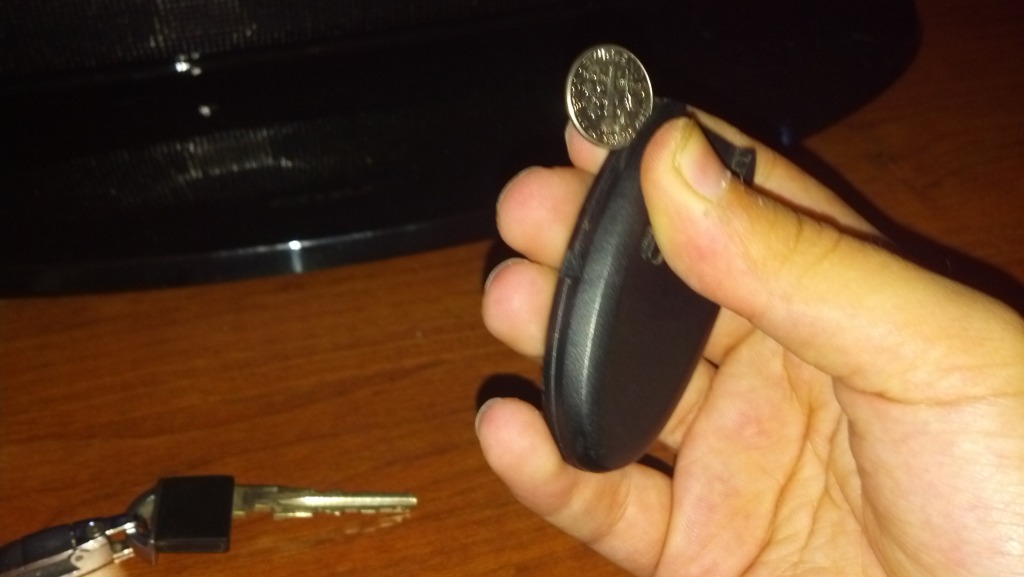
Step 3.
Wear your Grounding wrist strap (Highly recommended so you do not risk frying the board and replacing your key!). LIGHTLY grab onto the prongs that connect your board to the battery and GENTLY lift. I can not stress how gently you must do it enough.
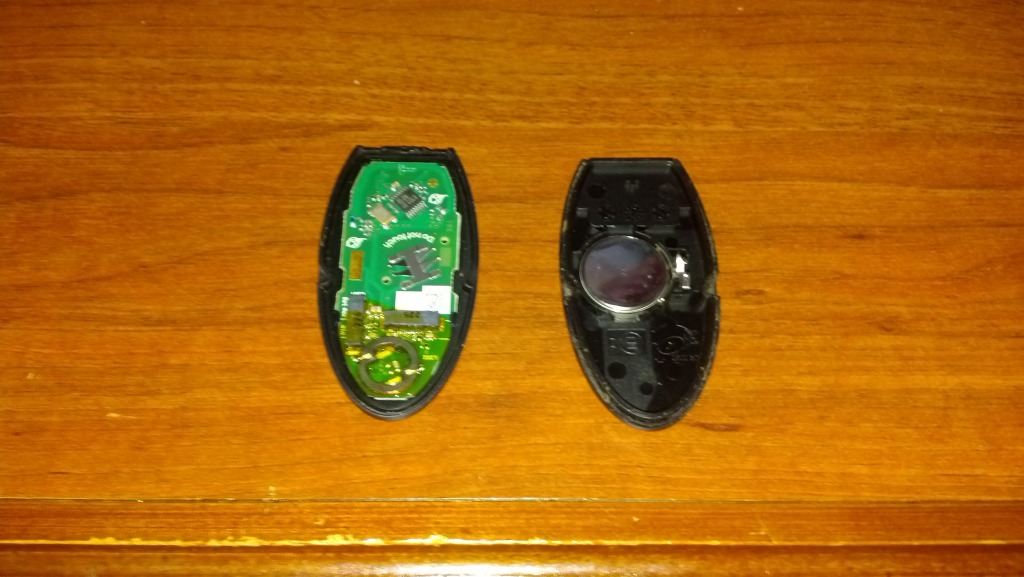
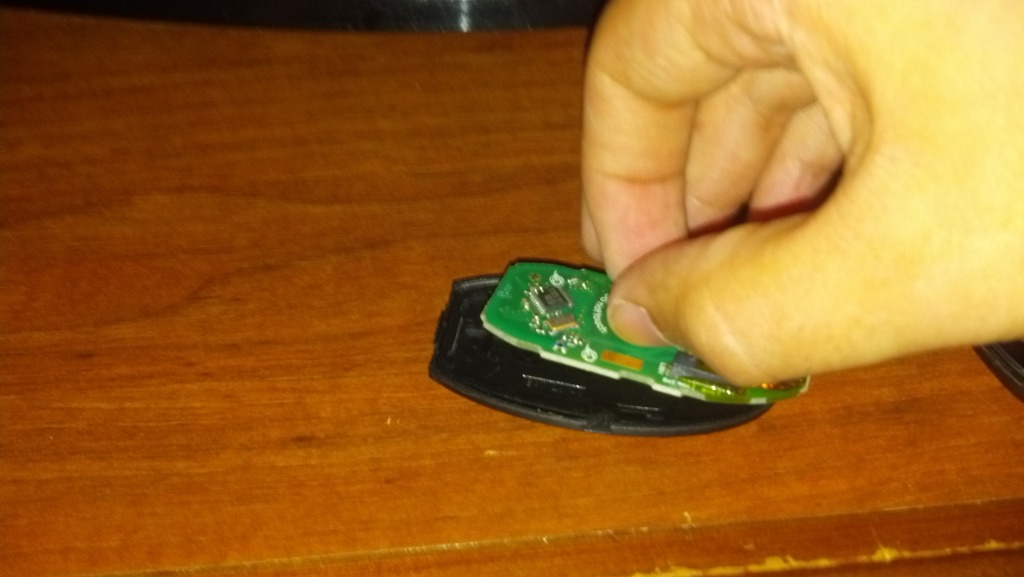
Step 4.
Remove the rubber piece from the key
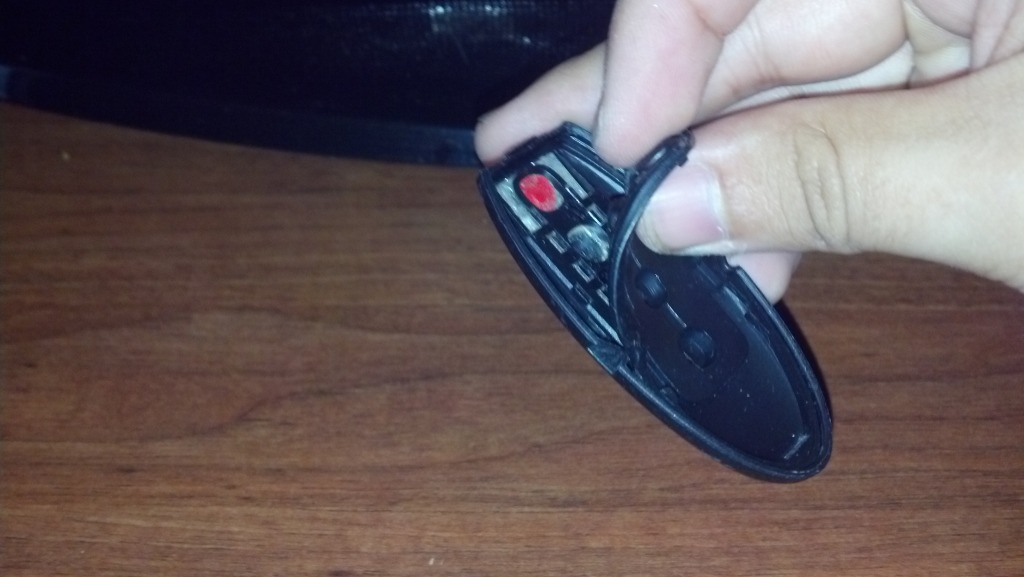
Step 5.
Flip the key over and lightly press on the Lock button. Add pressure as needed until it begins to pop off. Then work your way down pressing till it eventually comes out.
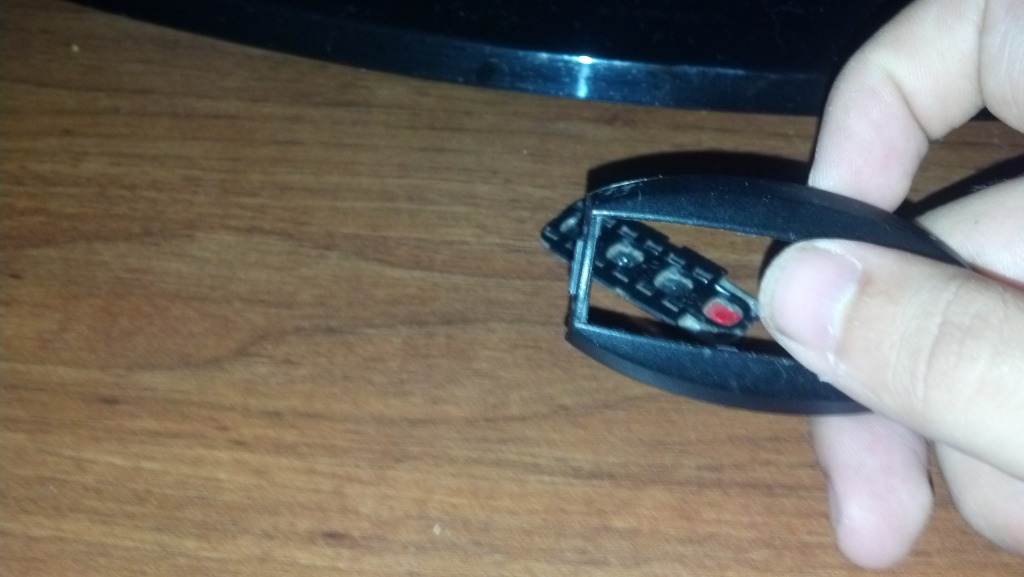
Step 6.
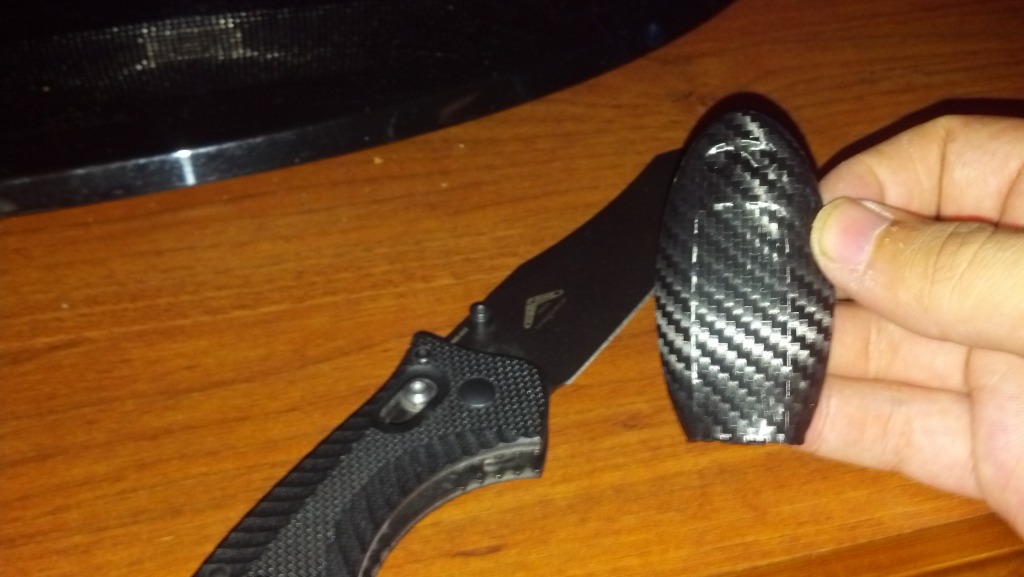
With your needle slowly work your way under the Infiniti emblem and start to pry it off. It is just held there with glue so it is not hard at all.
(No picture because I forgot)
Thats it! Now your key is all disassembled.
Wrapping your key!
Step 1.
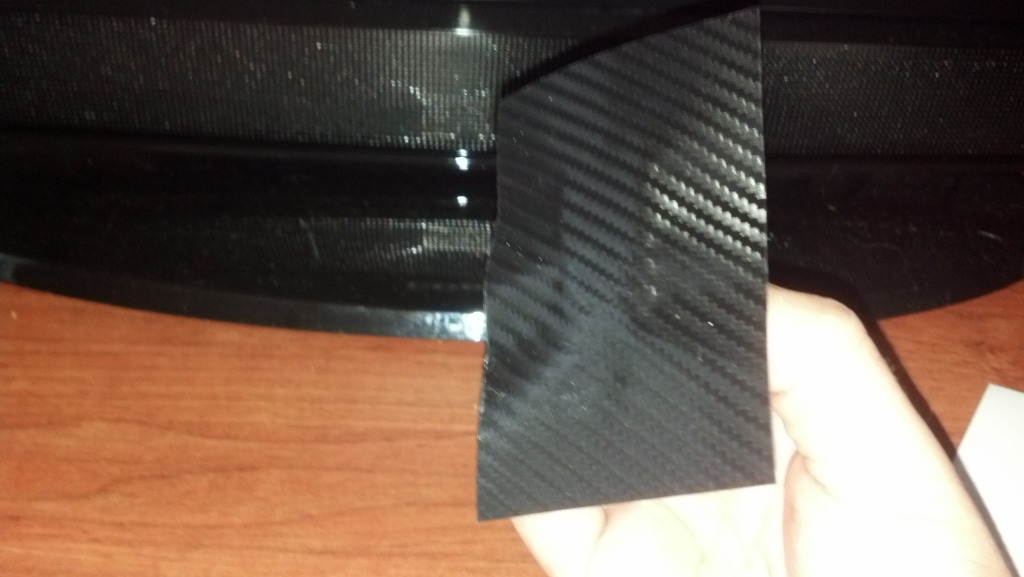
Cut your wrap to size
Step 2.
Lay your wrap onto your Key Fob and remove air bubbles. Also make sure to heat it up around were the logo goes and push it down so you have the impression where you replace the emblem at.
Step 3.
Start to heat up the wrap and pull it along the sides. Get a tight uniform fit all around. Do Not RUSH. Patience will make sure your finished product looks clean and OEM.
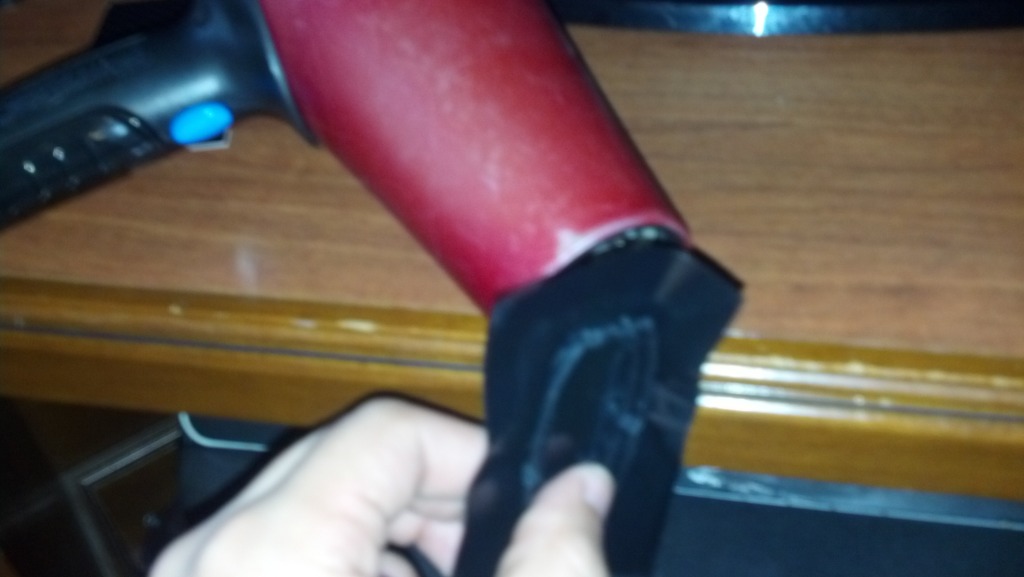
Step 4.
As you pull cut excess off areas you finished stretching over the edges. It'll help keep unwanted wrap out of your way
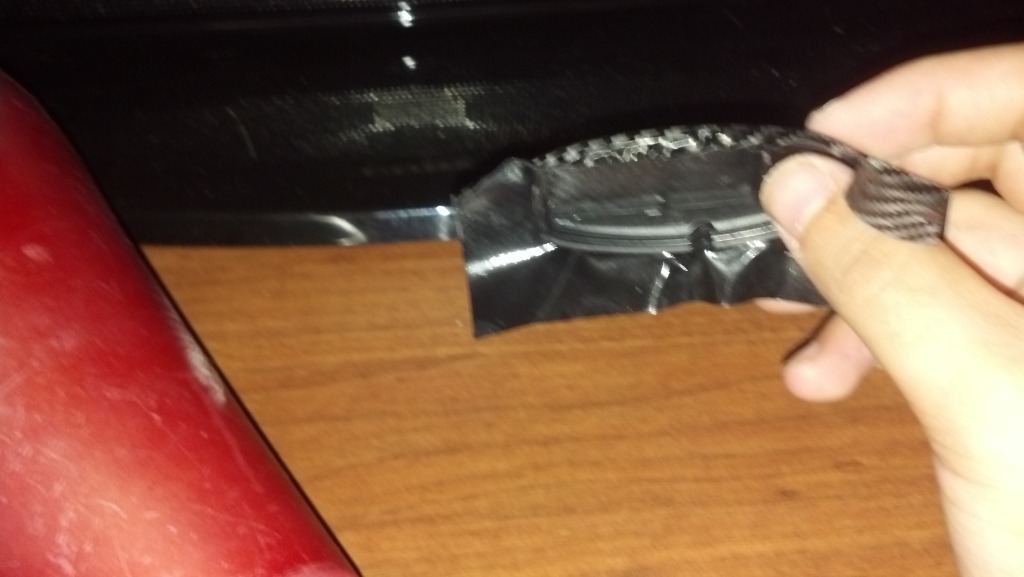
Step 5.
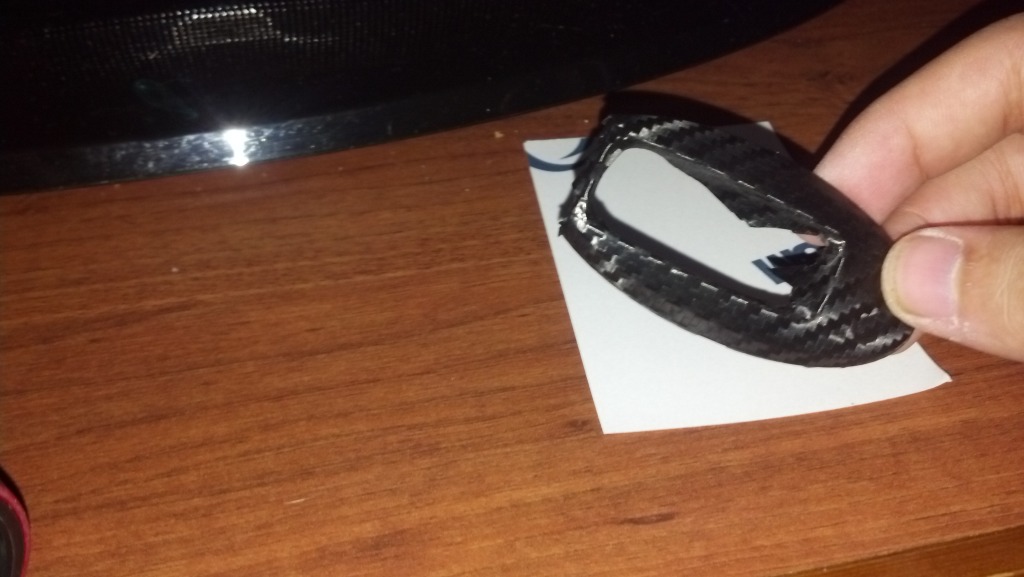
Once the wrap is how you want it, start trimming the excess wrap away. Leave enough to fold over the edges. But not so much that it hinders you from closing your Key Fob when you finish
Step 6.
Using your Knife/Razor cut an X in the middle and start stretching it into the Key Fob. Once you have it stretched inside of the fob repeat Step 5 and cut away the excess and fold it over the edges.

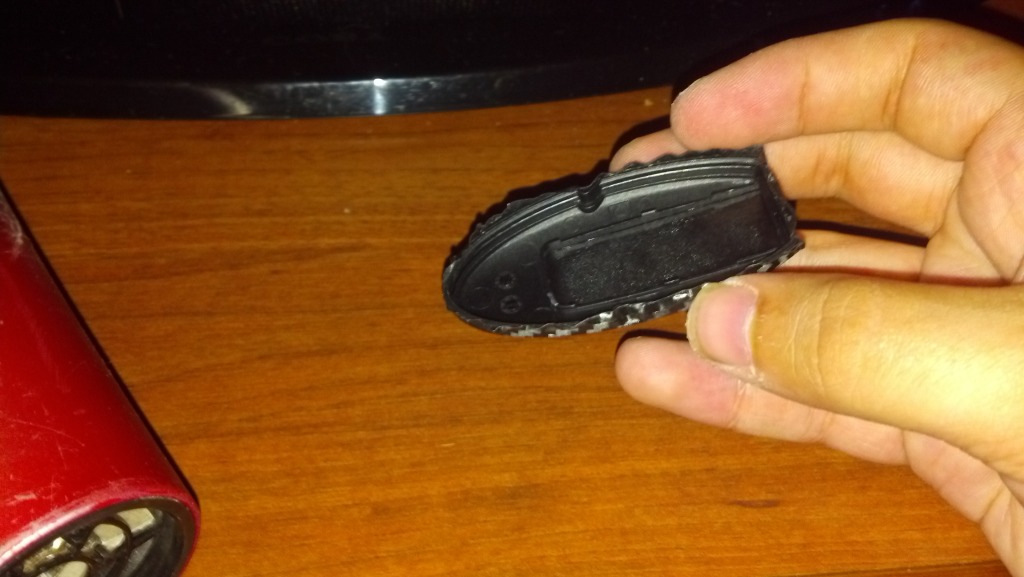
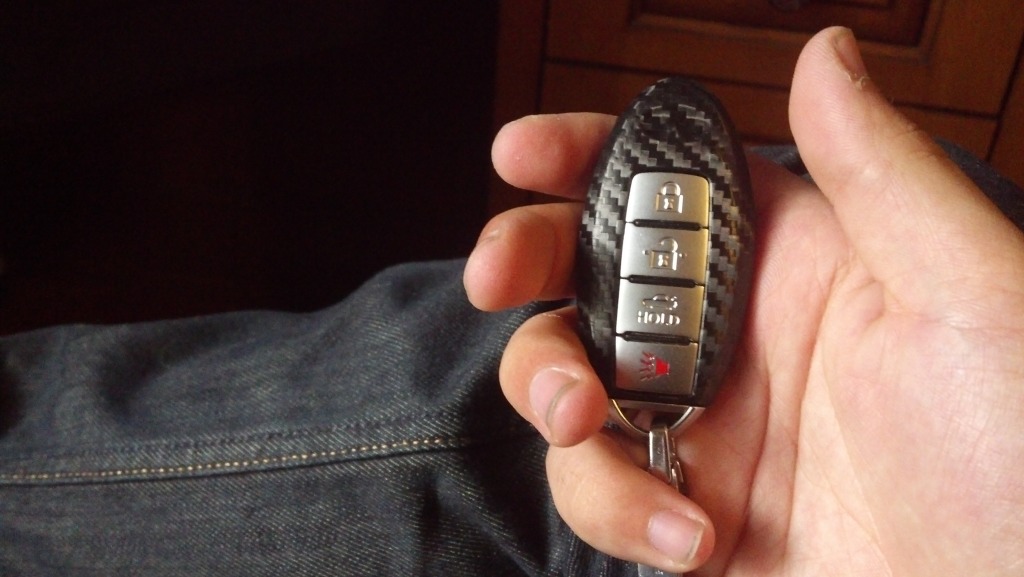
Final Step!
If you followed this perfectly and everything is stretched nice and clean just reverse the steps we did when we broke down your Key Fob. Then use your adhesive to put the Emblem back on! Now do the same to the other side!
Enjoy your newly wrapped and protected key fob!!!
(forgot about the emblem again before this picture was taken haha)
*ALSO Wrapped in Brushed Titanium*
If it makes it easier for myself and everyone else I'll add it into my steps and remove mine in its place.I apologize for the quality of the pictures. Cell phone pics are horrible. It's my first DIY so I will hopefully make a better one and not so sloppy if I ever do another
So lets start with Materials
-Scissors
-Wrap style of your choice (for this one I used 3M's 1080 Carbon Fiber)
-Needle
-Pry tool (I used a dime)
-Knife/Razor
-Blow Dryer/Heat Gun
-Grounding Wrist Strap (optional but recommended)
-Adhesive (I used superglue)
(You should get the best materials to make the job easier. I am on vacation and will be using whatever I have in my car/luggage at the time.)
Let me take a moment to talk about the wrap with everyone. I previously purchased my Brushed Titanium wrap from Auto Vinyl Solutions. I then decided I wanted to try others out as well. So I contacted 3M and they gave me a Sample Packed. It is every single on of their 1080 wraps cut into small squares perfect to wrap your keyfob with. Now I urge you to buy their product. I am telling you about their free sample pack because I feel that if you see how easy it is to use that you will want to buy their wrap for other projects you will have in mind. They make a quality product which is hard to find in todays world were everything is focused on mass numbers and cheapest production cost. So order their sample pack for free and play around with their selection of styles (brushed metals are insanely cool looking) but support them if you enjoy their product
Now lets tear your key down into pieces shall we?
Step 1.
Remove the key (simple enough
)Step 2.
Use your pry tool starting from the top and work your way around (same way you would replace your battery)
Step 3.
Wear your Grounding wrist strap (Highly recommended so you do not risk frying the board and replacing your key!). LIGHTLY grab onto the prongs that connect your board to the battery and GENTLY lift. I can not stress how gently you must do it enough.
Step 4.
Remove the rubber piece from the key
Step 5.
Flip the key over and lightly press on the Lock button. Add pressure as needed until it begins to pop off. Then work your way down pressing till it eventually comes out.
Step 6.
With your needle slowly work your way under the Infiniti emblem and start to pry it off. It is just held there with glue so it is not hard at all.
(No picture because I forgot
)Thats it! Now your key is all disassembled.
Wrapping your key!
Step 1.
Cut your wrap to size
Step 2.
Lay your wrap onto your Key Fob and remove air bubbles. Also make sure to heat it up around were the logo goes and push it down so you have the impression where you replace the emblem at.
Step 3.
Start to heat up the wrap and pull it along the sides. Get a tight uniform fit all around. Do Not RUSH. Patience will make sure your finished product looks clean and OEM.
Step 4.
As you pull cut excess off areas you finished stretching over the edges. It'll help keep unwanted wrap out of your way
Step 5.
Once the wrap is how you want it, start trimming the excess wrap away. Leave enough to fold over the edges. But not so much that it hinders you from closing your Key Fob when you finish
Step 6.
Using your Knife/Razor cut an X in the middle and start stretching it into the Key Fob. Once you have it stretched inside of the fob repeat Step 5 and cut away the excess and fold it over the edges.
Final Step!
If you followed this perfectly and everything is stretched nice and clean just reverse the steps we did when we broke down your Key Fob. Then use your adhesive to put the Emblem back on! Now do the same to the other side!
Enjoy your newly wrapped and protected key fob!!!
(forgot about the emblem again before this picture was taken haha)
*ALSO Wrapped in Brushed Titanium*

Last edited by SgtGoldy; Aug 24, 2012 at 03:21 PM.
Lots of work. Why didn't you just use Plastidip? 
J/K . Good job. Attention to detail. More work than I'd want to do, I just bought the rubber slip on cover for $6 but it looks nice. Thanks for sharing it.
J/K
. Good job. Attention to detail. More work than I'd want to do, I just bought the rubber slip on cover for $6 but it looks nice. Thanks for sharing it.
Thread Starter
Registered User
iTrader: (6)
Joined: Jul 2011
Posts: 801
Likes: 14
From: Orange County, CA
I did it for the fun of it really. I enjoy doing little projects so I took it more as an activity rather than protecting my keyfob.


Trending Topics

nice work....been thinking about doing this with my leftover gloss black wrap but didnt want to b/c of the chrome infiniti emblem. I didnt know it could just be pulled off like that. Thanks for the write up.


Thread Starter
Registered User
iTrader: (6)
Joined: Jul 2011
Posts: 801
Likes: 14
From: Orange County, CA

I cross posted this to the370z.com and a member is doing this with his but in Blue Brushed Aluminum. Should look great with his blue Z.
Thank ya sir!
