DIY: Installing window trim vinyl wrap 07+ G Sedans


 07-08-2014, 06:42 PM
#93
Premier Member


Anyone selling them precut lol

The following users liked this post:
blnewt (07-09-2014)
07-09-2014, 06:54 PM
#95

After a lotta procrastination I took the plunge today. One thing I personally found easier was instead of 1 1/8" for the top of the rear doors, I made it an 1 1/4". I removed both window rubbers outta the channel, so the "extra" material just wrapped right into the channels. The added 1/8" meant I didn't have to be as careful to center the vinyl on the trim. Thanks for the write up, Helped a lot
The following users liked this post:
therzdae (07-10-2015)
07-10-2014, 06:19 PM
#96
After a lotta procrastination I took the plunge today. One thing I personally found easier was instead of 1 1/8" for the top of the rear doors, I made it an 1 1/4". I removed both window rubbers outta the channel, so the "extra" material just wrapped right into the channels. The added 1/8" meant I didn't have to be as careful to center the vinyl on the trim. Thanks for the write up, Helped a lot

Like the wheels on your G too, what are they?
08-07-2014, 09:29 AM
#99
Registered User

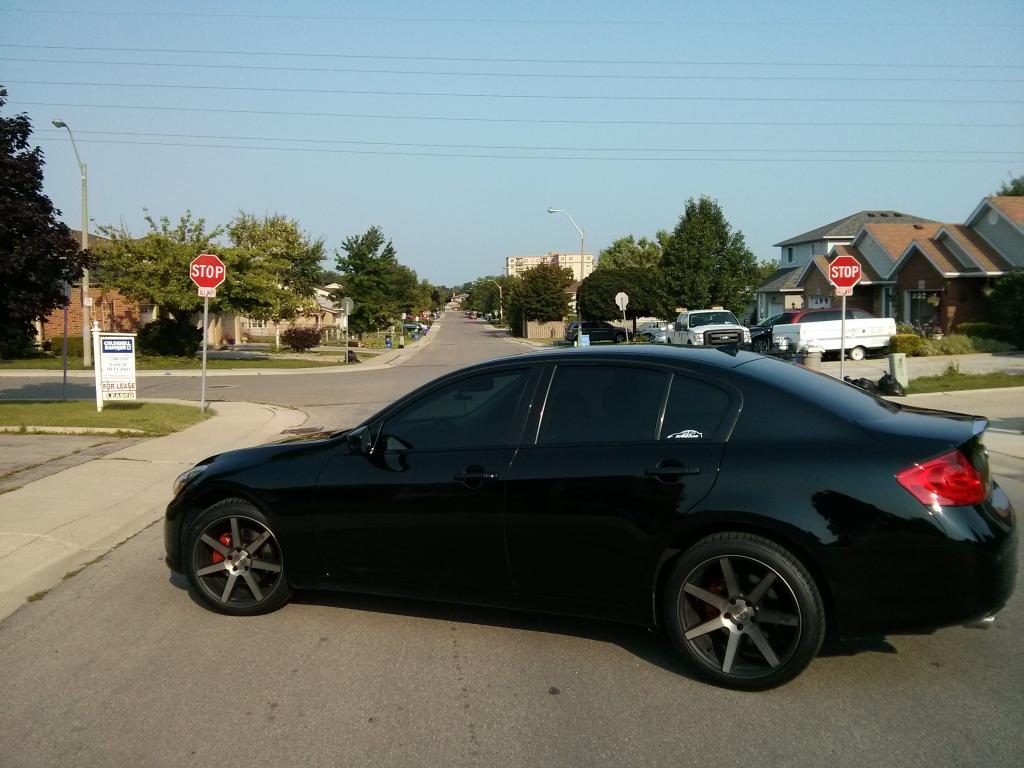
i tackled this diy... i dont think its difficult at all but you have to have steady hands and good attention to detail, anyhow mine i would say turned out just ok some bad trimmings lol the curve part of the front doors sucked as i couldnt get it in 1 piece and did an overlap
from 2ft out you can see it was a diy and not a good one( this is my first time with this) lol
belt line was pretty good.
thanks once again to brad for this awesome diy
pics so it did happened
parked in middle of street like a baws

from 2ft out you can see it was a diy and not a good one( this is my first time with this) lol
belt line was pretty good.
thanks once again to brad for this awesome diy
pics so it did happened
parked in middle of street like a baws

 08-07-2014, 09:47 AM
#100

Post or PM me pics of the "overlap" area and I'll give you my advice to do that section.
08-07-2014, 09:54 AM
#101
Registered User

was going to get the wife to help me but im going on a trip and had other things on the plate but i so had to do it already

the overlaps are at the curvatures both on the top of the door, rewatching the video i should have been pulling as i put it down, I will most likely redo it and will try the grill as well at that point i tried the chrome spoiler and that was epic fail, vinyl was cheap i think i paid 30 for 2x60
i was quoted from 200-250 for this job
08-07-2014, 10:04 AM
#102
Honestly, that video is how NOT to do a trim wrap. It gives you some insight into how the material can stretch but you don't want to use a straight piece of vinyl.
No professional shop unnecessarily curves a straight piece of vinyl like that. Either do the pre-cut as blnewt has shown or lay the vinyl over the area to be wrapped (with the backing still on), tape it down with painters tape, then cut the general area you'll be wrapping. Pre-cut pieces saves you material but if you're slightly off while cutting/installing then things will get very difficult and you may end up wasting material anyways.
If you're going to try something more difficult know that the material can stretch 100% of it's original size but during install shouldn't go beyond 30% or it will try to peal back.
blnewt, you can add this to the OP as well.
If you want to start doing more vinyl wrapping, here is Taylor's DIY Vinyl Kit.
Admins: All links on this page go to Amazon or Home Depot and I make no profit from this; just trying to help the community.
08-07-2014, 11:04 PM
#103
i tackled this diy... i dont think its difficult at all but you have to have steady hands and good attention to detail, anyhow mine i would say turned out just ok some bad trimmings lol the curve part of the front doors sucked as i couldnt get it in 1 piece and did an overlap
from 2ft out you can see it was a diy and not a good one( this is my first time with this) lol
belt line was pretty good.
thanks once again to brad for this awesome diy
pics so it did happened
parked in middle of street like a baws
from 2ft out you can see it was a diy and not a good one( this is my first time with this) lol
belt line was pretty good.
thanks once again to brad for this awesome diy
pics so it did happened
parked in middle of street like a baws
08-07-2014, 11:11 PM
#104
Honestly, that video is how NOT to do a trim wrap. It gives you some insight into how the material can stretch but you don't want to use a straight piece of vinyl.
No professional shop unnecessarily curves a straight piece of vinyl like that. Either do the pre-cut as blnewt has shown or lay the vinyl over the area to be wrapped (with the backing still on), tape it down with painters tape, then cut the general area you'll be wrapping. Pre-cut pieces saves you material but if you're slightly off while cutting/installing then things will get very difficult and you may end up wasting material anyways.
If you're going to try something more difficult know that the material can stretch 100% of it's original size but during install shouldn't go beyond 30% or it will try to peal back.
blnewt, you can add this to the OP as well.
If you want to start doing more vinyl wrapping, here is Taylor's DIY Vinyl Kit.
Admins: All links on this page go to Amazon or Home Depot and I make no profit from this; just trying to help the community.
No professional shop unnecessarily curves a straight piece of vinyl like that. Either do the pre-cut as blnewt has shown or lay the vinyl over the area to be wrapped (with the backing still on), tape it down with painters tape, then cut the general area you'll be wrapping. Pre-cut pieces saves you material but if you're slightly off while cutting/installing then things will get very difficult and you may end up wasting material anyways.
If you're going to try something more difficult know that the material can stretch 100% of it's original size but during install shouldn't go beyond 30% or it will try to peal back.
blnewt, you can add this to the OP as well.
If you want to start doing more vinyl wrapping, here is Taylor's DIY Vinyl Kit.
Admins: All links on this page go to Amazon or Home Depot and I make no profit from this; just trying to help the community.
to illustrate it's shortcomings. I posted it mainly to show what you can do w/ vinyl regarding the trim, but you're spot-on, not a great way to do that project, the vinyl won't be as structurally sound and you're wasting a ton of it.
Please feel free to add your insight any time, much appreciated
