
DIY: Illuminated Door Sills - Color Change


Illuminated Door Sills - Color Change
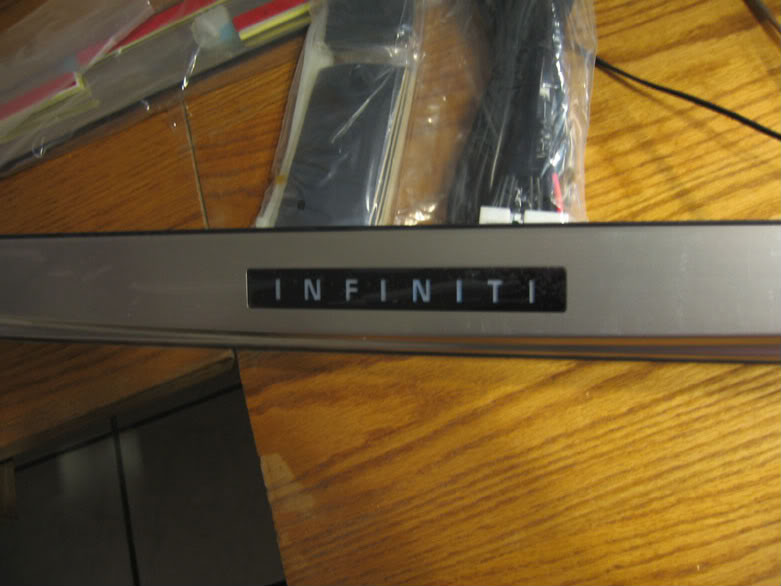
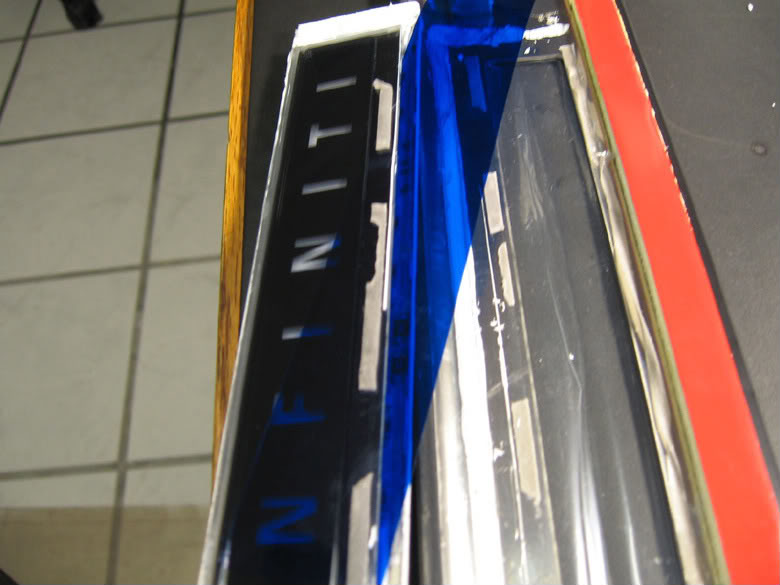
So to start here's a pic with the door sill turned off.
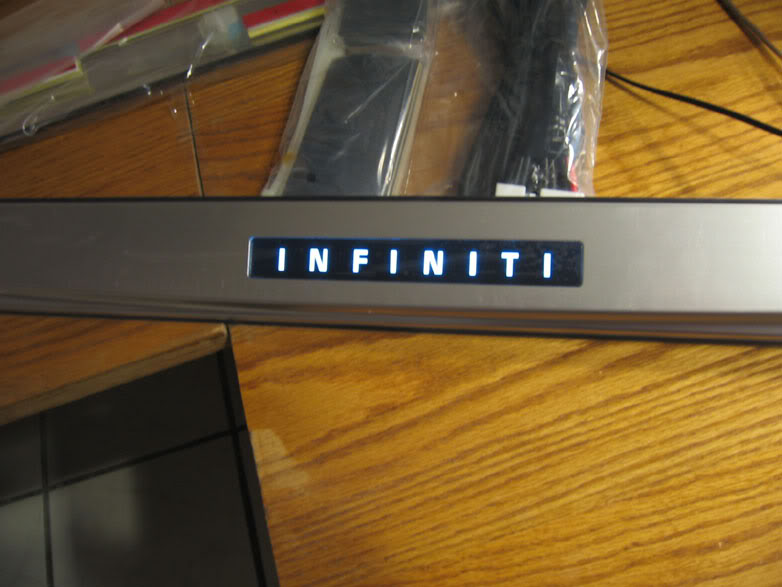
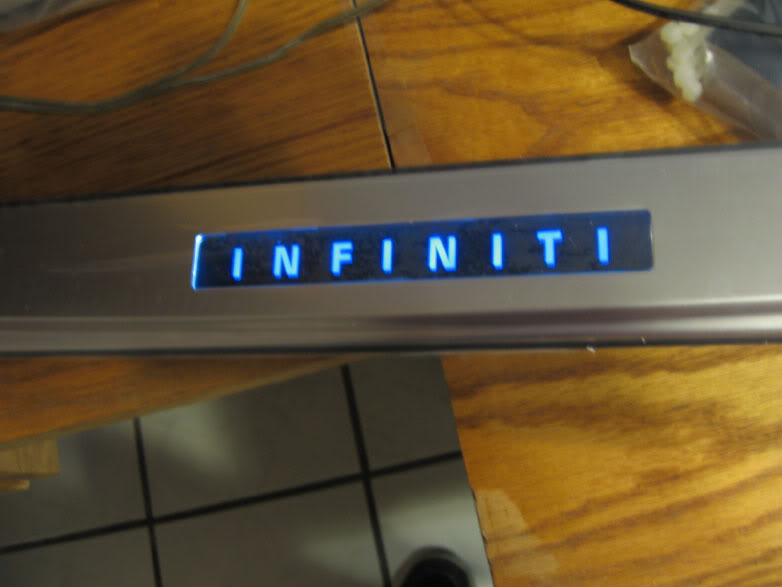
And here is one with it illuminated.
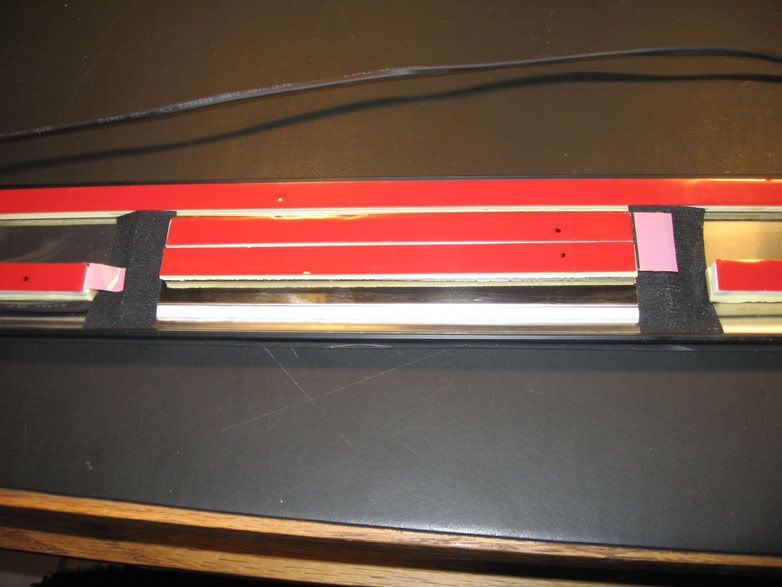
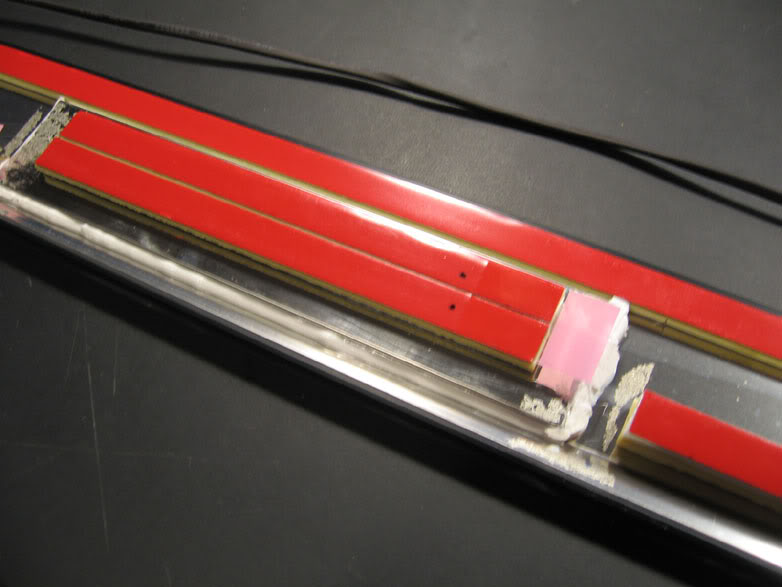
Here is the back of the door sill. You see all the double face tape. The 2 pieces of double face tape in the middle is the part we are working with. You see 2 pieces of black tape on either side of our work area. Take off the tape and save for later.
Here is a pic of the tape gone.
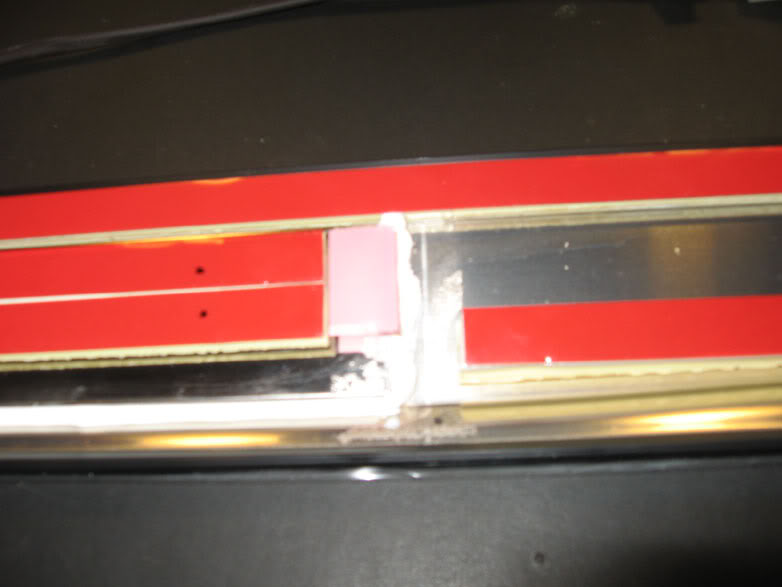
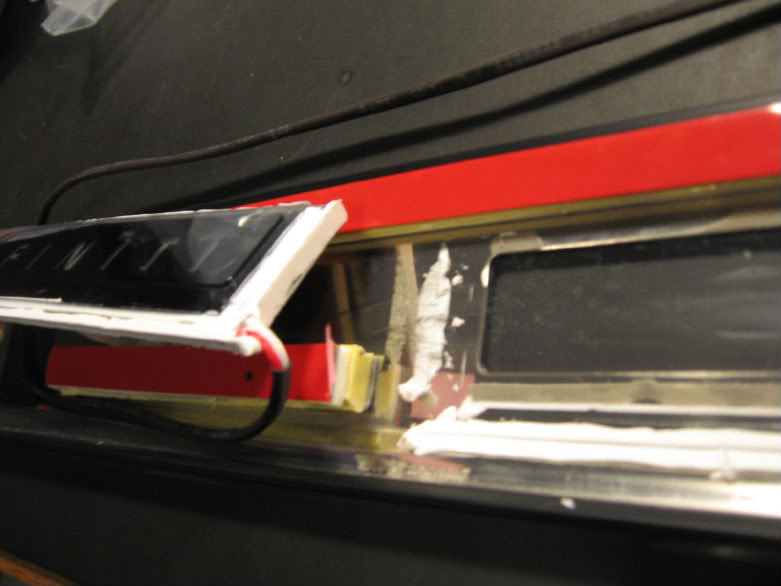
Sorry for the bad pic but cut away all the silicone that connects the metal cover to the main sill piece. There is 3 sides to cut, the 2 short sides and the long side NOT next to the double faced tape. There is no silicone on the 4th side. When you cut, just slide the blade along the metal cover and don't worry about scratching the main sill piece. You can't see it when it is installed. Then cut along the main sill piece to remove the bulk of the silicone. And be careful not to cut the wires that power it when you are cutting the silicone.
Once you have the silicone cut away, now comes the scary part. As you can see from this next pic there is a ring of thin (brownish-gray) double face tape that is actually holding the illuminated plastic part to the main sill piece.
Use a putty knife or a wide face screwdriver to pry the metal cover from the main sill piece. If you use a thin screwdriver you have a chance of deforming either metal piece. It is pretty well stuck on there, just work your way along the metal cover and it will pop right off. Here is a shot of the thin double face tape, you can either take it all off and apply a new piece or just reform it and cut away any excess.
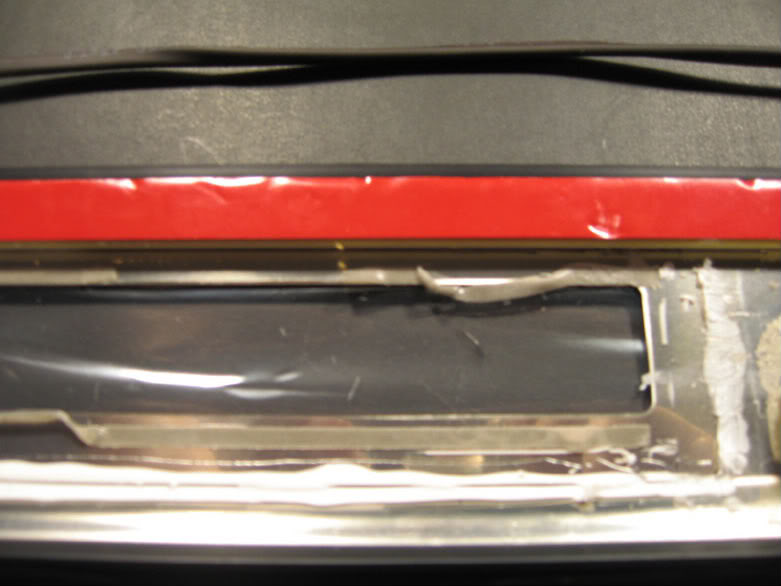
Now you can clean away any extra silicone left over. It doesn't need to sparkle just touch it up.
Turning our attention to the metal cover you just removed, turn it over and we see the actual illuminated face. There is a slit in the bottom of the plastic case. That's where they actually inserted the "INFINITI" cut out.
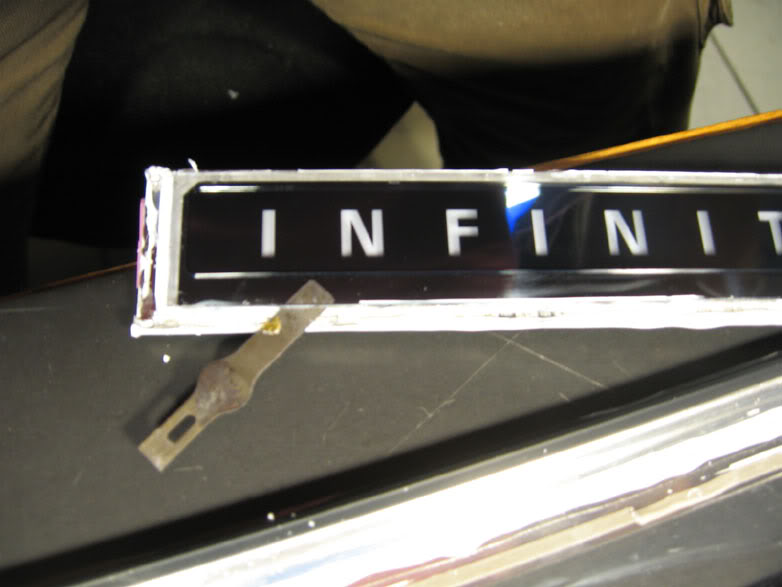
There is a thin line of silicone sealing the slit.
THIS IS VERY IMPORTANT.
Before you start this next bit you may want to cover the face of the plastic cover with painters tape to keep from scratching the face.
Find the edge of the slit and silicone. Run your blade along the slit at a 90 degree angle to the face of the plastic case. Only make 1 slice. Then run the blade along the slit, again only making 1 slice. Kind of in the same fashion as the pic above. The reason you only want to make one cut in each direction is because the more slices you make the more slivers of silicone that are going to be around that area when you install the gel. There will be a better chance of the gel pulling the slivers of silicon up into the slit. Keep that area as free from slivers of silicone as you can.
Once that is cut and clean, cut out your gel to fit slightly smaller than the black portion of the "INFINITI" cutout. Then slide the gel in there being careful not to drag any slivers of silicone in with it. If you do, just use the gel as a tool to remove the slivers, don't use a blade for risk of scratching the plastic cover.
Once you have the gel inside and are free from slivers, just press the plastic cover\metal cover back on the main sill piece. Don't worry if there are slivers of silicone on the outside protective plastic film when you reinstall the metal cover. They will come off when you install the door sills and remove the protective plastic film.
Now get some white Window and Door silicone, or any silicone you chose, and apply the silicone to the 3 sides that you cut off earlier. After that, reattach the 2 pieces of black tape that you removed earlier. You don't have to wait for the silicone to dry before you apply the tape.
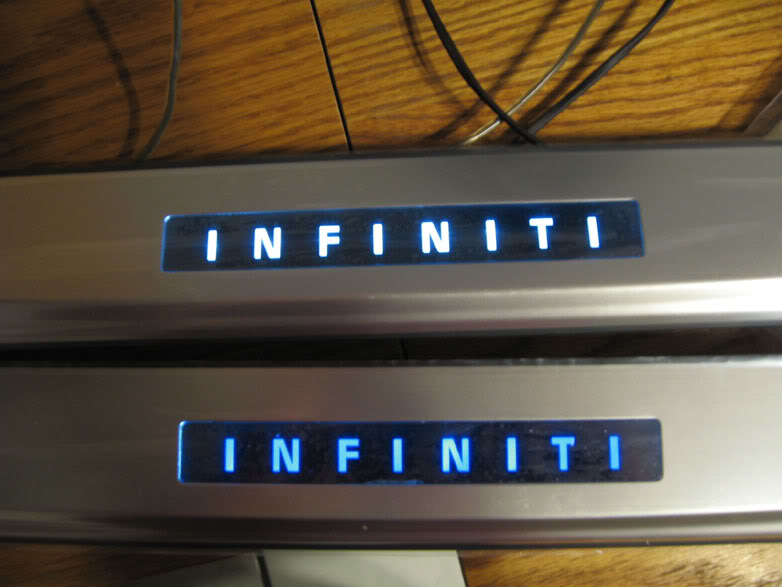
Now you should have a custom tinted door sill.
Now do the same on the other side.
And here is one with it illuminated.
Here is the back of the door sill. You see all the double face tape. The 2 pieces of double face tape in the middle is the part we are working with. You see 2 pieces of black tape on either side of our work area. Take off the tape and save for later.
Here is a pic of the tape gone.
Sorry for the bad pic but cut away all the silicone that connects the metal cover to the main sill piece. There is 3 sides to cut, the 2 short sides and the long side NOT next to the double faced tape. There is no silicone on the 4th side. When you cut, just slide the blade along the metal cover and don't worry about scratching the main sill piece. You can't see it when it is installed. Then cut along the main sill piece to remove the bulk of the silicone. And be careful not to cut the wires that power it when you are cutting the silicone.
Once you have the silicone cut away, now comes the scary part. As you can see from this next pic there is a ring of thin (brownish-gray) double face tape that is actually holding the illuminated plastic part to the main sill piece.
Use a putty knife or a wide face screwdriver to pry the metal cover from the main sill piece. If you use a thin screwdriver you have a chance of deforming either metal piece. It is pretty well stuck on there, just work your way along the metal cover and it will pop right off. Here is a shot of the thin double face tape, you can either take it all off and apply a new piece or just reform it and cut away any excess.
Now you can clean away any extra silicone left over. It doesn't need to sparkle just touch it up.
Turning our attention to the metal cover you just removed, turn it over and we see the actual illuminated face. There is a slit in the bottom of the plastic case. That's where they actually inserted the "INFINITI" cut out.
There is a thin line of silicone sealing the slit.
THIS IS VERY IMPORTANT.
Before you start this next bit you may want to cover the face of the plastic cover with painters tape to keep from scratching the face.
Find the edge of the slit and silicone. Run your blade along the slit at a 90 degree angle to the face of the plastic case. Only make 1 slice. Then run the blade along the slit, again only making 1 slice. Kind of in the same fashion as the pic above. The reason you only want to make one cut in each direction is because the more slices you make the more slivers of silicone that are going to be around that area when you install the gel. There will be a better chance of the gel pulling the slivers of silicon up into the slit. Keep that area as free from slivers of silicone as you can.
Once that is cut and clean, cut out your gel to fit slightly smaller than the black portion of the "INFINITI" cutout. Then slide the gel in there being careful not to drag any slivers of silicone in with it. If you do, just use the gel as a tool to remove the slivers, don't use a blade for risk of scratching the plastic cover.
Once you have the gel inside and are free from slivers, just press the plastic cover\metal cover back on the main sill piece. Don't worry if there are slivers of silicone on the outside protective plastic film when you reinstall the metal cover. They will come off when you install the door sills and remove the protective plastic film.
Now get some white Window and Door silicone, or any silicone you chose, and apply the silicone to the 3 sides that you cut off earlier. After that, reattach the 2 pieces of black tape that you removed earlier. You don't have to wait for the silicone to dry before you apply the tape.
Now you should have a custom tinted door sill.
Now do the same on the other side.


Personally I just used what was left. But I know some people are very ****. It still hold very well. You kind of have to make a judgment call on that one. Plus some of the double face tape was still on the plastic piece.

They are actually held on with clips. 4 of them. It is best to get them with a panel puller tool.
Take off the weatherstrip that goes all the way around the door, but you only need to remove the bottom portion, next to the door sills. That just pulls right up, no tools needed.
Then use your panel puller and start on the inside of the door sill. The part facing the interior is best so you don't scratch the painted door frame. Start by just prying up where you feel it clipped in. They are pretty tight so use some pressure.
Then work your way down the sill to the other 3 clips.
The new sill is held in with tape and 2 alignment posts, so make sure you clean the painted area with alcohol.

Trending Topics


Thread
Thread Starter
Forum
Replies
Last Post
KZK
Canada
0
Sep 2, 2015 05:30 AM
Upscale Speed
Body Interior Exterior Lighting
3
Aug 6, 2015 04:08 PM