
Pics of the Injen Cold Air Intake install


Thread Starter
Registered User
Joined: Dec 2008
Posts: 106
Likes: 2
From: Cincinnati
Pics of the Injen Cold Air Intake install
Here are some pics of me installing the Injen CAI intake.
Stock engine compartment pic prior to install.

First things first. Disconnect the battery. You'll have to actually connect back during the install to start the car and turn the wheels to get access to the wheel well pop pins and bumper bolt.

Unscrewing the engine cover bolts.

Radiator cover removed.

Bumper removed

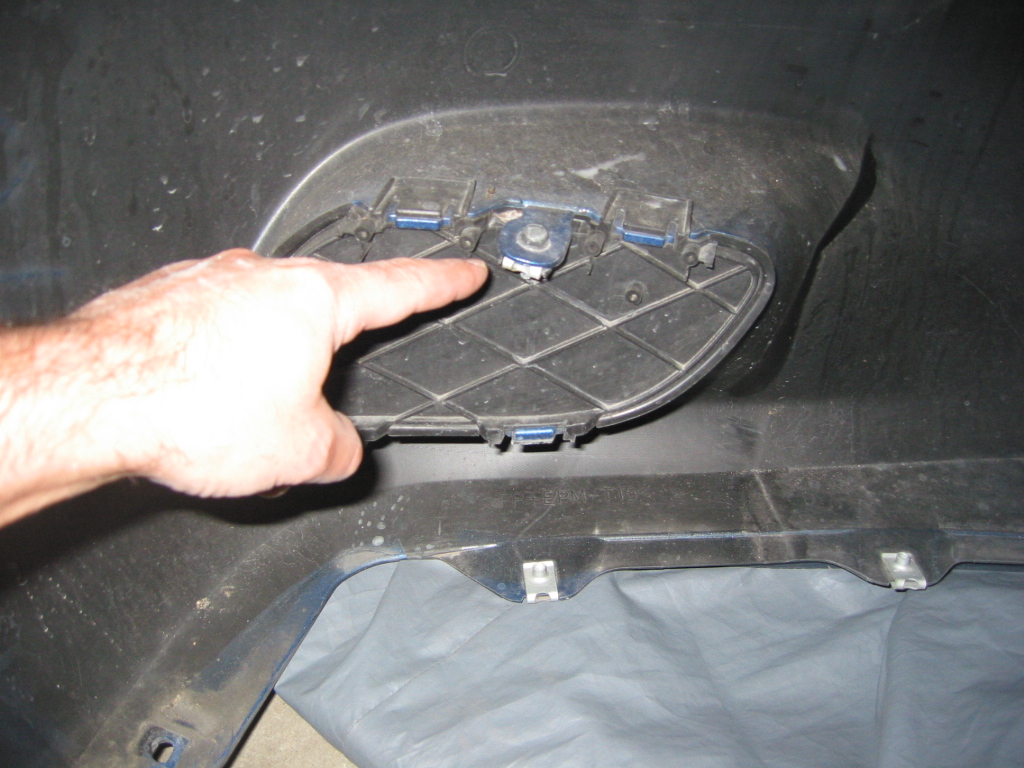
Inside pic of the driver's side fake air vent cover. One bolt secures the air vent cover.
Front view just after removing bumper.

Removing the bumper required removing 5 pop pins on the wheel well and one bumper bolt behind the wheel well.

Removing the winshield washer bottle. This will be replaced with a smaller bottle provided in the Injen kit. Note the brown plug at the bottom left of the bottle. This is the water level sensor. This will not be used on the new bottle, so you will not be fore warned if your washer fluid is running low.

There are two horns. One in front of the radiator and one beneath the driver's side headlamp assembly. The later mentioned horn will be re-mounted higher to allow room for the driver's side air filter for the new Injen CAI.

Removed airboxes and stock winshield washer resevoire.

Intakes installed.

Passenger side filter intalled.

Drivers's side filter installed.

Injen winshield washer reservoire intalled. Note the brown plug for the water level sensor is now zip tied to the wire harness.

Same pic, further away.
Pic of both intakes

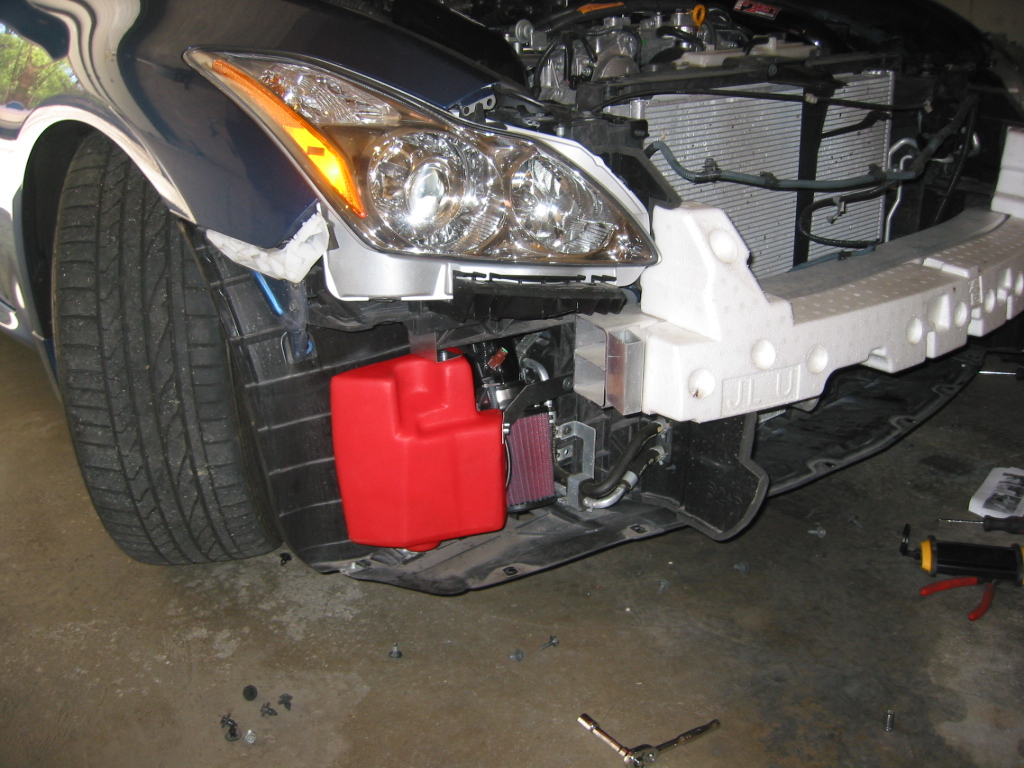
Pic of driver's side intake going down toward lower bumper.

Post intall. Everything back together.

Another pic of post intall.

I did have to reset the windows after re-connecting the battery, which consisted of turning the ignition on, rolling down each window, then rolling up each window and continuing to hold the window button in the up position for 3 seconds. Otherwise, your windows will roll down when you open your door. I did find the instructions in the owner's manual.
First driver after intalling the Injen CAI was fun. There is a definite response difference and the car appears to have a little bit more power. No before or after dyno, so I won't know for sure. The car sounds great too, although I do have the Tanabe Medalion Touring exhausts intalled as well.
Stock engine compartment pic prior to install.
First things first. Disconnect the battery. You'll have to actually connect back during the install to start the car and turn the wheels to get access to the wheel well pop pins and bumper bolt.
Unscrewing the engine cover bolts.
Radiator cover removed.
Bumper removed
Inside pic of the driver's side fake air vent cover. One bolt secures the air vent cover.
Front view just after removing bumper.
Removing the bumper required removing 5 pop pins on the wheel well and one bumper bolt behind the wheel well.
Removing the winshield washer bottle. This will be replaced with a smaller bottle provided in the Injen kit. Note the brown plug at the bottom left of the bottle. This is the water level sensor. This will not be used on the new bottle, so you will not be fore warned if your washer fluid is running low.
There are two horns. One in front of the radiator and one beneath the driver's side headlamp assembly. The later mentioned horn will be re-mounted higher to allow room for the driver's side air filter for the new Injen CAI.
Removed airboxes and stock winshield washer resevoire.
Intakes installed.
Passenger side filter intalled.
Drivers's side filter installed.
Injen winshield washer reservoire intalled. Note the brown plug for the water level sensor is now zip tied to the wire harness.
Same pic, further away.
Pic of both intakes
Pic of driver's side intake going down toward lower bumper.
Post intall. Everything back together.
Another pic of post intall.
I did have to reset the windows after re-connecting the battery, which consisted of turning the ignition on, rolling down each window, then rolling up each window and continuing to hold the window button in the up position for 3 seconds. Otherwise, your windows will roll down when you open your door. I did find the instructions in the owner's manual.
First driver after intalling the Injen CAI was fun. There is a definite response difference and the car appears to have a little bit more power. No before or after dyno, so I won't know for sure. The car sounds great too, although I do have the Tanabe Medalion Touring exhausts intalled as well.
Last edited by SEATOWNBOY; Apr 5, 2009 at 11:34 PM. Reason: typos
Thread Starter
Registered User
Joined: Dec 2008
Posts: 106
Likes: 2
From: Cincinnati
Couldn't tell you. Never had a Stillen intake. I've been happy with the Injen products. Ran then on my other car and was pretty happy. There are plenty of write ups on both within this forum, just do a search.


Registered User
Joined: Feb 2009
Posts: 58
Likes: 0
From: Miami, Fl
thats why im leaning more to injen. i read the stillen kinda just hangs there, i also dont like the idea of all the cutting. what would be sweet is if there were grill replacements like the center grill but for the sides, then again i dont know how bad that would be on a rainy day with the filter right behind it..
Trending Topics
Thread Starter
Registered User
Joined: Dec 2008
Posts: 106
Likes: 2
From: Cincinnati
No cutting. The entire install is fairly simple. No drilling, cutting, measuring at all. Only unscrewing and screwing back together everything. Most time consuming piece was figuring out that I had to reset my windows since I disconnected the battery, but once I searched it on the forum, I found the write up in the manual.
The additional thing I can say about the Injen CAI compared to the Stillen is maybe that you will have more consistent air temperature since the filters are down low blocked by direct airflow from the outside due to the bumper housing. The Stillen filters are right in the grill which will receive the air that comes in directly from the grill. The difference may not be that great, but I think a little consistency is still better with the Injen CAI. Then again, I'm not a subject matter expert on it. I am partial to Injen since I've had good luck with them in the past.
The additional thing I can say about the Injen CAI compared to the Stillen is maybe that you will have more consistent air temperature since the filters are down low blocked by direct airflow from the outside due to the bumper housing. The Stillen filters are right in the grill which will receive the air that comes in directly from the grill. The difference may not be that great, but I think a little consistency is still better with the Injen CAI. Then again, I'm not a subject matter expert on it. I am partial to Injen since I've had good luck with them in the past.

I like the Injen and Tanabe combo as well 
__________________
Best Car Insurance | Auto Protection Today | FREE Trade-In Quote
__________________
Best Car Insurance | Auto Protection Today | FREE Trade-In Quote

you don't need to take the bumper off to install Stillen gen3 intakes, yes a bit cutting click below
YouTube - Stillen Gen3 Ultra Long Intake installed
YouTube - Stillen Gen3 Ultra Long Intake installed on 2007 G35 Sedan V36 (VQ35HR)
YouTube - Stillen Gen3 Ultra Long Intake installed
YouTube - Stillen Gen3 Ultra Long Intake installed on 2007 G35 Sedan V36 (VQ35HR)

Nice writeup! Thanks for posting this for the community!
Only one note for others reading this, you'll want to ensure the MAF sensors are still connected if you decide to start to the car to move the wheels.. things can get a bit funky when they aren't connected, car won't be happy at all, can be a pita..
In regards to comments on the Gen 3.. I'll quickly clarify.. it's not really cutting a hole, but just enlarging the existing hole in the core support. The video posted outlines this, although the installee gets a little crazy with the size using that awesome cutting tool.. that thing kicks ***!
Again, thanks for the awesome writeup!


