R3diK3r0u5's G
 10-03-2011, 11:44 AM
#1

R3diK3r0u5's G
aka Raichyl

This thread is just a place for me to keep track of the progression of my vehicle. All questions and criticisms are welcome!
Mod List:
-Passport 8500 w/ Invisicord & Mike's Mount
-iPhone ProClip w/ custom wire running
-Full de-badge
-Input/video lockout bypass
-Custom bass level control mounted inside ashtray
-Alpine SWR-1242D powered by Alpine MRP-M500 w/ custom built box firing forward through rear seat pass-thru
-Eibach Pro-Kit Springs [@45k]
-Ark Performance Grip CBE [@48k]
-DIY Bumper Plugs
-BlackBetty Grounding Kit
-R2C MaxxFlow [@57k]
-Manual Hide Away license plate bracket
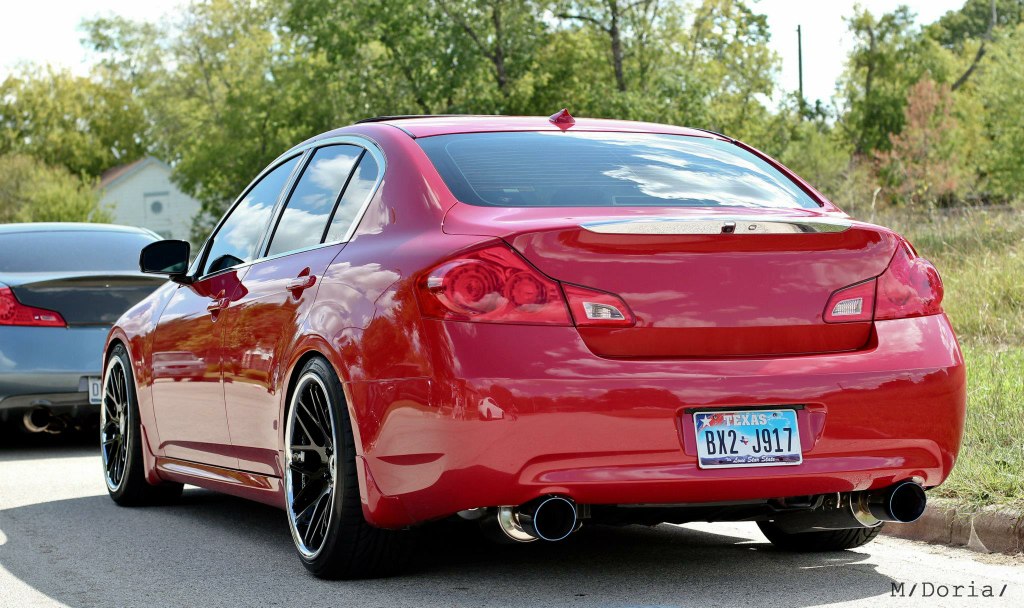
-Vertini Magic Concave [custom gloss black finish]
--20x9 +23
--20x10 +35
-'09 Sport Lip [@60k]
-DIY Midnight Grille
-White Turn Signals
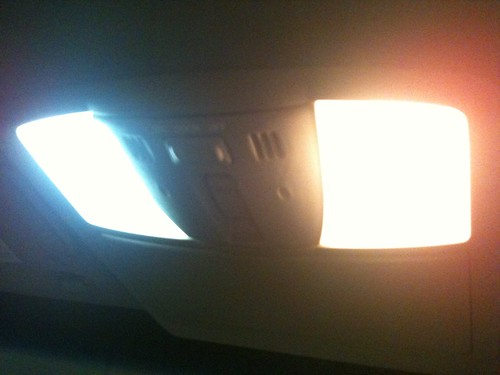
-Blue interior LEDs
-Fast Intentions RHFC
-DIY Gloss Black Headlights
-6k Headlight Bulbs
-6k Parking Lights
-6k 35w 9006 HID Fog Kit
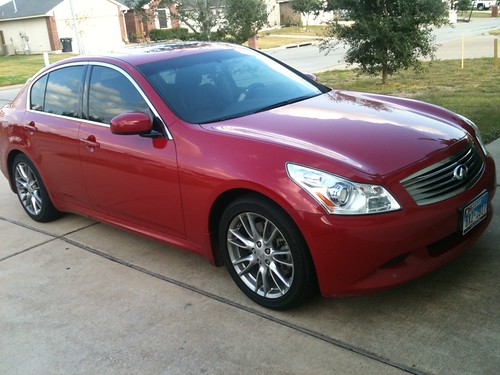
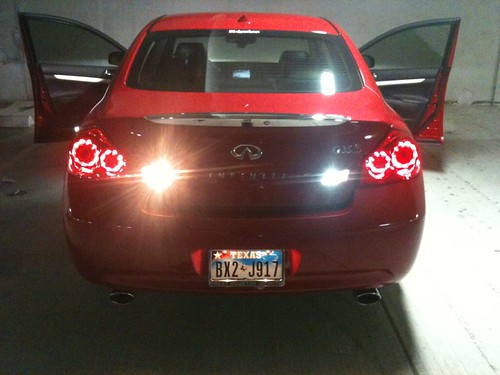
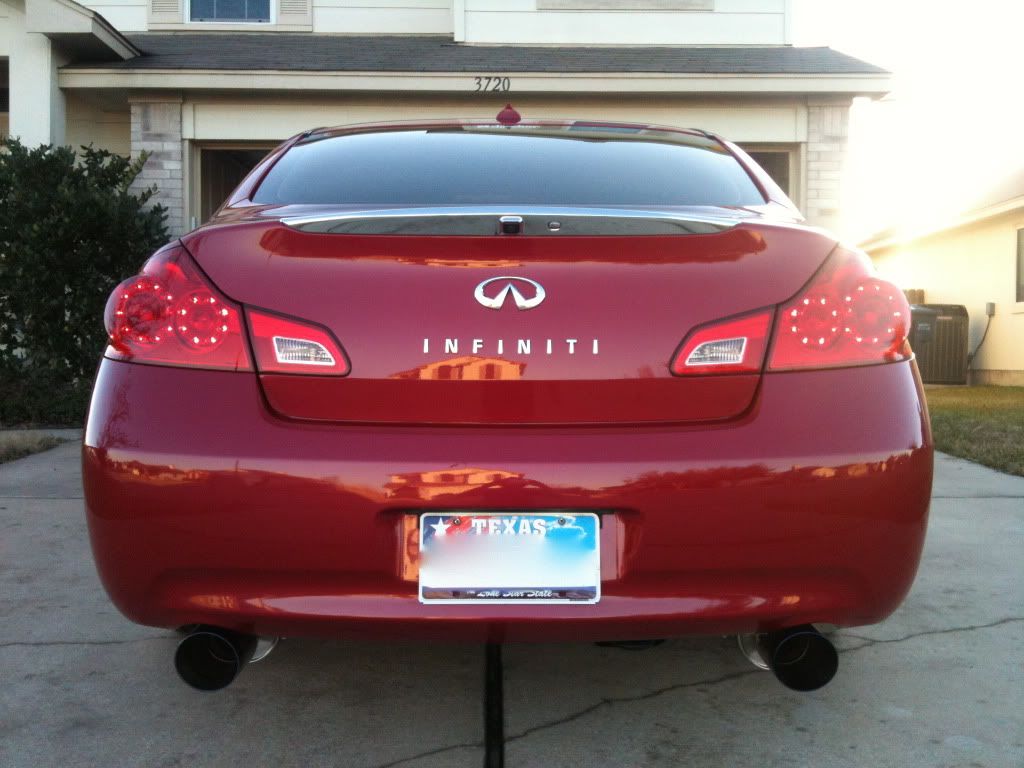
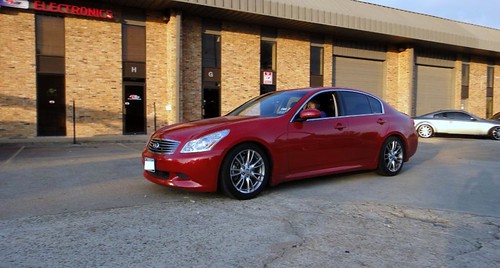
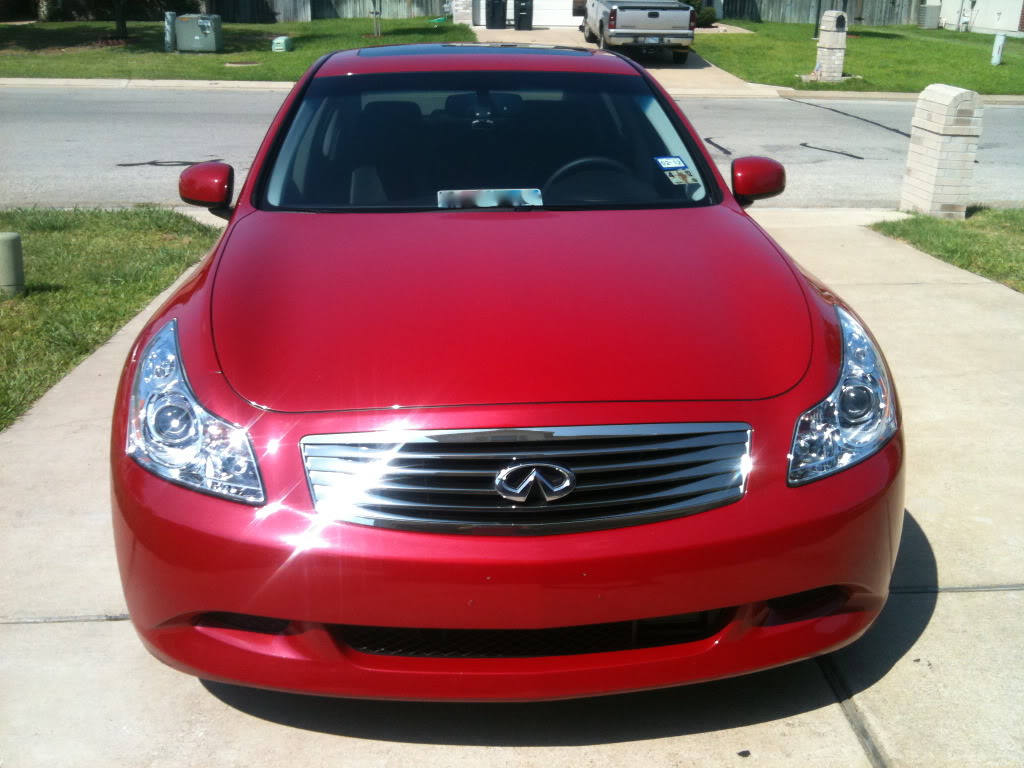
Well I started with a 2007 G35s Sedan Garnet Ember/Graphite fully loaded w/ NAV & Bose.
First Mod was to find a cleaner solution for my radar detector. Ordered the Invisicord so I could hook up to my mirror to lose the power cord across my dash and Mike's Mount to get rid of the suction cups so that my sun reflector could be put up behind the detector and save it from the sun.
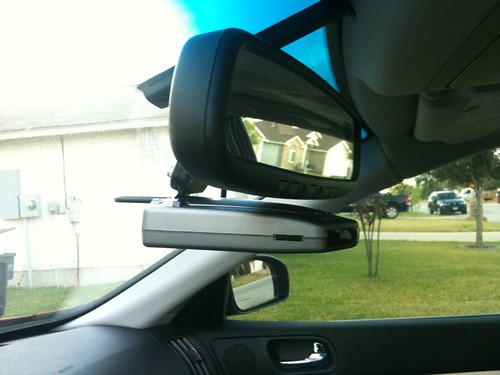
My only complaint here is that the piece of the original mount you use along with Mike's Mount is too thin to properly rest in the Passport. This causes rattling. I just shoved a plastic wedge in the back to make it secure and haven't had any problems. I later found Blendmount.com - Custom Radar Detector Mounts* Escort Beltronics Valentine One which looks to be a much nicer mount and solves the rattling problem with a spring loaded clip. But my mount is working out fine and was $60 cheaper.
Next, I needed a solution for my iPhone. I charge it in my car and use it for music and videos.

I found the ProClip to be a really clean mount that looks like it came from the dealership this way. Happy with its location and quality. I have drilled a hole just behind the mount and in the console to run the wires [power and AV] inside the console instead of outside. No more cord getting in the way when I try to shut my console!
Zhao, a friend on strictlygs.com, then started selling LED's so I went ahead and did those. All interior and exterior.
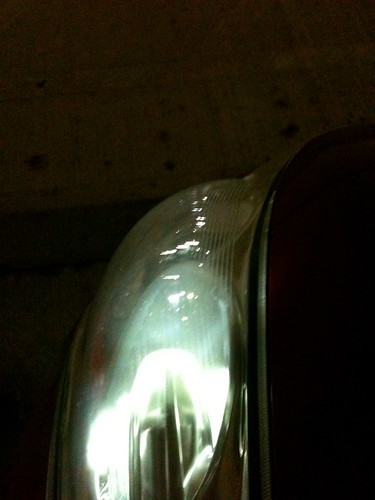
I took the picture of the parking light that way to show the stress cracks that have formed on my headlights. Already failed once at getting it replaced under warranty, will be trying a new dealership next maintenance. *1/12/11 Had them replaced*
De-badged my trunk.
Only removed the "G35s" lettering. Still considering removing the "Infiniti" lettering from under the Mt. Fuji symbol, but I like the way it keeps things centered. Also considering just taking it all off, just can't make up my mind.
I have since then fully de-badged it.
[Pic MIA]
Next I finally did the input/video lockout bypass. Located the VSS switch in the console just above the AV inputs.
I have a hole drilled just under the AV cables to run the wires inside the console to the iPhone mounted by the shifter. If you look closely you can see how I messed up. I was in a hurry and slipped with my drill bit and ate away some of the felt between the 12v and AV :Grimmace:
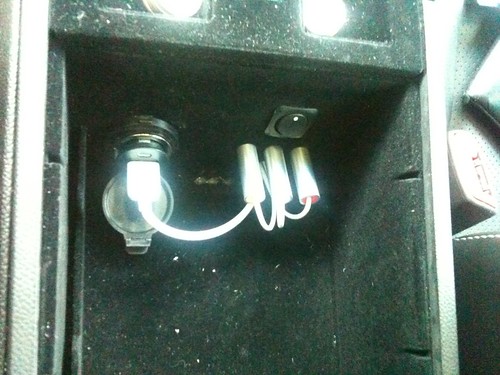
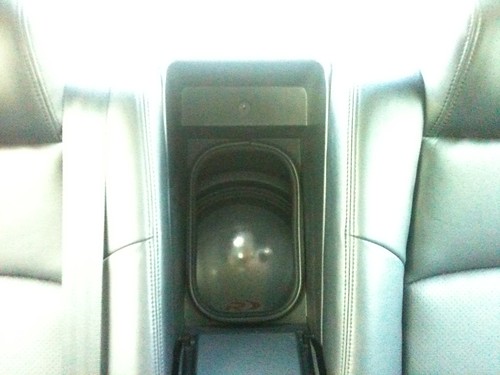
While I had the dash apart doing that previous project, I decided to wire up my bass level control **** and hide it in the ashtray.

I love how hidden it can be but at times is a little annoying to access. It's fine and not a problem when the shifter is in Drive, but is cramped when in Park.
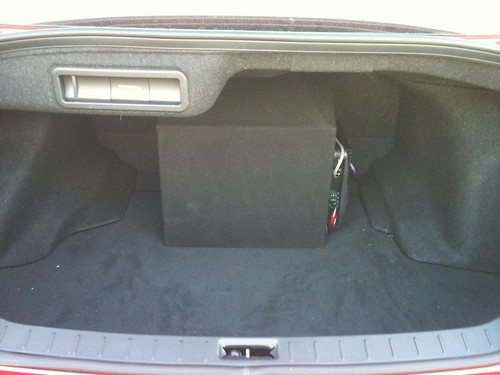
Next I installed my Alpine SWR-1242D powered by an Alpine MRP-M500 in a custom built box firing forward through rear seat pass-thru that I fabricated myself. It seals up flush against the back seat. This was my first time to wire a vehicle and my first box to ever build. Wow was I happy when everything came together and it actually all worked
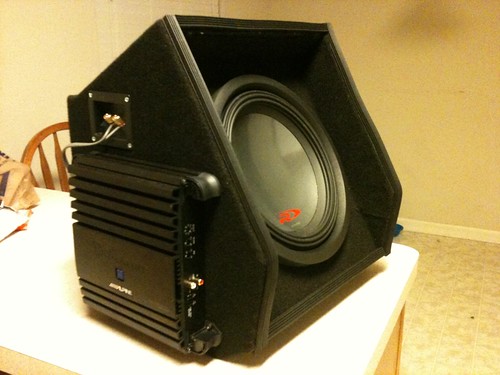
I removed the plastic door between the armrest and the pass-thru to keep it from rattling.
Time for the drop! picked em up used for $120

Working hard!
Finally taking my victory lap
Thanks to all the members of strictlygs.com who came out to the meet and lent their hands and knowledge!
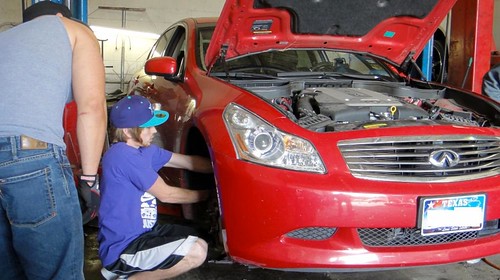
Headlights, door pulls, and steering wheel fixed!
[Pic MIA]
Had them all replaced for free under warranty. In the process they lost my 6000k parking lights but they put in 6000k headlamps for me! Sounds like I won in that trade!
Ark Performance Grip CBE was next!
Stock Sound Clip
Ark Sound Clip
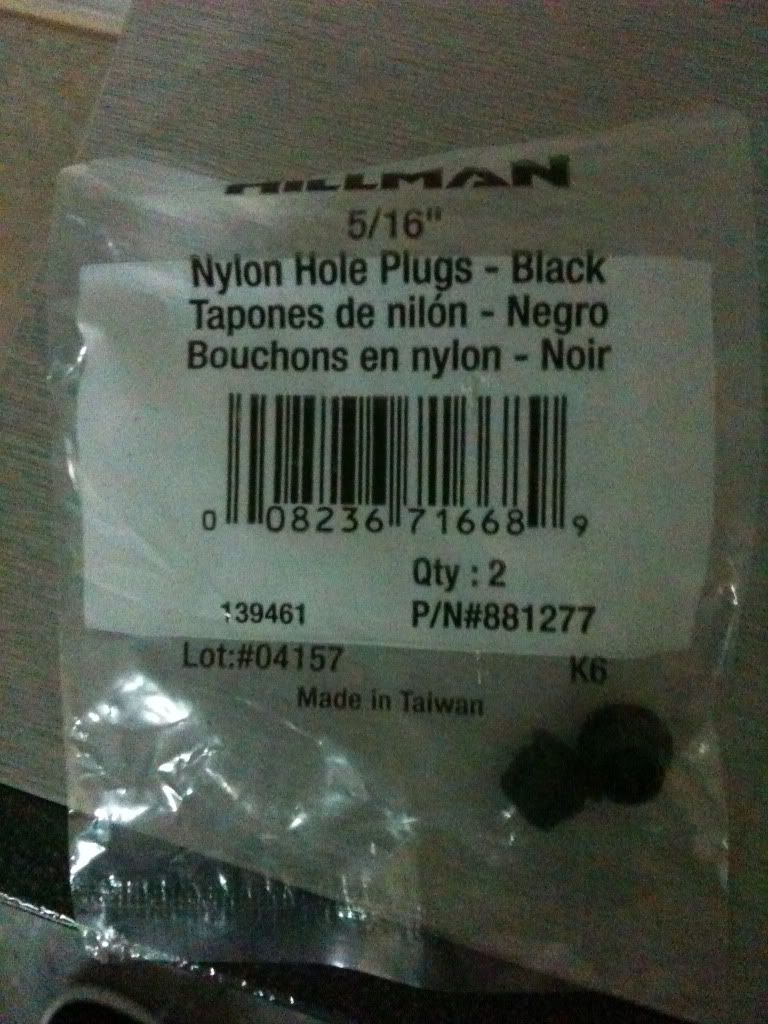
DIY Bumper Plugs
Just bought some plugs from home depot and painted them with the correct touch up paint. Bored the holes out to the right size for the plugs.
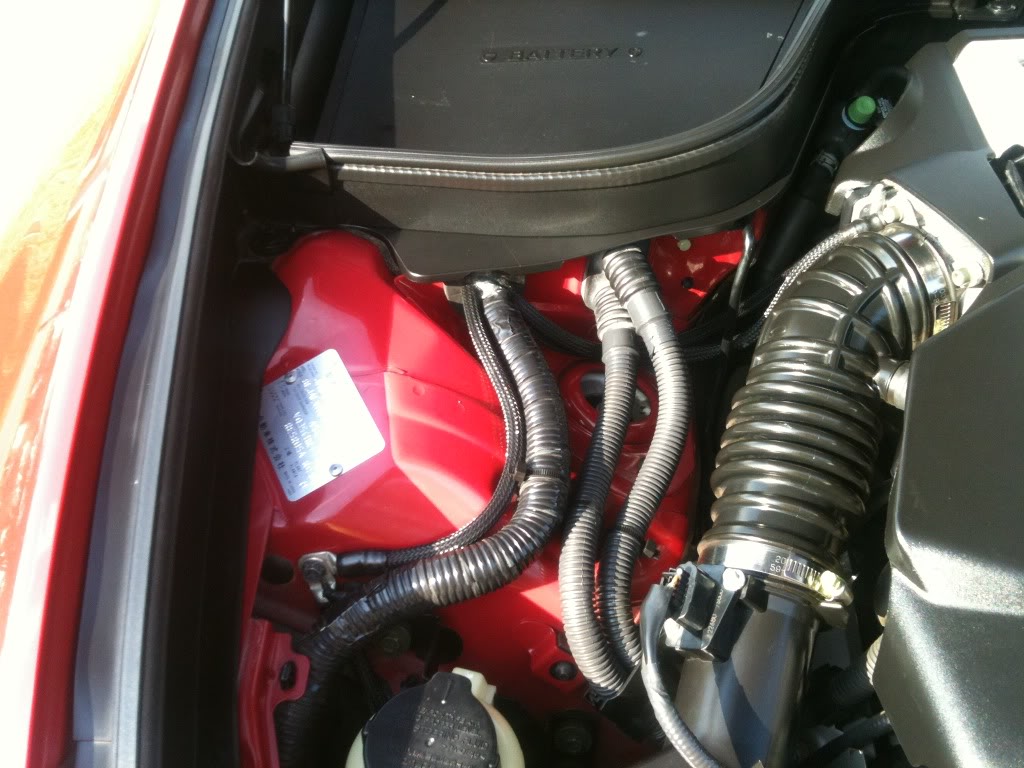
BlackBetty Grounding Kit
I routed the wires a little different than the instructions and I think it all came out great.
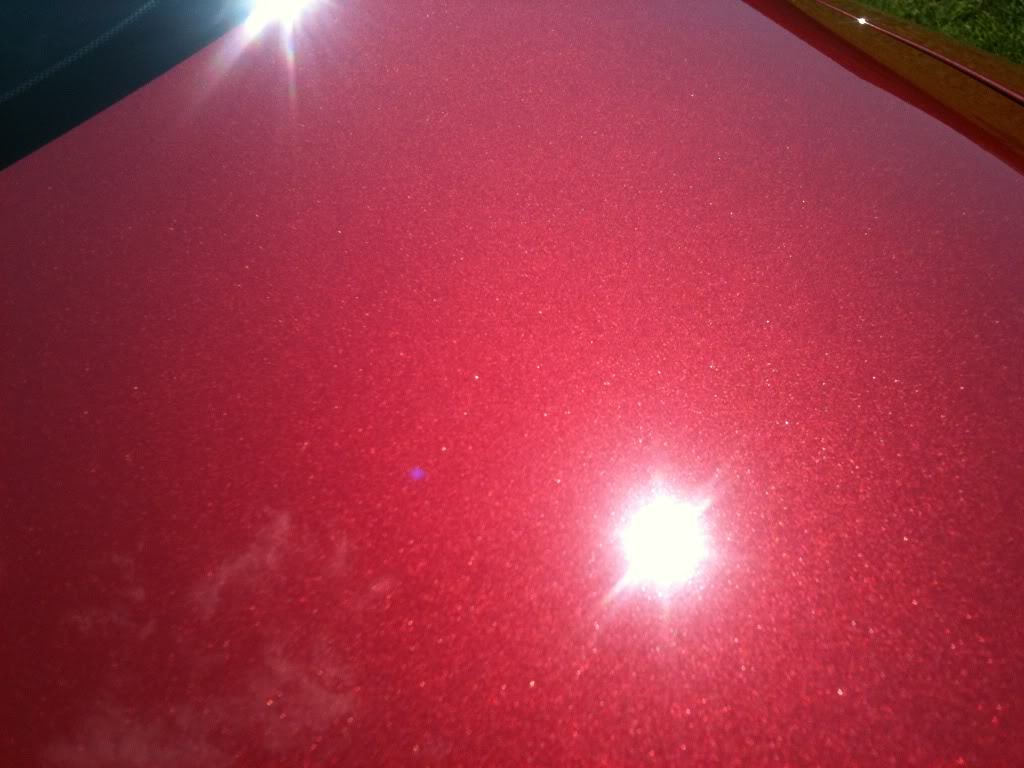
Full Paint Correction with the PC
Before
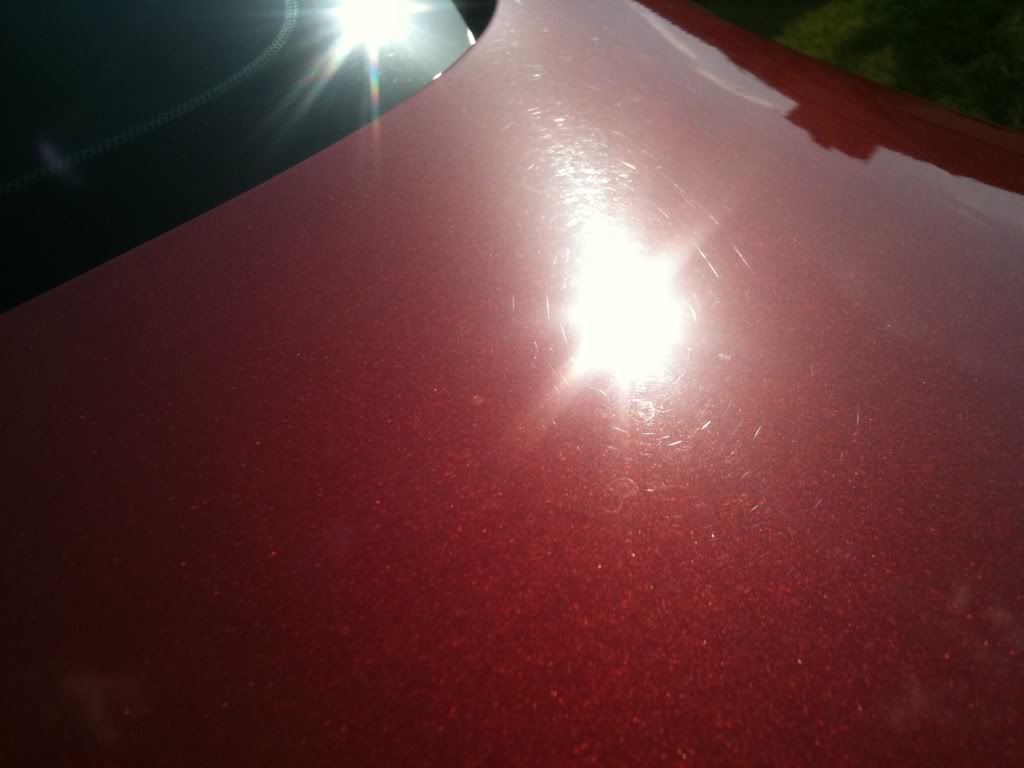
After
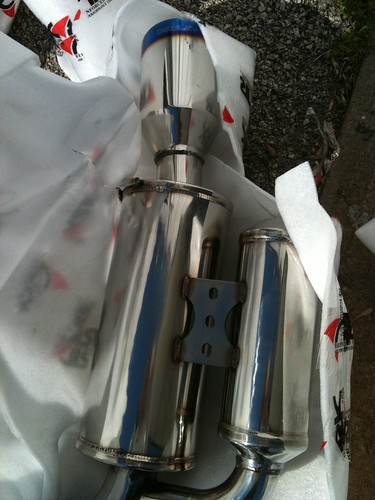
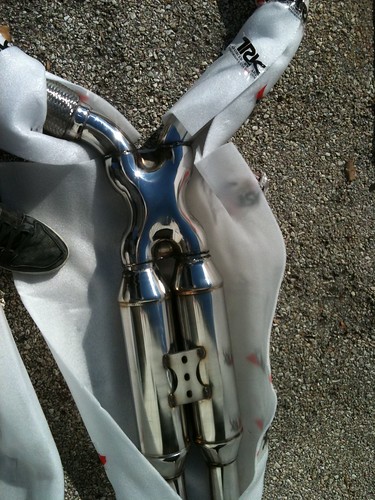
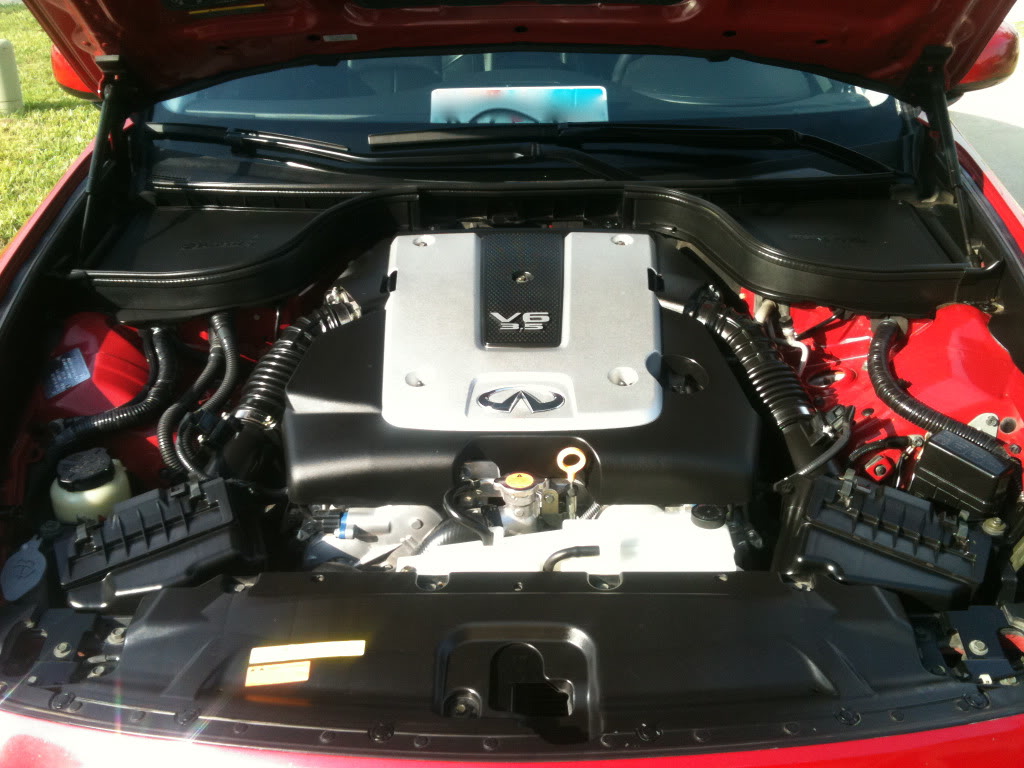
R2C MaxxFlow!
[Pic MIA]
For audio comparison, I took a video of the stock intake and R2C in park but they sounded almost identical. The growl really comes in while the car is under load. Really starts to get loud around 4.5k. When I get on it, I can't even hear my exhaust anymore.
Here is a quick and cruddy video my friend took while we were driving so you can hear it under load.
I also added a Hide Away license plate bracket. Although I liked the fun-ness of the powered one, I went the economical route and bought the manual one. I cut out a section of the black mesh in order to have a place to mount it in the middle of the bumper instead on the bottom.
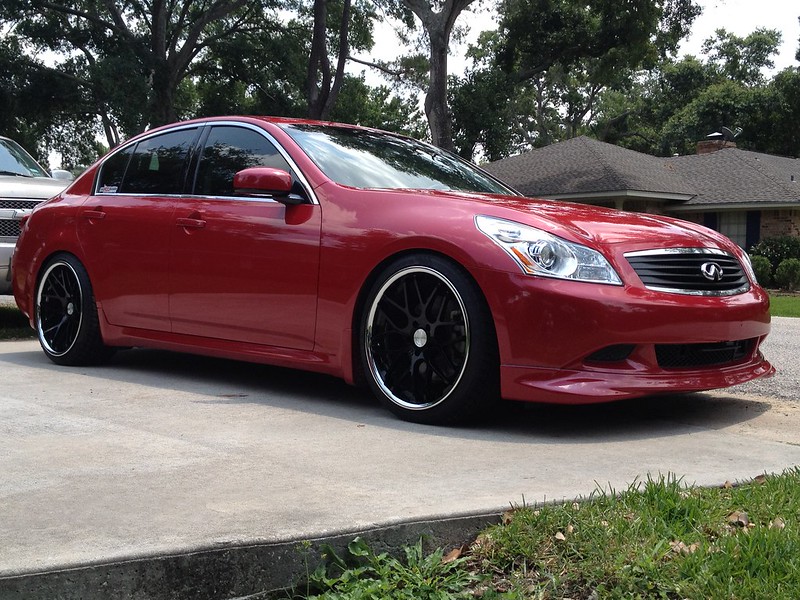
I finally found my wheels!
Vertini Magic Concave
20x9 +23
20x10 +35
wrapped with
245/35/20
275/30/20
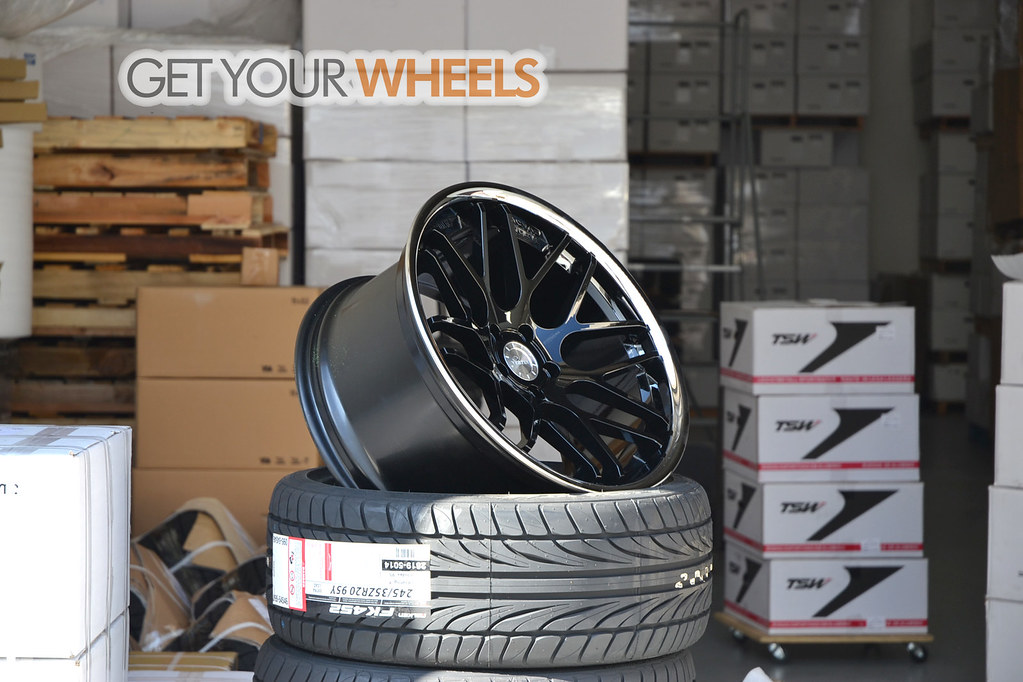

[1/17/12] [60k]
Sport Lip!
http://www.flickr.com/photos/74520361@N03/6722772667/Pretty easy to install with the included template. Everything lined up great except the middle two holes were way off so I have a few extra holes under my bumper..
-DIY Midnight Grille
Taped off the areas I wanted to remain chrome and roughed up the middle section I was painting with some sandpaper

Painted a few coats of color and a few coats of clear

Installed
*This post is at maximum length and now continues on page 3 post #39*
Thanks for checking it out and leaving your input!
Jd
This thread is just a place for me to keep track of the progression of my vehicle. All questions and criticisms are welcome!
Mod List:
-Passport 8500 w/ Invisicord & Mike's Mount
-iPhone ProClip w/ custom wire running
-Full de-badge
-Input/video lockout bypass
-Custom bass level control mounted inside ashtray
-Alpine SWR-1242D powered by Alpine MRP-M500 w/ custom built box firing forward through rear seat pass-thru
-Eibach Pro-Kit Springs [@45k]
-Ark Performance Grip CBE [@48k]
-DIY Bumper Plugs
-BlackBetty Grounding Kit
-R2C MaxxFlow [@57k]
-Manual Hide Away license plate bracket
-Vertini Magic Concave [custom gloss black finish]
--20x9 +23
--20x10 +35
-'09 Sport Lip [@60k]
-DIY Midnight Grille
-White Turn Signals
-Blue interior LEDs
-Fast Intentions RHFC
-DIY Gloss Black Headlights
-6k Headlight Bulbs
-6k Parking Lights
-6k 35w 9006 HID Fog Kit
Well I started with a 2007 G35s Sedan Garnet Ember/Graphite fully loaded w/ NAV & Bose.
First Mod was to find a cleaner solution for my radar detector. Ordered the Invisicord so I could hook up to my mirror to lose the power cord across my dash and Mike's Mount to get rid of the suction cups so that my sun reflector could be put up behind the detector and save it from the sun.
My only complaint here is that the piece of the original mount you use along with Mike's Mount is too thin to properly rest in the Passport. This causes rattling. I just shoved a plastic wedge in the back to make it secure and haven't had any problems. I later found Blendmount.com - Custom Radar Detector Mounts* Escort Beltronics Valentine One which looks to be a much nicer mount and solves the rattling problem with a spring loaded clip. But my mount is working out fine and was $60 cheaper.
Next, I needed a solution for my iPhone. I charge it in my car and use it for music and videos.
I found the ProClip to be a really clean mount that looks like it came from the dealership this way. Happy with its location and quality. I have drilled a hole just behind the mount and in the console to run the wires [power and AV] inside the console instead of outside. No more cord getting in the way when I try to shut my console!
Zhao, a friend on strictlygs.com, then started selling LED's so I went ahead and did those. All interior and exterior.
I took the picture of the parking light that way to show the stress cracks that have formed on my headlights. Already failed once at getting it replaced under warranty, will be trying a new dealership next maintenance. *1/12/11 Had them replaced*
De-badged my trunk.
Only removed the "G35s" lettering. Still considering removing the "Infiniti" lettering from under the Mt. Fuji symbol, but I like the way it keeps things centered. Also considering just taking it all off, just can't make up my mind.
I have since then fully de-badged it.
[Pic MIA]
Next I finally did the input/video lockout bypass. Located the VSS switch in the console just above the AV inputs.
I have a hole drilled just under the AV cables to run the wires inside the console to the iPhone mounted by the shifter. If you look closely you can see how I messed up. I was in a hurry and slipped with my drill bit and ate away some of the felt between the 12v and AV :Grimmace:
While I had the dash apart doing that previous project, I decided to wire up my bass level control **** and hide it in the ashtray.
I love how hidden it can be but at times is a little annoying to access. It's fine and not a problem when the shifter is in Drive, but is cramped when in Park.
Next I installed my Alpine SWR-1242D powered by an Alpine MRP-M500 in a custom built box firing forward through rear seat pass-thru that I fabricated myself. It seals up flush against the back seat. This was my first time to wire a vehicle and my first box to ever build. Wow was I happy when everything came together and it actually all worked
I removed the plastic door between the armrest and the pass-thru to keep it from rattling.
Time for the drop! picked em up used for $120
Working hard!
Finally taking my victory lap
Thanks to all the members of strictlygs.com who came out to the meet and lent their hands and knowledge!
Headlights, door pulls, and steering wheel fixed!
[Pic MIA]
Had them all replaced for free under warranty. In the process they lost my 6000k parking lights but they put in 6000k headlamps for me! Sounds like I won in that trade!
Ark Performance Grip CBE was next!
Stock Sound Clip
DIY Bumper Plugs
Just bought some plugs from home depot and painted them with the correct touch up paint. Bored the holes out to the right size for the plugs.
BlackBetty Grounding Kit
I routed the wires a little different than the instructions and I think it all came out great.
Full Paint Correction with the PC
Before
After
R2C MaxxFlow!
[Pic MIA]
For audio comparison, I took a video of the stock intake and R2C in park but they sounded almost identical. The growl really comes in while the car is under load. Really starts to get loud around 4.5k. When I get on it, I can't even hear my exhaust anymore.
Here is a quick and cruddy video my friend took while we were driving so you can hear it under load.
I also added a Hide Away license plate bracket. Although I liked the fun-ness of the powered one, I went the economical route and bought the manual one. I cut out a section of the black mesh in order to have a place to mount it in the middle of the bumper instead on the bottom.
I finally found my wheels!
Vertini Magic Concave
20x9 +23
20x10 +35
wrapped with
245/35/20
275/30/20
[1/17/12] [60k]
Sport Lip!
http://www.flickr.com/photos/74520361@N03/6722772667/Pretty easy to install with the included template. Everything lined up great except the middle two holes were way off so I have a few extra holes under my bumper..
-DIY Midnight Grille
Taped off the areas I wanted to remain chrome and roughed up the middle section I was painting with some sandpaper
Painted a few coats of color and a few coats of clear
Installed
*This post is at maximum length and now continues on page 3 post #39*
Thanks for checking it out and leaving your input!
Jd
Last edited by R3diK3r0u5; 07-23-2012 at 07:32 PM.


 10-03-2011, 01:17 PM
#5

red is the way to go! I just wish your rim didnt have the chrome lip, always love the all black (as i have on mine) I also debadge but left the mt fuji symbol. Was thinking of doing the same for the sub, having it mounted to point in, how does it sound like that?


Trending Topics


 10-04-2011, 04:59 PM
#14
thanks for checking it out guys!
plan on an emblemless midnight grille in the future
Thanks! and if you really want that done, i can set it up. I know a couple of photographers
as i dont have future plans of blacking out the chrome trim, i decided on the chrome lip for the wheels to keep it all tied in.
Personally I think the sub this way and the things in my trunk dont have the chance of damaging it. It does sound much better with the armrest down and i ended up taking off the plastic door because it would rattle if the armrest was up
way too many to list. aesthetically: black roof, grille diffuser. Performance: sways, ART, tune.
no rubbage. I don't know the exact camber as i havent gone for an alignment yet. I also don't have camber arms. those are the best pictures i have
i wont be blacking out the chrome trim. I will be keeping a red/black/chrome theme in that order of usage throughout the car. so the grill will most likely end up midnight, and the housings will end up black with chrome accents
i have a 3gs but any car charger for iphone will charge the iphone. you only run into problems with charging when using car integration. but i think my charger was a griffen something. i picked it because it sits almost flush with the outlet instead of sticking out
plan on an emblemless midnight grille in the future
Personally I think the sub this way and the things in my trunk dont have the chance of damaging it. It does sound much better with the armrest down and i ended up taking off the plastic door because it would rattle if the armrest was up
way too many to list. aesthetically: black roof, grille diffuser. Performance: sways, ART, tune.
i have a 3gs but any car charger for iphone will charge the iphone. you only run into problems with charging when using car integration. but i think my charger was a griffen something. i picked it because it sits almost flush with the outlet instead of sticking out