DIY: Headlight restoration
 12-23-2013, 09:08 PM
#1
Registered Member
Thread Starter
iTrader: (1)

Headlight restoration
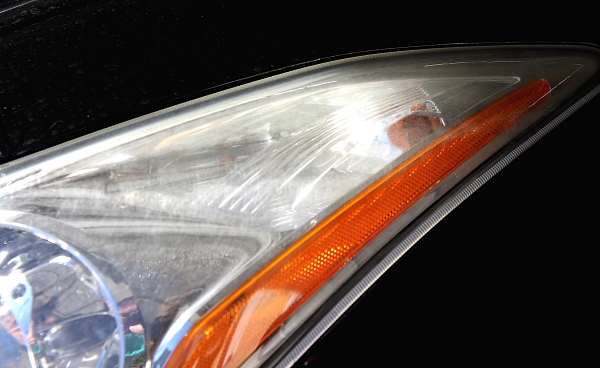
So I decided to clean up my headlights…..my buddies at the SoCalVQ GMR meet were nice enough to point out some yellow oxidation and scratches on my headlights 
Anywho…the material I used:
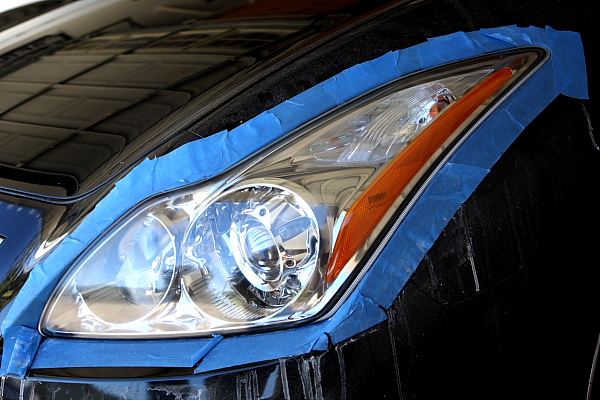
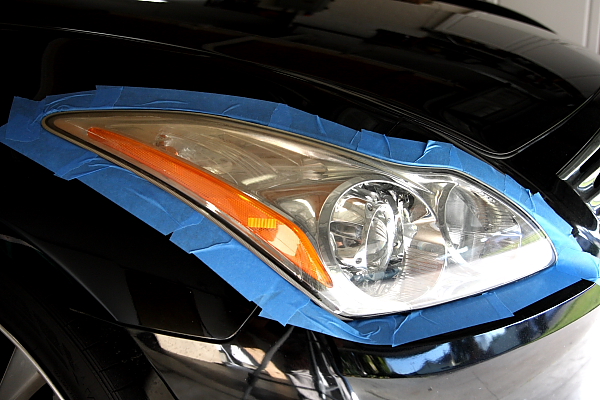
Here is a picture of the before:
I started by using a bucket with water to soak the sandpaper for about 10 minutes
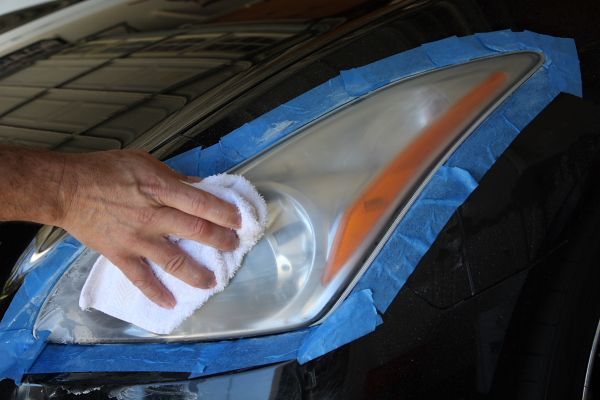
Masking tape and lubricate the lens
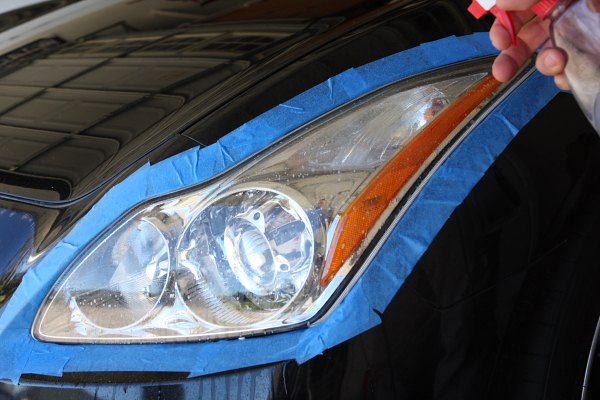
Always keeping the lens wet by either a spray bottle or dipping the sandpaper into the bucket with water.
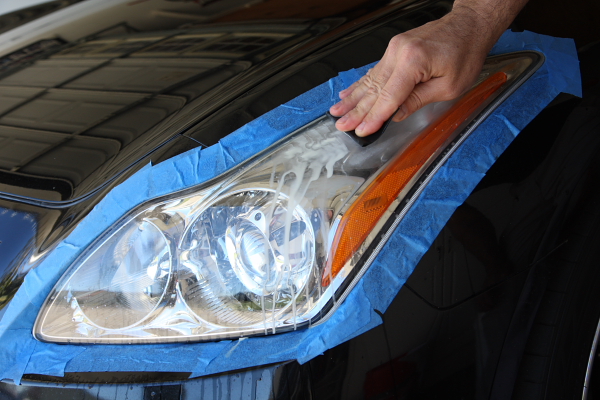
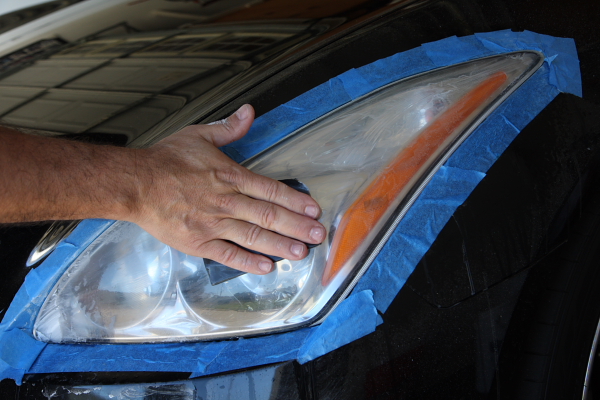
Started with the 1000 grit sand paper for the worst damaged areas
After some sanding I cleaned the lens to see if it needed any more sanding
Moved to the 2000 grit paper
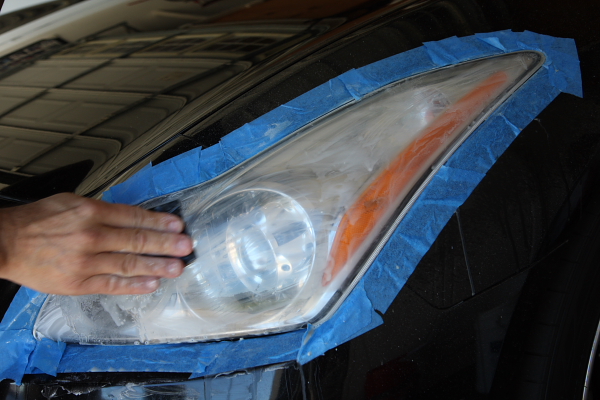
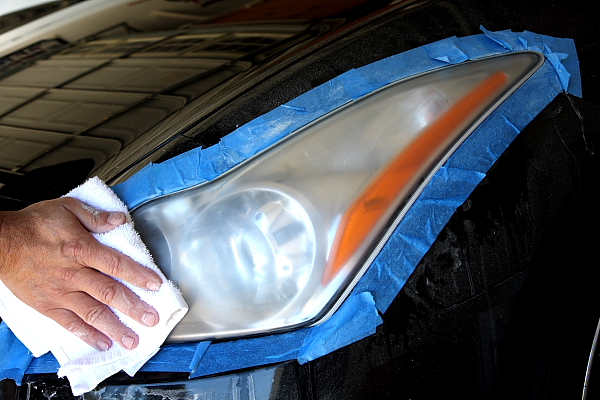
This is what is looks like after all the sanding
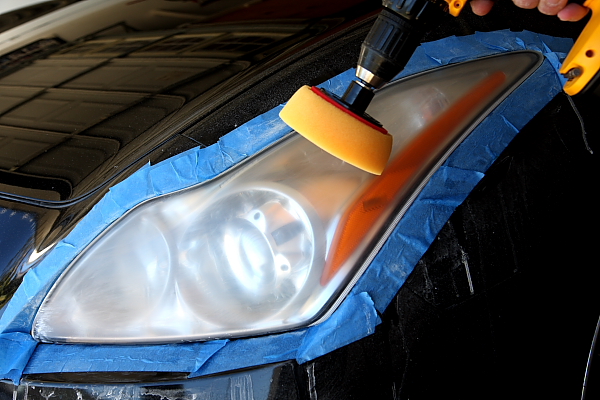
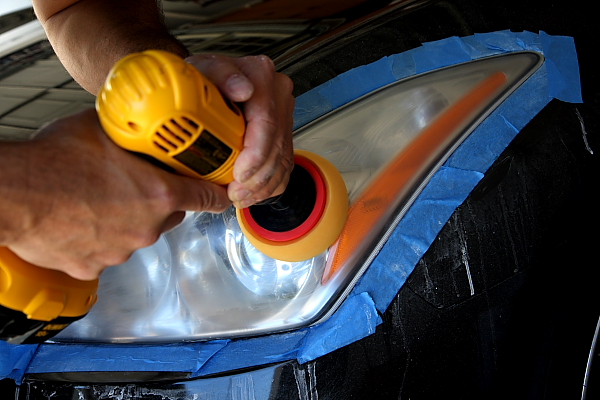
I then used a cordless drill with mini polishing pad using the 4500 polishing compound.
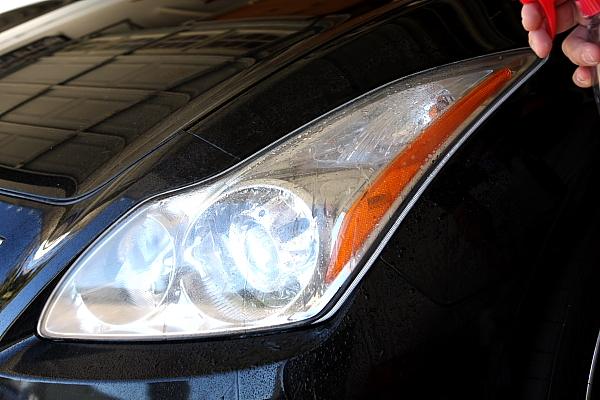
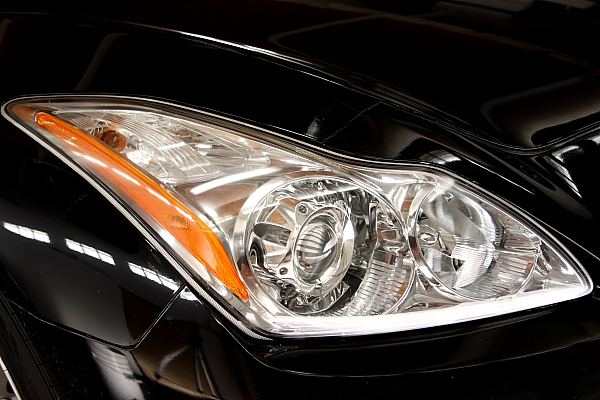
After polishing I removed the tape and cleaned the lens:
Added some blue magic lens sealer
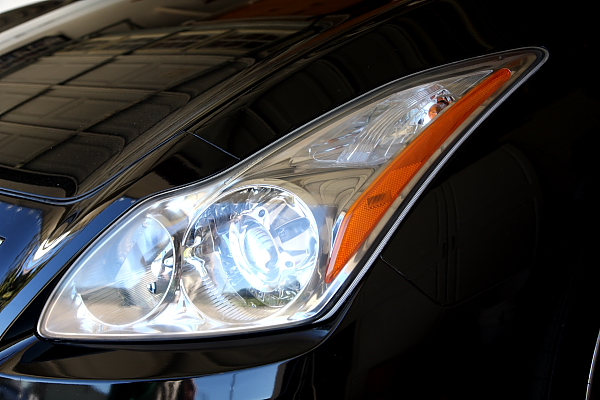
Passenger side before & after
Anywho…the material I used:
- 2000 grit sand paper
- 1000 grit sand paper
- Polishing compound 4500
- Bucket
- Water
- Spray bottle
- Cordless drill
- Mini polishing pads
- Headlight lens sealer (blue magic)
- Masking tape
Here is a picture of the before:
I started by using a bucket with water to soak the sandpaper for about 10 minutes
Masking tape and lubricate the lens
Always keeping the lens wet by either a spray bottle or dipping the sandpaper into the bucket with water.
Started with the 1000 grit sand paper for the worst damaged areas
After some sanding I cleaned the lens to see if it needed any more sanding
Moved to the 2000 grit paper
This is what is looks like after all the sanding
I then used a cordless drill with mini polishing pad using the 4500 polishing compound.
After polishing I removed the tape and cleaned the lens:
Added some blue magic lens sealer
Passenger side before & after
Last edited by Gio37; 12-24-2013 at 03:34 PM.

The following 24 users liked this post by Gio37:
blnewt (12-23-2013),
Bravo at (04-21-2015),
Dreism (06-07-2019),
Flakman (04-28-2015),
flipmode007 (07-16-2014),
and 19 others liked this post.
12-23-2013, 10:01 PM
#2
A quarter past stripped

Good work. I'm starting to get some oxidation as well. I think in a month or so after I settle in from all the other things I'm doing, I'll be doing this as well. Just did this two months ago to my F150's aftermarket Halo projectors.

 12-24-2013, 12:00 AM
#5
Registered Member
Thread Starter
iTrader: (1)
Thanks.
This is my first attempt at restoring headlights and Im pretty pleased with the results. I also have a Porter Cable 7424XP but decided to use the smaller pads with my cordless.
The Blue Magic sealer should keep the lens clear & bright, protect lens from UV rays and prevent it from yellowing & hazing.
12-24-2013, 08:43 AM
#7
Sticky.
Great write up thanks for sharing it. I've done quite a few of these. There's some things I'd add from my experience.
Wet sand in one direction. Then the opposite direction with the next finer grit. Very important to always keep it wet and rinse away grit periodically. I use soapy water. You can use different grits, I prefer to use 1500, then 2000, then 3000. It leaves an extremely smooth surface that requires less polishing. They'll be very white and hazy but polishing fixes that.
Like blnewt I also use a random orbital polisher with 4" pads. Orange pad with a cutting polish followed by white pad with finishing polish.
The following 2 users liked this post by Black Betty:
monytx (03-20-2016),
twin_snails (05-11-2015)
Trending Topics
12-24-2013, 09:50 AM
#8

The following users liked this post:
Presto (12-24-2013)
12-24-2013, 02:02 PM
#10
Registered Member
Thread Starter
iTrader: (1)
Sticky.
Great write up thanks for sharing it. I've done quite a few of these. There's some things I'd add from my experience.
Wet sand in one direction. Then the opposite direction with the next finer grit. Very important to always keep it wet and rinse away grit periodically. I use soapy water. You can use different grits, I prefer to use 1500, then 2000, then 3000. It leaves an extremely smooth surface that requires less polishing. They'll be very white and hazy but polishing fixes that.
Like blnewt I also use a random orbital polisher with 4" pads. Orange pad with a cutting polish followed by white pad with finishing polish.
Great write up thanks for sharing it. I've done quite a few of these. There's some things I'd add from my experience.
Wet sand in one direction. Then the opposite direction with the next finer grit. Very important to always keep it wet and rinse away grit periodically. I use soapy water. You can use different grits, I prefer to use 1500, then 2000, then 3000. It leaves an extremely smooth surface that requires less polishing. They'll be very white and hazy but polishing fixes that.
Like blnewt I also use a random orbital polisher with 4" pads. Orange pad with a cutting polish followed by white pad with finishing polish.


 07-15-2014, 10:11 AM
#13
Registered User

Ok I want to do this myself, not afraid of the work. I am afraid of the sanding process, I don't want to f' up...so when I get to this step how often do I wet the sand paper or lenses it self?? Or do I keep water running on the headlight while doing it?? 
Thanks guys
Thanks guys
07-16-2014, 06:25 AM
#15

How long does it last?
Gio, excellent diy thank you!
Does anyone have feedback on how long and how clear the headlights stay? Guy I work with said he did a "similar" process to his Honda civic and they yellowed within two months. I am not sure what if any uv protection he used.
Thanks
Does anyone have feedback on how long and how clear the headlights stay? Guy I work with said he did a "similar" process to his Honda civic and they yellowed within two months. I am not sure what if any uv protection he used.
Thanks