DIY: Hotchkis F&R Sway bar install
 01-21-2009, 06:06 PM
#1

Hotchkis F&R Sway bar install
This installation requires only basic tools and moderate mechanical skill. My opinion is a 4 or 5 out of 10 skill/difficulty level.
Tools used:
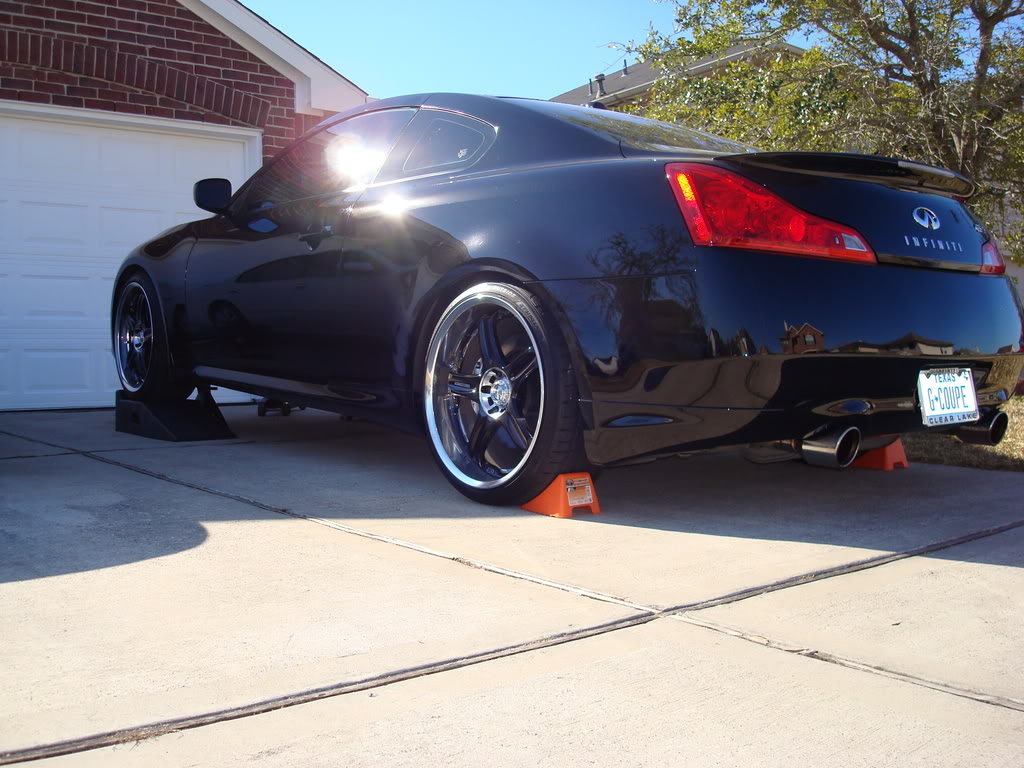
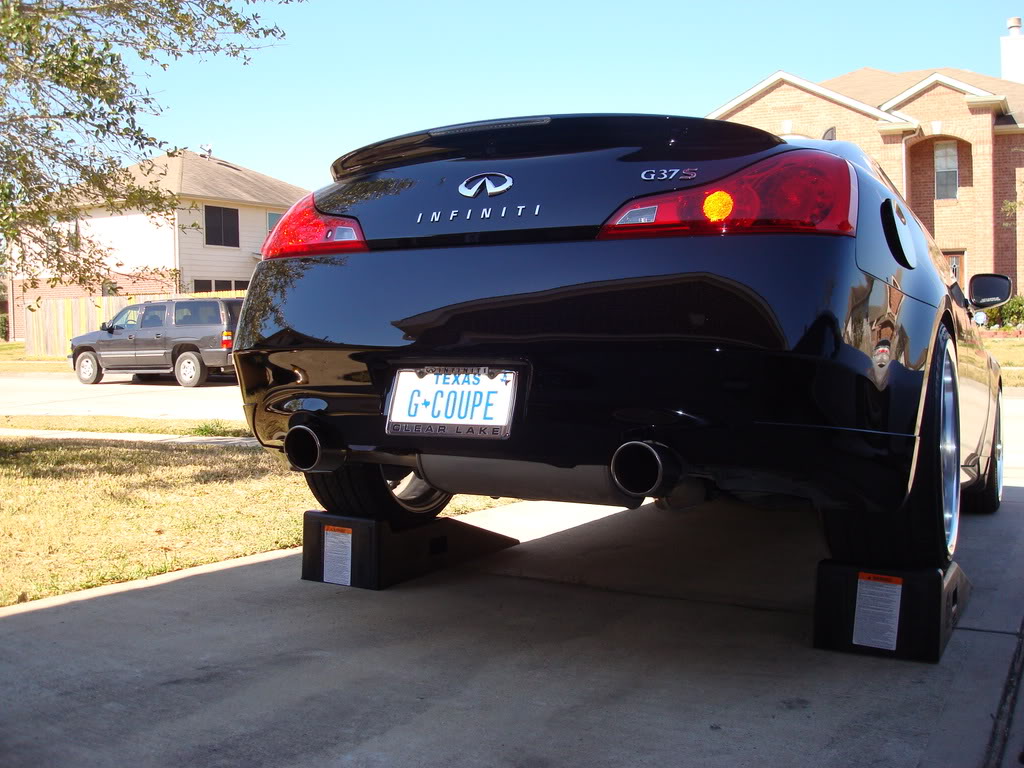
1) Unless you have access to a lift, pull the front of the car onto ramps or jack it up and place on jack stands. Always set the brake (even AT) and use wheel chocks for safety even on level ground. NEVER work under a car supported only by a jack.
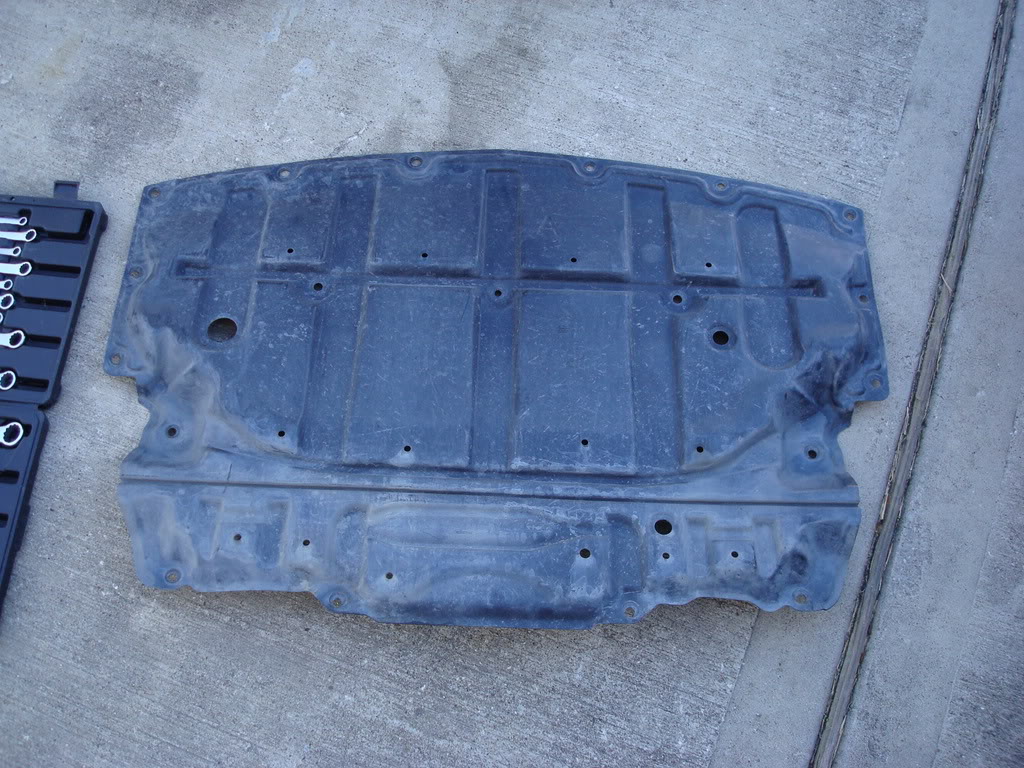
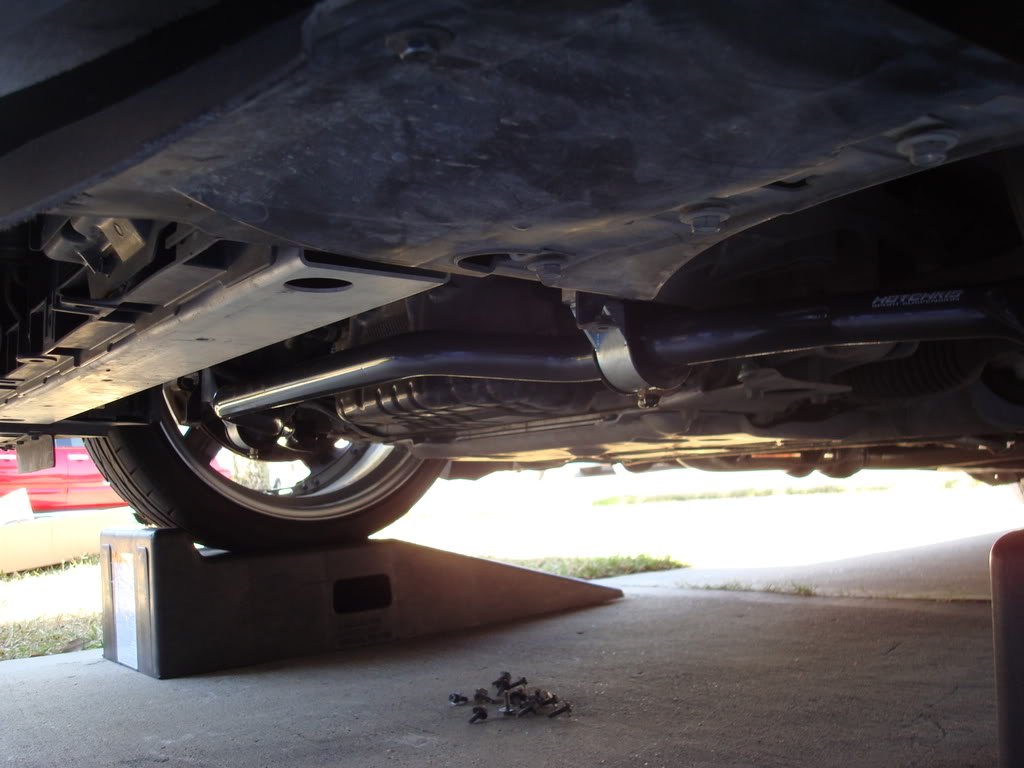
2) After your engine and exhaust are cool, crawl under the the front of the car and remove the plastic under body splash guard under the engine. You'll need a a 10mm socket for the 16 bolts around the edge and a flat head screwdriver to pry the 3 plastic trim clips holding it in place in the center.
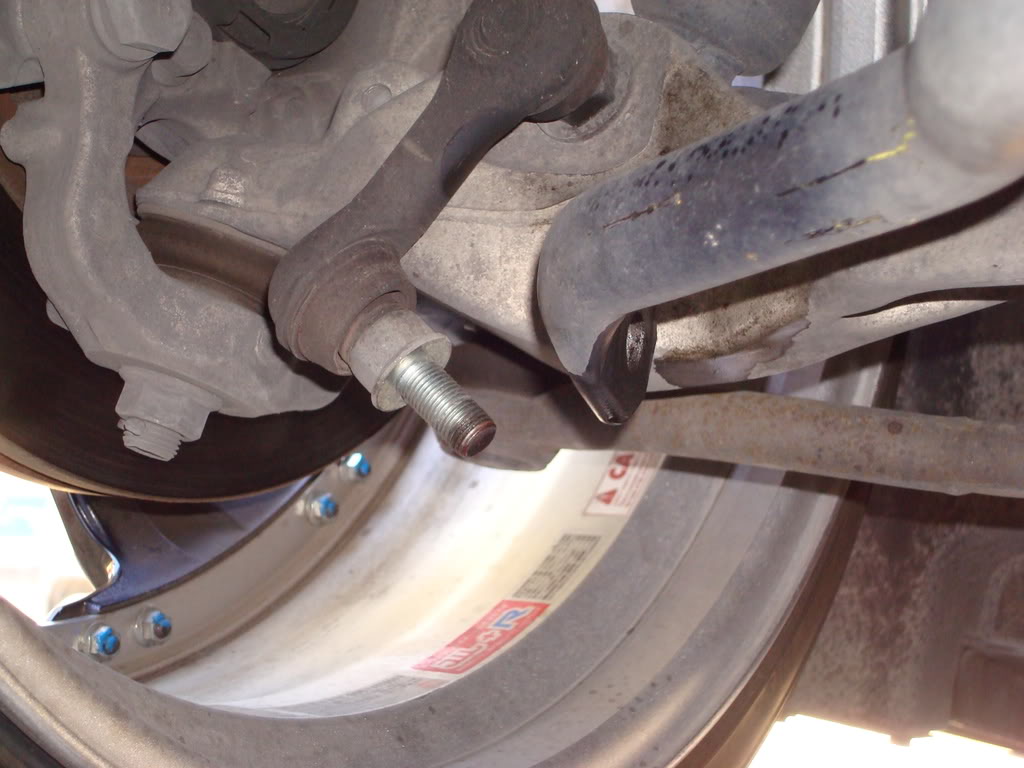
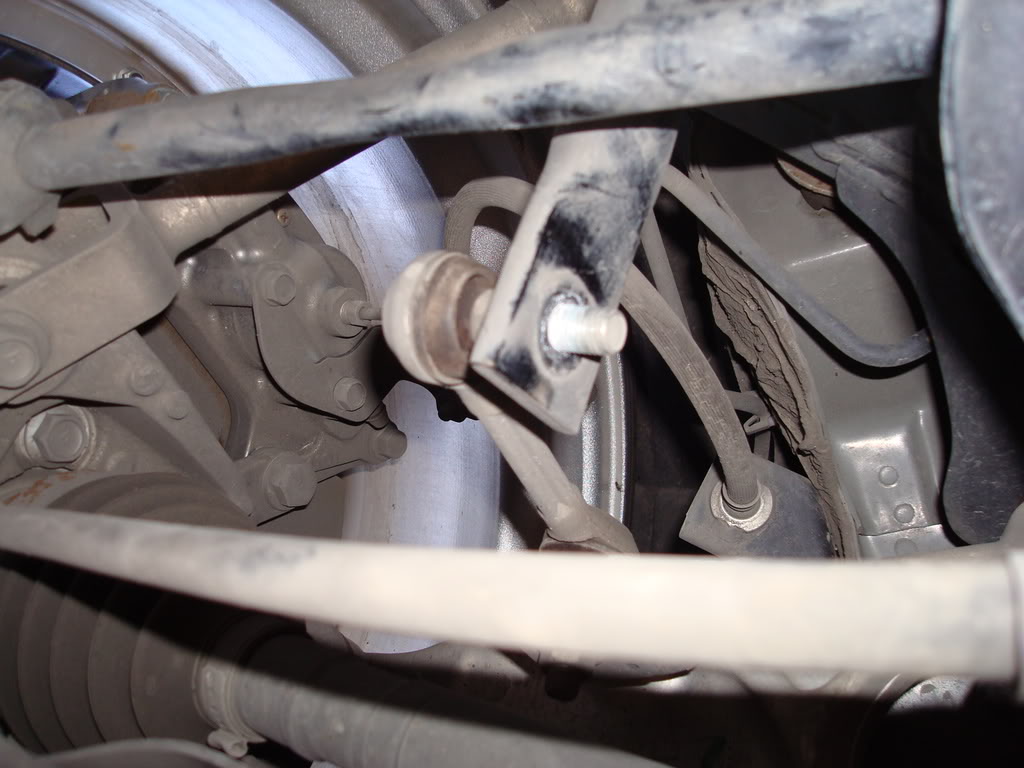
3) After removal of the splash guard, the next step is to remove both nuts holding the ends of the front sway bar to the end links with a 17mm socket. I sprayed them with the PB Blaster and waited about 10 minutes while I enjoyed a beer. If you're not He-Man or don't have an impact wrench, use the breaker bar.
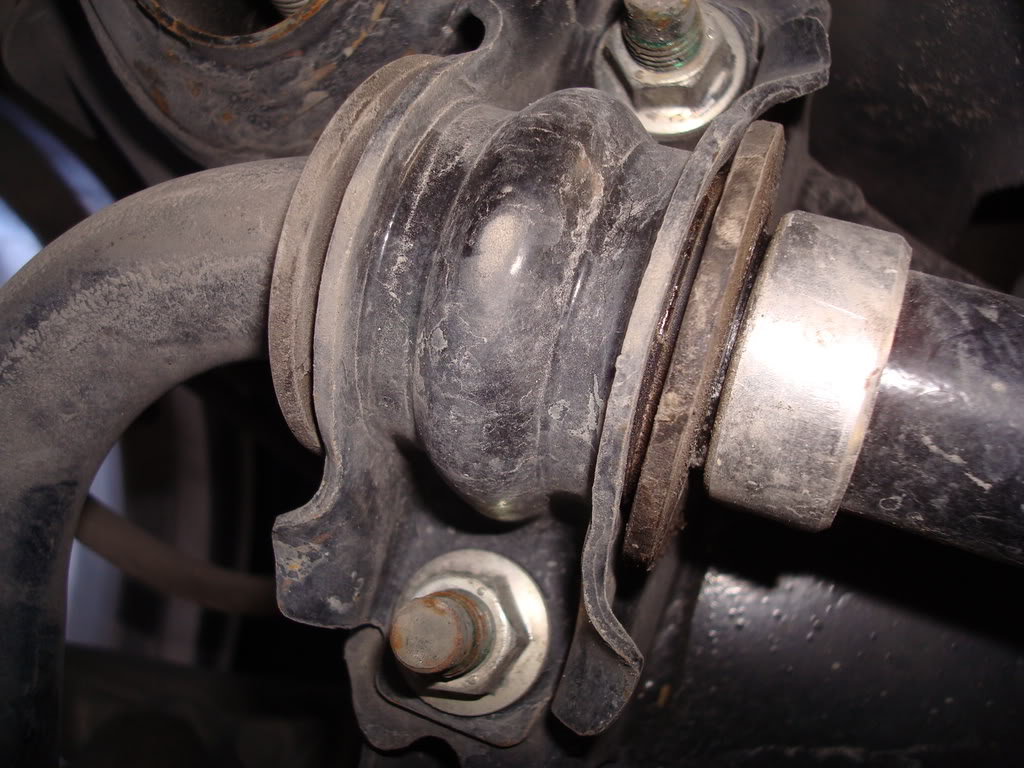
4) Next, remove the brackets that hold the bar to the frame by loosening the 14mm nuts with the socket. You may or may not need the breaker bar depending on how strong you are.

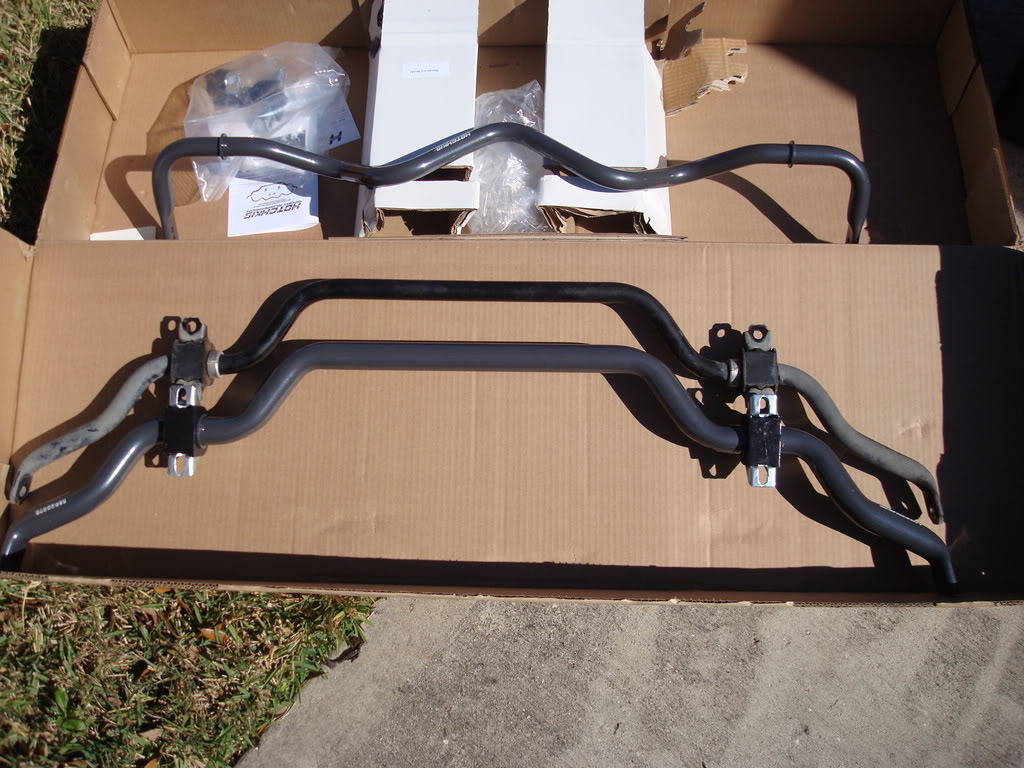
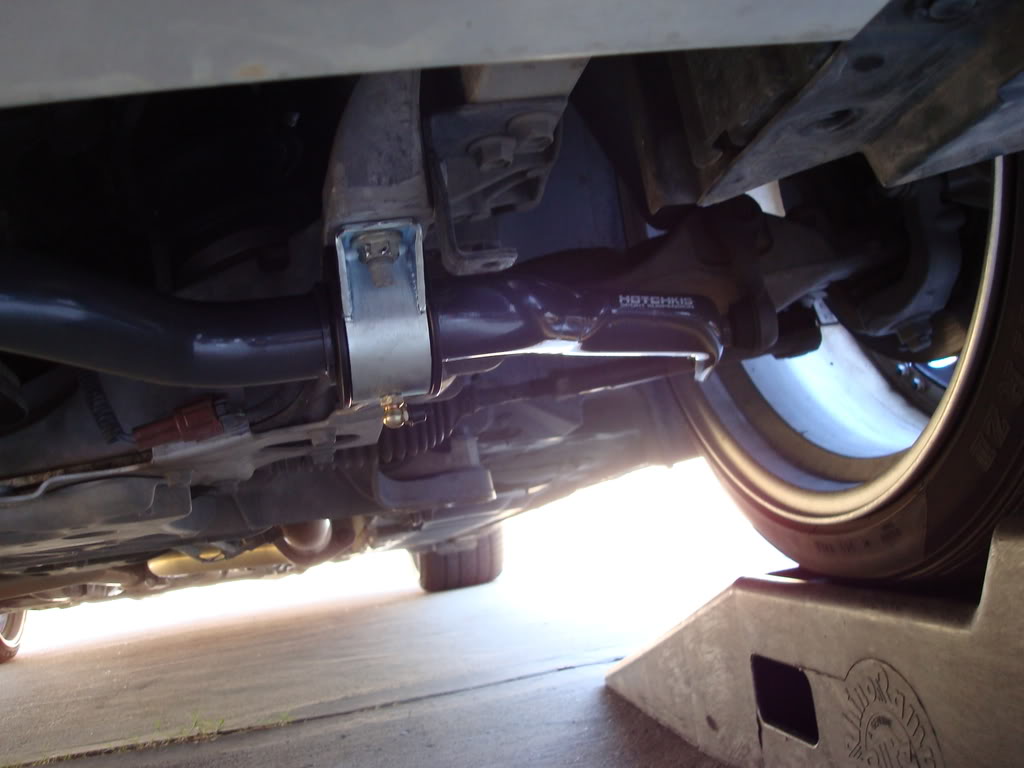
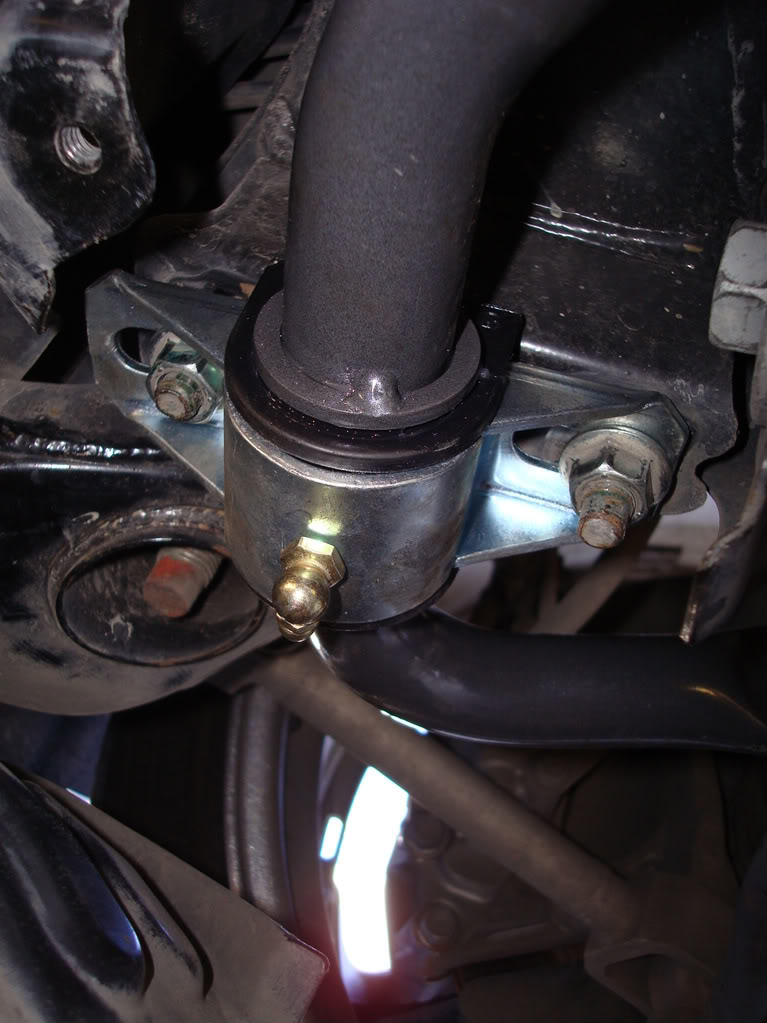
5) Generously lubricate the bushings for the new sway bar with the provided silicone grease. Use only SILICONE grease, as lithium or other types will eventually wash away eventually and you will have the most annoying noise you've ever heard (next to Fran Drescher's voice) coming from under your car all the time. Place the bushings onto the bar in the proper location (outside the stops) and place the bracket in place over them in the same configuration as the OEM parts.
6) Position the bar in the same location as the OEM part you just removed and bolt the brackets back into place. Torque all 4 nuts to 37 ft./lbs.
7) Reconnect the end links through the hole and replace the nut holding it in. Torque to 62 ft./lbs. Put the splash guard back in place and bolt/clip it back. You're done on the front! Have another beer. Now we need to hit it from the back.
8) Lift the rear of the car in the safe method of your choice.
9) The installation directions at this point call for you to remove the splash guards in front of the rear sway bar. Not necessary. Just remove the one rearmost 10mm bolt and it will pull down enough for you to work. Sorry, forgot to snap a photo of this.
10) Next the directions call for removal of the 4 bolts (14mm) holding the mid-pipe section from the muffler section, along with removing the mid pipe from the exhaust hangers so you can lower the mid pipe to access the rear sway bar. They also say to remove the center exhaust brace. Again, I didn't photograph this because I don't have OEM exhaust. What you actually have to remove will be dependent on your exhaust system and how it bolts up. I loosened the front bolts of my mid pipe and removed the rear bolts and let it hang down. I didn't remove the center brace as I didn't need to.
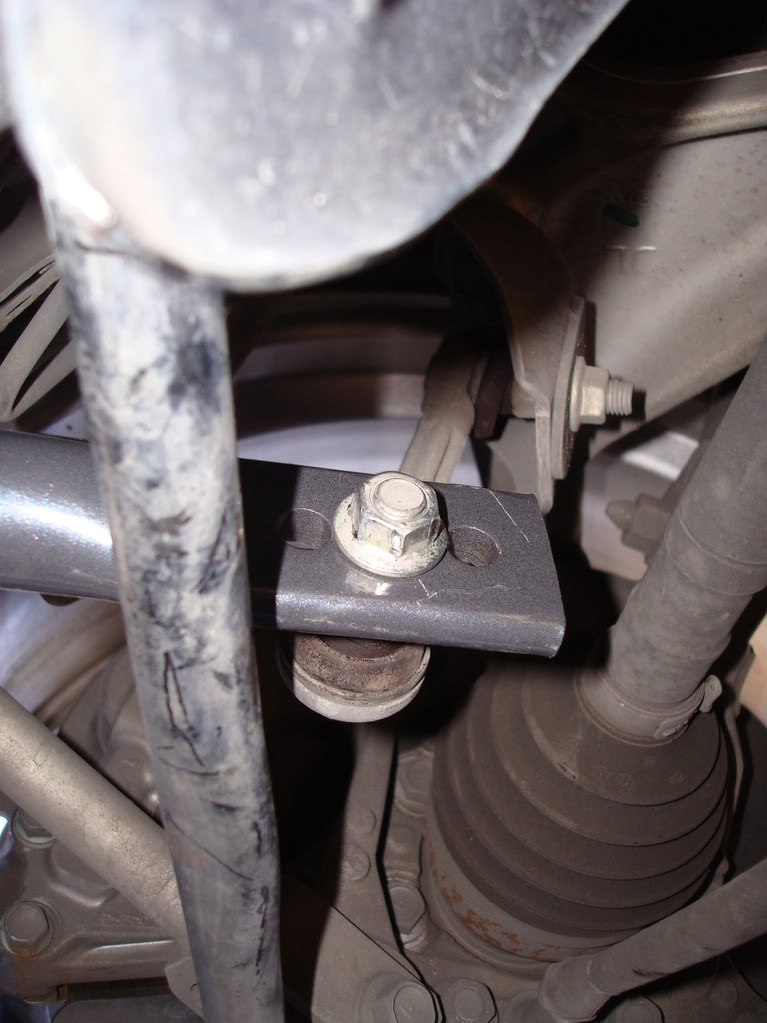
11) Now remove the end link nuts with a 14mm socket. Leave the end links through the ends of the bar to hold it in place when you remove the bushing brackets. Now remove the bushing brackets (also 14mm).
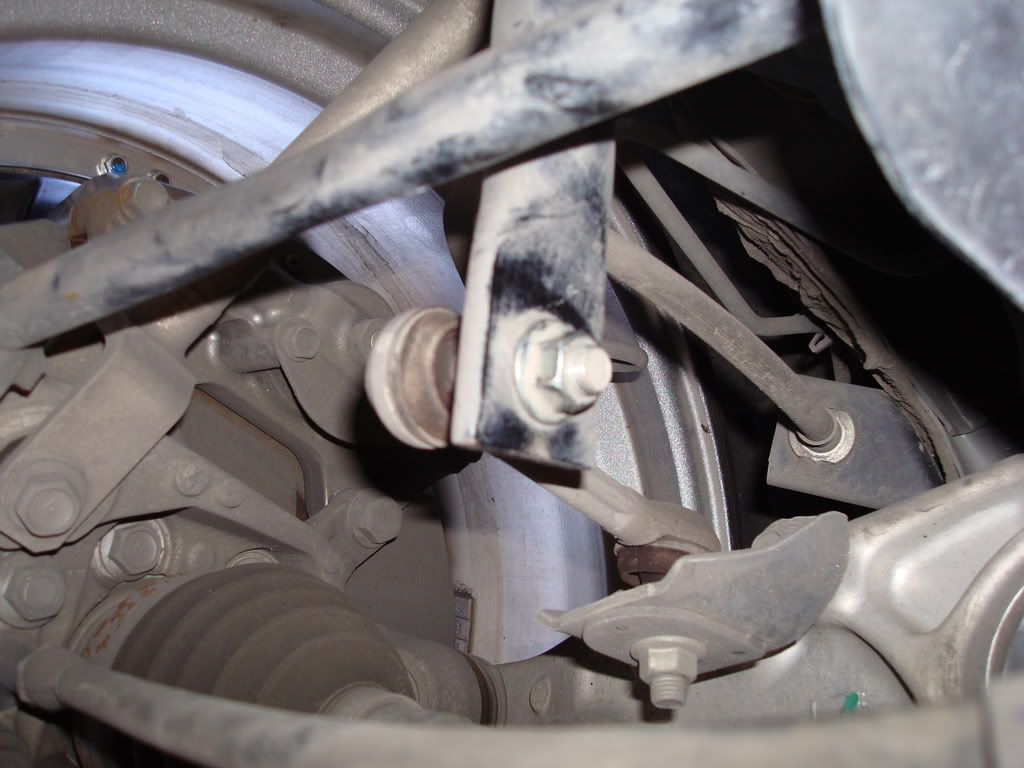
12) Once everything is loose, remove the OEM sway bar. Repeat the lubricate/position bushings and bracket routine from the front end. You remember, don't you?
13) Place the new Hotchkis rear sway bar into position like the OEM one you removed. Screw on the 4 14mm nuts to hold the brackets/bushings in place but don't tighten them all the way yet.
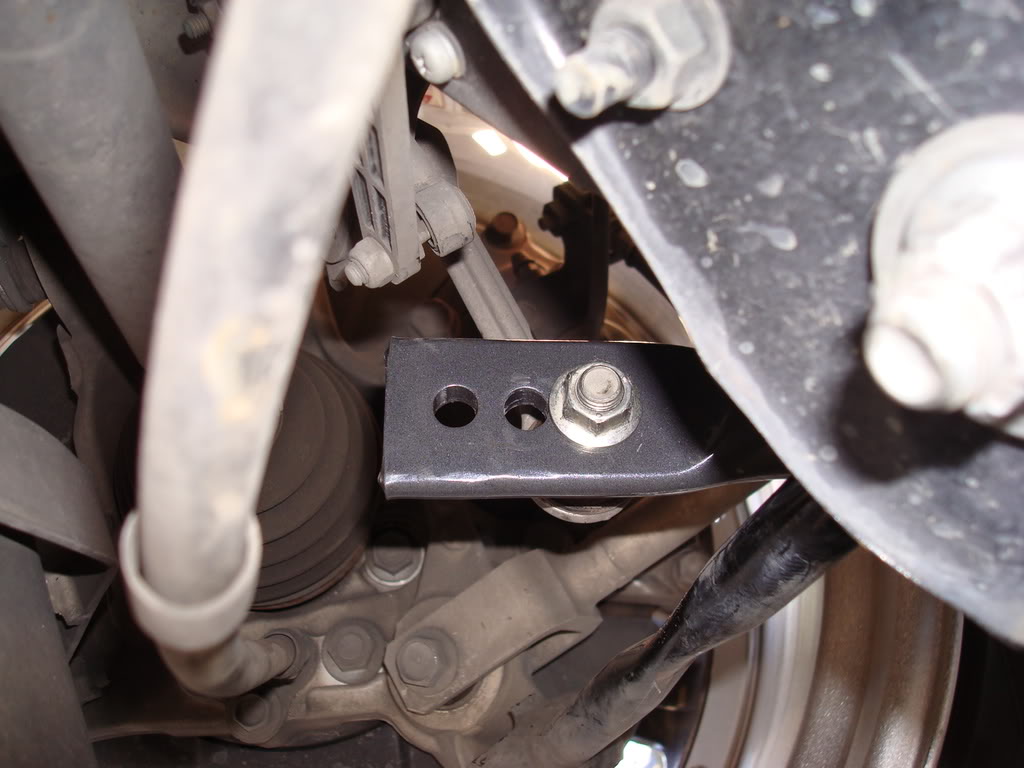
14) You'll notice that the new bar has 3 holes here the OEM one had only 1. This is to adjust the amount of stiffness in the rear. For the S model the hole nearest the end is 5% stiffer (will help you make the car more neutral when used with the stiffer front bar), the middle hole is 30% stiffer and the innermost hole is 60% stiffer (Non S is 120%, 175%, and 250% stiffer respectively). Choose your poison. It is very easy to come back and change the setting so experiment. It should go without saying, but put the end link through the same hole on each side.
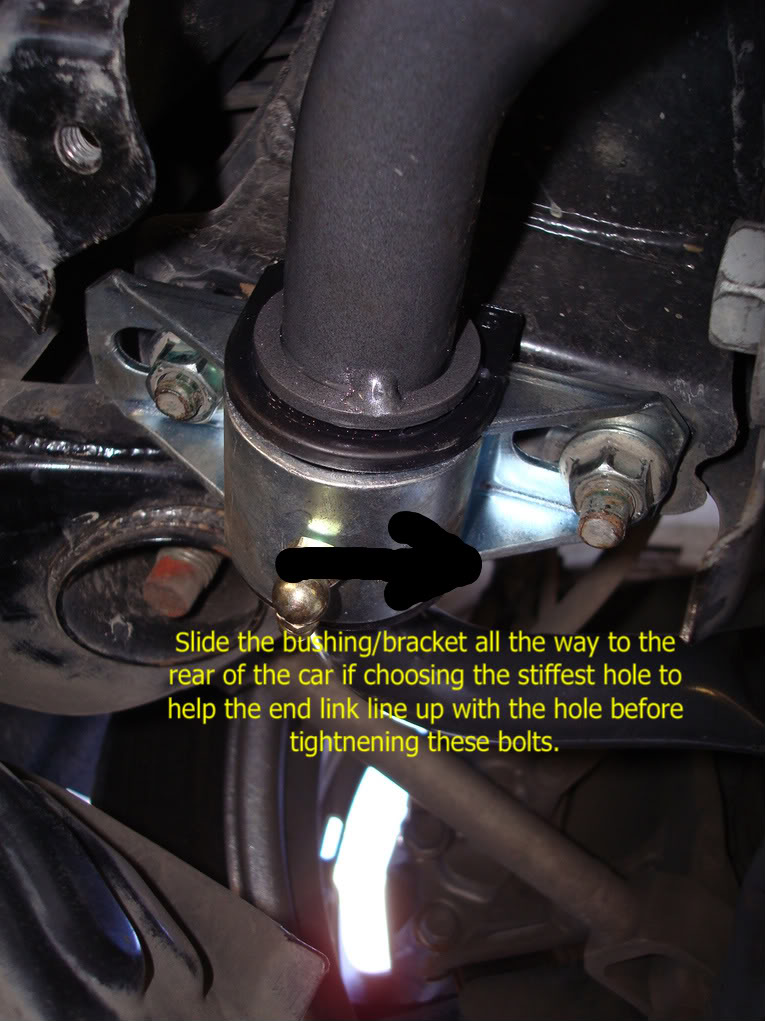
15) If you use the stiffest (innermost) hole, slide the bushing and it's bracket all the way to the REAR of the vehicle in order to help the hole in the bar align with the end link. When you've got it in position, tighten the bushing bracket nuts down to 25 ft./lbs. Tighten the end link nuts to 41 ft./lbs.
Finished! Go inside and have another beer and rejoice that a shop didn't just charge you $200 to do something you can do yourself in less than 2 hours.
Long term follow up
It's been a little over 3 years that I've had these sway bars on the car. I still like the way they feel very much. I recently had some noises and they were both related to the sway bars. One was simply that the bushings needed lubrication. That is easy with a grease gun becasue these particular sway bars have grease zerks so they can be lubricated in just a few seconds without removing the brackets.
The second noise was harder to find but it ended up being a loose nut holding one of the front brackets. I checked them all and one nut in the rear was loose as well. I torqued each nut to spec, so you may want to check yours periodically. I'd recommend checking nut torque and lubricating every 12 to 18 months. I think it was great that I got over 3 years without doing either.
Long term follow up II
It's been 5 and a half years since the initial install now (time flies!) Every time I take a corner at speed I realize more and more how great a performance increasing mod this really is. With a set of sticky tires the car will feel glued to the road, no tire squeal or scrub. Neutral steering and faster controlled speed into, through, and especially exiting corners. And you can easily dial in more understeer or oversteer to suit your style of driving and personal taste simply by changing the mounting points. The only negatives that I have found at all is that the bushings require periodic lubrication or they will become a little noisy. A squirt of grease every year or 2 is pretty easy with the integrated grease zerks. The other issue is that tying the 2 sides of the rear suspension together more stiffly can cause the car to break traction over irregularities like potholes and bumps somewhat more easily. Not a big deal to me and certainly not a deal breaker. Bottom line: put these on your G NOW!
Tools used:
- 10, 14, 17 mm sockets and ratchet
- 18" breaker bar
- flat head screwdriver
- 14 mm wrench
- Penetrating lubricant (I prefer PB Blaster)
1) Unless you have access to a lift, pull the front of the car onto ramps or jack it up and place on jack stands. Always set the brake (even AT) and use wheel chocks for safety even on level ground. NEVER work under a car supported only by a jack.
2) After your engine and exhaust are cool, crawl under the the front of the car and remove the plastic under body splash guard under the engine. You'll need a a 10mm socket for the 16 bolts around the edge and a flat head screwdriver to pry the 3 plastic trim clips holding it in place in the center.
3) After removal of the splash guard, the next step is to remove both nuts holding the ends of the front sway bar to the end links with a 17mm socket. I sprayed them with the PB Blaster and waited about 10 minutes while I enjoyed a beer. If you're not He-Man or don't have an impact wrench, use the breaker bar.
4) Next, remove the brackets that hold the bar to the frame by loosening the 14mm nuts with the socket. You may or may not need the breaker bar depending on how strong you are.
5) Generously lubricate the bushings for the new sway bar with the provided silicone grease. Use only SILICONE grease, as lithium or other types will eventually wash away eventually and you will have the most annoying noise you've ever heard (next to Fran Drescher's voice) coming from under your car all the time. Place the bushings onto the bar in the proper location (outside the stops) and place the bracket in place over them in the same configuration as the OEM parts.
6) Position the bar in the same location as the OEM part you just removed and bolt the brackets back into place. Torque all 4 nuts to 37 ft./lbs.
7) Reconnect the end links through the hole and replace the nut holding it in. Torque to 62 ft./lbs. Put the splash guard back in place and bolt/clip it back. You're done on the front! Have another beer. Now we need to hit it from the back.
8) Lift the rear of the car in the safe method of your choice.
9) The installation directions at this point call for you to remove the splash guards in front of the rear sway bar. Not necessary. Just remove the one rearmost 10mm bolt and it will pull down enough for you to work. Sorry, forgot to snap a photo of this.
10) Next the directions call for removal of the 4 bolts (14mm) holding the mid-pipe section from the muffler section, along with removing the mid pipe from the exhaust hangers so you can lower the mid pipe to access the rear sway bar. They also say to remove the center exhaust brace. Again, I didn't photograph this because I don't have OEM exhaust. What you actually have to remove will be dependent on your exhaust system and how it bolts up. I loosened the front bolts of my mid pipe and removed the rear bolts and let it hang down. I didn't remove the center brace as I didn't need to.
11) Now remove the end link nuts with a 14mm socket. Leave the end links through the ends of the bar to hold it in place when you remove the bushing brackets. Now remove the bushing brackets (also 14mm).
12) Once everything is loose, remove the OEM sway bar. Repeat the lubricate/position bushings and bracket routine from the front end. You remember, don't you?
13) Place the new Hotchkis rear sway bar into position like the OEM one you removed. Screw on the 4 14mm nuts to hold the brackets/bushings in place but don't tighten them all the way yet.
14) You'll notice that the new bar has 3 holes here the OEM one had only 1. This is to adjust the amount of stiffness in the rear. For the S model the hole nearest the end is 5% stiffer (will help you make the car more neutral when used with the stiffer front bar), the middle hole is 30% stiffer and the innermost hole is 60% stiffer (Non S is 120%, 175%, and 250% stiffer respectively). Choose your poison. It is very easy to come back and change the setting so experiment. It should go without saying, but put the end link through the same hole on each side.
15) If you use the stiffest (innermost) hole, slide the bushing and it's bracket all the way to the REAR of the vehicle in order to help the hole in the bar align with the end link. When you've got it in position, tighten the bushing bracket nuts down to 25 ft./lbs. Tighten the end link nuts to 41 ft./lbs.
Finished! Go inside and have another beer and rejoice that a shop didn't just charge you $200 to do something you can do yourself in less than 2 hours.
Long term follow up
It's been a little over 3 years that I've had these sway bars on the car. I still like the way they feel very much. I recently had some noises and they were both related to the sway bars. One was simply that the bushings needed lubrication. That is easy with a grease gun becasue these particular sway bars have grease zerks so they can be lubricated in just a few seconds without removing the brackets.
The second noise was harder to find but it ended up being a loose nut holding one of the front brackets. I checked them all and one nut in the rear was loose as well. I torqued each nut to spec, so you may want to check yours periodically. I'd recommend checking nut torque and lubricating every 12 to 18 months. I think it was great that I got over 3 years without doing either.
Long term follow up II
It's been 5 and a half years since the initial install now (time flies!) Every time I take a corner at speed I realize more and more how great a performance increasing mod this really is. With a set of sticky tires the car will feel glued to the road, no tire squeal or scrub. Neutral steering and faster controlled speed into, through, and especially exiting corners. And you can easily dial in more understeer or oversteer to suit your style of driving and personal taste simply by changing the mounting points. The only negatives that I have found at all is that the bushings require periodic lubrication or they will become a little noisy. A squirt of grease every year or 2 is pretty easy with the integrated grease zerks. The other issue is that tying the 2 sides of the rear suspension together more stiffly can cause the car to break traction over irregularities like potholes and bumps somewhat more easily. Not a big deal to me and certainly not a deal breaker. Bottom line: put these on your G NOW!
Last edited by Black Betty; 07-11-2014 at 12:02 PM. Reason: added more follow up

The following 17 users liked this post by Black Betty:
Aftershok (03-23-2014),
bikezilla (05-04-2016),
blnewt (07-06-2013),
bsanalyst (10-19-2016),
ColumbiaSkinny (05-02-2016),
and 12 others liked this post.


 01-21-2009, 07:01 PM
#5
I have to have the opportunity to drive it more. I did very little driving through turns, but my initial impression is that I like it. Turn in was great when I did a test run with just the front on. I'll have a more informed opinion when I get a few days to experience it; then I'll post a separate review.
I got a few but not good ones. They look exactly the same as they did on jtow's car except with a drop and no TS body kit.
I got a few but not good ones. They look exactly the same as they did on jtow's car except with a drop and no TS body kit.
 01-21-2009, 09:17 PM
#7
Banned

iTrader: (10)

Join Date: Apr 2008
Location: Hot Az
Posts: 391
Likes: 0
Received 0 Likes
on
0 Posts
Very nice write up, yea its pretty simple to do. For anyone on the fence on getting these, its a great investment and install is straightforward. Its not as hard as it seems, like BB said, save the cash and get something else w/ it.
Trending Topics


 02-28-2009, 04:14 PM
#13
Tools
I had to use a 19 open end to hold one of the front endlinks that wanted to turn instead of loosen with the 17 only. Deep sockets helped in a few places as did the breaker bar. I used ramps and ditched the creeper to maximize the height.
The car feels 100 percent better already , using the middle hole for now. AutoX Tomorrow!!
The car feels 100 percent better already , using the middle hole for now. AutoX Tomorrow!!
 emblems go?
