When you click on links to various merchants on this site and make a purchase, this can result in this site earning a commission. Affiliate programs and affiliations include, but are not limited to, the eBay Partner Network.
Last things I will do for a while, well this year or until spring. Finished the crossmember and the front strut forks.
Went black, galvanized, then silver.
All filled in solid through and through.
Clearly brush finished, but protected well.
2 coats of black and just one silver on the bare steel areas, not in the threads though.
Tranny is going to sleep here for a couple of months.
My first truck load returning from my break is Reading, PA to Compton, CA (2700 mi.) starting Monday so I will get my share of driving fullfilment even without the car.
That's it for this year. Happy Holidays, be safe and well. Thanks for viewing / reading. I really enjoyed this so far, I'll update down the road with it in the spring.
Hey all, I'm back working on the car, lots of things I have expanded into such as painting the sub frame(s) and polishing many aluminum suspension pieces.
I found the best front lower ball joint nut in grade 5 titanium one could want because they have thicker walls and is a stronger nut than other M16 x 1.5 nuts found in Ti. They are 32mm flange dia. vs. 30mm of the originals and they use a 24mm socket (or 15/16") vs. 22mm on the oe. They also are a bit taller but I test fit them on the knuckle and ball joint and the cotter pin still just fits perfectly.
If anyone is interested in these they can pm me and I will send a link where I got 'em on ebay, but I paid $58 for the pair and it took about 2 weeks to get them.
They are definitely unobtainium, I am hesitant to use nuts made of this to replace steel grade 8 or whatever oem is without going for a beefier version such as these. Light load places though it isn't so important, but a ball joint nut is critical to safety.
I used a bottle jack under the rear spindle or knuckle to get the both the shock and spring bucket arm bolts out and was able to completely remove the rear subframe. Only some rust on that piece near the ends by the wheels and some areas around some welds. I am contemplating some 2K Malbec Black spray you can get at 66 auto color that is in a rattle can to paint the subframe, a catalyst paint that would last a long time with chemical resistant urethane resins and durable.
I took photos of the 4 cam bolts' position for future reference before the sub-frame disassembly.
Right now I have the spring buckets and going back over the front knuckles removing casting protrusions.
Around the top of these there are a few things I can take out.
At first I use a hand file, then I have a few curved riffler rasps, and 320 grit discs that I fold and adhere into half circle shapes.
Rough areas on the side
Just trying to flatten this while using the surrounding surfaces as a guide. Mostly by hand, but used some carbide dremel cylindrical burr and a larger ones in a drill, have to be careful because it can chatter and run away and mark up other areas accidentally.
Usually when I can get it uniform with 320 grit I can take it to the buffing wheel.
The bottoms have more of 'those things' sticking out, hehe.
Same process, but some of the bottom places are too deep to get all the way removed without some light blending into the surrounding metal.
Course cutting buff, starting to 'color' it up and comparing. Using red twister for right side of car, and blue, well, for the other.
If I miss something while buffing, I go back over it with 320 grit, I have not gotten any further than doing the other side part so far. The square flat pats at the bushing area are useful to hold it in the vise.
THEN I SAW THESE>
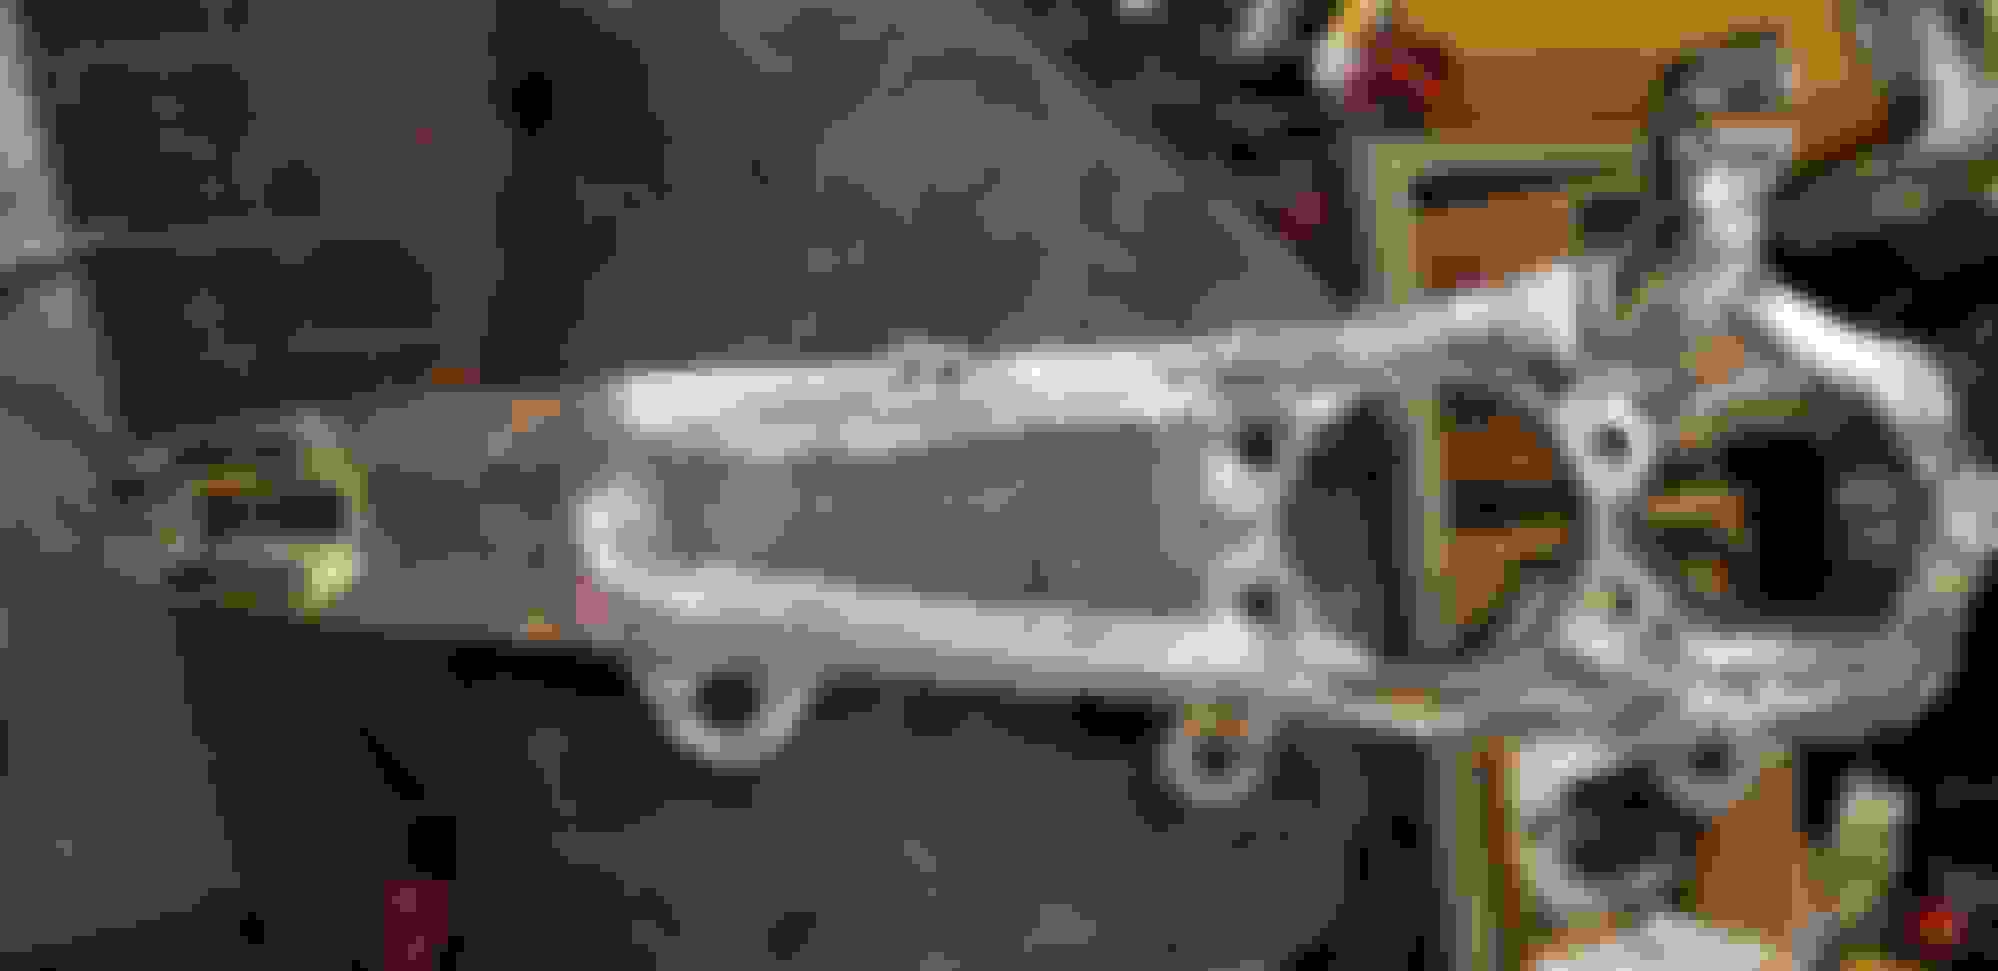
After seeing these Voodoo 13 6061 billet CNC things, I got the ambition to further remove the unnecessary features on my knuckles, I know cast OEM is not as strong, but I found lots to take off that would not weaken them much.
Clean on the inside, no casting marks that is what I am trying for.
Here I go at mine.
There is one on the opposite side, inside.
Almost gone.
I dab some milling or cutting fluid on the files every now and then so the aluminum doesn't clog up the teeth, they are just wood rasps. This is one of the rifflers.
Gone.
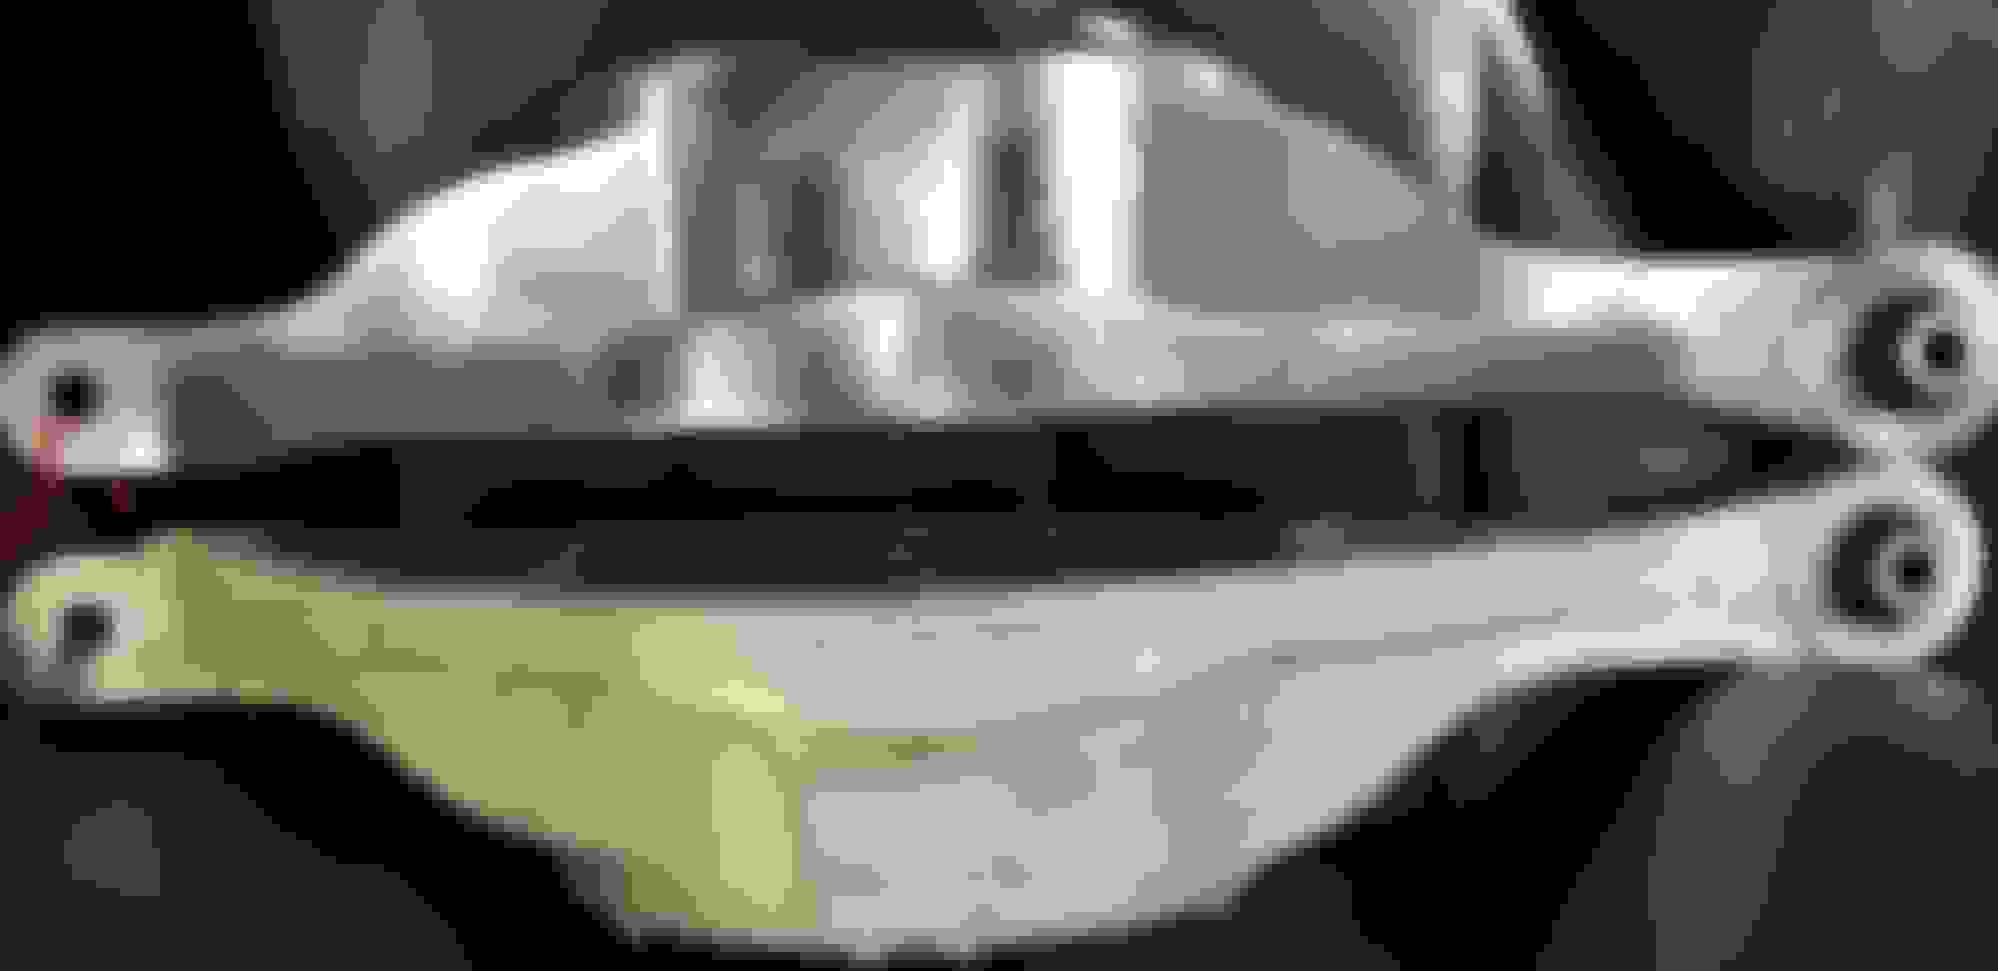
This is a really course file called a 'babbit' file that can really truck away the aluminum fast.
Chop chop chop. Clamped guide block to run against from the side so I could focus on pressure and staying parallel to the surface.
Back to finer hand file to get it close enough to sand.
Goofy nubs, you're next, haha.
This spherical burr ate most of them in this trench.
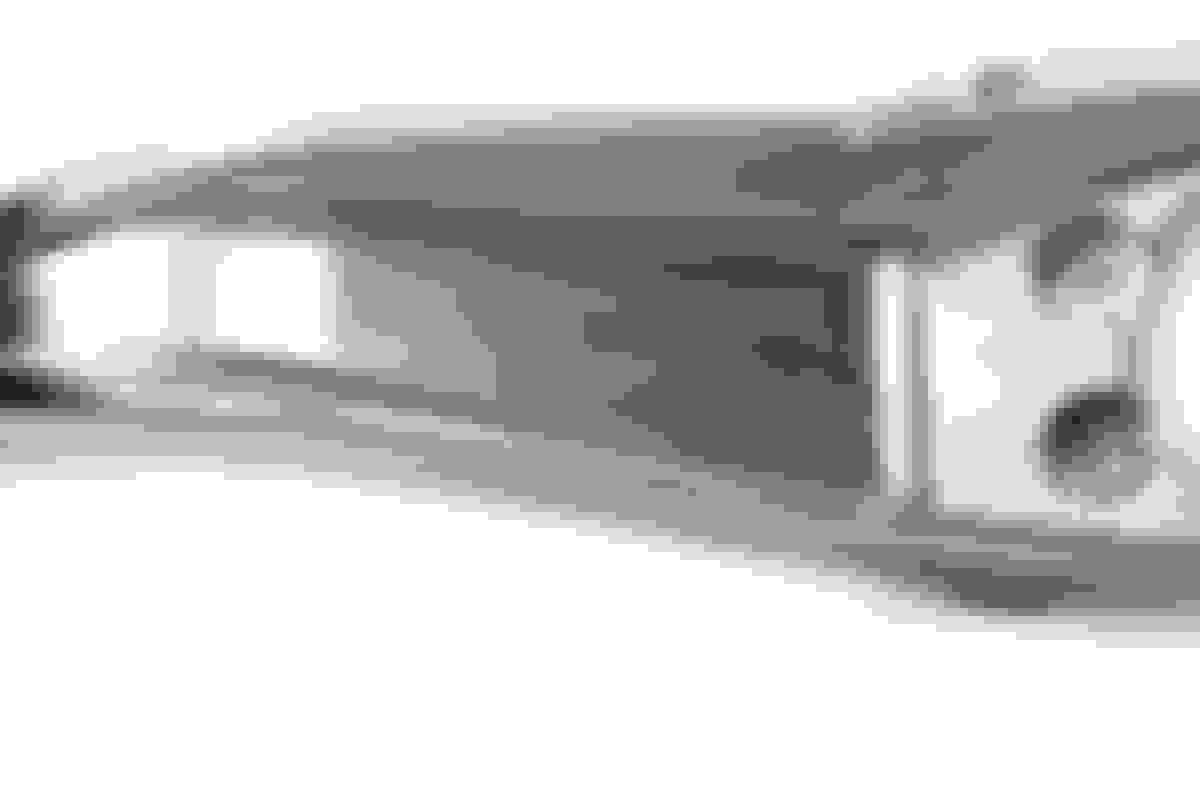
Smoothed off the top lettering.
Flattened out where the arrows are, the blue oval is a large column of material I may leave, I removed 2 smaller ones where the 2 inside red arrows are.
That's all I got for now, insane huh? Sorry for the abruptness to the end of this post. Lots to go.
Last edited by Justin Bailey; 03-01-2020 at 11:05 AM.
You're insane and this is awesome. Driving this car when you're done. Hmmmm... May need to go into a Nissan museum. Keep it up. Love following your work!
To paint the engine best (aside from removing it), I'd like to suspend it from above and remove the front sub frame out from under the car. To do this, I'd like to remove the upper intake manifold but leave the throttle bodies by unplugging what hoses and plugs there are, and just set it aside, I hope that in doing that I won't have any relearn issue.
Then my plan is to buy a 1/2" thick aluminum plate something like 3 or 4" wide x 12-14" or whatever length, then drill out matching holes (on a drill press) to bolt it onto the lower manifold, while then also having eye bolts or something in the plate to hang the whole weight of the engine from, then a threaded rod and some nuts through the eye bolts as a leveler set up to balance it out. I will have to wire or suspend the steering rack carefully so as not to stress the system circulation hoses and u joint, if I decide not to disconnect it from the column or tubes or hoses. I estimate the engine is 350 lbs, not sure with the front differential weight added. I can then disconnect the front diff and paint it and remove the alternator and engine mounts, paint them, and polish the mount brackets.
I also will take out the fans, but plan to avoid moving the radiator, ATF cooler, AC condenser, and compressor, but my compressor got leaky over that northeast cold snap and now has lost significant amounts of the green oil and probably the refrigerant just from sitting and not running the car, Not sure if the the compressor can be rebuilt by the dealer just to replace o-rings, or I have to get a new one and a dryer but not the condenser, as there was no mechanical failure just a sealing fail, (no bits of metal debris anywhere in the system from that). I don't for see them warranting it or anything on this car anymore after what I'm doing whatever the cause or cure is, but I've never dealt with covered repairs personally, so I don't know. It's my fault for not running the car and keeping the oil circulated in the system, it would be nice if things didn't just fail from not using them.
Still polishing the one knuckle, here is the passenger side, no clear coat yet
Still has the splotchy casting variance in the surface, no idea how deep it is, so kind of polished what's there. idk. There are some dings that were too deep I felt to completely remove and it will get more from driving so it's not going to get perfect or be perfect, and I'm ok with that
Polishing these parts is so tedious and time consuming that I am glad if I get satisfied enough to call them done, if it consumes the next month alone just polishing metal, then it does. I'm only working on it 1 or two days a week right now so it's kind of a drag on the whole process, but I'll get there or at least somewhere or on to painting more things soon. Not sure about the Malbec Black on the sub frames, I may just go with satin black, no one will really see it, it would be cool but only for the few moments I would ever be under the car like now and until completed. It's a past time for me that's all.
I found these nice JIS style oil pan M6 captive washer bolts in stainless at Zcardepot in MO.
They come in packs of 10, I used their 16mm length for the engine pan and also got 3 packs of the 12mm length for the 24 used on the trans pan.
Went around exchanging one at a time, this pan uses 10 bolts, the FSM says 61 in/lb but that is considering when installing with new liquid gasket maker. I found to get them tight like they were to loosen it was more like 100-110 in/lb. Got to change that ugly drain bolt to stainless or Ti sometime on the next change.
They take a 10mm socket, just like the G37 originals, but these not only have a flat captive washer like the originals but also a lock washer. I used a drop of oil on threads to tighten. Probably should have used RTV in the holes and on the thread then drove them, but that's that. I figured the sealant was still intact around the bolt thread in between the pan and aluminum upper pan so the seal was not really disturbed, but I will have to check to see later.
The ATF cooling lines are oily where that zip tie is, from the AC condenser oil leaking onto them from above but that is probably the last thing I need to worry about and I may help justify opening the system to remove the compressor to paint hte block better anyway. I can get it replaced or fixed up later when I get inspected.
These screws oddly are only partially threaded so I had to run them into an M6 x 1.0 die backwards to cut 2 or 3 more threads far enough to tighten them properly. The back end of the die has no starting cutters so I was able to get more threads onto the bolt that way, they were rolled thread but it hasn't weakened them much, I was afraid tightening may have raised the aluminum on the gasket surface out of flatness, but e everything seemed to work out ok. Just have to monitor for leaks later.
The 12mm are a little shorter than I expected from the additional lock washer, so went and used most of the 16mm length ones on the trans pan as well.
So the trans pan is done also. I should wax it sometime then.
They fit ok. I'm not sure if the O2 sensor wire hangars are stainless or not, they kind of seem like it.
Let me know if you find a magnetic Ti drain plug! I just hit up Pro Bolt to see if they make one.
Update: I went with this stainless one made in usa in MT. It has a magnet and is a 15mm wrench instead if 14 on the oem.
It is M12 x 1.25 I believe, I just did a finger-over-the-hole swap and lost mininal oil, went ok. It has an aluminum washer but I imagine the copper crush ones would work with this also.
Last edited by Justin Bailey; 03-08-2020 at 11:05 PM.


 12-01-2018, 11:00 PM


 Lots to go.